
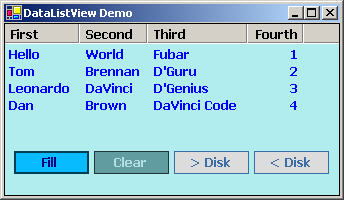
可扩展的 ListView 又名 DataListView
4.53/5 (13投票s)
2005年4月15日
20分钟阅读
117597
671
如何创建一个可扩展的 ListView 自定义控件,其中集成了数据绑定、可选的多线程和序列化功能。

引言
我最近在 MSDN 中看到一篇文章,它随 VS.NET 2003 一起提供:如何使用 VB.NET 制作一个可数据绑定的 ListView。我着迷地阅读了这篇文章,然后卷起袖子,动手创建了一个 C# 版本,但功能更多,例如自定义控件编写和一些神秘的功能。
背景
我最近遇到了需要显示一系列来自数据库的记录的情况,我在考虑是使用 DataGrid 更合适还是 ListView……当时我觉得 DataGrid 在资源方面似乎有点“重”,并且对 ListView 缺乏数据绑定支持感到沮丧。我仍然不确定 DataGrid 是否更耗费资源。我还在争论这一点……请随时分享您对此的意见/想法,因为这将提供宝贵的见解,不仅对我,也对其他 CodeProject 粉丝! :-)
本文和代码来自两个来源,我想向他们致敬
- Lubos Haskos,文章“在 C# 中指示空 ListView”的先驱。
- Mav Northwind,他在上述文章所在的论坛中提出了一个更一致的版本。
- MSDN 文档 - Visual Basic .NET - 创建数据绑定 ListView 控件,Rockford Lhotka,Magenic Technologies,2002年8月8日。
好的,代码可以在附件中找到,请结合本文学习,我要说的是,让我们深入探讨细节……
这对我有什么用?
啊哈,好的,让我们看看
- 复杂数据绑定。
- 能够显示一个字符串,指示没有数据源(即当
DataSource为null时)。 - 将列表序列化/反序列化到磁盘。
- 有限的线程支持!
- 反序列化后自动调整列大小,以及
- 嗯……普通
ListView的通用标准功能。 - 哦对了,你可以把它拖放到一个容器上,然后非常容易地调整/修改上述设置! :-)
怎么样?流口水了吗……?
哇!好多啊,但公平地说,包括/不包括换行符/空格在内,大约有 971 行代码……顺便说一下,WinForm 生成的代码算作总代码行数的一部分吗?这个问题值得思考,我还在琢磨……我的直觉告诉我它不算! - 各位请回答!对于初学者,LOC 是 **L**ines **O**f **C**ode 的缩写,是一种衡量项目复杂度的软件工程指标。好的!附件中的代码可能存在错误,因为其中一部分是从 VB.NET 翻译过来的。
复杂数据绑定
简而言之,**复杂**数据绑定是关于支持各种数据列表,即 DataSet 类型、Arrays、Collections。上句话中的关键词是**列表**,或者更简洁地说,是一个实现底层 IList 或 IListSource 接口的数据组。
InnerDataSource 和 GetField。这两个函数是实现复杂数据绑定的核心。事实上,为什么不呢,我将概述可用于帮助您自己创建自定义数据绑定控件的必要代码块。所以请耐心听我将它们拼凑起来。// declarations at start of class pertinent to this block:
private object mDataSource;
private string mDataMember;
//
private IList InnerDataSource(){
if (this.mDataSource is DataSet){
if (this.mDataMember.Length > 0){
// Look ma! Complex Casting here...
return
((IListSource)((DataSet)this.mDataSource).Tables[this.mDataMember]).GetList();
}else{
return ((IListSource)((DataSet)this.mDataSource).Tables[0]).GetList();
}
}else{
if (this.mDataSource is IListSource){
return ((IListSource)this.mDataSource).GetList();
}else{
return ((IList)this.mDataSource);
}
}
}
图1。
#region GetField Function - Private
private string GetField(object obj, string FieldName){
  if (obj is DataRowView){
    return (((DataRowView)obj)[FieldName].ToString());
  }else{
    if (obj is ValueType && obj.GetType().IsPrimitive){
      return obj.ToString();
    }else{
      if (obj is string){
        return (string)obj;
      }else{
        try{
          Type SourceType = obj.GetType();
          PropertyInfo prop = obj.GetType().GetProperty(FieldName);
          if (prop == null || !prop.CanRead){
            FieldInfo field = SourceType.GetField(FieldName);
            if (field == null){
              return "(null)";
            }else{
              return field.GetValue(obj).ToString();
            }
          }else{
            return prop.GetValue(obj, null).ToString();
          }
        }catch(Exception){
          return "(null)";
        }
      }
    }
  }
}
#endregion
图2。
InnerDataSource
(见上图 **图 1**)
此函数确定数据源是否为 DataSet 类型。如果 DataMember 是一个空字符串,它将使用 DataSet 中表的第零个索引返回一个 IList 类型。否则,它将返回一个与 DataSet 中的表名关联的 IList 类型。这就是所涉及的复杂类型转换,如所示。*也许这就是为什么它被称为复杂数据绑定*……开玩笑!我们获取上述 DataSet 的 DataSource 及其关联的 Tables 属性,通过索引器或表名,将其转换为 IListSource,然后最终获取 IListSource 实现的 GetList() 方法,是的,你猜对了,它返回一个 IList 实现!
其他类型转换则简单得多。要记住的底线是,如果 mDataSource 属于 DataSet 类型或 DataView,则分别将其转换为获取 IListSource 实现,如上所示,然后通过 IListSource 的 GetList() 方法返回 IList 类型,否则,将其转换回 IList 类型。听起来很困惑?所有类型的对象组(无论是 strings、ints 甚至类),如果该分组实现了 Array(或是一个 Array 对象,即 SomeType[])——它就是一个 IList,对于其余的——DataSet、DataView 或集合,这适用于你!
GetField
(见上图 **图 2**)
将最初用 VB.NET 编写的代码翻译后,我的第一印象是“哇!那是什么鬼?”我只是翻译了一下。重新阅读那段代码后,我明白了……说不清我喝了几杯茶、抽了几支烟重新读了多少遍…… :-) 哎,它像泥巴一样清晰!好的,GetField 只是返回一个 string 类型,它是 IList 接口底层实现的一部分。我们检查类型为 object 的 obj 是否属于以下类型之一:
DataRowView- armed with theFieldNamepassed into this function, we do a bit more casting to obtain the string value of the field associated with theobjtype via theFieldNameaccessor, i.e.[FieldName].ToString().- 基本类型 - 我在这里松散地使用“基本类型”一词,它可以表示基本的 .NET 基本类型,例如
string、int、byte、char等……所以我们最终使用该*类型* **或** 我应该说是基本类型的ToString()方法。 String类型——这个很简单……嗯……- 最后,万不得已时,使用反射来获取
obj变量中包含的字符串。这是我多次重读后发现“眼睛里有水泡”的部分……反射……嗯……好的,代码看起来有点吓人,因为最初我根本不知道发生了什么,直到我重读它,查阅 MSDN,用 VS.NET 2003 调试器单步调试后,我才明白发生了什么。首先,通过GetType()方法获取obj的反射*类型*。这会返回一大堆关于obj类型的巧妙反射片段。然后我们通过使用GetProperty(FieldName)方法获取反射的PropertyInfo,以获取与obj变量类型关联的属性。暂停片刻,思考一下这个场景。假设您有一个类类型数组(为了简单起见,我们称之为SomeClass),包装在一个集合(例如ArrayList)中,并且代码像这样执行:public class SomeClass{ private string sWotsit = string.Empty; private int iWotsit = -1; public SomeClass(string _sWotsit, int _iWotsit){ this.sWotsit = _sWotsit; this.iWotsit = _iWotsit; } public string Foo{ get{ return this.sWotsit; } } public int Bar{ get{ return this.iWotsit; } } } // further code....somewhere in some class private ArrayList arrListSomeClass = new ArrayList(); arrListSomeClass(new SomeClass("Hello There", 5));
通过这个例子,尽管代码是人为设计的,但让我们来想象一下上面代码中关于反射*类型*发生了什么。反射会说这样的话……“嗯……把
obj的类型放入这个变量SourceType中。FieldName将包含一个值为‘Foo’的字符串。好的,.NET,给我这个‘Foo’的PropertyInfo,并将值返回到prop中。让我们看看它是否为 null 或不可访问。好的,它不可访问,或者为 null,那么也许它是一个字段。好的,.NET,从SourceType的GetField("Foo")方法返回该值并将其放入field中。field的内容为 null 吗?是,我放弃了。不,不是,好的,从FieldInfo类型的GetValue(obj)方法返回该值。哦,prop不为 null。好的,从PropertyInfo类型的GetValue(obj, null)方法返回该值。在这个人为设计的代码示例中,由于“Foo”是一个属性,它会返回一个字符串值,即“Hello There”——听起来很牵强,是的,我觉得这是解释反射如何检查底层类型的最佳方式。如果代码抛出异常或失败,我们只需返回字符串“(null)”,因为我们无法获取反射失败的实际字符串表示形式!
这就是 GetField 的工作原理,也是一个至关重要的方面,通过检查,.NET 的反射可以找出特定类型的字符串内容。这种反射功能相当强大,不是吗?
好的,数据绑定核心已经涵盖,接下来是什么?
将上述内容组合起来,如何实现数据绑定在这里真正发挥作用……在这个 DoAutoDiscovery 函数中。唯一缺少的是,如果添加了新行或新列(例如来自 DataSet),我们如何获得更改通知?此方法负责设置事件以侦听 IBindingList 接口。IBindingList 实现是 IList 接口的一部分,并支持 DataView 和 DataTable 类。现在,您知道为什么我们连接事件来侦听任何更改……在事件处理程序中,我们只需调用 DataBind 将 ListView 重新绑定到底层的 IList 基础设施。
// declarations at start of class pertinent to this block:
private IBindingList mBindingList = null;
//
#region SetSource Method - Private
private void SetSource(){
  IList InnerSource = this.InnerDataSource();
  if (InnerSource is IBindingList){
    this.mBindingList = (IBindingList)InnerSource;
    this.mBindingList.ListChanged += new
      ListChangedEventHandler(mBindingList_ListChanged);
      // Our event handler here...
  }else{
    this.mBindingList = null;
  }
}
#endregion

#region mBindingList_ListChanged Event Handler
private void mBindingList_ListChanged(object sender,
                           ListChangedEventArgs e) {
  this.DataBind();
  if (this.Items.Count == 0) this.Invalidate();
}
#endregion
(图 3。)
让我们看看如何让 ListView 在绑定到数据源(无论是 DataSet、Array 还是 Collection)时自动构建列。这里的方法叫做 DoDiscovery,如 **图 4** 所示,它被重载了两次,或者换句话说,同一方法有两个变体,具有不同的方法签名或*参数*。第一个方法启动对相关列的发现,并为数据源中发现的每个列创建一个列标题。第一个重载用于 DataSet 相关,后者用于 Arrays、Collections。请注意,列标题是我们自己的自定义版本,继承自 ColumnHeader 类,即 mColumns。有趣的是,在 DoAutoDiscovery 的最后一个重载中,对于 Arrays、Collections,这里甚至有更多的反射发挥作用。这就是这些方法的要点。
// declarations at start of class pertinent to this block:
private DataColumnHeaderCollection mColumns = null;
//
#region DoAutoDiscovery Overloads
#region DoAutoDiscovery Method #1 - Private
private void DoAutoDiscovery(){
  if (this.mDataSource == null) return;
  IList InnerSource = InnerDataSource();
  this.mColumns.Clear();
  if (InnerSource == null) return;
  this.BeginUpdate();
  if (InnerSource is DataView){
    DoAutoDiscovery((DataView)InnerSource);
  }else{
    DoAutoDiscovery(InnerSource);
  }
  this.EndUpdate();
}
#endregion

#region DoAutoDiscovery Method #2 - Private
private void DoAutoDiscovery(DataView ds){
  int Field;
  DataColumnHeader Col;
  for (Field = 0; Field < ds.Table.Columns.Count; Field++){
    // Check if the column within <CODE>DataSet.Tables[...]
    // is hidden! This is intentional!
    if (ds.Table.Columns[Field].ColumnMapping != MappingType.Hidden){
      Col = new DataColumnHeader();
      Col.Text = ds.Table.Columns[Field].Caption;
      Col.Field = ds.Table.Columns[Field].ColumnName;
      this.mColumns.Add(Col);
    }
  }
}
#endregion

#region DoAutoDiscovery Method #3 - Private
private void DoAutoDiscovery(IList ds){
  if (ds.Count > 0){
    object obj = ds[0];
    if (obj is ValueType && obj.GetType().IsPrimitive){
      DataColumnHeader Col = new DataColumnHeader();
      Col.Text = "Value";
      this.mColumns.Add(Col);
    }else{
      if (obj is string){
        DataColumnHeader Col = new DataColumnHeader();
        Col.Text = "String";
        this.mColumns.Add(Col);
      }else{
        Type SourceType = obj.GetType();
        PropertyInfo[] props = SourceType.GetProperties();
        if (props.Length >= 0){
          for (int column = 0; column < props.Length; column++){
            this.mColumns.Add(props[column].Name);
          }
        }
        FieldInfo[] fields = SourceType.GetFields();
        if (fields.Length >= 0){
          for (int column = 0; column < fields.Length; column++){
            this.mColumns.Add(fields[column].Name);
          }
        }
      }
    }
  }
}
#endregion
#endregion
图4。
private void DataBinding(){
  if (bDisposing) return;
  base.Clear();
  if (this.mDataSource == null) return;
  if (this.mColumns.Count == 0) return;
  IList InnerSource = InnerDataSource();
  ListViewItem lvi = null;
  Cursor current = this.Cursor;
  this.Cursor = Cursors.WaitCursor;
  this.BeginUpdate();
  for (int Field = 0; Field < this.mColumns.Count; Field++){
    base.Columns.Add(this.mColumns[Field]);
  }
  for (int Row = 0; Row < InnerSource.Count; Row++){
   lvi = new ListViewItem();
   lvi.UseItemStyleForSubItems = this.mUseItemStyleForSubItems;
   lvi.Text = this.GetField(InnerSource[Row],
              this.mColumns[0].Field).ToString();
   for (int Field = 1; Field < this.mColumns.Count; Field++){
    lvi.SubItems.Add(this.GetField(InnerSource[Row],
            this.mColumns[Field].Field)).ToString();
   }
   this.Items.Add(lvi);
  }
  this.EndUpdate();
  this.Cursor = current;
}
(图 5)
原始功劳必须归于 Rockford Lhotka 的 VB.NET 版本——干杯伙计! :-)
现在,数据绑定解决了,当 DataSource 为 null 或 Items.Count == 0 时显示消息
功劳归于 Lubos Haskos 和 Mav.Northwind 的原创性。这里有一段代码,它重写了 WndProc 并拦截了背景绘制。在整个代码中,一旦建立数据源(即属性赋值中的 DataSource 或列表通过上述 **图 3** 中描述的事件处理程序更改时),就会进行快速检查。请参阅 **图 6** 中的以下代码……我已在运行时实例化了 SolidBrush 对象,使用默认颜色,并已连接事件处理程序以在构造函数中调整 SolidBrush 对象的颜色。如果 GridLines 属性为 true 且没有 Items,或 Columns.Count 为零,它会暂时关闭。显示消息的代码在简单的检查下执行,即 if (this.Items.Count == 0) this.Invalidate();。是的,这会触发背景绘制,即 Windows 消息 WM_ERASEBKGND 被发送到我们重写的 WndProc(...),它在这里被拦截,然后我们用我们自己的 SolidBrush 背景颜色对象填充整个矩形,然后通过 DrawString 方法绘制一个字符串,同样使用我们自己的 SolidBrush 前景色。它看起来比上面提到的先驱者 Lubos 和 Mav 创建的原始版本更有活力,原始版本使用单调的白色背景和黑色文本。
// declarations at start of class pertinent to this block:
private string mNoDataMessage = "There are no data available at present.";
private bool mGridLines = false;
private const int WM_ERASEBKGND = 0x14;
private SolidBrush mSbBackColor = new
   SolidBrush(System.Drawing.Color.FromKnownColor(KnownColor.Window));
private SolidBrush mSbForeColor = new
   SolidBrush(System.Drawing.Color.FromKnownColor(KnownColor.WindowText));
.....
//within the constructor
this.BackColorChanged += new EventHandler(DataListView_BackColorChanged);
this.ForeColorChanged += new EventHandler(DataListView_ForeColorChanged);
//
#region WndProc Override - Protected
protected override void WndProc(ref Message m) {
  base.WndProc (ref m);
  if (m.Msg == WM_ERASEBKGND){
    #region Handle drawing of "no items" message
    if (Items.Count == 0 && Columns.Count == 0){
      if (this.mGridLines){
        base.GridLines = false;
      }
      using (Graphics g = this.CreateGraphics()) {
        using (StringFormat sf = new StringFormat()){
          sf.Alignment = StringAlignment.Center;
          int w = (this.Width - g.MeasureString(this.mNoDataMessage,
                   this.Font).ToSize().Width) / 2;
          Rectangle rc = new Rectangle(0,
            (int)(this.Font.Height*1.5), w, this.Height);
          g.FillRectangle(this.mSbBackColor, 0, 0, this.Width, this.Height);
          g.DrawString(this.mNoDataMessage,
                       this.Font, this.mSbForeColor, w, 30);
        }
      }
    }else{
      base.GridLines = this.mGridLines;
    }
   #endregion
  }
}
#endregion
// Event Handlers
#region DataListView_BackColorChanged Event Handler
private void DataListView_BackColorChanged(object sender, EventArgs e) {
  this.mSbBackColor.Color = this.BackColor;
}
#endregion

#region DataListView_ForeColorChanged Event Handler
private void DataListView_ForeColorChanged(object sender, EventArgs e) {
  this.mSbForeColor.Color = this.ForeColor;
}
#endregion
图6。
将列表序列化/反序列化到磁盘。
要将 ListView 中包含的项序列化/反序列化到磁盘,我不得不使用二进制序列化。这样做的优点是数据文件比使用 XML 文本等效物更小。将 ListView 项序列化到磁盘的调用只是一行,仅表示 SerializeToDisk(string FileName, bool Overwrite);。根据线程设置,它将使用相同的签名调用私有方法 Serialize2Disk。要从磁盘反序列化到 ListView,只需调用 DeSerializeFromDisk(string FileName);。简单易用。这里也同样适用线程设置。
为了解释为什么使用二进制序列化,我尝试将项目序列化为纯文本 XML 时头疼不已,却被编译器告知 ListViewItems 不能标记为 [Serializable()]。所以我转而创建了一个自定义类来保存必要的位,并将其复制到自定义类的数组中。所讨论的自定义类名为 DataListView。
#region DataLstView Class
[Serializable()]
public class DataLstView{
  #region Private Variables within this scope
  private ListViewItem[] dlvItemsArr;
  private string[] dlvColumnNames;
  private byte[] dlvColumnAlignment;
  private int[] dlvColumnWidth;
  private object[] tagObjectArr;
  #endregion

  #region DataLstView Constructor - Empty for Serialization
  public DataLstView(){}
  #endregion

  #region DataListViewItems Get/Set Accessor
  public ListViewItem[] DataListViewItems{
    get{ return this.dlvItemsArr; }
    set{ this.dlvItemsArr = value; }
  }
  #endregion

  #region ColumnNames Get/Set Accessor
  public string[] ColumnNames{
    get{ return this.dlvColumnNames; }
    set{ this.dlvColumnNames = value; }
  }
  #endregion

  #region ColumnAlignment Get/Set Accessor
  public byte[] ColumnAlignment{
    get{ return this.dlvColumnAlignment; }
    set{ this.dlvColumnAlignment = value; }
  }
  #endregion

  #region ColumnWidth Get/Set Accessor
  public int[] ColumnWidth{
    get{ return this.dlvColumnWidth; }
    set{ this.dlvColumnWidth = value; }
  }
  #endregion

  #region DataListViewTags Get/Set Accessor
  public object[] DataListViewTags{
    get{ return this.tagObjectArr; }
    set{ this.tagObjectArr = value; }
  }
  #endregion
}
#endregion
图7。
为了实现序列化到磁盘,我通过属性将每个 DataListView 的数组进行了复制,如 Figure 8 所示。也许这并不完全高效或代码优化,但如果您有更好的方法,请随时分享您的想法,我将很高兴地修改本文和相关代码。:-)
// within Serialize2Disk method
  int nItemsCount = this.Items.Count;
  if (nItemsCount >= 1){
    DataLstView dlvItems = new DataLstView();
    dlvItems.DataListViewItems = new ListViewItem[nItemsCount];
    dlvItems.DataListViewTags = new object[nItemsCount];
    this.Items.CopyTo(dlvItems.DataListViewItems, 0);
    dlvItems.ColumnNames = new string[this.Columns.Count];
    dlvItems.ColumnAlignment = new byte[this.Columns.Count];
    dlvItems.ColumnWidth = new int[this.Columns.Count];
    for (int nLoopCnt = 0; nLoopCnt < this.Columns.Count; nLoopCnt++){
      dlvItems.ColumnNames[nLoopCnt] = this.Columns[nLoopCnt].Text;
      dlvItems.ColumnAlignment[nLoopCnt] =
               (byte)this.Columns[nLoopCnt].TextAlign;
      dlvItems.ColumnWidth[nLoopCnt] = (int)this.Columns[nLoopCnt].Width;
    }
    for (int nLoopCnt = 0; nLoopCnt < nItemsCount; nLoopCnt++){
      ListViewItem lvi = (ListViewItem)this.Items[nLoopCnt];
      dlvItems.DataListViewTags[nLoopCnt] = lvi.Tag;
    }
    // ....
      try{
        BinaryFormatter bf = new BinaryFormatter();
        bf.Serialize(fs, dlvItems);
      }catch(SerializationException){
        throw;
      }catch(Exception){
        throw;
      }finally{
        fs.Close();
      }
    // ....
  }
// Within DeSerializeFromDisk method
DataLstView dlvItems = new DataLstView();
// ....
this.BeginUpdate();
try{
  BinaryFormatter bf = new BinaryFormatter();
  this.DataSource = null;
  base.Columns.Clear();
  this.mColumns.Clear();
  this.Items.Clear();
  dlvItems = (DataLstView)bf.Deserialize(fs);
  if (dlvItems.ColumnNames.Length >= 1){
    for (int nLoopCnt = 0;
         nLoopCnt < dlvItems.ColumnNames.Length; nLoopCnt++){
      base.Columns.Add(dlvItems.ColumnNames[nLoopCnt],
                 dlvItems.ColumnWidth[nLoopCnt],
                 (HorizontalAlignment)dlvItems.ColumnAlignment[nLoopCnt]);
      this.mColumns.Add(dlvItems.ColumnNames[nLoopCnt],
                 dlvItems.ColumnWidth[nLoopCnt]);
    }
  }
  base.Items.AddRange(dlvItems.DataListViewItems);
  if (dlvItems.DataListViewTags.Length >= 1){
    for (int nLoopCnt = 0;
         nLoopCnt < dlvItems.DataListViewTags.Length; nLoopCnt++){
      ListViewItem lvi = this.Items[nLoopCnt];
      lvi.Tag = dlvItems.DataListViewTags[nLoopCnt];
    }
  }
}catch(SerializationException){
  throw;
}catch(Exception){
  throw;
}finally{
  fs.Close();
  this.EndUpdate();
}
图8。
线程支持
我将包含一段示例代码片段,它展示了线程应该是什么以及如何在 WinForms 中实现。该片段展示了如何将列表项进行线程序列化到磁盘。片段中使用的变量可以通过 Forms Designer 中的 Properties Explorer 访问,位于一个恰当名为“Threading”的自定义类别下。
我将参数保存到私有全局变量中,这些变量可以在此代码段中通过线程访问。在 SerializeToDiskThread 方法中,我检查 this.InvokeRequired 是否为 true。如果是,我使用控件的 BeginInvoke 方法,并使用委托 SerializeToDiskDlgt。BeginInvoke 的用法有很好的文档,不用说,使用它可以让控件感觉更流畅。
// Within the custom control...
private Thread t_Serialize = null;
private bool mThreadSerialization = false;
//...
#region SerializeToDisk Function
public void SerializeToDisk(string FileName, bool Overwrite){
  if (this.mThreadSerialization){ // this property on?
    this.mOverwrite = Overwrite;  // Yup! Thread this please!
    this.mFilename = FileName;
    this.t_Serialize = new Thread(new ThreadStart(SerializeToDiskThread));
    this.t_Serialize.Name = "Serializing to Disk Thread";
    this.t_Serialize.IsBackground = true;
    this.t_Serialize.Start();
  }else{                          // Nope! Bog-standard call please!
    this.Serialize2Disk(FileName, Overwrite);
  }
}
#endregion

#region SerializeToDisk Threading
private delegate void SerializeToDiskDlgt(string FileName, bool Overwrite);
private void SerializeToDiskThread(){
  lock(this){
    if (this.InvokeRequired){
      this.BeginInvoke(new SerializeToDiskDlgt(Serialize2Disk),
                new object[]{this.mFilename, this.mOverwrite});
    }else{
      this.Serialize2Disk(this.mFilename, this.mOverwrite);
    }
  }
}
#endregion
图9。
反序列化时自动调整列大小
在 DeSerializeFromDisk 方法的主体中,会同步调用此方法,如**下面的图 10 所示。**无论是否启用线程反序列化,这都不会有区别。关键在于以像素为单位测量字符串,而**不是**字符串的长度,所以我们使用我们亲爱的朋友 MeasureString。基本上,涉及两件事:获取列标题的像素长度,然后获取所有行中最大的列文本项的像素长度,并检查这两个结果中哪个值更大,这两个结果是方法 GetLargestColHdrTextExtent 和 GetLargestTextExtent 中的 ref 参数。我给结果加了 8 作为微调系数,否则列标题或行本身会显示省略号。请注意 BeginUpdate 和 EndUpdate 的用法,这可以防止调整大小时出现讨厌的闪烁!
private void ResizeCols(){
  Cursor current = this.Cursor;
  this.Cursor = Cursors.WaitCursor;
  if (this.Items.Count >= 1){
    if (this.mColumns.Count >= 1){
      this.BeginUpdate();
      for (int nLoopCnt = 0; nLoopCnt < this.mColumns.Count; nLoopCnt++){
        int nColHdrSize = 0, nColSize = 0;
        this.GetLargestColHdrTextExtent(this, nLoopCnt, ref nColHdrSize);
        this.GetLargestTextExtent(this, nLoopCnt, ref nColSize);
        if (nColHdrSize > nColSize){ // Column Header text is bigger?
          this.mColumns[nLoopCnt].Width = nColHdrSize + 8; // Fudge Factor
        }else{ // Nope!
          this.mColumns[nLoopCnt].Width = nColSize + 8;
        }
        nColHdrSize = nColSize = 0;
      }
      this.EndUpdate();
    }
  }
  this.Cursor = current;
}
图10。
嗯……普通 ListView 的通用标准功能
哦对了,你可以把它拖放到一个容器上,然后非常容易地调整/修改上述设置! :-)
数据绑定之后的第二个大问题。如何将所有这些组合在一起,形成一个可以拖到 WinForms Designer 上的漂亮控件。首先,要为工具箱显示一个漂亮的图标,必须执行以下操作:
- 创建一个 16x16 的小图标。
- 将图标添加到项目并设置“生成操作”为嵌入式。请参阅下面的图 11 了解屏幕截图。

图11。
- 在
public class DataListView : .....之前,添加以下内容,如以下图 12 所示[Serializable(), System.ComponentModel.DesignerCategory("Code"), ToolboxBitmapAttribute(typeof(<U>TB.nsListViewEx.DataListView</U>), "DataListView.ico")]
图12。
请务必在项目资源管理器中指定默认命名空间,否则漂亮的图标将不会在工具箱中显示,并且它必须与上面带下划线的部分匹配!

- 任何你想在设计器中显示的属性都应该有以下内容,如 Figure 13 所示
// Look at Figure 14 for the screenshot
// of Properties explorer for this particular snippet.
[System.ComponentModel.Category("Appearance"),
// ^^-- Specify which category in the Properties explorer. Fig. 14,C

System.ComponentModel.Browsable(<U>true</U>),
// ^^^^ Want the property to be invisible or inaccessible
//         thru Properties explorer? Set the underlined to false!
System.ComponentModel.Description("A default message" +
  " to show when there is no data bound to this DataListView."),
// ^^^^ The string between quotes will appear
//    at the bottom of the Properties Explorer window. Fig 14,B
DefaultValue("There are no data available at present.")]
// ^^^^ That will be the default value
//         depending on the property's data type. Fig 14,A
public string UnavailableDataMessage {
  get {  return this.mNoDataMessage; }
  set { if (!value.Equals(this.mNoDataMessage)){
          this.mNoDataMessage = value;
          Invalidate();
      }
    }
}
图 13。

图 14。
- 要关闭属性,或使其不显示,或重写它并使其不可见,请这样做:
[System.ComponentModel.Browsable(false)]
public new System.Windows.Forms.ImageList StateImageList{
  get{ return null; }
}
图 15。
我曾遇到一些情况,我开发了一个自定义控件,但编译器抱怨找不到默认属性,即使我已经重写并使其不可见。甚至
InitializeComponent()也坚持在代码中插入有问题的行或属性。我最终不得不手动进入InitializeComponent并删除设置该自定义控件属性的有问题的行。我发现这段代码可以解决问题,将下划线部分更改为与属性名称匹配,例如:private bool ShouldSerialize<U>StateImageList</U>(){ return true; }
图 16。
如果你查看 Forms 生成的代码(在
InitializeComponent()中),你会看到类似这样的内容:dataListView1.StateImageList = null;。如果你将返回值更改为false,它就不会显示!并且有了这个技巧,编译器接受了没有这样的属性并正常工作。一个快乐的编译器 = 更少的头发被拔掉 = 暂时不会秃头——嘿,我还有几个月就到三十岁了…… :-) 除了这个技巧,在这种情况下幸好不需要它,只需记住这个技巧,如果你遇到编译器烦恼的话。
由于此控件是数据绑定的 ListView,我继承自 System.Windows.Forms.ListView,即
public class DataListView : System.Windows.Forms.ListView{
//....
}
图 17。
此数据绑定 ListView 不需要的属性
View属性,这将默认为“Details”并设置为不可见。MultiSelect属性,这将默认为true,并设置为不可见。FullRowSelect属性,这将默认为true并设置为不可见。LargeImageList、SmallImageList和StateImageList属性,将其关闭并设置为不可见。
所需属性
- 要更改
DataSource,“数据”类别。 - 要更改
DataMember,“数据”类别。 - 要更改列,实际上,
Columns属性是继承的ListView的Column属性的重写,并已移至“数据”类别。 - 启用列名等自动发现,“数据”类别。
- 为了能够使用单个
ListView项样式,在“外观”类别下新增了一个名为“UseItemStyleForSubItems”的属性。 - 如果
DataSource为null或无数据,则可更改消息,“外观”类别。 - 新增了名为“Threading”的类别,其中包含
DataBindThreading、SerializationThreading、DeSerializationThreading和ReSizeColumnsThreading的bool值。
属性设置与上面创建新属性的示例非常相似,例如“UseItemStyleForSubItems”,其默认值为 false。嘿,我想能够轻松地给文本着色和更改它…… :-)
[System.ComponentModel.Category("Appearance"),
System.ComponentModel.Browsable(true),
  System.ComponentModel.Description("A way of customizing" +
    " each column style as per ListViewItem.UseItemStyleForSubItems."),
  DefaultValue(false)]
public bool UseItemStyleForSubItems {
get {  return this.mUseItemStyleForSubItems; }
set { if (this.mUseItemStyleForSubItems != value){
        this.mUseItemStyleForSubItems = value;
      }
    }
}
图 18。
有两个属性值得特别提及,即 DataSource 和 DataMember。毕竟,在从 VB.NET 翻译之后,我才意识到代码的意义,并强调了本文的主题。在许多可数据绑定的控件中,WinForms Designer/Properties Explorer 中似乎都有一个用于这两个属性的通用 UI。我直到“迷失在翻译中”(*双关语*!)之后才了解这一点。
请看下面的图 19,在将原始代码从 VB.NET 翻译成 C# 之前,有几件事对我来说是陌生的,它涉及我以前从未见过的代码。
#region DataSource Property
[System.ComponentModel.Category("Data"),
System.ComponentModel.Browsable(true),
System.ComponentModel.RefreshProperties(RefreshProperties.Repaint),
System.ComponentModel.TypeConverter(
  "System.Windows.Forms.Design.<U>DataSourceConverter</U>,
  System.Design"),
System.ComponentModel.Description("Data Source.")]
public object DataSource{
  get{ return this.mDataSource; }
  set{ if (value != null){
         this.mDataSource = value;
         this.SetSource();
         if (this.mAutoDiscovery){
           this.DoAutoDiscovery();
           if (this.Items.Count == 0) this.Invalidate();
         }
         this.DataBind();
       }
     }
}
#endregion
图 19。
System.ComponentModel.RefreshProperties 会刷新属性资源管理器和在选择数据源时所做的其他属性更改。System.ComponentModel.TypeConverter("System.Windows.Forms.Design.DataSourceConverter, System.Design"):这负责调出标准的下拉窗口以选择数据源。

图 20。
上面图 19 中带下划线的 DataSourceConverter 是提供数据源列表的通用下拉菜单的关键,该类可以在 System.Design 中找到,其中包括 DataListMember,下面将介绍。
#region DataMember Property
[System.ComponentModel.Category("Data"),
  System.ComponentModel.Editor(
  "System.Windows.Forms.Design.DataMemberListEditor,
  System.Design", typeof(System.Drawing.Design.UITypeEditor)),
  System.ComponentModel.Description("Data Member.")]
public string DataMember{
  get{ return this.mDataMember; }
  set{ if (value.Length != 0){
         this.mDataMember = value;
         //this.SetSource();
         //if (this.mAutoDiscovery){
         //     this.DoAutoDiscovery();
         //  if (this.Items.Count == 0) this.Invalidate();
         //}
       }
     }
}
#endregion
图 20。
上面图 20 显示了 DataMember 属性的属性代码片段。您会注意到我注释掉了自动绑定数据源的代码。事实上,在某些地方也注释掉了,因为我发现它绑定数据太频繁,感觉“减慢了”控件的加载速度。姑且称之为我的优化吧,看看构造函数,看看我是如何注释掉将事件处理程序 (Invalidate) 连接到 Columns 集合类 DataColumnHeaderCollection 的。同样,请随意评论。这个属性中让我着迷的部分是这行代码:System.ComponentModel.Editor("System.Windows.Forms.Design.DataMemberListEditor,System.Design", typeof(System.Drawing.Design.UITypeEditor))。同样,你可以想象我看到这个时的反应,我喝咖啡时喷了出来,说“这他妈的……”。基本上,这个属性只用一行代码就为 WinForms Designer 提供了强大的功能,一个漂亮的通用下拉窗口,为特定的数据源提供不同的数据成员。代码告诉设计器使用一种编辑器来选择数据成员,同样,这可以在 System.Design 类中找到。我承认我还没有看过其他的。作为兴趣点,这里是 VB.NET 的等效代码,只是为了让您了解翻译……
<Category("Data"), _
Editor("System.Windows.Forms.Design.DataMemberListEditor," & _
"System.Design", GetType(System.Drawing.Design.UITypeEditor))> _
Public Property DataMember() As String
  Get
    Return mDataMember
  End Get
  Set(ByVal Value As String)
    mDataMember = Value
    DataBind()
  End Set
End Property
后记
关于演示
我拼凑了一个非常简单的演示,它展示并证明了数据绑定有效,构建项目并观察它。在 *Form1.cs* 中,我手动创建了一个 DataSet 并指定了此控件的 DataSource 属性,并将其连接到此 DataSet。此外,列名被自定义字符串覆盖,而不是通过 *Reflection* 返回的。查看 btnFill_Click 事件处理程序,并注意我如何覆盖列名,并单独设置其样式。另外,为什么不取消该处理程序中的代码注释,以使用 ArrayList 作为其 DataSource:this.CreateAndFillArrList(); 来证明它有效。尽情玩弄它,并告诉我您的进展! :-)
失之毫厘谬以千里
我将 VB.NET 代码翻译成 C# 的最大绊脚石是,弄清楚 VB.NET 的 CType(...) 等效物,例如,将下面图 21 中的代码与上面图 1 中的代码进行比较!
' VB.NET Original version.
Private Function InnerDataSource() As IList
  If TypeOf mDataSource Is DataSet Then
    If Len(mDataMember) > 0 Then
      Return CType(CType(mDataSource, DataSet).Tables(mDataMember), _
        IListSource).GetList
    Else
      Return CType(CType(mDataSource, DataSet).Tables(0), _
        IListSource).GetList
    End If
  ElseIf TypeOf mDataSource Is IListSource Then
      Return CType(mDataSource, IListSource).GetList
  Else
      Return CType(mDataSource, IList)
  End If
End Function
图 21。
是的,我在翻译/阅读 VB.NET 时有时会漏掉下划线(VB.NET 的行连接符),这会立即误导未经训练的眼睛。
为什么使用二进制序列化,但没有加密
关于以二进制格式序列化到磁盘,因为我的需求相当具体,即任何懂电脑的人都可以轻松打开 XML 文本并更改列或 ListViewItems 中的数据内容。在这种情况下,这听起来有点过于牵强,但威胁确实存在。因此,为了最大限度地减少损害,我选择了二进制。当然,任何人都可以用十六进制编辑器轻松打开它……**但是**,安全性不是我的专长,因此我并不完全了解如何加密数据。例如,为什么选择一种安全加密例程实现而不是另一种,以及它们之间的区别等等?
那是我的错(我是一个自学成才的程序员,没有接触过以安全为目的的编程等方面),当然,我会被认为是安全链中的薄弱环节……所以我故意从设计中省略了处理加密的代码。也许我是这里的傻瓜,但我可以百分之百诚实地说,我觉得我只是在明智地避免在不了解如何实现等情况下,实施更安全的加密内容的方式,我甚至没有足够的信心知道该使用哪种加密模型等等……
还有其他评论吗?
请就此发表您的意见。也许您,读者,会认为我很懒惰、不负责任、天真、偏执甚至愚蠢,没有去查阅如何在 MSDN 中实现安全的加密方法。这正是我感到困扰的地方,这些方法广为人知,信息在公共领域,懂电脑的人可以通过瞥一眼信息就想出一种破解加密的方法,而且,到处都有天才在出色地揭露 IT 各个方面可能存在的安全漏洞,这让我在使用一个众所周知的加密方法时更加感到不安。
对您有帮助吗?
好了,我希望我发表这篇文章后能让某些人的生活更轻松,当然,也请随时发表您的想法、评论、批评和改进文章/代码的建议。
Slán leat agus go néirí bóthar leat.(爱尔兰谚语/表达,意为“祝你好运,愿你一路顺风!”)。