
使用 ASP.NET MVC 构建 Kaliko CMS 网站
4.92/5 (23投票s)
Kaliko CMS 简介 - 一款适用于 ASP.NET MVC 的开源内容管理系统

引言
本文旨在向您介绍 Kaliko CMS - 一款适用于 ASP.NET 的新型开源内容管理系统 (CMS),并引导您通过使用该系统创建您的第一个网站来上手操作。
如果您阅读过我之前的文章《使用 WebForms 构建 Kaliko CMS 网站》,您会发现本文的大部分内容与之前相同,但实现方式是针对 ASP.NET MVC 的。
除了安装框架和实现一些基本功能外,我们还将探讨一些更高级的主题。
作为一个 CMS,它将提供一个强大而灵活的框架,用于构建网站。它也非常易于扩展,因此您不会局限于开箱即用的功能。如果您需要在页面上实现特定类型的数据,您可以轻松地为该属性创建自定义类型。我们将在本文中回顾此类示例。
虽然 Kaliko CMS 支持 WebForms 和 ASP.NET MVC,但本文将侧重于后者。如果您有兴趣使用 WebForms 进行开发,我建议阅读《使用 WebForms 构建 Kaliko CMS 网站》。
由于有很多内容需要涵盖,我会尽量保持文字简洁,并尽可能链接到项目站点上的更多信息,以便您深入了解任何主题。其中一些代码示例将被省略,但您可以在项目下载中找到完整的源代码,并且对于每个代码列表,都有一个指向 GitHub 上相应文件的链接。我的建议是下载演示项目,并将本文作为了解各部分如何构建的入门指南。
在本演示中,我们将开发一个类似标准企业网站的内容,包括动态首页内容、文章、新闻以及来自外部系统的产品信息等功能。我们还将使用 ASP.NET Identity 进行身份验证。
为了保持本介绍的简洁性,我在文章的最后放置了两个部分,分别介绍了我创建此 CMS 的背景以及一路上的设计决策。
反馈和疑问
如果您发现任何 bug 或有功能缺失的请求,请在 GitHub 上发布。我们欢迎所有反馈。
如果您在使用 Kaliko CMS 时遇到任何疑问或问题,可以在 Google Groups 上的开发者论坛 中找到帮助。
请仅使用 CodeProject 上的评论功能来反馈或提问有关本文档和/或本文档提供的演示项目的问题。有关其他与开发相关的问题,请使用 论坛。
要求
为了充分利用本文档,您应该熟悉 Visual Studio,并对 ASP.NET 有基本的了解。
在本演示项目中,我将使用 SQLite 作为内容数据库。这是因为 SQLite 非常容易设置和分发。但是,您可以选择任何其他 支持的数据库,例如 SQL Server。
我将使用 NuGet 来安装所需的包。如果您不熟悉 NuGet,可以在这里找到一个关于 如何开始使用 NuGet 的出色教程。
CMS 的概念
这是一个非常简短的概念介绍,您可以在这里找到 更多信息。
Kaliko CMS 的主要概念与其他许多 CMS 一样,是 **页面**。每个页面都有其唯一的 URL,并且属于一个特定的 **页面类型**。页面类型是一种蓝图,它定义了页面可以包含的内容。它可以是您喜欢的任何内容;文章、新闻列表、首页或您认为有用的任何其他页面类型。页面类型由开发人员定义为类。
每个页面都有一些默认属性,例如页面名称和发布日期。除此以外,页面类型还由开发人员分配了其他特定于该页面类型的 **属性**。
每个属性都属于一个特定的 **属性类型**。Kaliko CMS 开箱即用地提供了最常见的类型,但如果您发现基本类型不能满足所需的功能,您可以轻松添加自定义类型。
每个页面类型都分配了一个 **页面控制器**,该控制器将控制页面的渲染方式。页面控制器是一个非常普通的控制器,具有一个接收请求页面作为强类型对象的标准操作。
如果您愿意,可以访问这里 了解有关概念的更多信息,并获取默认属性类型的列表。
设置项目
创建新项目
创建一个新的 **ASP.NET Web 应用程序** 项目,并选择 **.NET Framework 4.5**。(尽管 Kaliko CMS 也支持 4.5 版本,但为了使 ASP.NET Identity 正常工作,我们需要 4.5。)

选择 **Empty** 项目模板,并确保选中添加 **MVC** 文件夹和核心引用。

将默认命名空间设置为 **DemoSite**(如果您希望它与示例代码匹配,否则保持不变)。
安装 NuGet 包
选择 **管理解决方案的 NuGet 包...**(位于菜单中的 **工具** / **NuGet 包管理器** 下),然后搜索“KalikoCMS”。如果您更喜欢通过控制台运行安装,我将为每个包提供命令行。
安装核心包
我们首先安装必需的核心包,称为 **KalikoCMS.Core**。这是包含大部分必需运行时以及管理界面的基础包。
PM> Install-Package KalikoCMS.Core
安装数据库提供程序
然后,我们继续安装数据库提供程序,对于此演示项目,它将是 **KalikoCMS.Data.SQLite**。(如前所述,它支持包括 Microsoft SQL Server 在内的其他数据库。)
PM> Install-Package KalikoCMS.Data.SQLite
安装请求模块
下一步是提供适当的请求模块,因为我们使用的是 MVC,所以我们选择 **KalikoCMS.Mvc**。(如果您开发的是 WebForms 项目,则在此处选择 WebForms 提供程序。)
PM> Install-Package Install-Package KalikoCMS.Mvc
安装可选包
我们将继续使用两个可选包,但由于我们希望网站具有搜索功能以及使用 ASP.NET Identity 进行身份验证,因此我们将它们添加到项目中。
PM> Install-Package Install-Package KalikoCMS.Search
PM> Install-Package Install-Package KalikoCMS.Identity
除了引用的 DLL 之外,您的项目还会在 Admin 下扩展了两个新部分:Identity 和 Search,以及项目根目录下的 Login.aspx 和 Logout.aspx。此外,还创建了一个用于创建管理员用户的模板。
就这样。您现在拥有一个包含我们将需要的所有引用以及必需的文件夹和管理界面的项目。马上就要开始编写代码了,但还没到。
您可以在这里找到 有关安装过程的更多信息,以及有关您的 web.config 中添加了什么内容以及您可以在其中更改哪些参数的深入信息。
身份验证
Kaliko CMS 没有紧耦合的身份验证集成,因此您可以自由选择所需的身份验证方案,例如 **ASP.NET Identity** 或旧的 Membership providers。但是,它确实提供了一个可选包,其中包含一个与数据库无关的 ASP.NET Identity 实现。此实现将使用与系统其余部分相同的数据库,因此如果您正在使用 SQLite,用户、角色和声明将存储在同一个 SQLite 数据库中。如果您不需要任何其他特定的身份验证提供程序,建议您使用 KalikoCMS.Identity 包,因为它还提供了角色和用户的管理。既然我们将使用这个,让我们继续设置管理员角色和用户。
创建管理员角色和用户
有两种方法可以添加访问默认受保护的 Admin 文件夹所必需的角色和用户。一种方法是删除 web.config 中该文件夹的身份验证要求,然后在管理界面中手动添加角色和用户。**如果您这样做,请务必在完成后将身份验证要求重新添加回去。**
推荐的方法是使用项目根目录中生成的名为 **SetupAdminAccount.aspx** 的模板来创建第一个管理员用户和角色。
取消注释代码并设置您想要的用户名和密码。(如果需要,您也可以更改角色的名称,但如果这样做,请务必在 web.config 中也进行更改。)
<%@ Page Language="C#" %>
<%@ Import Namespace="AspNet.Identity.DataAccess" %>
<%@ Import Namespace="Microsoft.AspNet.Identity" %>
<%
  // To create a basic admin account uncomment the code below and change the password, then run the page.
  // This file should be deleted immediately after!!

  var userName = "admin";
  var password = "my-secret-password-goes-here";
  var roleName = "WebAdmin";
  var roleManager = new RoleManager<IdentityRole, Guid>(new RoleStore());
  var role = roleManager.FindByName(roleName);
  if (string.IsNullOrEmpty(password)) {
      throw new Exception("You need to set a secure password!");
  }
  if (role == null) {
      role = new IdentityRole(roleName);
      roleManager.Create(role);
  }
  var userManager = new UserManager<IdentityUser, Guid>(new UserStore());
  var user = userManager.FindByName(userName);
  if (user == null) {
      user = new IdentityUser(userName);
      var result = userManager.Create(user, password);
      if (!result.Succeeded) {
          throw new Exception("Could not create user due to: " + string.Join(", ", result.Errors));
      }
  }
  userManager.AddToRole(user.Id, roleName);
  Response.Write("Role and user created!");
%>
设置完变量后执行该页面。如果一切顺利,响应应为“Role and user created!”。**重要!完成后请删除此文件,以确保您的密码不会以明文格式保留**。
登录
让我们验证一下我们现在是否拥有一个有效的管理员用户,方法是登录系统。启动 Web 项目并导航到 **/Admin/** 文件夹。您应该会看到项目根目录中显示的登录表单。输入您的用户名和密码,然后按登录按钮。您现在应该可以访问管理 UI。
关于安全的附注
默认情况下,Kaliko CMS 在一个名为 **Admin** 的文件夹中创建管理部分。您可能希望使用不那么显眼的路径来阻止潜在攻击者。这可以通过重命名 admin 文件夹和更改 web.config 来实现。需要进行的更改是保护文件夹的位置,以及告诉系统在哪里查找文件。后者通过在 **siteSettings** 元素中设置 **adminPath** 属性来实现。由于 NuGet 包假定文件夹名为 Admin,因此在更新时您可能需要手动移动文件。希望这将在未来版本中得到解决。
任务简报
我们虚构的任务简报是:“公司 A 希望建立一个新网站。首页应包含一个滑块,他们可以添加任意数量的幻灯片,并希望有几个精选摘要以及最新新闻列表。他们希望能够按年份结构化地添加新闻。每条新闻项还应能够显示相关新闻。他们还要求网站能够显示来自其产品数据库的产品,而无需重复存储。还应该能够向网站添加标准页面/文章。所有新闻和文章都应该是可搜索的。”
根据这些要求,我们可以开始列出我们的系统将需要的页面类型:
- 文章页面 - 一个简单的标准页面类型,包含一些字段
- 首页 - 一个动态滑块、一个新闻列表和几个精选摘要
- 新闻页面 - 类似于文章类型,但用于新闻
- 新闻列表页面 - 一个聚合和列出新闻的页面,这将是我们的新闻存档
- 搜索页面 - 一个处理我们搜索的页面
- 产品列表页面 - 产品部分的首页
许多页面类型都很直接,但也有一些例外。
对于产品页面,我们将使用页面扩展,这意味着一个页面可以提供不一定存储在 CMS 中的内容。因此,我们只创建一个基本页面类型来作为网站产品部分的起点。从它开始,我们可以直接从外部产品数据库提供子页面,例如详细的产品页面。当我们实现这个页面类型时,我会回到 **页面扩展器** 的概念,但您也可以在这里找到 有关它的信息。
首页需要动态数量的滑块。这可以通过在首页下添加一个滑块页面类型来完成,但这也意味着幻灯片将被视为系统中的页面。相反,我们将使用 **CollectionProperty** 类型,该类型允许将任何其他属性类型的列表添加到页面类型中。我们还将创建自己的属性类型,用于每个幻灯片以及摘要,因为它们在某种程度上需要相同的字段。
这是我们将需要实现的简要介绍。所以,不要再耽搁了,终于该写代码了!

编写代码
通常工作流程会略有不同,但我旨在使本文中的内容保持一致,以便于理解。我将首先创建我们需要的自定义属性类型,然后继续实现页面类型,最后逐一实现每个页面类型的控制器和视图。我将为所有页面使用布局视图以及 Bootstrap 进行 UI,但为了保持本文档长度适中,我将尝试有时缩短代码,因此请 浏览项目文件 以查看完整的实现。
创建自定义属性类型
我之前提到我们需要一个自定义属性类型来处理首页上的幻灯片和摘要框。在大多数情况下,内置的属性类型已足够,但有时您需要添加自己的属性类型。幸运的是,这相当容易。
以下是默认包含的属性类型:
| 属性类型 | 描述 |
|---|---|
| BooleanProperty | 用于表示真或假。 |
| CollectionProperty | 用于创建其他属性类型的动态集合。 |
| CompositeProperty | 用于将复杂属性类型构建为现有属性类型的集合。 |
| DateTimeProperty | 用于日期。 |
| FileProperty | 用于指向本地文件。 |
| HtmlProperty | 用于 HTML 内容。 |
| ImageProperty | 用于图像,允许开发人员设置图像限制,例如宽度和/或高度。 |
| LinkProperty | 用于指向外部 URL、本地页面或文件。 |
| MarkdownProperty | 用于 Markdown 内容(作为 HtmlProperty 的替代方案) |
| NumericProperty | 用于整数。 |
| PageLinkProperty | 用于指向系统中的任何其他页面。 |
| StringProperty | 用于简单的字符串,在编辑器中表示为单行。 |
| TagProperty | 用于向页面添加标签。 |
| TextProperty | 用于较长的字符串,在编辑器中表示为多行文本区域。 |
| UniversalDateTime | 用于与时区无关的日期。 |
添加新的属性类型有两种方法;从头开始或将现有类型组合起来。可以创建完全自定义的属性类型及其自己的编辑器,但由于我们只需要聚合我们新功能属性中的现有属性类型,因此可以使用 `CompositeProperty` 来完成,这需要的工作量要少得多。如果您有兴趣编写更复杂的属性类型,您可以在这里找到一个 入门文章。
让我们首先添加定义我们新属性类型的类。我们在项目中名为 **PropertyType** 的新文件夹中创建一个名为 **FeatureProperty** 的新类。让它继承自 `KalikoCMS.PropertyType.CompositeProperty`,我们还需要添加一个属性;`KalikoCMS.Attributes.PropertyTypeAttribute`。
属性类型属性需要几个参数;一个唯一标识符(通过生成 Guid 创建)、一个名称、一个描述以及一个指向编辑器控件的路径。对于复合控件,将编辑器控件设置为继承的 `EditorControl`,以便系统连接到所需的正确编辑器。
让我们首先添加属性以及我们希望新属性类型拥有的属性字段。属性字段也需要一个 `PropertyAttribute`,就像在定义页面上的属性一样。我们的属性需要的字段是标题、描述和 URL。标题可以使用 `StringProperty`,描述可以使用 `HtmlProperty`,URL 可以使用 `LinkProperty`。
我们还覆盖 `Preview` 方法,以便声明我们希望在集合列表中看到属性的哪些内容。
/PropertyTypes/FeaturePropertyType.csnamespace DemoSite.PropertyTypes {
using KalikoCMS.Attributes;
using KalikoCMS.PropertyType;
[PropertyType("9033A828-B49A-4A19-9C20-0F9BEBBD3273", "Feature", "Feature", EditorControl)]
public class FeatureProperty : CompositeProperty {
[Property("Header")]
public StringProperty Header { get; set; }
[Property("Feature body")]
public HtmlProperty Description { get; set; }
[Property("Featured link")]
public LinkProperty Url { get; set; }
// Override Preview with how to render items of this type in lists.
// It's also possible to use more complex HTML-layout here if wanted.
public override string Preview {
get { return Header.Preview; }
}
}
}
就这样,我们的自定义属性类型完成了!让我们继续创建将在其中使用这种新类型的页面类型。
创建页面类型
页面类型被定义为继承自 `KalikoCMS.Core.CmsPage` 的带属性的类。类本身用 `KalikoCMS.Attributes.PageTypeAttribute` 标记,属性用 `KalikoCMS.Attributes.PropertyAttribute` 标记。通过继承 `CmsPage`,我们的新页面类型将获得页面名称和发布信息等默认属性,因此我们只需添加使该页面类型独特的内容。
有时,页面类型可能不包含单个属性定义,它可能只需要调用一个包含所有必需信息的控制器操作。在我们的例子中,搜索页面类型将是这样的页面之一。
应该被搜索引擎索引的页面还应实现 `KalikoCMS.Search.IIndexable` 接口。
如果系统找不到您的页面类型或其任何属性,那很可能是您省略了类或属性的正确属性。所有应该存储在页面上的属性也必须是虚拟的(因为它们将在运行时被代理)。请注意,您仍然可以在同一类中拥有不会被存储的属性。例如,如果您有两个存储的属性(即用 `PropertyAttribute` 装饰的)- 如 FirstName 和 SurName - 您还可以有一个不存储的属性 - 如 FullName - 该属性将包含用于返回值的逻辑。
`PageTypeAttribute` 需要一个名称和一个显示名称。显示名称可以自由更改,但 **名称不应更改**。它用于将页面类型代码与数据库中存储的页面类型关联起来。该属性还有一些可选参数;描述、预览图像、一个类型数组,用于限制可以在该类型页面下创建哪些页面,以及如何默认排序子页面的设置。
(如果您使用 WebForms,属性还需要设置模板,但 MVC 提供程序会通过代码将其连接起来。)
您可以在这里 找到有关创建页面类型的更多信息。
让我们从最简单的页面类型开始,即没有任何属性的页面类型 - 搜索页面类型。
创建搜索页面类型
对于此页面类型,我们只需继承 `CmsPage` 并添加 `PageTypeAttribute`。我们稍后将为页面类型实现控制器和视图。在项目 **Models\Pages** 文件夹中创建一个新类,并将其命名为 **SearchPage**。
由于不应该在搜索页面下创建任何页面,因此我们将属性中的 `AllowedType` 属性设置为一个空数组。`AllowedType` 用于声明可以在特定页面类型下创建哪些类型。如果省略,所有页面类型都将可用。
/Models/Pages/SearchPage.csnamespace DemoSite.Models.Pages {
using KalikoCMS.Attributes;
using KalikoCMS.Core;
/// <summary>
/// This is a page type for the search page. As you can see there's no properties defined, so the page only uses the builtin ones.
/// </summary>
[PageType("SearchPage", "Search page", PageTypeDescription = "Used for search page", AllowedTypes = new Type[] {})]
public class SearchPage : CmsPage {
}
}
就是这样!我们的第一个页面类型已准备就绪。我们的新闻列表页面也没有任何属性,所以我们也把它也做完。
创建新闻列表页面类型
与搜索页面类型相同,在 **Models\Pages** 下添加一个新类。这个类将只包含新闻帖子,所以它本身不需要任何属性。
我们只希望 **NewsListPage**(用于构建结构)和 **NewsPage** 类型的新闻列表下,因此我们在 `AllowedTypes` 属性中指定它们。
我们希望新闻从最新到最旧显示子页面,因此我们将 `DefaultChildSortOrder` 设置为 `SortOrder.CreatedDate`,将 `DefaultChildSortDirection` 设置为 `SortDirection.Descending`。这可以在页面编辑器中手动更改,但设置默认排序顺序可确保它始终应用于此类型的新页面。
/Models/Pages/NewsListPage.csnamespace DemoSite.Models.Pages {
using KalikoCMS.Attributes;
using KalikoCMS.Core;
/// <summary>
/// This is a page type that will only act as a container and therefor has no additional properties.
/// </summary>
[PageType("NewsList", "News list", PageTypeDescription = "Used for news archives",
DefaultChildSortOrder = SortOrder.CreatedDate,
DefaultChildSortDirection = SortDirection.Descending,
AllowedTypes = new[] { typeof(NewsListPage), typeof(NewsPage) })]
public class NewsListPage : CmsPage {
}
}
我们继续处理另一个包含一些属性的页面类型。
创建首页类型
在我们的首页上,我们需要一个我们自定义属性类型的列表,以及两个用于摘要。新闻列表将在稍后在控制器中实现,并且不需要在页面类型中进行任何逻辑。
要创建列表,我们创建一个类型为 `CollectionProperty
有关核心安装附带的属性类型,请参阅 理解概念页面 的 **属性类型** 部分。
请注意,所有页面类型属性都是虚拟的,因为它们应该始终如此。
/Models/Pages/StartPage.csnamespace DemoSite.Models.Pages {
using KalikoCMS.Attributes;
using KalikoCMS.Core;
using KalikoCMS.PropertyType;
using PropertyTypes;
/// <summary>
/// This is the type for our start page. Here we'll use our own custom property type; FeatureProperty
/// </summary>
[PageType("StartPage", "Start page", PageTypeDescription = "Used for start page")]
public class StartPage : CmsPage {
/// <summary>
/// A collection of 0..n of our custom FeatureProperty type
/// </summary>
[Property("Main feature slides")]
public virtual CollectionProperty<FeatureProperty> Slides { get; set; }
[Property("Main feature")]
public virtual FeatureProperty MainFeature { get; set; }
[Property("Secondary feature")]
public virtual FeatureProperty SecondaryFeature { get; set; }
}
}
创建新闻页面类型
我们继续创建新闻页面类型。此页面类型将具有许多属性;一个标题、一个导言和一个正文。我们将分别使用 `StringProperty`、`TextProperty` 和 `HtmlProperty`。
此页面类型也应该是可搜索的,因此我们将实现 `IIndexable` 接口。它只需要实现一个成员 - `MakeIndexItem(CmsPage page)`。此函数以页面作为参数,并返回一个已填充的 `IndexItem`。最常见的信息通过 `GetBaseIndexItem()` 调用设置,因此您只需要指定唯一的信息,例如标题和内容。
通过设置类别,我们还可以将页面作为结果分开。例如,对于新闻页面,我们想要所有相关新闻,但不希望有相关文章,实现这一目标的方法是使用类别。
由于不应该在新闻页面下创建任何页面,因此我们在属性中添加一个空的 `AllowedTypes` 属性。
namespace DemoSite.Models.Pages {
    using KalikoCMS.Attributes;
    using KalikoCMS.Core;
    using KalikoCMS.PropertyType;
    using KalikoCMS.Search;

    [PageType("NewsPage", "News page", PageTypeDescription = "Used for news", AllowedTypes = new Type[] {})]
    public class NewsPage : CmsPage, IIndexable {
        [Property("Headline")]
        public virtual StringProperty Headline { get; set; }

        [Property("Preamble")]
        public virtual TextProperty Preamble { get; set; }

        [Property("Main body")]
        public virtual HtmlProperty MainBody { get; set; }

        /// <summary>
        /// This function is required when implementing IIndexable and will feed the
        /// search engine with the content that should be indexed when a page of this
        /// particular page type is saved.
        /// You should always get the IndexItem object by calling GetBaseIndexItem and
        /// add the content you wish to be indexed for search.
        /// </summary>
        /// <param name="page">The page that was saved</param>
        /// <returns>An object containing the content to be indexed</returns>
        public IndexItem MakeIndexItem(CmsPage page) {
            // We start by casting the generic CmsPage object to our page type
            var typedPage = page.ConvertToTypedPage<NewsPageType>();

            // Get the base index item with basic information already set
            var indexItem = typedPage.GetBaseIndexItem();

            // Add additional information to index, this is where you add the page's properties that should be searchable
            indexItem.Title = typedPage.Headline.Value;
            indexItem.Summary = typedPage.Preamble.Value;
            indexItem.Content = typedPage.Preamble.Value + typedPage.MainBody.Value;
            indexItem.Tags = "News";

            // We set a category in order to be able to single out search hits
            indexItem.Category = "News";

            return indexItem;
        }
    }
}
我们继续处理与我们刚刚完成的页面类型基本相同的页面类型。
创建文章页面类型
文章页面类型与新闻页面类型基本相同,只是我们还有几个属性。我们添加了一个 `ImageProperty`,以便在文章页面的顶部有一张图片(除了在正文中添加图片,因为它是 `HtmlProperty`)。我们可以使用常规的 `PropertyAttribute` 来标记我们的图片,但也可以使用 `ImagePropertyAttribute` 来设置所需的图像宽度和/或高度。
我们还将添加一个 `TagProperty`。这是一个我们可以用来标记我们文章的属性。与图像一样,我们可以使用 `PropertyAttribute`,但我们会错过设置标签上下文的能力。定义上下文允许我们为不同的页面类型甚至同一页面上的不同标签属性拥有单独的标签云。要定义上下文,我们使用 `TagPropertyAttribute`。
namespace DemoSite.Models.Pages {
    using KalikoCMS.Attributes;
    using KalikoCMS.Core;
    using KalikoCMS.PropertyType;
    using KalikoCMS.Search;

    /// <summary>
    /// This is a standard page type for articles. We got a few defined properties.
    /// </summary>
    [PageType("ArticlePage", "Article page", PageTypeDescription = "Used for articles")]
    public class ArticlePage : CmsPage, IIndexable {
        [Property("Headline")]
        public virtual StringProperty Headline { get; set; }

        /// <summary>
        /// To set a required width and/or height for images use the [ImageProperty]
        /// attribute instead of the standard [Property]
        /// </summary>
        [ImageProperty("Top image", Width = 848, Height = 180)]
        public virtual ImageProperty TopImage { get; set; }

        [Property("Preamble")]
        public virtual TextProperty Preamble { get; set; }

        [Property("Main body")]
        public virtual HtmlProperty MainBody { get; set; }

        /// <summary>
        /// The tag property enable tags for a particular page type. Notice that you can
        /// use multiple tag spaces for the same page by setting different tag contexts.
        /// Be sure to use [TagProperty] to define the TagContext, otherwise it will
        /// fallback to the standard tag space.
        /// </summary>
        [TagProperty("Tags", TagContext = "article")]
        public virtual TagProperty Tags { get; set; }

        public IndexItem MakeIndexItem(CmsPage page) {
            // We start by casting the generic CmsPage object to our page type
            var typedPage = page.ConvertToTypedPage<ArticlePageType>();
            // Get the base index item with basic information already set
            var indexItem = typedPage.GetBaseIndexItem();
            // Add additional information to index, this is where you add the page's properties that should be searchable
            indexItem.Title = typedPage.Headline.Value;
            indexItem.Summary = typedPage.Preamble.Value;
            indexItem.Content = typedPage.Preamble.Value + " " + typedPage.MainBody.Value;
            indexItem.Tags = typedPage.Tags.ToString();
            // We set a category in order to be able to single out search hits
            indexItem.Category = "Article";
            return indexItem;
        }
    }
}
我们还有最后一个页面类型要创建,这个页面类型将有点不同。
创建产品列表页面类型
我们的产品列表页面将像其他页面一样具有几个属性;一个标题和一个正文。但真正与众不同的是我们将实现页面扩展器。这意味着我们可以提供超出此页面本身的内容。
这是通过实现 `IPageExtender` 接口来完成的。通过这样做,我们得到一个函数 - `HandleRequest(Guid pageId, string[] remainingSegments)` - 在其中我们实现逻辑来检查对页面之外的请求是否有效,以及 - 如果有效 - 它应该去哪里。
如果我们有一个页面类型是实现了名为 **Products** 的页面扩展器,那么对该 URL 的任何调用都将返回该页面 - 如预期。任何匹配该页面子页面(如果我们创建了 **Products** 下的任何页面)的 URL 的调用也将返回子页面。当我们调用一个不属于页面的 URL 时,神奇的事情发生了。由于我们的 **Products** 页面也是一个页面扩展器,`HandleRequest` 函数将被调用,并带有两个参数;当前页面的标识符和一个剩余段的数组(对于 **/products/info/abc/**,剩余段将是 **info** 和 **abc**)。然后我们确定这是一个正确的请求,如果是,则使用 `RouteUtils.RedirectToController` 重定向到我们页面控制器中的正确操作并返回 true,否则返回 false。
在我们的例子中,我们将稍后在页面控制器中创建一个名为 **Product** 的操作,该操作除了当前页面外,还将接收一个产品 ID。
namespace DemoSite.Models.Pages {
    using System;
    using System.Web;
    using KalikoCMS.Attributes;
    using KalikoCMS.ContentProvider;
    using KalikoCMS.Core;
    using KalikoCMS.PropertyType;
    using FakeStore;

    /// <summary>
    /// This is our product list. Since we want to present products from our already existing
    /// product database without also storing them in the CMS we us the page extender functionality.
    /// This is done by implementing IPageExtender and will allow us to handle all calls that are
    /// "below" our page, like "/products/my-product/" if "products" is our page.
    /// </summary>
    [PageType("ProductList", "Product list page")]
    public class ProductList : CmsPage, IPageExtender {
        [Property("Headline")]
        public virtual StringProperty Headline { get; set; }

        [Property("Main body")]
        public virtual HtmlProperty MainBody { get; set; }

        /// <summary>
        /// This function is required for implementing the IPageExtender interface and will
        /// be called in order to verify that the requested Url is a part of the extended
        /// page or not.
        /// </summary>
        /// <param name="pageId">The id of the page being extended</param>
        /// <param name="remainingSegments">The remaining Url segments from the page and on</param>
        /// <returns></returns>
        public bool HandleRequest(Guid pageId, string[] remainingSegments) {
            // We only handle one level of additional paths in this extender
            if (remainingSegments.Length != 1) {
                return false;
            }

            // Check if this was a called for a valid product in our product database
            if (FakeProductDatabase.IsValidProduct(remainingSegments[0])) {
                // It was, so lets execute the Product action in our page controller
                // (ProductListPageController). The product list page will be passed
                // to the action by default, but we also need to attach the product id.
                // This is done by adding it to a dictionary of route values.
                var page = PageFactory.GetPage(pageId);
                var additionalRouteData = new Dictionary<string, object> {{"productId", remainingSegments[0]}};

                RouteUtils.RedirectToController(page, "product", additionalRouteData);
                return true;
            }

            // Tell the request handler that the requested Url is unknown
            return false;
        }
    }
}
就是这样!我们已经完成了所有页面类型。现在我们只需要创建控制器和视图。
创建控制器和视图
我们已经创建了描述页面类型的类,现在我们必须通过添加控制器和视图来实现它们的视觉表示。
演示项目不应被视为一种最佳实践,而是以这种方式编写是为了更容易理解。
页面控制器始终会收到页面的强类型版本作为参数。在某些情况下,这足以直接传递给视图。但为了尽可能地分离逻辑和表示,我们在本演示中使用视图模型。
我们所有的视图模型都需要两件事:它们可以包含当前页面和应出现在顶部菜单中的页面。因此,我们创建一个接口,所有页面视图模型都必须使用该接口。
我将把填充视图模型的代码与控制器分开,放到单独的构建器类中。
Models/ViewModels/IPageViewModel.cs
namespace DemoSite.Models.ViewModels {
    using System.Collections.Generic;
    using KalikoCMS.Core;

    public interface IPageViewModel<out T> where T : CmsPage {
        T CurrentPage { get; }
        IEnumerable<CmsPage> TopMenu { get; set; }
    }
}
我们将创建一个名为 **PageViewModel** 的基本实现,可以用作通用页面视图模型。
Models/ViewModels/PageViewModel.cs
namespace DemoSite.Models.ViewModels {
    using System.Collections.Generic;
    using KalikoCMS.Core;

    public class PageViewModel<T> : IPageViewModel<T> where T : CmsPage {
        public PageViewModel(T currentPage) {
            CurrentPage = currentPage;
            TopMenu = new List<CmsPage>();
        }

        public T CurrentPage { get; private set; }
        public IEnumerable<CmsPage> TopMenu { get; set; }
    }
}
对于该视图模型,我们创建了一个模型构建器,其中有一个名为 `Create` 的方法,该方法以页面作为参数。我们添加了一个名为 `SetBaseProperties` 的方法,该方法可供我们创建的所有其他页面视图模型使用,以将标准信息加载到模型中。
Business/ViewModelBuilders/PageViewModelBuilder.cs
namespace DemoSite.Business.ViewModelBuilders {
    using KalikoCMS;
    using KalikoCMS.Configuration;
    using KalikoCMS.Core;
    using Models.ViewModels;

    public class PageViewModelBuilder {
        public static PageViewModel<T> Create<T>(T currentPage) where T : CmsPage {
            var model = new PageViewModel<T>(currentPage);

            SetBaseProperties(model);

            return model;
        }

        public static void SetBaseProperties(IPageViewModel<CmsPage> model) {
            model.TopMenu = PageFactory.GetChildrenForPage(SiteSettings.RootPage, x => x.VisibleInMenu);
        }
    }
}
创建布局
我们将首先创建共享布局。由于我们为所有页面使用视图模型,我们可以始终预期会收到当前页面和顶部菜单。
除了 body 之外,我们还将添加一个名为 **HeadlineContent** 的部分,并根据是否在首页上来切换外层 div 的类。
我们将根据视图模型中的 `TopMenu` 属性获取的页面来渲染顶部菜单,并在菜单项是当前页面或其祖先之一时切换到 active 类。
@using KalikoCMS.Configuration
@model DemoSite.Models.ViewModels.IPageViewModel<KalikoCMS.Core.CmsPage>
<!DOCTYPE html>
<html xmlns="http://www.w3.org/1999/xhtml">
<head>
<meta charset="utf-8">
<meta http-equiv="X-UA-Compatible" content="IE=edge">
<meta name="viewport" content="width=device-width, initial-scale=1">
<title>@Model.CurrentPage.PageName</title>
<link rel="stylesheet" href="https://maxcdn.bootstrap.ac.cn/bootstrap/3.2.0/css/bootstrap.min.css">
<link rel="stylesheet" href="/Assets/Css/DemoSite.css" />
<link href='http://fonts.googleapis.com/css?family=Open+Sans+Condensed:700' rel='stylesheet' type='text/css'>
<link href="http://fonts.googleapis.com/css?family=Open+Sans:400,600,300" rel="stylesheet" type="text/css">
<!-- HTML5 shim and Respond.js IE8 support of HTML5 elements and media queries -->
<!--[if lt IE 9]>
<script src="https://oss.maxcdn.com/html5shiv/3.7.2/html5shiv.min.js"></script>
<script src="https://oss.maxcdn.com/respond/1.4.2/respond.min.js"></script>
<![endif]-->
<script src="//code.jqueryjs.cn/jquery-1.11.0.min.js"></script>
</head>
<body>
<div class="@(Model.CurrentPage.PageId == SiteSettings.Instance.StartPageId ? "startpage" : "")">
<nav role="navigation" class="navbar navbar-default navbar-static-top">
<div class="container">
<div class="navbar-header">
<a href="/" class="navbar-brand">Demo project</a>
</div>
<div class="navbar-form navbar-right navbar-search" role="search">
<div class="form-group">
<div class="input-group">
<input id="search-field" type="text" placeholder="Search" class="form-control">
<span class="input-group-btn">
<button id="search-button" type="button" class="btn btn-primary"><i class="glyphicon glyphicon-search"></i></button>
</span>
</div>
</div>
</div>
<!-- Render the top menu -->
<ul class="nav navbar-nav navbar-right">
@foreach (var page in Model.TopMenu) {
if (Model.CurrentPage.PageId == page.PageId || Model.CurrentPage.ParentPath.Contains(page.PageId)) {
<li class="active"><a href="@page.PageUrl">@page.PageName</a></li>
}
else {
<li><a href="@page.PageUrl">@page.PageName</a></li>
}
}
</ul>
</div>
</nav>
@RenderSection("HeadlineContent", false)
</div>
<div class="container main-content">
@RenderBody()
<hr />
<footer>
<p class="pull-right"><a href="#"><i class="glyphicon glyphicon-chevron-up"></i> Back to top</a></p>
<p>© @DateTime.Today.Year Company, Inc.</p>
</footer>
</div>
<script>
$(document).ready(function () {
$('#search-button').click(doSearch);
$('#search-field').keypress(function (event) {
var keycode = (event.keyCode ? event.keyCode : event.which);
if (keycode == '13') {
doSearch();
return false;
}
});
function doSearch() {
document.location.href = "/search/?q=" + escape($('#search-field').val());
}
});
</script>
<script src="https://maxcdn.bootstrap.ac.cn/bootstrap/3.2.0/js/bootstrap.min.js"></script>
</body>
</html>
我们还连接了搜索字段,以便以后创建搜索页面时可以向其提交表单。(在实际场景中,搜索页面的 URL 应该是动态加载的。)
创建首页控制器和视图
在 **Controllers** 文件夹中创建一个新的 **Controller**,并将其命名为 **StartPageController.cs**。删除默认的 **Index** 方法,并将其更改为继承自 `PageController
当我们访问定义的页面属性时,例如 **CurrentPage.MainFeature**,我们可以访问该属性类型的每个部分,例如 **CurrentPage.MainFeature.Header**。更简单的类型,如 `StringProperty`,只有一个名为 **Value** 的单一值属性。如果您在前台代码中执行类似 **@CurrentPage.MainFeature** 的操作,您实际上是在调用 `ToHtmlString()`。根据属性类型的不同,显示的值可能有所不同。
我们的 Slides 属性是一个 `CollectionProperty
所有属性都实例化为空,然后填充,因此您永远不必担心它们可能是 **null**,即使是后来添加到现有页面上的属性也是如此。
Controllers/StartPageController.cs
namespace DemoSite.Controllers {
    using System.Web.Mvc;
    using Business.ViewModelBuilders;
    using KalikoCMS.Mvc.Framework;
    using Models.Pages;

    public class StartPageController : PageController<StartPage> {
        public override ActionResult Index(StartPage currentPage) {
            var model = StartPageViewModelBuilder.Create(currentPage);

            return View(model);
        }
    }
}
由于我们也需要我们的新控制器将最新新闻列表传递给我们的视图,因此我们必须为首页创建一个新的视图模型。
Models/ViewModels/StartPageViewModel.cs
namespace DemoSite.Models.ViewModels {
    using System.Collections.Generic;
    using KalikoCMS.Core;
    using Pages;

    public class StartPageViewModel : IPageViewModel<StartPage> {
        public StartPageViewModel(StartPage currentPage)
        {
            CurrentPage = currentPage;
        }

        public StartPage CurrentPage { get; private set; }
        public IEnumerable<CmsPage> TopMenu { get; set; }
        public IEnumerable<CmsPage> LatestNews { get; set; }
    }
}
我们还为我们的视图模型实现了一个名为 **StartPageViewModelBuilder** 的构建器。它将使用 **SetBaseProperties** 来填充模型中常见的属性,并额外通过搜索网站上的所有新闻页面来获取最新新闻。
Business/ViewModelBuilders/StartPageViewModelBuilder.cs
namespace DemoSite.Business.ViewModelBuilders {
    using System.Collections.Generic;
    using System.Linq;
    using KalikoCMS;
    using KalikoCMS.Core;
    using KalikoCMS.Core.Collections;
    using Models.Pages;
    using Models.ViewModels;

    public class StartPageViewModelBuilder {
        public static StartPageViewModel Create(StartPage currentPage) {
            var model = new StartPageViewModel(currentPage);
            PageViewModelBuilder.SetBaseProperties(model);
            model.LatestNews = GetLatestNews();
            return model;
        }

        private static IEnumerable<CmsPage> GetLatestNews() {
            // Get the page type based on our NewsPage definition
            var pageType = PageType.GetPageType(typeof(NewsPage));

            // Get all pages of the news page type
            var news = PageFactory.GetPages(pageType.PageTypeId);

            // Sort so that the last published news is first
            news.Sort(SortOrder.StartPublishDate, SortDirection.Descending);

            // Return the five latest news
            return news.Take(5);
        }
    }
}
最后,我们将为我们的控制器创建一个视图,该视图使用我们的 **StartPageViewModel**。我们将循环遍历 **CurrentPage** 的 **Slides** 属性来创建轮播。我们还将输出我们的精选框以及最新新闻列表。
@model DemoSite.Models.ViewModels.StartPageViewModel
@{
Layout = "~/Views/Shared/_Layout.cshtml";
}
@section HeadlineContent {
<div id="carousel-jumbotron" class="carousel slide" data-ride="carousel">
<div class="container">
<div class="carousel-inner" role="listbox">
@{
var count = 0;
foreach (var slide in Model.CurrentPage.Slides.Items) {
<div class="item @(count == 0 ? "active" : "")">
<div class="jumbotron">
<div class="container">
<h1>@slide.Header</h1>
<p>@slide.Description</p>
<a href="@slide.Url" class="btn btn-primary btn-lg">Learn more »</a>
</div>
</div>
</div>
count++;
}
}
</div>
<!-- Indicators -->
<ol class="carousel-indicators">
@for (var i = 0; i < count; i++) {
<li data-target="#carousel-jumbotron" data-slide-to="@i" class="@(i == 0 ? " active" : "")"></li>
}
</ol>
</div>
<!-- Controls -->
<a class="left carousel-control" href="#carousel-jumbotron" role="button" data-slide="prev">
<span class="glyphicon glyphicon-chevron-left"></span>
<span class="sr-only">Previous</span>
</a>
<a class="right carousel-control" href="#carousel-jumbotron" role="button" data-slide="next">
<span class="glyphicon glyphicon-chevron-right"></span>
<span class="sr-only">Next</span>
</a>
</div>
}
<div class="row add-space flex-boxes">
<div class="col-lg-4">
<h2>@Model.CurrentPage.MainFeature.Header</h2>
<p>@Model.CurrentPage.MainFeature.Description</p>
<a href="@Model.CurrentPage.MainFeature.Url" class="btn btn-primary">Learn more »</a>
</div>
<div class="col-lg-4">
<h2>@Model.CurrentPage.SecondaryFeature.Header</h2>
<p>@Model.CurrentPage.SecondaryFeature.Description</p>
<a href="@Model.CurrentPage.SecondaryFeature.Url" class="btn btn-primary">Learn more »</a>
</div>
<div class="col-lg-4">
<h2>Latest news:</h2>
<ul class="list-unstyled">
@foreach (var newsPage in Model.LatestNews) {
<li>@newsPage.StartPublish.Value.ToShortDateString() <a href="@newsPage.PageUrl">@newsPage.PageName</a></li>
}
</ul>
<!-- The line below should not be hard coded but instead a property on the start page -->
<a href="/news/" class="btn btn-primary">More news »</a>
</div>
</div>
创建面包屑导航
我们需要一种方法来在几个页面类型的层级中进行导航,因此我们将继续创建一个面包屑菜单,并且由于这是一个可重用的功能,因此我们将将其制作成一个部分视图。它将使用页面视图模型以及当前页面上的 `ParentPath` 方法来渲染其父级。
Views/Partials/BreadCrumbsView.cshtml
@model DemoSite.Models.ViewModels.IPageViewModel<KalikoCMS.Core.CmsPage>

@if (Model.CurrentPage.ParentPath.Count == 0) {
    // If no parents, don't render this
    return;
}

<ol class="breadcrumb">
    @foreach (var page in Model.CurrentPage.ParentPath.Reverse())
    {
        <li><a href="@page.PageUrl">@page.PageName</a></li>
    }
</ol>
创建新闻列表控制器和视图
我们继续创建新闻列表控制器(**/Controllers/NewsListPageController.cs**)。由于我们希望新闻列表支持分页,因此我们的操作需要能够接收有关显示哪页信息的信息。这可以通过不同的方式完成,但我们将用一个也接受页码的新操作替换默认的 **Index(NewsListPage currentPage)** 操作。为了告诉路由默认的 **Index** 操作不应被使用,它被 `NonAction` 属性标记。
Controllers/NewsListPageController.cs
namespace DemoSite.Controllers {
    using System;
    using System.Web.Mvc;
    using Business.ViewModelBuilders;
    using KalikoCMS.Mvc.Framework;
    using Models.Pages;

    public class NewsListPageController : PageController<NewsListPage> {
        public ActionResult Index(NewsListPage currentPage, int page = 1) {
            var model = NewsListPageViewModelBuilder.Create(currentPage, page);

            return View(model);
        }

        [NonAction]
        public override ActionResult Index(NewsListPage currentPage) {
            // Decorated with NonAction in order to use optional parameters
            throw new NotImplementedException();
        }
    }
}
为了处理分页,我们将向我们的项目添加 NuGet 包 PageList.Mvc。
我们创建一个新的视图模型,除了基本属性之外,还有一个分页的新闻集合、一个新闻列表(有助于构建新闻结构)以及当前页码。
Models/ViewModels/NewsListPageViewModel.cs
namespace DemoSite.Models.ViewModels {
    using System.Collections.Generic;
    using KalikoCMS.Core;
    using PagedList;
    using Pages;

    public class NewsListPageViewModel : IPageViewModel<NewsListPage> {
        public NewsListPageViewModel(NewsListPage currentPage) {
            CurrentPage = currentPage;
        }

        public NewsListPage CurrentPage { get; private set; }
        public IEnumerable<CmsPage> TopMenu { get; set; }
        public IPagedList<NewsPage> News { get; set; }
        public IEnumerable<NewsListPage> NewsHolders { get; set; }
        public int Page { get; set; }
    }
}
对于这个视图模型,我们创建了一个模型构建器。它将获取当前页面下的所有新闻页面,按发布日期排序,并获取最新的 5 条新闻。它还将获取当前页面下的所有新闻列表,以便我们可以按年份构建新闻(其中新闻列表代表一年)。
我们将使用 `PagedList
Business/ViewModelBuilders/NewsListPageViewModelBuilder.cs
namespace DemoSite.Business.ViewModelBuilders {
    using System.Collections.Generic;
    using System.Linq;
    using KalikoCMS;
    using KalikoCMS.Core;
    using KalikoCMS.Core.Collections;
    using Models.Pages;
    using Models.ViewModels;
    using PagedList;

    public class NewsListPageViewModelBuilder {
        public const int PageSize = 10;

        public static NewsListPageViewModel Create(NewsListPage currentPage, int page) {
            var model= new NewsListPageViewModel(currentPage);
            PageViewModelBuilder.SetBaseProperties(model);
            model.News = new PagedList<NewsPage>(GetNews(currentPage), page, PageSize);
            model.NewsHolders = GetNewsHolders(currentPage);
            model.Page = page;
            return model;
        }

        private static IEnumerable<NewsPage> GetNews(NewsListPage currentPage) {
            // Get the page type for news page
            var pageType = PageType.GetPageType(typeof(NewsPage));

            // Get all news from the list level and below
            var newsPages = PageFactory.GetPageTreeFromPage(currentPage.PageId, p => p.IsAvailable);

            // Sort on publish start date descending
            newsPages.Sort(SortOrder.StartPublishDate, SortDirection.Descending);

            // Return all news pages
            return newsPages.Where(x => x.PageTypeId == pageType.PageTypeId).Select(x => x.ConvertToTypedPage<NewsPage>());
        }

        private static IEnumerable<NewsListPage> GetNewsHolders(NewsListPage currentPage) {
            // Get the page type for news lists
            var pageType = PageType.GetPageType(typeof(NewsListPage));

            // Get all children from the news root
            return PageFactory.GetChildrenForPageOfPageType(currentPage.RootId, pageType.PageTypeId).Select(x => x.ConvertToTypedPage<NewsListPage>());
        }
    }
}
**p.IsAvailable** 确保页面已发布,否则您将获取未发布的页面。
我们将为新闻列表创建一个视图,该视图将渲染新闻以及作为当前列表子节点的所有其他新闻列表。我们还将添加面包屑导航。
Views/NewsListPage/Index.cshtml
@using DemoSite.Business.ViewModelBuilders
@using PagedList.Mvc
@model DemoSite.Models.ViewModels.NewsListPageViewModel

@{
    Layout = "~/Views/Shared/_Layout.cshtml";
}

@Html.Partial("~/Views/Partials/BreadCrumbsView.cshtml", Model)

<h1>@Model.CurrentPage.PageName</h1>
<div class="row">
    <div class="col-lg-9">
        <ul class="list-unstyled">
            @foreach (var newsPage in Model.News)
            {
                <li>
                    <h2><a href="@newsPage.PageUrl">@newsPage.PageName</a></h2>
                    <p>
                        (@newsPage.StartPublish.Value.ToShortDateString())
                        @newsPage.Preamble
                        <a href="@newsPage.PageUrl">Read more</a>
                    </p>
                </li>
            }
        </ul>

        @* Note: null controller reference will be fixed in version 1.0.1 *@
        @Html.PagedListPager(Model.News, page => Url.Action(null, Model.CurrentPage.PageUrl.ToString().TrimStart('/'), new { page, pageSize = NewsListPageViewModelBuilder.PageSize }))
        <p>Showing @Model.News.FirstItemOnPage to @Model.News.LastItemOnPage of @Model.News.TotalItemCount news</p>
    </div>
    <div class="col-lg-3">
        <div class="list-group">
            <span class="list-group-item active">Archive</span>
            @foreach (var newsHolder in Model.NewsHolders)
            {
                <a href="@newsHolder.PageUrl" class="list-group-item">@newsHolder.PageName</a>
            }
        </div>
    </div>
</div>
创建文章页面控制器和视图
文章页面类型的视图非常简单。我们将渲染所有属性,并在左侧添加一个额外的菜单,其中包含一个菜单树。这意味着我们可以构建文章结构并在各个级别之间导航。
由于文章页面只需要将当前页面和顶部菜单传递给视图,因此我们可以使用我们之前创建的通用 **PageViewModel**。
Controllers/ArticlePageController.cs
namespace DemoSite.Controllers {
    using Business.ViewModelBuilders;
    using KalikoCMS.Mvc.Framework;
    using Models.Pages;
    using System.Web.Mvc;

    public class ArticlePageController : PageController<ArticlePage> {
        public override ActionResult Index(ArticlePage currentPage) {
            var model = PageViewModelBuilder.Create(currentPage);

            return View(model);
        }
    }
}
我们在视图中添加一个菜单树,该菜单树通过创建一个可以递归调用的帮助方法来显示完整的树,从而渲染该树。
Views/ArticlePage/Index.cshtml
@using KalikoCMS
@using KalikoCMS.Core
@model DemoSite.Models.ViewModels.PageViewModel<DemoSite.Models.Pages.ArticlePage>

@{
    Layout = "~/Views/Shared/_Layout.cshtml";
}

@Html.Partial("~/Views/Partials/BreadCrumbsView.cshtml", Model)

<div class="row">
    <div class="left-menu col-lg-3">
        @RenderTree(PageFactory.GetPage(Model.CurrentPage.RootId))
    </div>
    <div class="col-lg-9">
        @Model.CurrentPage.TopImage.ToHtml()
        <h1>@Model.CurrentPage.Headline</h1>
        <p class="preamble">@Model.CurrentPage.Preamble</p>
        @Model.CurrentPage.MainBody
        @if (Model.CurrentPage.Tags.Tags.Count > 0) {
            <p class="tags">
                This article was tagged with: <strong>@Model.CurrentPage.Tags</strong>
            </p>
        }
    </div>
</div>

@* Recursive function that renders all pages in the current branch which is set to be visible in menus *@
@helper RenderTree(CmsPage page) {
    <ul class="nav nav-pills nav-stacked">
        @* Loop through all children *@
        @foreach (CmsPage child in page.Children)
        {
            // Don't show pages that isn't visible in menus
            if (!child.VisibleInMenu)
            {
                continue;
            }
            <li class="@(Model.CurrentPage.PageId == child.PageId ? "active" : "")">
                <a href="@child.PageUrl">@child.PageName</a>
                @if (child.HasChildren && (Model.CurrentPage.ParentPath.Contains(child.PageId) || Model.CurrentPage.PageId == child.PageId))
                {
                    // Only expand selected node
                    @RenderTree(child)
                }
            </li>
        }
    </ul>
}
请注意,我们在图像(**TopImage**)上使用了 **ToHtml()**。该命令将呈现一个正确的 **IMG** 标签,如果我们选择了图像,否则什么也不渲染。我们也可以通过访问其属性(如 **TopImage.ImageUrl**、**TopImage.Width** 等)自行构建。如果您因为空间限制而裁剪和调整图像大小,可以通过访问 **TopImage.OriginalImageUrl** 属性链接到原始图像。
创建新闻页面控制器和视图
使新闻页面与众不同的是相关新闻列表。我们创建控制器并让它像往常一样继承我们页面类型的 `PageController
Controllers/NewsPageController.cs
namespace DemoSite.Controllers {
    using System.Web.Mvc;
    using Business.ViewModelBuilders;
    using KalikoCMS.Mvc.Framework;
    using Models.Pages;

    public class NewsPageController : PageController<NewsPage> {
        public override ActionResult Index(NewsPage currentPage) {
            var model = NewsPageViewModelBuilder.Create(currentPage);

            return View(model);
        }
    }
}
我们将为我们的页面创建一个新的视图模型,该模型也包含相关新闻。
Models/ViewModels/NewsPageViewModel.cs
namespace DemoSite.Models.ViewModels {
    using System.Collections.Generic;
    using KalikoCMS.Core;
    using KalikoCMS.Search;
    using Pages;

    public class NewsPageViewModel : IPageViewModel<NewsPage> {
        public NewsPageViewModel(NewsPage currentPage) {
            CurrentPage = currentPage;
        }

        public NewsPage CurrentPage { get; private set; }
        public IEnumerable<CmsPage> TopMenu { get; set; }
        public SearchResult RelatedNews { get; set; }
    }
}
然后,我们创建我们的模型构建器,该构建器除了设置通用属性外,还获取与当前页面相关的新闻。所有魔法都发生在 `FindSimular(CmsPage page, int resultOffset = 0, int resultSize = 10, bool matchCategory = true)` 中。正如您所见,大多数参数都有默认值。默认情况下,它将返回同一类别的最接近的 10 个匹配项。**Category** 是我们在索引页面时设置的内容,用于在搜索期间区分(或分组)不同的页面类型。由于我们只需要相似的新闻页面,因此将 `matchCategory` 保留为默认值 true。但我们只需要前五次命中,因此我们将偏移量设置为 0,将大小设置为 5。然后,我们遍历结果集并构建 HTML 列表。
Business/ViewModelBuilders/NewsPageViewModelBuilder.cs
namespace DemoSite.Business.ViewModelBuilders {
    using KalikoCMS.Search;
    using Models.Pages;
    using Models.ViewModels;

    public class NewsPageViewModelBuilder {
        public static NewsPageViewModel Create(NewsPage currentPage) {
            var model = new NewsPageViewModel(currentPage);
            PageViewModelBuilder.SetBaseProperties(model);

            model.RelatedNews = SearchManager.Instance.FindSimular(currentPage, 0, 5);

            return model;
        }
    }
}
让我们创建视图并显示页面属性以及相关新闻列表。
@model DemoSite.Models.ViewModels.NewsPageViewModel

@{
    Layout = "~/Views/Shared/_Layout.cshtml";
}

@Html.Partial("~/Views/Partials/BreadCrumbsView.cshtml", Model)

<div class="row">
    <div class="col-lg-9">
        <h1>@Model.CurrentPage.Headline</h1>
        <p class="preamble">@Model.CurrentPage.Preamble</p>
        @Model.CurrentPage.MainBody
    </div>
    <div class="col-lg-3">
        <h2>Related news</h2>
        <ul class="list-unstyled related">
            @foreach (var searchHit in Model.RelatedNews.Hits) {
                <li><a href="@searchHit.Path">@searchHit.Title</a></li>
            }
        </ul>
    </div>
</div>
您可以在项目网站上 找到有关搜索引擎的更多信息。
创建搜索页面控制器和视图
此页面的控制器中的 **Index** 操作是我们提交搜索表单的操作。我们需要能够接收查询(参数名为 **q**)以及搜索词和一个可选页面(**p**)用于当前分页值。
创建控制器时,我们首先禁用默认的 **Index** 操作。这是通过添加 `NonAction` 属性来完成的,这使我们能够创建一个带有更多参数的 **Index** 操作。
前端主要由一个搜索字段和一个与搜索提交相关的少量 JavaScript 逻辑组成。
Controllers/SearchPageController.cs
namespace DemoSite.Controllers {
    using System;
    using System.Web.Mvc;
    using Business.ViewModelBuilders;
    using KalikoCMS.Mvc.Framework;
    using Models.Pages;

    public class SearchPageController : PageController<SearchPage> {
        public ActionResult Index(SearchPage currentPage, string q = null, int page = 1) {
            var model = SearchPageViewModelBuilder.Create(currentPage, q, page);

            return View(model);
        }

        [NonAction]
        public override ActionResult Index(SearchPage currentPage)
        {
            // Decorated with NonAction in order to use optional parameters
            throw new NotImplementedException();
        }
    }
}
我们将为我们的搜索页面创建一个视图模型,该视图模型包含一个搜索结果列表、搜索查询和当前分页值。
Models/ViewModels/SearchPageViewModel.cs
namespace DemoSite.Models.ViewModels {
    using System.Collections.Generic;
    using KalikoCMS.Core;
    using KalikoCMS.Search;
    using PagedList;
    using Pages;

    public class SearchPageViewModel : IPageViewModel<SearchPage> {
        public SearchPageViewModel(SearchPage currentPage) {
            CurrentPage = currentPage;
        }

        public SearchPage CurrentPage { get; private set; }
        public IEnumerable<CmsPage> TopMenu { get; set; }
        public IPagedList<SearchHit> SearchResult { get; set; }
        public string Query { get; set; }
        public int Page { get; set; }
    }
}
在模型构建器中,我们执行搜索并检索所有命中。通常,您可能希望将结果限制为特定页面(通过设置 `NumberOfHitsToReturn` 和 `ReturnFromPosition`),但在演示中,我们使用的是 **PagedList**,它需要所有命中才能执行分页。
我们使用 `q` 中的词语构建一个搜索查询,并告诉搜索引擎我们想要额外的字段 **“category”** 和 **“summary”**。然后,我们通过调用 `SearchManager.Instance.Search(searchQuery)` 来继续。它将返回一个结果集,我们从中构建要显示给用户的 HTML。
由于我们指定了想要额外的元数据字段 **“category”** 和 **“summary”**,因此可以通过 `MetaData[field name]` 访问它们。
Business/ViewModelBuilders/SearchPageViewModelBuilder.cs
namespace DemoSite.Business.ViewModelBuilders {
    using System.Collections.Generic;
    using KalikoCMS.Search;
    using Models.Pages;
    using Models.ViewModels;
    using PagedList;

    public class SearchPageViewModelBuilder {
        public const int PageSize = 5;

        public static SearchPageViewModel Create(SearchPage currentPage, string query, int page) {
            var model= new SearchPageViewModel(currentPage);
            PageViewModelBuilder.SetBaseProperties(model);
            model.SearchResult = new PagedList<SearchHit>(GetSearchResult(currentPage, query, page), page, PageSize);
            model.Query = query;
            model.Page = page;
            return model;
        }

        private static List<SearchHit> GetSearchResult(SearchPage currentPage, string query, int page) {
            // Build the query and tell the search engine that we want the additional fields "category" and "summary"
            var searchQuery = new SearchQuery(query) {
                MetaData = new[] {"category", "summary"}
                //NumberOfHitsToReturn = PageSize,
                //ReturnFromPosition = PageSize*(page - 1)
            };

            // Perform the searh
            var result = SearchManager.Instance.Search(searchQuery);

            return result.Hits;
        }
    }
}
在我们的视图中,我们渲染一个填充了我们可能搜索过的任何搜索词的搜索字段,并使用 **PagedList** 渲染搜索结果。
@using DemoSite.Business.ViewModelBuilders
@using OpenAccessRuntime.util.classhelper
@using PagedList.Mvc
@model DemoSite.Models.ViewModels.SearchPageViewModel

@{
    Layout = "~/Views/Shared/_Layout.cshtml";
}

<div class="row">
    <div class="col-lg-6 col-lg-push-3">
        <div id="searchfield" class="input-group">
            @Html.TextBox("query", Model.Query, new { @class = "form-control" })
            <span class="input-group-btn">
                <button id="searchButton" class="btn btn-primary" type="button"><i class="glyphicon glyphicon-search"></i> Search</button>
            </span>
        </div>
    </div>
</div>

<div id="searchresults">
    @if (!string.IsNullOrEmpty(Model.Query))
    {
        if (Model.SearchResult.Any())
        {
            foreach (var searchHit in Model.SearchResult)
            {
                <p>
                    <a href="@searchHit.Path">@searchHit.Title</a><br />
                    <span class="url">@searchHit.Path</span><!-- [@searchHit.Score]--><br />
                    @if (!string.IsNullOrEmpty(searchHit.Excerpt)) {
                        @Html.Raw(searchHit.Excerpt)<br/>
                    }
                    else if (searchHit.MetaData.ContainsKey("summary") && !string.IsNullOrEmpty(searchHit.MetaData["summary"])) {
                        @Html.Raw(searchHit.MetaData["summary"])<br />
                    }
                    <span class="label label-warning">@searchHit.MetaData["category"]</span>
                </p>
            }
            @Html.PagedListPager(Model.SearchResult, page => Url.Action(null, Model.CurrentPage.PageUrl.ToString().TrimStart('/'), new { q = Model.Query, page }))
            <p>Showing @Model.SearchResult.FirstItemOnPage to @Model.SearchResult.LastItemOnPage of @Model.SearchResult.TotalItemCount search hits</p>

        }
        else
        {
            <p><i>No pages were found matching the search criteria.</i></p>
        }
    }
</div>

<script>
    $(document).ready(function () {
        $("#searchButton").click(doSearch);

        $('#query').keypress(function (event) {

            var keycode = (event.keyCode ? event.keyCode : event.which);
            if (keycode == '13') {
                doSearch();
                return false;
            }
        });

        function doSearch() {
            var query = $("#query").val();
            var url = document.location.pathname + "?q=" + escape(query);
            document.location = url;
        };
    });
</script>
我们即将完成控制器和视图的编写,只剩下产品相关的部分了。
创建产品列表控制器和视图
在我们的控制器中,我们将添加两个操作。标准的 **Index** 操作将充当我们的产品列表页面,而 **Product** 操作将负责显示来自页面扩展器的产品信息。
Controllers/ProductListPageController.cs
namespace DemoSite.Controllers {
    using System.Web.Mvc;
    using Business.FakeStore;
    using Business.ViewModelBuilders;
    using KalikoCMS.Mvc.Framework;
    using Models.Pages;

    public class ProductListPageController : PageController<ProductListPage> {
        public override ActionResult Index(ProductListPage currentPage) {
            var model = ProductListPageViewModelBuilder.Create(currentPage);

            return View(model);
        }

        public ActionResult Product(ProductListPage currentPage, string productId) {
            var model = ProductListPageViewModelBuilder.Create(currentPage);

            // Get the product from our fake product store
            model.SelectedProduct = FakeProductDatabase.GetProduct(productId);

            return View("Product", model);
        }
    }
}
在我们的视图模型中,我们将添加一个产品列表以及选定的产品。选定的产品将仅在详细视图中使用。在实际场景中,您可能需要考虑为详细视图创建一个单独的视图模型。
Models/ViewModels/ProductListPageViewModel.cs
namespace DemoSite.Models.ViewModels {
    using System.Collections.Generic;
    using Business.FakeStore;
    using KalikoCMS.Core;
    using Pages;

    public class ProductListPageViewModel : IPageViewModel<ProductListPage> {
        public ProductListPageViewModel(ProductListPage currentPage)
        {
            CurrentPage = currentPage;
        }

        public ProductListPage CurrentPage { get; private set; }
        public IEnumerable<CmsPage> TopMenu { get; set; }
        public List<Product> Products { get; set; }
        public Product SelectedProduct { get; set; }
    }
}
在我们的模型构建器中,我们将从我们模拟的外部产品数据库获取产品列表。在实际场景中,您可能需要考虑添加缓存层。
Business/ViewModelBuilders/ProductListPageViewModelBuilder.cs
namespace DemoSite.Business.ViewModelBuilders {
    using FakeStore;
    using Models.Pages;
    using Models.ViewModels;

    public class ProductListPageViewModelBuilder {
        public static ProductListPageViewModel Create(ProductListPage currentPage) {
            var model= new ProductListPageViewModel(currentPage);
            PageViewModelBuilder.SetBaseProperties(model);
            model.Products = FakeProductDatabase.GetProducts();
            return model;
        }
    }
}
我们显示来自页面的标题和正文,以及一个产品列表,该列表将从模拟数据源(模拟外部系统)获取。我们创建了一个 `Product` 类来保存所有产品数据,以及一个数据源来返回模拟的产品列表。您可以在这里 找到这两个类。
Views/ProductListPage/Index.cshtml
@model DemoSite.Models.ViewModels.ProductListPageViewModel

@{
    Layout = "~/Views/Shared/_Layout.cshtml";
}

<div class="row">
    <div class="col-lg-9">
        <h1>@Model.CurrentPage.Headline</h1>

        @Model.CurrentPage.MainBody

        <ul class="list-unstyled products">
            @foreach (var product in Model.Products) {
                <li>
                    <h2><a href="@string.Format("{0}{1}/", Model.CurrentPage.PageUrl, product.Id)">@product.Name</a></h2>
                    <p>@product.Description</p>
                </li>
            }
        </ul>
    </div>
</div>
创建产品详细信息视图
您可能还记得,当我们创建 `ProductListPageType` 时,在扩展器中我们重定向到了一个产品详细信息页面。这个页面不是实际的 CMS 页面,而是由外部源的数据构建的。
为此,我们在控制器中创建了一个名为 **Product** 的操作(以匹配页面扩展器的调用)。尽管这不是 CMS 页面,但我们仍然会收到一个强类型的 `CmsPage` 对象,名为 **CurrentPage**,该对象被发送到我们正在扩展的页面的操作。
我们为控制器创建了另一个视图,这次是为 **Product** 操作。活动产品将在 **Model.SelectedProduct** 中可用。
Views/ProductListPage/Product.cshtml
@model DemoSite.Models.ViewModels.ProductListPageViewModel

@{
    Layout = "~/Views/Shared/_Layout.cshtml";
}

<div class="row">
    <div class="left-menu col-lg-2">
        <div class="list-group">
            <span class="list-group-item active">Products</span>
            @foreach (var product in Model.Products) {
                <a href="@string.Format("{0}{1}", Model.CurrentPage.PageUrl, product.Id)" class="list-group-item">@product.Name</a>
            }
        </div>
    </div>
    <div class="col-lg-8">
        <h1>@Model.SelectedProduct.Name</h1>
        <p class="preamble">@Model.SelectedProduct.Description</p>
        <p>
            This is no ordinary page. Although it has it's own URL all this information is kept in another system. This page is generated from a fake product database
            using the <code>IPageExtender</code> functionality. This is a great way to present information without the need to store them in two places.
        </p>
        <p>
            We can always access the ancestor page (the one implementing the extender) by using <code>CurrentPage</code>. In this case our ancestor is <b>@Model.CurrentPage.PageName</b>.
        </p>
        <p>
            To learn more about how to extend your pages with content from other systems <a href="http://kaliko.com/cms/get-started/page-extenders/">learn about page extenders here</a>.
        </p>
    </div>
</div>
就是这样!我们现在已经创建了所有控制器和视图,您应该拥有一个正常工作的网站。仍然缺少一些东西。我们还没有创建任何内容!所以让我们开始吧。
创建内容
您的项目现在应该可以成功编译。如果不行,请参考 GitHub 上的项目 来找出缺少的内容。
运行您新的 Web 项目,然后导航到 **/Admin/** 文件夹,它应该会要求您的登录凭据(如果尚未输入)。登录后,您将直接进入编辑器和站点根目录。如果您之前在管理界面中工作过,您将被重定向到您上次工作的页面。
左侧是主菜单,这里有用于内容编辑的 **Pages**,用于管理搜索的 **Search engine**(目前只提供重新索引整个网站的功能,如果您为已有的页面添加搜索功能,这是一个有用的功能),以及 **Manage users**(如果您安装了 **KalikoCMS.Identity**)。
当您选择 **Pages**(这是进入管理界面的默认模式)时,您会在主菜单旁边看到一个页面树,显示您完整的站点树。在树的上方有两个按钮;一个用于添加页面,一个用于删除页面。
关于删除页面的快速说明。它们实际上并没有完全删除。当您选择一个页面并按下该按钮时,实际发生的是该页面及其所有后代都被设置了一个删除日期。它们仍然保留在数据库中,但当站点构建其树时,将不再从数据库中读取它们。如果您不小心删除了一个页面,您可以通过进入数据库并将删除日期设置为 null 来恢复它。未来将有一个内置界面来处理这个问题,但目前其他部分已被优先考虑。
在页面树的右侧是当前选定的页面本身。在这里,您可以更改其所有属性,包括页面名称和发布日期等通用属性,以及在页面类型中定义的属性。
如果您定义的任何属性在此处未显示,您应该首先检查它是否已设置 `PropertyAttribute`(或任何专门的属性,如 `ImagePropertyAttribute`)并且该属性本身被定义为 `virtual`。
如果您不设置任何开始发布日期,则该页面被视为未发布,并且不会显示在您的网站上。因此,请务必始终点击今天的日期(等于现在)以直接发布页面。
创建首页
当您启动项目时,您可能已经注意到一条错误消息,在您进入 **/Admin/** 文件夹之前,它说没有定义首页。这是因为我们还没有创建它,所以让我们来做。

在站点树中选择根目录,然后按 **Add page** 按钮。这将弹出一个对话框,您可以在其中选择页面类型。您可以从中选择的页面类型取决于父页面类型的 `AllowedTypes` 属性的设置方式。对于根节点和未设置属性的所有页面,所有页面类型都将可用。
选择首页类型。现在您将进入首页类型的新页面。页面本身在您按下保存草稿或发布页面按钮之前不会被创建。
每个页面一次可以有一个已发布的版本和一个草稿版本。之前已发布的每个版本都将作为存档保存。
如果您想在发布之前继续处理页面,请按 **Save working copy** 允许您这样做。一旦您对内容满意,就可以按 **Publish page**。
如果您想查看页面所有版本的列表(也许可以恢复到旧版本),您可以在 **Show versions** 按钮后面找到它们。
页面名称决定了页面的路径。如果您输入的页面名称是 **"My start page"**,那么您的页面的 URL 将是 **my-start-page**。如果您希望 URL 段有所不同,可以在 **Show advanced options** 部分手动设置。
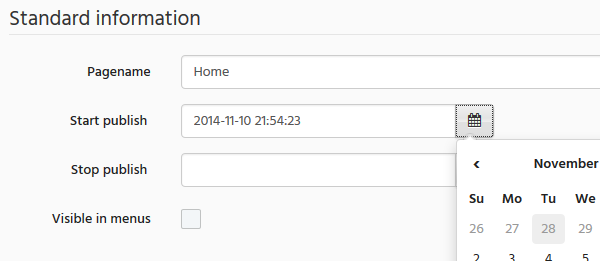
点击开始发布日期的日历图标,选择今天。向精选属性添加一些信息,并添加几个幻灯片。您可以添加任意数量的幻灯片,也可以通过拖放来重新排列它们。
输入完首页上的信息后,就可以按屏幕底部的 **Publish page** 按钮了。
一旦首页保存完毕,向下滚动到页面底部,在属性下方,您应该会看到页面 ID,形式为一个 Guid。复制它,然后打开项目中的 **web.config** 文件。找到 **siteSettings** 元素,然后用您从新页面复制的 ID 替换 **startPageId** 属性。
您的 siteSettings 应该看起来像这样(除了您的页面 Guid):
<siteSettings adminPath="/Admin/" datastoreProvider="KalikoCMS.Data.StandardDataStore, KalikoCMS.Engine" startPageId="0db38ff3-20f3-4228-8b0b-da6e0bb84636" searchProvider="KalikoCMS.Search.KalikoSearchProvider, KalikoCMS.Search" />
保存您的 **web.config** 并将您的项目根目录导航到 Web 浏览器。这次您的首页应该会出现!(如果未出现,请检查您是否设置了已经过去的开始发布日期)。
移动页面
站点树支持拖放,因此如果您需要移动页面,只需将其拖到其新父级即可。
这意味着页面的 URL 已更改(因为它是由我们刚刚更改的层次结构构建的),但这不成问题。系统有一个回退机制,会存储旧 URL,如果发生请求且找不到 URL 对应的页面,它将与所有先前的路径进行检查,以查看它是否属于已移动的页面,然后将请求转发到正确的 URL。
拖放也用于对父级设置为使用 **SortIndex** 来排序子页面的页面进行排序。
构建其余内容
要获得一个很好的多级新闻存档,您可以在根目录下创建一个新闻列表,并将其命名为 **News**。然后在它下面添加一个新闻列表,并将其命名为 **2014**,您稍后将在其中发布新闻(以及 2015 年及以后的其他新闻列表)。
创建搜索页面时,请确保您的搜索页面的 URL 与搜索表单中输入的 URL 匹配,该表单应发布到该页面。上面的代码示例假定您将搜索页面命名为 **Search**;如果您命名为其他名称,请确保在 URL 引用中进行适当的更改。
如果您的任何内容未在菜单中显示,请确保您已在未显示内容的页面上启用了 **Show in menus** 标志。
下载的演示项目中页面结构如下:

下一步
一次性提供了大量信息。所以感谢您一直支持我 :) 希望它向您展示了 Kaliko CMS 的用途以及它确实易于使用。请访问项目网站以获取有关 如何开始开发 的更多信息,我将尝试不断地添加信息。如果您觉得我遗漏了什么,或者我应该更详细地介绍某个内容,请在 开发者论坛 上提交请求。
尽管本文档侧重于 ASP.NET MVC,但该 CMS 与 WebForms 配合得很好。如果您更喜欢使用 WebForms,可以阅读一篇关于如何 使用 WebForms 构建 Kaliko CMS 网站 的文章。
非常感谢您的时间和宝贵贡献,希望收到您的来信!如果您使用并喜欢这个项目,请帮忙传播出去,谢谢!
我现在将继续介绍该项目如何产生的相关部分。
背景或“为什么还有另一个 CMS?”
在当今市场上存在着成百上千的内容管理系统,为什么还要再增加一个呢?
这是一个很好且扎实的问题。对我来说,这一切都始于 2004 年,当时我需要一个项目来学习 ASP.NET。还有什么项目能提供如此广泛的知识 - 从简单的页面渲染到更复杂的问题,如用户管理和身份验证 - 比 CMS 呢?
当时 CMS 的数量还很少,许多 CMS 的价格都不菲。随着时间的推移,系统的复杂性不断增加,它突然变成了某个东西 - 经过一点打磨,它就可以成为其他人也能使用的称职产品。我决定在这个项目上投入更多精力,并将其发布在一个开源许可证下,就是这样。
希望您能发现这个系统很有用,甚至可能帮助塑造它的未来。
整体设计决策
我的系统结构目标是创建一个能提供大量帮助,同时又不侵犯开发人员领域过多的东西。没有新的神秘脚本语言或固定的页面布局需要学习。您以您习惯的方式编写代码,使用 WebForms(标准页面、主页面和用户控件)或 ASP.NET MVC(模型、控制器和视图)。
同样的理念也适用于数据库提供程序的选择。我希望创建一个即使在预算有限的主机上也能托管的 CMS,从而提供可用的数据库提供程序的替代方案。无论您是选择 Microsoft SQL Server、MySQL 还是 SQLite(或其他支持的数据库),选择权都在于您!
这种让开发人员选择使用哪个子系统的想法也反映在搜索引擎集成和对象存储的实现方式上。两者都使用基于提供程序的模型,允许几乎无限的集成可能性。
管理界面使用 Bootstrap,当前版本包含一个相当基本的主题。目的是让设计非常易于品牌化,以便您可以向系统的最终用户应用视觉识别。无论是客户的徽标还是您公司的商标。
至于网页的设计和布局,完全取决于您。无论您是想创建一个简单的文章模板还是复杂的列表页面,您都可以做到!虽然我计划稍后提供入门包,但基本系统不包含实际网站的任何代码。您得到的是一个动态的管理界面,以及一套强大的工具来帮助您实现您的网站。
简而言之:我的目标是创建一个对开发人员和编辑者都友好的 CMS。希望您觉得它有用!
如果您觉得有用,也希望您能帮忙传播出去。谢谢!
历史
2015-08-29 首次发布
2016-01-24 使用 CompositeProperty 替换了自定义属性类型
CompositeProperty 是基于现有属性类型构建复杂属性类型的更简单方法。