
Android 的模型-视图-视图模型框架
4.88/5 (8投票s)
ENTERLIB 简介,
引言
Model-View-Controller (MVC) 模式在软件开发中已被广泛应用并取得了良好成果,主要与 Django、Symphony、ASP.NET MVC 等框架的 Web 开发相关。另一方面,出现了一些这种模式的变体,例如 Model-View-ViewModel (MVVM) 或 Model-View-Presenter (MVP) 模式,它们已被有效地应用于桌面应用程序。
关于 Android,有人认为它在某种程度上是一个 MVC 框架,因为 Activity 或 Fragment acts as a Controller,而 View 在 layout xml 文件中定义。问题在于,通常 Activity 或 Fragment 类的文件会非常庞大,包含大量用于管理 UI 和事件处理的代码。因此,这使得在新的需求下难以维护和扩展。
我在这里介绍的、基于 MVVM 模式的、并且已经成功用于两个 Android 产品中的框架名为 Enterlib。Enterlib 帮助您将应用程序组件解耦到分离的层中,并且它们之间的通信通过明确定义的接口或契约进行。这种架构将帮助您编写可重用、健壮且可测试的组件,这些组件可以随着新功能的添加而扩展,而代码的改动很少。此外,该框架还提供了实用的工具用于:
- 执行数据绑定
- 调用异步操作
- 执行数据验证和转换
- 将组件序列化为 JSON
- 调用 RESTful HTTP 服务
- 执行数据过滤
- 松耦合组件之间的通信
- 使用通用接口实现 Repository 模式
- 实现 View
- 实现 ViewModel
- 附加的 Widget 集
背景
Enterlib 的一些基础组件概念来自于 WPF (Windows Presentation Foundation),例如依赖属性、数据上下文、资源和绑定。也来自于一些已知的模式,例如 Observer、Commanding、Delegates 和 Factory 等。
使用代码
使用 Enterlib 时,View 可以实现 `IDataView`。这个接口定义了在 ViewModel 进行后台操作时显示进度对话框、在后台操作完成后更新 UI、指示 View 已准备好显示数据以及以友好的方式报告异常或验证消息等通用功能。还有一个 `FragmentView` 类实现了 `IDataView`,并被用作 `BindableFragment` 的基类,后者实现了 `IFormView` 接口,并允许轻松的数据绑定和输入数据的验证。
通常 ViewModel 被定义为 `DataViewModel` 的子类。然后 View 负责创建其 ViewModel,为此 `FragmentView` 定义了在调用 `onActivityCreated` 时调用的以下方法。
protected abstract DataViewModel createViewModel(Bundle savedInstanceState);
`DataViewModel` 是绑定操作的根 DataContext,它实现了 Observable 模式,并在属性更改时通知 View。此外,它还定义了在后台线程中加载数据以及导航到应用程序中的其他 View 的通用工作流。在 ViewModel 中,您可以定义命令,这些命令代表用户在 UI 上执行操作时要调用的操作,例如按下按钮或在 `ListView` 中选择一个项目,我们稍后将看到这一点。
让我们来看一个简单的应用程序示例,使用 Eclipse+ADT,我们将定义一个登录 Activity,验证用户输入,调用登录命令,如果用户提供正确的凭据,则跳转到一个显示产品列表的 Activity。首先,我们必须将 enterlib_lib 导入为 android 项目库。`MainActivity` 和 `LogInFragment` 的代码如下所示。
package mvvm.sample;

import android.app.Activity;
import android.os.Bundle;

public class MainActivity extends Activity {

	@Override
	protected void onCreate(Bundle savedInstanceState) {
		super.onCreate(savedInstanceState);
		setContentView(R.layout.activity_main);

		if (savedInstanceState == null) {
			getFragmentManager().beginTransaction()
					.add(R.id.container, new LogInFragment()).commit();
		}
	}
}
package mvvm.sample;

import com.enterlib.databinding.BindingResources;
import com.enterlib.mvvm.BindableFragment;
import com.enterlib.mvvm.DataViewModel;

import android.content.Intent;
import android.os.Bundle;
import android.view.LayoutInflater;
import android.view.View;
import android.view.ViewGroup;

public class LogInFragment extends BindableFragment {

	public LogInFragment() {
	}

	@Override
	public View onCreateView(LayoutInflater inflater, ViewGroup container,
			Bundle savedInstanceState) {
		View rootView = inflater.inflate(R.layout.fragment_main, container,
				false);
		return rootView;
	}

	@Override
	protected BindingResources getBindingResources() {
		return new BindingResources()
		.put("R.string", R.string.class);
	}

	@Override
	protected DataViewModel createViewModel(Bundle savedInstanceState) {
		return new LogInViewModel(this);
	}

	@Override
	public void navigateTo(int requestCode, Bundle extras, Object data) {
		switch (requestCode) {
		case LogInViewModel.GO_HOME:
			startActivity(new Intent(getActivity(), HomeActivity.class));
			break;

		default:
			break;
		}
	}
}
`LogInFragment` 创建了一个 `LogInViewModel` 实例,并提供了一个 `BindingResources`,该实例预先配置了应用程序的资源类,例如 `R.string` 和 `R.layout`。在设置绑定以定位项目模板布局或在显示验证消息时显示输入字段的显示名称时,会使用这些资源。`LogInViewModel` 的代码如下所示。
package mvvm.sample;

import com.enterlib.exceptions.ValidationException;
import com.enterlib.fields.Field;
import com.enterlib.fields.Form;
import com.enterlib.mvvm.Command;
import com.enterlib.mvvm.DataViewModel;
import com.enterlib.mvvm.IDataView;
import com.enterlib.threading.IWorkPost;
import com.enterlib.validations.ErrorInfo;

public class LogInViewModel extends DataViewModel {
	public static final int GO_HOME = 0;

	/**The Model class*/
	public static class LoginModel{
		public String Username;
		public String Password;
	}

	/**The login data*/
	LoginModel login;

	/** Define the property Login */
	public LoginModel getLogin() {
		return login;
	}

	public LogInViewModel(IDataView view) {
		super(view);
	}

	/** Here perform the load of data asynchronously you could, for example retrieve the last logged user from a repository*/
	@Override
	protected boolean loadAsync() throws Exception {
		login =new LoginModel();
		return true;
	}

	/**The command binded to the Login Button in the layout*/
	public Command LoginCommand = new Command() {

		public void invoke(Object invocator, Object args) {
			//Gets the field that invoke the command
			Field field = (Field) invocator;
			//The containers for the Fields
			Form form = field.getForm();

			//validates the input data
			if(form.validate()){

				//If the data is valid then updates the login's fields
				form.updateSource();

				doAsyncWork("Verifing user's credentials...", new IWorkPost() {
					@Override
					public boolean runWork() throws Exception {

						//simulating a time consuming operation such as consulting a sqlite database or invoking
						//a REST services
						Thread.sleep(2000);

						if(!login.Username.equalsIgnoreCase("admin")){
							//Example of a bussiness validation. This is generaly done in a bussiness object of example a UserManager
							//To indicate a bussines validation failure, raise a validation exception
							//with an ErrorInfo object containing the error messages
							//for the properties of the Model, in this case the LoginModel
							throw new ValidationException(new ErrorInfo()
								.addError("Username", "the User you speficified can not be found in our database."));
						}

						//always return true for calling onWorkFinish
						return true;
					}
					@Override
					public void onWorkFinish(Exception workException) {
						if(workException!=null)
							return;

						//if no exception was thrown go to the Home Activity
						getNavigator().navigateTo(GO_HOME, null, null);
					}
				});

			}
		}
	};
}
当调用命令时,调用者是 `Field` 的一个实例。`Field` acts as a controller for the UI element。它定义了元素支持的可绑定属性和命令。它还负责设置绑定、控制验证工作流、在值无效时通知用户,并在设置或获取字段值时调用值转换器。字段包含在 `Form` 对象中。`Form` 负责通过调用 `Form` 的方法,从 Fragment 的根 `ViewGroup` 创建字段。
/**Creates a Field for each widgets in ViewGroup that contains binding expressions
 * @param bindingResources The resources containing the layout class ,string class, {@link IValueConverter} object
 * 							,{@link IValueConverter} objects, etc.
 * @param rootView The root of the layout.
 * @param viewModel The root DataContext.
 * @return The Form for accessing the Fields.
 */
public static Form build(BindingResources bindingResources, ViewGroup rootView, Object viewModel);
`LogInFragment` 的布局如下所示。绑定使用 `android:tag` 属性定义为表达式。例如,`relativeLayout1` 将绑定定义为 `LogInViewModel` 的只读 `Login` (getLogin) 属性,表达式为 `android:tag="{Value:Login}"`。这会将 `relativeLayout1` 子项的 DataContext 设置为 `Login` 属性的值。
<RelativeLayout xmlns:android="http://schemas.android.com/apk/res/android"
    xmlns:tools="http://schemas.android.com/tools"
    android:layout_width="match_parent"
    android:layout_height="match_parent"
    android:paddingBottom="@dimen/activity_vertical_margin"
    android:paddingLeft="@dimen/activity_horizontal_margin"
    android:paddingRight="@dimen/activity_horizontal_margin"
    android:paddingTop="@dimen/activity_vertical_margin"
    tools:context="mvvm.sample.MainActivity$PlaceholderFragment" />

    <RelativeLayout
        android:id="@+id/relativeLayout1"
        android:layout_width="match_parent"
        android:layout_height="wrap_content"
        android:layout_centerInParent="true"
        android:tag="{Value:Login}" >

        <TextView
            android:id="@+id/textView1"
            android:layout_width="wrap_content"
            android:layout_height="wrap_content"
            android:layout_alignLeft="@+id/editText1"
            android:layout_alignParentTop="true"
            android:text="@string/username"
            android:textAppearance="?android:attr/textAppearanceMedium" />

        <TextView
            android:id="@+id/textView2"
            android:layout_width="wrap_content"
            android:layout_height="wrap_content"
            android:layout_alignLeft="@+id/editText1"
            android:layout_below="@+id/editText1"
            android:text="@string/password"
            android:textAppearance="?android:attr/textAppearanceMedium" />

        <EditText
            android:id="@+id/editText1"
            android:layout_width="wrap_content"
            android:layout_height="wrap_content"
            android:layout_below="@+id/textView1"
            android:layout_centerHorizontal="true"
            android:background="@drawable/custom_edit_text"
            android:ems="10"
            android:tag="{Value:Username, Required:true, DisplayRes:username}" />

        <EditText
            android:id="@+id/editText2"
            android:layout_width="wrap_content"
            android:layout_height="wrap_content"
            android:layout_alignLeft="@+id/textView2"
            android:layout_below="@+id/textView2"
            android:background="@drawable/custom_edit_text"
            android:ems="10"
            android:inputType="textPassword"
            android:tag="{Value:Password, Required:true, DisplayRes:password}" />
    </RelativeLayout >

    <TextView
        android:id="@+id/textView3"
        android:layout_width="wrap_content"
        android:layout_height="wrap_content"
        android:layout_alignParentTop="true"
        android:layout_centerHorizontal="true"
        android:layout_marginTop="52dp"
        android:text="MVVM SAMPLE"
        android:textAppearance="?android:attr/textAppearanceLarge" />

    <Button
        android:id="@+id/button1"
        android:layout_width="wrap_content"
        android:layout_height="wrap_content"
        android:layout_below="@+id/relativeLayout1"
        android:layout_centerHorizontal="true"
        android:tag="{ClickCommand:LoginCommand}"
        android:text="Login" />

</RelativeLayout>
在上面的代码列表中,包含用户名输入的 `EditText` 声明了以下绑定 `android:tag="{Value:Username, Required:true, DisplayRes:username}"`。这意味着控制 `EditText` 的字段值绑定到字段数据上下文的“username”属性,该数据上下文是绑定到控制父布局的字段值的对象。这创建了一个绑定链,直到达到根数据上下文 `LogInViewModel`。此外,表达式 `DisplayRes:username` 表明,当显示验证消息时,字段的名称是资源文件 `res/value/string.xml` 中名为“username”的字符串。此外,ViewModel 的 `LoginCommand` 通过表达式 `android:tag="{ClickCommand:LoginCommand}"` 绑定到 `Button` 的 `Field` 的可绑定属性 `ClickCommandProperty`。
产品列表 Activity 的代码列表如下所示。
package mvvm.sample;

import android.app.Activity;
import android.os.Bundle;

public class HomeActivity extends Activity {
	@Override
	protected void onCreate(Bundle savedInstanceState) {
		super.onCreate(savedInstanceState);
		setContentView(R.layout.activity_main);

		if (savedInstanceState == null) {
			getFragmentManager().beginTransaction()
					.add(R.id.container, new ProductListFragment()).commit();
		}
	}
}
View
package mvvm.sample;

import java.util.Random;

import android.os.Bundle;
import android.view.LayoutInflater;
import android.view.View;
import android.view.ViewGroup;

import com.enterlib.data.ICollectionRepository;
import com.enterlib.databinding.BindingResources;
import com.enterlib.exceptions.InvalidOperationException;
import com.enterlib.mvvm.DataViewModel;
import com.enterlib.mvvm.GenericListFragment;

//
//	The GenericListFragment is a View that support a ListField(the Field for managing a ListView)
//	and provides out of the box and functionalities for sorting, filtering and refreshing
public class ProductListFragment extends GenericListFragment<ProductListItem> {

	@Override
	public void onCreate(Bundle savedInstanceState) {
		super.onCreate(savedInstanceState);
		setHasOptionsMenu(true);
	}

	@Override
	public View onCreateView(LayoutInflater inflater, ViewGroup container,
			Bundle savedInstanceState) {
		return inflater.inflate(R.layout.fragment_products_list, null);
	}

	//
	//Creates the Repository for obtain the list of products
	@Override
	protected ICollectionRepository<ProductListItem> createRepository() {
		return new ICollectionRepository<ProductListItem>() {

			@Override
			public ProductListItem[] getItems() throws InvalidOperationException {
				ProductListItem[]products = new ProductListItem[20];
				Random ran = new Random();

				for (int i = 0; i < products.length; i++) {
					ProductListItem p = new ProductListItem();
					p.id = i +1;
					p.name ="Product "+ String.valueOf(p.id);
					p.price = ran.nextDouble() * 1000;
					p.currency = "USD";
					p.stock = ran.nextInt(50);
					products[i] = p;
				}

				//Simulating a time consuming operation
				try {
					Thread.sleep(3000);
				} catch (InterruptedException e) {
					// TODO Auto-generated catch block
					e.printStackTrace();
				}
				return products;
			}
		};
	}

	//Creates a instance of the ViewModel, In most cases you don't need to override this method in a descendant of GenericListFragment
	// But it is done here to specify the SelectionCommand to invoke when an user select an item in the Search Dialog that is
	//shown after the user press the search menu
	@Override
	protected DataViewModel createViewModel(Bundle savedStateInstance) {
		ProductListViewModel vm = new ProductListViewModel(this, createRepository());
		setSelectionCommand(vm.SelectCommand);
		return vm;
	}

	//creates the Resources for the Bindings
 	//In this case we put the class for the R.layout, this is necessary for the
	//binding infrastructure to locate the product_item_template layout applied
	//to each ProductListItem
	@Override
	protected BindingResources getBindingResources() {
		return new BindingResources()
		.put("R.string", R.string.class)
		.put("R.layout", R.layout.class);
	}

	//The hint for the EditTex in the Search Dialog.
	//By default the search is done using the toString of the ProductListItem
	@Override
	protected String getFilterHint() {
		return "Name";
	}

}
模型
package mvvm.sample;

public class ProductListItem {
	public int id;
	public String name;
	public double price;
	public String currency;
	public int stock;

	@Override
	public String toString() {
		return name;
	}
}
在这种情况下,ViewModel 继承自 `CollectionViewModel<t>`,它定义了一个只读属性 `getItems`,该属性返回 `T` 的数组。正如在 `fragment_products_list` 的 XML 布局中可以看到的,这个属性被绑定到控制 `ListView` 的 `ListField` 的 `Value` 属性。
package mvvm.sample;

import android.view.View;
import android.widget.AdapterView;

import com.enterlib.data.ICollectionRepository;
import com.enterlib.fields.Field;
import com.enterlib.mvvm.CollectionViewModel;
import com.enterlib.mvvm.IMessageReporter;
import com.enterlib.mvvm.IReporterDataView;
import com.enterlib.mvvm.SelectionCommand;

public class ProductListViewModel extends CollectionViewModel<ProductListItem> {

	public ProductListViewModel(IReporterDataView view,
			ICollectionRepository<ProductListItem>  repository) {
		super(view, repository);

	}

	public SelectionCommand SelectCommand = new SelectionCommand() {

		@Override
		public void invoke(Field field, AdapterView<?> adapterView, View itemView,
				int position, long id) {
			ProductListItem item = (ProductListItem) adapterView.getItemAtPosition(position);
			((IMessageReporter) getView()).showMessage("Item Selected "+item.name);

		}
	};

}
ProductListFragment 的布局 (fragment_products_list)
<?xml version="1.0" encoding="utf-8"?>
<RelativeLayout xmlns:android="http://schemas.android.com/apk/res/android"
    xmlns:tools="http://schemas.android.com/tools"
    android:layout_width="match_parent"
    android:layout_height="match_parent"
    android:paddingTop="@dimen/activity_vertical_margin">
<ListView
        android:id="@+id/listView"
        android:layout_width="match_parent"
        android:layout_height="match_parent"
        android:fastScrollEnabled="true"
        android:tag="{
        	Value:Items,
        	ItemTemplate:product_item_template,
        	ItemClickCommand:SelectCommand}" />

</RelativeLayout>
Item Template Layout (product_item_template)
<?xml version="1.0" encoding="utf-8"?>
<LinearLayout xmlns:android="http://schemas.android.com/apk/res/android"
    android:layout_width="match_parent"
    android:layout_height="match_parent"
    android:orientation="vertical" >


    <LinearLayout
        android:layout_width="match_parent"
        android:layout_height="wrap_content" >

        <TextView
            android:textStyle="bold"
            android:layout_width="wrap_content"
            android:layout_height="wrap_content"
            android:text="Name:"
             />

		<Space
		    android:layout_width="wrap_content"
		    android:layout_height="wrap_content"
		    android:layout_marginLeft="1dp"
		    android:layout_marginRight="1dp" />

        <TextView
            android:layout_width="wrap_content"
            android:layout_height="wrap_content"
            android:tag="{Value:name}"
            />

    </LinearLayout>


    <LinearLayout
        android:layout_width="match_parent"
        android:layout_height="wrap_content" >

        <TextView
            android:textStyle="bold"
            android:layout_width="wrap_content"
            android:layout_height="wrap_content"
            android:text="Price:"
             />

        <TextView
            android:layout_width="wrap_content"
            android:layout_height="wrap_content"
            android:tag="{Value:price}"
             />

		<Space
		    android:layout_width="wrap_content"
		    android:layout_height="wrap_content"
		    android:layout_marginLeft="2dp"
		    android:layout_marginRight="2dp" />

        <TextView
            android:layout_width="wrap_content"
            android:layout_height="wrap_content"
            android:tag="{Value:currency}"
            />

    </LinearLayout>

     <LinearLayout
        android:layout_width="match_parent"
        android:layout_height="wrap_content" >

        <TextView
            android:textStyle="bold"
            android:layout_width="wrap_content"
            android:layout_height="wrap_content"
            android:text="In Stock: " />

        <TextView
            android:layout_width="wrap_content"
            android:layout_height="wrap_content"
            android:tag="{Value:stock}"
             />

    </LinearLayout>
</LinearLayout>
登录屏幕


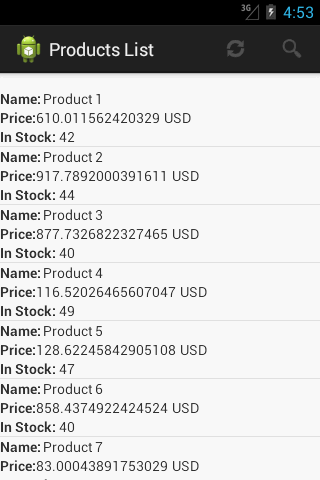
产品列表屏幕


关注点
Enterlib 中还有许多本文未涵盖的功能,并且它还在不断增长,新增了许多实用工具。在我开发从 WCF 实现的 RESTfull 服务检索数据的企业级 Android 应用程序期间,它对我非常有帮助。我希望它也能在您的项目中有所帮助,并欢迎任何改进该框架的建议。
关于作者
- 开发者:Ansel Castro Cabrera
- LinkedIn: https://www.linkedin.com/pub/ansel-castro/60/b07/258
- Email: ansel86castro@gmail.com