
使用 Typescript、MongoDB、Express 和 Socket.io 编写的 Node.js 应用程序。
4.11/5 (6投票s)
使用 Express 和 MongoDB,以及 Socket.io 进行实时更新,分步开发一个 Node.js 应用程序(使用 Typescript)。
引言
本文是我之前一篇关于使用 Microsoft ASP.Net 和 SQLServer 实现服务器的文章的延续。文章
背景
上述文章中用于说明的代码是一个真实应用程序的一部分,但由于存在一些限制,在 IIS 上托管服务器并不可行。
为了解决这个问题,我使用 Node.js 编写了服务器。此外,任何对添加的资源所做的更改都需要实时更新给当时连接的客户端。这个问题使用 Socket.IO 解决了。没有将资源和用户信息存储在 SQLServer 中,而是引入了 MongoDB,并且基于接收和传输给客户端的 JSON 类型数据,使用起来非常方便。
我在本文中将使用其中一些服务器代码进行说明。这篇文章中的 AngularJS/Typescript 客户端代码仍然可以作为客户端,通过少量修改与本文的 Node.JS 服务器进行通信。
服务器开发
在开始开发基础之前,我将列出使环境为开发此应用程序做好准备所需的一些步骤。
- 安装Node.js 开发环境。
- 安装MongoDB。请遵循步骤,并通过配置使 mongodb 服务运行起来。
- 熟悉express。
- 什么是multer?
- 使用Socket.io的实时引擎。
- Q - Promises 及相关内容。
- 获取最新的Typescript。我正在使用这个版本(用于 Visual Studio,我的编译在 VS 中进行)- 版本 1.8.6
此服务器的开发随着进展会变得复杂,下面按顺序列出。
Basic
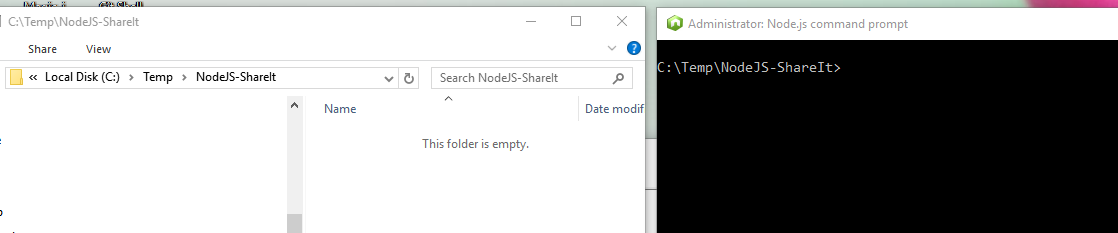
创建一个新文件夹来存放服务器代码。在我的例子中,是“C:\Temp\NodeJS-ShareIt”。
打开 Node.js 命令提示符,并将文件夹更改为之前创建的新文件夹。
我们使用 Node 包管理器来初始化项目。键入“npm init”并回答向导式问题,以生成 package.json 文件。

现在文件夹中有一个新的 package.json 文件。您可以随意打开此文件并编辑其中的值。请注意 JSON 中键值对的开头和结尾引号。
接下来,我们将开始为该项目安装各个包。
通过键入以下命令安装 express。
npm install express --save

通过键入以下命令安装 mime。
npm install mime --save
现在安装 body-parser。
npm install body-parser --save

使用以下命令安装 multer。
npm install multer --save

如下安装 Socket.io。
npm install socket.io --save

现在安装 MongoDB。一个 npm 包,用于提供操作 MongoDB 数据所需的 API。
npm install mongodb --save

接下来安装 Q,用于我们在 MongoDB 数据操作中主要使用的 promises 和 deferred 对象。
npm install q --save

接下来安装 node.js 和 express 的类型定义。在此之前,我们需要全局安装“tsd”。您可能会注意到 tsd 已弃用。我的目标只是获取类型定义,这仍然可以使用 tsd 来实现。因此,目前使用 tsd。
npm install tsd -g

现在我们将安装 express 的类型定义。
tsd install express --save

下图显示了 package.json 文件的内容。测试命令作为项目的一部分存在,但本文未提供详细信息。

接下来,我们将添加此 Node.js 应用程序所需的源代码。为了简化操作,我们使用 Visual Studio 和单独安装的Node.js 工具 for Visual Studio。
创建一个空的“scripts”文件夹,以便我们可以在其中添加新文件。
通过从 Visual Studio 2015 打开新项目来创建空的 NodeJS 项目。我使用的是社区版,如链接文章所示。

点击“新建项目”对话框中的“确定”将启动一个向导,请按照下图完成项目创建。

点击“下一步”打开下一个向导窗口。暂时不要指定启动文件。我们可以在添加文件后稍后再做。

最后一步是提供项目文件名。我接受默认值。

点击“完成”将创建一个新的 Node.js 项目,其中包含 typings 和两个 .json 文件。
右键单击“scripts”文件夹以添加新项。

您可以看到“node_modules”文件夹未包含在内,这是没有必要的。
将新文件命名为“server.ts”。当我们执行“npm init”时,我们指定了相同的名称。

现在将以下代码复制到刚刚创建的 server.ts 文件中。
"uses strict"
var http = require('http');
import express = require('express');
var fs = require('fs');
var bodyParser = require('body-parser');

var app = express();
app.use(express.static("../ShareIt-Client"));
var server = http.Server(app);
var io = require('socket.io')(server);
var port = process.env.port || 8080;

// parse application/x-www-form-urlencoded
app.use(bodyParser.urlencoded({ extended: false }));

// parse application/json
app.use(bodyParser.json());

app.get('/', (req, res) => {
    fs.readFile('index.html',
        (err, data) => {
            if (err) {
                res.writeHead(500);
                return res.end('Error loading index.html');
            }

            res.writeHead(200);
            res.end(data);
        });
});

io.on('connection', (socket) => {
    console.log('a user connected');
    socket.on('disconnect', function () {
        console.log('user disconnected');
    });
});

server.listen(port, _ => {
    console.log('listening on *: ' + port);
});
构建项目。如果为 Visual Studio 安装了正确的 Typescript 版本,则项目可以毫无问题地构建。
我们可以在 Visual Studio 中调试源代码。为此,我们需要指定启动文件。请参阅下图。

Node.js 端口未设置,因此 Visual Studio 分配了默认端口。
或者,可以通过如下所示的命令启动服务器。在这种情况下,需要在浏览器中打开客户端。

另一种调试方法是使用 Node.js 命令提示符中的“node-debug”。这与使用 F12 开发者工具基本相同。请参阅下图,了解调试环境的显示方式。

下载 NodeJS-ShareIt 服务器代码 - 31 KB
客户端代码位于“ShareIt-Client”文件夹中,该文件夹与 C:\Temp\NodeJS-ShareIt 处于同一级别。客户端源代码粘贴在下方。
下载 ShareIt-Client 客户端代码 - 1.6 MB
高级
以上步骤和代码是为了提供一个可工作的 Node.js 服务器以及连接到服务器的客户端。
下面列出了更多代码,使服务器能够登录用户和注册新用户。
在 scripts 文件夹中添加一个新的 typescript 文件“dal.ts”。此文件中的代码负责连接到 MongoDB、断开连接、向命名集合插入新文档以及检索文档。

这是要粘贴到 dal.ts 文件中的源代码。
var MongoClient = require('mongodb').MongoClient;
var assert = require('assert');
var Q = require("q");

// Create a class to manage the data manipulation.
export class DataAccess {
    static shareItUrl: string = 'mongodb://127.0.0.1:27017/ShareIt';
    dbConnection: any = null;

    // Open the MongoDB connection.
    public openDbConnection() {
        if (this.dbConnection == null) {
            MongoClient.connect(DataAccess.shareItUrl, (err, db) => {
                assert.equal(null, err);
                console.log("Connected correctly to MongoDB server.");
                this.dbConnection = db;
            });
        }
    }

    // Close the existing connection.
    public closeDbConnection() {
        if (this.dbConnection) {
            this.dbConnection.close();
            this.dbConnection = null;
        }
    }

    // Get the current count of Student entities.
    public getStudentsCount(): any {
        return this.getDocumentCount('Students');
    }

    // Insert a new Student.
    public insertStudent(student: any): any {
        return this.insertDocument(student, 'Students');
    }

    // Get a new Student based on the user name.
    public getStudent(userName: string): any {
        var deferred = Q.defer();
        if (this.dbConnection) {
            var cursor = this.dbConnection.collection('Students').find();
            cursor.each((err, document) => {
                assert.equal(err, null);
                if (err) {
                    deferred.reject(new Error(JSON.stringify(err)));
                }
                else if (document !== null && document['userName'] === userName) {
                    return deferred.resolve(document);
                }
                else if (document === null) {
                    return deferred.resolve(document);
                }
            });
        }

        return deferred.promise;
    }

    // Insert a new document in the collection.
    private insertDocument(document: any, collectionName: string): any {
        var deferred = Q.defer();
        this.dbConnection.collection(collectionName).insertOne(document, (err, result) => {
            assert.equal(err, null);
            if (err) {
                deferred.reject(new Error(JSON.stringify(err)));
            }
            deferred.resolve(result);
        });

        return deferred.promise;
    }

    // Get the count of all documents in the collection.
    private getDocumentCount(collectionName: string): any {
        var deferred = Q.defer();
        this.dbConnection && this.dbConnection.collection(collectionName).count((err, result) => {
            assert.equal(err, null);
            if (err) {
                deferred.reject(new Error(JSON.stringify(err)));
            }
            deferred.resolve(result);
        });
        return deferred.promise;
    }
}
mongod 服务正在我的机器上运行,并且配置为监听端口 27017。首次运行代码时,会创建一个 ShareIt 数据库。在运行代码之前,请遵循 MongoDB 文档中的步骤使其正常工作。
接下来创建一个新文件,该文件包含 baseController 类,作为所有控制器类的基类。在本文中,我们只添加 StudentController 并仅操作学生数据。

base.ts 文件的代码如下。
import express = require('express');
import da = require('./dal');

// Create a class to act as the base class for all the controllers.
export class baseController {
    dataAccess: da.DataAccess;
    socket: any;

    // Send an error message.
    sendErrorMessage = (res: express.Response, e?: Error) => {
        if (e) {
            var ex = JSON.stringify(e);
            return res.status(400).json({ Message: e.message, ExceptionMessage: ex });
        }
        else {
            res.sendStatus(400);
        }
    }

    // Set the socket.
    public setSocket = (socket: any) => {
        this.socket = socket;
    }
}
接下来,我们将添加 StudentController 代码。

代码如下。
import express = require('express');
import da = require('./dal');
import base = require('./base');
var Q = require("q");

export interface IStudent {
    id: number;
    firstName: string;
    lastName: string;
    userName: string;
    password: string;
}

class Student implements IStudent {
    public id: number;
    public firstName: string;
    public lastName: string;
    public userName: string;
    public password: string;

    constructor(student: IStudent) {
        this.id = student.id;
        this.firstName = student.firstName;
        this.lastName = student.lastName;
        this.userName = student.userName;
        this.password = student.password;
    }
}

// Create a class to manage the Students entity.
export class StudentController extends base.baseController {
    constructor(app: express.Express, da: da.DataAccess) {
        super();
        this.dataAccess = da;
        app.get("/api/Students", this.getStudent());
        app.post("/api/Students", this.postStudent());
    }

    // Register Student
    postStudent = (): any => {
        var da = this.dataAccess;
        var em = this.sendErrorMessage;
        return (req: express.Request, res: express.Response) => {
            var student = new Student(<IStudent>req.body);
            if (student != null) {
                da.getStudent(student.userName).then((result) => {
                    if (result) {
                        return em(res, { name: "Error", message: "A user with same username exist" });
                    }

                    da.getStudentsCount().then((count) => {
                        student.id = count + 1;
                        da.insertStudent(student).then((reult) => {
                            res.sendStatus(201);
                        }).catch((e) => {
                            return em(res, e);
                        });
                    }).catch((e) => {
                        return em(res, e);
                    });
                }).catch(e => {
                    return em(res, e);
                });
            }
            else {
                em(res);
            }
        }
    }

    // Get a Student.
    getStudent = (): any => {
        var da = this.dataAccess;
        var em = this.sendErrorMessage;
        return (req: express.Request, res: express.Response) => {
            da.getStudent(req.query.userName).then((result) => {
                if (result) {
                    res.json(result);
                }
                else {
                    return em(res, { name: "Error", message: "User not found" });
                }
            }).catch(e => {
                return em(res, e);
            });
        }
    }

}
我们需要修改在基础步骤中添加的 server.ts 文件。必须创建控制器并管理 DataAccess 连接。
这是 server.ts 的完整代码。
"uses strict"
var http = require('http');
import express = require('express');
var fs = require('fs');
var bodyParser = require('body-parser');

import st = require('./student');
import da = require('./dal');

var app = express();
app.use(express.static("../ShareIt-Client"));
var server = http.Server(app);
var io = require('socket.io')(server);
var port = process.env.port || 8080;

// parse application/x-www-form-urlencoded
app.use(bodyParser.urlencoded({ extended: false }));

// parse application/json
app.use(bodyParser.json());

app.get('/', (req, res) => {
    fs.readFile('index.html',
        (err, data) => {
            if (err) {
                res.writeHead(500);
                return res.end('Error loading index.html');
            }

            res.writeHead(200);
            res.end(data);
        });
});

// Create Student controller
var dataAccess = new da.DataAccess()
var studentController = new st.StudentController(app, dataAccess);

io.on('connection', (socket) => {
    console.log('a user connected');
    dataAccess.openDbConnection();

    socket.on('disconnect', function () {
        dataAccess.closeDbConnection();
        console.log('user disconnected');
    });
});

server.listen(port, _ => {
    console.log('listening on *: ' + port);
});
以下是一些服务器运行时的截图。第一个是使用 Postman 的 Get 调用。

以下是一些客户端交互。

另一个。

关注点
我曾多次遇到困难,对于尝试新技术和方法的人来说,这并不奇怪。
原始代码是较早开发的,在创建服务器时,我遇到了与 typescript 相关的问题。旧的 typescript 编译器 (1.7) 无法编译新的 node.js typedef 文件。我将编译器更新到 1.8.6 后,问题得到了解决。
MongoDB 需要作为服务运行并在正确的端口上监听。如果您将其设置为在其他地方监听,请更新代码。
我稍后将在此文章中更新更多代码和问题。