如何在ASP.NET Web API中启用跨域请求
4.82/5 (35投票s)
如何在ASP.NET Web API中启用跨域请求
引言
本文将学习如何在ASP.NET Web API中启用跨域请求。我们知道ASP.NET Web API是平台无关的。最近,我遇到一个需要在移动应用程序中调用我们的Web API的需求。这里,我将使用两个应用程序,一个是ASP.NET Web应用程序,另一个是用Ionic平台制作的移动应用程序。
背景
跨域(跨域资源共享)是万维网联盟(W3C)的一个标准。基本上,它被认为是HTML5的一部分。移动应用程序将使用API通过XML Http请求(`GET`,`POST`,`PUT`,`DELETE`等Http动词)调用ASP.NET Web应用程序。默认情况下,ASP.NET Web API中禁用了跨域请求。但是当我们需要调用ASP.NET Web API时,就需要启用它。本文我们将更多地关注我们的ASP.NET Web API而不是移动应用程序。

首先,我们将创建一个数据库。以下查询可用于在SQL Server中创建数据库。创建数据库
CREATE DATABASE StudentMgt;
创建表
USE [StudentMgt]
GO

/****** Object:  Table [dbo].[Student]    Script Date: 8/17/2016 9:10:38 PM ******/
SET ANSI_NULLS ON
GO

SET QUOTED_IDENTIFIER ON
GO

CREATE TABLE [dbo].[Student](
	[StudentID] [int] IDENTITY(1,1) NOT NULL,
	[FirstName] [nvarchar](50) NULL,
	[LastName] [nvarchar](50) NULL,
	[Email] [nvarchar](50) NULL,
	[MobileNo] [nvarchar](30) NULL,
	[Address] [nvarchar](250) NULL,
 CONSTRAINT [PK_tbl_Student] PRIMARY KEY CLUSTERED
(
	[StudentID] ASC
)WITH (PAD_INDEX = OFF, STATISTICS_NORECOMPUTE = OFF, IGNORE_DUP_KEY = OFF,
 ALLOW_ROW_LOCKS = ON, ALLOW_PAGE_LOCKS = ON) ON [PRIMARY]
) ON [PRIMARY]

GO
最终,数据库和表都已创建。以下是表的图片

我们将使用一些演示数据来进行我们的工作。
GO
INSERT [dbo].[StudentMgt] ([StudentID], [FirstName], [LastName], [Email], [MobileNo], [Address]) _
VALUES (1, N'Pritu ', N'PS', N'Pritu@gmail.com', N'017511111111', NULL)
GO
INSERT [dbo].[StudentMgt] ([StudentID], [FirstName], [LastName], [Email], [MobileNo], [Address]) _
VALUES (2, N'Mona ', N'Akter', N'Mona@yahoo.com', N'017511111112', NULL)
GO
INSERT [dbo].[StudentMgt] ([StudentID], [FirstName], [LastName], [Email], [MobileNo], [Address]) _
VALUES (3, N'Rashedul ', N'Haque
', N'Rashedul@gmail.com', N'017511111113', NULL)
GO
INSERT [dbo].[StudentMgt] ([StudentID], [FirstName], [LastName], [Email], [MobileNo], [Address]) _
VALUES (4, N'Mamun ', N'Rashed', N'Mamun @gmail.com', N'017511111114', NULL)
GO
创建ASP.NET Web应用程序
单击“文件”,“新建”和“项目”,选择ASP.NET Web应用程序,然后输入项目名称、位置并单击“确定”按钮。从弹出的窗口中,我们将选择Web API,并为MVC Web API自动选择添加文件夹和核心引用。

单击“确定”后,将创建一个具有核心引用的MVC模式结构项目。

创建实体数据模型
右键单击您的模型文件夹,然后单击“新建”,选择“ADO.NET实体数据模型”。按照给定的步骤操作。完成此过程后,您可以在您的模型文件夹中看到edmx文件和其他文件。这里,我为我们的实体数据模型名称指定了`StudentMgtEntities`。现在您可以看到已创建了一个带有edmx扩展名的文件。以下是图片

创建StudentController
右键单击您的控制器文件夹,然后选择“添加”,“单击控制器”,选择“Web API 2控制器-空”。单击“添加”后,输入控制器名称。我将我的控制器名称命名为“`StudentController`”。哇,我们的`StudentController`已创建。以下是代码
 public class StudentController : ApiController
    {
        // StudentMgtEntites object point
        private StudentMgtEntities _dbContext = null;
        // Constructor
        public StudentController()
        {
            // create instance of an object
            _dbContext = new StudentMgtEntities();
        }
        [HttpGet]
        // Get Students List
        public List<Student> GetStudents()
        {
            List<Student> students = _dbContext.Students.ToList();
            return students;
        }
    }
我们的`Student`控制器已创建。现在我们将检查

哇,我们的API有效。我们得到了XML格式的数据。但是我们将使用json格式。我们需要在`WebApiConfig`类中更改为json格式的数据。以下是代码
 public static class WebApiConfig
    {
        public static void Register(HttpConfiguration config)
        {
            // Web API configuration and services
            config.Formatters.Clear();
            config.Formatters.Add(new JsonMediaTypeFormatter());
            // Configure Web API to use only bearer token authentication.
            config.SuppressDefaultHostAuthentication();
            config.Filters.Add(new HostAuthenticationFilter(OAuthDefaults.AuthenticationType));

            // Web API routes
            config.MapHttpAttributeRoutes();

            config.Routes.MapHttpRoute(
                name: "DefaultApi",
                routeTemplate: "api/{controller}/{id}",
                defaults: new { id = RouteParameter.Optional }
            );
        }
    }
实际上,我添加了两行用于json数据。
 config.Formatters.Clear();
 config.Formatters.Add(new JsonMediaTypeFormatter());
再次,我们将检查我们的API

好的,API给出了json数据。它工作正常。现在,我们将在此由Ionic平台制作的移动应用程序中调用此API。

现在我们将运行我们的移动应用程序。我们如何运行我们的移动应用程序,请参见下图。

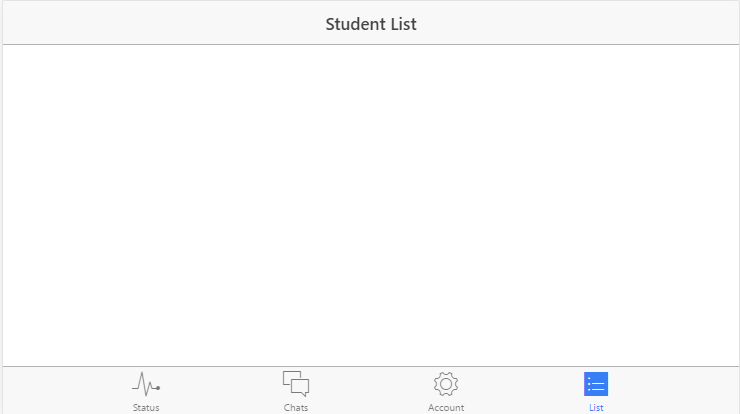
我们可以在浏览器中看到以下屏幕。

它成功运行了,但我没有看到任何数据。让我们找出为什么数据无法加载。我得到一个错误。错误是

实际上,这是这篇文章的主要重点。好的,让我们解决这个错误。我们将把以下代码放在`webconfig`中的`
然后,请将以下代码放在`webconfig`中的`
  <httpProtocol>
      <customHeaders>
        <add name="Access-Control-Allow-Origin" value="*" />
        <add name="Access-Control-Allow-Headers" value="Content-Type" />
        <add name="Access-Control-Allow-Methods" value="GET, POST, PUT, DELETE, OPTIONS" />
      </customHeaders>
    </httpProtocol>
我们刚刚设置了访问控制,以允许使用标头和来源的方法,如`GET`、`POST`、`PUT`、`DELETE`、`OPTIONS`。使用`NuGetManager`安装“`Microsoft.AspNet.WebApi.Cors`”包。

我们将修改`WebApiConfig`类。
public static class WebApiConfig
    {
        public static void Register(HttpConfiguration config)
        {
            var cors = new EnableCorsAttribute("https://:18479", "*", "*");
            config.EnableCors(cors);
            // Web API configuration and services
            config.Formatters.Clear();
            config.Formatters.Add(new JsonMediaTypeFormatter());
            // Configure Web API to use only bearer token authentication.
            config.SuppressDefaultHostAuthentication();
            config.Filters.Add(new HostAuthenticationFilter(OAuthDefaults.AuthenticationType));
            // Web API routes
            config.MapHttpAttributeRoutes();
            config.Routes.MapHttpRoute(
                name: "DefaultApi",
                routeTemplate: "api/{controller}/{id}",
                defaults: new { id = RouteParameter.Optional }
            );
        }
    }
以下几行是`Register`方法,但此方法采用`HttpConfiguration`类的参数。此类表示`httpServer`实例的`Configuration`。我们声明了`EnableCorsAttribute`类来初始化`EnableCorsAttribute`类的新实例。但是此类为构造函数接受三个参数,如来源、标头和方法。
- 来源是“`https://:18479`”
- 标头是“`*`”,它允许所有与标头相关的问题
- 方法是“`*`”,它允许所有与方法相关的问题
 var cors = new EnableCorsAttribute("https://:18479", "*", "*");
  config.EnableCors(cors);
我们修改了我们的Global.asax类
public class WebApiApplication : System.Web.HttpApplication
    {
        protected void Application_BeginRequest()
        {
            if (Request.Headers.AllKeys.Contains("Origin") && Request.HttpMethod == "OPTIONS")
            {
                Response.Flush();
            }
        }
        protected void Application_Start()
        {
            AreaRegistration.RegisterAllAreas();
            GlobalConfiguration.Configure(WebApiConfig.Register);
            FilterConfig.RegisterGlobalFilters(GlobalFilters.Filters);
            RouteConfig.RegisterRoutes(RouteTable.Routes);
            BundleConfig.RegisterBundles(BundleTable.Bundles);
        }
    }
我们在Global.asax类中添加了`Application_BeginRequest`方法。通常,此方法检查标头的所有键。如果它包含“`Origin`”并且`Request HttpMethod`是“`OPTIONS`”,则将所有当前缓冲的输出发送到客户端。
protected void Application_BeginRequest()
        {
            if (Request.Headers.AllKeys.Contains("Origin") && Request.HttpMethod == "OPTIONS")
            {
                Response.Flush();
            }
        }
我们的代码完成了。现在我们将检查

它完成了。希望这会有所帮助。快乐编码! :)
