
.Net 应用程序,可在线和离线工作 [智能客户端概念]
4.86/5 (19投票s)
在本文中,我们将学习创建一个可在线和离线工作的应用程序。
引言
想下载源代码,只需从给定的 GitHub URL 拉取即可
https://github.com/saineshwar/SMARTCLIENTPROJECT
在本文中,我们将学习创建一个可在线和离线工作的应用程序,哦,您可能会想,这是什么意思?应用程序在线和离线,如果应用程序连接到互联网,则应用程序在线,如果应用程序未连接到任何互联网连接,则它离线。

图 1. 用户工作差异
为了制作这种应用程序,我创建了 2 个应用程序。
- Asp.net MVC Web 应用程序
- Windows 应用程序
您可能又会想,为什么是 2 个应用程序,对吧?
Asp.net MVC Web 应用程序
Asp.net MVC Web 应用程序具有新客户注册、登录、显示数据等功能。
该 Web 应用程序还包含 Web API,Windows 应用程序将使用这些 Web API 来插入和删除数据。
并且在 Windows 应用程序中插入数据后,当用户使用 MVC Web 应用程序中的用户凭据登录时,这些插入的数据必须显示在仪表板上。
所有报告都将针对 Web 服务器上的可用数据进行。
Windows 应用程序
在 Windows 应用程序中,我们将使用在 Web 应用程序中注册的相同凭据登录,并且在我们首次在 Windows 应用程序中登录时,我们需要互联网连接,这样您也可以在应用程序离线时登录。
成功登录后,将显示一个新窗体,用户将在其中添加新产品,在此过程中我们不需要互联网连接。
当有互联网连接时,它将同步 Windows 应用程序中的所有数据到 Web 应用程序 [Web 服务器],此过程将在后台运行。
与此同时,在将所有数据传输到 Web 服务器时,它还将从 Windows 应用程序数据库中删除已传输的数据。
用于开发 Web 应用程序的工具
Vs2012 express
SQL server 2008 express
Vs2012 express
Sqlite 数据库
让我们首先了解 Web 应用程序的数据库结构
创建数据库
在开始理解结构之前,让我们使用名称 SmartDB 在 SQL Server 中创建一个数据库
创建一个新数据库很简单,只需右键单击数据库文件夹,然后选择“新建数据库”,一个名为“新建数据库”的新对话框将弹出,其中将要求输入数据库名称,只需输入 SmartDB,然后单击“确定”按钮。

图 2. 数据库视图
创建数据库后,现在让我们向数据库添加表。
在 SmartDB 数据库中添加表
表:- ClientRegistration
在此表中,我们将存储客户注册数据

图 3. ClientRegistration 表
表:- ProductTB
在此表中,我们将存储从 Windows 应用程序发送的产品数据。

图 4. ProductTB 表
在理解了表结构之后,现在让我们继续看看 Web 应用程序是如何创建的
创建 MVC 应用程序
让我们开始创建一个 Windows 窗体应用程序。
从开始页面打开 Visual Studio IDE,单击“新建项目”链接,将弹出一个名为“新建项目”的新对话框,然后从左侧面板选择“模板”->“Web”,最后在中间面板选择“ASP.NET MVC 4 Web Application”,然后我们将项目命名为“SmartWebApp”。

图 5. 创建 MVC 应用程序
命名项目后,只需单击“确定”按钮创建项目,单击“确定”按钮后,将弹出一个名为“新建 ASP.NET MVC 4 项目”的新对话框,在该项目模板中,我们将选择“基本模板”,最后单击“确定”按钮。

图 6. 选择项目模板
创建应用程序后的项目结构

图 7. 创建应用程序后的项目结构
创建解决方案后,我们将在此解决方案中实现存储库模式。
实现存储库模式
为了实现存储库模式,我们需要向解决方案添加一个类库。

图 8. 实现存储库模式
让我们添加第一个层,命名为 [SmartWebApp.Model],要添加,只需右键单击解决方案[SmartWebApp],然后选择“添加”->“新建项目”,添加新项目后,将弹出一个新对话框,在其中从左侧面板选择“Visual C#”,然后选择“Windows”,在选择了 Windows 后,您将在中间面板找到各种项目,从中选择“类库”,并将其命名为“SmartWebApp.Model”,最后单击“确定”按钮。
以类似的方式,我们将添加所有项目
[SmartWebApp.Interface],
[SmartWebApp.Concrete],
[SmartWebApp.BL]
添加项目引用 
图 9. 添加项目引用
添加项目引用后,现在我们将创建一个注册页面供用户注册以使用您的 Windows 应用程序。
在 [SmartWebApp.Model] 中添加模型
在本部分,我们将向 [SmartWebApp.Model] 项目添加一个名为 Registration 的简单类,并为其属性应用数据注释。
Registration 模型代码片段
public class Registration
{
 [Key]
 public long RegistrationID { get; set; }

 [Required(ErrorMessage = "Enter First Name")]
 [StringLength(100, ErrorMessage = "The {0} must be at least {2} characters long.", MinimumLength = 3)]
 public string FirstName { get; set; }

 [Required(ErrorMessage = "Enter Last Name")]
 public string Lastname { get; set; }

 [Required(ErrorMessage = "Select Gender")]
 public string Gender { get; set; }

 [Required(ErrorMessage = "Enter Username ")]
 [StringLength(100, ErrorMessage = "The {0} must be at least {2} characters long.", MinimumLength = 6)]
 [Remote("ValidateUser", "Register", ErrorMessage = "Username Already Exists")]
 public string Username { get; set; }

 [Required(ErrorMessage = "Enter Password")]
 [StringLength(100, ErrorMessage = "The {0} must be at least {2} characters long.", MinimumLength = 6)]
 [DataType(DataType.Password)]
 public string Password { get; set; }

 [Compare("Password", ErrorMessage = "The password and confirmation password do not match.")]
 [Required(ErrorMessage = "Enter Confirm Password")]
 [DataType(DataType.Password)]
 public string ConfirmPassword { get; set; }

 [Required(ErrorMessage = "Enter Mobileno")]
 public string Mobileno { get; set; }

 [Required(ErrorMessage = "Enter EmailID")]
 [DataType(DataType.EmailAddress)]
 public string EmailID { get; set; }

}
添加模型后,现在让我们逐步添加一个控制器和视图。
添加注册控制器
要添加注册控制器,只需右键单击“控制器”文件夹,然后选择“添加”,然后选择“控制器”,单击“控制器”后,将弹出一个名为“添加控制器”的新对话框。在此对话框中,要添加控制器,我们不做任何更改,只需单击“添加”按钮添加一个名为“Register Controller”的控制器。

图 10. 添加注册控制器后的快照
添加 IRegistration 接口
添加注册控制器后,现在让我们在SmartWebApp.Interface 项目中添加一个名为IRegistration的新接口,并在其中声明一些方法
IRegistration 接口代码片段
using SmartWebApp.Model;
using System;
using System.Collections.Generic;
using System.Linq;
using System.Text;

namespace SmartWebApp.Interface
{
    public interface IRegistration
    {
        int CreateUser(Registration registration);
        bool ValidateUser(string Username);
    }
}
添加 Dapper ORM
RegistrationConcrete 将包含一个与数据库通信的方法,为了通信,我们将使用 ORM [Dapper],它是免费的 ORM,从 NuGet 安装。
要添加Dapper ORM,只需右键单击项目,然后选择“管理 NuGet 程序包”,将弹出一个新对话框“管理 NuGet 程序包”,然后从左侧面板选择“在线”,然后选择“全部”,之后,右上角有一个“在线搜索”框,在其中键入“Dapper”并选择“Dapper dot net”,然后单击“安装”按钮进行安装。

如果您想从程序包管理器控制台添加,只需键入以下命令

图 11. 安装 Dapper ORM

图 12. 安装 Dapper ORM
添加 Dapper ORM 后,让我们在 web.config 文件中添加数据库连接字符串。
在 web.config 文件中配置连接字符串
<connectionStrings>
    <add name="DBconnection"
         connectionString="Data Source=########; UID=##; Password=##########; Database=SmartDB"
         providerName="System.Data.SqlClient" />
  </connectionStrings>
在 web.config 文件中添加连接字符串后,接下来我们将添加 RegistrationConcrete。
添加类 RegistrationConcrete
在 SmartWebApp.Interface 中添加接口后,现在让我们在具体类中实现这个接口,通过在SmartWebApp.Concrete中创建一个名为的新具体类。
要添加RegistrationConcrete类,只需右键单击SmartWebApp.Concrete项目,然后选择“添加”->“类”,并将类命名为“RegistrationConcrete”。

图 13. 添加 RegistrationConcrete 后的快照
添加 RegistrationConcrete 类后,接下来我们将实现 IRegistration 接口。
正如您所知,我们将使用 Dapper ORM,同时我们也将使用存储过程来获得良好的应用程序性能。
注意:- 我将提供存储过程脚本供下载。
RegistrationConcrete 类代码片段
using SmartWebApp.Interface;
using System;
using System.Collections.Generic;
using System.Linq;
using System.Text;
using SmartWebApp.Model;
using Dapper;
using System.Data.SqlClient;
using System.Configuration;
using System.Data;
namespace SmartWebApp.Concrete
{
    public class RegistrationConcrete : IRegistration
    {
        public int CreateUser(Registration registration)
        {
            using (SqlConnection con = new
     SqlConnection(ConfigurationManager.ConnectionStrings["DBconnection"].ConnectionString))
            {
                con.Open();
                SqlTransaction sqltans = con.BeginTransaction();
                var param = new DynamicParameters();
                param.Add("@RegistrationID", registration.RegistrationID);
                param.Add("@FirstName", registration.FirstName);
                param.Add("@Lastname", registration.Lastname);
                param.Add("@Gender", registration.Gender);
                param.Add("@Username", registration.Username);
                param.Add("@Password", registration.Password);
                param.Add("@Mobileno", registration.Mobileno);
                param.Add("@EmailID", registration.EmailID);
                var result = con.Execute("sprocClientRegistrationInsertUpdateSingleItem",
                      param,
                      sqltans,
                      0,
                      commandType: CommandType.StoredProcedure);

                if (result > 0)
                {
                    sqltans.Commit();
                }
                else
                {
                    sqltans.Rollback();
                }

                return result;
            }
        }

        public bool ValidateUser(string Username)
        {
            using (SqlConnection con = new
   SqlConnection(ConfigurationManager.ConnectionStrings["DBconnection"].ConnectionString))
            {
                con.Open();
                var param = new DynamicParameters();
                param.Add("@Username", Username);
                var result = con.Query
哦,到目前为止,我们已经完成了 RegistrationConcrete 的实现,最后让我们完成业务层实现。
在 SmartWebApp.BL 中添加类 RegistrationBL
我们将在[SmartWebApp.BL]项目中添加 RegistrationBL 类
要添加RegistrationBL类,只需右键单击SmartWebApp.BL项目,然后选择“添加”->“类”,并将类命名为“RegistrationBL”。

图 14. 添加 RegistrationBL 后的快照
RegistrationBL 类代码片段
using SmartWebApp.Interface;
using SmartWebApp.Model;
using System;
using System.Collections.Generic;
using System.Linq;
using System.Text;

namespace SmartWebApp.BL
{
    public class RegistrationBL
    {
        IRegistration _IRegistration;
        public RegistrationBL(IRegistration IRegistration)
        {
            _IRegistration = IRegistration;
        }

        public int CreateUser(Registration registration)
        {
           return _IRegistration.CreateUser(registration);
        }

        public bool ValidateUser(string Username)
        {
            return _IRegistration.ValidateUser(Username);
        }

    }
}
RegistrationBL 类有一个构造函数,它将从控制器接收一个具体对象,并且此方法将调用这里的具体类。
哇,我们完成了一个小的实现周期,现在让我们更改一下我们之前添加的 RegisterController。
在 Register Controller 中做更改
Register Controller 代码片段
using SmartWebApp.BL;
using SmartWebApp.Concrete;
using SmartWebApp.CryptoLib;
using SmartWebApp.Model;
using System;
using System.Collections.Generic;
using System.Linq;
using System.Web;
using System.Web.Mvc;

namespace SmartWebApp.Controllers
{
    public class RegisterController : Controller
    {
        RegistrationBL _RegistrationBL;
        public RegisterController()
        {
            _RegistrationBL = new RegistrationBL(new RegistrationConcrete());
        }

        [HttpGet]
        public ActionResult NewUser()
        {
            return View();
        }

        [HttpPost]
        public ActionResult NewUser(Registration Registration)
        {
            if (ModelState.IsValid)
            {
                Registration.Password = EncryptandDecryptAES.Encrypt(Registration.Password);
                _RegistrationBL.CreateUser(Registration);
                TempData["Message"] = "Registration Done Successfully";
                return RedirectToAction("NewUser", "Register");
            }
            else
            {
                return View(Registration);
            }
        }

        public JsonResult ValidateUser(string Username)
        {
            if (Request.IsAjaxRequest())
            {
                var result = _RegistrationBL.ValidateUser(Username);
                return Json(result, JsonRequestBehavior.AllowGet);
            }
            else
            {
                return Json("Failed", JsonRequestBehavior.AllowGet);
            }
        }

    }
}
如果您仔细检查 RegisterController,您会发现它有一个构造函数,在该构造函数中,我们正在创建一个业务层对象,并将一个具体类[RegistrationConcrete]作为参数传递给它。
RegistrationBL _RegistrationBL;
public RegisterController()
{
    _RegistrationBL = new RegistrationBL(new RegistrationConcrete());
}
下一步,我们有 2 个操作方法,名为 NewUser,一个处理 [HttpGet] 请求,另一个处理 [HttpPost] 请求,下面是它的代码片段。
[HttpGet]
 public ActionResult NewUser()
 {
     return View();
 }


[HttpPost]
public ActionResult NewUser(Registration Registration)
{
    if (ModelState.IsValid)
    {
        Registration.Password = EncryptandDecryptAES.Encrypt(Registration.Password);
        _RegistrationBL.CreateUser(Registration);
        TempData["Message"] = "Registration Done Successfully";
        return RedirectToAction("NewUser", "Register");
    }
    else
    {
        return View(Registration);
    }
}
当我们发布一个表单时,[Registration] 模型将填充数据。
下一步,我们检查已发布的模型是否有效。如果有效,那么我们对密码进行加密,并将此模型发送到业务层以保存在数据库中,否则我们将模型返回给视图以在视图上显示错误。
在理解了 2 个操作方法的工作原理之后,控制器中最后只剩下一个方法,那就是ValidateUser,它用于进行远程验证。
注意:- 远程验证
在此远程验证中,我们检查用户输入的用户名是否已存在于数据库中,如果存在,则会显示错误消息“用户名已存在”。
ValidateUser 操作方法代码片段
public JsonResult ValidateUser(string Username)
{
    if (Request.IsAjaxRequest())
    {
        var result = _RegistrationBL.ValidateUser(Username);
        return Json(result, JsonRequestBehavior.AllowGet);
    }
    else
    {
        return Json("Failed", JsonRequestBehavior.AllowGet);
    }
}
远程验证应用于模型属性。
[Remote("ValidateUser", "Register", ErrorMessage = "Username Already Exists")]
public string Username { get; set; }
使用 AES 算法保护密码
此处出于安全考虑,我们将密码以加密格式存储在数据库中,使用高级加密标准 (AES) 算法。
添加视图 NewUser
要添加视图,只需右键单击 [NewUser] 操作方法,然后从列表中选择“添加视图”,选择“添加视图”后,将弹出一个名为“添加视图”的新对话框。
视图的名称与操作方法的名称相同,我们不会对其进行更改。之后,我们将选择视图引擎,即 Razor。然后我们将创建一个强类型视图,为此我们将选择模型[Registration],在脚手架模板中,我们将选择“空”模板。
如果您想要布局,请勾选给定选项。最后,单击“添加”按钮。
此视图将添加到“视图”文件夹中,在其中将有一个与控制器名称 [Register] 相同的文件夹,在此视图将放置在其中。
NewUser 视图代码片段
@model SmartWebApp.Model.Registration
@{
    ViewBag.Title = "NewUser";
}
@using (Html.BeginForm())
{
    @Html.AntiForgeryToken()
    @Html.ValidationSummary(true)


    <div class="container">
        <br />
        <div class="row">
            <div class="col-md-3">
                @Html.LabelFor(model => model.FirstName)
                @Html.TextBoxFor(model => model.FirstName, new { @class = "form-control", autocomplete =
       "off" })
                @Html.ValidationMessageFor(model => model.FirstName)
            </div>
            <div class="col-md-3">
                @Html.LabelFor(model => model.Lastname)

                @Html.TextBoxFor(model => model.Lastname, new { @class = "form-control", autocomplete =
  "off" })
                @Html.ValidationMessageFor(model => model.Lastname)
            </div>
            <div class="col-md-3">
                @Html.LabelFor(model => model.Gender)
                @Html.RadioButtonFor(model => model.Gender, "M")@Html.Label("Male")
                @Html.RadioButtonFor(model => model.Gender, "F")@Html.Label("Female")
                @Html.ValidationMessageFor(model => model.Gender)
            </div>
            <div class="col-md-3">
                @Html.LabelFor(model => model.Username)
                @Html.TextBoxFor(model => model.Username, new { @class = "form-control", autocomplete =
       "off" })
                @Html.ValidationMessageFor(model => model.Username)
            </div>
        </div>
        <div class="row">
            <div class="col-md-3">
                @Html.LabelFor(model => model.Password)
                @Html.PasswordFor(model => model.Password, new { @class = "form-control", autocomplete =
      "off" })
                @Html.ValidationMessageFor(model => model.Password)
            </div>
            <div class="col-md-3">
                @Html.LabelFor(model => model.ConfirmPassword)
                @Html.PasswordFor(model => model.ConfirmPassword, new { @class = "form-control", autocomplete =
      "off" })
                @Html.ValidationMessageFor(model => model.ConfirmPassword)
            </div>
            <div class="col-md-3">
                @Html.LabelFor(model => model.Mobileno)
                @Html.TextBoxFor(model => model.Mobileno, new { @class = "form-control", autocomplete =
        "off" })
                @Html.ValidationMessageFor(model => model.Mobileno)
            </div>
            <div class="col-md-3">
                @Html.LabelFor(model => model.EmailID)
                @Html.TextBoxFor(model => model.EmailID, new { @class = "form-control", autocomplete =
       "off" })
                @Html.ValidationMessageFor(model => model.EmailID)
            </div>
        </div>
        <br />
        <div class="row">
            <div class="col-md-3">
                <input type="submit" class="btn btn-success" value="Register" />
            </div>
        </div>
        <br />
        @if (TempData["Message"] != "" && TempData["Message"] != null)
        {
            <div class="row">
                <div class="col-md-6">
                    @TempData["Message"]
                    <br />
                    Click Here to Login :-  @Html.ActionLink("Login", "Users", "Login")
                </div>
            </div>
        }

    </div>

}

@section Scripts {
    @Scripts.Render("~/bundles/jqueryval")
}
最后,保存您的应用程序并运行。
注册用户之前的快照

图 15. 注册用户之前的快照
注册用户后的快照

图 16. 注册用户后的快照
在 Client Registration 表中插入数据后。

图 17. 用户注册后 Client Registration 表的快照
完成注册用户后,现在让我们继续创建一个登录页面。
添加登录模型
登录模型包含 2 个属性:用户名和密码。
另一个模型用于在登录后作为响应获取数据。
Login 模型代码片段
using System;
using System.Collections.Generic;
using System.ComponentModel.DataAnnotations;
using System.Linq;
using System.Text;
using System.Web.Mvc;

namespace SmartWebApp.Model
{
    public class LoginViewModel
    {
        [Required(ErrorMessage = "Enter Username ")]
        [StringLength(30)]
        public string Username { get; set; }

        [Required(ErrorMessage = "Enter Password")]
        [StringLength(30)]
        [DataType(DataType.Password)]
        public string Password { get; set; }
    }

    public class LoginViewResponse
    {
        public string Username { get; set; }
        public string Password { get; set; }
        public string RegistrationID { get; set; }
    }

}
添加模型后,让我们开始添加 ILogin 接口,它与我们添加的注册接口类似,我们只需遵循相同的步骤。
添加 ILogin 接口
此接口只包含一个方法,即 ValidateLoginUser 方法,该方法接受 2 个参数作为输入

图 18. 添加 ILogin 接口后的快照
ILogin 接口代码片段
using SmartWebApp.Model;
using System;
using System.Collections.Generic;
using System.Linq;
using System.Text;

namespace SmartWebApp.Interface
{
    public interface ILogin
    {
         LoginViewResponse ValidateLoginUser(string Username, string Password);
    }
}
添加模型后,让我们开始添加 LoginConcrete 类,它与我们添加的注册具体类类似,我们只需遵循相同的步骤。
添加 LoginConcrete
此 LoginConcrete 类将继承 ILogin 接口。

图 19. 添加 LoginConcrete 类后的快照
LoginConcrete 类代码片段
using Dapper;
using SmartWebApp.Interface;
using SmartWebApp.Model;
using System;
using System.Collections.Generic;
using System.Configuration;
using System.Data;
using System.Data.SqlClient;
using System.Linq;
using System.Text;

namespace SmartWebApp.Concrete
{
    public class LoginConcrete : ILogin
    {
        public LoginViewResponse ValidateLoginUser(string Username, string Password)
        {
            using (SqlConnection con = new
SqlConnection(ConfigurationManager.ConnectionStrings["DBconnection"].ConnectionString))
            {
                con.Open();
                var param = new DynamicParameters();
                param.Add("@Username", Username);
                param.Add("@Password", Password);
                var result = con.Query
添加 LoginConcrete 类后,接下来我们将添加业务层 LoginBL。
添加 LoginBL
此 LoginBL 类有一个构造函数,它将从控制器接收一个具体对象,并且此方法将调用这里的具体类[LoginConcrete]。

图 20. 添加 LoginBL 类后的快照
LoginBL 类代码片段
using SmartWebApp.Interface;
using SmartWebApp.Model;
using System;
using System.Collections.Generic;
using System.Linq;
using System.Text;

namespace SmartWebApp.BL
{
    public class LoginBL
    {
        ILogin _ILogin;
        public LoginBL(ILogin ILogin)
        {
            _ILogin = ILogin;
        }

        public LoginViewResponse ValidateLoginUser(string Username, string Password)
        {
            return _ILogin.ValidateLoginUser(Username, Password);
        }
    }
}
添加 LoginBL 类后,接下来我们将添加 LoginController。
添加 LoginController
要添加登录控制器,只需右键单击“控制器”文件夹,然后选择“添加”,然后选择“控制器”,单击“控制器”后,将弹出一个名为“添加控制器”的新对话框。在此对话框中,要添加控制器,我们不做任何更改,只需单击“添加”按钮添加一个名为“Login Controller”的控制器。

图 21. 添加 LoginController 后的快照
添加控制器后,我已将操作方法名称更改为 Users。
Login Controller 代码片段
using SmartWebApp.BL;
using SmartWebApp.Concrete;
using SmartWebApp.CryptoLib;
using SmartWebApp.Model;
using System;
using System.Collections.Generic;
using System.Linq;
using System.Web;
using System.Web.Mvc;

namespace SmartWebApp.Controllers
{
    public class LoginController : Controller
    {
        //
        // GET: /Login/
        LoginBL LoginBL;
        public LoginController()
        {
            LoginBL = new LoginBL(new LoginConcrete());
        }

        [HttpGet]
        public ActionResult Users()
        {
            return View();
        }

        [HttpPost]
        [ValidateAntiForgeryToken]
        public ActionResult Users(LoginViewModel LoginViewModel)
        {
            if (ModelState.IsValid)
            {
                string password = EncryptandDecryptAES.Encrypt(LoginViewModel.Password);

                var val = LoginBL.ValidateLoginUser(LoginViewModel.Username, password);
                if (val.RegistrationID == null)
                {
                    Session["UserToken"] = string.Empty;
                    TempData["Message"] = "Invalid Username and Password.";
                    return RedirectToAction("Users", "Login");
                }
                else
                {
                    Session["UserToken"] = val.RegistrationID;
                    return RedirectToAction("Home", "Dashboard");
                }
            }
            return View("Users", LoginViewModel);
        }

        [HttpGet]
        public ActionResult Logout()
        {
            Session.Abandon();
            return RedirectToAction("Users", "Login");
        }

    }
}
在更改操作方法名称后,让我们逐一了解操作方法。
当用户第一次请求页面时,将调用 [HttpGet] 操作,它将返回视图。

图 22. 登录页面快照
登录屏幕出现后,用户将输入用户名和密码,然后单击登录按钮,此时将调用 HTTP POST 方法。
发布表单后的第一步是检查 ModelState.IsValid 是否有效,如果无效,则显示错误消息,如果有效,则加密密码,然后将其传递给 ValidateLoginUser 方法以检查用户输入的凭据是否有效,如果不有效,则显示错误消息“用户名或密码无效”,如果有效,则重定向到我们尚未创建的仪表板页面,将在后续步骤中显示。
现在我们已经完成了登录页面的理解,接下来我们将创建一个产品模型。
我们创建产品模型是为了接收来自 Windows 应用程序的数据,然后反序列化 JSON 数据并映射到模型。
Product 模型代码片段
using System;
using System.Collections.Generic;
using System.Linq;
using System.Text;

namespace SmartWebApp.Model
{
    public class Product
    {
        public int ProductID { get; set; }
        public string ProductNumber { get; set; }
        public string Name { get; set; }
        public string Color { get; set; }
        public string ProductClass { get; set; }
        public decimal Price { get; set; }
        public string Description { get; set; }
        public DateTime CreatedDate { get; set; }
        public string CLientIDToken { get; set; }
    }
}
添加产品模型后,接下来我们将添加 IProduct,它将有一个方法来向数据库插入产品并获取产品列表以显示在仪表板上。
添加 IProduct 接口
在此接口中,我们将声明 2 个方法,一个用于插入产品,另一个用于获取产品列表。
IProduct 接口代码片段
using SmartWebApp.Model;
using System;
using System.Collections.Generic;
using System.Linq;
using System.Text;

namespace SmartWebApp.Interface
{
    public interface IProduct
    {
        int InsertProduct(Product product);
        List
添加产品模型后,接下来我们将添加 ProductConcrete,它将有一个方法来向数据库插入产品并获取产品列表以显示在仪表板上。
添加 ProductConcrete 类
此类包含所有与向产品表插入数据和从中检索数据相关的代码。
ProductConcrete 类代码片段
using Dapper;
using SmartWebApp.Interface;
using SmartWebApp.Model;
using System;
using System.Collections.Generic;
using System.Configuration;
using System.Data;
using System.Data.SqlClient;
using System.Linq;

namespace SmartWebApp.Concrete
{
    public class ProductConcrete : IProduct
    {
        public int InsertProduct(Product product)
        {
            try
            {
                using (SqlConnection con = new
SqlConnection(ConfigurationManager.ConnectionStrings["DBconnection"].ConnectionString))
                {
                    con.Open();
                    SqlTransaction sqltans = con.BeginTransaction();
                    var param = new DynamicParameters();
                    param.Add("@ProductID", product.ProductID);
                    param.Add("@ProductNumber", product.ProductNumber);
                    param.Add("@Name", product.Name);
                    param.Add("@Color", product.Color);
                    param.Add("@ProductClass", product.ProductClass);
                    param.Add("@Price", product.Price);
                    param.Add("@Description", product.Description);
                    param.Add("@CreatedDate", product.CreatedDate);
                    param.Add("@CLientIDToken", product.CLientIDToken);

                    var result = con.Execute("sprocProductTBInsertUpdateSingleItem",
                          param,
                          sqltans,
                          0,
                          commandType: CommandType.StoredProcedure);

                    if (result > 0)
                    {
                        sqltans.Commit();
                    }
                    else
                    {
                        sqltans.Rollback();
                    }

                    return result;
                }
            }
            catch (Exception)
            {
                throw;
            }
        }

        public List<Product> ListProduct()
        {
            using (SqlConnection con = new
SqlConnection(ConfigurationManager.ConnectionStrings["DBconnection"].ConnectionString))
            {
                con.Open();
                return con.Query<Product>("sprocProductTBSelectList", null, null, false, 0, commandType:
CommandType.StoredProcedure).ToList();
            }

        }
    }
}
添加 ProductConcrete 后,下一步我们将添加 ProductBL
添加 ProductBL 类
ProductBL 类代码片段
using SmartWebApp.Interface;
using SmartWebApp.Model;
using System;
using System.Collections.Generic;
using System.Linq;
using System.Text;

namespace SmartWebApp.BL
{
    public class ProductBL
    {
        IProduct _IProduct;
        public ProductBL(IProduct IProduct)
        {
            _IProduct = IProduct;
        }

        public int InsertProduct(Product product)
        {
          return  _IProduct.InsertProduct(product);
        }
        public List
添加 ProductBL 后,下一步我们将添加一个名为“product”的 Web API。
添加 Web API
要添加 Web API,只需右键单击“控制器”文件夹,然后选择“添加”,然后选择“控制器”,单击“控制器”后,将弹出一个名为“添加控制器”的新对话框。
在此对话框中,要添加 API 控制器,我们将选择一个模板,即“具有空读/写操作的 API 控制器”,然后将控制器命名为ProductController,最后只需单击“添加”按钮添加一个 API 控制器。

图 23. 添加 Product WEB API 后的快照
Web API 的处理及其加密和解密
添加 Web API 后,我们只会处理其 Post 方法,因为 Windows 应用程序将使用此 API 并以加密格式发送产品数据。
为了进行加密和解密,我们将使用 TripleDES 算法,并将 [密钥, IV] 分享给 Windows 应用程序以发送加密格式的数据。
此算法已添加到解决方案的 CryptoLib 文件夹中。
加密和解密算法代码片段
using System;
using System.Collections.Generic;
using System.IO;
using System.Linq;
using System.Security.Cryptography;
using System.Text;
using System.Web;

namespace SmartWebApp.CryptoLib
{
    public static class EncryptionDecryptorTripleDES
    {
        public static byte[] Encryption(string PlainText, string key, string IV)
        {
            TripleDES des = CreateDES(key, IV);
            ICryptoTransform ct = des.CreateEncryptor();
            byte[] input = Encoding.Unicode.GetBytes(PlainText);
            return ct.TransformFinalBlock(input, 0, input.Length);
        }

        public static string Decryption(string CypherText, string key, string IV)
        {

            byte[] b = Convert.FromBase64String(CypherText);
            TripleDES des = CreateDES(key, IV);
            ICryptoTransform ct = des.CreateDecryptor();
            byte[] output = ct.TransformFinalBlock(b, 0, b.Length);
            return Encoding.Unicode.GetString(output);

        }

        static TripleDES CreateDES(string key, string IV)
        {
            MD5 md5 = new MD5CryptoServiceProvider();
            TripleDES des = new TripleDESCryptoServiceProvider();
            des.Key = md5.ComputeHash(Encoding.Unicode.GetBytes(key));
            des.IV = Encoding.ASCII.GetBytes(IV);
            return des;
        }


    }
}
在查看了 CryptoLib 的代码片段后,接下来,我们将查看 web.config 文件中存储的密钥和 IV。
用于加密和解密的密钥和 IV 的代码片段
<appSettings>
    <add key="webpages:Version" value="2.0.0.0" />
    <add key="webpages:Enabled" value="false" />
    <add key="PreserveLoginUrl" value="true" />
    <add key="ClientValidationEnabled" value="true" />
    <add key="UnobtrusiveJavaScriptEnabled" value="true" />
    <add key="keyValue" value="18694440" />
    <add key="IVValue" value="BFA3EO5T" />
    <add key="APIKEY" value="QbOsqf3LZAefzwwSBKHX" />
 </appSettings>
到目前为止,我们已经完成了密钥设置,接下来我们将查看ProductController Web API 的代码片段。
ProductController 代码片段
在此代码片段中,我们将从 Windows 应用程序接收请求参数中的数据,进一步解密数据,然后反序列化它,并将其强制转换为对象,然后插入数据库。
using SmartWebApp.BL;
using SmartWebApp.Concrete;
using SmartWebApp.CryptoLib;
using SmartWebApp.Filters;
using SmartWebApp.Model;
using System;
using System.Collections.Generic;
using System.Configuration;
using System.Linq;
using System.Net;
using System.Net.Http;
using System.Web.Http;
using System.Web.Script.Serialization;

namespace SmartWebApp.Controllers
{
    public class ProductController : ApiController
    {
        ProductBL ProductBL;

        string keyValue = ConfigurationManager.AppSettings["keyValue"].ToString();
        string IVValue = ConfigurationManager.AppSettings["IVValue"].ToString();

        public ProductController()
        {
            ProductBL = new ProductBL(new ProductConcrete());
        }


        // POST api/product
        [AuthoriseAPI]
        public HttpResponseMessage Post(HttpRequestMessage Request)
        {
            try
            {
                var Responsedata = Request.Content.ReadAsStringAsync().Result;

                string data = EncryptionDecryptorTripleDES.Decryption(Responsedata, keyValue, IVValue);

                Product objpro = new JavaScriptSerializer().Deserialize
在您查看了 API 的代码片段之后,我们添加了数据加密和解密的安全性,并且我们还创建了基于令牌的安全性,以便在此过程中增加一层安全性。
创建 AuthoriseAPI 属性
为了做到这一点,我添加了AuthorizeAttribute,同时我们也分享了一个APIKEY给 Windows 应用程序,并且在每个请求中,必须存在这个密钥。如果不存在,则表示用户或客户端未授权。
我们将此属性添加到 filters 文件夹中。
要添加过滤器,只需右键单击“filters”文件夹,然后选择“添加”->“类”,然后将其命名为AuthoriseAPI,然后继承AuthorizeAttribute。

图 24. 添加 AuthoriseAPI Filter 后的快照
AuthoriseAPI 属性代码片段
using SmartWebApp.CryptoLib;
using System;
using System.Collections.Generic;
using System.Configuration;
using System.Linq;
using System.Net.Http;
using System.Text;
using System.Web;
using System.Web.Http;
using System.Web.Http.Controllers;

namespace SmartWebApp.Filters
{
    public class AuthoriseAPI : AuthorizeAttribute
    {
        protected override bool IsAuthorized(HttpActionContext actionContext)
        {
            try
            {
                string keyValue = ConfigurationManager.AppSettings["keyValue"].ToString();
                string IVValue = ConfigurationManager.AppSettings["IVValue"].ToString();
                string SmartWeb_APIKEY = ConfigurationManager.AppSettings["APIKEY"].ToString();

                IEnumerable
在您查看了 AuthoriseAPI 代码片段之后
第一个工作原理是设置 appSettings 中的密钥。
<add key="APIKEY" value="QbOsqf3LZAefzwwSBKHX" />
设置此密钥后,我们将在 ProductController 的 Post 方法顶部放置此属性。

图 25. Product Web API 的 Post 方法快照
解释 AuthoriseAPI 的代码片段
AuthoriseAPI 属性将在 POST 操作方法执行之前被调用,在此属性中,我们将检查名为APIKEY的令牌,然后将其转换为 FromBase64String,然后使用冒号将其分割成几部分 { : },分割后我们得到 2 个哈希值。
string tokens = tokenHeaders.First();

string key = Encoding.UTF8.GetString(Convert.FromBase64String(tokens));

string[] parts = key.Split(new char[] { ':' });

string Windows_APIKEY = parts[0]; //Hash 1 (Received in API request)

string hash2 = parts[1]; //Hash 2

//Hash 2 Decryption
string DecryHash1 = EncryptionDecryptorTripleDES.Decryption(hash2, keyValue, IVValue);

//Spliting Values
string[] datapart = DecryHash1.Split(new char[] { ':' });

// 1) Hash 2 Contains Username
string username = datapart[0];

// 2) Hash 2 Contains Ticks
long ticks = long.Parse(datapart[1]);
此哈希值是加密格式的,我们需要使用我们在 web.config 文件中存储的相同密钥和 VI 进行解密。
解密后,您的第一个哈希值将是 APIKEY,第二个哈希值将是用户名和 Ticks。
首先,我们将收到的令牌中的日期时间与系统的当前日期进行比较,如果匹配,我们才解密 APIKEY。
然后与 web.config 文件中的密钥进行匹配,如果匹配,我们才允许访问 Web API,否则将向用户显示错误消息“无效客户端!”。
DateTime currentdate = new DateTime(ticks);
//Comparing Current Date with date sent
if (currentdate.Date == DateTime.Now.Date)
{
    //Hash 1 Decryption
    string DecryAPIKEY = EncryptionDecryptorTripleDES.Decryption(Windows_APIKEY, keyValue, IVValue);

    // DecryHash2 Contains ClientToken
    if (string.Equals(DecryAPIKEY, SmartWeb_APIKEY, comparisonType: StringComparison.InvariantCulture) ==
true)
    {
        return true;
    }
    else
    {
        return false;
    }
}
   else
{
    return false;
}
在完成所有内容的理解后,我们继续创建仪表板,用户可以在其中查看每天从 Windows 应用程序同步的所有数据。
添加仪表板
为了添加仪表板,我们将添加一个名为 Dashboard 的控制器,并在该页面上显示所有产品数据。
嗯,我们需要在这里显示产品集合,我将使用 Grid.MVC 工具来显示数据。
从 Nuget 程序包管理器添加它很简单。
只需键入 Grid.MVC 并单击“安装”按钮进行安装。


图 26. 从 NuGet 安装 Grid.MVC 程序包
Dashboard 控制器代码片段
我们将向视图发送一个产品列表,并在视图中仅将数据绑定到 grid view [Grid.MVC]。
using SmartWebApp.BL;
using SmartWebApp.Concrete;
using SmartWebApp.Filters;
using System;
using System.Collections.Generic;
using System.Linq;
using System.Web;
using System.Web.Mvc;

namespace SmartWebApp.Controllers
{
    [AuthenticateUser]
    public class DashboardController : Controller
    {
        //
        // GET: /Dashboard/
        ProductBL ProductBL;
        public DashboardController()
        {
            ProductBL = new ProductBL(new ProductConcrete());
        }

        [HttpGet]
        public ActionResult Home()
        {
            var data = ProductBL.ListProduct();
            return View(data);
        }
    }
}
创建仪表板后,让我们看看它是如何显示的。

图 27. 从 NuGet 安装 Grid.MVC 程序包
现在我们已经完成了仪表板部分,让我们继续了解另一个用于身份验证的 WEB API。
创建用户身份验证 API
要添加 API,我们需要遵循与添加产品 API 相同的步骤,我们只需将其命名为AuthenticateUser。

图 28. 添加 AuthenticateUser 控制器后的快照
AuthenticateUser API 的工作原理
此 API 的工作是检查用户输入的凭据是否有效。
这些数据从 Windows 应用程序传递过来,它以加密格式发送用户名和密码,首先我们需要解密,反序列化,然后最终发送到 ValidateLoginUser 方法以检查凭据,如果有效,则我们将数据作为响应发送回 WEBAPI 的消费者 [Windows 应用程序],在响应中,我们发送相同的用户详细信息。
下面是返回的 JSON 响应。
{
"Username":"saineshwar",
"Password":"et3HqIkdUefzPl+lbxhPeQ==",
"RegistrationID":"1"
}
AuthenticateUser 控制器代码片段
using Newtonsoft.Json;
using SmartWebApp.BL;
using SmartWebApp.Concrete;
using SmartWebApp.CryptoLib;
using SmartWebApp.Filters;
using SmartWebApp.Model;
using System;
using System.Collections.Generic;
using System.Configuration;
using System.Linq;
using System.Net;
using System.Net.Http;
using System.Web.Http;
using System.Web.Script.Serialization;

namespace SmartWebApp.Controllers
{
    public class AuthenticateUserController : ApiController
    {

        LoginBL LoginBL;

        public AuthenticateUserController()
        {
            LoginBL = new LoginBL(new LoginConcrete());
        }


        // POST api/authenticateuser
        [AuthoriseAPI]
        public string Post(HttpRequestMessage Request)
        {
            if (Request != null)
            {
                var Responsedata = Request.Content.ReadAsStringAsync().Result;
                string keyValue = ConfigurationManager.AppSettings["keyValue"].ToString();
                string IVValue = ConfigurationManager.AppSettings["IVValue"].ToString();
                string data = EncryptionDecryptorTripleDES.Decryption(Responsedata, keyValue, IVValue);
                LoginViewModel objVM = new JavaScriptSerializer().Deserialize
在理解了 AuthenticateUser API 后,我们将进一步添加 ActionFilter 属性来认证用户是否已登录以访问页面。
要添加过滤器,只需右键单击“filters”文件夹,然后选择“添加”->“类”,然后将其命名为 AuthenticateUser,然后继承 FilterAttribute,IActionFilter。

图 29. 创建 AuthenticateUser Filter 后的快照
如果您查看了登录代码片段,当用户输入有效的登录名和密码时,我们将收到 [Username, Password, and RegistrationID] 作为响应,我们将 RegistrationID 存储在 session 中。
Session["UserToken"] = val.RegistrationID;
并且这个 session 将在 Action Filter Attribute 中检查,看它是否为 Null。如果为 Null,我们将重定向到登录页面。
如果它不为 Null,我们则不做任何操作。
AuthenticateUser 控制器代码片段
using System;
using System.Collections.Generic;
using System.Linq;
using System.Web;
using System.Web.Mvc;
using System.Web.Routing;

namespace SmartWebApp.Filters
{
    public class AuthenticateUser : FilterAttribute, IActionFilter
    {
        public void OnActionExecuted(ActionExecutedContext filterContext)
        {

        }
        public void OnActionExecuting(ActionExecutingContext filterContext)
        {
            if (filterContext.HttpContext.Session["UserToken"] == null)
            {
                filterContext.Result = new RedirectToRouteResult(new RouteValueDictionary(new
                {
                    action = "Users",
                    controller = "Login"
                }));
            }
        }
    }
}
在 Dashboard 控制器上应用 AuthenticateUser 属性
创建 AuthenticateUser 属性后,接下来我们将将其应用于 Dashboard 控制器,以便只有经过身份验证的用户才能使用它。

图 30. 在 Dashboard 控制器上应用 AuthenticateUser 属性后的快照
最后,我们已经完成了SmartWebAPP,让我们看看项目的结构。
SmartWebAPP 的完整项目结构

图 31. 完成的项目结构快照
登录页面

图 32. 登录视图快照
仪表板

图 33. 仪表板视图快照
完成 Web 应用程序后,现在让我们开始创建 Windows 窗体应用程序 [Client]
创建 Windows 应用程序 [DemoSmartClient]
在开始创建新的项目结构之前,让我们先看看基本原理,这样您就能更容易地理解其余部分。
在这里,我们将创建一个 Windows 应用程序,该应用程序可在线和离线工作,您可能会想,什么是在线和离线,对吧?它的意思是,当有互联网连接时,它就是在线的,当它离线时,意味着没有互联网连接,当没有互联网连接时,我们将数据保存在应用程序的本地数据库中 [SQLite db],并且一旦我们获得互联网连接,我们将同步数据从本地数据库到 Web 应用程序 [Web 服务器],并逐一删除本地存储中的记录,一旦我们发送数据并获得响应,并且另一个需要注意的重要一点是,我们将通过使用 TripleDES 算法 along with token based security for API 来保护 Web 服务器和本地应用程序之间的数据传输。
图 1. Web 和 Windows 应用程序的工作原理
创建 Windows 窗体应用程序
让我们开始创建一个 Windows 窗体应用程序。
从开始页面打开 Visual Studio IDE,单击“新建项目”链接,将弹出一个名为“新建项目”的新对话框,然后从左侧面板选择“模板”->“Windows”,最后在中间面板选择“Windows Forms Application”,然后我们将项目命名为“DemoSmartClient”。
图 2. 创建 Windows 窗体应用程序
最后,单击 OK 按钮创建项目。
实现存储库模式
我们将遵循与在 Web 应用程序中添加存储库模式时相同的步骤。

图 3. 在 Windows 窗体应用程序中实现存储库模式
添加存储库模式后,下一步我们将从 NuGet 程序包管理器向[DemoSmartClient.Concrete]项目添加SQLite 数据库引用。
将 SQLite 数据库引用添加到 DemoSmartClient.Concrete

要添加SQLite,只需右键单击项目,然后选择“管理 NuGet 程序包”,将弹出一个新对话框“管理 NuGet 程序包”,然后从左侧面板选择“在线”,然后选择“全部”,之后,右上角有一个“在线搜索”框,在其中键入“SQLite”并选择“System.Data.SQLite”,然后单击“安装”按钮进行安装。

图 4. 在 DemoSmartClient.Concrete 项目中安装 SQLite
添加 SQLite 引用后,接下来我们将创建 SQLite 数据库并创建一个表。
让我们开始创建数据库和表
为了以可管理的方式完成此过程,我创建了一个特殊的接口和类来处理数据库管理部分。
在 DemoSmartClient.Interface 中添加新的接口 IManageDB
在DemoSmartClient.Interface项目中添加新的接口 IManageDB,然后在其中声明方法。

图 5. 在 DemoSmartClient.Interface 项目中添加新的接口 IManageDB
IManageDB 接口代码片段
using System;
using System.Collections.Generic;
using System.Linq;
using System.Text;

namespace DemoSmartClient.Interface
{
    public interface IManageDB
    {
        void CreateSqlLiteDatabase();
        void Changepassword();
        void Setpassword();
        void Removepassword();
        void Createtbproduct();
        void Createt_Login_Table();
    }
}
在 DemoSmartClient.Concrete 中添加新的类 ManageDBConcrete
在 DemoSmartClient.Concrete 项目中添加新的类 ManageDBConcrete,然后在其中实现 IManageDB 接口。

图 6. 在 DemoSmartClient.Concrete 项目中添加新的具体类 ManageDBConcrete
ManageDBConcrete 类代码片段
using DemoSmartClient.Interface;
using System;
using System.Collections.Generic;
using System.Configuration;
using System.Data.SQLite;
using System.Linq;
using System.Text;

namespace DemoSmartClient.Concrete
{
    public class ManageDBConcrete : IManageDB
    {
        public void CreateSqlLiteDatabase()
        {
            SQLiteConnection.CreateFile("SmartData.db3");
        }

        public void Changepassword()
        {
            using (SQLiteConnection con = new
SQLiteConnection(ConfigurationManager.AppSettings["DBConnection"].ToString()))
            {
                con.Open();
                con.ChangePassword("@@#DEMOSMART#@@");
            }
        }

        public void Setpassword()
        {
            using (SQLiteConnection con = new
SQLiteConnection(ConfigurationManager.AppSettings["DBConnection"].ToString()))
            {
                con.SetPassword("@@#DEMOSMART#@@");
            }
        }
        public void Removepassword()
        {
            using (SQLiteConnection con = new
SQLiteConnection(ConfigurationManager.AppSettings["DBConnection"].ToString()))
            {
                con.SetPassword("@@#DEMOSMART#@@");
                con.Open();
                con.ChangePassword("");
            }
        }

        public void Createtbproduct()
        {
            try
            {
                using (SQLiteConnection con = new
SQLiteConnection(ConfigurationManager.AppSettings["DBConnection"].ToString()))
                {

                    con.Open();
                    using (SQLiteCommand com = new SQLiteCommand(con))
                    {
                        string createTableQuery =
                           @"CREATE TABLE IF NOT EXISTS [ProductTB] (
                          [ProductID] INTEGER NOT NULL PRIMARY KEY AUTOINCREMENT,
                          [ProductNumber] NVARCHAR(2048)  NULL,
                          [Name] VARCHAR(2048)  NULL,
                          [Color] VARCHAR(2048)  NULL,
                          [ProductClass] VARCHAR(2048)  NULL,
                          [Price] Decimal(18,2)  NULL,
                          [Description] VARCHAR(2048)  NULL,
                          [CreatedDate] DateTime ,
                          [CLientIDToken] VARCHAR(2048) NULL
                          )";
                        com.CommandText = createTableQuery;
                        com.ExecuteNonQuery();
                    }
                }
            }
            catch (Exception)
            {
                throw;
            }
        }
        public void Createt_Login_Table()
        {
            using (SQLiteConnection con = new
SQLiteConnection(ConfigurationManager.AppSettings["DBConnection"].ToString()))
            {
                con.Open();

                using (SQLiteCommand com = new SQLiteCommand(con))
                {
                    string createTableQuery =
                       @"CREATE TABLE IF NOT EXISTS [LoginTB] (
                          [UserID] INTEGER NOT NULL PRIMARY KEY AUTOINCREMENT,
                          [Username] NVARCHAR(2048)  NULL,
                          [Password] VARCHAR(2048)  NULL,
                          [CLientIDToken] VARCHAR(2048)  NULL
                          )";
                    com.CommandText = createTableQuery;
                    com.ExecuteNonQuery();
                }
            }
        }
    }
}
第一步是创建一个名为“SmartData.db3”的数据库,然后我们将创建两个表 [LoginTB, ProductTB] 来存储数据。我们还将为数据库设置密码以确保安全。
同样,我们将在 DemoSmartClient.BL 项目中添加一个新类 ManageDBBL
在 DemoSmartClient.BL 项目中添加新的类 ManageDBBL
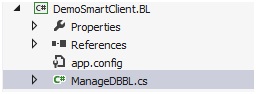
图 7. 在 DemoSmartClient.BL 项目中添加新的业务类 ManageDBBL
ManageDBBL 类代码片段
using DemoSmartClient.Interface;
using System;
using System.Collections.Generic;
using System.Linq;
using System.Text;

namespace DemoSmartClient.BL
{
    public class ManageDBBL
    {
        IManageDB _IManageDB;
        public ManageDBBL(IManageDB IManageDB )
        {
            _IManageDB = IManageDB;
        }

        public void CreateSqlLiteDatabaseBL()
        {
            _IManageDB.CreateSqlLiteDatabase();
        }

        public void ChangepasswordBL()
        {
            _IManageDB.Changepassword();
        }

        public void SetpasswordBL()
        {
            _IManageDB.Setpassword();
        }

        public void RemovepasswordBL()
        {
            _IManageDB.Removepassword();
        }

        public void Createtbproduct()
        {
            _IManageDB.Createtbproduct();
        }

        public void Createt_Login_Table()
        {
            _IManageDB.Createt_Login_Table();
        }
    }
}
添加此类后,我们将在应用程序首次启动时调用此方法来创建数据库和表。
如果您想查看表结构,请下载 SQLite 浏览器
然后,如果您想查看创建后的表结构,可以从给定的 URL http://sqlitebrowser.org/ 下载 SQLite 浏览器

图 8. SQLite 数据库浏览器视图
下载后安装它,然后选择我们创建的数据库。
数据库位于主项目文件夹[DemoSmartClient\DemoSmartClient\bin\Debug]文件夹中。

图 9. SQLite 数据库已创建在 binà debug 文件夹[SmartData.db3]中
之后,使用 SQLite 浏览器选择数据库进行查看,如下所示,并查看我们创建的表结构。

图 10. 带有表的 [SmartData.db3] 数据库视图
下一步我们将创建登录页面。
在创建页面之前,让我们先为登录页面创建一个存储库,然后我们将在登录页面中调用所有这些方法。
添加 UserLogin 模型
首先,我们将添加一个名为 UserLogin 的模型,并为其添加一些属性。
UserLogin 类代码片段
using System;
using System.Collections.Generic;
using System.Linq;
using System.Text;

namespace DemoSmartClient.Model
{
    public class UserLogin
    {
        public int UserID { get; set; }
        public string Username { get; set; }
        public string Password { get; set; }
        public string RegistrationID { get; set; }
    }
}

图 11. 在 DemoSmartClient.Model 项目中添加 UserLogin 类后的快照
添加 ILogin 接口
添加模型后,接下来我们将添加一个名为 ILogin 的接口。
在此模型中,我们将声明一个方法,该方法将由 LoginConcrete 类实现。
ILogin 接口代码片段
using DemoSmartClient.Model;
using System;
using System.Collections.Generic;
using System.Linq;
using System.Text;

namespace DemoSmartClient.Interface
{
    public interface ILogin
    {
        string CheckUserExists(string Username, string Password);
        int InsertLoginData(UserLogin LoginModel);
    }
}
此接口包含 2 个方法。
- CheckUserExists 方法用于检查用户是否已存在于 SQLite 数据库中。
- InsertLoginData 方法将数据插入 LoginTB 表。
添加 LoginConcrete 类
LoginConcrete 类将继承 ILogin 接口

图 12. 在 DemoSmartClient.Concrete 项目中添加 LoginConcrete 类后的快照
LoginConcrete 类代码片段
using DemoSmartClient.Interface;
using DemoSmartClient.Model;
using System;
using System.Collections.Generic;
using System.Configuration;
using System.Data.SQLite;
using System.Linq;
using System.Text;
using System.Data;

namespace DemoSmartClient.Concrete
{
    public class LoginConcrete : ILogin
    {
        public string CheckUserExists(string Username, string Password)
        {
            string result = string.Empty;
            DataSet ds = new DataSet();
            using (SQLiteConnection con = new
SQLiteConnection(ConfigurationManager.AppSettings["DBConnection"].ToString()))
            {
                con.SetPassword("@@#DEMOSMART#@@");
                con.Open();

                using (SQLiteCommand com = new SQLiteCommand(con))
                {
                    try
                    {
                        com.CommandText = "select CLientIDToken from logintb Where Username='" + Username +
"'and Password='" + Password + "'";
                        com.CommandType = CommandType.Text;
                        SQLiteDataAdapter da = new SQLiteDataAdapter();
                        da.SelectCommand = com;
                        da.Fill(ds);
                        if (ds != null)
                        {
                            if (ds.Tables[0].Rows.Count > 0)
                            {
                                result = Convert.ToString(ds.Tables[0].Rows[0]["CLientIDToken"]);
                            }
                        }
                    }
                    catch (Exception)
                    {
                        throw;
                    }
                    finally
                    {
                        ds.Dispose();
                    }
                }
            }
            return result;
        }

        public int InsertLoginData(UserLogin LoginModel)
        {
            try
            {
                using (SQLiteConnection con = new
SQLiteConnection(ConfigurationManager.AppSettings["DBConnection"].ToString()))
                {
                    con.SetPassword("@@#DEMOSMART#@@");
                    con.Open();

                    using (SQLiteCommand com = new SQLiteCommand(con))
                    {
                        string SQLQuery = "insert into LoginTB (Username,Password,CLientIDToken) values ('"
+ LoginModel.Username + "','" + LoginModel.Password + "','" + LoginModel.RegistrationID + "')";
                        com.CommandText = SQLQuery;
                        return com.ExecuteNonQuery();
                    }
                }

            }
            catch (Exception)
            {
                throw;
            }
        }
    }
}
完成理解登录具体类代码后,让我们继续添加一个粘合接口和具体类的类 LoginBL
添加 LoginBL 类
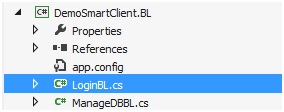
图 13. 在 DemoSmartClient.BL 项目中添加 LoginBL 类后的快照
LoginBL 类代码片段
using DemoSmartClient.Interface;
using DemoSmartClient.Model;
using System;
using System.Collections.Generic;
using System.Linq;
using System.Text;

namespace DemoSmartClient.BL
{
    public class LoginBL
    {
        ILogin _ILogin;
        public LoginBL(ILogin ILogin)
        {
            _ILogin = ILogin;
        }
        public string CheckUserExists(string Username, string Password)
        {
            return _ILogin.CheckUserExists(Username, Password);
        }
        public int InsertLoginData(UserLogin LoginModel)
        {
            return _ILogin.InsertLoginData(LoginModel);
        }
    }
}
完成添加 LoginBL 类代码后,让我们继续设计登录页面并在其中使用此方法。
添加和设计登录表单
我们将添加一个新的 Windows 窗体并将其命名为“Login.cs”
登录表单上只有 2 个文本控件和一个按钮。

图 14. 添加和设计新的登录表单

图 15. 登录表单上的控件
设计表单后,接下来我们将编写代码来检查互联网连接以及显示互联网连接指示器。
添加 CheckInternetConnection 类
为了检查互联网连接,我创建了一个名为 CheckInternetConnection 的静态类,并将其添加到一个名为 CommonLib 的新文件夹中。

图 16. 在 CommonLib 文件夹中添加名为 CheckInternetConnection 的新类
CheckInternetConnection 类代码片段
using System;
using System.Collections.Generic;
using System.Linq;
using System.Text;

namespace DemoSmartClient.CommonLib
{
    public static class CheckInternetConnection
    {
        [System.Runtime.InteropServices.DllImport("wininet.dll")]
        private extern static bool InternetGetConnectedState(out int Description, int ReservedValue);

        public static bool CheckNet()
        {
            int desc;
            return InternetGetConnectedState(out desc, 0);
        }
    }
}
此类将返回布尔值 true 或 false,如果互联网连接可用,则返回 true,否则返回 false。
理解互联网连接检查器类后,接下来我们将显示互联网连接指示器。
互联网连接指示器的工作原理
我添加了 2 张图片,一张叠在另一张上面

添加图片后,我们将使用计时器控件来检查互联网连接并显示指示器。
在表单上添加 Timer 控件以检查 Internet 连接并显示 Internet Connection 指示器 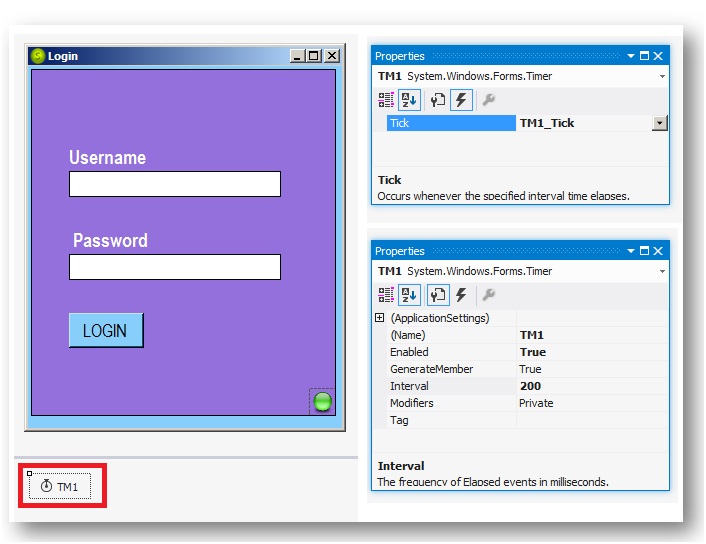
图 18. 添加 Timer 控件以检查 Internet 连接并显示 Internet Connection 指示器
同时,我们还设置了一个静态变量,该变量将在整个应用程序中用于检查互联网连接。
NetConnectionChecker 代码片段
public static class NetConnectionChecker
{
    private static bool _Connection;

    public static bool Connection
    {
        get { return _Connection; }
        set { _Connection = value; }
    }
}
添加静态类后,接下来我们将使用连接 Timer 的 tick 事件来显示互联网连接指示器。
Timer ticks 事件代码片段
在此事件中,我们检查互联网连接是否可用,并根据此显示图像指示器,如果互联网连接不可用,则显示红色图像,如果互联网连接可用,则显示绿色图像。
private void TM1_Tick(object sender, EventArgs e)
{
    if (CheckInternetConnection.CheckNet() == true)
    {
        PBimgRed.Visible = false;
        NetConnectionChecker.Connection = true;
        if (PBimggreen.Visible == true)
        {
            PBimggreen.Visible = false;
        }
        else
        {
            PBimggreen.Visible = true;
        }
    }
    else
    {
        NetConnectionChecker.Connection = false;
        PBimggreen.Visible = false;

        if (PBimgRed.Visible == true)
        {
            PBimgRed.Visible = false;
        }
        else
        {
            PBimgRed.Visible = true;
        }
    }
}

图 19. 显示互联网连接指示器,在线时显示绿色灯,离线时显示红色灯
接下来我们将进行用户身份验证。
使用下面的代码片段进行用户身份验证过程
当用户输入用户名和密码然后单击登录按钮时,首先我们将检查它是否不为空,然后我们将使用 AES 算法加密密码,并将其传递给 CheckUserExists 方法以检查此值是否存在于 SQLite 数据库中,如果不存在,那么我们将直接从 Web 服务器使用 WEB API [https://:6778/api/authenticateuser] 进行用户验证,如果服务器上存在凭据,那么在响应中我们将获得用户名和密码作为响应,此 WEB API 以加密格式发送,然后我们解密这些值,然后再次检查数据库,如果这些值不存在,那么我们将插入从 API 收到的响应,一旦这些值插入到 SQLite 数据库中,我们现在就可以在用户离线时通过 SQLite 数据库进行验证并允许执行此工作
登录按钮代码片段
private void BtnLogin_Click(object sender, EventArgs e)
{
    try
    {
        if (txtusername.Text == "")
        {
            MessageBox.Show("Enter Username");
        }
        else if (txtpassword.Text == "")
        {
            MessageBox.Show("Enter Password");
        }
        else
        {
            string Username = txtusername.Text;
            string Password = txtpassword.Text;

            //Local Database check
            var result = LoginBL.CheckUserExists(Username, EncryptandDecryptAES.Encrypt(Password));

            if (string.IsNullOrEmpty(result) && NetConnectionChecker.Connection == false)
            {
                MessageBox.Show("Login Cannot be done need internet Connection");
            }
            else if (string.IsNullOrEmpty(result) && NetConnectionChecker.Connection == true)
            {
                ValidateUserandGetResponse(Username, Password);
            }
            else
            {
                ShareObject.CLientIDToken = result;
                ShareObject.Username = Username;
                MessageBox.Show("Login Successfully");
                this.Hide();
                Login frm1 = new Login();
                frm1.Close();
                AddProduct addpro = new AddProduct();
                addpro.Show();
            }
        }
    }
    catch (Exception)
    {

        throw;
    }

}
使用 WEB API 验证用户凭据
我们将用户名和密码传递给此方法,然后我们将使用 AES 算法加密密码,然后我们将使用 Web Client 调用 WEB API 来发布数据,但在那之前,我们将加密要发送的整个对象,此外,我们还拥有基于令牌的身份验证以确保额外的安全性 [“APIKEY”],我们生成令牌密钥并发送给 Web 服务器,在 Web 服务器上,它会验证发送的令牌密钥,然后它将解密发送的数据并与 Web 服务器上的 SQL 服务器进行验证,并在响应中,我们将获得用户名和密码作为响应,此 WEB API 以加密格式发送,然后我们解密这些值。
ValidateUserandGetResponse 方法代码片段
public void ValidateUserandGetResponse(string Username, string Password)
{
    try
    {
        UserLogin objvm = new UserLogin()
           {
               Username = Username,
               Password = EncryptandDecryptAES.Encrypt(Password)
           };

        ShareObject.Username = Username;
        using (var client = new WebClient())
        {
            string ClientToken = ConfigurationManager.AppSettings["CLientIDToken"].ToString();
            string keyValue = ConfigurationManager.AppSettings["keyValue"].ToString();
            string IVValue = ConfigurationManager.AppSettings["IVValue"].ToString();


            Uri URI = new Uri(ConfigurationManager.AppSettings["LoginURI"].ToString());
            client.Headers.Add("Content-Type:application/json");
            client.Headers.Add("APIKEY", GenerateToken.CreateToken(Username, ClientToken, DateTime.Now.Ticks));
            client.Headers.Add("Accept:application/json");
            client.UploadStringCompleted += new UploadStringCompletedEventHandler(Callback);

            string SerializeData = JsonConvert.SerializeObject(objvm);

            byte[] buffer = EncryptionDecryptorTripleDES.Encryption(SerializeData, keyValue, IVValue);
            client.UploadStringAsync(URI, Convert.ToBase64String(buffer));
        }
    }
    catch (Exception)
    {
        throw;
    }
}
回调方法代码片段
当收到 API 响应并且它是加密格式时,将调用此方法,首先我们需要解密它,然后我们将反序列化它,然后我们得到最终的输出作为对象。
void Callback(object sender, UploadStringCompletedEventArgs e)
        {
            string ClientToken = ConfigurationManager.AppSettings["CLientIDToken"].ToString();
            string keyValue = ConfigurationManager.AppSettings["keyValue"].ToString();
            string IVValue = ConfigurationManager.AppSettings["IVValue"].ToString();

            if (e.Error != null)
            {
            }
            if (e.Result != null || !string.IsNullOrEmpty(e.Result))
            {
                string finalData = JToken.Parse(e.Result).ToString();
                string data = EncryptionDecryptorTripleDES.Decryption(finalData, keyValue, IVValue);
                UserLogin userlogin = JsonConvert.DeserializeObject
完成理解代码片段后,接下来我们将继续创建产品模型。
在 DemoSmartClient.Model 项目中添加产品模型
我们正在创建此模型以将对象发送到 SQLite 数据库以将产品插入产品表中,同时我们使用相同的产品模型 [对象] 将数据发送到 Web 服务器。

图 20. 在 DemoSmartClient.Model 项目中添加产品模型
首先,我们将添加一个名为 Product 的模型
Product 模型代码片段
using System;
using System.Collections.Generic;
using System.Linq;
using System.Text;

namespace DemoSmartClient.Model
{
    public class Product
    {
        public int ProductID { get; set; }
        public string ProductNumber { get; set; }
        public string Name { get; set; }
        public string Color { get; set; }
        public string ProductClass { get; set; }
        public decimal Price { get; set; }
        public string Description { get; set; }
        public DateTime CreatedDate { get; set; }
        public string CLientIDToken { get; set; }
    }
}
添加模型后,接下来我们将添加一个名为 IProduct 的接口。
在 DemoSmartClient.Interface 项目中添加 IProduct 接口
在此接口中,我们将声明一个用于插入产品、获取产品数据、删除产品数据的方法。

图 21. 在 DemoSmartClient.Interface 项目中添加 IProduct 接口
IProduct 接口代码片段
using DemoSmartClient.Model;
using System;
using System.Collections.Generic;
using System.Data;
using System.Linq;
using System.Text;

namespace DemoSmartClient.Interface
{
    public interface IProduct
    {
        bool AddProduct(Product Product);
        DataTable GetData(string CLientIDToken);
        bool DeleteProduct(int ProductID);
    }
}
添加接口后,接下来我们将添加 ProductConcrete 类。
在 DemoSmartClient.Concrete 项目中添加 ProductConcrete 类
ProductConcrete 类将继承 IProduct 接口。
在具体类中,我们将数据库访问部分的所有代码写在这里,在这个类中,我写了插入产品、获取产品和删除产品的代码。

图 22. 在 DemoSmartClient.Concrete 项目中添加 ProductConcrete 类
注意:- 我正在使用 SQLiteDatabaseHelper 类来进行 CRUD 操作,我将随项目源代码一起提供此类。
ProductConcrete 类代码片段
using DemoSmartClient.Interface;
using DemoSmartClient.Model;
using System;
using System.Collections.Generic;
using System.Configuration;
using System.Data.SQLite;
using System.Data;

namespace DemoSmartClient.Concrete
{
    public class ProductConcrete : IProduct
    {
        SQLiteDatabaseHelper db;
        public ProductConcrete()
        {
            db = new SQLiteDatabaseHelper();
        }

        public bool AddProduct(Product Product)
        {
            try
            {
                bool result = false;

                Dictionary
添加 ProductConcrete 类后,下一步我们将向 DemoSmartClient.BL 项目添加 ProductBL。
在 DemoSmartClient.BL 项目中添加 ProductBL 类
业务类恰好位于用户界面和存储库模式数据类之间。

图 23. 在 DemoSmartClient.BL 项目中添加 ProductBL 类
ProductBL 类代码片段
using System;
using System.Collections.Generic;
using System.Data;
using System.Linq;
using System.Text;

namespace DemoSmartClient.BL
{
    public class ProductBL
    {
        IProduct _IProduct;
        public ProductBL(IProduct IProduct)
        {
            _IProduct = IProduct;
        }

        public bool AddProduct(Product Product)
        {
            return _IProduct.AddProduct(Product);
        }

        public DataTable GetData(string CLientIDToken)
        {
            return _IProduct.GetData(CLientIDToken);
        }

        public bool DeleteProduct(int ProductID)
        {
            return _IProduct.DeleteProduct(ProductID);
        }

    }
}
添加业务层后,下一步我们将创建“添加产品”表单。
添加产品表单
产品表单用于收集产品数据,并将其保存在 SQLite 数据库中,并将记录显示给用户,正如我们在 DataGridView 中添加的那样。
我们只是在表单上添加了一些文本框控件和下拉框控件,以及一对按钮和 DataGridView 用于显示数据。
与此同时,如果您查看页面底部,我们添加了 2 个组件
- 定时器
- BackgroundWorker
这里我们有一个计时器,用于在特定间隔调用 BackgroundWorker。
BackgroundWorker 的工作是使用 Web Client 将数据推送到 Web 服务器。
图 24. 带有所有控件和组件的产品表单视图
添加表单和组件后,下一步我们将把产品保存在数据库中。
将产品保存在 SQLite 数据库中
如果您查看下面的代码片段,首先我们将验证控件,如果一切都有效,那么我们将询问确认“您想保存数据吗?”是或否,如果是,那么我们将数据保存在数据库中,同时我们将从数据库中获取该数据并显示在 DataGridView 中,最后在添加后重置控件数据。

BtnSave 按钮事件代码片段
private void BtnSave_Click(object sender, EventArgs e)
{

    try
    {
        if (TxtProductNumber.Text == "")
        {
            MessageBox.Show("Enter Product Number");
            TxtProductNumber.Focus();
        }
        else if (TxtProductName.Text == "")
        {
            MessageBox.Show("Enter Product Name");
            TxtProductName.Focus();
        }
        else if (TxtPrice.Text == "")
        {
            MessageBox.Show("Enter Price");
            TxtPrice.Focus();
        }
        else if (ComboColor.SelectedIndex == -1)
        {
            MessageBox.Show("Select Color");
            ComboColor.Focus();
        }
        else if (ComboClass.SelectedIndex == -1)
        {
            MessageBox.Show("Select Class");
            ComboClass.Focus();
        }
        else
        {
            string message = "Are you sure you want save this record";
            if (MessageBox.Show(message, "confirmation", MessageBoxButtons.YesNo,
                MessageBoxIcon.Information) == System.Windows.Forms.DialogResult.Yes)
            {
                string selectedComboColor = ComboColor.Items[ComboColor.SelectedIndex].ToString();
                string selectedComboClass = ComboClass.Items[ComboClass.SelectedIndex].ToString();

                Product objproduct = new Product();
                objproduct.Color = selectedComboColor;
                objproduct.Description = TxtDescription.Text;
                objproduct.Name = TxtProductName.Text;
                objproduct.Price = Convert.ToDecimal(TxtPrice.Text);
                objproduct.ProductNumber = TxtProductNumber.Text;
                objproduct.ProductClass = selectedComboClass;
                objproduct.CreatedDate = DateTime.Now;
                objproduct.CLientIDToken = ShareObject.CLientIDToken;
                // Calling Business Layer
                ProductBL.AddProduct(objproduct);
                // Binding data to DataGridView
                DGData.DataSource = ProductBL.GetData(ShareObject.CLientIDToken);
                DGData.ReadOnly = true;
                Clear();
            }
        }
    }
    catch (Exception)
    {

        throw;
    }
}
重置控件代码片段
public void Clear()
{
    TxtDescription.Text = string.Empty;
    TxtProductName.Text = string.Empty;
    TxtPrice.Text = string.Empty;
    TxtProductNumber.Text = string.Empty;
    ComboColor.SelectedIndex = -1;
    ComboClass.SelectedIndex = -1;
}
在理解了保存产品代码片段后,接下来我们将理解如何从数据库删除产品。
从数据库删除产品
要删除记录,您需要选择要删除的行在 DataGridView 中,然后单击删除按钮。

图 25. 从数据库删除产品
之后,它会询问确认是否删除记录,是/否,如果是,那么它将获取零位置的单元格 ID,即产品 ID,然后将其传递给业务层以从数据库中删除,删除后,我们将重新绑定 DataGridView。
btnDelete 按钮事件代码片段
private void btnDelete_Click(object sender, EventArgs e)
{
    try
    {
        string message = "Are you sure you want to delete this record(s)";
        if (MessageBox.Show(message, "confirmation", MessageBoxButtons.YesNo, MessageBoxIcon.Information)
            == System.Windows.Forms.DialogResult.Yes)
        {
            foreach (DataGridViewRow item in this.DGData.SelectedRows)
            {
                int productID = Convert.ToInt32(item.Cells[0].Value);
                ProductBL.DeleteProduct(productID);
            }
            DGData.DataSource = ProductBL.GetData(ShareObject.CLientIDToken);
            DGData.AllowUserToAddRows = false;
            DGData.ReadOnly = true;
        }
    }
    catch (Exception)
    {
        throw;
    }
}
在理解了删除产品代码片段后,接下来我们将理解 Timer 和 BackgroundWorker 如何用于将数据推送到 Web 服务器。
Timer 和 BackgroundWorker 的工作用于将数据推送到 Web 服务器

图 26. Timer 和 BackgroundWorker 的工作原理
让我们从计时器开始,我们将使用计时器 tick 事件来调用 BackgroundWorker,并将其间隔设置为 60000 毫秒(即 1 分钟),每隔 1 分钟,它将调用 BackgroundWorker RunWorkerAsync(); 事件。

图 27. 设置 Timer 控件的属性和事件
Timer tick 事件代码片段
private void TMSyncData_Tick(object sender, EventArgs e)
{
    BGWorkerDataPusher.RunWorkerAsync();
}
接下来,我们将查看我们将要设置的 BackgroundWorker 的事件和属性。
设置 BackgroundWorker 的属性和事件
我们将使用此组件在后台运行任务。您可能会想,我们要运行什么任务,哈,我们要将产品数据推送到后台的 Web 服务器。
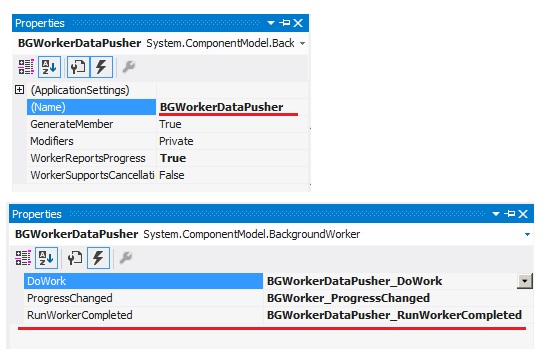
图 28. 设置 BackgroundWorker 控件的属性和事件
让我们看看 BackgroundWorker 的事件执行顺序
当调用 RunWorkerAsync(); 时,第一个被调用的事件是 DoWork,然后是 ProgressChanged,最后是 RunWorkerCompleted 事件。
DoWork 事件代码片段
在此事件中,我们将检查互联网连接是否可用,然后我们才调用方法 BackgroundProcessLogicMethod();
private void BGWorkerDataPusher_DoWork(object sender, DoWorkEventArgs e)
{
    if (NetConnectionChecker.Connection == true)
    {
        BackgroundProcessLogicMethod();
    }
}
在 BackgroundProcessLogicMethod(); 方法中,我们将根据用户从数据库获取数据,然后将值赋给产品模型,然后将产品模型传递给 DataPusher(Product Product) 方法。
BackgroundProcessLogicMethod 方法代码片段
public void BackgroundProcessLogicMethod()
{
    //getting data from database
    var data = ProductBL.GetData(ShareObject.CLientIDToken);
    for (int i = 0; i < data.Rows.Count; i++)
    {
        Product Product = new Product();
        Product.ProductID = Convert.ToInt32(data.Rows[i]["ProductID"]);
        Product.Name = Convert.ToString(data.Rows[i]["Name"]);
        Product.Price = Convert.ToDecimal(data.Rows[i]["Price"]);
        Product.Color = Convert.ToString(data.Rows[i]["Color"]);
        Product.Description = Convert.ToString(data.Rows[i]["Description"]);
        Product.ProductClass = Convert.ToString(data.Rows[i]["ProductClass"]);
        Product.CreatedDate = Convert.ToDateTime(data.Rows[i]["CreatedDate"]);
        Product.CLientIDToken = Convert.ToString(data.Rows[i]["CLientIDToken"]);
        Product.ProductNumber = Convert.ToString(data.Rows[i]["ProductNumber"]);
        DataPusher(Product);
        if (data.Rows.Count > 0)
        {
            BGWorkerDataPusher.ReportProgress((data.Rows.Count * 10));
        }
        else
        {
            BGWorkerDataPusher.ReportProgress((10 * 10));
        }
    }
}
在 DataPusher 方法中,我们将使用 WebClient 调用在 SmartWebapp 应用程序中创建的 product WEBAPI,然后传递数据,我们首先需要序列化我们将要发送的产品模型,并对序列化数据进行加密,同时我们还将从 header 发送 APIKEY,我们已经分享了生成 APIKEY 的逻辑,以便在 SmartWebapp 应用程序中进行基于令牌的身份验证。
最好将 URL 和令牌保存在 App.config 的 appSettings 中。
进行这些更改后,它们将应用于整个应用程序。
在 DataPusher 方法中,我们将使用 4 个键[CLientIDToken, LiveURI, keyValue, IVValue]
<appSettings>
  <add key="DBConnection" value="Data Source=SmartData.db3" />
  <add key="keyValue" value="18694440" />
  <add key="IVValue" value="BFA3EO5T" />
  <add key="LiveURI" value="https://:6778/api/product" />
  <add key="LoginURI" value="https://:6778/api/authenticateuser" />
  <add key="CLientIDToken" value="QbOsqf3LZAefzwwSBKHX" />
</appSettings>
DataPusher 方法代码片段
public void DataPusher(Product Product)
{
    try
    {
        using (var client = new WebClient())
        {
            string ClientToken = ConfigurationManager.AppSettings["CLientIDToken"].ToString();
            Uri URI = new Uri(ConfigurationManager.AppSettings["LiveURI"].ToString());
            client.Headers.Add("Content-Type:application/json");
            client.Headers.Add("Accept:application/json");

            //Token APIKEY
            client.Headers.Add("APIKEY",
            GenerateToken.CreateToken(ShareObject.Username, ClientToken, DateTime.Now.Ticks));

            //Setting Call back method
            client.UploadStringCompleted += new UploadStringCompletedEventHandler(Callback);

            //key and IV
            string keyValue = ConfigurationManager.AppSettings["keyValue"].ToString();
            string IVValue = ConfigurationManager.AppSettings["IVValue"].ToString();

            //Serializing Object
            string SerializeData = JsonConvert.SerializeObject(Product);
            //Encrypting Serialized Object
            byte[] buffer = EncryptionDecryptorTripleDES.Encryption(SerializeData, keyValue, IVValue);

            //Converting bytes To Base64String and then Upload data
            client.UploadStringAsync(URI, Convert.ToBase64String(buffer));
        }
    }
    catch (Exception)
    {
        throw;
    }
}
传递所有这些值后,我们将调用 UploadStringAsync 方法上传数据,并接收响应,我们设置了回调方法,下面是回调方法代码片段,它在出错时接收错误,在没有错误时接收响应值。
在响应中,我们接收到在 Web 服务器上插入的 ProductID,然后我们根据此从 SQLite 数据库中删除该记录。
Callback 方法代码片段
void Callback(object sender, UploadStringCompletedEventArgs e)
{
    try
    {
        if (e.Error != null)
        {
        }
        else if (e.Result != null || !string.IsNullOrEmpty(e.Result))
        {
           //getting ProductID in Response
            string finalData = e.Result;

            if (finalData != null)
            {
                //Deleting Product by ProductID
                ProductBL.DeleteProduct(Convert.ToInt32(finalData));
            }
        }
    }
    catch (Exception)
    {
        throw;
    }
}
在此事件之后,接下来将调用的是 ProgressChanged 事件。
ProgressChanged 事件
此事件用于显示处理进度,例如,当数据同步到 Web 服务器时显示进度条。
 图 29. 使用 ProgressChanged 事件显示进度条
在下面的代码片段中,我们正在为进度条设置百分比以显示,同时我们还显示一个带有百分比的标签,最后,我们还刷新 grid 以删除已同步到服务器的数据。
BGWorker_ProgressChanged 事件代码片段
void BGWorker_ProgressChanged(object sender, ProgressChangedEventArgs e)
{
    try
    {
        //Setting Values to display
        progressBar1.Value = e.ProgressPercentage;
        //displaying Percentage in label
        lblStatus.Text = "Processing......" + progressBar1.Value.ToString() + "%";
        //Refreshing DataGridView
        DGData.DataSource = null;
        DGData.Update();
        DGData.Refresh();
        //Rebinding DataGridView
        DGData.DataSource = ProductBL.GetData(ShareObject.CLientIDToken);
    }
    catch (Exception)
    {
        throw;
    }
}
在此事件之后,最后一个调用的事件是 RunWorkerCompleted。
在 RunWorkerCompleted 事件中,我们刷新 DataGridView 并重新绑定数据到 DataGridView,这是 BackgroundWorker 被调用的最后一个事件。
BGWorkerDataPusher_RunWorkerCompleted 事件代码片段
private void BGWorkerDataPusher_RunWorkerCompleted(object sender, RunWorkerCompletedEventArgs e)
{
    DGData.DataSource = null;
    DGData.Update();
    DGData.Refresh();
    DGData.DataSource = ProductBL.GetData(ShareObject.CLientIDToken);
}
摘要
我们在本文中学到了很多东西,我们学习了如何创建 MVC 项目,如何创建 WEB API,如何保护 WEB API,此外,我们还在 Windows 应用程序中学习了新的东西,使用了 SQLite 数据库,以及如何消费 WEBAPI。
感谢阅读,我将继续带来新的想法和文章。