
Master Chef (第二部分) ASP.NET Core MVC 结合 Fluent NHibernate 和 AngularJS
5.00/5 (7投票s)
在这篇文章中,我将介绍如何使用 ASP.NET Core MVC、Fluent NHibernate 和 Angular JS 来实现一个 CRUD SPA(单页应用程序)。
在 Maser Chef Part 1 中,我介绍了如何将 ASP.NET Core MVC 与 Fluent NHibernate 和 Angular JS 集成。在这篇文章中,我将介绍如何使用 ASP.NET Core MVC、Fluent NHibernate 和 Angular JS 来实现一个 CRUD SPA(单页应用程序)。
在 Repository 中使用泛型
创建、读取、更新和删除(CRUD)是持久化存储的四个基本功能。
我们首先需要在 repository 类中实现数据库级别的 CRUD。我希望使用泛型来实现查询、添加、更新、删除方法,以避免重复编码。为什么要使用泛型?简而言之,它类型安全、能在编译时进行检查、速度更快,并且适用于具有相同底层行为的多种类型。
在之前的数据模型类中,所有成员的名称都与数据库字段相同。实际上,数据模型类的成员不必与数据库字段相同。例如,Recipe 类的 Id 不必是 RecipeId,它可以是任何名称,比如 Id。我们所需要做的就是在映射时告知 Fluent NHibernate,如下所示。
Id(x => x.Id, "RecipeId");
这样 Fluent NHibernate 就知道它正在将“Id”映射到“RecipeId”。
因为我们不必使用与数据库字段相同的名称,现在我们有机会改变不同的数据模型类以拥有一些共同的成员。
所以我们创建了一个基类 Entity。
    public class Entity
    {
        public virtual Guid Id { get; set; }
        public virtual Guid? ParentId { get; set; }
        public virtual Type ParentType => null;
}
然后,我们让 Recipe、RecipeStep 和 RecipeItem 继承 Entity,并将 Recipe 的 RecipeId 替换为 Id,将 RecipeStep 的 RecipeStepId 替换为 Id,并将 RecipeItem 的 ItemId 替换为 Id。另外,还将 RecipeStep 的 RecipeId 替换为 ParentId,将 RecipeItem 的 RecipeStepId 替换为 ParentId。
 public class Recipe : Entity
    {
        public virtual string Name { get; set; }
        public virtual string Comments { get; set; }
        public virtual DateTime ModifyDate { get; set; }
        public virtual IList<RecipeStep> Steps { get; set; }
}

public class RecipeStep : Entity
    {
        public virtual int StepNo { get; set; }
        public virtual string Instructions { get; set; }
        public virtual IList<RecipeItem> RecipeItems { get; set; }
        public override Type ParentType => typeof(Recipe);
    }
public class RecipeItem : Entity
    {
        public virtual string Name { get; set; }
        public virtual decimal Quantity { get; set; }
        public virtual string MeasurementUnit { get; set; }
        public override Type ParentType => typeof(RecipeStep);
    }
现在我们也需要更改映射类。请注意不同名称的映射。
public class RecipeMap : ClassMap<Recipe>
    {
        public RecipeMap()
        {
            Id(x => x.Id, "RecipeId");
            Map(x => x.Name);
            Map(x => x.Comments);
            Map(x => x.ModifyDate);
            HasMany(x => x.Steps).KeyColumn("RecipeId").Inverse().Cascade.DeleteOrphan().OrderBy("StepNo Asc");
            Table("Recipes");
        }
}
public class RecipeStepMap : ClassMap<RecipeStep>
    {
        public RecipeStepMap()
        {
            Id(x => x.Id, "RecipeStepId");
            Map(x => x.ParentId, "RecipeId");
            Map(x => x.StepNo);
            Map(x => x.Instructions);
            HasMany(x => x.RecipeItems).KeyColumn("RecipeStepId").Inverse().Cascade.DeleteOrphan();
            Table("RecipeSteps");
        }
    }
public class RecipeItemMap : ClassMap<RecipeItem>
    {
        public RecipeItemMap()
        {
            Id(x => x.Id, "ItemId");
            Map(x => x.Name);
            Map(x => x.Quantity);
            Map(x => x.MeasurementUnit);
            Map(x => x.ParentId, "RecipeStepId");
            Table("RecipeItems");
        }
    }
“Cascade.DeleteOrphan”是什么意思?这个选项会在你删除父对象时删除子对象。对我们而言,删除一个食谱将删除该食谱的所有步骤和条目,删除一个步骤将删除该步骤的所有条目。
然后我们将 Repository 的方法更改为泛型方法,并添加泛型约束,即 T 必须是 Entity 的子类。
public T GetEntity<T>(Guid id) where T : Entity
        {
            try
            {
                return _session.Get<T>(id);
            }
            catch (Exception ex)
            {
                throw ex;
            }
        }

        public T AddEntity<T>(T entity) where T : Entity
        {
            T newOne = null;
            using (var transaction = _session.BeginTransaction())
            {
                try
                {
                    _session.SaveOrUpdate(entity);
                    Commit(transaction, entity);
                    RefreshParentObject(entity);
                    newOne = _session.Get<T>(entity.Id) as T;
                }
                catch (Exception ex)
                {
                    throw ex;
                }

                return newOne;
            }
        }

        public void UpdateEntity<T>(T entity) where T : Entity
        {
            using (var transaction = _session.BeginTransaction())
            {
                try
                {
                    _session.Update(entity);
                    Commit(transaction, entity);
                    RefreshParentObject(entity);
                }
                catch (Exception ex)
                {
                    throw ex;
                }

            }
        }

        public void DeleteEntity<T>(Guid id) where T : Entity
        {
            using (var transaction = _session.BeginTransaction())
            {
                var entity = _session.Get<T>(id);
                if (entity != null)
                {
                    try
                    {
                        _session.Delete(entity);
                        Commit(transaction, entity);
                        RefreshParentObject(entity);
                    }
                    catch (Exception ex)
                    {
                        throw ex;
                    }
                }
            }
        }
对于 add、update 和 delete 方法,它们都调用 RefreshParentObject()。这是什么意思?当我们更改 RecipeStep 或 RecipeItem 时,其父对象的缓存并不知道此更改。我们需要刷新父对象的缓存。
    void RefreshParentObject(Entity entity)
        {
            if (!entity.ParentId.HasValue)
                return;
            var parentObj = _session.Get(entity.ParentType, entity.ParentId.Value);
            if (parentObj != null)
                _session.Refresh(parentObj);
        }
现在我们更新 Web API 控制器。
        [HttpGet("{id}")]
        public IActionResult Get(Guid id)
        {
            var recipe = _repository.GetEntity<Recipe>(id);
            if (recipe != null)
                return new ObjectResult(recipe);
            else
                return new NotFoundResult();

        }
        [HttpPost]
        public IActionResult Post([FromBody]Recipe recipe)
        {
            if (recipe.Id == Guid.Empty)
            {
                recipe.ModifyDate = DateTime.Now;
                return new ObjectResult(_repository.AddEntity<Recipe>(recipe));
            }
            else
            {
                var existingOne = _repository.GetEntity<Recipe>(recipe.Id);
                existingOne.Name = recipe.Name;
                existingOne.Comments = recipe.Comments;
                existingOne.ModifyDate = DateTime.Now;
                _repository.UpdateEntity<Recipe>(existingOne);
                return new ObjectResult(existingOne);
            }
        }
        [HttpPut("{id}")]
        public IActionResult Put(Guid id, [FromBody]Recipe recipe)
        {
            var existingOne = _repository.GetEntity<Recipe>(recipe.Id);
            existingOne.Name = recipe.Name;
            existingOne.Comments = recipe.Comments;
            _repository.UpdateEntity<Recipe>(recipe);
            return new ObjectResult(existingOne);
        }

        [HttpDelete("{id}")]
        public IActionResult Delete(Guid id)
        {
            _repository.DeleteEntity<Recipe>(id);
            return new StatusCodeResult(200);
        }
Angular 客户端路由
现在我们需要在我们的 Master Chef 应用程序中设置客户端路由,以便根据客户端提供的 URL 动态替换视图。我们可以从 angular-route 模块获取 Angular 路由功能。
使用 ngRoute 模块,你可以在单页应用程序中导航到不同的页面,而无需重新加载页面。$route 用于将深度链接 URL 映射到控制器和视图(HTML 部分)。它会监视 $location.url() 并尝试将路径映射到现有的路由定义。
$route 有两个依赖项:$location 和 $routeParams。
1) 注入 ngRoute
打开 app.js,将 ngroute 注入我们的 masterChefApp 模块。
(function () {
    'use strict';

    angular.module('masterChefApp', [
        // Angular modules
        'ngRoute',

        // Custom modules
        'recipesService'
        // 3rd Party Modules

    ]);
})();
2) 配置 Angular 路由
为我们的 Angular 应用模块 masterChefApp 定义一个配置函数。在该配置函数中,使用来自 ngRoute 模块的路由提供者服务来定义客户端路由。
angular.module('masterChefApp').config(['$routeProvider', '$locationProvider', function ($routeProvider, $locationProvider) {
        $routeProvider
        .when('/', {
            templateUrl: 'partials/recipes.html',
            controller: 'recipesController'
        })
        .when('/recipes/add', {
            templateUrl: 'partials/add.html',
            controller: 'recipesAddController'
        })
        .when('/recipes/edit/:id', {
            templateUrl: 'partials/edit.html',
            controller: 'recipesEditController'
        })
        .when('/recipes/delete/:id', {
            templateUrl: 'partials/delete.html',
            controller: 'recipesDeleteController'
        });

        $locationProvider.html5Mode(true);

}]);
第一个是默认路由——斜杠。第二个是 /recipes/add。第三个是 /recipes/edit/ 并将 :id 作为路由参数传递,这允许我们获取一个动态 ID 来匹配某个食谱。最后一个路由 /recipes/delete/:id 也需要一个动态 ID 参数。这个默认路由将列出所有食谱。“Add”路由将处理添加,“Edit”路由将处理编辑或更新,“Delete”路由将处理删除或移除。CRUD 功能由这四个客户端路由表示。对于每个路由,我们需要同时定义一个模板 URL——指示应该为该路由渲染的 HTML——以及一个单独的控制器来处理该路由。
在最底部,使用 $locationProvider 的 html5Mode 函数,将其设置为 true,以确保我可以使用友好自然的 URL,并避免在客户端路由中使用 hash bang。
Angular JS 客户端控制器
我们已经配置了默认路由、添加路由、编辑路由和删除路由。然后我们需要相应的控制器:recipesController、recipesAddController、recipesEditController 和 recipesDeleteController。我们将所有这些控制器定义在 recipesController.js 中。
1) 注入“Add”、“Edit”和“Delete”控制器
angular
        .module('masterChefApp')
        .controller('recipesController', recipesController)
        .controller('recipesAddController', recipesAddController)
        .controller('recipesEditController', recipesEditController)
        .controller('recipesDeleteController', recipesDeleteController);
2) 实现 Recipes Add Controller
recipesAddController.$inject = ['$scope', 'Recipe', '$location'];
    function recipesAddController($scope, Recipe, $location) {
        $scope.recipe = new Recipe();
        $scope.addRecipe = function () {
            $scope.recipe.$save(function () {
                $location.path('/');
            });
        }
    }
因此 recipesAddController 需要 $scope、Recipe 服务和 $location 服务。recipesAddController 创建或提供允许用户向应用程序添加食谱的功能。为此,它会创建一个新的 $scope 变量 recipe,并使用 Recipe 服务。它还会创建一个 $scope 函数 addRecipe,该函数将通过使用 Recipe 服务的 save 方法将食谱提交到服务器。在食谱提交后的回调中,我们将把应用程序重定向到其主页。
3) 实现 Recipes Edit Controller
recipesEditController.$inject = ['$scope', 'Recipe', '$location', '$routeParams'];
    function recipesEditController($scope, Recipe, $location, $routeParams) {
        $scope.recipe = Recipe.get({ id: $routeParams.id });
        $scope.editRecipe = function () {
            $scope.recipe.$save(function () {
                $location.path('/');
           });
        }
}
recipesEditController 需要 $scope、Recipe 服务、$location 服务。它还需要 $routeParameter 来传递 id。recipesEditController 创建或提供允许用户更新应用程序中的食谱的功能。我们将使用 &routeParams 服务获取要更新的食谱。通过从路由参数中获取 ID 来获取食谱的 ID。然后,我们将访问服务器并调用 Recipe 服务的 get 函数来获取相应的食谱——这次是提供该 ID 的 get 方法。这将提供给前端。用户将能够进行任何操作。
最后,我们将更新后的食谱记录提交给服务器。
4) 实现 Recipes Delete Controller
recipesDeleteController.$inject = ['$scope', 'Recipe', '$location', '$routeParams'];
    function recipesDeleteController($scope, Recipe, $location, $routeParams) {
        $scope.recipe = Recipe.get({ id: $routeParams.id });
        $scope.deleteRecipe = function () {
            $scope.recipe.$remove({ id: $scope.recipe.id }, function () {
                $location.path('/');
            });
        };
}
recipesDeleteController 使用 $routeParams 获取 ID 并检索特定的食谱。然后提供 deleteRecipe 函数,我们可以使用 Recipe 服务的 $remove 方法来告诉服务器我们想要删除某个特定的食谱。
部分视图模板
1) 修改 Index.html 以使用 ng-view
修改 index.html 以使用部分视图。首先添加一个“base”标签及其 href 属性为 /。这对于 $locationProvider 正常工作是必需的,因为它需要一个基础。现在转到 body 内容。删除所有内容,只使用 ng-view 指令。
<!DOCTYPE html>
<html ng-app="masterChefApp">
<head>
    <base href="/">
    <meta charset="utf-8" />
    <title>Master Chef Recipes</title>
    <script src="lib/angular/angular.min.js"></script>
    <script src="lib/angular-resource/angular-resource.min.js"></script>
    <script src="lib/angular-route/angular-route.min.js"></script>
    <script src="app.js"></script>
    </head>
<body ng-cloak>
    <div>
        <ng-view></ng-view>
    </div>
</body>
</html>
基于这个 ng-view 指令和我们已经设置好的路由,ng-view 将能够根据客户端路由在 $routeProvider 上提供正确的局部视图和相应的控制器来支持该视图。
我们在 app.js 文件中指定了四个控制器。这些控制器提供了 CRUD 操作。路由 URL / 将从服务器检索所有食谱。/recipes/add 将创建一个新食谱。带有变量 id 的 recipes/edit 将更新现有食谱,带有变量 id 的 /recipes/delete 将从服务器删除或移除特定食谱。
现在我们在 wwwroot 文件夹下创建一个“partials”文件夹。然后可以一个接一个地添加模板。
2) 检索模板 – Recipes.html
右键单击 wwwroot 下的“partials”文件夹。添加一个新项。在客户端模板部分,选择 HTML 页面。我们给它命名为“recipes.html”。

recipes.html 将检索并显示食谱列表。
<div>
    <h2>Master Chief Recipes</h2>
    <ul>
        <li ng-repeat="recipe in recipes">
            <div>
               <h5>{{recipe.name}} - {{recipe.comments}}</h5>
            </div>
            <div>
                <a href="recipes/edit/{{recipe.id}}">edit</a>
            </div>
            <div>
                <a href="recipes/delete/{{recipe.id}}">delete</a>
            </div>
            <ul>
                <li ng-repeat="step in recipe.steps">
                    <p> step {{step.stepNo}} : {{step.instructions}}</p>
                    <ul>
                        <li ng-repeat="item in step.recipeItems">
                            <p> {{item.name}}  {{item.quantity}} {{item.measurementUnit}}</p>
                        </li>
                    </ul>
                </li>
            </ul>
        </li>
    </ul>
    <p><a href="recipes/add"> Add a new recipe </a></p>
</div>
请注意,这不是完整的 HTML。我们只是定义了一个将在 AngularJS 应用程序中替换的部分视图。
现在如果我们运行它,我们应该能看到所有食谱。

3) Bootstrap 样式
虽然它能工作,但它是一个完全朴素的 HTML。所以我们需要应用一些 CSS 样式。
Bootstrap 是一个非常流行的前端框架,它包含基于 HTML 和 CSS 的设计模板,用于排版、表单、按钮、表格、导航、模态框、图片轮播等,以及可选的 JavaScript 插件。应用 Bootstrap 样式可以让我们的 Master Chef Web 应用程序更漂亮。
我们已经在 bower 配置中添加了 bootstrap 包。
 {
	"name": "asp.net",
	"private": true,
  "dependencies": {
    "jquery": "3.1.0",
    "bootstrap": "3.1.0",
    "angular": "1.5.8",
    "angular-route": "1.5.8",
    "angular-resource": "1.5.8"
  }
}
所以 Bootstrap 已经安装在 wwwroot\lib 文件夹中。现在我们将其包含在 index.html 中。
<link href="lib/bootstrap/dist/css/bootstrap.min.css" rel="stylesheet" media="screen">
我们将应用以下 Bootstrap 样式。
我们将 index.html 中的主 div 应用 .container-fluid(全宽)类以实现适当的对齐和填充。
我们在 recipes.html 中为 ui 应用了所有 .list-group,为 li 应用了 .list-group-item。我们还为添加链接应用了“btn-primary”,为编辑链接应用了“btn-default”,为删除链接应用了“btn-delete”。我还想将食谱显示为徽章,所以也应用了 .badge 样式。
再次运行 Master Chef,看看现在是什么样子。

Bootstrap 包含一个强大的移动优先的网格系统,用于构建各种形状和大小的布局。它基于 12 列布局,并有多个级别,每个媒体查询范围对应一个级别。它有三个主要组件——容器、行和列。容器——.container 用于固定宽度或 .container-fluid 用于全宽——使你的网站内容居中并帮助对齐你的网格内容。行是列的水平组,可确保你的列正确对齐。列类表示你希望在一行中使用的列数,总共 12 列。所以如果你想要三个等宽的列,你会使用 .col-xs-4。
我们在 Master Chef 模板中使用了 Bootstrap 网格系统。
4) 使用 Angular JS 实现展开/折叠
我知道有很多方法可以使用 jQuery 来实现展开/折叠并修改 DOM。但请记住,我们正在使用 AngularJS 的 MVVM 模式。所以我想通过修改控制器(视图模型)中的模型来实现展开/折叠。
在 recipesController 中添加 expand() 函数。在 expand() 函数中,我们设置了食谱对象的 show 属性。
recipesController.$inject = ['$scope', 'Recipe'];

    function recipesController($scope, Recipe) {
        $scope.recipes = Recipe.query();
        $scope.expand = function (recipe) {
            recipe.show = !recipe.show;
        }
}
我们添加了一个 ng-click 来调用 recipesController 中的 expand() 函数。
  <div class="btn-group">
                <button class="btn badge pull-left" ng-click="expand(recipe)"><h5>{{recipe.name}} - {{recipe.comments}}</h5></button>
 </div>
然后我们使用 ng-show 来控制是否显示食谱详情。
<ul class="list-group" ng-show="recipe.show">
                <li ng-repeat="step in recipe.steps" class="list-group-item">

只需单击食谱徽章即可展开任何你想查看的内容。

5) 创建模板 – add.html
右键单击 wwwroot 下的“partials”文件夹。添加一个新项。在客户端模板部分,选择 HTML 页面。我们给它命名为“add.html”。
在 add.html 中,使用 ng-submit 将数据发布到服务器。我们将用户输入的信息通过 ng-model 指令绑定到一个作用域变量 recipe。当用户通过按 Save 按钮提交表单时,我们将调用一个作用域函数 addRecipe,该函数在控制器中会秘密地将此 recipe 对象提交给服务器。
<h1>Add a new recipe</h1>
<div class="container-fluid">
    <form ng-submit="addRecipe()">
        <div class="row">
            <div class="form-group col-xs-4">
                <label for="name">Name</label>
                <input ng-model="recipe.name" name="name" type="text" class="form-control" />
            </div>
        </div>
        <div class="row">
            <div class="form-group col-md-4 col-xs-8">
                <label for="comments">Comments</label>
                <input ng-model="recipe.comments" name="comments" type="text" class="form-control" />
            </div>
        </div>
        <div class="row">
            <button type="submit" class="btn btn-primary">Save</button>
            <a href="/" class="btn btn-default">Cancel</a>
        </div>
    </form>
</div>

6) 编辑模板 – edit.html
右键单击 wwwroot 下的“partials”文件夹。添加一个新项。在客户端模板部分,选择 HTML 页面。我们给它命名为“edit.html”。
现在我们想更新一个食谱。我们将在 edit.html 部分模板中处理这个问题。edit.html 看起来像 add.html,因为我们需要提供所有必需的字段供最终用户实际更新现有食谱。我们有 recipe.name 和 recipe.comments 的输入。它们通过 ng-model 指令绑定到一个作用域变量——一个对象 recipe。另外,在 edit 控制器中,有一个作用域函数——editRecipe。因此,当用户在 edit.html 中按下 Save 按钮时,该函数将被调用,其任务是将更新后的食谱信息提交到服务器进行持久化存储。
<h1>Edit recipe</h1>
<div class="container-fluid">
    <form ng-submit="editRecipe()">
        <div class="row">
            <div class="form-group col-xs-4">
                <label for="name">Name</label>
                <input ng-model="recipe.name" name="name" type="text" class="form-control" />
            </div>
        </div>
        <div class="row">
            <div class="form-group col-md-4 col-xs-8">
                <label for="comments">Comments</label>
                <input ng-model="recipe.comments" name="comments" type="text" class="form-control" />
            </div>
        </div>
        <div class="row">
            <button type="submit" class="btn btn-primary">Save</button>
            <a href="/" class="btn btn-default">Cancel</a>
        </div>
    </form>
</div>

7) 删除模板
右键单击 wwwroot 下的“partials”文件夹。添加一个新项。在客户端模板部分,选择 HTML 页面。我们给它命名为“delete.html”。
在 delete.html 中,我们将提供一个用于确认的段落。你真的想删除这个食谱吗?我们将绑定到要处理的食谱信息——将被删除的食谱。我们将提供一个按钮,该按钮调用一个作用域函数——deleteRecipe。它将提交一个请求到服务器以移除特定的食谱。
<div class="alert alert-warning">
    <p>Do you really want to delete this recipe?</p>
    <p> {{recipe.name}} - {{recipe.comments}}</p>
</div>
<button ng-click="deleteRecipe()" class="btn btn-danger">Yes</button>
<a href="/" class="btn btn-default">No</a>

多个 URL 映射到同一个 Web API 控制器
那么关于食谱步骤和食谱条目呢?一般而言,我们可以创建单独的 API 控制器来处理食谱步骤和食谱条目。但这太笨重了。我更喜欢将所有与食谱相关的 RESTful 服务包装在 RecipesController 中。但这肯定需要不同的 URL 来处理食谱步骤操作和食谱条目操作。幸运的是,ASP.NET Core Web API 支持不同的路由。路由是 Web API 将 URI 匹配到操作的方式。Web API 支持一种新型路由,称为属性路由。顾名思义,属性路由使用属性来定义路由。属性路由让你能够更好地控制 Web API 中的 URI。例如,你可以轻松创建描述资源层次结构的 URI。
Web 控制器类的 Route 属性是基础 URI。
[Route("api/[controller]")]
    public class RecipesController : Controller
{
….
}
对于 RecipesController,基础 URL 是 /api/recipes。
[HttpGet("{id}")]
        public IActionResult Get(Guid id)
        {
            var recipe = _repository.GetEntity<Recipe>(id);
            if (recipe != null)
                return new ObjectResult(recipe);
            else
                return new NotFoundResult();

        }
上面的方法没有 Route 属性,这意味着该方法被映射到 /api/recipes/:id。
但是,似乎我们需要为 get step 方法和 get item 方法使用不同的 URL。我希望 getting step 的 URL 是 /api/recipes/step/:id,getting item 的 URL 是 /api/recipes/item/:id。所以我们为 get step 方法添加 [Route("step/{id}")],为 get item 方法添加 [Route("item/{id}")]。
[HttpGet]
        [Route("step/{id}")]
        public IActionResult GetStep(Guid id)
        {
            var recipeStep = _repository.GetEntity<RecipeStep>(id);
            if (recipeStep != null)
                return new ObjectResult(recipeStep);
            else
                return new NotFoundResult();

        }
[HttpGet]
        [Route("item/{id}")]
        public IActionResult GetItem(Guid id)
        {
            var recipeItem = _repository.GetEntity<RecipeItem>(id);
            if (recipeItem != null)
                return new ObjectResult(recipeItem);
            else
                return new NotFoundResult();

        }
让我们看看 API 路由是否有效。点击 IIS Express 启动我们的 Web 应用程序。首先检查 URL,api/recipes/step/AEE9602B-03EF-4A5F-A380-2962134ADB7E。

它按预期工作。
然后我们检查 api/recipes/item/862B91D5-FB60-4004-8179-0415AB900795。
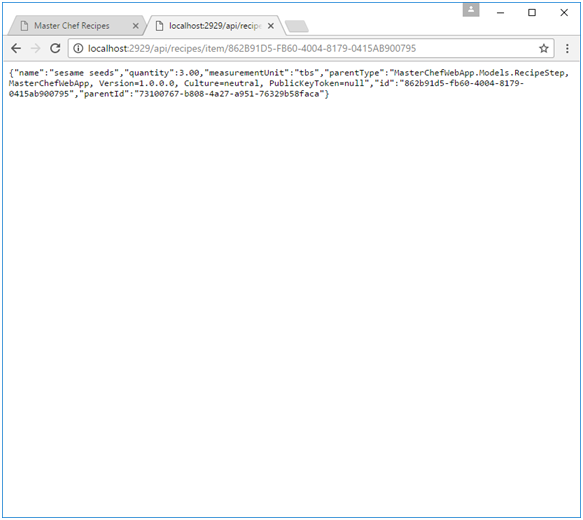
它也工作正常。
我们还需要为 post 和 delete 添加 Route 属性。
//GET api/recipes/step/:id
        [HttpGet]
        [Route("step/{id}")]
        public IActionResult GetStep(Guid id)
        {
            var recipeStep = _repository.GetEntity<RecipeStep>(id);
            if (recipeStep != null)
                return new ObjectResult(recipeStep);
            else
                return new NotFoundResult();

        }

        //POST api/recipes/step
        [HttpPost]
        [Route("step")]
        public IActionResult UpdateStep([FromBody]RecipeStep recipeStep)
        {
            if (recipeStep.Id == Guid.Empty)
            {
                return new ObjectResult(_repository.AddEntity<RecipeStep>(recipeStep));
            }
            else
            {
                var existingOne = _repository.GetEntity<RecipeStep>(recipeStep.Id);
                existingOne.StepNo = recipeStep.StepNo;
                existingOne.Instructions = recipeStep.Instructions;
                _repository.UpdateEntity<RecipeStep>(existingOne);
                return new ObjectResult(existingOne);
            }
        }

        //DELETE api/recipes/step/:id
        [HttpDelete]
        [Route("step/{id}")]
        public IActionResult DeleteStep(Guid id)
        {
            _repository.DeleteEntity<RecipeStep>(id);
            return new StatusCodeResult(200);
        }

        // GET api/recipes/item/:id
        [HttpGet]
        [Route("item/{id}")]
        public IActionResult GetItem(Guid id)
        {
            var recipeItem = _repository.GetEntity<RecipeItem>(id);
            if (recipeItem != null)
                return new ObjectResult(recipeItem);
            else
                return new NotFoundResult();

        }

        //POST api/recipes/item
        [HttpPost]
        [Route("item")]
        public IActionResult UpdateItem([FromBody]RecipeItem recipeItem)
        {
            if (recipeItem.Id == Guid.Empty)
            {
                if (recipeItem.MeasurementUnit == null)
                    recipeItem.MeasurementUnit = "";
                return new ObjectResult(_repository.AddEntity<RecipeItem>(recipeItem));
            }
            else
            {
                var existingOne = _repository.GetEntity<RecipeItem>(recipeItem.Id);
                existingOne.Name = recipeItem.Name;
                existingOne.Quantity = recipeItem.Quantity;
                existingOne.MeasurementUnit = recipeItem.MeasurementUnit;
                _repository.UpdateEntity<RecipeItem>(existingOne);
                return new ObjectResult(existingOne);
            }
        }

        //DELETE api/recipes/item/:id
        [HttpDelete]
        [Route("item/{id}")]
        public IActionResult DeleteItem(Guid id)
        {
            _repository.DeleteEntity<RecipeItem>(id);
            return new StatusCodeResult(200);
        }
单个 Angular Resource 服务有多个路由 URL
Angular 资源服务也支持多个 URL。到目前为止,我们只使用了默认操作。
{
  get: {method: 'GET'},
  save: {method: 'POST'},
  query: {method: 'GET', isArray: true},
  remove: {method: 'DELETE'},
  delete: {method: 'DELETE'}
}
上面的操作是 ng resource 内置的,所以我们可以直接使用它。
  recipesService.factory('Recipe', ['$resource', function ($resource) {
        return $resource('/api/recipes/:id');
    }]);
但是我们现在需要定义我们自己的自定义操作,并为该操作提供与默认 URL 不同的 URL。
recipesService.factory('Recipe', ['$resource', function ($resource) {
        return $resource('/api/recipes/:id', {}, {
            getRecipeStep: { method: 'GET', url: '/api/recipes/step/:id' },
            saveRecipeStep: { method: 'POST', url: '/api/recipes/step' },
            removeRecipeStep: { method: 'DELETE', url: '/api/recipes/step/:id' },
            getRecipeItem: { method: 'GET', url: '/api/recipes/item/:id' },
            saveRecipeItem: { method: 'POST', url: '/api/recipes/item' },
            removeRecipeItem: { method: 'DELETE', url: '/api/recipes/item/:id' }
        });
}]);
我们仍然为食谱使用默认操作,并添加新的自定义操作 getRecipeStep、saveRecipeStep、removeRecipeStep、getRecipeItem、saveRecipeItem 和 removeRecipeItem。
所有 URL 都匹配食谱步骤和食谱项的 Web API URL。
为食谱步骤和食谱项添加新的 Angular 路由
现在我们需要在 app.js 中为食谱步骤的创建、更新、删除以及食谱条目的创建、更新、删除添加新的客户端路由。
     $routeProvider
       .when('/', {
           templateUrl: 'partials/recipes.html',
           controller: 'recipesController'
       })
       .when('/recipes/add', {
           templateUrl: 'partials/add.html',
           controller: 'recipesAddController'
       })
       .when('/recipes/edit/:id', {
           templateUrl: 'partials/edit.html',
           controller: 'recipesEditController'
       })
       .when('/recipes/delete/:id', {
           templateUrl: 'partials/delete.html',
           controller: 'recipesDeleteController'
       })
       .when('/recipes/addStep/:id', {
           templateUrl: 'partials/addStep.html',
           controller: 'recipesAddStepController'
       })
       .when('/recipes/editStep/:id', {
           templateUrl: 'partials/editStep.html',
           controller: 'recipesEditStepController'
       })
       .when('/recipes/deleteStep/:id', {
           templateUrl: 'partials/deleteStep.html',
           controller: 'recipesDeleteStepController'
       })
       .when('/recipes/addItem/:id', {
           templateUrl: 'partials/addItem.html',
           controller: 'recipesAddItemController'
       })
       .when('/recipes/editItem/:id', {
           templateUrl: 'partials/editItem.html',
           controller: 'recipesEditItemController'
       })
       .when('/recipes/deleteItem/:id', {
           templateUrl: 'partials/deleteItem.html',
           controller: 'recipesDeleteItemController'
       });
为食谱步骤和食谱项添加新的 Angular 控制器
在 recipesController.js 中注入 step 和 item 控制器。
     angular
        .module('masterChefApp')
        .controller('recipesController', recipesController)
        .controller('recipesAddController', recipesAddController)
        .controller('recipesEditController', recipesEditController)
        .controller('recipesDeleteController', recipesDeleteController)
        .controller('recipesAddStepController', recipesAddStepController)
        .controller('recipesEditStepController', recipesEditStepController)
        .controller('recipesDeleteStepController', recipesDeleteStepController)
        .controller('recipesAddItemController', recipesAddItemController)
        .controller('recipesEditItemController', recipesEditItemController)
        .controller('recipesDeleteItemController', recipesDeleteItemController);
recipesAddStepController 创建或提供允许用户向应用程序添加食谱步骤的功能。当我们添加食谱步骤时,我们需要父食谱 ID。我们将使用 &routeParams 服务来获取要创建的食谱步骤。通过从路由参数中获取 ID 来获取食谱的 ID。
recipesAddStepController.$inject = ['$scope', 'Recipe', '$location', '$routeParams'];
    function recipesAddStepController($scope, Recipe, $location, $routeParams) {
        $scope.recipeStep = new Recipe();
        $scope.recipeStep.parentId = $routeParams.id;
        $scope.addRecipeStep = function () {
            $scope.recipeStep.$saveRecipeStep(function () {
                $location.path('/');
            });
        };
    }
recipesEditStepController 创建或提供允许用户更新应用程序中的食谱步骤的功能。我们将使用 &routeParams 服务来获取要更新的食谱步骤。通过从路由参数中获取 ID 来获取食谱步骤的 ID。
    recipesEditStepController.$inject = ['$scope', 'Recipe', '$location', '$routeParams'];
    function recipesEditStepController($scope, Recipe, $location, $routeParams) {
        $scope.recipeStep = Recipe.getRecipeStep({ id: $routeParams.id });
        $scope.editRecipeStep = function () {
            $scope.recipeStep.$saveRecipeStep(function () {
                $location.path('/');
            });
        };
    }
recipesDeleteStepController 使用 $routeParams 获取 ID 并检索特定的食谱步骤。然后提供该函数来向应用程序删除食谱步骤。
    recipesDeleteStepController.$inject = ['$scope', 'Recipe', '$location', '$routeParams'];
    function recipesDeleteStepController($scope, Recipe, $location, $routeParams) {
        $scope.recipeStep = Recipe.getRecipeStep({ id: $routeParams.id });
        $scope.deleteRecipeStep = function () {
            $scope.recipeStep.$removeRecipeStep({ id: $scope.recipeStep.id }, function () {
                $location.path('/');
            });
        };
}
recipesAddItemController 创建或提供允许用户向应用程序添加食谱条目的功能。当我们添加食谱条目时,我们需要父食谱步骤 ID。我们将使用 &routeParams 服务来获取要创建的食谱条目。通过从路由参数中获取 ID 来获取食谱步骤的 ID。
recipesAddItemController.$inject = ['$scope', 'Recipe', '$location', '$routeParams'];
    function recipesAddItemController($scope, Recipe, $location, $routeParams) {
        $scope.recipeItem = new Recipe();
        $scope.recipeItem.parentId = $routeParams.id;
        $scope.addRecipeItem = function () {
            $scope.recipeItem.$saveRecipeItem(function () {
                $location.path('/');
            });
        };
}
recipesEditItemController 创建或提供允许用户更新应用程序中的食谱条目的功能。我们将使用 &routeParams 服务来获取要更新的食谱条目。通过从路由参数中获取 ID 来获取食谱条目的 ID。
    recipesEditItemController.$inject = ['$scope', 'Recipe', '$location', '$routeParams'];
    function recipesEditItemController($scope, Recipe, $location, $routeParams) {
        $scope.recipeItem = Recipe.getRecipeItem({ id: $routeParams.id });
        $scope.editRecipeItem = function () {
            $scope.recipeItem.$saveRecipeItem(function () {
                $location.path('/');
            });
        };
    }
recipesDeleteItemController 使用 $routeParams 获取 ID 并检索特定的食谱条目。然后向应用程序提供该函数以删除食谱条目。
    recipesDeleteItemController.$inject = ['$scope', 'Recipe', '$location', '$routeParams'];
    function recipesDeleteItemController($scope, Recipe, $location, $routeParams) {
        $scope.recipeItem = Recipe.getRecipeItem({ id: $routeParams.id });
        $scope.deleteRecipeItem = function () {
            $scope.recipeItem.$removeRecipeItem({ id: $scope.recipeItem.id }, function () {
                $location.path('/');
            });
        };
}
添加食谱步骤和食谱条目的所有模板
现在我们需要为食谱步骤和食谱条目创建所有模板。在 partials 文件夹中创建“addStep.html”、“editStep.html”、“deleteStep.html”、“addItem.html”、“editItem.html”和“deleteItem.html”。
1) 食谱步骤模板
在 addStep.html 中,使用 ng-submit 将数据发布到服务器。当用户按下 Save 按钮时,调用作用域函数 addRecipeStep,该函数在控制器后台将此食谱步骤对象提交到服务器。
<h1>Add a new recipe step</h1>
<div class="container-fluid">
    <form ng-submit="addRecipeStep()">
        <div class="row">
            <div class="form-group col-xs-1">
                <label for="stepNo">Step No.</label>
                <input ng-model="recipeStep.stepNo" name="stepNo" type="text" class="form-control" />
            </div>
        </div>

        <div class="row">
            <div class="form-group col-md-4 col-xs-8">
                <label for="instructions">Instructions</label>
                <input ng-model="recipeStep.instructions" name="instructions" type="text" class="form-control" />
            </div>
        </div>
        <div class="row">
            <button type="submit" class="btn btn-primary">Save</button>
            <a href="/" class="btn btn-default">Cancel</a>
        </div>
    </form>
</div>

editStep.html 更新现有的食谱步骤。输入字段通过 ng-model 指令绑定到一个作用域变量——一个对象 recipeStep。另外,在 step edit 控制器中,有一个作用域函数——editRecipeStep。
<h1>Edit Recipe Step</h1>
<div class="container-fluid">
    <form ng-submit="editRecipeStep()">
        <div class="row">
            <div class="form-group col-xs-1">
                <label for="stepNo">Step No.</label>
                <input ng-model="recipeStep.stepNo" name="stepNo" type="text" class="form-control" />
            </div>
        </div>

        <div class="row">
            <div class="form-group col-md-4 col-xs-8">
                <label for="instructions">Instructions</label>
                <input ng-model="recipeStep.instructions" name="instructions" type="text" class="form-control" />
            </div>
        </div>
        <div class="row">
            <button type="submit" class="btn btn-primary">Save</button>
            <a href="/" class="btn btn-default">Cancel</a>
        </div>
    </form>
</div>

在 deleteStep.html 中,我们将提供一个用于确认的段落。我们将提供一个按钮,该按钮调用一个作用域函数——deleteRecipeStep。它将提交一个请求到服务器以移除特定的食谱步骤。
<div class="alert alert-warning">
    <p>Do you really want to delete this recipe step?</p>
    <p> {{recipeStep.stepNo}} - {{recipeStep.instructions}}</p>
</div>
<button ng-click="deleteRecipeStep()" class="btn btn-danger">Yes</button>
<a href="/" class="btn btn-default">No</a>

2) 食谱条目模板
在 addItem.html 中,使用 ng-submit 将数据发布到服务器。当用户按下 Save 按钮时,调用作用域函数 addRecipeItem,该函数在控制器后台将此食谱条目对象提交到服务器。
<h1>Add a new recipe item</h1>
<div class="container-fluid">
    <form ng-submit="addRecipeItem()">
        <div class="row">
            <div class="form-group col-xs-4">
                <label for="name">Name</label>
                <input ng-model="recipeItem.name" name="name" type="text" class="form-control" />
            </div>
        </div>
        <div class="row">
            <div class="form-group col-md-4 col-xs-4">
                <label for="quantity">Quantity</label>
                <input ng-model="recipeItem.quantity" name="quantity" type="text" class="form-control" />
            </div>
        </div>
        <div class="row">
            <div class="form-group col-md-4 col-xs-4">
                <label for="measurementUnit">Measurement Unit</label>
                <input ng-model="recipeItem.measurementUnit" name="measurementUnit" type="text" class="form-control" />
            </div>
        </div>
        <div class="row">
            <button type="submit" class="btn btn-primary">Save</button>
            <a href="/" class="btn btn-default">Cancel</a>
        </div>
    </form>
</div>

editItem.html 更新现有的食谱条目。输入字段通过 ng-model 指令绑定到一个作用域变量——一个对象 recipeItem。另外,在 item edit 控制器中,有一个作用域函数——editRecipeItem。
<h1>Edit Recipe Item</h1>
<div class="container-fluid">
    <form ng-submit="editRecipeItem()">
        <div class="row">
            <div class="form-group col-xs-4">
                <label for="name">Name</label>
                <input ng-model="recipeItem.name" name="name" type="text" class="form-control" />
            </div>
        </div>
        <div class="row">
            <div class="form-group col-md-4 col-xs-4">
                <label for="quantity"></label>
                <input ng-model="recipeItem.quantity" name="quantity" type="text" class="form-control" />
            </div>
        </div>
        <div class="row">
            <div class="form-group col-md-4 col-xs-4">
                <label for="measurementUnit"></label>
                <input ng-model="recipeItem.measurementUnit" name="measurementUnit" type="text" class="form-control" />
            </div>
        </div>
        <div class="row">
            <button type="submit" class="btn btn-primary">Save</button>
            <a href="/" class="btn btn-default">Cancel</a>
        </div>
    </form>
</div>

在 deleteItem.html 中,我们将提供一个用于确认的段落。我们将提供一个按钮,该按钮调用一个作用域函数——deleteRecipeItem。它将提交一个请求到服务器以移除特定的食谱条目。
<div class="alert alert-warning">
    <p>Do you really want to delete this recipe item?</p>
    <p> {{recipeItem.name}}  {{recipeItem.quantity}} {{recipeItem.measurementUnit}}</p>
</div>
<button ng-click="deleteRecipeItem()" class="btn btn-danger">Yes</button>
<a href="/" class="btn btn-default">No</a>

一切都完成了。现在你可以创建、更新或删除食谱了。你将成为一名真正的特级厨师。而不仅仅是一个只会遵循他人食谱的厨师。
IE 缓存问题
最后,我想谈谈在 IE 中发生的一个缓存问题。如果我们使用 IE 运行 IIS Express,在我添加了一个名为“Roasting Duck”的新食谱后,你无法立即看到我刚刚添加的新食谱。是插入不正确吗?去检查数据库,新食谱就在那里。看起来当返回列表时,AngularJS 根本没有发送 httpget 请求到服务器,而是直接从缓存中获取结果。这就是为什么新的更新没有显示出来的原因。我们可以通过 httpProvider 来解决这个问题。在 AngularJS 应用程序的配置函数中注入 httpProvider。然后将 http 的默认缓存设置为 false,并在 http get 请求头中将 If-Modified-Since 设置为 0。
angular.module('masterChefApp').config(['$routeProvider', '$httpProvider', '$locationProvider', function ($routeProvider, $httpProvider, $locationProvider) {
        //disable http cache
        $httpProvider.defaults.cache = false;
        if (!$httpProvider.defaults.headers.get) {
            $httpProvider.defaults.headers.get = {};
        }

        $httpProvider.defaults.headers.get['If-Modified-Since'] = '0';
        //////////////////////////////////////////////////////////////////

        $routeProvider
        .when('/', {
            templateUrl: 'partials/recipes.html',
            controller: 'recipesController'
        })
        .when('/recipes/add', {
            templateUrl: 'partials/add.html',
            controller: 'recipesAddController'
        })
        .when('/recipes/edit/:id', {
            templateUrl: 'partials/edit.html',
            controller: 'recipesEditController'
        })
        .when('/recipes/delete/:id', {
            templateUrl: 'partials/delete.html',
            controller: 'recipesDeleteController'
        })
        .when('/recipes/addStep/:id', {
            templateUrl: 'partials/addStep.html',
            controller: 'recipesAddStepController'
        })
        .when('/recipes/editStep/:id', {
            templateUrl: 'partials/editStep.html',
            controller: 'recipesEditStepController'
        })
        .when('/recipes/deleteStep/:id', {
            templateUrl: 'partials/deleteStep.html',
            controller: 'recipesDeleteStepController'
        })
        .when('/recipes/addItem/:id', {
            templateUrl: 'partials/addItem.html',
            controller: 'recipesAddItemController'
        })
        .when('/recipes/editItem/:id', {
            templateUrl: 'partials/editItem.html',
            controller: 'recipesEditItemController'
        })
        .when('/recipes/deleteItem/:id', {
            templateUrl: 'partials/deleteItem.html',
            controller: 'recipesDeleteItemController'
        });

        $locationProvider.html5Mode(true);

    }]);
然后我们再试一次。效果非常好。虽然我在 Google Chrome 中没有遇到这个缓存问题,但我们仍然需要在 IE 中修复这个问题,因为 Web 应用程序应该能在所有浏览器上运行。
结论
在这篇文章中,我介绍了如何使用 angular route 来创建 SPA CRUD 应用程序。我们还讨论了如何在单个服务器端 Web API 控制器中映射多个 URL。以及相应地,如何在单个客户端 angular resource 服务中映射不同的路由。从 Maser Chef Part 3 开始,我们将开启在 Angular2 和 EntityFramework Core 上的新冒险。