
你好 B4J:用 ABMaterial 创建 Bible.Show WebApp
4.67/5 (4投票s)
使用 B4J ABMaterial 创建基于 Google Material 的 HTML5 应用。
引言
本文是我之前文章 你好 B4J:使用 Visual Basic 语法开发完整的 Java 应用程序 的延续。ABMaterial 框架 是一个名叫 Alain Bailleul(又名“alwaysbusy”)的聪明人的杰作。ABMaterial 框架将优化的 Materialize CSS 与免费编程工具 B4J (Basic4Java) 结合在一起。它允许创建不仅由于 Google 的 Material Design 而外观精美,而且可以使用来自 Anywhere Software 的强大免费工具进行编程的 Web 应用程序。你可以从这里了解更多关于 Google Material Design 的信息。
我大约两个月前开始接触这个框架。该框架有一些组件,你可以使用 B4J 创建它们,输出是一个完整的 HTML5、JavaScript、CSS3 应用程序,它使用 WebSocket,所有这些都基于 Java 的 Jetty Web 服务器。你不需要自己键入任何 HTML5 代码,你使用相同的类似 VB 的语法,像这样开发你的应用程序。
这个 Bible.Show WebApp 的内容是直接从面向对象方式编写的源代码编译而来的。根据他们的演示应用程序,ABMaterial Web 应用程序是桌面、平板电脑和手机感知的。根据屏幕大小,你的应用程序可能会显示不同。例如,当你在桌面上调整网站大小时,可以编程让左侧的侧边栏消失,在顶部栏中显示一个“汉堡”按钮。
要理解 ABMaterial 框架,需要考虑网格/组件和主题。网格/组件定义 WebApp 的结构和可以放置在页面中的组件。主题可用于定义应用程序中组件的外观,因为它使用颜色编码和强度,以及这些组件的 z 深度。
我将首先引导你完成使用 ABMaterial 框架创建 WebApp 的过程。
背景
我假设你已经阅读了我之前的文章《你好 B4J》。这些 WebApp 的开发将基于该工具。但是,为了开发 ABMaterial WebApp,你需要获取框架的副本。可以从这个 链接 获取免费版本。你也可以从这个 链接 查看该框架的现场演示。它是一个令人印象深刻的工具,Bible.Show 就是用它开发的。
每个 ABMaterial webapp 都基于 7 个文件,它们是:
1. 你的 B4J 项目的 .b4j 项目文件
2. ABMApplication.bas - 项目的主应用程序文件
3. ABMCacheScavenger.bas - 这是版本 2 及更高版本的模块,用于缓存你的网页
4. ABMPageTemplate.bas - 这是所有页面都基于的模块
5. ABMSessionCreator.bas - 此模块用于你的 Web 会话管理
6. ABMShared.bas - 此模块可以包含你可以在所有其他模块中使用的源代码
7. ABMUploadHandler.bas - 此模块用于管理文件上传到你的站点,对于具有上传功能的应用程序来说是强制性的。
然而,对于任何想要掌握这个框架的人来说,彻底审查演示非常重要。现在,让我们使用演示说明来创建一个简单的应用程序。
首先
1. 设置
下载 ABMaterial Framework 后,你会发现一些文件夹:Library 和一些 Demo Projects。首先,将 Library 文件夹中的所有库文件(如 ABMaterial.jar 和 ABMaterial.xml)复制到你的 B4J 库文件夹。
接下来,复制 Templates 文件夹并将其重命名为你的新应用程序的名称,例如 HelloABM。进入该文件夹并将 Template.b4j 和 Template.b4j.meta 都重命名为你的应用程序名称。例如:Template.b4j -> HelloABM.b4j 和 Template.b4j.meta -> HelloABM.b4j.meta。现在你已准备好编写你的 ABMaterial Web 应用程序了!
你也可以打开 Template.b4j 项目并运行它,作为你的第一个实验。让我们来看看 Template.b4j 文件中的 AppStart 方法。
Sub AppStart (Args() As String)
 ' the user needs to login
 'ABMShared.NeedsAuthorization = True
 ' Build the Theme
 ABMShared.BuildTheme("mytheme")
 ' create the app
 Dim myApp As ABMApplication
 myApp.Initialize
 ' create the pages
 Dim myPage As ABMPageTemplate
 myPage.Initialize
 ' add the pages to the app
 myApp.AddPage(myPage.Page)
 ' start the server
 myApp.StartServer(srvr, "srvr", 51042)
 ABMShared.RedirectOutput(File.DirApp, "logs.txt")
 StartMessageLoop
End Sub
当你的应用被编译(在 B4J 中按下运行)或在 b4j 之外时,生成的输出将在你的 Objects 文件夹中,其中会有一个 www 文件夹、一个 <AppName>.jar 文件和一个 copymewithjar.needs 文件。这些是你的 VPS 中运行你的应用所需的组件。
1. 你在服务器上启动编译后的 .jar 文件(例如,java -jar MyApp.jar)。这与在 b4j IDE 中点击运行相同。
2. 用户在其浏览器中加载应用程序(例如,https://:51042/MyApp)。你可以将端口名称更改为任何你想要的端口。还要确保防火墙已打开此端口以进行连接。在 B4J 的开发模式下,这应该可以正常工作。
3. WebApp 将用户重定向到 ABMApplication 中定义的 InitialPage。
4. 如果此用户不存在会话,则进入 ABMSessionCreator 类。
5. 创建页面类的新实例(调用 Initialize,我们调用包含页面 GRID 结构的 BuildPage() 方法)。
6. 当浏览器中页面的 DOM 完全加载时,调用 WebSocket_Connected
如果是新会话,我们初始化页面对象,调用 ConnectPage() 并将所有内容保存到缓存中。
如果存在现有会话,则从缓存中恢复页面和所有全局变量。
7. 所有内容都发送到浏览器。我们通过执行 page.Refresh 来完成此方法,并通过调用 page.FinishedLoading 告诉浏览器我们已完成。
8. 当用户离开页面时,会触发 beforeunload 事件。
9. 调用 WebSocket_Disconnected。
10. 如果一段时间后没有重新连接,服务器将销毁会话。缓存清除器将进行一些清理。
如果用户在页面仍在缓存中时返回应用程序,它将继续使用缓存的页面。如果缓存的页面消失,用户将被重定向到应用程序的入口点。请注意,当用户仍然连接到互联网时,浏览器会定期向服务器发送“心跳”以保持会话“活动”。
2. 现在你已准备好编写你的第一个 ABMaterial WebApp
有几件事是你的应用程序个性化所必需的(Mx,即强制性),还有一些是可选的(Ox)。
(M1):在 B4J 中,转到 Project -> Build Configurations 并将包名更改为你的应用程序名称,例如 com.b4j.HelloABM。
(M2):在 ABMApplication 模块中,更改变量 Title 和描述来描述你的应用程序。它们将显示在浏览器选项卡中。
(M3):将变量 AppName 更改为你的应用程序名称(区分大小写!)。进入 ABMPageTemplate 类并将 AppName 变量设置为完全相同的名称,例如 HelloABM。
(M4):创建一个新类:项目 -> 添加新模块 -> 类模块 -> 服务器 WebSocket 并命名它(例如“MyFirstPage”)。将 ABMTemplatePage 中的所有代码复制到你新创建的类中,并将 Name 变量更改为你给新类的名称。在我们的示例中是“MyFirstPage”(区分大小写!)。
(M5):返回 ABMApplication 并将变量 InitialPage 更改为你新创建的页面。在我们的示例中是“MyFirstPage”。
(M6):现在我们所要做的就是将新页面添加到应用程序中。在 Main 模块中,创建新页面的实例,初始化它并将其添加到应用程序中。(你可以删除有关 ABMPageTemplate 的示例代码行)。
(O2):最好现在第一次运行程序。所有需要的文件夹都将在 www 文件夹中为你创建。例如,图片文件夹,你可以在其中放置页面所需的所有图片。打开你的文件浏览器并检查它创建的文件夹结构和文件,以熟悉 ABMaterial 应用程序的构建方式。请注意,有一个名为 donotdelete.conn 的文件。好吧,不要删除此文件。它是一个空文件,用于检查从浏览器到服务器的连接。如果没有连接(它无法下载此文件),那么应用程序可以以更友好的方式做出反应。
就这样。你可以开始创建 ABMaterial Web 应用程序了!对于你想要制作的每个新页面,只需重复步骤 (M4) 到 (M6)。
3. ABMaterial WebApp 的组件
在引言中,我谈到了网格/组件和主题。ABMaterial 使用“主题”来设置诸如背景颜色、文本颜色、Z 深度等属性到 ABMComponents。在大多数情况下,所有这些都可以在 ABMShared 模块中创建,用于所有将适用于你的应用程序页面的主题。你可以在每个页面中设置该页面专门需要的主题。例如,这是 ABMShared 中用于页面主题的部分代码。
Public Sub BuildTheme(themeName As String)
    MyTheme.Initialize(themeName)
    ' the page theme
    MyTheme.Page.BackColor = ABM.COLOR_WHITE
    MyTheme.Page.BackColorIntensity = ABM.INTENSITY_NORMAL
    MyTheme.Page.ConnectedIndicatorColor = ABM.COLOR_GREEN
    MyTheme.Page.ConnectedIndicatorColorIntensity = ABM.INTENSITY_NORMAL
    MyTheme.Page.DisconnectedIndicatorColor = ABM.COLOR_RED
    MyTheme.Page.DisconnectedIndicatorColorIntensity = ABM.INTENSITY_NORMAL
    MyTheme.Page.PlaceHolderColor = ABM.COLOR_GREY
    MyTheme.Page.PlaceHolderColorIntensity = ABM.INTENSITY_NORMAL
从上可知,当此主题应用于页面时,页面的背景颜色将是白色,强度正常,连接指示器绿色,断开连接指示器红色,输入组件的占位符灰色。所有其他组件都将遵循相同的方法。每个组件都有自己的主题属性,你只需更改你想要更改的属性,因为有一些默认属性。我在这里编写了一份详细的 ABMaterial 组件主题快速参考 这里。
创建主题是通过 Theme.AddxxxxxxTheme("Name") 方法完成的。你给主题的名称稍后可以在 ABMComponent 的 ThemeName 参数中使用。接下来,你使用 Theme.xxxxxx("name") 方法来设置背景颜色、z 深度、对齐方式等属性。例如,如果我们要有一个深红色按钮,我们将在 ABMShared 中像这样定义它的主题。
// darkred button
theme.AddButtonTheme("darkred")
theme.Button("darkred").BackColor = ABM.COLOR_RED
theme.Button("darkred").BackColorIntensity = ABM.INTENSITY_DARKEN1
然后我们可以在页面中像这样创建按钮。
Dim btn1 As ABMButton
btn1.InitializeRaised(page, "btn1", "", "", "BUTTON", "darkred")
page.Cell(2,1).AddComponent(btn1)
在这个按钮定义中,darkred 参数作为主题名称传递,这将使按钮具有深红色。你可能已经注意到,上面代码的最后一部分以 page.Cell(2,1) 开头,这告诉 ABMaterial 编译器将该按钮放在 R2C1,即第 2 行第 1 列。这便将我们带到了 Grid。
在将任何 ABMComponents 放置到页面之前,需要设计页面网格。在介绍中我提到 ABMaterial 是基于经过优化的 Material CSS 版本的。本质上,这更像是 BootStrap 网格,但已针对 ABMaterial 进行了调整。
3.1 网格
ABMaterial 中的网格由行和列组成。每行必须有 12 个大小相等的列。这有助于设计页面的响应式布局。可以为小型 (S-mall)、中型 (M-edium) 和大型 (L-arge) 设备定义列。
首先,你需要向页面添加行和列,这些行和列将承载你的组件。有两种方法可以做到这一点。
AddRows(numberOfRows, centerInRow, themeName)
你指定行数,行是否应在页面上居中,并传递要使用的主题。顶部和底部默认边距设置为 20 像素,但是 AddRows 将你的 TopMargin 设置为 0,BottomMargin 设置为 20 像素。第二种方法是 AddRowsM。
AddRowsM(numberOfRows,centerInPage,marginTopPx,marginBottomPx,themeName)
顾名思义,使用此方法,你需要为行指定顶部和底部边距。例如,如果你想向页面添加 10 行,你将 numberOfRows 传递为 10。
接下来将是向你的行添加列。有四种方法可以向每行添加列:AddCells12、AddCellsOSMP、AddCellsOS、AddCells12MP。 控制方法或所有其他方法的基础方法是 AddCellsOSMP。
O - 代表偏移量 (OS,OM,OL)
S - 代表大小 (SS,SM,SL)
M - 代表顶部和底部边距
P - 代表左右填充。
传递偏移量和大小时,它们遵循小、中、大的顺序,分别用于小型设备、中型设备和大型设备。
AddCellsOSMP(numberOfCells,offsetSmall,offsetMedium,offsetLarge,sizeSmall,sizeMedium,sizeLarge,marginTopPx,marginBottomPx,paddingLeftPx, paddingRightPx,themeName)
让我们看看下图 1 中每个列添加方法对传递变量的作用。
图 1:网格方法

从上面可以看出,当我们运行 AddCells12 时,对于小型、中型和大型设备,将添加跨越 12 列的单元格数。对于 AddCellOS,必须指定偏移量和大小,对于 AddCells12MP,将添加每个跨越 12 列的单元格,并且用户必须指定边距和填充。
下面的示例将添加 1 行,其中包含 2 个单元格,每个单元格跨越 6 列,适用于所有设备,包括小型、中型和大型设备。
page.AddRowsM(1,True,0,0, "").AddCellsOS(2,0,0,0,6,6,6,"")
图 2:1 行,2 个单元格,每个跨越 6 列

我已在此处撰写了一篇关于此内容的深度文章 这里。这是我对 ABMaterial 网格的看法。
举个例子,让我们看看 Bible.Show WebApp 的一个页面,即 scriptures 页面。我这样定义了我的网格:
page.AddRows(2, True, "").AddCells12(1, "")
page.AddRows(10, True, "").AddCellsOS(2, 0, 0, 0, 6, 3, 3, "").AddCellsOS(2, 0, 0, 0, 6, 3, 3, "")
page.AddRows(1, True, "").AddCells12(1, "")
page.AddRows(10, True, "").AddCellsOS(2, 0, 0, 0, 6, 3, 3, "").AddCellsOS(2, 0, 0, 0, 6, 3, 3, "")
这总共有大约 23 行。我还想显示旧约和新约。在小型设备上,它看起来大致如下图 3 所示。
图 3:小型设备上的经文

图 4:中型和大型设备上的经文

从上面的网格定义来看,我们添加了 10 行,其中包含 2 个单元格,每个单元格在小型设备上跨越 6 列,这确保了对于小型设备,使用了 2 列,因为总共等于 12 个空间。小型设备的第二列将被换行到下一行。对于中型和大型设备,我们有 2 列占据 3 个空间,2 x 3 = 6 加上另外 6 个,总共 12 个。
在创建应用程序时,你也可以使用此调用打开网格。
page.ShowGridInfo = True
这会导致你的页面像下图 5 一样显示。
图 5:显示网格

因此,当你添加组件时,你会参考 page.Cell(6,2)、page.Cell(4,4) 等。
从上面的例子中,在添加的 10 行中,我们只使用了 4 列,在小型设备上,只显示了两列,因为每列宽 6 个空间,下一列被包裹在前一列下方。对于中型和大型设备,如你所见,显示了四列,每列占用 3 个空间。4 x 3 = 12。
幸运的是,ABMaterial 的 2.20 版本提供了一个网格设计器,你可以用它来定义你的网格。这会生成源代码,你可以在 BuildGrid 方法之前将其插入你的页面中。
还有一个 Page.DebugPrintGrid 方法,它会在调试器中记录你的网格。回顾一下,让我们看看下面图 6 中各种网格构建方法以及它们可以做什么。
图 6:各种网格方法

3.2 组件
在构建 Bible.Show WebApp 时,我使用了上面“首先要做的事”第 2 条中解释的相同方法。这个 Web 应用程序大约有 19 个页面,执行各种操作。Web 应用程序中的所有内容都从嵌入在应用程序本身的 SQLite 数据库中读取。该数据库包含我用来显示内容以满足应用程序要求的各种信息。因此,没有用户输入。
3.2.1 欢迎页面
应用启动后,它会打开欢迎页面。这是在 ABMApplication 类模块中设置为应用 InitialPage 的页面。
Private InitialPage As String = "welcome/welcome.html" '<-------- First page to load
欢迎页面有一些标签和图像滑动器来显示应用程序的各种图像。你会注意到每个页面左上角的徽标。我用透明度创建了该徽标,并将其保存到生成的应用程序的 images 文件夹中。对于简单的徽标,最好使用 236 x 49 的宽度和高度。我还为应用程序创建了尺寸为 152px、144px 和 32px 的图标,并将它们也放在我的 images 文件夹中。这些是在 ABMApplication 模块的 Initialize 方法中定义的。
ABM.AddAppleTouchIcon("152.png", "152x152")
ABM.AddMSTileIcon("144.png", "144x144")
ABM.AddFavorityIcon("32.png", "32x32")
在欢迎页面中,我将页面名称更改为 welcome,在 BuildPage 中,将 htmlname 更改为 welcome.html。应用程序中的每个页面都有一个导航栏。由于每个页面在运行时都会动态生成为 html,因此应该有一个方法在运行时创建每个页面结构。由于页面已缓存,因此速度障碍不大。查看每个页面的 BuildPage 方法,我们有以下内容。
public Sub BuildPage()
    ' initialize the theme
    BuildTheme
    ' initialize this page using our theme
    page.InitializeWithTheme(Name, "/ws/" & ABMShared.AppName & "/" & Name, False, ABMShared.SessionMaxInactiveIntervalSeconds, theme)
    page.ShowLoader=True
    page.ShowLoaderType=ABM.LOADER_TYPE_MANUAL
    page.PageHTMLName = "welcome.html"
    page.PageTitle = "Bible.Show"
    page.PageDescription = ""
    page.PageKeywords = ""
    page.PageSiteMapPriority = "0.5"
    page.PageSiteMapFrequency = ABM.SITEMAP_FREQ_MONTHLY
    'page.UseFontAwesome = False
    page.DisableBackButton = False
    page.UseGoogleAnalytics(ABMShared.TrackingID, Null) ' IMPORTANT Change this to your own TrackingID !!!!!!!
    page.GoogleMapsAPIExtras = ABMShared.GoogleMapsAPIExtras
    page.IsFixedFooter = True
    page.DisablePageReloadOnSwipeDown = True
    page.PageLanguage = "en"
    page.SetFontStack("arial,sans-serif")
    page.PaddingBottom = 200
    page.AlwaysShowVerticalScrollBar = False
    ' adding a navigation bar
    Dim sbtopimg As ABMImage
    sbtopimg.Initialize(page, "sbtopimg", "../images/logo.png", 1)
    sbtopimg.SetFixedSize(236, 49)
    page.NavigationBar.Initialize(page, "navBar", ABM.SIDEBAR_MANUAL_HIDEMEDIUMSMALL, "Wamkelekile", True, True, 330, 49, sbtopimg, ABM.COLLAPSE_ACCORDION, "theblood")
    page.NavigationBar.ActiveSideReturnName = "welcome"
    page.NavigationBar.SideBarLogoHeight = 49
    page.NavigationBar.TopBarDropDownConstrainWidth = True
    ' you must add at least ONE dummy item if you want to add items to the topbar in ConnectNaviagationBar
    page.NavigationBar.AddTopItem("DUMMY", "DUMMY", "", "", False)
    ' you must add at least ONE dummy item if you want to add items to the sidebar
    page.NavigationBar.AddSideBarItem("DUMMY", "DUMMY", "", "")
    page.ShowGridInfo = False
    ' create the page grid
    page.AddRows(3, True, "").AddCells12(1, "")
    page.BuildGrid 'IMPORTANT once you loaded the complete grid AND before you start adding components
    ABMShared.BuildFooterFixed(page, 200, ABM.VISIBILITY_ALL)
    ABMShared.ConnectFooter(page, "Conceptualized, designed and developed by Mashy{BR}Powered by ABMaterial", "MashCreationz Copyright @2014-2016{BR}Email: <a href="mailto:anele@mbangas.com">anele@mbangas.com</a>")
    ' add a error box template if the name is not entered
    page.AddModalSheetTemplate(ABMShared.BuildWrongInputModalSheet(page))
    ' add a modal sheet template for a yes no msgbox
    page.AddModalSheetTemplate(ABMShared.BuildMsgBoxYesNo(page))
    ' add a modal sheet template for a  msgbox
    page.AddModalSheetTemplate(ABMShared.BuildMsgBox(page))
End Sub
ShowLoader 表示在页面上显示一个旋转器,并且由于我们是手动创建组件,因此旋转器模式将是手动的,我们将通过代码将其隐藏。你的应用程序还可以链接到 Google 跟踪以用于统计目的,因此你可以获取你的 TrackingID 并在此处使用。这也可以包括 Google 地图跟踪 ID(如果你有的话)。
导航栏添加了一些虚拟项,这些项在运行时被清除。网格中添加了 3 行,以便我们可以放置组件。此页面还添加了一个页脚。
当页面连接时,一些组件会添加到页面中。请记住,页面组件是动态的,因此可以在运行时更改它们的属性。
Public Sub ConnectPage()
    'connect navigation bar
    ConnectNavigationBar
    'add components for the page
    page.Cell(2,1).AddComponent(ABMShared.BuildHeader(page, "par151", "Wamkelekile (Welcome) to the Bible.Show WebApp"))
    Dim imgsld153 As ABMImageSlider
    imgsld153.Initialize(page, "imgsld153", "myslider")
    page.Cell(3,1).AddComponent(imgsld153)
    Dim lbl152 As ABMLabel
    lbl152.Initialize(page, "lbl152", "Bible.Show is the brainchild of Anele 'Mashy' Mbanga. This was the first concept app I decided on when I started developing Android Apps and was then released on the store. With the advent of the ABMaterial Framework, a possibility availed itself for me to start there too as a first step for everything in putting God first. I hope you enjoy using this app as much as I enjoyed creating it. Should you need an app developed, please dont hestitate to contact me on email <a href="mailto:anele@mbangas.com">anele@mbangas.com</a>. Be blessed.", ABM.SIZE_PARAGRAPH, False, "")
    page.Cell(2,1).AddComponent(lbl152)
    RefreshOnLoad_imgsld153
    AdminAccess
    page.Refresh ' IMPORTANT
    ' NEW, because we use ShowLoaderType=ABM.LOADER_TYPE_MANUAL
    page.FinishedLoading 'IMPORTANT
    page.RestoreNavigationBarPosition
End Sub
通过这种方法,调用 ConnectNavigationBar 方法,该方法会在页面的左侧边栏上创建所有元素。添加了一个标题组件、一个带有附加标签的图像滑动器,以介绍 Bible.Show。然后加载图像滑动器的内容。
Public Sub ConnectNavigationBar()
    ' Clear the dummies we created in BuildNavigationBar
    page.NavigationBar.Clear
    'connect the items in the navigation bar
    page.NavigationBar.AddSideBarDivider("")
    page.NavigationBar.AddSideBarComponent("pagewelcome", ABMShared.BuildSideBarComponent(page, "welcome", "../images/reading.png", "Wamkelekile", "Welcome to Bible.Show"),"../welcome/welcome.html")
    page.NavigationBar.AddSideBarDivider("")
    page.NavigationBar.AddSideBarComponent("pagescripture", ABMShared.BuildSideBarComponent(page, "scripture", "../images/openbook80.png", "Scripture", "Select book, chapter to read"),"../scripture/scripture.html")
    page.NavigationBar.AddSideBarDivider("")
    page.NavigationBar.AddSideBarComponent("pagebiblepromises", ABMShared.BuildSideBarComponent(page, "biblepromises", "../images/promises.png", "Bible Promises", "Topic based verses"),"../biblepromises/biblepromises.html")
    page.NavigationBar.AddSideBarDivider("")
    page.NavigationBar.AddSideBarComponent("pageparables", ABMShared.BuildSideBarComponent(page, "parables", "../images/parables.png", "Parables", "Parables of Jesus Christ"),"../parables/parables.html")
    page.NavigationBar.AddSideBarDivider("")
    page.NavigationBar.AddSideBarComponent("pagemiracles", ABMShared.BuildSideBarComponent(page, "miracles", "../images/miracles.png", "Miracles", "Miracles of Jesus Christ"),"../miracles/miracles.html")
    page.NavigationBar.AddSideBarDivider("")
    page.NavigationBar.AddSideBarComponent("pagelife", ABMShared.BuildSideBarComponent(page, "life", "../images/life.png", "Life", "Living life scriptures"),"../life/life.html")
    page.NavigationBar.AddSideBarDivider("")
    page.NavigationBar.AddSideBarComponent("pagegreatchapters", ABMShared.BuildSideBarComponent(page, "greatchapters", "../images/flagwhite.png", "Great Chapters", "Great chapters of the bible"),"../greatchapters/greatchapters.html")
    page.NavigationBar.AddSideBarDivider("")
    page.NavigationBar.AddSideBarComponent("pagegreatstories", ABMShared.BuildSideBarComponent(page, "greatstories", "../images/greatstories.png", "Great Stories", "Great stories of the bible"),"../greatstories/greatstories.html")
    page.NavigationBar.AddSideBarDivider("")
    page.NavigationBar.AddSideBarComponent("pagegreatverses", ABMShared.BuildSideBarComponent(page, "greatverses", "../images/greatverses.png", "Great Verses", "Great verses of the bible"),"../greatverses/greatverses.html")
    page.NavigationBar.AddSideBarDivider("")
    page.NavigationBar.AddSideBarComponent("pagequalities", ABMShared.BuildSideBarComponent(page, "qualities", "../images/positive.png", "Qualities", "Positive & Negative Qualities"),"../qualities/qualities.html")
    page.NavigationBar.AddSideBarSubItem("qualities", "pmq", "Bible.Show", "mdi-action-thumb-up", "../pmq/pmq.html")
    page.NavigationBar.AddSideBarDivider("")
    page.NavigationBar.AddSideBarComponent("pagebibleinpictures", ABMShared.BuildSideBarComponent(page, "bibleinpictures", "../images/picture.png", "Bible in Pictures", "See the bible in pictures"),"../bibleinpictures/bibleinpictures.html")
    'refresh the navigation bar
    page.NavigationBar.Refresh ' IMPORTANT
End Sub
侧导航项链接到应用程序中的每个页面。每次选择一个项时,应用程序都会导航到该页面。你会注意到在应用程序中,许多方法都引用自 ABMShared。如前所述,我们使用 ABMShared 来托管应用程序中的通用代码。请注意,你可以在 ABMShared 中定义 ConnectNavigatioBar 方法,然后从你的页面中调用它,将 page As ABMPage 参数传递给它。BuildPage 中的 NavigationBar 创建代码也是如此。
你可能已经注意到,每个组件都有一个 Initialize 方法来创建它。不过,有些组件有多个初始化方法来初始化它们。那是后话了。所需要的只是知道每个组件应该如何初始化以及设置哪些属性才能使其工作。
由于 ImageSlider 在运行时加载,调用它将从文件夹中添加图像,所有这些信息都基于表内容。滑动条的每张图片都有一个标题、一个副标题和一个图片链接,以及它将是哪种类型的幻灯片。我们用于此滑动条的刷新方法从数据库中读取这些内容,然后更新 ABMImageSlider。
'Refresh the contents of the ABMImageSlider during runtime.
Private Sub RefreshOnLoad_imgsld153()
    'Get access to the component in the page.
    Dim imgsld153 As ABMImageSlider = page.Component("imgsld153")
    'Define list details to load to the imageslider
    Dim results As List
    Dim resCnt As Int
    Dim resTot As Int
    Dim resMap As Map
    'The parent folder for the images
    Dim folderPath As String = "../images/"
    'The default extension for each image file
    Dim extension As String = ".png"
    Dim imgFile As StringBuilder
    Dim img As String
    'variable to hold the image field
    Dim imgField As String = ""
    'variable to hold the TitleField
    Dim titleField As String = ""
    'variable to hold the SubTitleField
    Dim subTitleField As String = ""
    'Add a spinner to the page
    page.Pause
    'Get connection from current pool if MySQL/MSSQL or SQLite
    Dim jSQL As SQL = ABMShared.SQLGet
    'Get the records as a list of maps from the db
    results = ABMShared.SQLExecuteMaps(jSQL,"select * from intro", Null)
    'Close the connection to the database
    ABMShared.SQLClose(jSQL)
    'Loop throught each record read and process it
    resTot = results.size - 1
    For resCnt = 0 To resTot
        'Get the record map
        resMap = results.get(resCnt)
        imgField = resMap.getdefault("image","")
        titleField = resMap.getdefault("title","")
        subTitleField = resMap.getdefault("subtitle","")
        'Build the image path
        imgFile.Initialize
        imgFile.Append(folderPath)
        imgFile.Append(imgField)
        img = imgFile.ToString
        img = ABMShared.FixImage(img,extension)
        imgsld153.AddSlideImage(img,titleField,subTitleField,ABM.IMAGESLIDER_RIGHT)
    Next
    page.Resume
End Sub
BuildPage 中的图像滑块使用 Initialize 创建,并定义了一个变量名 imgsld153,因此使用此方法,我们需要通过...访问组件。
Dim imgsld153 As ABMImageSlider = page.Component("imgsld153")
然后在此控件中运行 AddSlideImage 以添加图像。在应用程序执行期间,通过此调用在 AppStart 中与 SQLite 数据库建立了连接。
ABMShared.InitializeSQLite(File.DirApp, "bibleshow.db", True)
因此,在分发应用程序时,也请将 bibleshow.db 文件包含在 Objects 文件夹中。上面的方法获取与数据库的开放连接,对数据库执行 SQL 查询,并返回以 Map 格式表示的记录列表。Map 的工作方式与 VB 中的 Dictionary 对象相同,具有键和值。由 ExecuteMaps 返回的所有字段名称始终为小写。使用 GetDefault 的目的是,当记录字段包含 NULL 时,返回一个空字符串。
如你所见,应用程序中的大多数方法(如所示)从数据库中读取内容并显示它。这就是此处应用的方法论。当页面运行时,它会像图 7 中那样显示。
图 7:欢迎

ABMaterial WebApps 的默认主题是浅蓝色,为了使页脚和导航栏呈现深红色,我为它们各创建了一个主题。
MyTheme.AddNavigationBarTheme("theblood")
MyTheme.NavigationBar("theblood").topbarbackcolorintensity = ABM.INTENSITY_DARKEN4
MyTheme.NavigationBar("theblood").sidebarwavescircle = True
MyTheme.NavigationBar("theblood").topbarbackcolor = ABM.COLOR_RED
MyTheme.NavigationBar("theblood").topbarwavescircle = True
你可以探索随附的 ABMShared 类模块,以了解这是如何完成的。
3.2.2 书籍和章节
图 8:书籍

图 9:章节

书籍和章节页面遵循相同的方法。当用户选择 侧边栏 中的“经文”链接时,他们可以访问书籍。应用程序根据选择的约章读取相关书籍,并以“芯片”形式显示它们。我已经在上面解释了与此页面相关的网格。现在让我们看看 ABMChips 是如何加载的。
'Create new ABMChips during runtime.
Private Sub RefreshOnLoad_chpOldTestament()
    'Define list details to load to the chips
    Dim results As List
    Dim resCnt As Int
    Dim lsKey As String
    Dim resTot As Int
    Dim resMap As Map
    Dim resJSON As String
    Dim irow As Int = 3
    Dim icell As Int = 1
    'variable to hold the idfield
    Dim idField As String
    'variable to hold the textfield
    Dim textField As String
    'Read arguments from LocalStorage (if any)
    'Add a spinner to the page
    page.Pause
    'Get connection from current pool if MySQL/MSSQL or SQLite
    Dim jSQL As SQL = ABMShared.SQLGet
    'Get the records as a list of maps from the db
    results = ABMShared.SQLExecuteMaps(jSQL,"select * from books where BookID <= 39 order by BookID", Null)
    'Close the connection to the database
    ABMShared.SQLClose(jSQL)
    'Loop throught each record read and process it
    resTot = results.size - 1
    For resCnt = 0 To resTot
        'Get the record map
        resMap = results.get(resCnt)
        'convert map to json
        resJSON = ABMShared.Map2Json(resMap)
        idField = resMap.getdefault("bookid","")
        textField = resMap.getdefault("bookname","")
        'Save record to LocalStorage
        lsKey = "Books" & idField
        ABMShared.LocalStorageSave(page, lsKey, textField)
        Dim chpOldTestament As ABMChip
        textField = textField.Replace(" ", "{NBSP}")
        chpOldTestament.Initialize(page, idField, textField, False, "bloodred")
        chpOldTestament.Image = "../images/openbook80.png"
        chpOldTestament.Tag = resJSON
        page.Cell(irow,icell).AddArrayComponent(chpOldTestament, "chpOldTestament")
        icell = icell + 1
        If icell = 5 Then
            irow = irow + 1
            icell = 1
        End If
    Next
    page.Resume
End Sub
从上面可以看到,我们从第 3 行第 1 格开始加载每个芯片,当我们在添加芯片的第 4 个格时,我们将下一个芯片添加到下一行。数据库连接与 Books 表建立,加载 BookID <= 39 的记录。读取书号和书名,并使用 images 文件夹中的 openbook80.png 图像添加一个 ABMChip 项目。另请注意传递给每个芯片组件的主题。每个芯片组件在添加时都会将记录详细信息保存在标签中,因为我们希望在选择芯片时访问它。
现在,当每个芯片被选中时,它会像这样被处理。
'An ABMChip has been clicked
Public Sub chpOldTestament_Clicked(Target As String)
    Dim chip As ABMChip = page.Component(Target)
    'Read the chip tag property
    Dim Tag As String = chip.Tag
    'Convert the tag to a map
    Dim chipMap As Map = ABMShared.Json2Map(Tag)
    'Read the id and text fields
    Dim idField As String = chipMap.GetDefault("bookid", "")
    Dim textField As String = chipMap.GetDefault("bookname", "")
    'Save to LocalStorage
    ABMShared.LocalStorageSave(page, "BookID", idField)
    ABMShared.LocalStorageSave(page, "BookName", textField)
    ABMShared.NavigateToPage(ws, ABMPageId, "../chapters/chapters.html")
End Sub
在上面的 ConnectPage 代码中,每个标签和图像滑动器都使用 AddComponent 方法添加。这里的芯片使用 AddArrayComponent 方法创建。这是因为我们正在创建多个芯片,并且我们希望它们具有相同的事件,因此使用 AddArrayComponent。
当每个芯片被选中时,我们读取其中包含我们选择的书籍的 bookid 和 bookname 的 tag 属性。然后这些被保存到所用设备的 LocalStorage 中,以便以后检索。完成后,应用程序会显示章节页面。例如,上面我们选择了创世纪,一旦发生这种情况,创世纪书中的章节就会被加载。
章节模块的 ConnectPage 已定义如下:
Public Sub ConnectPage()
    'connect navigation bar
    ConnectNavigationBar
    Dim sbTitle As StringBuilder
    sbTitle.Initialize
    Dim BookName As String
    BookName = ABMShared.LocalStorageRead(page, "BookName")
    sbTitle.Append(BookName)
    sbTitle.Append(" ")
    page.NavigationBar.Title = sbTitle.ToString.Trim
    'add components for the page
    RefreshOnLoad_chapters
    AdminAccess
    page.Refresh ' IMPORTANT
    ' NEW, because we use ShowLoaderType=ABM.LOADER_TYPE_MANUAL
    page.FinishedLoading 'IMPORTANT
    page.RestoreNavigationBarPosition
End Sub
之前保存的详细信息从 LocalStorage 中读取,然后导航栏标题用选定的 BookName 更新,然后调用 RefreshOnLoad_chapters 方法。该方法使用之前从经文页面选择的 BookID 从 Book 表中读取记录,然后创建芯片。然后当选择一个章节芯片时,读取内容并显示诗歌页面。
'An ABMChip has been clicked
Public Sub chapters_Clicked(Target As String)
    Dim chip As ABMChip = page.Component(Target)
    'Read the chip tag property
    Dim Tag As String = chip.Tag
    'Convert the tag to a map
    Dim chipMap As Map = ABMShared.Json2Map(Tag)
    'Read the id and text fields
    Dim idField As String = chipMap.GetDefault("chapter", "")
    Dim textField As String = chipMap.GetDefault("chapter", "")
    'Save to LocalStorage
    ABMShared.LocalStorageSave(page, "Chapter", idField)
    ABMShared.LocalStorageSave(page, "Chapter", textField)
    ABMShared.NavigateToPage(ws, ABMPageId, "../verses/verses.html")
End Sub
3.2.3 经文
正如你可能猜到的那样,书号、书名、所选章节都从已处理的芯片中读取。导航栏更新后,适用于本章的经文内容加载到一个标签控件中。
Public Sub ConnectPage()
    'connect navigation bar
    ConnectNavigationBar
    Dim sbTitle As StringBuilder
    sbTitle.Initialize
    Dim BookName As String
    BookName = ABMShared.LocalStorageRead(page, "BookName")
    sbTitle.Append(BookName)
    sbTitle.Append(" ")
    Dim Chapter As String
    Chapter = ABMShared.LocalStorageRead(page, "Chapter")
    sbTitle.Append(Chapter)
    sbTitle.Append(" ")
    page.NavigationBar.Title = sbTitle.ToString.Trim
    'add components for the page
    Dim lblverse As ABMLabel
    lblverse.Initialize(page, "lblverse", "", ABM.SIZE_PARAGRAPH, False, "")
    page.Cell(2,1).AddComponent(lblverse)
    RefreshOnLoad_lblverse
    AdminAccess
    page.Refresh ' IMPORTANT
    ' NEW, because we use ShowLoaderType=ABM.LOADER_TYPE_MANUAL
    page.FinishedLoading 'IMPORTANT
    page.RestoreNavigationBarPosition
End Sub
显示诗句的标签添加到第 2 行第 1 列。我发现有时从第 1 行开始添加组件并不能制作出美观的应用程序。
并显示经文...
Private Sub RefreshOnLoad_lblverse()
    'Define list details to load to the content
    Dim results As List
    Dim resCnt As Int
    Dim lsKey As String
    Dim resTot As Int
    Dim resMap As Map
    Dim sbLine As StringBuilder
    Dim strValue As String
    'Read arguments from LocalStorage (if any)
    Dim BookID As String = ABMShared.LocalStorageRead(page, "BookID")
    Dim Chapter As String = ABMShared.LocalStorageRead(page, "Chapter")
    'Add a spinner to the page
    page.Pause
    'Get connection from current pool if MySQL/MSSQL or SQLite
    Dim jSQL As SQL = ABMShared.SQLGet
    'Get the records as a list of maps from the db
    results = ABMShared.SQLExecuteMaps(jSQL,"select verse, scripture from Bible where Book = ? and Chapter = ? order by verse", Array As String(BookID,Chapter))
    'Close the connection to the database
    ABMShared.SQLClose(jSQL)
    'Initialize the content holder
    sbLine.Initialize
    'Loop throught each record read and process it
    resTot = results.size - 1
    For resCnt = 0 To resTot
        'Get the record map
        resMap = results.get(resCnt)
        'Build each line
        Dim eachLine As StringBuilder
        eachLine.Initialize
        For Each strField As String In resMap.Keys
            strValue = resMap.getdefault(strField, "")
            eachLine.Append(strValue)
            eachLine.Append(" ")
        Next
        Dim strOutPut As String = eachLine.ToString.Trim
        'RunMethods referenced pasted in MyMethods of the page for eachLine
        strOutPut = ColorScripture(strOutPut)
        strOutPut = ColorScripture1(strOutPut)
        strOutPut = ItalicScripture(strOutPut)
        strOutPut = BoldScripture(strOutPut)
        strOutPut = ItalicScripture1(strOutPut)
        sbLine.Append(strOutPut)
        sbLine.Append("{BR}")
    Next
    'Get the label and update it
    Dim lblverse As ABMLabel = page.Component("lblverse")
    lblverse.Text = sbLine.ToString.Trim
    lblverse.Refresh
    page.Resume
End Sub
这本质上导致了图 10 所示的结果,具体取决于你选择了哪个章节。
图 10:经文阅读

3.2.4 其他页面
图 11:ABMCard 组件
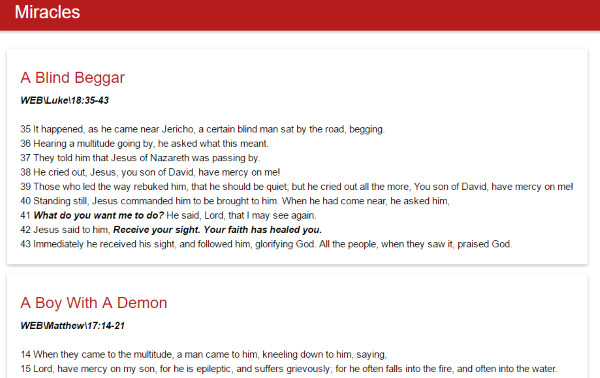
除了“图说圣经”和“品质”之外,其他页面都使用动态 ABMCard 组件来显示内容。就像之前的页面一样,这些卡的记录从相应的数据库表中读取,然后在运行时创建和更新卡片。所有这些都在每个页面的 ConnectPage 中发生。让我们举一个例子。
Private Sub RefreshOnLoad_miraclecard()
    'Define list details to load to the cards
    Dim results As List
    Dim resCnt As Int
    Dim lsKey As String
    Dim resTot As Int
    Dim resMap As Map
    Dim resJSON As String
    Dim irow As Int = 2
    Dim icell As Int = 1
    'variable to hold the id field
    Dim IdField As String
    'variable to hold the title
    Dim TitleField As String
    'variable to hold the content
    Dim ContentField As String
    'Read arguments from LocalStorage (if any)
    'Add a spinner to the page
    page.Pause
    'Get connection from current pool if MySQL/MSSQL or SQLite
    Dim jSQL As SQL = ABMShared.SQLGet
    'Get the records as a list of maps from the db
    results = ABMShared.SQLExecuteMaps(jSQL,"select * from Miracles", Null)
    'Close the connection to the database
    ABMShared.SQLClose(jSQL)
    'Loop throught each record read and process it
    resTot = results.size - 1
    For resCnt = 0 To resTot
        'Get the record map
        resMap = results.get(resCnt)
        IdField = resMap.getdefault("id","")
        ContentField = resMap.getdefault("verses","")
        TitleField = resMap.getdefault("lessontitle","")
        Dim miraclecard As ABMCard
        miraclecard.InitializeAsCard(page, IdField, TitleField, ContentField, ABM.CARD_NOTSPECIFIED, "bloodred")
        miraclecard.IsReveal = True
        page.Cell(irow,icell).AddArrayComponent(miraclecard, "miracle")
    Next
    page.Resume
End Sub
卡片内没有执行任何代码,尽管可以创建卡片来捕获添加到其中的每个 ActionButton 的点击事件。
3.2.5 图解圣经
“图解圣经”页面使用 ABMFlexWall 组件来显示图片。此组件是在页面的 ConnectPage 方法中创建的。
Public Sub ConnectPage()
    'connect navigation bar
    ConnectNavigationBar
    'add components for the page
    Dim flex51 As ABMFlexWall
    flex51.Initialize(page, "flex51", 350)
    page.Cell(3,1).AddComponent(flex51)
    RefreshOnLoad_flex51
    AdminAccess
    page.Refresh ' IMPORTANT
    ' NEW, because we use ShowLoaderType=ABM.LOADER_TYPE_MANUAL
    page.FinishedLoading 'IMPORTANT
    page.RestoreNavigationBarPosition
End Sub
然后,flexwall 中的图像从数据库表中读取,并创建链接到服务器 images 文件夹中存储的图像。
'Refresh the contents of the ABMFlexWall during runtime from a table.
Private Sub RefreshOnLoad_flex51()
    'Get access to the component in the page.
    'Get the flexwall component to process
    Dim flex51 As ABMFlexWall
    flex51 = page.Component("flex51")
    'Define list details to load to the flexwall
    Dim results As List
    Dim resCnt As Int
    Dim resTot As Int
    Dim resMap As Map
    Dim photoCnt As Int = 0
    Dim photoID As String
    'The parent folder for the images
    Dim folderPath As String = "images"
    'The default extension for each image file
    Dim extension As String = ".jpg"
    Dim simg As String
    Dim strPhoto As String
    'variable to hold the image field
    Dim imgField As String = ""
    'variable to hold the TitleField
    Dim titleField As String = ""
    Dim fStructure As String = "www" & "/" & ABMShared.AppName & "/"
    If folderPath.Length > 0 Then
        fStructure = fStructure & folderPath & "/"
    End If
    'we want a format that will meet ../images
    Dim pStructure As String = fStructure
    pStructure = pStructure.Replace("www/" & ABMShared.AppName, "..")
    fStructure = File.Combine(File.DirApp, fStructure)
    Dim imgSize As String
    'The image width and size if images are sized to be the same size
    Dim imgWidth As String = "350"
    Dim imgHeight As String = "350"
    'Add a spinner to the page
    page.Pause
    'Get connection from current pool if MySQL/MSSQL or SQLite
    Dim jSQL As SQL = ABMShared.SQLGet
    'Get the records as a list of maps from the db
    results = ABMShared.SQLExecuteMaps(jSQL,"select * from pictures order by key", Null)
    'Close the connection to the database
    ABMShared.SQLClose(jSQL)
    'Loop throught each record read and process it
    resTot = results.size - 1
    For resCnt = 0 To resTot
        'Get the record map
        resMap = results.get(resCnt)
        imgField = resMap.getdefault("tag","")
        titleField = resMap.getdefault("text","")
        'Build the image path
        simg = ABMShared.FixImage(imgField,extension)
        'We will get image sizes from the images themselves, hold the photo actual path
        photoCnt = photoCnt + 1
        photoID = "photo" & photoCnt
        strPhoto = pStructure & simg
        'Get the image dimensions
        imgSize = ABM.Util.GetImageDimensions(fStructure,simg)
        If imgSize <> "" Then
            imgWidth = ABMShared.MvField(imgSize,1,"x")
            imgHeight = ABMShared.MvField(imgSize,2,"x")
        End If
        'Add ABMImage component in the FlexWall
        Dim img As ABMImage
        img.Initialize(page, photoID, strPhoto, 1)
        img.IsResponsive = True
        img.Caption = titleField
        img.IsCircular = False
        img.IsClickable = False
        img.IsMaterialBoxed = True
        flex51.AddArrayImage(img,imgWidth,imgHeight,"flex51Images")
    Next
    page.Resume
End Sub
当每张图像被选中时,它会在一个材料框中打开。
图 12:图解圣经

当选择一张图片时,它会成为活动图片并隐藏所有其他图片。这是因为添加的每张图片都设置了 IsMaterialBoxed = True。
图 13:选定的图像

3.2.6 列表视图,即 ABMList 组件
应用程序的品质(积极和消极)部分使用了 ABMList 组件。列表显示用户可以从中选择的选项列表。Bible.Show 列表项的定义方式是具有一个图标和一个项。列表项还可以包含可以从图像文件夹中引用的其他图像。
图 14:带有静态项目的 ABMList 组件

Public Sub ConnectPage()
    'connect navigation bar
    ConnectNavigationBar
    'add components for the page
    Dim lst90 As ABMList
    lst90.Initialize(page, "lst90", ABM.COLLAPSE_EXPANDABLE, "")
    lst90.AddItem("item91", ABMShared.ListItemIconTitle(page, "item91", "mdi-action-thumb-up", "Positive Mental Qualities", ""))
    lst90.AddItem("item92", ABMShared.ListItemIconTitle(page, "item92", "mdi-action-thumb-down", "Negative Mental Qualities", ""))
    lst90.AddItem("item93", ABMShared.ListItemIconTitle(page, "item93", "mdi-action-thumb-up", "Positive Physical Qualities", ""))
    lst90.AddItem("item94", ABMShared.ListItemIconTitle(page, "item94", "mdi-action-thumb-down", "Negative Physical Qualities", ""))
    lst90.AddItem("item95", ABMShared.ListItemIconTitle(page, "item95", "mdi-action-thumb-up", "Positive Spiritual Qualities", ""))
    lst90.AddItem("item96", ABMShared.ListItemIconTitle(page, "item96", "mdi-action-thumb-down", "Negative Spiritual Qualities", ""))
    lst90.SubItemLeftPadding = 5
    page.Cell(2,1).AddComponent(lst90)
    AdminAccess
    page.Refresh ' IMPORTANT
    ' NEW, because we use ShowLoaderType=ABM.LOADER_TYPE_MANUAL
    page.FinishedLoading 'IMPORTANT
    page.RestoreNavigationBarPosition
End Sub
这个 ABMList 组件采用了单行方法,但是你可以使用 ABMContainer 以你喜欢的方式创建你的项目。当每个列表项目被选中时,会触发相应的事件,将用户带到选定的编码页面。
'An ABMList item has been clicked
Public Sub lst90_Clicked(ItemId As String)
    Select Case ItemId
    Case "item91"
        ABMShared.NavigateToPage(ws, ABMPageId, "../pmq/pmq.html")
    Case "item92"
        ABMShared.NavigateToPage(ws, ABMPageId, "../nmq/nmq.html")
    Case "item93"
        ABMShared.NavigateToPage(ws, ABMPageId, "../ppq/ppq.html")
    Case "item94"
        ABMShared.NavigateToPage(ws, ABMPageId, "../npq/npq.html")
    Case "item95"
        ABMShared.NavigateToPage(ws, ABMPageId, "../psq/psq.html")
    Case "item96"
        ABMShared.NavigateToPage(ws, ABMPageId, "../nsq/nsq.html")
    End Select
End Sub
这些品质中引用的页面使用 ABMCard 组件加载内容,如上所述。
图 15:积极的属灵品质

4. 部署应用
为了部署这个应用程序,我启动了我的 VPS 并将 www 文件夹、jar 文件和 bibleshow.db 复制到我的服务器。这个 Bible.Show WebApp 的实时版本可以在这里玩。
关注点
ABMaterial 框架是一个非常棒的工具。它的其他优点是你可以开发适用于桌面、平板电脑和设备的响应式应用程序。这使得你的 Web 应用程序能够很好地适应你使用的任何设备。这个框架正在不断发展,你可以在其中使用 Google 图标和 Font Awesome 图标等等。使用该框架开发的应用程序应该部署在 VPS 中,并使用 WebSocket,这使得整个体验非常流畅。我非常喜欢他们使用的页面缓存方法,因为它使你开发的应用程序非常快。虽然我这里的方法是使用 SQLite 数据库,但无需太多改动,只需更改连接调用,同一个应用程序就可以与 MySQL 和 SQL Server 数据库一起使用,代码不变,无需更改其他任何内容。这使得它具有很高的可伸缩性。
如演示中所述,还有许多其他组件,它们还提供了大量信息和功能,你可以将其添加到你的应用程序中。只需了解每个组件的工作原理以及它如何适应整个事物。