
裸金属 MVVM - 代码与现实的碰撞 - 第二部分
5.00/5 (11投票s)
从根本上学习 MVVM
引言
关于 MVVM 的文章有很多很多,所以你可能会想我为什么要写更多关于它的文章。简单来说,是因为市面上关于 MVVM 的信息有很多误导,我希望这一系列文章能帮助消除一些关于这个非常非常直接的模式的迷思。
现在,你可能知道 MVVM 最初是为 WPF 应用程序设计的模式,并且它已经从其卑微的起点扩展到了其他语言、框架和平台。然而,由于这些不同的实现都依赖于我们开发者无法直接看到的特性,我们往往会忽略 MVVM 究竟是什么让它成为我们开发工具箱中如此有用的工具,以及我们需要从哪些特性开始使用 MVVM。所以,在本篇文章中(就像我们在第一篇中所做的那样),我们将抛弃所有那些花哨的平台,而是从零开始构建一个 MVVM 应用程序,作为一个控制台应用程序。是的,没错,我们将重现一些幕后发生的事情,以展示使 MVVM 成为可能的“魔法”。
在本文中,我们将研究如何让我们的绑定代码处理更复杂的场景,以及如何通过支持菜单和处理基于用户输入的命令来改进我们的应用程序。
系列文章
- 裸金属 MVVM - 代码与现实的碰撞 - 第一部分 - 介绍绑定操作和
INotifyPropertyChanged的作用 - 裸金属 MVVM - 代码与现实的碰撞 - 第二部分 - 更好的绑定和 ICommand - 本文
- 裸金属 MVVM - 代码与现实的碰撞 - 第三部分 - 成功的模板(第一部分)
开发环境
我使用 VS 2015 开发了这个应用程序,并大量使用了 C#6 的特性。如果你没有安装 VS2015,我希望你至少能够跟随我的思路,因为我将在这里解释整个代码库。
引入复杂性
正如我们在上一篇文章中讨论的,我们一直局限于处理简单的 View 到 ViewModel 到 Model 的交互,绑定引擎只处理非常直接的绑定,并且需要在建立绑定之前设置 DataContext。现在是时候解决这些不足之处了。我们要做的第一件事是定义一个新的 Model,它公开一个硬编码的整数——截至今天,每个人都 32 岁。所以,这个 Model 看起来是这样的
public class AgeModel
{
  public int Age => 32;
}
现在,我们需要更新 PersonViewModel 来公开这个 Model。我们不会将 Age 值公开给 View,而是允许 View 通过 ViewModel 绑定到我们 AgeModel 中的 Age(我知道,在这个阶段,View 似乎不应该知道 Model,但这种深度绑定功能在您有父/子 ViewModel 时特别有用)。
public class PersonViewModel : INotifyPropertyChanged
{
  private readonly PersonModel personModel;
  private readonly PersonModelValidator validator;
  private readonly AgeModel age;

  public PersonViewModel()
  {
    personModel = new PersonModel();
    validator = new PersonModelValidator();
    age = new AgeModel();
  }

  public AgeModel Age
  {
    get { return age; }
  }

  public string Name
  {
    get { return personModel.Name; }
    set
    {
      if (!validator.IsValid(value))
      {
        return;
      }
      personModel.Name = value;
      OnPropertyChanged();
    }
  }

  public event PropertyChangedEventHandler PropertyChanged;

  protected virtual void OnPropertyChanged([CallerMemberName] string propertyName = null)
  {
    PropertyChanged?.Invoke(this, new PropertyChangedEventArgs(propertyName));
  }
}
我们在这里看到的是,我们公开了 AgeModel,而不是 age.Age,所以我们需要在 View 中添加一些穿透绑定(Age.Age)。
public class ProgramView : Framework
{
  private readonly PersonViewModel viewModel = new PersonViewModel();
  public ProgramView()
  {
    DataContext = viewModel;
    SetBinding("Name");
    SetBinding("Age.Age");
  }

  public void Input()
  {
    string input = Console.ReadLine();
    viewModel.Name = input;
  }
}
如果我们现在运行应用程序,我们会发现我们得不到预期的输出。

为什么会这样?为什么输入一次这个值会更新属性两次?这里可能发生了什么?答案在于我们在上一篇文章中介绍的 Parse 方法相当简陋的实现。无论我们是否已经绑定到该实例,该代码都会挂接到 INPC。好的,让我们来修复这个特定的缺陷。
private static readonly HashSetinstances = new HashSet();
public void Parse()
{
 INotifyPropertyChanged inpc = Source as INotifyPropertyChanged;
 if (inpc == null)
 {
   return;
 }
 if (instances.Contains(inpc))
 {
   return;
 }
 instances.Add(inpc);
 inpc.PropertyChanged += Inpc_PropertyChanged;
}
我们将维护一个已分配 INPC 处理程序的实例列表。由于每个绑定都是一个新类,因此我们有一个已分配 INPC 的实例的静态列表。在 Parse 方法中,我们需要检查是否已经在此处分配了处理程序,如果已经分配,则退出。现在如果我们运行这个,我们应该看到 INPC 代码运行了预期的次数。

这已经好多了,但我们仍然缺少一些东西。我们看不到初始值,所以我们没有看到这里的 Age 值。让我们现在纠正一下,并显示我们预期的值。幸运的是,检索任意复杂的树是一个相当直接的过程。目前,我们只需要添加一个方法来“向下走”绑定,直到它可以显示属性。让我们将此方法添加到我们的代码库中。
private static object Show(object type, string propertyName)
{
  while (true)
  {
    string[] properties = propertyName.Split('.');
    PropertyInfo propertyInfo;
    if (properties.Length > 1)
    {
      string property = properties.First();
      propertyName = propertyName.Substring(property.Length + 1);
      propertyInfo = type.GetType().GetProperty(propertyName);
      if (propertyInfo == null)
      {
        return $"Data binding error:
               Unable to get {propertyName} from {type.GetType().FullName}";
      }
      type = propertyInfo.GetValue(type);
      continue;
    }
    propertyInfo = type.GetType().GetProperty(propertyName);
    if (propertyInfo == null)
    {
      return $"Data binding error:
             Unable to get {propertyName} from {type.GetType().FullName}";
    }
    object value = propertyInfo.GetValue(type);
    return value ?? "<<Unset>>";
  }
}
这应该可以很巧妙地遍历层次结构,准备显示需要显示的值。此时,理解这一点很重要,它不能处理列表。一旦我们将集合支持引入我们的框架,我们将不得不重新审视此功能。目前,由于我们有一个简单的对象层次结构,这足以满足我们的需求。现在我们只需要调用此方法并显示值。有趣的是处理属性不存在的代码。由于绑定只是作为字符串输入的,所以我们有可能输入错误的属性名称。通过返回一个未设置绑定的消息,我们可以很好地表明绑定输入错误。好了,是时候最后一次回顾 Parse 方法并修改它来显示值了。
public void Parse()
{
  object value = Show(Source, Name);
  Console.WriteLine($"{Name} is {value}");
  INotifyPropertyChanged inpc = Source as INotifyPropertyChanged;
  if (inpc == null)
  {
    return;
  }
  if (instances.Contains(inpc))
  {
    return;
  }
  instances.Add(inpc);
  inpc.PropertyChanged += Inpc_PropertyChanged;
}
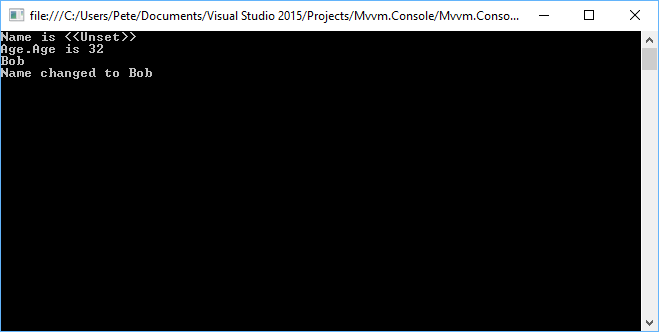
就这样。我们得到了一个可以成功显示绑定值的程序。现在,当我们运行我们的应用程序时,它应该看起来像这样
让事情变得有趣
我必须承认,这个特定的示例应用程序现在感觉有点令人失望,因为我们遵循了一个预设的路线,用户只是输入一个名字,程序就退出了。如果我们的应用程序更具交互性,允许用户从菜单中选择选项,那不是很好吗?我们将稍微改变一下,让用户更改控制台的前景和背景颜色,并允许他们输入姓名或退出应用程序。如果用户决定更改默认颜色方案,我们的应用程序可能会看起来像这样。

现在我们知道要构建什么了,我们需要做的第一件事是为菜单项添加一些基础设施。我们将从一对相当直接的类开始,一个代表单个菜单项,一个类将这些单独的条目分组在一起。
public class MenuItem
{
  public string Header { get; set; }
  public ICommand Command { get; set; }
}
MenuItem 代表我们想在屏幕上显示的一个条目,当用户选择它时会采取一些行动。我们可以看到其中有一个 ICommand 条目,代表当用户选择该特定选项时将执行的命令。我们很快就会回到这个特定接口,但我们将完成我们 Menu 类的充实。
public class Menu
{
  private readonly List<MenuItem> menuItems = new List<MenuItem>();
  public void Add(MenuItem menuItem)
  {
    menuItems.Add(menuItem);
  }

  public IEnumerable<MenuItem> Items => menuItems;
}
这是一个相当直接的实现。这个类允许我们将许多菜单项分组在一起,当我们开始添加菜单项时,我们将使用它。
ICommand
在上一篇文章中,我确实承诺我们会处理添加命令的支持,现在我们就来做这件事。对于熟悉 WPF 的人来说,ICommand 接口应该非常熟悉。嗯,如果我们要使用 WPF 提供的那个,那会很熟悉,但它对我们来说有点过头了。相反,我们将实现我们自己的简化 ICommand 接口,它只公开 WPF 版本中的 Execute 方法。关键在于,虽然 WPF 提供了自己的命令基础结构,但其他平台和框架提供了不同的功能和实现,所以我们将从一个允许我们探索命令背后原理的开始。当我们在这系列文章的后期研究 WPF 中的 MVVM 时,我们将不得不考虑 WPF 中的命令管理基础结构,这目前对理论来说有点沉重。总之,这是我们的 ICommand 接口。
public interface ICommand
{
  void Execute();
}
接口只包含一个契约,该契约规定我们将使用 Execute 方法来执行用户想要执行的操作。所以,现在我们已经定义了命令接口,让我们来实现它。现在,我们将基于 Josh Smith 多年前为 WPF 编写的 RelayCommand 实现。我们之所以基于他的版本,是因为他的实现中有一些细微之处,我们将在研究 WPF MVVM 时加以解决,所以使用他的版本似乎很合适,并且我们将探讨为什么会有 Prism 的 DelegateCommand 这样的实现。
public class RelayCommand : ICommand
{
  private readonly Action executeAction;
  public RelayCommand(Action execute)
  {
    executeAction = execute;
  }
  public void Execute()
  {
    executeAction();
  }
}
这再简单不过了。当我们创建这个类的实例时,我们传入一个我们希望命令执行的 Action,当我们调用 Execute 时,它就会执行该操作。好了,是时候重新审视我们的 ViewModel 了。我们将对其进行大量改造。
public class PersonViewModel : INotifyPropertyChanged
{
  private readonly PersonModel personModel;
  private readonly PersonModelValidator validator;

  public PersonViewModel()
  {
    personModel = new PersonModel();
    validator = new PersonModelValidator();
    Age = new AgeModel();
    Menu.Add(GetMenuItem("1. Change the name", InputName));
    Menu.Add(GetMenuItem("2. Change the foreground color to red",
                        ()=> SetForegroundColor(ConsoleColor.DarkRed)));
    Menu.Add(GetMenuItem("3. Change the foreground color to green",
                        () => SetForegroundColor(ConsoleColor.DarkGreen)));
    Menu.Add(GetMenuItem("4. Change the foreground color to white",
                        () => SetForegroundColor(ConsoleColor.White)));
    Menu.Add(GetMenuItem("5. Change the background color to cyan",
                        () => SetBackgroundColor(ConsoleColor.DarkCyan)));
    Menu.Add(GetMenuItem("6. Change the background color to yellow",
                        () => SetBackgroundColor(ConsoleColor.DarkYellow)));
    Menu.Add(GetMenuItem("7. Change the background color to black",
                        () => SetBackgroundColor(ConsoleColor.Black)));
    Menu.Add(GetMenuItem("q. Quit", () => Environment.Exit(0)));
  }

  private void SetForegroundColor(ConsoleColor consoleColor)
  {
    Console.ForegroundColor = consoleColor;
    PrintMenu(true);
  }

  private void SetBackgroundColor(ConsoleColor consoleColor)
  {
    Console.BackgroundColor = consoleColor;
    PrintMenu(true);
  }

  public Menu Menu { get; } = new Menu();

  public void PrintMenu(bool clearScreen)
  {
    if (clearScreen)
    {
      Console.Clear();
    }
    foreach (MenuItem menuItem in Menu.Items)
    {
      Console.WriteLine(menuItem.Header);
    }
  }

  public AgeModel Age { get; }

  public string Name
  {
    get { return personModel.Name; }
    set
    {
      if (!validator.IsValid(value))
      {
        return;
      }
      personModel.Name = value;
      OnPropertyChanged();
    }
  }

  public event PropertyChangedEventHandler PropertyChanged;

  protected virtual void OnPropertyChanged([CallerMemberName] string propertyName = null)
  {
    PropertyChanged?.Invoke(this, new PropertyChangedEventArgs(propertyName));
  }

  private void InputName()
  {
    Console.WriteLine($"{Environment.NewLine}Please enter a name");
    string input = Console.ReadLine();
    PrintMenu(true);
    Name = input;
  }

  private static MenuItem GetMenuItem(string header, Action commandAction)
  {
    return new MenuItem { Header = header, Command = new RelayCommand(commandAction) };
  }
}
我承认那里有很多东西,所以让我们将其分解成更小的部分。我们将在这里引入一个新的属性,我们将从 View 中绑定到它。这个属性是我们在构造函数中填充的 Menu,如下所示
public PersonViewModel()
{
  personModel = new PersonModel();
  validator = new PersonModelValidator();
  Age = new AgeModel();
  Menu.Add(GetMenuItem("1. Change the name", InputName));
  Menu.Add(GetMenuItem("2. Change the foreground color to red",
                      ()=> SetForegroundColor(ConsoleColor.DarkRed)));
  Menu.Add(GetMenuItem("3. Change the foreground color to green",
                      () => SetForegroundColor(ConsoleColor.DarkGreen)));
  Menu.Add(GetMenuItem("4. Change the foreground color to white",
                      () => SetForegroundColor(ConsoleColor.White)));
  Menu.Add(GetMenuItem("5. Change the background color to cyan",
                      () => SetBackgroundColor(ConsoleColor.DarkCyan)));
  Menu.Add(GetMenuItem("6. Change the background color to yellow",
                      () => SetBackgroundColor(ConsoleColor.DarkYellow)));
  Menu.Add(GetMenuItem("7. Change the background color to black",
                      () => SetBackgroundColor(ConsoleColor.Black)));
  Menu.Add(GetMenuItem("q. Quit", () => Environment.Exit(0)));
}
GetMenuItem 只是构建并返回一个 MenuItem 的新实例,我们可以将其添加到我们的 Menu 中。传递给此方法的 Action 是我们用于构建 RelayCommand 的。除了 Environment.Exit 之外,其他操作都与我们将要编写的代码有关。InputName 将允许用户输入新名称,而 SetForegroundColor 将更改前景颜色,而 SetBackgroundColor 则顾名思义,会更改背景颜色。
private static MenuItem GetMenuItem(string header, Action commandAction)
{
  return new MenuItem { Header = header, Command = new RelayCommand(commandAction) };
}

private void InputName()
{
  Console.WriteLine($"{Environment.NewLine}Please enter a name");
  string input = Console.ReadLine();
  PrintMenu(true);
  Name = input;
}

private void SetForegroundColor(ConsoleColor consoleColor)
{
  Console.ForegroundColor = consoleColor;
  PrintMenu(true);
}

private void SetBackgroundColor(ConsoleColor consoleColor)
{
  Console.BackgroundColor = consoleColor;
  PrintMenu(true);
}
我们在这里看到大量调用 PrintMenu。当我们调用它并传递 true 作为参数时,我们将清除屏幕并重新显示菜单文本。我们这样做是为了始终为用户提供清晰的菜单视图——好吧,至少与某些更花哨的颜色组合提供的清晰度一样。我们之所以在设置 InputName 中的 Name 值之前调用 PrintMenu,是因为我们希望确保向用户显示名称的更改。这感觉非常笨拙,事实也确实如此。在未来的文章中,我们将涵盖模板的概念,并了解如何应用模板使这里变得更清晰。
public void PrintMenu(bool clearScreen)
{
  if (clearScreen)
  {
    Console.Clear();
  }
  foreach (MenuItem menuItem in Menu.Items)
  {
    Console.WriteLine(menuItem.Header);
  }
}
顺便说一下,这个方法之所以是 public 的,是因为我们将直接从 View 调用它,以最初打印菜单——我们这样做是因为我们仍然想看到初始值。当我们开始添加模板支持时,我们会解决这个问题——目前,我乐于保持现状。
说到 View,我们需要在那里做哪些改变?好吧,我们只需要添加两样东西(目前——我们很快就会研究 Framework 的一个更改,它会稍微影响 View 的结构)。第一件事是绑定到 ViewModel 中的 Menu 条目,另一件事是打印初始菜单。
SetBinding("Menu");
viewModel.PrintMenu(false);
但这怎么运作?菜单绑定是如何工作的,因为我们还没有任何特殊代码来处理它?嗯,为了支持这一点,我们需要稍微增强一下 Binding 类。基本上,我们需要在那里做两件事,第一件事是提供一个公开我们 Menu 的 Menu 属性,第二件事是修改 Parse 方法来检查条目,这样,当绑定值是 Menu 时,它就会添加到我们的新属性中。这段代码有一个限制,就是 Menu 不能是嵌套属性。同样,当我们为应用程序提供模板支持时,我们会解决这个问题。顺便说一下,我们在绑定上提供 Menu 的原因是,我们希望在此阶段允许我们的代码拥有多个菜单(如果需要)。这显然是一个相当牵强的例子,但我们现在不必过于担心。
public Menu Menu { get; private set; }
public void Parse()
{
  object value = Show(Source, Name);
  Menu menu = value as Menu;
  if (menu != null)
  {
    Menu = menu;
    return;
  }
  Console.WriteLine($"{Name} is {value}");
  INotifyPropertyChanged inpc = Source as INotifyPropertyChanged;
  if (inpc == null)
  {
    return;
  }
  if (instances.Contains(inpc))
  {
    return;
  }
  instances.Add(inpc);
  inpc.PropertyChanged += Inpc_PropertyChanged;
}
最后一块拼图是,我们将如何自动挂接菜单,以便系统等待适当的按键,然后根据输入进行操作?为此,我们将必须稍微修改 Framework 类,以提供一个输入循环并将此连接回我们的 View。我们将添加一个虚拟的 Initialize 方法,我们将在我们的 View 中重写它,在那里我们将设置我们的绑定。这个虚拟方法将做的最后一件事是调用我们的输入循环。
protected virtual void Initialize()
{
  InputLoop();
}

private void InputLoop()
{
  while (true)
  {
    ConsoleKeyInfo key = Console.ReadKey();
    foreach (MenuItem menuItem in bindings.Values.Where(binding => binding.Menu != null)
      .SelectMany(binding => binding.Menu.Items.Where(
        menuItem => menuItem.Header.Substring(0, 1) == key.KeyChar.ToString())))
    {
      menuItem.Command.Execute();
    }
  }
}
这段代码中唯一有点吓人的部分是 foreach 中的 LINQ 语句。它只是遍历绑定中所有非 null 的菜单项,然后查找菜单头部的第一个字符与用户按下的键匹配的条目。当它找到匹配项时,它将执行与该菜单项关联的命令。现在需要装配的最后一部分是我们 View 的修改,以处理 Initialize 方法。
public class ProgramView : Framework
{
  private readonly PersonViewModel viewModel = new PersonViewModel();

  protected override void Initialize()
  {
    DataContext = viewModel;
    SetBinding("Name");
    SetBinding("Age.Age");
    // Well, this is different. We're binding to the Menu here.
    SetBinding("Menu");
    viewModel.PrintMenu(false);

    base.Initialize();
  }
}
总结
好了,就是这样!我们增强了我们的控制台框架,以支持更深层次的绑定结构,并处理命令。命令处理在 MVVM 应用程序中起着重要作用,所以这是我们在继续本系列文章之前需要解决的一个问题。在下一篇文章中,我们将开始研究如何为我们的应用程序提供模板支持,并了解如何使用它来更好地影响我们绑定事物的方式。我们还将开始研究集合支持的精彩世界。
历史
- 2017 年 1 月 5 日:初始版本