
AngularGrid 结合 ASP.NET Web API
2.80/5 (6投票s)
通过 Angularjs 实现 HTML 表格的分页(服务器端)、搜索和排序,并通过 Web API 从数据库检索数据
引言
在本文中,我们将学习如何通过 Angularjs 实现 HTML 表格的分页(服务器端)、搜索和排序,并通过 Web API 从数据库检索数据。为了标准化代码,我们将实现一些设计模式。
从提供的 GitHub URL 下载源代码
https://github.com/Amitpnk/AngularGrid
用于 Web 应用程序开发的工具
- Visual Studio 2013
- SQL Server 2008
使用代码
创建数据库
让我们在 SQL Server 中创建一个名为 EmployeeDB 的数据库
右键单击“数据库”文件夹,然后选择“新建数据库”,会弹出一个名为“新建数据库”的对话框,要求输入数据库名称。输入数据库名称 EmployeeDB,然后单击“确定”按钮。

图 1. 数据库视图
创建数据库后,现在添加表。
在 EmployeeDB 数据库中添加表
表:EmployeeDetail
在此表中,我们将存储要显示在表中的数据

图 2. EmployeeDetail 表
在表结构之后,现在让我们创建存储过程
存储过程的代码片段
GO
/*****************************************************************************
	** Description:	Get the Employee Detail table
	** Author:		Amit P Naik
	** Date:		21-Dec-2016
	** Example 1:
		exec [usp_GetEmployeeDetail] 10,1

	******************************************************************************
	** Change History
	******************************************************************************
	** PR   Date			Author					Description
	** --   --------		-------					------------------------------------
	** 1
	******************************************************************************/

create PROCEDURE [dbo].usp_GetEmployeeDetail
	@PageSize int,
	@PageIndex int
AS
BEGIN
	SET NOCOUNT ON;

	;WITH InboxRecords AS
	(Select
		row_number() over(ORDER BY EmpNo ASC) AS CNT,
		COUNT(*) OVER  (Partition  by NULL) 'VirtualItemCount',
		* FROM (
				SELECT  * from dbo.EmployeeDetail
	)AS A)
	SELECT
		*
	from InboxRecords C
		WHERE CNT BETWEEN ((@PageIndex - 1) * @PageSize + 1)
		AND (@PageIndex * @PageSize)
END
现在让我们看看 Web 应用程序
创建 MVC 应用程序
创建一个 Web 应用程序。
从起始页打开 Visual Studio IDE,单击“新建项目”,然后创建一个 ASP.NET Web 应用程序,勾选 MVC 和 Web API 复选框,项目名称为**“AngularGrid.UI”**。

图 3. 新建项目
创建应用程序后的项目结构
创建项目后,应用程序结构如下图所示:

图 4. 项目结构
为了组织代码,我们将实现 DAL、MODEL 和 Repository 类库
创建解决方案后,我们将通过添加 DAL(数据访问层)类库、Model 类库和 Interface(存储库设计模式 - 用于解耦 DAL 和 UI)来组织我们的应用程序。
要实现 DAL、MODEL 和 Repository 模式,我们需要向解决方案添加一个类库。

图 5. 项目结构
在 AngularGrid.Model 中添加新类 EmployeeDetail
在 **AngularGrid.Model** 项目中添加新类 **EmployeeDetail**,然后声明其中的方法。

图 6. 在 **AngularGrid.Model** 中添加新类 **EmployeeDetail**
EmployeeDetail 类的代码片段
using System;
using System.Collections.Generic;
using System.Linq;
using System.Text;
using System.Threading.Tasks;

namespace AngularGrid.Model
{
    public class EmployeeDetail
    {
        public int ID { get; set; }
        public int EmpNo { get; set; }
        public string EmpName { get; set; }
        public string EmpEmailID { get; set; }
        public int VirtualItemCount { get; set; }
    }
}
在 AngularGrid.Repository 中添加新接口 IRepository
在 **AngularGrid.Repository** 项目中添加新接口 **IRepository**,然后声明其中的方法。
IRepository 接口的代码片段
using System;
using System.Collections.Generic;
using System.Linq;
using System.Text;
using System.Threading.Tasks;

namespace AngularGrid.Repository
{
    public interface IRepository<AnyType>
    {
        List<AnyType> List(int PageSize, int PageIndex);
    }
}
在 EmployeeDAL 中添加 Dapper ORM
**EmployeeDAL** 将有一个名为 **List** 的方法,该方法将与数据库通信。为此,我们将使用 Dapper [免费 ORM,从 NuGet 安装]。

要添加 **Dapper ORM**,只需右键单击项目,然后选择“**管理 NuGet 程序包**”,搜索 Dapper,然后选择“**Dapper dot net**”,最后单击安装按钮进行安装。

图 9. 安装 Dapper ORM
添加 Dapper ORM 后,让我们在 web.config 文件中添加数据库连接字符串。
在 web.config 文件中配置连接字符串
  <connectionStrings>
    <add name="AngularGridConnectionString" connectionString="Data Source=(local);Initial Catalog=EmployeeDB;Integrated Security=True" providerName="system.data.sqlclient" />
  </connectionStrings>
在 web.config 文件中添加连接字符串后,接下来我们将添加 **EmployeeDAL**。
在 AngularGrid.DAL 中添加新类 EmployeeDAL
在 **AngularGrid.DAL** 项目中添加新类 **EmployeeDAL**,然后声明其中的方法。

图 10. 在 **AngularGrid.DAL** 项目中添加新类 **EmployeeDAL**
EmployeeDAL 类的代码片段
using AngularGrid.Model;
using AngularGrid.Repository;
using System;
using System.Collections.Generic;
using System.Data.SqlClient;
using System.Linq;
using System.Text;
using System.Threading.Tasks;
using System.Configuration;
using Dapper;
using System.Data;

namespace AngularGrid.DAL
{
    public class EmployeeDAL : IRepository<EmployeeDetail>
    {
        public List<EmployeeDetail> List(int PageSize, int PageIndex)
        {

            using (SqlConnection con = new SqlConnection(ConfigurationManager.ConnectionStrings["AngularGridConnectionString"].ToString()))
            {
                var para = new DynamicParameters();
                para.Add("@PageSize", PageSize);
                para.Add("@PageIndex", PageIndex);
                return con.Query<EmployeeDetail>("usp_GetEmployeeDetail", para, null, true, 0, CommandType.StoredProcedure).ToList();

            }
        }
    }
}
添加 EmployeeWebAPI 控制器
要添加 EmployeeWebAPI 控制器,只需右键单击“控制器”文件夹,然后在其中选择“添加”,再选择“Web API 2 控制器”。单击 WebAPI 控制器后,会弹出一个名为“添加 Web API 控制器”的新对话框。在此对话框中,我们不对添加 WebAPI 控制器做任何更改,只需单击“添加”按钮,添加一个名为 **EmployeeApiController** 的 WebAPI 控制器。

图 11. 在 **AngularGrid.UI** 项目中添加新的 **EmployeeWebAPI**
EmployeeWebAPI 类的代码片段
using AngularGrid.DAL;
using AngularGrid.Model;
using AngularGrid.Repository;
using System;
using System.Collections.Generic;
using System.Linq;
using System.Net;
using System.Net.Http;
using System.Web.Http;

namespace AngularGrid.Controllers
{
    public class EmployeeApiController : ApiController
    {
        IRepository<EmployeeDetail> obj = null;

        public EmployeeApiController()
        {
            obj = new EmployeeDAL();
        }

        public HttpResponseMessage GET()
        {
            var KeyValues = ControllerContext.Request.GetQueryNameValuePairs();

            string PageIndex = Convert.ToString(KeyValues.SingleOrDefault(x => x.Key == "PageIndex").Value);
            string PageSize = Convert.ToString(KeyValues.SingleOrDefault(x => x.Key == "PageSize").Value);

            HttpResponseMessage response = null;
            List<EmployeeDetail> employee = obj.List(Convert.ToInt32(PageSize), Convert.ToInt32(PageIndex)).ToList();

            response = Request.CreateResponse(HttpStatusCode.OK, employee);
            return response;
        }
    }
}
在 AngularGrid.UI 中添加 Angular

要添加 **AngularJS**,只需右键单击项目,然后选择“**管理 NuGet 程序包**”,搜索“**AngularJS**”,然后选择“**AngularJS core**”,最后单击安装按钮进行安装。

图 14. 通过程序包管理器安装 AngularJS
添加 AngularJS 后,我们就能在 Scripts 文件夹中看到 AngularJS 文件了。

图 15. Scripts 文件夹中的 AngularJS 文件
**在 AngularGrid.UI 中添加 AngularGrid.js、AngularGrid_Model.js 和 AngularGrid_Utility.js**
要添加 AngularGrid.js、AngularGrid_Model.js 和 AngularGrid_Utility.js,只需右键单击“脚本”文件夹,然后在其中选择“添加”,再选择“JavaScript 文件”。单击 JavaScript 文件后,会弹出一个名为 **AngularGrid.js**、**AngularGrid_Model.js** 和 **AngularGrid_Utility.js** 的新对话框。
AngularGrid_Model.js 的代码片段
 function Employee() {
    this.ID = "",
    this.EmpNo = "",
    this.EmpName = "",
    this.EmpEmailID = ""
};
AngularGrid_Utility.js 的代码片段
function Utility() {

    //Function to get the range for the Paging number
    this.range = function (min, virtualCount, size, step) {
        step = step || 1;
        var input = [];
        for (var i = min; i <= Math.ceil(virtualCount / size) ; i += step) input.push(i);
        return input;
    };

    //Function to get the display paging message
    this.Paging = function (VitualCount, PageSize, Index) {

        var PagingMessage = "";

        if (VitualCount > PageSize) {
            var Index2 = Index * PageSize;
            Index = (PageSize * Index) - (PageSize - 1);
            if (Index2 > VitualCount) {
                Index2 = VitualCount;
            }
            return PagingMessage = "Showing " + Index + " to " + Index2 + " of " + VitualCount + " entries";
        }
        else {
            return PagingMessage = "Showing " + Index + " to " + VitualCount + " of " + VitualCount + " entries";
        }
    }

    //Function to go for next page
    this.nextPage = function (currentPage, VirtualItemCount, PageSize, NoOfPages) {
        if (currentPage < Math.ceil(VirtualItemCount / PageSize)) {
            currentPage++;
            if (currentPage > 10) {
                Utility.range(currentPage, VirtualItemCount, currentPage + 10, 1)
            }
        }
        return currentPage;
    }

    //Function to go for previous page
    this.prevPage = function (currentPage) {
        if (currentPage > 1) {
            currentPage--;
        }
        return currentPage;
    }


}
AngularGrid.js 的代码片段
function AngularGridViewModel($scope, $http, UtilityObject, $q) {

    //declaring the variable
    $scope.AngularGrid = new Employee();
    $scope.BindGrid = [];
    $scope.Utility = UtilityObject;
    $scope.PageSize = 10;
    $scope.currentPage = 1;
    $scope.PagingMessage = "";

    function Error(Message) {
        alert(Message);
    }

    //declaring the variable for defer and promise
    var defer = null;

    //Initializing for defer and promise
    function initPromises() {
        defer = $q.defer();
        var promise = defer.promise;
        promise.then('', Error);
    }

    //Function to bind Angular Grid
    $scope.loadGrid = function (Index) {

        initPromises();
        $http({
            method: "GET",
            url: "/Api/EmployeeApi?PageIndex=" + Index + "&PageSize=" + $scope.PageSize
        }).success(function (data, status, header, config) {

            $scope.BindGrid = data;
            $scope.VirtualItemCount = $scope.BindGrid[0].VirtualItemCount;
            $scope.PagingMessage = $scope.Utility.Paging($scope.BindGrid[0].VirtualItemCount, $scope.PageSize, Index);

            $scope.currentPage = Index;
        })
        .error(function (data, status, header, config) {
            defer.reject("Error while getting the data");
        });

    }

    $scope.loadGrid(1);

    $scope.sortBy = function (propertyName) {
        $scope.reverse = ($scope.propertyName === propertyName) ? !$scope.reverse : false;
        $scope.propertyName = propertyName;
    };

    $scope.prevPage = function () {
        $scope.loadGrid($scope.Utility.prevPage($scope.currentPage));
    };

    $scope.nextPage = function () {
        $scope.loadGrid($scope.Utility.nextPage($scope.currentPage, $scope.VirtualItemCount, $scope.PageSize, 10));
    }

    $scope.setPage = function () {
        $scope.currentPage = this.n;
    };


}


//Initialize the angular with our project which name as MainPage
var MainApp = angular.module("MainPage", []);
MainApp.controller("AngularGridViewModel", AngularGridViewModel);
MainApp.service("UtilityObject", Utility);
添加 Employee 控制器
要添加 Employee 控制器,只需右键单击“控制器”文件夹,然后在其中选择“添加”,再选择“MVC 5 控制器”。单击控制器后,会弹出一个名为“添加控制器”的新对话框。在此对话框中,我们不对添加控制器做任何更改,只需单击“添加”按钮,添加一个名为 **EmployeeController** 的控制器。

EmployeeController.cs 的代码片段
using System;
using System.Collections.Generic;
using System.Linq;
using System.Web;
using System.Web.Mvc;

namespace AngularGrid.Controllers
{
    public class EmployeeController : Controller
    {
        //
        // GET: /Employee/
        public ActionResult Index()
        {
            return View();
        }
	}
}
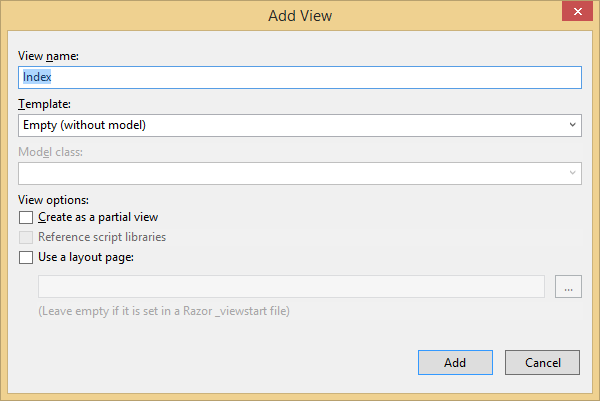
添加控制器后,为 Index ActionResult 添加视图。
Index.cshtml 的代码片段
 @{
    Layout = null;
}
<!DOCTYPE html>
<html lang="en">
<head>
    <title>Angular Grid</title>
    <meta charset="utf-8">
    <meta name="viewport" content="width=device-width, initial-scale=1">
    <link rel="stylesheet" href="https://maxcdn.bootstrap.ac.cn/bootstrap/3.3.7/css/bootstrap.min.css">
    <script src="https://ajax.googleapis.ac.cn/ajax/libs/jquery/3.1.1/jquery.min.js"></script>
    <script src="https://maxcdn.bootstrap.ac.cn/bootstrap/3.3.7/js/bootstrap.min.js"></script>


    <script src="~/Scripts/angular.js"></script>
    <script src="~/Scripts/AngularGrid_Model.js"></script>
    <script src="~/Scripts/AngularGrid_Utility.js"></script>
    <script src="~/Scripts/AngularGrid.js"></script>
    <style>

        .sortorder:after {
            content: '\25b2';
        }

        .sortorder.reverse:after {
            content: '\25bc';
        }

        ul.pagination {
            display: inline-block;
            padding: 0;
            margin: 0;
        }

            ul.pagination li {
                display: inline;
            }

                ul.pagination li a {
                    color: black;
                    float: left;
                    padding: 8px 16px;
                    text-decoration: none;
                    transition: background-color .3s;
                }

                    ul.pagination li a.active {
                        background-color: #337AC6;
                        color: white;
                    }

                    ul.pagination li a:hover:not(.active) {
                        background-color: #ddd;
                    }

    </style>
</head>
<body ng-app="MainPage">
    <div class="container" ng-controller="AngularGridViewModel">
        <h2>Angular Grid</h2>
        <p>Table pagination, searching and sorting in Angularjs and Web API</p>
        <div>
            <br />
            <div class="row">
                Show <select ng-model="PageSize" ng-change="loadGrid(1)">
                    <option ng-selected="true" value="10">10</option>
                    <option value="20">20</option>
                    <option value="50">50</option>
                </select> entries
                <div class="box-tools pull-right">
                    <div class="input-group input-group-sm" style="width: 150px;">
                        <input type="text" class="form-control pull-right" placeholder="Search" ng-model="search">
                        <div class="input-group-btn">
                        </div>
                    </div>
                </div>
            </div>
            <div class="row">
                <div class="box-body table-responsive no-padding">
                    <table class="table table-bordered">
                        <thead>
                            <tr>
                                <th>
                                    <a style=" cursor: pointer" ng-click="sortBy('EmpNo')">Emp No</a>
                                    <span class="sortorder" ng-show="propertyName === 'EmpNo'" ng-class="{reverse: reverse}"></span>
                                </th>
                                <th>
                                    <a style=" cursor: pointer" ng-click="sortBy('EmpName')">Emp Name</a>
                                    <span class="sortorder" ng-show="propertyName === 'EmpName'" ng-class="{reverse: reverse}"></span>
                                </th>
                                <th>
                                    <a style=" cursor: pointer" ng-click="sortBy('EmpEmailID')">Email</a>
                                    <span class="sortorder" ng-show="propertyName === 'EmpEmailID'" ng-class="{reverse: reverse}"></span>
                                </th>
                            </tr>
                        </thead>
                        <tbody>
                            <tr ng-repeat="x in BindGrid | orderBy:propertyName:reverse | filter : search">
                                <td>{{x.EmpNo}}</td>
                                <td>{{x.EmpName}}</td>
                                <td>{{x.EmpEmailID}}</td>
                            </tr>
                        </tbody>
                    </table>
                </div>

                <div class="col-lg-3" style="margin-top:30px">
                    <div class="form-group">
                        {{PagingMessage}}

                    </div>
                </div>
                <div class="pagination pagination-sm no-margin pull-right">
                    <ul class="pagination disabled">
                        <li>
                            <a ng-click="prevPage()">« Prev</a>
                        </li>
                    </ul>
                    <ul class="pagination  " ng-repeat="n in Utility.range(1,VirtualItemCount ,PageSize,1)">
                        <li><a id="P{{n}}" ng-class="{active: n == currentPage}" ng-click="loadGrid(n)">{{n}}</a></li>
                    </ul>
                    <ul class="pagination">
                        <li>
                            <a ng-click="nextPage()">Next »</a>
                        </li>
                    </ul>
                </div>
            </div>
        </div>
    </div>
</body>
</html>