
设置 Angular 2 开发环境
5.00/5 (3投票s)
本文将介绍如何使用 Visual Studio Code 和 Windows 操作系统设置 Angular 2 的开发环境。
注意: 附加的代码中删除了 node_modules 文件夹的所有内容,因此无法直接运行。请按照文章中的说明进行操作。
引言
最近我一直在使用 Visual Studio Code 学习 Angular 2。这是我第一次接触 Visual Studio Code 和 Angular 2。Visual Studio Code 非常轻量级,但与传统的 Visual Studio 相比,我们需要自己完成很多工作。在本文中,我们将分享我为设置开发环境所做的步骤。
基本安装
- 安装 Node.js
让我们从 Node.js 开始,它将作为 JavaScript 运行时。它还用于使用 npm 工具(Node 模块的包管理器)来管理 JavaScript 包。
可以从 此处 安装 Node.js
有关 Node.js 的更多信息,可以在此 stackoverflow 讨论 中找到。您可能还会问一个问题:是否必须使用 Node.js 或是否有其他替代方法可以使用 TypeScript 编译器将 .ts 文件编译成 .js 文件?答案可以在 此处 找到。
- 安装 TypeScript
在 Angular 2 中,我们使用 TypeScript 语言编写代码。TypeScript 代码需要编译成 JavaScript。为此,我们需要安装 TypeScript 编译器,它会将 TypeScript 代码转换为 JavaScript 代码。可以使用以下 npm 命令在命令提示符中安装 TypeScript:npm install -g typescript
这里的 –g 表示 TypeScript 需要全局安装,以便在您机器上的任何项目中都可以使用。
- 安装 Visual Studio Code
我们需要一个源代码编辑器来编写应用程序,我们将使用 Visual Studio Code 源代码编辑器。它非常轻量级,可以用于编写 JavaScript 应用程序代码。
从 此链接 安装 Visual Studio Code。更多详情请访问 此网页。
创建演示应用
- 在系统的任意位置创建一个名为 FirstAnguar2Demo 的文件夹。打开 Visual Studio Code 编辑器,然后单击“文件”>“打开文件夹”按钮。浏览“FirstAnguar2Demo”文件夹。现在 VS Code 编辑器窗口看起来如下。

- 浏览应用程序文件夹 'FirstAngular2Demo' 后,VS Code 编辑器将显示如下。

到目前为止,我们还没有向文件夹添加任何文件,让我们添加一个。向此文件夹添加一个名为 package.json 的文件。

将以下代码粘贴到 package.json 文件中。{ "name": "first-angular2-demo", "version": "2.0.0", "description": "Creating first component in Angular 2", "main": "main.js", "keywords": [], "repository": { "type": "git", "url": "git://github.com/deeleman/learning-angular2.git" }, "scripts": { "start": "tsc && concurrently \"tsc -w\" \"lite-server\" ", "lite": "lite-server", "tsc": "tsc", "tsc:w": "tsc -w" }, "dependencies": { "@angular/common": "~2.4.0", "@angular/compiler": "~2.4.0", "@angular/core": "~2.4.0", "@angular/forms": "~2.4.0", "@angular/http": "~2.4.0", "@angular/platform-browser": "~2.4.0", "@angular/platform-browser-dynamic": "~2.4.0", "@angular/router": "~3.4.0", "systemjs": "0.19.40", "core-js": "^2.4.1", "rxjs": "5.0.1", "zone.js": "^0.7.4", "bootstrap": "^3.3.7" } }有关 package.json 文件的更多信息可以在 此处 找到。在上面的代码中,以下是关键部分:
scripts: 是 package.json 脚本文件的一个属性。它包含在您的包生命周期的不同时间运行的脚本命令。有关更多描述,请参阅 此页面。
dependencies: 在此部分,我们指定了 Angular 应用程序所需的所有依赖项。
- 向 'FirstAnguar2Demo' 文件夹添加一个名为 Systemjs.Config.js 的文件。将以下代码粘贴到 Systemjs.Config.js 文件中:
(function (global) {
  System.config({
    map: {
      app: 'app',

      '@angular/core': 'node_modules/@angular/core/bundles/core.umd.js',
      '@angular/common': 'node_modules/@angular/common/bundles/common.umd.js',
      '@angular/compiler': 'node_modules/@angular/compiler/bundles/compiler.umd.js',
      '@angular/platform-browser': 'node_modules/@angular/platform-browser/bundles/platform-browser.umd.js',
      '@angular/platform-browser-dynamic': 'node_modules/@angular/platform-browser-dynamic/bundles/platform-browser-dynamic.umd.js',
      '@angular/http': 'node_modules/@angular/http/bundles/http.umd.js',
      '@angular/router': 'node_modules/@angular/router/bundles/router.umd.js',
      '@angular/forms': 'node_modules/@angular/forms/bundles/forms.umd.js',
      'rxjs': 'node_modules/rxjs'
    },
    packages: {
      app: {
        main: './main.js',
        defaultExtension: 'js'
      },
      rxjs: {
        defaultExtension: 'js'
      }
    }
  });
})(this);
有关 Systemjs.Config.js 的更多信息,请参阅 此链接。
- 向 'FirstAnguar2Demo' 文件夹添加一个名为 tsconfig.json 的新文件。
 {
  "compilerOptions": {
    "target": "es5",
    "module": "commonjs",
    "moduleResolution": "node",
    "sourceMap": true,
    "emitDecoratorMetadata": true,
    "experimentalDecorators": true,
    "lib": [ "es2015", "dom" ]
  }
}
tsconfig.json: 我们在此指定 TypeScript 编译器将组件代码转换为当前浏览器可读的纯 ECMAScript 5 JavaScript 代码所需的设置。
- 添加一个名为 typings.json 的新文件。在新创建的文件中添加与下面相同的代码:
{
    "ambientDependencies":
  {
         "es6-shim": "github:DefinitelyTyped/DefinitelyTyped/es6-shim/es6-shim.d.ts#6697d6f7dadbf5773cb40ecda35a76027e0783b2"
   }
}
typings.Json: 用于检查编译时错误并提供智能感知。
- 打开命令提示符,导航到应用程序文件夹路径(对我来说是 E:\Angular2\FirstAnguar2Demo)。运行以下命令:
npm install

通过运行此命令,将安装 packages.json 文件中指定的所有必需依赖项。打开 'FirstAnguar2Demo' 文件夹,您将能够看到已创建 'node_modules' 文件夹。打开此文件夹,您将看到所有依赖项都已添加。
在 VS Code 中单击刷新选项,现在 node_modules 文件夹也将会在 VS Code 中可见。

- 在根文件夹中添加一个名为 app 的新文件夹。添加一个名为 main.ts 的文件。
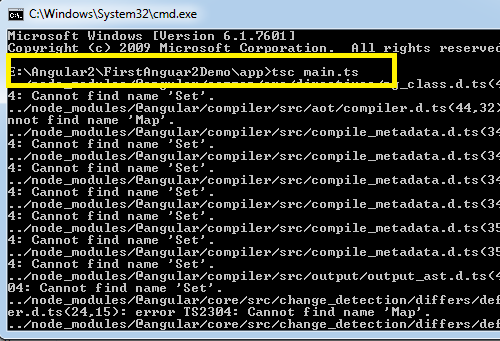
import { Component, NgModule } from '@angular/core';
import { BrowserModule } from '@angular/platform-browser';
import { platformBrowserDynamic } from '@angular/platform-browser-dynamic';
@Component({
    selector: 'hello-angular',
    template: '<h1 class="text-center"> {{greeting}} </h1>'
})
export class DemoAngularComponent {
    greeting: string;
    constructor() {
        this.greeting = 'Welcome to Angular 2 App !!';
    }
}
// Main module, bootstrapping HelloAngularComponent as root component
@NgModule({
    imports: [BrowserModule],
    declarations: [DemoAngularComponent],
    bootstrap: [DemoAngularComponent],
})
export class AppModule { }
// Application bootstrap (specific for browser environments)
const platform = platformBrowserDynamic();
platform.bootstrapModule(AppModule);
在命令提示符中导航到 app 文件夹并运行以下命令:tsc main.ts
当我们运行此命令时,main.ts 文件将被 TypeScript 编译器编译,并在同一位置创建一个 main.js 文件。
- 现在我们需要一个可以在浏览器中查看的 .html 文件,所以让我们在根文件夹级别(E:\Angular2\FirstAnguar2Demo)添加一个 Index.html 文件。将以下代码粘贴到 Index.html 文件中,如此处所示:
<!DOCTYPE HTML>
<html>
    <head>
    <meta charset="utf-8">
    <title>Learning Angular 2</title>
    <!-- Polyfill for older browsers -->
    <script src="node_modules/core-js/client/shim.min.js"></script>
    <script src="node_modules/zone.js/dist/zone.js"></script>
    <script src="node_modules/reflect-metadata/Reflect.js"></script>
    <script src="node_modules/systemjs/dist/system.src.js"></script>
    <script src="systemjs.config.js"></script>
    <script>
        System.import('app').catch(console.error.bind(null));
    </script>
    <link rel="stylesheet" href="node_modules/bootstrap/dist/css/bootstrap.min.css">
  </head>
    <body>
    <hello-angular></hello-angular>
  </body>
</html>
运行演示应用
我们将使用 lite-server 快速运行应用程序。它提供静态内容,检测更改,刷新浏览器,并提供许多自定义选项。让我们使用 lite-server 安装并运行应用程序:
# To install globally:
    npm install -g lite-server


# To run (you must be in the application folder as shown in below screenshots):
    lite-server

在浏览器中,您将能够看到您的第一个 Angular 2 应用正在运行。

结论
在本篇文章中,我们学习了如何使用 Visual Studio Code 为 Angular 2 应用程序开发设置环境。希望这些步骤能帮助您迈出学习 Angular 2 的第一步。您的评论和建议非常欢迎。
参考文献
[1] 为什么我们需要为 Angular 2.0 安装 Node.js?
[2] Systemjs.config.js 在 Angular 2 的打包结构中做什么?