
使用 Unity 框架结合 ASP.NET MVC 进行依赖注入
3.81/5 (8投票s)
在本文中,我们将探讨如何使用 Unity 框架与 MVC 结合,从应用程序中消除硬编码的依赖关系。
引言
大多数带有硬编码依赖关系的应用程序在维护方面都不够好,因为开发该项目的开发人员已经转移到新项目或离开了公司,并且项目没有适当的文档,这在维护项目时会造成问题。在项目中需要快速进行一些更改时,理解代码会变得很困难。为了解决这类问题,我们将使用 Microsoft Unity 框架,这将有助于我们使项目易于维护。
“好的项目总是易于维护”

什么是依赖注入?
依赖注入是一种用于消除硬编码依赖的设计模式。
注入类型
- 构造函数注入
- 属性注入 (Properties)
- 方法注入
在本文中,我们将使用构造函数注入,因为这种类型最常用。
所需工具。
Visual Studio 2015
SQL Server 2008
让我们开始创建一个使用基本项目模板的 MVC 项目。
创建应用程序
打开 Visual Studio IDE,在开始页选择“新建项目…”
选择“新建项目”链接后,将出现“新建项目”对话框。在该对话框中,选择“模板”->“Visual C#”,然后选择“Web”。选择后,您将看到“ASP.NET Web 应用程序”。选择后,只需将您的项目命名为“MvcInjection”,最后单击 OK 按钮即可创建项目。
选择模板

单击 ok 按钮后,将出现另一个项目模板选择向导,名为“新建 ASP.NET 项目”。在该模板中,选择 MVC 模板。我们不为该项目创建单元测试,因此请不要勾选此选项,最后单击 OK 按钮。

按照上述所有选项进行选择后,单击 OK 按钮,您的项目将创建完成。
创建 MvcInjection 项目后的项目结构

创建项目后,我们现在将在项目中添加层 [类库]。
添加 MVCInjection.Model [类库]
首先,我们将添加一个名为 MVCInjection.Model 的 Model 层。
提示:您可能会想,项目中有 Model 文件夹,为什么还要添加 MVCInjection.Model 层?因为如果项目很大,最好将 Model 移到 [类库] 中,并添加到主项目中。
要添加 [类库],只需右键单击项目列表中的项目,选择“添加”->“新建项目”。

选择“新建项目”后,将出现一个名为 添加新项目 的新对话框。在左侧面板中选择类型 Visual C#,然后选择 Windows,从模板中选择 [类库],然后将您的项目命名为 MVCInjection.Model,然后单击 OK 按钮。

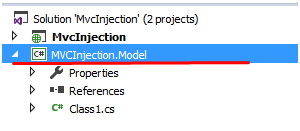
添加 MVCInjection.Model 后的项目结构
现在我们将添加接口以使您的应用程序松耦合。
添加 MVCInjection.Interface [类库]
我们将以与添加 MVCInjection.Model [类库] 类似的方式添加 MVCInjection.Interface。
要添加 [类库],只需右键单击项目列表中的项目,选择“添加”->“新建项目”。
选择“新建项目”后,将出现一个名为 添加新项目 的新对话框。在左侧面板中选择类型 Visual C#,然后选择 Windows,从模板中选择 [类库],然后将您的项目命名为 MVCInjection.Interface,然后单击 OK 按钮。

添加 MVCInjection.Interface 后的项目结构

现在我们将添加实现 接口 的具体类。
添加 MVCInjection.Concrete [类库]
我们将以与添加 MVCInjection.Interface [类库] 类似的方式添加 MVCInjection.Concrete。
要添加 [类库],只需右键单击项目列表中的项目,选择“添加”->“新建项目”。
选择“新建项目”后,将出现一个名为 添加新项目 的新对话框。在左侧面板中选择类型 Visual C#,然后选择 Windows,从模板中选择 [类库],然后将您的项目命名为 MVCInjection.Concrete,然后单击 OK 按钮。

添加 MVCInjection.Concrete 后的项目结构

现在我们已经完成了在项目中添加所有 [类库]。
在 MVCInjection.Model 中添加 Model
接下来,我们将在 [MVCInjection.Model] 中添加一个名为 CustomerModel 的 Model。
要添加 Model,只需右键单击 MVCInjection.Model -> 然后选择“添加”-> 在其中选择“类”。
单击“类”后,将弹出“添加新项”对话框,其中包含类选择,并询问类名,在此我们将其输入为“CustomerModel”。

添加 Model 后,现在让我们为其添加一些属性。
为 CustomerModel 添加属性
namespace MVCInjection.Model
{
    public class CustomerModel
    {
        public int CustomerID { get; set; }
        public string Name { get; set; }
        public string Address { get; set; }
        public string Country { get; set; }
        public string City { get; set; }
        public string Phoneno { get; set; }
    }
}
完成添加 Model 和属性后,现在让我们添加接口。
在 MVCInjection.Interface 中添加接口
我们将在 MVCInjection.Interface 中添加接口。
要添加接口,只需右键单击 MVCInjection.Interface -> 然后选择“添加”-> 在其中选择“添加新项”菜单。
单击“添加新项”后,将弹出一个新的“添加新项”对话框,其中选择“接口”,然后我们将接口命名为“ICustomer”。


添加接口后,现在我们将添加 MVCInjection.Model 的引用到 MVCInjection.Interface 中,以便在接口中访问 Model。
在 MVCInjection.Interface (ICustomer) 中添加 MVCInjection.Model (Customer) 的引用
要添加引用,只需右键单击 MVCInjection.Interface [类库],然后选择“添加引用”。选择后,将出现一个名为“引用管理器”的新对话框,其中选择 MVCInjection.Model,然后单击 OK 按钮。


添加引用后,现在我们将在接口中声明一些方法。
在 MVCInjection.Interface 中声明方法
using MVCInjection.Model;
using System.Collections.Generic;

namespace MVCInjection.Interface
{
    public interface ICustomer
    {
        void Add(CustomerModel Customer);     // Create New Customer
        void Update(CustomerModel Customer);  // Modify Customer
        void Delete(CustomerModel Customer);  // Delete Customer
        CustomerModel GetById(int id); // Get an Single Customer details by id
        IEnumerable<CustomerModel> GetAll();  // Gets All Customer details
    }
}
完成在接口中声明所有方法后,现在让我们在 MVCInjection.Concrete 中添加具体类。
在 MVCInjection.Concrete 中添加类
我们将在项目中的 MVCInjection.Concrete [类库] 中添加一个类。
要添加 Model,只需右键单击 MVCInjection.Concrete -> 然后选择“添加”-> 在其中选择“类”。
单击“类”后,将弹出“添加新项”对话框,其中包含类选择,并询问类名,在此我们将其输入为“CustomerConcrete”。
在 MVCInjection.Concrete (ICustomer) 中添加 MVCInjection.Interface (ICustomer) 的引用
要添加引用,只需右键单击 MVCInjection.Concrete [类库],然后选择“添加引用”。选择后,将出现一个名为“引用管理器”的新对话框,其中选择 MVCInjection.Interface 和 MVCInjection.Model,都需要,然后单击 OK 按钮。

现在我们已经完成了添加引用,现在让我们在 CustomerConcrete 类中实现 ICustomer 接口中声明的所有方法。
CustomerConcrete 类将实现 ICustomer 接口。
using MVCInjection.Interface;
using System;
using System.Collections.Generic;
using System.Linq;
using System.Text;
using System.Threading.Tasks;
using MVCInjection.Model;

namespace MVCInjection.Concrete
{
    public class CustomerConcrete : ICustomer
    {


    }
}
现在,为了执行所有数据库操作(如 CRUD),我将使用 Dapper ORM。
我们将从 NuGet 包管理器中添加 Dapper ORM 的引用,并将其添加到 MVCInjection.Concrete [类库] 中。
要打开“管理 NuGet 包”对话框,只需右键单击 MVCInjection.Concrete [类库],然后从列表中选择 管理 NuGet 包。
管理 NuGet 包对话框的快照。
在搜索框中输入 Dapper。并选择 Dapper dot net 如下所示,然后单击“安装”按钮。

添加 Dapper 后的项目结构

添加 Dapper ORM 后,接下来我们将创建数据库、表和存储过程以执行 CRUD 操作。
数据库部分
这里我将展示一些数据库部分。
我已创建名为 [CustomerDB] 的数据库。

之后,我在 CustomerDB 数据库中创建了一个名为 [CustomerTB] 的表。

我们将使用存储过程来执行 CRUD 操作。
以下是我创建的存储过程的名称,我将提供这些存储过程供下载。

使用的连接字符串
  <connectionStrings>
    <add name="DefaultConnection"
         providerName="System.Data.SqlClient"
         connectionString="Data Source=sai-pc;Database=CustomerDB;UID=sa;Password=Pass$123" />
  </connectionStrings>
完成数据库部分后,我们将返回 MVCInjection.Concrete [类库] 中的 CustomerConcrete 类。
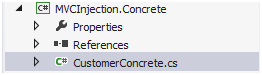
CustomerConcrete 类将实现 ICustomer 接口
在此部分,我实现了接口中声明的所有方法,并使用 Dapper 执行 CRUD 操作。
using Dapper;
using MVCInjection.Interface;
using MVCInjection.Model;
using System.Collections.Generic;
using System.Configuration;
using System.Data;
using System.Data.SqlClient;
using System.Linq;

namespace MVCInjection.Concrete
{
    public class CustomerConcrete : ICustomer
    {

        public void Add(CustomerModel Customer)
        {
            try
            {
                using (SqlConnection con = new SqlConnection(ConfigurationManager.ConnectionStrings["DefaultConnection"].ConnectionString))
                {
                    con.Open();
                    SqlTransaction sqltans = con.BeginTransaction();
                    var param = new DynamicParameters();
                    param.Add("@CustomerID", Customer.CustomerID);
                    param.Add("@Name", Customer.Name);
                    param.Add("@Address", Customer.Address);
                    param.Add("@Country", Customer.Country);
                    param.Add("@City", Customer.City);
                    param.Add("@Phoneno", Customer.Phoneno);
                    var result = con.Execute("sprocCustomerTBInsertUpdateSingleItem",
                          param,
                          sqltans,
                          0,
                          commandType: CommandType.StoredProcedure);

                    if (result > 0)
                    {
                        sqltans.Commit();
                    }
                    else
                    {
                        sqltans.Rollback();
                    }

                }
            }
            catch (System.Exception)
            {
                throw;
            }

        }

        public void Update(CustomerModel Customer)
        {
            try
            {
                using (SqlConnection con = new SqlConnection(ConfigurationManager.ConnectionStrings["DefaultConnection"].ConnectionString))
                {
                    con.Open();
                    SqlTransaction sqltans = con.BeginTransaction();
                    var param = new DynamicParameters();
                    param.Add("@CustomerID", Customer.CustomerID);
                    param.Add("@Name", Customer.Name);
                    param.Add("@Address", Customer.Address);
                    param.Add("@Country", Customer.Country);
                    param.Add("@City", Customer.City);
                    param.Add("@Phoneno", Customer.Phoneno);
                    var result = con.Execute("sprocCustomerTBInsertUpdateSingleItem",
                        param,
                        sqltans,
                        0,
                        commandType: CommandType.StoredProcedure);


                    if (result > 0)
                    {
                        sqltans.Commit();
                    }
                    else
                    {
                        sqltans.Rollback();
                    }
                }
            }
            catch (System.Exception)
            {
                throw;
            }
        }

        public void Delete(CustomerModel Customer)
        {
            try
            {
                using (SqlConnection con = new SqlConnection(ConfigurationManager.ConnectionStrings["DefaultConnection"].ConnectionString))
                {
                    con.Open();
                    SqlTransaction sqltans = con.BeginTransaction();
                    var param = new DynamicParameters();
                    param.Add("@CustomerID", Customer.CustomerID);
                    var result = con.Execute("sprocCustomerTBDeleteSingleItem",
                        param,
                        sqltans,
                        0,
                        commandType: CommandType.StoredProcedure);

                    if (result > 0)
                    {
                        sqltans.Commit();
                    }
                    else
                    {
                        sqltans.Rollback();
                    }
                }
            }
            catch (System.Exception)
            {
                throw;
            }
        }

        public CustomerModel GetById(int id)
        {
            try
            {
                using (SqlConnection con = new SqlConnection(ConfigurationManager.ConnectionStrings["DefaultConnection"].ConnectionString))
                {
                    con.Open();
                    var param = new DynamicParameters();
                    param.Add("@CustomerID", id);
                    return con.Query<CustomerModel>("sprocCustomerTBSelectList",
                        param,
                        null,
                        true,
                        0,
                        commandType: CommandType.StoredProcedure).SingleOrDefault();
                }
            }
            catch (System.Exception)
            {
                throw;
            }
        }

        public IEnumerable<CustomerModel> GetAll()
        {
            try
            {
                using (SqlConnection con = new SqlConnection(ConfigurationManager.ConnectionStrings["DefaultConnection"].ConnectionString))
                {
                    con.Open();
                    var param = new DynamicParameters();
                    return con.Query<CustomerModel>("sprocCustomerTBSelectList",
                        null,
                        null,
                        true,
                        0,
                        commandType: CommandType.StoredProcedure).ToList();
                }
            }
            catch (System.Exception)
            {
                throw;
            }
        }

    }
}
完成实现后,接下来我们将向主 Web 项目 [MvcInjection] 添加 Model 和 Interface 的引用。
向主 Web 项目 MvcInjection 添加 Model 和 Interface 的引用
要添加引用,只需右键单击 MVCInjection,然后选择“添加引用”。选择后,将出现一个名为“引用管理器”的新对话框,其中选择 MVCInjection.Interface、MVCInjection.Model、MVCInjection.Concrete,因为它们是必需的,然后单击 OK 按钮。

添加引用后的项目

添加此引用后,现在让我们添加一个名为 CustomerController 的控制器。
添加控制器
要添加控制器,只需右键单击 Controller 文件夹,然后选择“添加”,然后选择“控制器”。
单击“控制器”后,将弹出名为“添加控制器”的新对话框。
我将控制器命名为“CustomerController”,在模板中,我将选择“带有空读/写操作的 MVC 控制器”,最后单击“添加”按钮。


添加 CustomerController 后的项目结构

带有所有空操作方法的 CustomerController

现在我们将向 MVCInjection Application 添加 Microsoft Unity Framework 的引用。
添加 Microsoft Unity Framework 引用
添加 Microsoft Unity Framework 有两种方法。
- 通过管理 NuGet 包添加
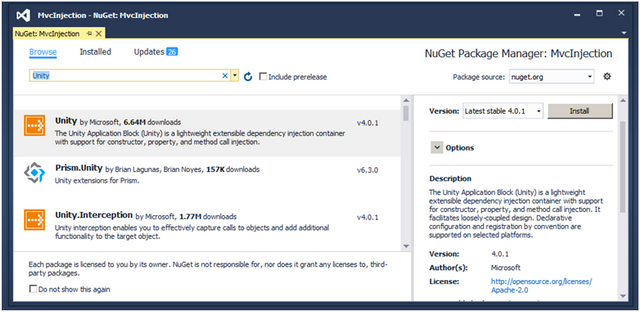
要打开“管理 NuGet 包”对话框,只需右键单击 MVCInjection,然后从列表中选择 管理 NuGet 包。
在搜索框中输入 Unity。
并选择 Unity 如下所示,然后单击“安装”按钮,它将被安装。
添加 Unity 后,接下来我们将把 Unity.MVC 包添加到项目中,方法与添加 Unity 相同,只需在搜索框中输入 Unity.MVC,然后选择 Unity.MVC 如下所示,然后单击“安装”按钮,它将被安装。

安装 Microsoft Unity Framework 后,您应该能在应用程序启动文件夹 [App_Start] 中看到 2 个类:UnityConfig 类和 UnityWebActivator 类。
添加 Microsoft Unity Framework 后的项目结构

安装 Microsoft Unity Framework 后,您会发现 UnityConfig 和 UnityWebActivator 这两个类。
UnityConfig:指定主容器的 Unity 配置。
UnityWebActivator:提供 Unity 与 ASP.NET MVC 集成的引导程序。
下面您可以看到 UnityConfig 类的快照。

Register
现在我们将注册所有类型映射到 Unity 容器。
在 UnityConfig 类中,我们将使用 RegisterTypes 方法,在该方法中,我们将保存映射,以便将哪个接口解析为哪个具体类。
private readonly ICustomer ICustomer;

 public CustomerController(ICustomer _ICustomer)
 {
     this.ICustomer = _ICustomer;
 }
我们有一个名为 ICustomer 的接口和另一个名为 CustomerConcrete 的具体类,我们正在 Unity 容器中注册类型。
这里我们已注册类型。
container.RegisterType<ICustomer, CustomerConcrete>();
我们应该只在 RegisterTypes 方法中注册所有类型。
     public static void RegisterTypes(IUnityContainer container)
     {
         // TODO: Register your types here
         container.RegisterType<ICustomer, CustomerConcrete>();
     }
这表示无论我们在哪里使用 ICustomer 进行构造函数注入,都将注入 CustomerConcrete 对象。
现在我们不再需要手动创建对象,所有对象创建都将由 Unity 容器处理,您只需请求 Unity 容器为您处理,这样容器就可以解析任何依赖关系。
现在我们将使用构造函数注入,我们将在 CustomerController 中进行此操作。
 private readonly ICustomer ICustomer;

 public CustomerController(ICustomer _ICustomer)
 {
     this.ICustomer = _ICustomer;
 }
在运行时,当您的构造函数被调用时,Unity 容器将用 CustomerConcrete 类解析 ICustomer 接口。
现在通过构造函数注入,我们获得了对象,然后我们可以从该对象调用 CustomerConcrete 类中的所有方法。
以下是 CustomerController 的代码片段。
using MVCInjection.Interface;
using MVCInjection.Model;
using System.Web.Mvc;

namespace MvcInjection.Controllers
{
    public class CustomerController : Controller
    {

        private readonly ICustomer ICustomer;

        public CustomerController(ICustomer _ICustomer)
        {
            this.ICustomer = _ICustomer;
        }


        public ActionResult Index()
        {
            var Alldata = ICustomer.GetAll();
            return View(Alldata);
        }

        //
        // GET: /Customer/Details/5

        public ActionResult Details(int id)
        {
            var Detailsdata = ICustomer.GetById(id);
            return View(Detailsdata);
        }

        //
        // GET: /Customer/Create

        public ActionResult Create()
        {
            return View();
        }

        //
        // POST: /Customer/Create

        [HttpPost]
        public ActionResult Create(CustomerModel Customer)
        {
            try
            {
                if (ModelState.IsValid)
                {
                    ICustomer.Add(Customer);
                    return View();
                }
                else
                {
                    return View(Customer);
                }
            }
            catch
            {
                return View();
            }

        }

        //
        // GET: /Customer/Edit/5

        public ActionResult Edit(int id)
        {
            var Editdata = ICustomer.GetById(id);
            return View(Editdata);
        }

        //
        // POST: /Customer/Edit/5

        [HttpPost]
        public ActionResult Edit(CustomerModel Customer)
        {
            try
            {
                if (ModelState.IsValid)
                {
                    ICustomer.Update(Customer);
                    return View();
                }
                else
                {
                    return View(Customer);
                }
            }
            catch
            {
                return View();
            }
        }

        //
        // GET: /Customer/Delete/5

        public ActionResult Delete(int id)
        {
            var Deletedata = ICustomer.GetById(id);
            return View(Deletedata);
        }

        //
        // POST: /Customer/Delete/5

        [HttpPost]
        public ActionResult Delete(CustomerModel Customer)
        {
            try
            {
                ICustomer.Delete(Customer);
                return RedirectToAction("Index");
            }
            catch
            {
                return View();
            }
        }
    }
}
完成使用 Unity 构造函数注入在所有 Action 方法中使用 CustomerConcrete 类并访问所有方法后,现在我们将一个接一个地为所有 Action 方法添加所有视图。
添加所有创建/更新/删除/索引的视图
要添加视图,只需右键单击 Index ActionResult 方法内的任意位置,然后选择“添加视图”来为我们的 Index 表单创建视图模板。

在这里,下面的快照中,我选择了 Razor 作为视图引擎,我们将创建一个强类型视图,为此我选择了 Model 类 Customer,并且我们想创建一个输入表单,为此我选择了 Create in Scaffold 模板,最后单击 Add 按钮。

单击 Add 按钮后,将创建视图,并将其存储在 Views 文件夹中。在此文件夹内有一个与 Controller 同名的文件夹 [Customer],该视图将放置在此文件夹中。
同样,我们将为所有 Action 方法添加视图。
添加详细信息视图
要添加详细信息视图,我们只需遵循类似的步骤。在 Model 中,我们将选择 Customer,在 Scaffold 模板中,我们将选择 Details。
添加创建视图
要添加创建视图,我们只需遵循类似的步骤。在 Model 中,我们将选择 Customer,在 Scaffold 模板中,我们将选择 Create。
添加编辑视图
要添加编辑视图,我们只需遵循类似的步骤。在 Model 中,我们将选择 Customer,在 Scaffold 模板中,我们将选择 Edit。
添加删除视图
要添加删除视图,我们只需遵循类似的步骤。在 Model 中,我们将选择 Customer,在 Scaffold 模板中,我们将选择 Delete。
完成所有视图的添加后,您的 Views 文件夹应如下所示。
添加视图后的项目结构

现在我们已经完成了视图的添加,让我们运行应用程序。
要访问应用程序,我们将输入 URL: - https://:#####/Customer/create
(##### 是本地主机端口号)。
应用程序的执行仅在第一次运行时。

运行应用程序后,我们将看到构造函数注入是如何发生的。
通过在构造函数中附加调试器,您可以检查正在注入的内容。
在下面的快照中,它正在注入 Concrete 类(CustomerConcrete)。

我们调用了 Create Action 方法,它将返回一个 View [Create]。
输入数据后,我将单击 Create 按钮将数据保存到数据库。

同样,我们可以访问我们创建的所有视图。
“如果您仔细观察,对象创建过程已经移出,我们不再手动创建对象。”
创建 Customer [SQL Server] 后的结果
