
使用树莓派构建数字相框
5.00/5 (5投票s)
用 35 美元的树莓派和旧屏幕构建您自己的数字相框。
引言
这是一个由树莓派驱动的定制数字相框。我使用HTML5 canvas 元素来显示图像,以及天气、时间和日期信息。
必备组件
你需要配置树莓派并安装操作系统,这已经在我的之前的文章中介绍过了。
Using the Code
用于显示照片以及天气、时间和日期信息的HTML代码如下
<div class="container" style="overflow: hidden;">
        <div class="event">
            <h1 style="margin-bottom: 5px;
             font-family:Alegreya Sans;text-align: center;">
             <span style="padding-left:15px;" id="dateHead"></span></h1>
            <h1 style="margin-bottom: 5px;font-family:Alegreya Sans;">
             <span style="padding-left:15px;" id="weatherHead"></span></h1>
            <h4 style="margin-top: 5px;font-family:Alegreya Sans;">
             <span style="padding-left:15px;font-size:18px;"
              id="weatherBody"></span></h4>
            <h1 style="margin-bottom:5px;font-family:Alegreya Sans;
                text-align: center;"><span id="timeHead"></span></h1>
        </div>
       <canvas id="photoGallery" style="background-color :black;top: 0px;left: 0px;">
                Your browser does not support the HTML5 canvas tag.
       </canvas>
</div>
HTML <canvas> 元素用于通过JavaScript绘制图形。以下是用于在 canvas 中加载图像的JavaScript代码。
var imgIndex = 0;
var photoTimer = 10000;
var weatherTimer = 1000 * 60 * 60;
var clockTimer = 1000;
var canvas = document.getElementById('photoGallery');
var context = canvas.getContext('2d');
var img = new Image();
img.src = images[imgIndex];
img.onload = function () {
      var width = window.innerWidth;
      var height = window.innerHeight;
      context.canvas.width = width;
      context.canvas.height = height;
      context.drawImage(img, 0, 0, width, height);
};

setClock();
setInterval(loadPhoto, photoTimer);
setInterval(getWeather, weatherTimer);
setInterval(setClock, clockTimer);

function loadPhoto() {
   imgIndex = imgIndex >= images.length ? 0 : ++imgIndex;
   img.src = images[imgIndex];
}

function setClock() {
  var d = new Date();
  $("#dateHead").html(d.toDateString());
  $("#timeHead").html(d.toLocaleTimeString());
}

function getWeather() {
 $.simpleWeather({
    location: 'Burlington,CA',
    woeid: '',
    unit: 'c',
    success: function (weather) {
        html = weather.city + ', ' + weather.region + '   ' +
               weather.temp + '°' + weather.units.temp;
        $("#weatherHead").html(html);
        html = 'Feel like ' + eval(weather.wind.chill + weather.temp) +
               '°' + '  ' + weather.currently + '  ' +
                weather.wind.direction + '  ' + weather.wind.speed +
                '  ' + weather.units.speed;
        $("#weatherBody").html(html);
    },
    error: function (error) {
        $(".weather").html('<p>' + error + '</p>');
    }
  });

$(function () {
    getWeather();
});
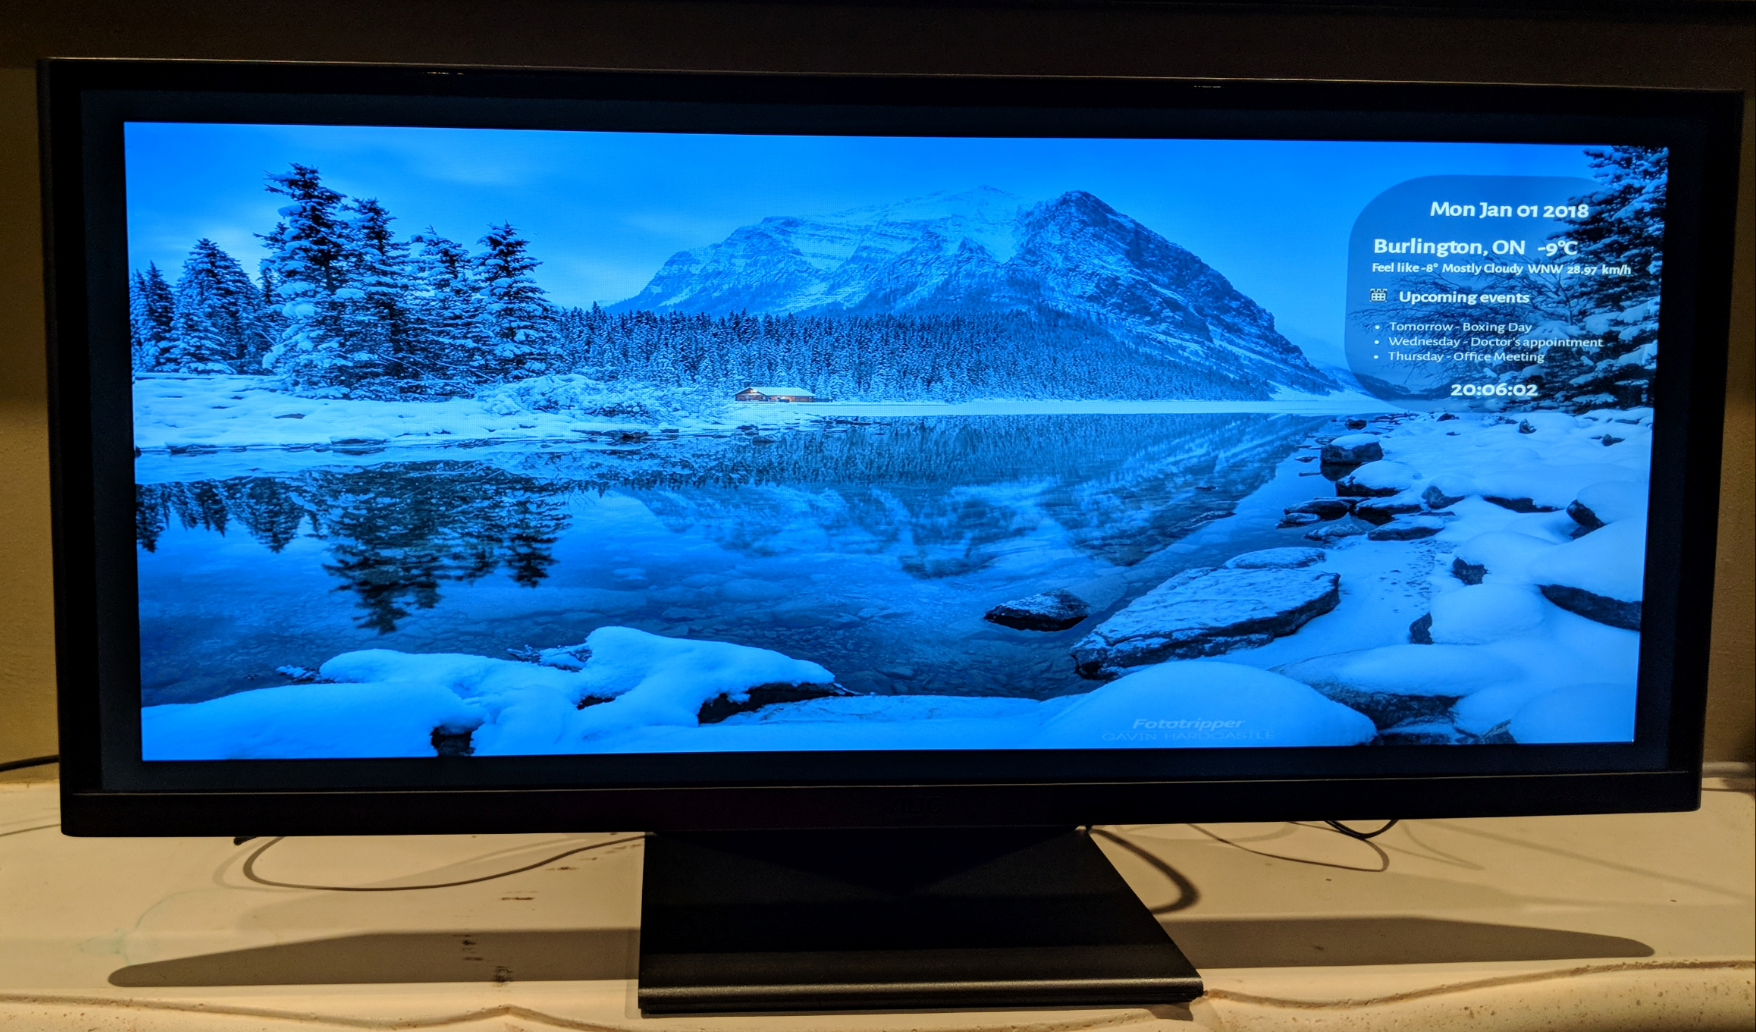
上面的代码片段使用jquery simpleweather 插件来显示给定位置的天气信息。目前,我正在从flickr显示照片,但是,Google Photos、Calendar或flickr API可以被集成,我将在下一篇文章中介绍。另外,我正在使用天气位置'Burlington,CA',这可以使用HTML5 Geolocation API 获取。这是我们的HTML输出。

设置树莓派
树莓派的设置已经在我的之前的文章中介绍过了。接下来,我们将会在树莓派上安装NGINX Web服务器。首先,通过在终端中输入以下命令来安装 nginx 包
sudo apt-get install nginx
接下来,我们将使用ftp或在终端中用我们的代码替换 nginx 默认页面。
sudo nano /var/www/html/index.nginx-debian.html
并使用以下命令启动服务器
sudo /etc/init.d/nginx start
现在,在树莓派chromium中输入https://启动页面,在浏览器中可以通过按键盘上的 F11 键进入全屏模式。以下是我的演示

关注点
我将在下一篇文章中介绍与Google Photos、Calendar或Flickr API的集成。
历史
- 2018年1月1日:初始版本