
一个基于 ASP.NET Core、Angular、EntityFrameworkCore 和 ASP.NET Boilerplate 的多租户 (SaaS) 应用程序
4.92/5 (13投票s)
创建一个基于 ASP.NET Boilerplate 并使用 ASP.NET Core、Angular 和 EntityFrameworkCore 的多租户 (SaaS) Web 应用程序。
- 从 Github 仓库获取源代码。
目录
本文最初发布于 ASP.NET Boilerplate
引言
在本文中,我们将看到一个使用以下框架开发的 SaaS(多租户)应用程序
- ASP.NET Boilerplate 作为应用程序框架。
- ASP.NET Core 作为 Web 框架。
- Entity Framework Core 作为 ORM。
- Angular5 作为 SPA 框架。
- Bootstrap 作为 HTML/CSS 框架。
从模板创建应用程序
ASP.NET Boilerplate 提供模板以简化项目启动。我们从 https://aspnetboilerplate.com/Templates 创建启动模板

我选择了 ASP.NET Core 2.x、Angular 并勾选了 “Include login, register, user, role and tenant management pages”。它为我们创建了一个现成可用的解决方案,包括登录页面、导航和基于 Bootstrap 的布局。下载后用 Visual Studio 2017+ 打开解决方案,我们将看到一个分层解决方案结构,其中包括一个单元测试项目。

运行项目
首先,我们选择 EventCloud.Host 作为启动项目。解决方案带有 Entity Framework Core Code-First Migrations。因此,(恢复 Nuget 包后) 我们打开包管理器控制台 (PMC) 并运行 Update-Database 命令来创建数据库。
包管理器控制台的默认项目应该是 EventCloud.EntityFrameworkCore (因为它包含迁移)。此命令在本地 SQL Server 中创建 EventCloud 数据库 (您可以在 appsettings.json 文件中更改连接字符串)。

首先我运行 EventCloud.Host 项目。我们将看到以下屏幕

我们将使用 Angular-CLI 来启动 Angular UI。以下是启动 Angular UI 的步骤
- 在 EventCloud/angular 位置打开 cmd
- 运行
yarn命令安装包 - 运行
npm start运行应用程序

然后当您浏览 https://:4200 时,您将看到以下登录页面
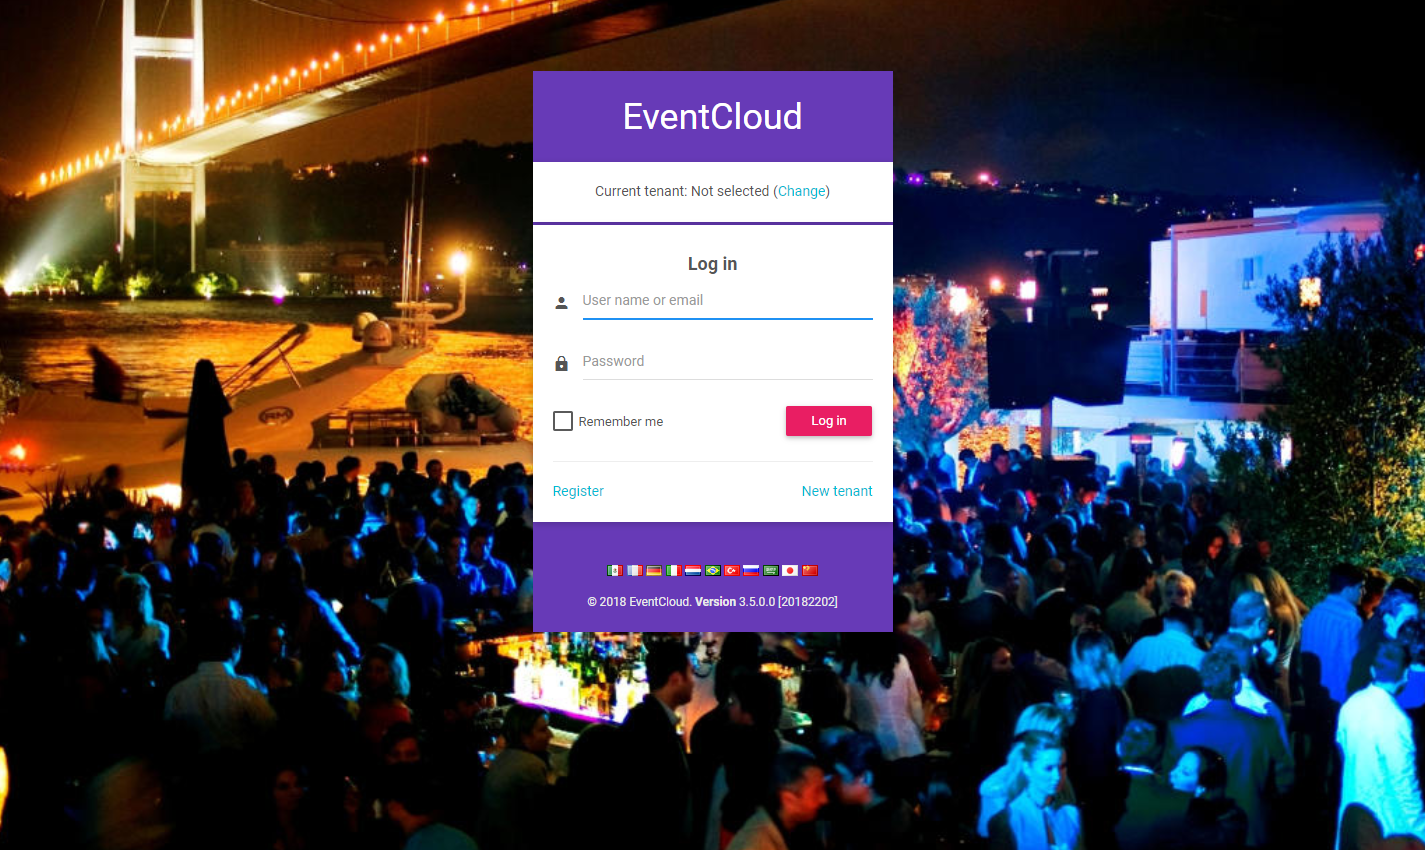
我们可以将租户名称更改为 Default,输入 admin 作为用户名,123qwe 作为密码登录。
登录后,我们看到基于 Bootstrap 的基本 Admin BSB Material Design 布局。

如果您将 tenancyName 留空,您将以主机身份登录并看到以下仪表板(多了一个管理租户的菜单项)

这是一个带有动态菜单的本地化 UI。Angular 布局、路由和基本基础设施都正常工作。我将此项目作为事件云项目的基础。
事件云项目
在本文中,我将展示项目的关键部分并进行解释。因此,在阅读本文的其余部分之前,请下载示例项目,在 Visual Studio 2017+ 中打开并运行迁移(在运行迁移之前,请确保没有名为 EventCloudDb 的数据库)。我将遵循一些 DDD (领域驱动设计) 技术来创建领域 (业务) 层和应用层。
Event Cloud 是一个免费的 SaaS(多租户)应用程序。我们可以创建一个拥有自己的事件、用户、角色等的租户。在创建、取消和注册事件时,会应用一些简单的业务规则。
那么,让我们开始研究源代码。
实体
实体是我们领域层的一部分,位于 EventCloud.Core 项目下。ASP.NET Boilerplate 启动模板附带 Tenant、User、Role... 等实体,这些实体对于大多数应用程序都是通用的。我们可以根据需要自定义它们。当然,我们可以添加我们应用程序特定的实体。
事件云项目的基本实体是 Event 实体。
[Table("AppEvents")]
public class Event : FullAuditedEntity<Guid>, IMustHaveTenant
{
    public const int MaxTitleLength = 128;
    public const int MaxDescriptionLength = 2048;

    public virtual int TenantId { get; set; }

    [Required]
    [StringLength(MaxTitleLength)]
    public virtual string Title { get; protected set; }

    [StringLength(MaxDescriptionLength)]
    public virtual string Description { get; protected set; }

    public virtual DateTime Date { get; protected set; }

    public virtual bool IsCancelled { get; protected set; }

    /// <summary>
    /// Gets or sets the maximum registration count.
    /// 0: Unlimited.
    /// </summary>
    [Range(0, int.MaxValue)]
    public virtual int MaxRegistrationCount { get; protected set; }

    [ForeignKey("EventId")]
    public virtual ICollection<EventRegistration> Registrations { get; protected set; }

    /// <summary>
    /// We don't make constructor public and forcing to create events using <see cref="Create"/> method.
    /// But constructor can not be private since it's used by EntityFramework.
    /// Thats why we did it protected.
    /// </summary>
    protected Event()
    {

    }

    public static Event Create(int tenantId, string title, DateTime date, string description = null, int maxRegistrationCount = 0)
    {
        var @event = new Event
        {
            Id = Guid.NewGuid(),
            TenantId = tenantId,
            Title = title,
            Description = description,
            MaxRegistrationCount = maxRegistrationCount
        };

        @event.SetDate(date);

        @event.Registrations = new Collection<EventRegistration>();

        return @event;
    }

    public bool IsInPast()
    {
        return Date < Clock.Now;
    }

    public bool IsAllowedCancellationTimeEnded()
    {
        return Date.Subtract(Clock.Now).TotalHours <= 2.0; //2 hours can be defined as Event property and determined per event
    }

    public void ChangeDate(DateTime date)
    {
        if (date == Date)
        {
            return;
        }

        SetDate(date);

        DomainEvents.EventBus.Trigger(new EventDateChangedEvent(this));
    }

    internal void Cancel()
    {
        AssertNotInPast();
        IsCancelled = true;
    }

    private void SetDate(DateTime date)
    {
        AssertNotCancelled();

        if (date < Clock.Now)
        {
            throw new UserFriendlyException("Can not set an event's date in the past!");
        }

        if (date <= Clock.Now.AddHours(3)) //3 can be configurable per tenant
        {
            throw new UserFriendlyException("Should set an event's date 3 hours before at least!");
        }

        Date = date;

        DomainEvents.EventBus.Trigger(new EventDateChangedEvent(this));
    }

    private void AssertNotInPast()
    {
        if (IsInPast())
        {
            throw new UserFriendlyException("This event was in the past");
        }
    }

    private void AssertNotCancelled()
    {
        if (IsCancelled)
        {
            throw new UserFriendlyException("This event is canceled!");
        }
    }
}
事件实体不仅仅只有获取/设置属性。实际上,它没有公共设置器,设置器是受保护的。它有一些领域逻辑。所有属性都必须由 事件 实体本身更改,以确保领域逻辑得以执行。
Event 实体的构造函数也是受保护的。因此,创建 Event 的唯一方法是 Event.Create 方法。
Event 实现了 IMustHaveTenant 接口。这是 ASP.NET Boilerplate (ABP) 框架的一个接口,确保此实体是每个租户的。这是多租户所必需的。因此,不同的租户将拥有不同的事件,并且无法看到彼此的事件。ABP 会自动过滤当前租户的实体。
Event 类继承自 FullAuditedEntity,其中包含创建、修改和删除审计列。FullAuditedEntity 还实现了 ISoftDelete,因此事件无法从数据库中删除。当您删除它时,它们被标记为已删除。当您查询数据库时,ABP 会自动过滤(隐藏)已删除的实体。
在 DDD 中,实体具有领域(业务)逻辑。我们有一些简单的业务规则,您在检查实体时可以很容易理解这些规则。
我们应用程序的第二个实体是 EventRegistration
[Table("AppEventRegistrations")]
public class EventRegistration : CreationAuditedEntity, IMustHaveTenant
{
    public int TenantId { get; set; }

    [ForeignKey("EventId")]
    public virtual Event Event { get; protected set; }
    public virtual Guid EventId { get; protected set; }

    [ForeignKey("UserId")]
    public virtual User User { get; protected set; }
    public virtual long UserId { get; protected set; }

    /// <summary>
    /// We don't make constructor public and forcing to create registrations using <see cref="CreateAsync"/> method.
    /// But constructor can not be private since it's used by EntityFramework.
    /// Thats why we did it protected.
    /// </summary>
    protected EventRegistration()
    {

    }

    public static async Task<EventRegistration> CreateAsync(Event @event, User user, IEventRegistrationPolicy registrationPolicy)
    {
        await registrationPolicy.CheckRegistrationAttemptAsync(@event, user);

        return new EventRegistration
        {
            TenantId = @event.TenantId,
            EventId = @event.Id,
            Event = @event,
            UserId = @user.Id,
            User = user
        };
    }

    public async Task CancelAsync(IRepository<EventRegistration> repository)
    {
        if (repository == null) { throw new ArgumentNullException("repository"); }

        if (Event.IsInPast())
        {
            throw new UserFriendlyException("Can not cancel event which is in the past!");
        }

        if (Event.IsAllowedCancellationTimeEnded())
        {
            throw new UserFriendlyException("It's too late to cancel your registration!");
        }

        await repository.DeleteAsync(this);
    }
}
与 Event 类似,我们有一个静态的创建方法。创建新的 EventRegistration 的唯一方法是这个 CreateAsync 方法。它获取一个事件、用户和一个注册策略。它使用 registrationPolicy.CheckRegistrationAttemptAsync 方法检查给定用户是否可以注册该事件。如果给定用户不能注册给定事件,此方法将抛出异常。通过这种设计,我们确保在创建注册时应用了所有业务规则。没有不使用注册策略就创建注册的方法。
有关实体的更多信息,请参阅实体文档。
事件注册策略
EventRegistrationPolicy 类定义如下所示
public class EventRegistrationPolicy : IEventRegistrationPolicy
{
    private readonly IRepository<EventRegistration> _eventRegistrationRepository;
    private readonly ISettingManager _settingManager;

    public EventRegistrationPolicy(
        IRepository<EventRegistration> eventRegistrationRepository,
        ISettingManager settingManager
        )
    {
        _eventRegistrationRepository = eventRegistrationRepository;
        _settingManager = settingManager;
    }

    public async Task CheckRegistrationAttemptAsync(Event @event, User user)
    {
        if (@event == null) { throw new ArgumentNullException("event"); }
        if (user == null) { throw new ArgumentNullException("user"); }

        CheckEventDate(@event);
        await CheckEventRegistrationFrequencyAsync(user);
    }

    private static void CheckEventDate(Event @event)
    {
        if (@event.IsInPast())
        {
            throw new UserFriendlyException("Can not register event in the past!");
        }
    }

    private async Task CheckEventRegistrationFrequencyAsync(User user)
    {
        var oneMonthAgo = Clock.Now.AddDays(-30);
        var maxAllowedEventRegistrationCountInLast30DaysPerUser = await _settingManager.GetSettingValueAsync<int>(AppSettingNames.MaxAllowedEventRegistrationCountInLast30DaysPerUser);
        if (maxAllowedEventRegistrationCountInLast30DaysPerUser > 0)
        {
            var registrationCountInLast30Days = await _eventRegistrationRepository.CountAsync(r => r.UserId == user.Id && r.CreationTime >= oneMonthAgo);
            if (registrationCountInLast30Days > maxAllowedEventRegistrationCountInLast30DaysPerUser)
            {
                throw new UserFriendlyException(string.Format("Can not register to more than {0}", maxAllowedEventRegistrationCountInLast30DaysPerUser));
            }
        }
    }
}
这是我们领域的重要组成部分。在创建事件注册时,我们有两条规则
- 用户不能注册过去的事件。
- 用户在 30 天内最多可以注册一定数量的事件。因此,我们有注册频率限制。
事件管理器
EventManager 实现了事件的业务(领域)逻辑。所有事件操作都应使用此类别执行。其定义如下所示
public class EventManager : IEventManager
{
    public IEventBus EventBus { get; set; }

    private readonly IEventRegistrationPolicy _registrationPolicy;
    private readonly IRepository<EventRegistration> _eventRegistrationRepository;
    private readonly IRepository<Event, Guid> _eventRepository;

    public EventManager(
        IEventRegistrationPolicy registrationPolicy,
        IRepository<EventRegistration> eventRegistrationRepository,
        IRepository<Event, Guid> eventRepository)
    {
        _registrationPolicy = registrationPolicy;
        _eventRegistrationRepository = eventRegistrationRepository;
        _eventRepository = eventRepository;

        EventBus = NullEventBus.Instance;
    }

    public async Task<Event> GetAsync(Guid id)
    {
        var @event = await _eventRepository.FirstOrDefaultAsync(id);
        if (@event == null)
        {
            throw new UserFriendlyException("Could not found the event, maybe it's deleted!");
        }

        return @event;
    }

    public async Task CreateAsync(Event @event)
    {
        await _eventRepository.InsertAsync(@event);
    }

    public void Cancel(Event @event)
    {
        @event.Cancel();
        EventBus.Trigger(new EventCancelledEvent(@event));
    }

    public async Task<EventRegistration> RegisterAsync(Event @event, User user)
    {
        return await _eventRegistrationRepository.InsertAsync(
            await EventRegistration.CreateAsync(@event, user, _registrationPolicy)
            );
    }

    public async Task CancelRegistrationAsync(Event @event, User user)
    {
        var registration = await _eventRegistrationRepository.FirstOrDefaultAsync(r => r.EventId == @event.Id && r.UserId == user.Id);
        if (registration == null)
        {
            //No need to cancel since there is no such a registration
            return;
        }

        await registration.CancelAsync(_eventRegistrationRepository);
    }

    public async Task<IReadOnlyList<User>> GetRegisteredUsersAsync(Event @event)
    {
        return await _eventRegistrationRepository
            .GetAll()
            .Include(registration => registration.User)
            .Where(registration => registration.EventId == @event.Id)
            .Select(registration => registration.User)
            .ToListAsync();
    }
}
它执行领域逻辑并触发所需的事件。
有关领域服务的更多信息,请参阅领域服务文档。
领域事件
我们可能希望在应用程序中的某些状态更改时定义和触发一些特定于领域的事件。我定义了两个特定于领域的事件
- EventCancelledEvent: 在事件取消时触发。它在
EventManager.Cancel方法中触发。 - EventDateChangedEvent: 在事件日期更改时触发。它在
Event.ChangeDate方法中触发。
我们处理这些事件并通知相关用户这些更改。此外,我还处理了 EntityCreatedEventDate<Event>(这是一个预定义的 ABP 事件,会自动触发)。
为了处理一个事件,我们应该定义一个事件处理类。我定义了 EventUserEmailer,以便在需要时向用户发送电子邮件。
public class EventUserEmailer :
        IEventHandler<EntityCreatedEventData<Event>>,
        IEventHandler<EventDateChangedEvent>,
        IEventHandler<EventCancelledEvent>,
        ITransientDependency
{
    public ILogger Logger { get; set; }

    private readonly IEventManager _eventManager;
    private readonly UserManager _userManager;

    public EventUserEmailer(
        UserManager userManager,
        IEventManager eventManager)
    {
        _userManager = userManager;
        _eventManager = eventManager;

        Logger = NullLogger.Instance;
    }

    [UnitOfWork]
    public virtual void HandleEvent(EntityCreatedEventData<Event> eventData)
    {
        //TODO: Send email to all tenant users as a notification

        var users = _userManager
            .Users
            .Where(u => u.TenantId == eventData.Entity.TenantId)
            .ToList();

        foreach (var user in users)
        {
            var message = string.Format("Hey! There is a new event '{0}' on {1}! Want to register?", eventData.Entity.Title, eventData.Entity.Date);
            Logger.Debug(string.Format("TODO: Send email to {0} -> {1}", user.EmailAddress, message));
        }
    }

    public void HandleEvent(EventDateChangedEvent eventData)
    {
        //TODO: Send email to all registered users!

        var registeredUsers = AsyncHelper.RunSync(() => _eventManager.GetRegisteredUsersAsync(eventData.Entity));
        foreach (var user in registeredUsers)
        {
            var message = eventData.Entity.Title + " event's date is changed! New date is: " + eventData.Entity.Date;
            Logger.Debug(string.Format("TODO: Send email to {0} -> {1}", user.EmailAddress, message));
        }
    }

    public void HandleEvent(EventCancelledEvent eventData)
    {
        //TODO: Send email to all registered users!

        var registeredUsers = AsyncHelper.RunSync(() => _eventManager.GetRegisteredUsersAsync(eventData.Entity));
        foreach (var user in registeredUsers)
        {
            var message = eventData.Entity.Title + " event is canceled!";
            Logger.Debug(string.Format("TODO: Send email to {0} -> {1}", user.EmailAddress, message));
        }
    }
}
我们可以在不同的类中处理相同的事件,也可以在相同的类中处理不同的事件(如本例所示)。在这里,我们处理这些事件并向相关用户发送电子邮件作为通知(实际上没有实现电子邮件功能,以使示例应用程序更简单)。事件处理程序应该实现 IEventHandler<event-type> 接口。当相关事件发生时,ABP 会自动调用处理程序。
有关领域事件的更多信息,请参阅 EventBus 文档。
应用服务
应用程序服务使用领域层来实现应用程序的用例(通常由表示层使用)。EventAppService 执行事件的应用程序逻辑。
[AbpAuthorize]
public class EventAppService : EventCloudAppServiceBase, IEventAppService
{
    private readonly IEventManager _eventManager;
    private readonly IRepository<Event, Guid> _eventRepository;

    public EventAppService(
        IEventManager eventManager,
        IRepository<Event, Guid> eventRepository)
    {
        _eventManager = eventManager;
        _eventRepository = eventRepository;
    }

    public async Task<ListResultDto<EventListDto>> GetListAsync(GetEventListInput input)
    {
        var events = await _eventRepository
            .GetAll()
            .Include(e => e.Registrations)
            .WhereIf(!input.IncludeCanceledEvents, e => !e.IsCancelled)
            .OrderByDescending(e => e.CreationTime)
            .Take(64)
            .ToListAsync();

        return new ListResultDto<EventListDto>(events.MapTo<List<EventListDto>>());
    }

    public async Task<EventDetailOutput> GetDetailAsync(EntityDto<Guid> input)
    {
        var @event = await _eventRepository
            .GetAll()
            .Include(e => e.Registrations)
            .ThenInclude(r => r.User)
            .Where(e => e.Id == input.Id)
            .FirstOrDefaultAsync();

        if (@event == null)
        {
            throw new UserFriendlyException("Could not found the event, maybe it's deleted.");
        }

        return @event.MapTo<EventDetailOutput>();
    }

    public async Task CreateAsync(CreateEventInput input)
    {
        var @event = Event.Create(AbpSession.GetTenantId(), input.Title, input.Date, input.Description, input.MaxRegistrationCount);
        await _eventManager.CreateAsync(@event);
    }

    public async Task CancelAsync(EntityDto<Guid> input)
    {
        var @event = await _eventManager.GetAsync(input.Id);
        _eventManager.Cancel(@event);
    }

    public async Task<EventRegisterOutput> RegisterAsync(EntityDto<Guid> input)
    {
        var registration = await RegisterAndSaveAsync(
            await _eventManager.GetAsync(input.Id),
            await GetCurrentUserAsync()
            );

        return new EventRegisterOutput
        {
            RegistrationId = registration.Id
        };
    }

    public async Task CancelRegistrationAsync(EntityDto<Guid> input)
    {
        await _eventManager.CancelRegistrationAsync(
            await _eventManager.GetAsync(input.Id),
            await GetCurrentUserAsync()
            );
    }

    private async Task<EventRegistration> RegisterAndSaveAsync(Event @event, User user)
    {
        var registration = await _eventManager.RegisterAsync(@event, user);
        await CurrentUnitOfWork.SaveChangesAsync();
        return registration;
    }
}
如您所见,应用程序服务本身不实现领域逻辑。它只使用实体和领域服务(EventManager)来执行用例。
有关应用程序服务的更多信息,请参阅应用程序服务文档。
表示层
此应用程序的表示层是使用 Angular 作为 SPA 构建的。
事件列表
当我们登录应用程序时,首先看到的是事件列表

我们直接使用 EventAppService 来获取事件列表。以下是用于创建此页面的 events.component.ts
import { Component, Injector, ViewChild } from '@angular/core';
import { appModuleAnimation } from '@shared/animations/routerTransition';
import { EventServiceProxy, EventListDto, ListResultDtoOfEventListDto, EntityDtoOfGuid } from '@shared/service-proxies/service-proxies';
import { PagedListingComponentBase, PagedRequestDto } from "shared/paged-listing-component-base";
import { CreateEventComponent } from "app/events/create-event/create-event.component";

@Component({
    templateUrl: './events.component.html',
    animations: [appModuleAnimation()]
})
export class EventsComponent extends PagedListingComponentBase<EventListDto> {

    @ViewChild('createEventModal') createEventModal: CreateEventComponent;

    active: boolean = false;
    events: EventListDto[] = [];
    includeCanceledEvents:boolean=false;

    constructor(
        injector: Injector,
        private _eventService: EventServiceProxy
    ) {
        super(injector);
    }

    protected list(request: PagedRequestDto, pageNumber: number, finishedCallback: Function): void {
        this.loadEvent();
        finishedCallback();
    }

    protected delete(event: EntityDtoOfGuid): void {
        abp.message.confirm(
            'Are you sure you want to cancel this event?',
            (result: boolean) => {
                if (result) {
                    this._eventService.cancelAsync(event)
                        .subscribe(() => {
                            abp.notify.info('Event is deleted');
                            this.refresh();
                        });
                }
            }
        );
    }

    includeCanceledEventsCheckboxChanged() {
        this.loadEvent();
    };

    // Show Modals
    createEvent(): void {
        this.createEventModal.show();
    }

    loadEvent() {
        this._eventService.getListAsync(this.includeCanceledEvents)
            .subscribe((result: ListResultDtoOfEventListDto) => {
                this.events = result.items;
            });
    }
}
我们将 EventServiceProxy 注入到 events.component.ts 组件中。我们使用了 ABP 的动态 Web API 层功能。它会自动动态地创建所需的 Web API 控制器和 Angular 服务。因此,我们可以像调用常规 TypeScript 函数一样使用应用程序服务方法。所以,要调用 EventAppService.GetListAsync C# 方法,我们只需调用 _eventService.getListAsync TypeScript 函数。
当用户点击“+ 新事件”按钮(触发 createEvent 函数)时,我们还会打开一个“新事件”模态(对话框)。我将不深入探讨 Angular 视图的细节,因为它们比较简单,您可以在源代码中查看。
事件详情
当我们点击事件的“详情”按钮时,我们会跳转到事件详情页面,URL 类似于 http://eventcloud.aspnetboilerplate.com/#/events/e9499e3e-35c0-492c-98ce-7e410461103f。GUID 是事件的 ID。

在这里,我们可以看到事件详情和已注册的用户。我们可以注册事件或取消注册。此视图的组件定义在 event-detail.component.ts 中,如下所示
import { Component, OnInit, Injector } from '@angular/core';
import { appModuleAnimation } from '@shared/animations/routerTransition';
import { ActivatedRoute, Params, Router } from '@angular/router';
import { AppComponentBase } from '@shared/app-component-base';
import { EventDetailOutput, EventServiceProxy, EntityDtoOfGuid, EventRegisterOutput } from '@shared/service-proxies/service-proxies';

import * as _ from 'lodash';

@Component({
    templateUrl: './event-detail.component.html',
    animations: [appModuleAnimation()]
})

export class EventDetailComponent extends AppComponentBase implements OnInit {

    event: EventDetailOutput = new EventDetailOutput();
    eventId:string;

    constructor(
        injector: Injector,
        private _eventService: EventServiceProxy,
        private _router: Router,
        private _activatedRoute: ActivatedRoute
    ) {
        super(injector);
    }

    ngOnInit(): void {
        this._activatedRoute.params.subscribe((params: Params) => {
            this.eventId = params['eventId'];
            this.loadEvent();
        });
    }

    registerToEvent(): void {
        var input = new EntityDtoOfGuid();
        input.id = this.event.id;

        this._eventService.registerAsync(input)
            .subscribe((result: EventRegisterOutput) => {
                abp.notify.success('Successfully registered to event. Your registration id: ' + result.registrationId + ".");
                this.loadEvent();
            });
    };

    cancelRegistrationFromEvent(): void {
        var input = new EntityDtoOfGuid();
        input.id = this.event.id;

        this._eventService.cancelRegistrationAsync(input)
            .subscribe(() => {
                abp.notify.info('Canceled your registration.');
                this.loadEvent();
            });
    };

    cancelEvent(): void {
        var input = new EntityDtoOfGuid();
        input.id = this.event.id;

        this._eventService.cancelAsync(input)
            .subscribe(() => {
                abp.notify.info('Canceled the event.');
                this.backToEventsPage();
            });
    };

    isRegistered(): boolean {
        return _.some(this.event.registrations, { userId: abp.session.userId });
    };

    isEventCreator(): boolean {
        return this.event.creatorUserId === abp.session.userId;
    };

    loadEvent() {
        this._eventService.getDetailAsync(this.eventId)
            .subscribe((result: EventDetailOutput) => {
                this.event = result;
            });
    }

    backToEventsPage() {
        this._router.navigate(['app/events']);
    };
}
我们简单地使用事件应用服务来执行操作。
主菜单
顶部菜单由 ABP 模板自动创建。我们在 sidebar-nav.component.ts 类中定义菜单项。
@Component({
    templateUrl: './sidebar-nav.component.html',
    selector: 'sidebar-nav',
    encapsulation: ViewEncapsulation.None
})
export class SideBarNavComponent extends AppComponentBase {

    menuItems: MenuItem[] = [
        new MenuItem(this.l("HomePage"), "", "home", "/app/home"),

        new MenuItem(this.l("Tenants"), "Pages.Tenants", "business", "/app/tenants"),
        new MenuItem(this.l("Users"), "Pages.Users", "people", "/app/users"),
        new MenuItem(this.l("Roles"), "Pages.Roles", "local_offer", "/app/roles"),
        new MenuItem(this.l("Events"), "Pages.Events", "event", "/app/events"),
        new MenuItem(this.l("About"), "", "info", "/app/about"),

...
Angular 路由
定义菜单只会在页面上显示它。Angular 有自己的路由系统。路由在 app-routing-module.ts 中定义,如下所示
import { NgModule } from '@angular/core';
import { RouterModule } from '@angular/router';
import { AppComponent } from './app.component';
import { AppRouteGuard } from '@shared/auth/auth-route-guard';
import { HomeComponent } from './home/home.component';
import { AboutComponent } from './about/about.component';
import { UsersComponent } from './users/users.component';
import { TenantsComponent } from './tenants/tenants.component';
import { RolesComponent } from "app/roles/roles.component";
import { EventsComponent } from "app/events/events.component";
import { EventDetailComponent } from "app/events/event-detail/event-detail.component";

@NgModule({
    imports: [
        RouterModule.forChild([
            {
                path: '',
                component: AppComponent,
                children: [
                    { path: 'home', component: HomeComponent, canActivate: [AppRouteGuard] },
                    { path: 'users', component: UsersComponent, data: { permission: 'Pages.Users' }, canActivate: [AppRouteGuard] },
                    { path: 'roles', component: RolesComponent, data: { permission: 'Pages.Roles' }, canActivate: [AppRouteGuard] },
                    { path: 'tenants', component: TenantsComponent, data: { permission: 'Pages.Tenants' }, canActivate: [AppRouteGuard] },
                    { path: 'events', component: EventsComponent, data: { permission: 'Pages.Events' }, canActivate: [AppRouteGuard] },
                    { path: 'events/:eventId', component: EventDetailComponent },
                    { path: 'about', component: AboutComponent }
                ]
            }
        ])
    ],
    exports: [RouterModule]
})
export class AppRoutingModule { }
本地化
本地化文本可以存储在不同的源中。您甚至可以在同一个应用程序中使用多个源(如果您有多个模块,每个模块可以定义一个独立的本地化源,或者一个模块可以定义多个源)。
ILocalizationSource 接口应由本地化源实现。然后将其注册到 ASP.NET Boilerplate 的本地化配置中。每个本地化源必须具有唯一的源名称。
在 .Core/Localization/SourceFiles/ 中有预定义的本地化源类型,如下所示。

单元和集成测试
ASP.NET Boilerplate 提供了工具,使单元和集成测试更容易。您可以在项目的源代码中找到所有测试代码。在这里,我将简要解释基本测试。解决方案包括 EventAppService_Tests 类,该类测试 EventAppService。请看该类中的 2 个测试。
public class EventAppService_Tests : EventCloudTestBase
{
    private readonly IEventAppService _eventAppService;

    public EventAppService_Tests()
    {
        _eventAppService = Resolve<IEventAppService>();
    }

    [Fact]
    public async Task Should_Get_Test_Events()
    {
        var output = await _eventAppService.GetListAsync(new GetEventListInput());
        output.Items.Count.ShouldBe(1);
    }

    [Fact]
    public async Task Should_Create_Event()
    {
        //Arrange
        var eventTitle = Guid.NewGuid().ToString();

        //Act
        await _eventAppService.CreateAsync(new CreateEventInput
        {
            Title = eventTitle,
            Description = "A description",
            Date = Clock.Now.AddDays(2)
        });

        //Assert
        UsingDbContext(context =>
        {
            context.Events.FirstOrDefault(e => e.Title == eventTitle).ShouldNotBe(null);
        });
    }

    [Fact]
    public async Task Should_Not_Create_Events_In_The_Past()
    {
        //Arrange
        var eventTitle = Guid.NewGuid().ToString();

        //Act
        await Assert.ThrowsAsync<UserFriendlyException>(async () =>
        {
            await _eventAppService.CreateAsync(new CreateEventInput
            {
                Title = eventTitle,
                Description = "A description",
                Date = Clock.Now.AddDays(-1)
            });
        });
    }

    [Fact]
    public async Task Should_Cancel_Event()
    {
        //Act
        await _eventAppService.CancelAsync(new EntityDto<Guid>(GetTestEvent().Id));

        //Assert
        GetTestEvent().IsCancelled.ShouldBeTrue();
    }

    [Fact]
    public async Task Should_Register_To_Events()
    {
        //Arrange
        var testEvent = GetTestEvent();

        //Act
        var output = await _eventAppService.RegisterAsync(new EntityDto<Guid>(testEvent.Id));

        //Assert
        output.RegistrationId.ShouldBeGreaterThan(0);

        UsingDbContext(context =>
        {
            var currentUserId = AbpSession.GetUserId();
            var registration = context.EventRegistrations.FirstOrDefault(r => r.EventId == testEvent.Id && r.UserId == currentUserId);
            registration.ShouldNotBeNull();
        });
    }

    [Fact]
    public async Task Should_Cancel_Registration()
    {
        //Arrange
        var currentUserId = AbpSession.GetUserId();
        await UsingDbContext(async context =>
        {
            var testEvent = GetTestEvent(context);
            var currentUser = await context.Users.SingleAsync(u => u.Id == currentUserId);
            var testRegistration = await EventRegistration.CreateAsync(
                testEvent,
                currentUser,
                Substitute.For<IEventRegistrationPolicy>()
                );

            context.EventRegistrations.Add(testRegistration);
        });

        //Act
        await _eventAppService.CancelRegistrationAsync(new EntityDto<Guid>(GetTestEvent().Id));

        //Assert
        UsingDbContext(context =>
        {
            var testEvent = GetTestEvent(context);
            var testRegistration = context.EventRegistrations.FirstOrDefault(r => r.EventId == testEvent.Id && r.UserId == currentUserId);
            testRegistration.ShouldBeNull();
        });
    }

    private Event GetTestEvent()
    {
        return UsingDbContext(context => GetTestEvent(context));
    }

    private static Event GetTestEvent(EventCloudDbContext context)
    {
        return context.Events.Single(e => e.Title == TestDataBuilder.TestEventTitle);
    }
}
我们使用 xUnit 作为测试框架。在第一个测试中,我们简单地创建一个事件并检查数据库中是否存在。在第二个测试中,我们故意尝试创建一个过去的事件。由于我们的业务规则不允许这样做,所以我们应该在这里得到一个异常。
通过此类测试,我们测试了从应用程序服务开始的所有内容,包括 ASP.NET Boilerplate 的所有方面(如验证、工作单元等)。
基于令牌的身份验证
如果您想从移动应用程序消费 API/应用程序服务,您可以使用基于令牌的身份验证机制,就像我们对 Angular 客户端所做的那样。启动模板包含 JwtBearer 令牌身份验证基础设施。
我们将使用 Postman(一个 Chrome 扩展程序)来演示请求和响应。
身份验证
只需向 https://:21021/api/TokenAuth/Authenticate 发送一个 POST 请求,并带上 Context-Type="application/json" 头,如下所示

我们发送了一个包含 tenancyName、userNameOrEmailAddress 和 password 的 JSON 请求正文。对于主机用户,tenancyName 不是必需的。如上所示,返回 JSON 的 result 属性包含令牌。我们可以保存它并用于后续请求。
使用 API
认证并获取到 token 后,我们可以使用它来调用任何 授权 的操作。所有 应用服务 都可以远程使用。例如,我们可以使用 用户服务 来获取 用户列表。

只需向 https://:21021/api/services/app/user/getAll 发送一个 GET 请求,并带上 Content-Type="application/json" 和 Authorization="Bearer your-auth-token" 头。UI 上可用的所有功能也都可以作为 API 使用。
UI 上几乎所有可用的操作也都可以作为 Web API 使用(因为 UI 使用相同的 Web API),并且可以轻松消费。
源代码
您可以在这里获取最新的源代码 Event Cloud Source