
集成了 Spring Security 和 Spring Rest 的 Spring MVC 应用程序
在本文中,我将介绍一个功能齐全的Spring MVC应用程序。它集成了Spring Security和Spring Rest。该示例应用程序可用作模板,而本教程则为您提供了每个组件工作方式的总体概念。
引言
本教程将讨论如何使用注解来设置Spring MVC Web应用程序,并集成Spring Security和Spring Rest。我大约在一年前开始学习这个。当时文档很少。现在,文档很多了。我尝试通过本教程提供的,是提供一个比现有文档更全面的示例。
使用注解来构建基于Spring的Web应用程序有什么意义?在此之前,您必须使用基于XML的配置来设置Spring IoC容器,并描述组件如何相互交互。完全基于注解的Spring应用程序使开发人员免于创建大量XML配置文件。开发人员可以设计自己的配置文件版本来托管应用程序所需的信息或数据。我相信这是Spring注解在应用程序开发中最强大的优势。当您阅读代码和本教程时,您就会明白我的意思。
示例如何工作
这是一个典型的基于Spring MVC的Web应用程序。它有一个所有人都可以访问的默认主页。还有三个页面,每个页面都有不同的访问级别。用户只能以特定角色登录才能访问每个页面。还有一个简单的RESTful服务,该服务也受到保护。用户只有在登录具有适当角色的情况下才能使用此服务。
用户身份验证和授权信息保存在纯文本文件中。当用户尝试访问用户无权访问的页面时,将显示登录页面。一旦用户使用正确的凭据登录,用户将被分配适当的角色,然后用户将被授权访问页面。
为了演示如何创建RESTful服务,我只添加了一个RestController类和一个方法。我只想说明一点,RESTful服务可以通过Spring Security进行保护。Spring Security被配置为传统的身份验证和授权组件。也就是说,一旦合法用户登录,将使用会话来跟踪用户的身份验证和授权,直到同一用户注销或因长时间不活动而被踢出。
这里有很多文件。但我不会一一介绍,只介绍关键的。希望它能描绘出一幅清晰的图景,说明Spring MVC、Spring Security和Spring Rest如何协同工作。如果不行,请下载源代码并运行它看看。让我们开始吧。
启动类
如前所述,不再使用XML来指定Spring配置,所有配置都通过Java注解完成。您甚至看不到web.xml。为了使此应用程序正常工作,必须有一个入口点——一个服务器容器可以识别并启动Web应用程序的类。这是该类
package org.hanbo.general.web.servlet;

import org.hanbo.general.web.config.RootConfig;
import org.hanbo.general.web.config.WebConfig;
import org.springframework.web.servlet.support.AbstractAnnotationConfigDispatcherServletInitializer;

public class ServletStart extends
   AbstractAnnotationConfigDispatcherServletInitializer
{
   @Override
   protected Class<?>[] getRootConfigClasses()
   {
      return new Class[] { RootConfig.class, WebConfig.class };
   }

   @Override
   protected Class<?>[] getServletConfigClasses()
   {
      return null;
   }

   @Override
   protected String[] getServletMappings()
   {
      return new String[] { "/" };
   }
}
这个类很容易理解。它被称为ServletStart。它继承自一个名为AbstractAnnotationConfigDispatcherServletInitializer的类。当Web应用程序部署到Web服务器时,容器会将此类识别为启动类。AbstractAnnotationConfigDispatcherServletInitializer是Spring的DispatcherServlet类的子类,这使得我的类ServletStart成为Spring的DispatcherServlet类的子类。因此,我的类成为一个子类。因此,它可以用于启动Web应用程序。
有三个方法,中间一个未使用。第一个返回类类型对象的数组。指定的两个是RootConfig类和WebConfig类。这两个类的实例提供了更多的配置。最后一个以字符串数组的形式返回servlet映射路径。指定的servlet映射是“/”。这相当于web.xml文件中的“<servlet-mapping>”标签。
通过注解进行配置
上一节介绍了另外两个类。一个是RootConfig,另一个是WebConfig。如前所述,它们用于提供Web应用程序的配置。让我们从RootConfig开始。它非常简单
package org.hanbo.general.web.config;

import org.springframework.context.annotation.ComponentScan;
import org.springframework.context.annotation.Configuration;

@Configuration
@ComponentScan({
   "org.hanbo.general.web"
})
public class RootConfig
{
}
RootConfig类本身不做太多事情,它没有属性也没有方法。重要的是类上的两个注解。@Configuration注解表示该类提供配置信息。另一个注解@ComponentScan(...)告诉Spring框架扫描参数中指定的包,查找可注入的类,并创建所有对象的依赖注入图。诀窍在于指定根包,在本例中是“org.hanbo.general.web”,它将遍历其下的所有子包,查找所有可注入的类。
什么使一个类成为可注入的类?如果您用@Component、@Service、@Controller和@RestController等注解一个类,那么这些类就可以通过@Autowired注入到其他类中。
还有另一个类,“WebConfig”。这是代码
package org.hanbo.general.web.config;

import org.springframework.context.annotation.Bean;
import org.springframework.context.annotation.ComponentScan;
import org.springframework.context.annotation.Configuration;
import org.springframework.web.servlet.config.annotation.EnableWebMvc;
import org.springframework.web.servlet.config.annotation.ResourceHandlerRegistry;
import org.springframework.web.servlet.config.annotation.WebMvcConfigurerAdapter;
import org.springframework.web.servlet.view.InternalResourceViewResolver;
import org.springframework.web.servlet.view.JstlView;

@EnableWebMvc
@Configuration
@ComponentScan({
   "org.hanbo.general.web",
   "org.hanbo.general.web.entities",
   "org.hanbo.general.web.repositories",
   "org.hanbo.general.web.services"
})
public class WebConfig extends WebMvcConfigurerAdapter {

   @Override
   public void addResourceHandlers(ResourceHandlerRegistry registry) {
      registry.addResourceHandler("/assets/**")
         .addResourceLocations("/assets/");
   }

   @Bean
   public InternalResourceViewResolver viewResolver() {
      InternalResourceViewResolver viewResolver
                         = new InternalResourceViewResolver();
      viewResolver.setViewClass(JstlView.class);
      viewResolver.setPrefix("/WEB-INF/views/jsp/");
      viewResolver.setSuffix(".jsp");
      return viewResolver;
   }
}
这个“WebConfig”类稍微复杂一些。它继承自一个名为WebMvcConfigurerAdapter的类。这个基类是WebMvcConfigurer接口的默认实现。通过继承它,我可以覆盖接口中方法的子集。在本例中,我只实现了两个方法。一个是addResourceHandlers()。覆盖此方法允许我硬编码“/assets/**”文件夹(位于webapps文件夹中)作为所有静态内容和网页模板的基本位置。另一个方法是viewResolver()。这个方法指定我希望使用JSTL进行视图构建;从“/WEB-INF/views/jsp/”位置,可以使用所有页面模板,Web应用程序查找的文件扩展名为“.jsp”。稍后在MVC控制器部分将进一步讨论。
这个类也被注解为@Configuration和@ComponentScan。我不认为@ComponentScan注解在这里是必需的,因为它已经在“RootConfig”上指定了。我把它留在这里只是为了说明,如果您将@ComponentScan添加到任何被注解为@Configuration的类中,它将扫描包以查找可注入的类。您可以尝试删除其中一个并保留另一个,然后运行整个应用程序,看看它是否仍然有效。
@EnableWebMvc注解允许将WebConfig类中定义的所有配置添加到Web应用程序中。这就是这个类的全部内容。
安全配置
将Spring Security添加到这个Web应用程序花了我一段时间才理解。这非常简单。第一件事是添加一个AbstractSecurityWebApplicationInitializer的子类。这是代码
package org.hanbo.general.web.config;

import org.springframework.security.web.context.AbstractSecurityWebApplicationInitializer;

public class SecurityConfigInitializer
   extends AbstractSecurityWebApplicationInitializer
{
}
当Web应用程序启动时,上面的类将注册一个springSecurityFilterChain对象。我猜所有这些都是通过组件扫描完成的。然后需要一个继承WebSecurityConfigurerAdapter的类。这是代码
package org.hanbo.general.web.config;

import org.hanbo.general.web.security.SampleAccessDeniedHandler;
import org.hanbo.general.web.security.UserAuthenticationService;
import org.springframework.beans.factory.annotation.Autowired;
import org.springframework.context.annotation.Bean;
import org.springframework.context.annotation.Configuration;
import org.springframework.security.config.annotation.authentication.builders.AuthenticationManagerBuilder;
import org.springframework.security.config.annotation.method.configuration.EnableGlobalMethodSecurity;
import org.springframework.security.config.annotation.web.builders.HttpSecurity;
import org.springframework.security.config.annotation.web.configuration.EnableWebSecurity;
import org.springframework.security.config.annotation.web.configuration.WebSecurityConfigurerAdapter;
import org.springframework.security.crypto.bcrypt.BCryptPasswordEncoder;
import org.springframework.security.crypto.password.PasswordEncoder;
import org.springframework.security.web.access.AccessDeniedHandler;
import org.springframework.security.web.authentication.SavedRequestAwareAuthenticationSuccessHandler;
import org.springframework.security.web.util.matcher.AntPathRequestMatcher;

@Configuration
@EnableWebSecurity
@EnableGlobalMethodSecurity(securedEnabled = true, prePostEnabled = true)
public class SecurityConfig extends WebSecurityConfigurerAdapter
{
   @Autowired
   private UserAuthenticationService authenticationProvider;

   @Override
   protected void configure(HttpSecurity http)
      throws Exception
   {
      http.authorizeRequests()
         .antMatchers("/").permitAll()
         .and().formLogin().loginPage("/login")
         .usernameParameter("username")
         .passwordParameter("password")
         .defaultSuccessUrl("/index", true).failureUrl("/accessDenied")
         .successHandler(new SavedRequestAwareAuthenticationSuccessHandler()) // not necessary.
         .and().logout().logoutRequestMatcher(new AntPathRequestMatcher("/logout"))
         .logoutSuccessUrl("/logoutPage");
   }

   @Autowired
   protected void configure(AuthenticationManagerBuilder authMgrBuilder)
      throws Exception
   {
      authMgrBuilder.authenticationProvider(authenticationProvider);
   }

   @Bean
   public AccessDeniedHandler accessDeniedHandler()
   {
      return new SampleAccessDeniedHandler();
   }
}
这个“SecurityConfig”类被注解为@Configuration。这意味着该类提供配置。它还被注解为@EnableWebSecurity,这表明Spring Security将被启用,并且安全配置将在此类中找到(因为它是用@EnableWebSecurity注解的)。
@EnableGlobalMethodSecurity(securedEnabled = true, prePostEnabled = true)注解很有意思。我添加它以便可以在MVC动作方法上使用基于角色的授权。也就是说,对于控制器,所有动作方法都将带有@PreAuthorize("hasRole('ROLE_...')")或@PreAuthorize("hasAnyRoles('ROLE_...', 'ROLE_...', ...)")。当用户访问这些动作方法时,除非用户已登录并拥有必要的角色,否则用户将收到403错误。
现在让我们来剖析这个类中定义的方法。第一个方法configure(HttpSecurity http)定义了当用户与Web应用程序交互时安全是如何工作的。方法调用链基本上做了以下事情
- Web应用程序的任何子URL都将被允许匿名访问。这样做的原因是,我想锁定特定页面,这些页面是可以安全访问的。
- 登录页面将被路由到“/login”,这将是一个用户可以输入凭据以获得访问权限的表单。
- 表单将包含两个字段:“
username”和“password”,它们将被提取并传递给身份验证管理器。 - 当用户登录时,他们首先看到的是“/index”页面。
- 当用户身份验证失败时,将显示“/accessDenied”页面。
- 我使用了
SavedRequestAwareAuthenticationSuccessHandler类来处理登录成功后页面将重定向到用户尝试访问的页面的场景。 - 注销请求由URL“/logout”处理。请注意,身份验证和授权cookie的清理是由Spring Security完成的,无需额外代码。但是,为了显示注销页面,我调用了“
logoutSuccess()”方法。
第二个方法用于设置身份验证提供程序。这是一个非常重要的配置。自定义身份验证提供程序允许您实现自己的方式来使用输入的用户名和密码进行身份验证。典型的场景是获取用户名和密码,在数据库中查找用户,并将散列密码与数据库中的散列密码进行比较。如果匹配,则加载用户的角色并附加给用户。之后,每当用户访问页面时,将使用与用户关联的角色来确定授权。
该类的最后一个方法定义了一个bean。安全配置出现了一些问题。我相信这可能是我正在使用的Spring Security版本中的一个bug。这迫使我定义一个AccessDeniedHandler,以便每当发生访问被拒绝时,它都会重定向到一个访问被拒绝的页面。在我们定义我的AccessDeniedHandler(称为SampleAccessDeniedHandler)之前,我将首先向您展示我的自定义身份验证提供程序。
自定义身份验证提供程序
对于这个示例Web应用程序,我在一个名为“UserInfo.txt”的文本文件中硬编码了四个不同的用户,该文件位于resources文件夹中。我的身份验证提供程序(称为UserAuthenticationService)将加载文件,将其反序列化为Java数组。然后使用用户名和密码进行身份验证。一旦通过身份验证,所有与用户关联的角色都将被添加到用户的身份验证令牌中。这是代码
package org.hanbo.general.web.security;

import java.util.ArrayList;
import java.util.HashSet;
import java.util.List;
import java.util.Set;

import org.apache.log4j.LogManager;
import org.apache.log4j.Logger;
import org.hanbo.general.web.security.models.UserModel;
import org.hanbo.general.web.security.models.UserRoleModel;
import org.hanbo.general.web.security.utils.SecurityUtils;
//import org.hanbo.writer.admin.services.LoginUserService;
import org.springframework.beans.factory.annotation.Autowired;
import org.springframework.security.authentication.AuthenticationProvider;
import org.springframework.security.authentication.UsernamePasswordAuthenticationToken;
import org.springframework.security.core.Authentication;
import org.springframework.security.core.AuthenticationException;
import org.springframework.stereotype.Service;

import org.springframework.security.core.GrantedAuthority;
import org.springframework.security.core.authority.SimpleGrantedAuthority;

@Service
public class UserAuthenticationService
   implements AuthenticationProvider
{
   private static Logger _logger = LogManager.getLogger(UserAuthenticationService.class);

   @Autowired
   private LoginUserService userService;

   @Override
   public Authentication authenticate(Authentication authentication)
      throws AuthenticationException
   {
      Authentication retVal = null;
      String name = authentication.getName();
      String password = authentication.getCredentials().toString();

      if (name == null || name.length() <= 0)
      {
         _logger.error("Authentication failed. User name is null or empty.");
         return retVal;
      }

      if (password == null || password.length() <= 0)
      {
         _logger.error("Authentication failed. User password is null or empty.");
         return retVal;
      }

      UserModel authenticatedUser = this.authenticateUser(name, password);
      if (authenticatedUser != null)
      {
         boolean isUserActive = authenticatedUser.isActive();
         if (!isUserActive)
         {
            return null;
         }

         Authentication userAuth = createAuthentication(
            authenticatedUser, password
         );

         return userAuth;
      }

      return null;
   }

   @Override
   public boolean supports(Class<?> authentication)
   {
      return authentication.equals(UsernamePasswordAuthenticationToken.class);
   }

   private Authentication createAuthentication(
      UserModel userPrincipal, String credential
   )
   {
      List<GrantedAuthority> grantedAuths
         = createLoginUserAuthority(userPrincipal.getUserRoles());

      if(grantedAuths.size() == 0)
      {
         return null;
      }

      credential = encryptPassword(credential);

      _logger.debug("Creating authentication here...");

      Authentication auth
         = new UsernamePasswordAuthenticationToken(
            userPrincipal, credential, grantedAuths
         );

      _logger.debug("Creating authentication here... Done.");

      return auth;
   }

   private UserModel authenticateUser(String userName, String userPass)
   {
      UserModel user = userService.getLoginUser(userName);
      if (user != null)
      {
         String passEncrypted = user.getHashedUserPass();

         if (SecurityUtils.passwordEquals(userPass, passEncrypted))
         {
            _logger.debug("Authentication Successful.");
            return user;
         }
      }

      return null;
   }

   private List<GrantedAuthority> createLoginUserAuthority(List<UserRoleModel> userRoles)
   {
      List<GrantedAuthority> grantedAuths = new ArrayList<GrantedAuthority>();
      Set<GrantedAuthority> uniqueAuths = new HashSet<GrantedAuthority>();

      for (UserRoleModel userRole : userRoles)
      {
         if (userRole.getRoleName().equals(UserRoleModel.ROLE_SITE_ADMIN))
         {
            uniqueAuths.add(new SimpleGrantedAuthority("ROLE_SITE_ADMIN"));
            uniqueAuths.add(new SimpleGrantedAuthority("ROLE_SITE_STAFF"));
            uniqueAuths.add(new SimpleGrantedAuthority("ROLE_SITE_USER"));
            uniqueAuths.add(new SimpleGrantedAuthority("ROLE_GUEST"));
         }
         else if (userRole.getRoleName().equals(UserRoleModel.ROLE_SITE_SUPERVISOR))
         {
            uniqueAuths.add(new SimpleGrantedAuthority("ROLE_SITE_STAFF"));
            uniqueAuths.add(new SimpleGrantedAuthority("ROLE_SITE_USER"));
            uniqueAuths.add(new SimpleGrantedAuthority("ROLE_GUEST"));
         }
         else if (userRole.getRoleName().equals(UserRoleModel.ROLE_SITE_USER))
         {
            uniqueAuths.add(new SimpleGrantedAuthority("ROLE_SITE_USER"));
            uniqueAuths.add(new SimpleGrantedAuthority("ROLE_GUEST"));
         }
         else if (userRole.getRoleName().equals(UserRoleModel.ROLE_GUEST))
         {
            uniqueAuths.add(new SimpleGrantedAuthority("ROLE_GUEST"));
         }
         else
         {
            uniqueAuths.clear();
         }
      }

      if (uniqueAuths.size() > 0)
      {
         grantedAuths.addAll(uniqueAuths);
         _logger.info("Number of roles: " + grantedAuths.size());
      }

      return grantedAuths;
   }

   private static String encryptPassword(Object credential)
   {
      String encryptedPass = "";
      if (credential != null)
      {
         String password = (String)credential;

         encryptedPass = SecurityUtils.encryptPassword(password);
      }

      return encryptedPass;
   }
}
这个类非常直接。第一个方法authenticate()负责对用户进行身份验证。首先,它检查用户名和密码,确保它们不是null或空。然后将用户的用户名和密码传递给LoginUserService对象。这个LoginUserService将从文本文件中加载所有用户。将文本string反序列化为JSON对象,然后将其转换为UserModel对象的列表。用户名将用于查找匹配的UserModel对象,并且输入的密码将被散列并与UserModel对象的散列密码进行比较。如果匹配,则将UserModel对象返回给authenticate()。在authenticate()中,如果有一个有效的UserModel对象,它将检查并确保用户仍然处于活动状态,如果用户处于活动状态,那么所有关联的角色都将被添加到用户的身份验证令牌中并返回。如果所有检查都失败,则返回null而不是有效的身份验证令牌。
将用户角色添加到身份验证令牌的方法是createLoginUserAuthority方法
private List<GrantedAuthority> createLoginUserAuthority(List<UserRoleModel> userRoles)
{
   List<GrantedAuthority> grantedAuths = new ArrayList<GrantedAuthority>();
   Set<GrantedAuthority> uniqueAuths = new HashSet<GrantedAuthority>();

   for (UserRoleModel userRole : userRoles)
   {
      if (userRole.getRoleName().equals(UserRoleModel.ROLE_SITE_ADMIN))
      {
         uniqueAuths.add(new SimpleGrantedAuthority("ROLE_SITE_ADMIN"));
         uniqueAuths.add(new SimpleGrantedAuthority("ROLE_SITE_STAFF"));
         uniqueAuths.add(new SimpleGrantedAuthority("ROLE_SITE_USER"));
         uniqueAuths.add(new SimpleGrantedAuthority("ROLE_GUEST"));
      }
      else if (userRole.getRoleName().equals(UserRoleModel.ROLE_SITE_SUPERVISOR))
      {
         uniqueAuths.add(new SimpleGrantedAuthority("ROLE_SITE_STAFF"));
         uniqueAuths.add(new SimpleGrantedAuthority("ROLE_SITE_USER"));
         uniqueAuths.add(new SimpleGrantedAuthority("ROLE_GUEST"));
      }
      else if (userRole.getRoleName().equals(UserRoleModel.ROLE_SITE_USER))
      {
         uniqueAuths.add(new SimpleGrantedAuthority("ROLE_SITE_USER"));
         uniqueAuths.add(new SimpleGrantedAuthority("ROLE_GUEST"));
      }
      else if (userRole.getRoleName().equals(UserRoleModel.ROLE_GUEST))
      {
         uniqueAuths.add(new SimpleGrantedAuthority("ROLE_GUEST"));
      }
      else
      {
         uniqueAuths.clear();
      }
   }

   if (uniqueAuths.size() > 0)
   {
      grantedAuths.addAll(uniqueAuths);
      _logger.info("Number of roles: " + grantedAuths.size());
   }

   return grantedAuths;
}
此方法的作用是:如果用户是管理员,则他拥有所有角色(包括员工、用户和访客)。如果用户是员工角色,那么用户也将拥有用户和访客角色。如果用户是用户角色,那么用户将拥有用户和访客角色。如果用户是访客角色,那么用户将只有访客角色。如果没有与用户关联的角色,则用户的角色列表将被清除。
我的UserAuthenticationService中的第二个方法称为supports。这是代码
@Override
public boolean supports(Class<?> authentication)
{
   return authentication.equals(UsernamePasswordAuthenticationToken.class);
}
它的作用是告诉Web应用程序身份验证令牌是UsernamePasswordAuthenticationToken类型的。这就是UserAuthenticationService的全部内容。
访问拒绝处理程序
我需要一个访问拒绝处理程序的原因是我想要拦截访问拒绝异常,然后我可以将响应重定向到一个自定义的访问拒绝页面。我认为之所以需要这样做,是因为我错误地配置了授权交互,或者这是我正在使用的Spring Security版本中的一个bug。我敢肯定我错误地配置了Spring授权。如果您感兴趣,请尝试修复它。尽管这是一个问题,但它提供了一个学习的机会。在本节中,我将向您展示这个访问拒绝处理程序如何工作。这是代码
package org.hanbo.general.web.security;

import java.io.IOException;

import javax.servlet.ServletException;
import javax.servlet.http.HttpServletRequest;
import javax.servlet.http.HttpServletResponse;

import org.springframework.security.access.AccessDeniedException;
import org.springframework.security.web.access.AccessDeniedHandler;
import org.springframework.stereotype.Component;

@Component
public class SampleAccessDeniedHandler
   implements AccessDeniedHandler
{
   @Override
   public void handle(HttpServletRequest request, HttpServletResponse response, AccessDeniedException ex)
        throws IOException, ServletException {
      String redirectUrl = request.getContextPath();
      redirectUrl = redirectUrl + "/accessDenied";
      response.sendRedirect(redirectUrl);
   }
}
如您所见,SampleAccessDeniedHandler的实现只有一个方法需要覆盖。它被称为handle()。该方法接受一个HttpServletRequest对象、一个HttpServletResponse对象以及访问拒绝异常对象。基本上,这个类的对象将使用原始请求和一个最终将返回给用户的响应对象来拦截访问拒绝异常。
无论原始请求和异常是什么,handle()方法都会首先获取上下文路径,即Web应用程序的基础URL。然后,我将子URL“/accessDenied”添加到其中。并将其用作重定向URL。最后,我将重定向URL设置为响应。就是这样。当调用此方法时,它将重定向到该URL。
我想介绍的最后一件事是处理用户身份验证和授权的控制器。该类名为UsersController,这是代码
package org.hanbo.general.web.controllers;

import org.springframework.security.access.prepost.PreAuthorize;
import org.springframework.stereotype.Controller;
import org.springframework.web.bind.annotation.RequestMapping;
import org.springframework.web.bind.annotation.RequestMethod;
import org.springframework.web.servlet.ModelAndView;

@Controller
public class UsersController
{
   @RequestMapping(value="login", method= RequestMethod.GET)
   public ModelAndView login()
   {

      ModelAndView retVal = new ModelAndView();
      retVal.setViewName("login");
      retVal.addObject("viewName", "Please Log In");

      return retVal;
   }

   @RequestMapping(value="/accessDenied", method = RequestMethod.GET)
   public ModelAndView loginError()
   {
      ModelAndView retVal = new ModelAndView();
      retVal.setViewName("noAccess");
      retVal.addObject("viewName", "Access Denied");
      retVal.addObject("noAccessTitle", "Access Denied");
      retVal.addObject("noAccessMsg", "You don't have permission to access this page");

      return retVal;
   }

   @RequestMapping(value="/logoutPage", method = RequestMethod.GET)
   public ModelAndView logoutPage()
   {
      ModelAndView retVal = new ModelAndView();
      retVal.setViewName("login");
      retVal.addObject("viewName", "Logout Successfully");
      retVal.addObject("noAccessTitle", "Logout Successfully");
      retVal.addObject("noAccessMsg", "You have logged out successfully");

      return retVal;
   }
}
在此类中,有三个方法,每个方法处理一个URL。所有这些都可以匿名访问。第一个称为login()。它将用户请求路由到登录页面。第二个称为loginError()。它将用户请求路由到登录错误页面。最后一个称为logoutPage(),它将在用户实际注销后显示注销页面。
所有这些方法都是简单的动作方法(.NET术语)。它们都返回ModelAndView类型的对象。ModelAndView对象有一些有用的方法可以调用
setViewName(),这将设置将用于显示的jsp模板addObject(),这将向模型添加视图数据,以便视图模板可以使用它来创建最终视图
下一节将介绍更多关于Spring MVC的内容。登录页面的显示效果如下
<%@ page contentType="text/html" pageEncoding="UTF-8"%>
<%@ taglib prefix="t" tagdir="/WEB-INF/tags" %>
<%@ taglib prefix="c" uri="http://java.sun.com/jsp/jstl/core"%>
<t:loginTemplate>
   <jsp:attribute name="loginCss">
   </jsp:attribute>
   <jsp:attribute name="loginJs">
      <script src="${pageContext.request.contextPath}/assets/custom/js/login.js"></script>
   </jsp:attribute>
   <jsp:body>
    <div style="margin-top: 100px">
    <div class="row">
       <div class="col-xs-2 col-sm-3 col-md-4 col-lg-4"></div>
       <div class="col-xs-8 col-sm-6 col-md-4 col-lg-4">
          <div class="content-box">
             <h3>Please Sign In</h3>
             <form id="loginForm" class="form-horizontal"
             action="<c:url value='/login'/>" method="POST">
                <div class="form-group">
                   <div class="col-xs-12">
                      <input type="text" class="form-control"
                      id="username" name="username" placeholder="User Name">
                   </div>
                </div>
                <div class="form-group">
                   <div class="col-xs-12">
                      <input type="password" class="form-control"
                      id="password" name="password" placeholder="Password">
                   </div>
                </div>
                <div id="loginError" class="row" style="display: none;">
                   <div class="col-xs-12">
                      <div id="loginErrorMsg"
                      class="alert alert-danger alert-padding" role="alert"></div>
                   </div>
                </div>
                <div class="row">
                   <div class="col-xs-2"></div>
                   <div class="col-xs-5"><input type="submit"
                   class="form-control btn btn-primary" value="Log In"></div>
                   <div class="col-xs-5"><input type="reset"
                   class="form-control btn btn-default" value="Clear"></div>
                </div>
                <input type="hidden" name="${_csrf.parameterName}"
                value="${_csrf.token}" />
             </form>
          </div>
       </div>
       <div class="col-xs-2 col-sm-3 col-md-4 col-lg-4"></div>
    </div>
    </div>
   </jsp:body>
</t:loginTemplate>
语法与常规HTML不同。我使用了JSTL,这样我就可以将页面分解成组件和布局。如您所见,上面的JSP代码中有两个输入字段
- 一个是“
username” - 另一个是“
password”
这两个字段是SecurityConfig用于识别用户凭据的字段(请参阅configure()方法)。需要记住的一个重要事情是,当提交登录表单时,它将被提交到“/login”URL,并且使用的HTTP方法是“post”。另一个需要记住的重要事情是,我使用了CSRF令牌来提供额外的安全验证。这是您看到name="${_csrf.parameterName}"的地方。您可以选择禁用它。但是对于基于MVC的Web应用程序,使用CSRF作为额外的安全措施是一种好的做法。
Spring MVC控制器
为了演示Spring MVC与Spring Security的集成,我创建了两个控制器。一个是TestController,它将处理基于MVC的Web页面。另一个是TestApiController,它将处理RESTful请求。这是TestController的代码
package org.hanbo.general.web.controllers;

import org.springframework.security.access.prepost.PreAuthorize;
import org.springframework.stereotype.Controller;
import org.springframework.web.bind.annotation.RequestMapping;
import org.springframework.web.bind.annotation.RequestMethod;
import org.springframework.web.servlet.ModelAndView;

@Controller
public class TestController
{
   @RequestMapping(value="/", method = RequestMethod.GET)
   public ModelAndView defaultPage()
   {
      ModelAndView retVal = new ModelAndView();
      retVal.setViewName("index");
      retVal.addObject("userRole", "anonymous");
      retVal.addObject("pageName", "index");

      return retVal;
   }

   @RequestMapping(value="/index", method = RequestMethod.GET)
   public ModelAndView index()
   {
      ModelAndView retVal = new ModelAndView();
      retVal.setViewName("index");
      retVal.addObject("userRole", "anonymous");
      retVal.addObject("pageName", "index");

      return retVal;
   }

   @PreAuthorize("hasRole('ROLE_SITE_ADMIN')")
   @RequestMapping(value="/secure/testPage1", method = RequestMethod.GET)
   public ModelAndView testPage1()
   {
      ModelAndView retVal = new ModelAndView();
      retVal.setViewName("testPage1");
      retVal.addObject("userRole", "site admin");
      retVal.addObject("pageName", "testPage1");

      return retVal;
   }

   @PreAuthorize("hasRole('ROLE_SITE_STAFF')")
   @RequestMapping(value="/secure/testPage2", method = RequestMethod.GET)
   public ModelAndView testPage2()
   {
      ModelAndView retVal = new ModelAndView();
      retVal.setViewName("testPage2");
      retVal.addObject("userRole", "site staff");
      retVal.addObject("pageName", "testPage2");

      return retVal;
   }

   @PreAuthorize("hasRole('ROLE_SITE_USER')")
   @RequestMapping(value="/secure/testPage3", method = RequestMethod.GET)
   public ModelAndView testPage3()
   {
      ModelAndView retVal = new ModelAndView();
      retVal.setViewName("testPage3");
      retVal.addObject("userRole", "site user");
      retVal.addObject("pageName", "testPage3");
      W
      return retVal;
   }
}
与我们之前看过的所有配置代码相比,这个TestController类非常容易理解。该类被注解为@Controller,这表明TestController类是一个MVC控制器。在这个类中,有五个public方法。前两个代表默认主页(通过“/”或“/index”访问),它们是相同的。其他三个方法分别代表具有特定角色才能访问的页面
testPage1():只有管理员角色的用户才能访问此页面testPage2():只有员工角色的用户才能访问此页面testPage3():只有用户角色的用户才能访问此页面
所有这些方法都易于理解。所有这些方法都没有参数。它们都用@RequestMapping注解。此注解通过参数value将子URL设置在上下文路径上。它还允许开发人员定义该方法可以处理的HTTP方法(通过参数method)。此注解还可以使用其他几个参数来进一步指定该方法如何处理HTTP请求。我在这里不介绍它们。
所有三个方法都用@PreAuthorize注解。此注解指定访问此方法需要授权。这是基于角色的授权机制。可以传递的参数看起来像这样
@PreAuthorize("hasRole('<role name>')")
基本上,该值是一个表达式。只有当身份验证令牌具有<role name>角色时。角色名称看起来像这样:ROLE_SITE_ADMIN;或ROLE_SITE_STAFF;等。需要记住的一个重要事项是,如果您使用基于角色的授权,角色名称必须以“ROLE_”前缀开头。没有这个前缀,基于角色的授权将不起作用。试试看。您可以从“ROLE_SITE_STAFF”的所有出现处删除“ROLE_”前缀。然后登录为站点员工,并尝试访问testPage2。您将收到“Access Denied”错误。通过查看这些@PreAuthorize注解,您可以猜测访问这些页面所需的用户角色。
所有方法都做类似的事情,返回一个ModelAndView对象,该对象有一个视图模板,并在模型中包含一些值,以便它们可以在网页上显示。接下来,我将简要介绍RESTful API。
RESTful API演示
为了简单起见,我创建了一个简单的REST控制器来演示如何实现,这非常简单。该类名为TestApiController。这是代码
package org.hanbo.general.web.controllers;

import org.hanbo.general.web.models.CarModel;
import org.springframework.http.HttpStatus;
import org.springframework.http.ResponseEntity;
import org.springframework.security.access.prepost.PreAuthorize;
import org.springframework.web.bind.annotation.RequestMapping;
import org.springframework.web.bind.annotation.RequestMethod;
import org.springframework.web.bind.annotation.RequestParam;
import org.springframework.web.bind.annotation.ResponseBody;
import org.springframework.web.bind.annotation.RestController;

import org.apache.log4j.*;

@RestController
public class TestApiController
{
   private static Logger logger = LogManager.getLogger(TestApiController.class);

   @PreAuthorize("hasRole('ROLE_SITE_USER')")
   @RequestMapping(value="/secure/api/carModel", method= RequestMethod.GET)
   @ResponseBody
   public ResponseEntity<CarModel> getCarModel(
         @RequestParam("make")
         String make,
         @RequestParam("model")
         String model)
   {
      logger.info("Car Maker: " + make);
      logger.info("Car Model: " + model);

      CarModel carEntity = new CarModel();
      carEntity.setMaker("Honda");
      carEntity.setModel("Accord");
      carEntity.setYear(2016);
      carEntity.setPrice(19667.28f);

      ResponseEntity<CarModel> retVal = new ResponseEntity<CarModel>(carEntity, HttpStatus.OK);
      return retVal;
   }
}
这个类与MVC控制器TestController几乎相同。它被注解为@RestController,意味着该控制器类是用于RESTful服务的,而不是用于MVC网页导航。这个类只有一个方法。它叫做getCarModel()。它接受一个名为“make”和“model”的string参数,进行一些计算,然后返回一个包含汽车制造商、型号、年份和价格的对象。当然,这是一个虚拟的动作方法(又是.NET术语)。它被硬编码为返回一个特定的型号。有趣的是,汽车型号被序列化为JSON对象并返回。我喜欢使用ResponseEntity,因为我可以为响应对象设置HTTP状态码(如200、404、403、401或500)。但我确实意识到,有时这有点大材小用,有时我只需要返回实际对象,该对象可以自动序列化为JSON对象并返回。
该方法被注解为@PreAuthorize、@RequestMapping和@ResponseBody。@ResponseBody注解强制将响应序列化为JSON字符串。因此,从技术上讲,我不需要将对象包装在ResponseEntity对象中。我只是把它当作一种乐趣,并演示如果您需要将HTTP状态码设置为响应的一部分,ResponseEntity就是实现它的方式。
这两个参数都用@RequestParam注解。此注解表明这两个参数的值来自URL的查询字符串,即
https://:<port number>/secure/api/carModel?make=Subaru&model=Out+Back
问号之后的所有内容都是查询字符串。如果您使用上面的URL,并且以站点用户角色登录,您应该会看到以下响应
{ "maker": "Honda", "model": "Accord", "year": 2016, "price": 19667.28 }
接下来,我将讨论如何构建和测试此应用程序。
如何构建和测试
如何构建
下载示例应用程序的源代码后,第一件事就是进入asset下的所有js文件夹,并将*.sj文件重命名回*.js。项目可以通过gradle构建和运行。要构建gradle,命令是
gradle build
要执行它,请运行命令
gradle jettyRun
您还可以使用gradle创建Eclipse项目
gradle eclipse
一旦生成了eclipse项目和classpath文件,就可以将它们导入Eclipse。请注意,所有这些都是使用Java 1.8完成的。
如何测试
当您使用命令gradle jettyRun时,如果一切顺利,您将在命令行控制台中看不到任何错误。这是一个示例截图

要访问默认的index页面,URL是:https://:8080/SampleSpring4/index,或者:https://:8080/SampleSpring4/。当您导航到此页面时,您将看到以下内容

要访问测试页面#1,该页面仅通过站点管理员帐户可用。具有站点管理员角色的用户是“testadmin”。密码是“123test321”(不带双引号)。要测试此用户角色,请导航到:https://:8080/SampleSpring4/secure/testPage1。您将首先看到登录页面。正确输入用户名和密码,您将看到以下内容

查看导航栏,有三个测试页面可供查看。具有站点管理员角色的用户还具有站点员工和站点用户角色。因此,用户可以完全访问此Web应用程序提供的所有页面。在尝试下一个用户之前,您应该注销。在右上角,有一个名为“Account”的下拉导航菜单。点击它,您将看到“Log Out”选项。点击它将注销您的用户。
让我们尝试使用具有站点员工角色的用户登录。这是一个超级用户角色,特权比管理员略低。用户是“teststaff”,密码仍然是“123test321”。导航到URL:https://:8080/SampleSpring4/secure/testPage2。然后使用“teststaff”登录,您将看到以下屏幕截图

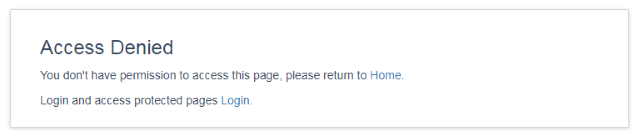
现在您可以看到,对于此用户,没有可用的测试页面#1。如果您尝试通过URL导航到测试页面#1:https://:8080/SampleSpring4/secure/testPage1。您将收到一个403错误页面。
最后,您可以测试站点用户帐户。首先注销,然后导航到:https://:8080/SampleSpring4/secure/testPage3。使用用户“testuser1”和密码“123test321”登录。您将看到以下屏幕截图

现在,尝试RESTful API服务。它可以使用站点用户角色访问。导航到URL:https://:8080/SampleSpring4/secure/api/getCarModel?make=subaru&model=out+back
{"maker":"Honda","year":2016,"model":"Accord","price":19667.28}
最后,我们可以尝试一个无效用户。用户“testuser2”可以使用相同的密码登录。但是,此用户已被禁用。因此您无法登录。
关注点
这将是我关于使用应用程序容器(Jetty、Glassfish、JBoss)的Spring MVC与Spring Security的第一个也是最后一个帖子。它将是我学到的关于Spring MVC、Spring Rest和Spring Security的所有知识的总结。下一阶段的工作将是使用Spring Boot或使用Jetty jar来创建独立的Web应用程序。这是未来。
希望这对您有所帮助。
历史
- 2018年3月13日 - 初稿