
使用 OpenGL 进行橡皮筋式选择
使用 OpenGL 进行橡皮筋式选择 - 一个实用类
引言
本文展示了如何在 OpenGL 应用程序中实现橡皮筋效果。
背景
橡皮筋效果经常被绘图程序使用。其目标是绘制一些内容,例如矩形,然后擦除它,而不会干扰已经渲染的内容。然后可以使用橡皮筋矩形来选择对象。对于 OpenGL 应用程序,可以通过启用逻辑运算并将其设置为 XOR 模式来实现橡皮筋效果。
这里的源代码包含一个名为 jxglTracker 的简单 C++ 类。该类中的两个主要成员函数是 DrawTrackRect() 和 Track()。在 DrawTrackRect() 函数中,通过调用 glEnable(GL_COLOR_LOGIC_OP) 启用逻辑运算,并通过调用 glLogicOp(GL_XOR) 设置 XOR 模式。橡皮筋矩形使用 glRecti() 绘制。
void jxglTracker::DrawTrackRect(int x1, int y1, int x2, int y2)
{
    CRect rectClient;
    m_pWnd->GetClientRect(&rectClient);

    glEnable(GL_COLOR_LOGIC_OP);
    glLogicOp(GL_XOR);
    // drawing different rubber-banding rectangle
    // depending on the mouse movement x-direction
    if(x1 < x2)
    {
        glColor4f(0.0, 0.0, 1.0, 0.5);
    }
    else
    {
        glColor4f(1.0, 0.0, 0.0, 0.5);
    }
    glPolygonMode(GL_FRONT_AND_BACK, GL_LINE);
    // OpenGL window coordinates are different from GDI's
    glRecti(x1, rectClient.Height() - y1, x2,
                rectClient.Height() - y2);
    glPolygonMode(GL_FRONT_AND_BACK, GL_FILL);
    glFlush(); // must flush here
    glDisable(GL_COLOR_LOGIC_OP);
}
在 Track() 函数中,我们首先将绘制缓冲区设置为前缓冲区,而不是默认的后缓冲区。这是必要的,因为我们不想干扰已经绘制的内容(重新绘制可能会很昂贵),而橡皮筋矩形正在不断地绘制和擦除。在这里,我们还设置了一个方便的投影矩阵,以便窗口客户端矩形上的像素对应于 OpenGL 模型坐标系。在无限 for 循环中调用 DrawTrackRect(),直到收到 WM_LBUTTONUP、WM_RBUTTONDOWN 或 ESC WM_KEYDOWN 消息。Track() 函数接受 CWnd* pWnd 和 CPoint point 作为参数,通常从客户端窗口 pWnd 的 WM_LBUTTONDOWN 消息处理程序中调用。
BOOL jxglTracker::Track(CWnd* pWnd, CPoint point)
{
    m_pWnd = pWnd;
    ASSERT(m_pWnd != 0);
    CRect rectClient;
    m_pWnd->GetClientRect(&rectClient);

    // set drawing mode to front-buffer
    glDrawBuffer(GL_FRONT);

    // set up a convenient projection matrix
    glMatrixMode(GL_PROJECTION);
    glPushMatrix();
    glLoadIdentity();
    glOrtho(0, rectClient.Width(), 0,
               rectClient.Height(), -1, 1);
    glViewport(-1, -1, rectClient.Width() + 2,
                       rectClient.Height() + 2);

    if (::GetCapture() != NULL)
    {
        return FALSE;
    }

    // set mouse capture because we
    // are going to work on this window
    pWnd->SetCapture();
    ASSERT(pWnd == CWnd::GetCapture());
    pWnd->UpdateWindow();

    BOOL bMoved = FALSE;
    CPoint ptOld = point;
    CRect rectOld = CRect(ptOld, ptOld);
    CPoint ptNew;

    BOOL bStop = FALSE;
    for (;;)
    {
        // loop forever until LButtonUp,
        // RButtonDown or ESC keyDown
        MSG msg;
        VERIFY(::GetMessage(&msg, NULL, 0, 0));

        if (CWnd::GetCapture() != pWnd)
        {
            break;
        }

        if(msg.message == WM_LBUTTONUP || msg.message == WM_MOUSEMOVE)
        {
            ptNew.x = (int)(short)LOWORD(msg.lParam);
            ptNew.y = (int)(short)HIWORD(msg.lParam);
            m_rect = CRect(ptOld, ptNew);

            if (bMoved)
            {
                m_bErased = TRUE;
                DrawTrackRect(&rectOld);
            }
            rectOld = m_rect;
            if (msg.message != WM_LBUTTONUP)
            {
                bMoved = TRUE;
            }

            if (msg.message == WM_MOUSEMOVE)
            {
                m_bErased = FALSE;
                DrawTrackRect(&m_rect);
            }
            else
            {
                bStop = TRUE;
                ASSERT(msg.message == WM_LBUTTONUP);
            }
        }
        else if(msg.message == WM_KEYDOWN)
        {
            if (msg.wParam == VK_ESCAPE)
            {
                bStop = TRUE;
            }
        }
        else if(msg.message == WM_RBUTTONDOWN)
        {
            bStop = TRUE;
        }
        else
        {
            DispatchMessage(&msg);
        }

        if(bStop)
        {
            break;
        }

    } // for (;;)

    // release mouse capture
    ReleaseCapture();

    if(!m_bErased)
    {
        // do a final erase if needed
        DrawTrackRect(m_rect);
    }

    glPopMatrix();
    // restore drawing mode to back-buffer
    glDrawBuffer(GL_BACK);

    return TRUE;
}
Using the Code
jxglTracker 类可以简单地在 WM_LBUTTONDOWN 消息处理程序中使用,如下所示
void COglRubberBandView::OnLButtonDown(UINT nFlags, CPoint point)
{
    CPaintDC dc(this); // device context for painting
    wglMakeCurrent(dc.m_hDC, m_hRC);

    jxglTracker tracker;
    tracker.Track(this, point);

    CView::OnLButtonDown(nFlags, point);
}
关注点
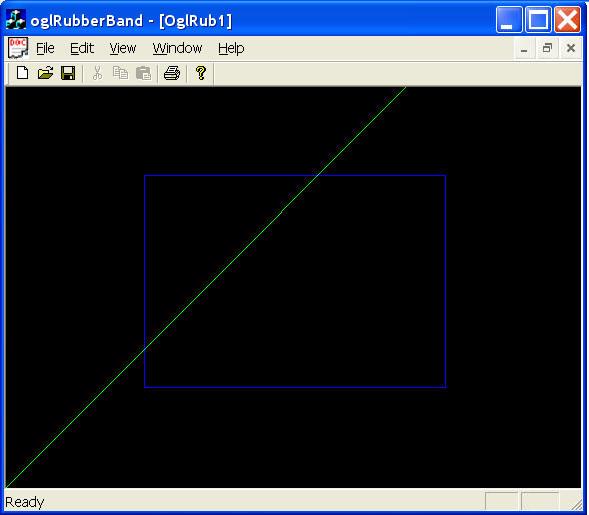
使用 MDI MFC-OpenGL 应用程序 (oglRubberBand) 来测试 jxglTracker 橡皮筋类。该应用程序是由 MFC AppWizard (接受默认设置) 使用 VC++ 6.0 生成的。解释设置 OpenGL 的细节超出了本文的范围。主要逻辑包含在视图类 (COglRubberBandView) 中,应该很容易理解。当然,jxglTracker.h 和 jxglTracker.cpp 文件被添加到项目中。OpenGL 库通过 stdafx.h 文件中的 #pragma comment(lib,"opengl32.lib") 等链接。
根据您系统的显卡速度,可以更改要绘制的几何实体数量,如下所示。请注意,已经绘制的实体数量不应影响橡皮筋效果的绘制速度。
void COglRubberBandView::OnPaint()
{
    //...
    const int nLines = 10000; // let's draw quite a few lines
    //...
}
祝您编码愉快!
历史
- 2006 年 2 月 8 日:初始发布
- 2009 年 11 月 16 日:文章更新 - 代码更改,修复了 Windows 7 环境中的显示错误
- 2012 年 1 月 6 日:文章更新 - 代码更改,修复了 Vista 和 Windows 7 中的错误