
Windows Phone 7 中的城市自行车
学习如何构建一个小型的移动应用程序来可视化城市自行车共享系统的数据。获取最近的站点,查找可用自行车的数量,并计算前往其他站点的路线。
 |
 |
目录
此应用程序有一个网页版本,网址为 www.bikeincity.com
更新
自从我发布这篇文章以来,我继续对该应用程序进行了开发,并开发了一个类似的应用,该应用目前正在进行应用商店认证。要通过认证,您必须正确实现“Tombstoning”。我为这篇文章增加了一个章节,描述了该应用程序的 tombstoning 过程。如果您只对此感兴趣,可以直接跳转到 Tombstoning 章节。
引言
今年我有机会住在巴黎,这是一个很棒的城市,有一个很酷的自行车共享系统叫做 Velib。那里有超过 1000 个自行车站点,您可以随便取一辆自行车,然后在旅程结束后在另一个站点归还。我想知道我是否可以获取有关这些站点的信息,并使用必应地图控件将其可视化。经过一些研究,我发现另一个法国城市 - 雷恩 - 也拥有自行车共享系统,并且有一个免费的开发者 API 来获取此类数据。于是我对自己说,虽然不是巴黎,但为什么不呢。我决定为 Windows Phone 7 构建一个应用程序,允许用户执行以下操作。
- 使用手机的 GPS 查找最近的站点,并获取有关它们的信息(可用自行车的数量,可停放自行车的插槽数量)。
- 当用户选择一个站点时,他也可以计算前往指定目的地地址附近其他站点的路线。
背景
我大约在两个月前萌生了构建此应用程序的想法;然而,当时我只考虑使用必应地图 API 的 Web 应用程序。当我在编写这个 Web 应用程序的过程中,Windows Phone 7 发布了,于是我对自己说,一旦我完成 Web 应用程序,我就会将其移植到移动设备上。
您可以在 这个网站上查看 Web 应用程序。请注意,它在开发过程中被搁置了,因此无法可靠运行。好吧,很快将应用程序移植到移动设备的想法很快就被遗忘了,因为我发现它在手机上并没有那么容易。
首先 - 必应地图 API 和 Phone Maps 的命名空间不同。例如,Location 类在这两个命名空间中都存在,但它们并不相同,因此您需要更改模型类。
其次 - 手机是不同的。屏幕很小,所以花了我一些时间来重新排列所有内容以适应屏幕。
将来,我计划整合这两个应用程序,以便它们可以共享尽可能多的代码。
本文不是一个完整的教程 - 它不是一个关于如何构建应用程序的分步教程,但我会尽力提供尽可能详细的应用程序描述。我希望在阅读之后,您能够理解应用程序是如何构建的以及它的工作原理。
我希望为您提供一些关于必应地图、Windows Phone 7 和 Silverlight 的有用信息。没有严格的先决条件,但我假设您熟悉 C#,并且了解 Silverlight 和 WPF 的基础知识。
架构
我尽量使应用程序尽可能简单,因此它只由几个类组成。主类是 MainPage 类,它包含所有可视化数据。它使用下面描述的数据模型(仅两个类)。要与 Web 服务通信,MainPage 使用 ServiceCaller 类。ServiceCaller 提供访问 Web 服务的方法以及在结果获取并处理后触发的事件。GeoCoordinateSimulator 模拟 GPS 设备 API,并在设备位置更改时触发事件。这是一个简单的架构图

应用程序包含其他几个类,从架构角度来看并不重要。
数据模型
在本节中,我将描述应用程序背后的模型 - 将包含在地图上可视化所需信息的类。只有两个类:BikeStation 和 BikeRoute。所有这些类,以及整个项目,都使用 System.Device.Location 命名空间中的 GeoCoordinate 类。此类代表由经度和纬度定义的地理位置。此类还包含一些其他属性,如 Course 和 Speed,这些属性在此应用程序中未使用。要存储位置,我们可以使用 Microsoft.Phone.Controls.Maps 命名空间中的 Location 类。此类不包含这些附加信息,并且是必应地图 API 的一部分。从 Location 到 GeoCoordinate 存在自动转换,但反之则不然。
BikeStation 存储有关自行车租赁点 all 的信息。这基本上是地址、位置、总插槽数和可用自行车数。还有一个 ObservavleCollection<bikeroute> Routes 属性,它包含一个路线集合 - 这些路线在用户搜索从选定站点到目的地附近其他站点的路线时加载。
public class BikeStation : INotifyPropertyChanged
{
    private  GeoCoordinate _location;
    private int _free;
    private bool _isSelected;
    private int _walkDistance;
    private int _id;
    private string _address;
    private int _total;
    private ObservableCollection<bikeroute> _routes;
...
   public GeoCoordinate Location
    {
      get
      {
        return _location;
      }
      set
      {
        _location = value;
        OnPropertyChanged("Location");
      }
    }
    //all other public properties
}
BikeStation 还包含一个名为 WalkDistance 的属性,表示站点到当前用户位置的直线距离。此距离使用稍后描述的 Haversine 公式计算。
BikeRoute 类简单地表示两个自行车站点之间的路线。这里最重要的属性是 Locations 属性,类型为 LocationCollection。顾名思义,这是 Location 的集合,稍后将用于在地图上绘制路线。
public class BikeRoute : INotifyPropertyChanged
{
    private BikeStation _to;
    private BikeStation _from;
    private double _distance;
    private int _time;
    private LocationCollection _locations;
    private double _opacity;
    private bool _isSelected;
    private int _totalTime;

    public LocationCollection Locations
    {
      get {
        if (_locations == null)
        {
          _locations = new LocationCollection();
        }
        return _locations;
      }

      set {
        _locations = value;
        OnPropertyChanged("Locations");
      }
    }
   //all other public properties
}
为了保持简单,我们可以将所有需要可视化的数据保存在 MainPage(主类)和用户在应用程序启动后导航到的 Phone 页面中。
public class MainPage:PhoneApplicationPage, INotifyPropertyChanged{

   private BikeStation[] _stations;

    public ObservableCollection<bikestation> DepartureStations
    {
        get
        {
            if (_departureStations == null)
            {
                _departureStations = new ObservableCollection<bikestation>();
            }
            return _departureStations;
        }
        set
        {
            _departureStations = value;
            OnPropertyChanged("DepartureStations");
        }
    }
    public ObservableCollection<bikestation> ArrivalStations {...}

    public GeoCoordinate Departure
    {
        get {
            return _from;
        }
        set
        {
            _from = value;
            OnPropertyChanged("From");
        }
    }

   public GeoCoordinate Arrival

   public BikeRoute CurrentRoute {...}
   public BikeStation CurrentStation {...}
}
总而言之,我们有两个 ObservableCollection 用于存储出发站和到达站。只有当用户搜索路线时,到达站点的集合才会被填充。当用户搜索距离其当前位置最近的站点时,这些站点将存储在 DepartureStations 集合中。
类型为 GeoCoordinate 的 Departure 和 Arrival 属性用于在地图上可视化当前位置和目的地位置。
CurrentRoute 和 CurrentStation 只是持有用户通过单击站点图钉选择的站点或从路线列表中选择的路线的属性。
私有数组 BikeStations _station 是城市所有站点的集合。当用户请求其位置附近的站点时,将查询此集合。
MainPage 类实现了 INotifyPropertyChanged,以便 UI 在某些属性更改时得到通知。
使用和模拟 GPS
为了获取用户的当前位置,我们将使用手机的 GPS;为此,我们使用 GeoCoordinateWatcher 类。此类是手机 GPS 的 API,包含一个 Position 属性,类型为 GeoPosition<geocoordinate>,它实际上是带有 TimeStamp 的当前 Location。它还提供了 PositionChanged 事件,当设备更改其位置时会触发该事件。可以在 GeoCoordinateWatcher 的构造函数中指定接收到的位置信息的准确度。有两种可能性:
GeoPositionAccuracy.Default- 此选项允许原生框架决定使用哪个位置数据源(WiFi、GSM 小区信息、GPS)来优化功耗。GeoPositionAccuracy.High- 此选项将强制GeoCoordinateWatcher始终使用 GPS,这是功耗最高的,但准确度也最高。
为了控制 PositionChanged 事件的触发频率,我们可以设置 MovementThreshold 属性(以米为单位),它表示将导致事件被调用的位置更改级别。这是初始化 GeoCoordinateWatcher 并订阅 PositionChanged 事件的处理程序的代码。
GeoCoordinateWatcher _watcher =
   new GeoCoordinateWatcher(GeoPositionAccuracy.Default);
_watcher.MovementThreshold = 20;
_watcher.PositionChanged+=
  new EventHandler<geopositionchangedeventargs<geocoordinate>>(
  _watcher_PositionChanged);
_watcher.Start();
GeoCoordinateWatcher 实现了 IDisposable,因此当我们完成使用它时,应该调用其 Dispose 方法,或者将其包含在 using 语句中。
_watcher.Stop();
_watcher.Dispose();
模拟器中的 GPS
在模拟器中运行应用程序时,无法使用 GeoCoordinateWatcher;但是,我们可以通过定义自己的实现 IGeoPositionWatcher<t> 的类来模拟 GPS 设备。GeoCoordinateWatcher 使用 GeoCoordinate 作为模板类来实现 IGeoPositionWatcher<t> 接口。这意味着它使用 GeoCoordinate 作为存储位置数据的类。这就是为什么 Position 属性是 GeoPosition<geocoordinate> 类型的原因。我们可以定义自己的类来实现在 IGeoCoordinateWatcher<geocoordinate> 接口,并实现其方法和属性。我的实现仅适用于此应用程序的情况 - 我有一个城市,我想模拟用户在城市中的移动。为了实现这一点,我需要知道城市的边界,然后使用计时器,每隔几秒(或几分钟)模拟一次城市边界内的位置变化。因此,让我们从定义一个名为 GeoCoordinateSimulator 的类开始,该类将实现 IGeoCoordinateWatcher<geocoordinate> 接口。
public class GeoCoordinateSimulator : IGeoPositionWatcher<geocoordinate>
{
  //represents left down corner of city bordering rectangle
  private GeoCoordinate _leftCorner;

  //represents right up corner of city bordering rectangle
  private GeoCoordinate _rightCorner;

  //direction in which the current position will change
  private double _dLat;
  private double _dLong;

  //Time interval between 2 changes of position
  private int _interval;

  private GeoPosition<geocoordinate> _position;

  //timer to fire position changes
  private Timer _timer;
  public Object _timerState;
}
城市的边界将由两个 GeoCoordinate 字段确定,分别表示左下角和右上角。GeoCoordinate 对象 _position 将提供模拟器的当前位置。为了模拟移动,我声明了两个 double 变量,它们代表 X(经度)和 Y(纬度)方向上的位置变化。作为最后一块拼图,我们有一个 Timer,它会定期在预定义的间隔内触发,并对当前位置应用更改并触发 PositionChanged 事件。构造函数有三个参数,其中两个用于描述城市的角落点,第三个是计时器应该触发的间隔。在构造函数中,除了确保角落点顺序正确的某些检查之外,位置被设置为城市中心。
public GeoCoordinateSimulator(GeoCoordinate left, GeoCoordinate right, int interval)
{
  ...
  double latRange = _rightCorner.Latitude - _leftCorner.Latitude;
  double longRange = _rightCorner.Longitude - _leftCorner.Longitude;

  //setting current position to the midle of the city
  _position = new GeoPosition<geocoordinate>(DateTime.Now,
              new GeoCoordinate(_leftCorner.Latitude + latRange / 2,
                                _leftCorner.Longitude + longRange / 2));

  //set the interval at which the timer should fire
  _interval = interval;
}
Start() 方法只是创建计时器并设置回调。回调方法将经度和纬度方向上的变化值添加到当前位置。如果生成点超出了城市边界,它将随机生成一个新的方向以留在城市内。
public void TimerCallBack(Object obj)
{
  Random r = new Random();
  double newLatitude, newLongitude;

  while (!IsInRange(newLatitude = this.Position.Location.Latitude + _dLat,
  newLongitude = this.Position.Location.Longitude + _dLong) ||
                     (_dLat==0.0 && _dLong==0.0))
  {
    _dLat = (r.NextDouble() - 0.5) * BikeConst.GPS_SIMULATOR_STEP;
    _dLong = (r.NextDouble() - 0.5) * BikeConst.GPS_SIMULATOR_STEP;
  }

  //set new position
  _position = new GeoPosition<geocoordinate>(DateTime.Now,
              new GeoCoordinate(newLatitude,newLongitude));

  //fire the event if there are any subscribers
  if (this.PositionChanged != null)
  {
    PositionChanged(this,
      new GeoPositionChangedEventArgs<geocoordinate>(this.Position));
  }
}
为了获得新的移动方向,我生成一个介于 -0.5 和 0.5 之间的随机值,然后将其乘以一个 double 常量,该常量表示变化的大小。另请注意,您必须检查两个变化值是否为零,因为位置将永远不会改变。当设置新位置时,PositionChanged 事件将触发,通知观察者有关更改的信息。有一个对 IsInRange() 方法的调用,该方法只是检查给定点是否仍在城市矩形内。
public bool IsInRange(double lat,double lng)
{
  return (lat > _leftCorner.Latitude && lng > _leftCorner.Longitude
    && lat < _rightCorner.Latitude && lng < _rightCorner.Longitude) ;
}
为了使用此模拟器,我们将仅使用 GeoCoordinateSimulator 而不是 GeoPositionWatcher 类。它将触发 PositionChanged 事件,就好像我们使用一个实际设备一样,该设备正在更改其位置。
//these are lower left and upper right corners of Rennes
GeoCoordinate leftCorner = new GeoCoordinate(48.094133, -1.705112);
GeoCoordinate rightCorner = new GeoCoordinate(48.123018,-1.642971);
_watcher = new GeoCoordinateSimulator(leftCorner,
               rightCorner, BikeConst.GPS_SIMULATOR_INTERVAL);
_watcher.Start();
计算地球表面的距离
为了查看哪些站点离手机当前位置最近,我们将不得不计算两个由球面坐标定义的点之间的距离。为此,使用了 Haversine 公式,该公式允许计算球面上两点之间的距离。更多信息可以在 维基百科页面 和 此网站上找到。计算是在 GeoMath 类中的一个静态方法 ComputeDistance 中实现的。
public static int ComputeDistance(Location start, Location end)
{
  var R = 6371;
  double lat1 = ToRad(start.Latitude);
  double lat2 = ToRad(end.Latitude);

  double lng1 = ToRad(start.Longitude);
  double lng2 = ToRad(end.Longitude);

  double dlng = lng2 - lng1;
  double dlat = lat2 - lat1;

  var a = Math.Pow(Math.Sin(dlat / 2),2) + Math.Cos(lat1) *
                   Math.Cos(lat2) * Math.Pow(Math.Sin(dlng/2),2);
  var c = 2*Math.Asin(Math.Min(1,Math.Sqrt(a)));

  var d = R * c;
  return (int)(d * 1000);
}
获取数据
本部分介绍如何调用必应地图 Web 服务来地理编码地址和获取路线,以及如何调用雷恩市 Web 服务来获取自行车系统的数据。该项目包含一个名为 ServiceCaller 的类,它提供对所有数据存储的访问。更具体地说,它提供了异步调用 Web 服务并将结果返回给 MainPage 的方法。
从自行车系统中获取信息
我需要的数据可以通过雷恩市提供的 Web 服务访问。要访问此数据,您必须在 http://data.keolis-rennes.com/ 注册为开发者。在此地址,您还将找到 REST API 的文档。注册后,您将获得一个开发者密钥,您将其传递给 Web 服务以获取数据。基本上,要从系统中获取任何数据,您需要按照以下形式组成一个 HTTP GET 请求。
http://data.keolis-rennes.com/xml/?version=1.0&key=XXXXXXXXXXXXXXX&cmd=command
在这里,key 参数将是您的开发者密钥,cmd 将是描述您操作的命令。
获取所有站点的列表
要获取所有站点的列表,ServiceCaller 类包含一个方法 GetAllStations()。此方法使用 WebClient 类,该类允许我们异步接收由其 URL 标识的数据。数据下载后,ServiceCaller 将触发 StationsLoaded 事件。在我们请求数据之前,我们注册一个方法,该方法将在下载过程完成后执行。
public void GetAllStations()
{
  WebClient ws = new WebClient();
  string url = "http://data.keolis-rennes.com/xml/?" +
               "version=1.0&key=key&cmd=getstation";
  ws.DownloadStringCompleted +=
     new DownloadStringCompletedEventHandler(StationsListRecieved);
  ws.DownloadStringAsync(new Uri(url));
}
在调用具有“getstation”命令的 Web 服务后,我们将获得 XML,可以使用 LINQ 轻松解析,其结构如下。
<?xml version="1.0" encoding="UTF-8" standalone="yes"?>
<opendata>
    <request>http://data.keolis-rennes.com/xml/?
             version=1.0&key=yourkey&cmd=getstation</request>
    <answer>
        <status code="0" message="OK"/>
        <data>
            <station>
                <id>75</id>
                <number>75</number>
                <name>ZAC SAINT SULPICE</name>
                <state>1</state>
                <latitude>48.1321</latitude>
                <longitude>-1.63528</longitude>
                <slotsavailable>21</slotsavailable>
                <bikesavailable>8</bikesavailable>
                <pos>0</pos>
                <district>Maurepas - Patton</district>
                <lastupdate>2010-12-05T01:29:06+01:00</lastupdate>
            </station>
            <station>
                <id>52</id>
                <number>52</number>
                <name>VILLEJEAN-UNIVERSITE</name>
                <state>1</state>
                <latitude>48.121075</latitude>
                <longitude>-1.704122</longitude>
                <slotsavailable>14</slotsavailable>
                <bikesavailable>11</bikesavailable>
                <pos>1</pos>
                <district>Villejean-Beauregard</district>
                <lastupdate>2010-12-05T01:29:06+01:00</lastupdate>
            </station>
        </data>
    </answer>
</opendata>
数据下载后,将执行 StationsListRecieved 事件处理程序。您需要的数据以 XML 形式存储,因此我们可以使用 LINQ to XML 来解析它并获取 BikeStation 类的数组。我们可以检查 StationsLoaded 事件是否有任何订阅者,然后触发它,并提供一个类型为 StationsLoadedEventArgs 的参数。
if (e.Result != null)
{
  XDocument xDoc = XDocument.Parse(e.Result);
  BikeStation[] result = null;

  result = (from c in xDoc.Descendants("opendata").Descendants(
                 "answer").Descendants("data").Descendants("station")
            select new BikeStation
            {
              Address = (string)c.Element("name").Value,
              Id = Convert.ToInt16(c.Element("id").Value),
              Location = new GeoCoordinate(
                             Convert.ToDouble(c.Element("latitude").Value),
                             Convert.ToDouble(c.Element("longitude").Value)),
              Free = Convert.ToInt16(c.Element("bikesavailable").Value),
              FreePlaces = Convert.ToInt16(c.Element("slotsavailable").Value)
            }).ToArray();

  //Send event containing the received array of bike station to the MainPage
  if (this.StationsLoaded != null)
  {
    this.StationsLoaded(this, new StationsLoadedEventArgs(result));
  }
}
StationsLoadedEventArgs 是一个简单的类,它派生自 EventArgs 并封装了 BikeStation[] 数组。
public class StationsLoadedEventArgs:EventArgs
{
  public BikeStation[] Stations { get; set; }
  public StationsLoadedEventArgs(BikeStation[] stations)
  {
    this.Stations = stations;
  }
}
在构造函数中,MainPage 类使用 ServiceCaller 来获取所有站点。当集合接收到后,ServiceCaller 将触发其 StationsLoaded 事件,MainPage 只会将此集合分配给其私有 _stations 集合,该集合稍后将被查询以获取最近的站点。
获取站点的详细信息
这里情况有点不同。我们已经有了一个 BikeStation 对象,我们只想更新其中的信息。再次,我们将使用 WebClient 来获取数据,但在此之前,我们将为 BikeStation 创建一个 GUID 并将其存储在字典中。然后我们将调用 DownloadStringAsync 方法,该方法有两个参数,将 GUID 作为第二个参数传递。这将导致在接收到“completed”事件时,我们可以恢复 GUID 并将接收到的值分配给正确的 BikeStation 对象。方法 GetStationInformation(BikeStation) 显示了如何调用 Web 服务。
public void GetStationInformation(BikeStation station)
{
  string url = String.Format("http://data.keolis-rennes.com/xml/" +
               "?version=1.0&key={0}&cmd=getstation¶m[request]" +
               "=number¶m[value]={1}",
    BikeConst.RENNES_KEY,station.Id);
    Guid stationGuid = Guid.NewGuid();
    _stationsDict.Add(stationGuid, station);
    WebClient webClient = new WebClient();
    webClient.DownloadStringCompleted +=
       new DownloadStringCompletedEventHandler(StationInformationReceived);
    webClient.DownloadStringAsync(new Uri(url), stationGuid);
}
雷恩数据服务的 URL 与之前的不同。“getstation”命令可以有一个参数“number”,对应于站点的 ID。
我们将收到的数据将是 XML,其结构与调用站点列表时相同(如上所述),但 XML 将只包含一个站点。
收到数据后,我们首先恢复站点的 GUID。它在事件参数的UserState 参数中到达。稍后,我们再次使用 LINQ to XML 解析数据,然后我们可以更新选定的站点。更新后,我们可以从字典中删除 GUID。
if(e.Result!=null){
  string xmlString = e.Result;

  XDocument xDoc = XDocument.Parse(xmlString);
  Guid stationGuid = (Guid)e.UserState;
  BikeStation station = _stationsDict[stationGuid];


  var stInfo = (from c in xDoc.Descendants("opendata").Descendants(
                     "answer").Descendants("data").Descendants("station")
                select new BikeStation
                {
                  Free = Convert.ToInt16(c.Element("bikesavailable").Value),
                }).First();

  station.Free = stInfo.Free;
 _stationsDict.Remove(stationGuid);
}
使用必应地图服务
这部分在 WP7 开发者培训套件中已得到很好的解释 - 因此这里只是简要的解释以及我如何根据我的具体情况进行调整。请注意,为了使用必应地图服务和组件,您需要在必应地图门户注册以获取您的开发者密钥。必应地图 API 公开了几个可通过 Internet 访问的 WCF 服务。此应用程序使用了其中两个:地理编码服务和路线服务。
要访问这些 WCF 服务中的每一个,您需要在项目中添加指向正确 URL 的服务引用。必应地图 SOAP 服务的 URL 列表可以在 此站点上找到。如果您在访问服务时遇到任何问题,可以查阅 此页面,这是一篇关于如何开发与必应地图 SOAP 服务交互的 Silverlight 应用程序的通用文章。
地理编码地址
在这里,我可以使用与 MSDN 提供的代码非常相似的代码。我们创建一个新的 GeoCodeRequest,并将我们要进行地理编码的地址作为查询传递给它。创建 GeocodeServiceClient 时,我们在构造函数中指定服务终结点。这里我们可以使用标准的 HTTP 绑定,但也有可用的安全绑定(使用 SSL)。
public void GeocodeAddress(string address,State state)
{
  if (address != String.Empty)
  {
    GeocodeRequest geocodeRequest = new GeocodeRequest();

    // Your key should be in stored in the _mapID
    geocodeRequest.Credentials = new Credentials();
    geocodeRequest.Credentials.ApplicationId = _mapID;

    //set the address which we search
    geocodeRequest.Query = address;

    // Make the geocode request
    GeocodeServiceClient geocodeService =
      new GeocodeServiceClient("BasicHttpBinding_IGeocodeService");
    geocodeService.GeocodeCompleted +=
      new EventHandler<geocodecompletedeventargs>( GeocodeCompleted);

    //passing the state argument - either this
    //is to just location or to get directions
    geocodeService.GeocodeAsync(geocodeRequest, state);
  }
}
当我们从必应服务获取结果时,我们将触发 BikePlaceGeocoded 事件,并将地理编码的 GeoCoordinate 对象作为此事件的参数传递,以将其传递给 MainPage 类。
void GeocodeCompleted(object sender, GeocodeCompletedEventArgs e)
{
  if (e.Result.ResponseSummary.StatusCode ==
      GeocodeService.ResponseStatusCode.Success)
  {
    if (e.Result.Results.Count > 0)
    {
      GeoCoordinate coordinate = e.Result.Results[0].Locations[0];
      if (this.BikePlaceGeocoded != null)
      {
        BikePlaceGeocoded(this,
          new AddressGeocodedEventArgs(coordinate,(State)e.UserState));
      }
    }
  }
}
为了完成您的想法,这是 AddressGeocodedEventArgs 的代码。
public class AddressGeocodedEventArgs : EventArgs
{
  public GeoCoordinate Location {get;set;}

  public AddressGeocodedEventArgs(GeoCoordinate c, State s)
  {
    this.Location = c;
    this.StateType = s;
  }
}
计算路线
ServiceCaller 公开了一个名为 CalculateRoute 的方法,该方法接受 BikeRoute 作为其参数。因此,这里我们假设我们已经有一个包含起点和终点的 BikeRoute 对象,并且我们想要计算路线 - 获取确切的方向和总时间。
public void CalculateRoute(BikeRoute route)
{
  RouteServiceClient routeClient =
    new RouteServiceClient("BasicHttpBinding_IRouteService");
  routeClient.CalculateRouteCompleted +=
    new EventHandler<calculateroutecompletedeventargs>(
    CalculatedRoute_Completed);


  RouteRequest routeRequest = new RouteRequest();

  routeRequest.Options = new RouteOptions();
  routeRequest.Options.Mode = TravelMode.Driving;
  routeRequest.Options.Optimization = RouteOptimization.MinimizeDistance;
  routeRequest.Credentials = new Credentials();
  routeRequest.Credentials.ApplicationId = _mapID;

  routeRequest.Waypoints = new ObservableCollection<waypoint>();

  Waypoint from = new Waypoint();
  from.Location = route.From.Location;
  routeRequest.Waypoints.Add(from);

  Waypoint to = new Waypoint();
  to.Location = route.To.Location;
  routeRequest.Waypoints.Add(to);


  Guid routeGuid = Guid.NewGuid();
  _routesDict.Add(routeGuid, route);

  routeClient.CalculateRouteAsync(routeRequest, routeGuid);
}
在 RouteOptions 对象中,我们指定我们要驾驶路线并最小化距离。这应该能为骑行提供良好的结果(好吧,即使有时我们认为骑自行车我们可以做任何事情,我们也应该遵守交通规则)。然后,我们将两个 Waypoint 添加到 RouteRequest 中,对应于自行车租赁站点。与更新 BikeStation 信息一样,我将 BikeRoute 对象存储在字典中,并将键(GUID)传递给请求。
void CalculatedRoute_Completed(object sender, CalculateRouteCompletedEventArgs e)
{
  if ((e.Result.ResponseSummary.StatusCode ==
                RouteService.ResponseStatusCode.Success))
  {
    Guid routeGuid = (Guid)e.UserState;
    //get the route from the route table
    BikeRoute route = _routesDict[routeGuid];

    //add all the points in the route to the LocationCollection
    //which is later binded to the object.
    foreach (Location p in e.Result.Result.RoutePath.Points)
    {
      route.Locations.Add(p);
    }

    route.Distance = e.Result.Result.Summary.Distance;
    //calculate time estimation in minutes
    route.Time = (int)e.Result.Result.Summary.TimeInSeconds / 60 *
                      BikeConst.DRIVE_TO_BIKE;
    //remove the route from the dictionary
    _routesDict.Remove(routeGuid);
  }
}
在事件处理程序中,当路线计算完成后,我恢复 GUID 以获取相关的路线。构成所需路线的点存储在 Result 的 RoutePath.Point 集合中。我们将它们添加到 BikeRoute 的 Locations 属性中。如前所述,此属性的类型为 LocationCollection,MapPolyline 对象可以绑定到它 - 这将在接下来的部分中介绍。
准备 GUI
在开始创建 GUI 之前,了解 Windows Phone 7 的 UI 设计和交互指南会很有用,该指南提供了配色方案。因此,我在此应用程序中使用的一些画笔可以在此文档中找到。
<SolidColorBrush x:Name="LimeBrush" Color="#8CBF26"/>
<SolidColorBrush x:Name="OrangeBrush" Color="#F09609"/>
现在我们要做的第一件事就是将地图放置在适当的位置。地图位于 Microsoft.Phone.Controls.Maps 命名空间中,因此我们必须在 XAML 的顶部添加声明。
xmlns:map="clr-namespace:Microsoft.Phone.Controls.Maps;
           assembly=Microsoft.Phone.Controls.Maps"
...

<map:Map x:Name="map" CredentialsProvider="{Binding CredentialsProvider}"
                         CopyrightVisibility="Collapsed"
                         LogoVisibility="Collapsed"
                         ZoomLevel="{Binding Zoom,Mode=TwoWay}"
                         HorizontalAlignment="Stretch"
                         VerticalAlignment="Stretch"></map>
您可以看到 ZoomLevel 绑定到 MainPage 类公开的 Zoom 属性;CredentialsProvider 也是如此。CredentialsProvider 属性应包含您的 Ming Maps 开发者密钥。
public double Zoom
{
  get { return _zoom; }
  set
  {
    var coercedZoom = Math.Max(MinZoomLevel, Math.Min(MaxZoomLevel, value));
    if (_zoom != coercedZoom)
    {
      _zoom = value;
      OnPropertyChanged("Zoom");
    }
  }
}

public CredentialsProvider CredentialsProvider
{
  get { return _credentialsProvider; }
}
在设置缩放级别时,我们确保它大于存储在常量中的最大和最小级别。我决定使用与官方 WP7 Training Kit 中使用的相同的按钮进行缩放,原因很简单 - 它们看起来比我提出的任何东西都好,所以我将它们作为起点,并稍微简化了样式。这是缩放按钮。
<Button x:Name="ButtonZoomIn" Style="{StaticResource ButtonZoomInStyle}"
                            HorizontalAlignment="Left" VerticalAlignment="Top"
                            Height="56" Width="56" Margin="8,250,0,0"
                            Click="ButtonZoomIn_Click"/>
您可以看到我通过设置 Margin 属性将按钮放置在地图上。同样,显而易见的是 ButtonZoomInStyle 应用于此按钮。这个按钮定义在单独的 DefaultStyles.xaml 文件中。我将在此详细介绍样式,因为项目中其他按钮也使用了相同的样式类型。
<Style x:Key="ButtonZoomInStyle" TargetType="Button"
    <Setter Property="Template">
        <Setter.Value>
            <ControlTemplate TargetType="Button">
                <Grid Background="Transparent" Width="48" Height="48">
                    <VisualStateManager.VisualStateGroups>
                        <VisualStateGroup x:Name="CommonStates">
                            <VisualState x:Name="Normal"/>
                            <VisualState x:Name="Pressed">
                                <Storyboard>
                                    <ObjectAnimationUsingKeyFrames
                                           Storyboard.TargetProperty="Visibility"
                                           Storyboard.TargetName="image">
                                        <DiscreteObjectKeyFrame KeyTime="0"
                                           Value="Visible"/>
                                    </ObjectAnimationUsingKeyFrames>
                                    <ObjectAnimationUsingKeyFrames
                                              Storyboard.TargetProperty="Visibility"
                                              Storyboard.TargetName="image1">
                                        <DiscreteObjectKeyFrame KeyTime="0"
                                              Value="Collapsed"/>
                                    </ObjectAnimationUsingKeyFrames>
                                </Storyboard>
                            </VisualState>
                        </VisualStateGroup>
                    </VisualStateManager.VisualStateGroups>
                    <Image x:Name="image"
                        Source="/BikeInCity;component/Icons/Zoom/ZoomIn_White.png"
                        Stretch="Fill" Visibility="Collapsed"/>
                    <Image x:Name="image1"
                        Source="/BikeInCity;component/Icons/Zoom/ZoomIn_Black.png"
                        Stretch="Fill"/>
                </Grid>
            </ControlTemplate>
        </Setter.Value>
    </Setter>
</Style>
该样式覆盖了按钮的 Template 属性。我们定义了一个新的 ControlTemplate,其中包含一个 Grid,内部有两个图像(一个叠加在另一个之上)。我们使用 VisualStates 来将顶部图像的 Visibility 设置为 Collapsed,从而在用户按下按钮时显示下面的图像。
如果您不熟悉 VisualStates 的概念,您可以将其视为描述组件在特定状态下外观的声明。VisualStates 仅在 Silverlight 中实现,并且像 Triggers 一样工作,它们可以被视为 WPF Triggers 的替代品。基本思想是,组件的创建者将定义几个状态,并必须预见哪些状态对用户很重要 - 因此在某些方面,我们可以说这个概念的功能不如 Triggers(其中模板设计者拥有更多自由,并且不受一组预定义状态的限制)。
在这里,在 Grid 中,我们有一个 VisualStateManager,其中包含一个名为“CommonStates”的状态组。这是 Button 组件的预定义组,包含四个状态:Normal、MouseOver、Pressed 和 Disabled。我只对 Normal 和 Pressed 状态感兴趣。通过不对 Normal 状态做进一步更改,我声明我不想为组件在该状态下的外观做任何更改。
另一方面,Pressed 状态包含一个 Storyboard,它提供了一个时间线,用于我们可能想要在组件上执行的某些动画。在此示例中,我们将仅使用 ObjectAnimationUsingKeyFrame,它允许我们在特定时间更改组件的属性。这里我们只是说当 Button 被单击时,将第一个图像的 Visibility 设置为 Collapsed。
为了控制缩放级别,我们在缩放按钮上添加了两个处理程序,我们在其中递增或递减 Zoom 属性的当前值。
添加地址面板
当用户想要获取到另一个位置的路线时,将显示此面板。
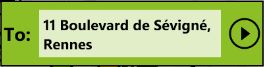
<Border Background="{StaticResource LimeBrush}" Width="400" Height="100"
        x:Name="DirectionsPanel" BorderThickness="2" BorderBrush="Black"
        Visibility="Collapsed">

    <StackPanel Orientation="Horizontal">
        <TextBlock Text="To:" VerticalAlignment="Center" Margin="3,0,0,0"
                   FontSize="28" FontWeight="Bold" Foreground="Black"/>
        <TextBox Name="txtAddressTo" Width="300" Text="71 Rue d'Inkermann"
                 FontSize="22" FontWeight="Bold" TextWrapping="Wrap"/>
        <Button Name="bntSearch" Style="{StaticResource ButtonPlayStyle}"
                    Click="ComputeDirections_Click"/>
    </StackPanel>
</Border>
这没什么复杂的 - 一个带有水平方向 StackPanel 的 Border 组件。应用于 Button 的样式与应用于缩放按钮的样式类似。您可以看到此按钮已分配了一个回调 - 我们稍后将讨论它。
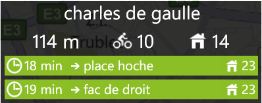
添加站点面板
显示站点详细信息的面板被添加到与地图组件相同的网格列中 - 它实际上放置在地图组件之上。
<Grid x:Name="StationPanel" Width="400"
           MinHeight="40" Margin="0,10,0,0" VerticalAlignment="Top">
    <Border Background="Black" BorderBrush="White"
           BorderThickness="2" Opacity="0.8"/>
    <StackPanel DataContext="{Binding CurrentStation}">
        <Grid DataContext="{Binding}">
            <Grid.RowDefinitions>
                <RowDefinition  Height="Auto"/>
                <RowDefinition Height="Auto"/>
            </Grid.RowDefinitions>
            <Grid.ColumnDefinitions>
                <ColumnDefinition Width="30"/>
                <ColumnDefinition/>
                <ColumnDefinition/>
                <ColumnDefinition/>
                <ColumnDefinition Width="30"/>
            </Grid.ColumnDefinitions>
            <TextBlock Text="{Binding Address}" Margin="3,0,0,3"
               VerticalAlignment="Center" FontSize="28"
               HorizontalAlignment="Center" Grid.ColumnSpan="5"/>

            <StackPanel Orientation="Horizontal" Grid.Column="1"
                     Margin="6,1,6,0" Grid.Row="1"
                     VerticalAlignment="Center" HorizontalAlignment="Center">
                <TextBlock Text="{Binding WalkDistance}"
                   VerticalAlignment="Center" FontSize="28"/>
                <TextBlock Text=" m" FontSize="30" VerticalAlignment="Center"/>
            </StackPanel>
            <StackPanel Orientation="Horizontal" Grid.Column="2"
                    Margin="6,1,6,0" Grid.Row="1"
                    VerticalAlignment="Center" HorizontalAlignment="Center">
                <Image Source="/Icons/Others/BicycleWhite.png"
                       Height="40" Width="45"/>
                <TextBlock Text="{Binding Path=Free}"
                    VerticalAlignment="Center" FontSize="28"/>
            </StackPanel>
            <StackPanel Orientation="Horizontal"
                    Grid.Column="3" Margin="6,1,6,0" Grid.Row="1"
                    VerticalAlignment="Center" HorizontalAlignment="Center">
                <Image Source="/Icons/Others/HouseWhite.png"
                       Height="40" Width="45" />
                <TextBlock Text="{Binding Path=FreePlaces}"
                    VerticalAlignment="Center" FontSize="28"/>
            </StackPanel>
        </Grid>

        <!-- Route List -->
        <ListBox x:Name="RouteList" ItemsSource="{Binding Routes}"
             ItemTemplate="{StaticResource RouteListTemplate}"
             VerticalAlignment="Top" SelectionChanged="RouteList_SelectionChanged"
             MaxHeight="120" ItemContainerStyle="{StaticResource ListItemStyle}"
                 Width="395" Margin="0,0,0,5"/>
    </StackPanel>
</Grid>
站点面板由一个 Border 组成,其 Opacity 设置为 0.8,因此可以看到下面的地图。在这个 Border 上方放置了一个 StackPanel,其 DataContext 属性绑定到 MainPage 的 CurrentStation 属性。StackPanel 上有两个组件:一个包含站点信息的 Grid 和一个包含从站点到目的地站点的路线的列表。Grid 中的所有文本框都绑定到 CurrentStation 属性中 BikeStation 对象的属性。
路线列表的 ItemsSource 绑定到 BikeStation 类的 Routes 属性。列表设置了 ItemContainerStyle 和 ItemTemplateStyle。项容器样式设置每个项的容器样式。这里我有一个简单的样式,它只是改变所选项的颜色。

<Style x:Key="ListItemStyle" TargetType="ListBoxItem">
    <Setter Property="Template">
        <Setter.Value>
            <ControlTemplate TargetType="ListBoxItem">
                <Grid x:Name="Container"
                         Background="{StaticResource LimeBrush}"
                         Margin="5,3,5,3">
                    <VisualStateManager.VisualStateGroups>
                        <VisualStateGroup x:Name="SelectionStates">
                            <VisualState x:Name="Unselected"/>
                            <VisualState x:Name="Selected">
                                <Storyboard>
                                    <ObjectAnimationUsingKeyFrames
                                               Storyboard.TargetProperty="Background"
                                               Storyboard.TargetName="Container">
                                        <DiscreteObjectKeyFrame KeyTime="0"
                                            Value="{StaticResource OrangeBrush}" />
                                    </ObjectAnimationUsingKeyFrames>
                                </Storyboard>
                            </VisualState>
                            <VisualState x:Name="SelectedUnfocused">
                                <Storyboard>
                                    <ObjectAnimationUsingKeyFrames
                                             Storyboard.TargetProperty="Background"
                                             Storyboard.TargetName="Container">
                                        <DiscreteObjectKeyFrame KeyTime="0"
                                             Value="{StaticResource OrangeBrush}" />
                                    </ObjectAnimationUsingKeyFrames>
                                </Storyboard>
                            </VisualState>
                        </VisualStateGroup>
                        <VisualStateGroup x:Name="FocusStates">
                            <VisualState x:Name="Unfocused"/>
                            <VisualState x:Name="Focused">
                                <Storyboard>
                                    <ObjectAnimationUsingKeyFrames
                                              Storyboard.TargetProperty="Background"
                                              Storyboard.TargetName="Container">
                                        <DiscreteObjectKeyFrame KeyTime="0"
                                              Value="{StaticResource OrangeBrush}" />
                                    </ObjectAnimationUsingKeyFrames>
                                </Storyboard>
                            </VisualState>
                        </VisualStateGroup>
                    </VisualStateManager.VisualStateGroups>
                    <ContentPresenter />
                </Grid>
            </ControlTemplate>
        </Setter.Value>
    </Setter>
</Style>
如果您阅读了关于样式设置按钮的部分,您会看到概念是相同的。对于项可能处于的某些状态,我正在更改容器的背景颜色。与样式设置按钮相比,这里只有一个区别。按钮不包含 ContentPresenter 标签,因为没有必要将任何内容放入按钮中。但是,这里我们只是为容器设置样式,而列表项的内容将不同。它将是 ItemTemplate,它将被放入 ContentPresenter 中。ItemTemplate 指定每个列表项的 DataTemplate。
<Grid Width="395" Background="Transparent" HorizontalAlignment="Stretch">
    <Grid.ColumnDefinitions>
        <ColumnDefinition Width="95"/>
        <ColumnDefinition Width="25"/>
        <ColumnDefinition Width="210"/>
        <ColumnDefinition Width="65"/>
    </Grid.ColumnDefinitions>

    <StackPanel Orientation="Horizontal">
        <Image Source="/Icons/Others/ClockWhite.png/"
               Height="30" Width="30"/>
        <TextBlock Text="{Binding TotalTime}"/>
        <TextBlock Text=" min"/>
    </StackPanel>
    <Image Source="/Icons/Others/NextWhite.png"
            Height="25" Width="25" Grid.Column="1"/>
    <TextBlock Text="{Binding Path=To.Address}" Grid.Column="2"/>
    <StackPanel Grid.Column="3" Orientation="Horizontal">
        <Image Source="/Icons/Others/HouseWhite.png"
               Height="30" Width="30" />
        <TextBlock Text="{Binding Path=To.FreePlaces}"/>
    </StackPanel>
</Grid>
应用程序栏
为了允许用户执行某些操作,最简单的方法是使用应用程序栏 - 手机显示屏底部的半透明面板。它的 XAML 声明实际上已经包含在 Visual Studio 提供的模板中。您可以将最多四个按钮直接放在面板上,您还可以选择将菜单项放在这些按钮下方。我这里只有两个按钮,功能如下。
- 获取路线的按钮(从一辆自行车站点到附近输入地址的站点)。
- 获取手机 GPS 提供的实际位置最近站点的按钮。
<phone:PhoneApplicationPage.ApplicationBar>
    <shell:ApplicationBar IsVisible="True" IsMenuEnabled="True" Opacity="0.8">
        <shell:ApplicationBarIconButton
           IconUri="/Icons/ApplicationBar/Directions.png"
           Text="Directions" Click="GetDirections_Click"/>
        <shell:ApplicationBarIconButton
           IconUri="/Icons/ApplicationBar/Location.png"
           Text="Here" Click="ShowNearStations_Click"/>
    </shell:ApplicationBar>
</phone:PhoneApplicationPage.ApplicationBar>
处理用户操作
本章一般描述用户按下应用程序栏按钮之一时执行的操作。
获取最近的站点
ShowNearStations_Click 方法是第一个应用程序栏按钮的事件处理程序,它将当前位置设置为 GeoCoordinateWatcher 的实际位置,并调用 ShowNearStations 方法。此方法以当前位置作为参数。
this.DepartureStations = GetNearStations(location, BikeConst.ANGLE_DISTANCE);
this.map.SetView(location, BikeConst.ZOOM_DETAIL);
this.StationPanel.Visibility = System.Windows.Visibility.Visible;

//deselecte the currently selected station
if (this.CurrentStation != null)
{
  this.CurrentStation.IsSelected = false;
}

//selecte on of the new stations
if (this.DepartureStations.Count > 0)
{
  this.CurrentStation = this.DepartureStations[0];
  this.CurrentStation.IsSelected = true;
}
在此方法中,我们首先获取所需位置附近的站点,然后使用地图的 SetView 方法缩放到该站点。之后,我们只需确保选择一个站点以显示有关其信息。让我们现在观察 GetNearStations 方法,它实际上是最重要的。
private ObservableCollection<bikestation>
        GetNearStations(GeoCoordinate coordinate, double distance)
{
  ObservableCollection<bikestation> collection =
            new ObservableCollection<bikestation>();

  if (this.Stations != null)
  {

    double lat = coordinate.Latitude;
    double lng = coordinate.Longitude;

    var stationList = from s in this.Stations
                      where (Math.Abs(s.Location.Latitude - lat) <
                             distance & Math.Abs(s.Location.Longitude - lng)
                             < distance)
                      select s;


    foreach (BikeStation station in stationList)
    {
      station.WalkDistance =
              GeoMath.ComputeDistance(station.Location, coordinate);
    }

    var result = stationList.Where(x => x.WalkDistance < 400);

    foreach (BikeStation station in result)
    {
      collection.Add(station);
    }

    //get the information just for the closest stations
    foreach (BikeStation station in collection)
    {
      _serviceCaller.GetStationInformation(station);
    }
  }
  return collection;
}
这里我们使用 LINQ 来获取最近的站点。我们选择经度和纬度与实际位置不太“远”的站点。实际上,这不会给我们一个圆形距离的站点,而是实际位置周围正方形内的所有站点。
为了计算此集合中每个站点的精确距离,我们调用 ComputeDistance 方法,该方法使用球面余弦定律来计算距离。
计算完所有距离后,使用 Where 方法将集合限制为距离小于 400 米的站点。
在此处使用 LINQ 的原因是消除需要计算球面距离的站点数量,因为这是一项成本很高的操作。
总而言之,GetNearStations 方法将使用最近的站点填充 ObservableCollection。稍后,我们将把此集合的内容绑定到地图。
获取路线
这里我们调用 ServiceCaller 类中的 GeocodeAddress,该类已在“获取数据”章节中进行了描述。因为 GeocodeAddress 是一个异步操作,所以我们必须分配一个事件处理程序来在地址地理编码后执行操作。
void BikePlaceGeocoded(object sender, AddressGeocodedEventArgs e)
{
  this.CurrentStation.Routes.Clear();
  this.CurrentRoute = null;

  //set the destination place
  this.Arrival = e.Location;

  //retrieve the stations arround destination place
  this.ArrivalStations =
       GetNearStations(this.Arrival, BikeConst.ANGLE_DISTANCE);


  foreach (BikeStation destination in this.ArrivalStations)
  {
    BikeStation[] list = { this.CurrentStation, destination };
    BikeRoute route = new BikeRoute();
    route.From = this.CurrentStation;
    route.To = destination;


    //add item to collection, keep just couple
    //fastest routes in the collection
    this.CurrentStation.Routes.Add(route);

    //call the web service to calculate the directions of the route
    _serviceCaller.CalculateRoute(route);
  }
}
在事件处理程序中,我们将首先清除当前站点的 Routes 集合,以删除可能来自先前搜索的任何路线,并取消选择当前路线。在 AddressGeocodedEventArgs 中,我们获取站点的位置,该位置被分配给 Arrival 属性。这次我们调用 GetNearStations 方法来获取所有到达站点。
然后,对所有到达站点进行循环,为从当前选定站点到到达站点的每条路线创建一个新的 BikeRoute。在此循环中,调用 ServiceCaller 的 CalculateRoute 方法,该方法请求必应服务获取驾驶路线。当路线获取完成后,BikeRoute 对象将被修改。
在地图上可视化
这里我们假设 MainPage 类的属性中已经包含了所有数据,我们只需要在地图上显示它们。
可视化用户位置
让我们从可视化当前位置和目标位置开始。要可视化单个点,将使用 Pushpin 组件。
<map:map>
  <map:Pushpin Location="{Binding Departure}"
         Style="{StaticResource PlaceMarkStyle}"/>
  <map:Pushpin Location="{Binding Arrival}"
         Style="{StaticResource PlaceMarkStyle}"/>
</map:map>
我们有两个 Pushpin,它们的 Location 属性绑定到 MainPage 类的 Departure 和 Arrival 属性,这两个属性的类型都是 GeoCoordinate。这两个组件都使用 PlaceMarkStyle。

<Style x:Key="PlaceMarkStyle" TargetType="map:Pushpin">
  <Setter Property="Template">
      <Setter.Value>
          <ControlTemplate>
              <Canvas>
                  <Path Width="16" Height="15"
                        Canvas.Top="13" Stretch="Fill"
                        Stroke="#FF000000" Fill="#FF000000"
                        Data="F1 M 8,28 L 0,16L 16,16L 8,28 Z "/>
                  <Rectangle Width="6" Height="13"
                         Canvas.Left="5" Stretch="Fill"
                         Stroke="#FF000000" Fill="#FF000000"/>
                  <Canvas.RenderTransform>
                      <CompositeTransform TranslateX="-16"
                                TranslateY="-14"/>
                  </Canvas.RenderTransform>
              </Canvas>
          </ControlTemplate>
      </Setter.Value>
  </Setter>
</Style>
该样式将标准控件模板覆盖为一个指向位置的小箭头。箭头由两个对象组成:一个矩形和一个三角形,三角形是箭头的顶部。重要的是,缩放时的默认相对点是 Pushpin 的左下角。这就是为什么使用 RenderTransform 将 Pushpin 转换到组件的左下角。
可视化站点
由于地图上可能同时存在多个站点,因此使用 MapItemsControl 对象,该对象用于在地图上可视化多个相同类型的对象。
<map:MapItemsControl ItemTemplate="{StaticResource StationTemplate}"
                     ItemsSource="{Binding DepartureStations}"/>
<map:MapItemsControl ItemTemplate="{StaticResource StationTemplate}"
                     ItemsSource="{Binding ArrivalStations}"/>

ItemSource 属性分别绑定到 DepartureStations 和 ArrivalStations 集合 - 基本上表示我们希望可视化这些集合中的所有站点。这次,我们不应用样式,而是创建一个新的 DataTemplate,它将应用于集合中的所有项。我们希望将每个站点显示为自定义的 Pushpin。这次 Pushpin 的自定义要复杂一些,因为 Pushpin 在被选中时必须显示有关站点的详细信息。
<DataTemplate x:Key="StationTemplate">
    <map:Pushpin Location="{Binding Location}"
               MouseLeftButtonDown="Pushpin_MouseLeftButtonDown">
        <map:Pushpin.Template>
            <ControlTemplate>
                <Grid>
                    <Grid.ColumnDefinitions>
                        <ColumnDefinition/>
                        <ColumnDefinition/>
                    </Grid.ColumnDefinitions>
                    <Canvas VerticalAlignment="Bottom">
                        <Ellipse x:Name="Ellipse" Width="35" Height="35"
                                 Stretch="Fill" StrokeThickness="4" Stroke="Black"
                                 Fill="{Binding IsSelected,Converter=
                                       {StaticResource BoolToBrush}"/>
                        <Path x:Name="Path" Width="16"
                              Height="27" Canvas.Left="10"
                              Canvas.Top="30" Stretch="Fill"
                              StrokeThickness="3" StrokeLineJoin="Round"
                              Stroke="Black" Fill="Black"
                              Data="F1 M 35,41L 23,81L 11,41"/>
                        <Canvas.RenderTransform>
                            <CompositeTransform TranslateX="-17.5"
                                TranslateY="-30.5"/>
                        </Canvas.RenderTransform>
                    </Canvas>

                    <Border Background="Black" Opacity="0.8"
                            Grid.Column="1" Margin="20,0,0,0"
                            Visibility="{Binding IsSelected,
                                        Converter={StaticResource BootToVisibility}}"
                            HorizontalAlignment="Center">
                        <StackPanel>
                            <Grid>
                                <Grid.ColumnDefinitions>
                                    <ColumnDefinition/>
                                    <ColumnDefinition/>
                                </Grid.ColumnDefinitions>
                                <StackPanel HorizontalAlignment="Left">
                                    <Image Source="/Icons/Others/BicycleWhite.png"
                                          Height="30" Width="30"/>
                                    <Image Source="/Icons/Others/HouseWhite.png"
                                          Height="30" Width="30" />
                                </StackPanel>
                                <StackPanel Margin="3" Grid.Column="1">
                                    <TextBlock Text="{Binding Path=Free}"/>
                                    <TextBlock Text="{Binding Path=FreePlaces}"/>
                                </StackPanel>
                            </Grid>
                        </StackPanel>
                    </Border>
                </Grid>
            </ControlTemplate>
        </map:Pushpin.Template>
    </map:Pushpin>
</DataTemplate>
图钉由一个包含两列的网格组成。左列包含由 Ellipse 和 Path 对象组成的实际标记,右列包含有关对象的信息。再次,这次我们必须使用渲染转换将 Pushpin 转换到左下角。此 DataTemplate 直接定义在 MainPage 类中,因为它有一个 MouseLeftButtonDown 事件连接到一个属于该类的处理程序。在此处理程序中,我们只是更改当前选定的 BikeStation 为用户单击的那个。
private void Pushpin_MouseLeftButtonDown(object sender, MouseButtonEventArgs e)
{
  if (this.CurrentStation != null)
  {
    this.CurrentStation.IsSelected = false;
  }

  BikeStation station = (BikeStation)((Pushpin)sender).DataContext;
  station.IsSelected = true;
  this.CurrentStation = station;
}
在 DataTemplate 中,两个依赖属性取决于 BikeStation 的 IsSelected 属性:包含详细信息的右列的 Visibility 以及图钉的颜色。因此,布尔值必须转换为适当的类型。在我的应用程序中,我使用了通用布尔值到值转换器的概念,我在 Anthony Jones 的博客上找到了它,所以所有功劳都归于他。
可视化路线
最后添加到地图上的项目是路线。我决定始终只可视化 CurrentRoute 属性中选定的路线。这次我们使用 MapPolyline 组件。此组件的 Location 属性绑定到 BikeRoute 的 Locations 属性,其类型为 LocationCollection。
<map:MapPolyline Locations="{Binding Path=CurrentRoute.Locations}"
                 Stroke="Black" StrokeThickness="3"/>
Tombstoning
Tombstoning 是指应用程序在关闭或仅停用时保存应用程序状态的过程。您必须实现 tombstoning,因为 WP7 只允许一个应用程序同时运行(除了一些“Choosers”和“Launchers”)。因此,当用户例如接到电话时,应用程序必须保存其当前状态,并在用户完成后回来,假装什么都没发生。此外,即使用户正确关闭了应用程序,下次打开它时,他可能应该看到它就像关闭之前一样。
通用说明
为了正确解释它,我绘制了以下图表。您的应用程序基本上有三种状态,以及允许这些状态之间转换的几个事件。

在您的 App.xaml.cs 文件中,已经为所有这些事件提供了空的事件处理程序 - 因此,基本上,等待编写代码并实现 tombstoning。
当用户启动应用程序时,它会进入“正在运行”状态。然后我们有两种可能性。用户通过单击“后退”按钮正确关闭应用程序,或者他会接到电话、开始搜索、拍照或执行任何其他中断性活动。如果发生这种情况,我们必须 tombstone 应用程序 - 保存其当前状态。在应用程序“tombstoned”并进入“已停用”状态后,再次有两种可能性。用户将按“后退”按钮直接返回应用程序,或者他将转到菜单并再次启动应用程序。我们应该实现 tombstoning,以便前两种情况的结果相同。
通用方法描述
我们将需要存储的所有数据封装到一个数据模型类中。在我的例子中,这个类叫做 BikeSituation,它包含了地图上可视化的所有站点和路线。之后,这个类就可以被持久化。当应用程序关闭时,这个类将被序列化并存储在 IsolatedStorage 中。当应用程序被停用时,这个类将被存储在 PhoneApplicationService.Current.State 字典中。PhoneApplicationService 类专门用于管理应用程序的生命周期。
实现
第一个重要步骤是将站点和选定的路线封装到一个名为 BikeSituation 的数据类中。如果需要持久化缩放,我们也可以添加“Zom”属性。
public class BikeSituation implements INotifyPropertyChanged{
    private ObservableCollection<bikestation> _arrivalStations;
    private ObservableCollection<bikestation> _departureStations;
    private BikeCoordinate _departure;
    private BikeCoordinate _arrival;
    private BikeRoute _currentRoute;
    private BikeStation _currentStation;
    private double _zoom;

    public ObservableCollection<bikestation> ArrivalStations
    {
      get
      {
        if (_arrivalStations == null)
        {
          _arrivalStations = new ObservableCollection<bikestation>();
        }
        return _arrivalStations;
      }
      set
      {
        _arrivalStations = value;
        OnPropertyChanged("ArrivalStations");
      }
    }
    //all other public properties
}
现在这个类准备好了,MainPage 将只包含这个类 - 代表地图上的当前情况。BikeSituation 对象可以直接存储在 DataContext 属性中。
public class MainPage{
...
    public BikeSituation Situation
    {
      get
      {
        return (BikeSituation)this.DataContext;
      }
      set
      {
        this.DataContext = value;
      }
    }
}
现在让我们开始在 App.xaml.cs 中实现方法。我将从 Application_Closing 方法的描述开始。
private void Application_Closing(object sender, ClosingEventArgs e)
{
  //when closing the application save to situation to isolated file storage
  MainPage page = RootFrame.Content as MainPage;
  BikeSituation situation = page.Situation;
  SaveLocalCopy(situation);
}
在这里,我们首先获取当前情况,然后调用一个将情况序列化到本地 IsolatedStorage 的方法。
private void SaveLocalCopy(BikeSituation situation)
{
  Thread.CurrentThread.CurrentCulture = CultureInfo.InvariantCulture;
  using (IsolatedStorageFile isf = IsolatedStorageFile.GetUserStoreForApplication())
  {
    using (IsolatedStorageFileStream fs = isf.CreateFile("Situation.dat"))
    {
      XmlSerializer ser = new XmlSerializer(typeof(BikeSituation));
      ser.Serialize(fs, situation);
    }
  }
}
此方法稍后在执行停用时将再次使用。这里使用了 IsolatedStorage 类,它实现了 IDisposable,因此我们应该使用 using 语句在完成后处理资源。
现在让我们看看 Application_Deactivated。此方法是一个事件处理程序,当用户中断应用程序(电话呼叫、搜索...)时触发。
private void Application_Deactivated(object sender, DeactivatedEventArgs e)
{
  MainPage page = RootFrame.Content as MainPage;
  BikeSituation situation = page.Situation;
  SaveLocalCopy(situation);
  if (situation != null)
  {
    if (PhoneApplicationService.Current.State.ContainsKey("Situation"))
    {
      PhoneApplicationService.Current.State.Remove("Situation");
    }
    PhoneApplicationService.Current.State.Add("Situation", situation);
  }
}
在这里,我们获取情况并执行与“Closing”方法相同的保存操作。但此外,我们还将此情况对象存储到应用程序状态字典中。如果应用程序被中断然后用户返回应用程序,我们可以直接从 PhoneApplicationService.Current.State 加载数据对象。如果他转到菜单并再次启动应用程序,我们仍然会从 IsolatedStorage 中获得最新情况的副本。
现在我的 Application_Activated 事件处理程序保持为空 - 这是有原因的。如果字典中有数据对象,那么我将在构造函数中执行必要的操作。
private voeid Application_Activated(object sender, ActivatedEventArgs e)
{
}
来自 App 文件的最后一块拼图是 Application_Launching 事件处理程序,当用户启动应用程序(从菜单或应用程序磁贴)时调用。
private void Application_Launching(object sender, LaunchingEventArgs e)
{
  BikeSituation situation = new BikeSituation();
  try
  {
    using (IsolatedStorageFile isf =
           IsolatedStorageFile.GetUserStoreForApplication())
    {
      if (isf.FileExists("Situation.dat"))
      {
        XmlSerializer ser = new XmlSerializer(typeof(BikeSituation));
        object obj = ser.Deserialize(isf.OpenFile("Situation.dat",
                                     System.IO.FileMode.Open)) as BikeSituation;
        if (obj != null && obj is BikeSituation)
        {
          situation = obj as BikeSituation;
          PhoneApplicationService.Current.State.Add("Situation", situation);
        }
      }
    }
  }
  catch (Exception ex)
  {     //LOG your exceptions }
}
这有点有趣。如果 IsolatedStorage 中有数据对象,那么我将加载该对象并将其放入 PhoneApplicationService.Current.State 字典中。这样,“情况”将在构造函数中加载。为了完成解释,这是构造函数的一部分,它从应用程序状态字典加载 BikeSituation 对象并将其放入 this.Situation 属性。请记住,此属性直接映射到 MainPage 类的 DataContext。
public void MainPage(){
   ...
   //if there is some Situation in the State of the application
   if (PhoneApplicationService.Current.State.ContainsKey("Situation"))
   {
     this.Situation =
       PhoneApplicationService.Current.State["Situation"] as BikeSituation;
     PhoneApplicationService.Current.State.Remove("Situation");
   }
   else
   {
     this.Situation = new BikeSituation();
   }
}
您可以看到,如果没有字典中的对象(绝对是应用程序第一次运行时),那么我们将创建一个新的 BikeSituation 并将其分配给 DataContext。
一些细节
- 将对象存储到 IsolatedStorage 比存储到应用程序状态慢。
IsolatedStorage在手机硬盘上完成,而应用程序状态保留在内存中。如果您有大量数据,应该考虑是否需要将其存储在IsolatedStorage中。 - XMLSerialization 可能很棘手。以下是我遇到的三个问题:
- 循环引用 - 在我的示例中,我有一个
BikeSituation,它包含从站点开始的BikeRoutes,然后BikeRoute对象本身由两个BikeStation对象组成(路线的起点和终点站点)。这会导致序列化期间出错。您可以使用[XMLIgnore]来忽略其中一个属性以避免此错误。 - GeoCoordinate 序列化 - 在序列化
BikeStation和BikeSituation类中的GeoCoordinate时,我一直收到FormatException。我不确定原因是什么 - 我最终编写了自己的类“BikeCoordinate”,它只包含经度和纬度,并且可以正常序列化。这意味着之后需要 **转换器** 来将地图对象(Pushpins)绑定到这些新的坐标类型。所有这些都包含在源代码中。 - 一个对象反序列化为两个不同的对象:在
BikeSituation中,我有一个CurrentStation属性,它包含一个指向DepartureStations集合中仅一个Station的引用。然而,序列化和随后的反序列化将导致两个不同的对象:一个在集合中,另一个在CurrentStation属性中。有几种方法可以避免这种情况,例如,在序列化期间忽略CurrentStation属性,然后将其设置为集合中对象的正确引用。 - 5 秒规则 - 请注意,如果您想通过认证流程,您的应用程序应在 5 秒内启动。因此,通常避免在 tombstoning 过程中将大型对象存储到
IsolatedStorage。
技术提示
在使用必应地图时,我发现了一些有趣的东西,让我在此分享。
- Silverlight 版必应地图和 WP7 版必应地图是不同的。具体来说,使用的命名空间不同,因此重用一些代码会有点困难。我认为我可以重用我以前的必应地图 Silverlight 的模型,但这是不可能的。例如,
Location和LocationCollection类在这两个 API 中都存在,但它们不同。因此,如果您想重用手机和 Web 应用程序的模型,您可能应该将位置存储为double值,然后使用转换器将它们转换为所需的类型。 - 您无法绑定
MapPolyline组件的Stroke属性。此属性不是依赖属性 - 我发现它是在我想在地图上显示更多路线并为它们分配不同颜色时。这里无法绑定,但是您可以重写Loaded事件并在MapPolyline对象添加到地图时分配颜色。这假设颜色不会改变。
总结
我在这里尝试展示如何构建一个应用程序,该应用程序在 WP7 上的必应地图组件上可视化数据。这次,数据来自雷恩的自行车共享系统,特别是来自其 Web 服务。然而,同样的方法,您也可以从任何其他来源可视化任何其他地理数据。
为了保持连贯性,我决定描述所有应用程序,所以也许对某些读者来说,这里有很多通用的 Silverlight 知识是他们已经掌握的 - 另一方面,我希望它对 Silverlight 初学者(比如我)有用。
另外请注意,目前我没有设备可以尝试,所以我不能确定在实际设备上的性能。
还有很多可以改进的地方:允许用户搜索任何位置附近的站点,通过在单独的线程上处理异步回调来加速 GUI。我将继续努力并在未来更新文章。
这是我的第一篇正式文章,因此任何反馈都将受到高度赞赏。
历史
- 2010/12/4 - 首个版本。
- 2010/12/23 - 实现并添加了 Tombstoning 的描述。
- 2011/1/5 - 添加了在线版本的链接。