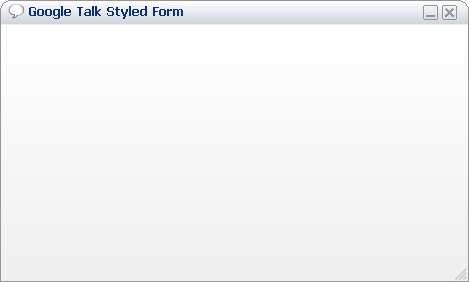
Google Talk 风格的 Windows 窗体
如何使用自定义的 Paint 事件处理程序来绘制你自己的 Windows 窗体。

引言
本文主要解释了如何使用自定义的 Paint 事件处理程序来绘制你自己的 Windows 控件(在本例中是一个 Form 控件)。GoogleTalkForm 类继承并扩展了 System.Windows.Forms.Form 控件 (由 Microsoft .NET Framework 提供) 以提供 Google Talk Windows 窗体的外观和感觉。
类属性 IsWindowSnappable, IsResizable, ResizableColor, TitleColor, TitleFont, TitleBackColor, TitleForeColor, TitleStyle, BodyBackColor, BodyForeColor, BodyStyle, OutlineColor, OutlineSize, IconsNormalColor, IconsHiLiteColor, MinimumHeight, 和 MinimumWidth 可以用来改变窗体的标准外观和行为。
GoogleTalkForm 类提供
- Windows 窗体的绘制。
- 使用双缓冲的绘制。
- 窗体捕捉到特定的客户端桌面区域。
- 鼠标事件处理。
- 系统上下文菜单项绘制。
工作原理
首先,我们需要重写窗体事件,例如 OnPaint,OnMouseDown,OnMouseUp,和 OnMouseMove, OnDoubleClick 来处理窗体 Paint 事件和鼠标事件。
protected override void OnPaint(PaintEventArgs e)
{
   ...
}

protected override void OnMouseDown(MouseEventArgs e)
{
   ...
}
窗体的样式必须使用 GoogleTalkForm 类构造函数中的 SetStyle 方法设置,以反映所需的行为。
this.SetStyle(ControlStyles.AllPaintingInWmPaint |
              ControlStyles.UserPaint, true);
this.SetStyle(ControlStyles.Selectable, true);
this.SetStyle(ControlStyles.StandardClick, true);
this.SetStyle(ControlStyles.StandardDoubleClick, true);
this.SetStyle(ControlStyles.DoubleBuffer, true);
this.SetStyle(ControlStyles.ResizeRedraw, true);
this.SetStyle(ControlStyles.Opaque, true);
this.SetStyle(ControlStyles.SupportsTransparentBackColor, false);
this.UpdateStyles();
isMousePointerInArea 方法用于检查当前鼠标位置是否在特定的客户端矩形区域内。必须计算出鼠标相对于 Windows 窗体的位置,因为 Control.MousePosition 返回的是相对于桌面的鼠标位置。
private bool isMousePointerInArea(Point mousePosition, Rectangle area)
{
    Point relativePoint = new Point(0, 0);
    relativePoint.X = mousePosition.X - this.Location.X;
    relativePoint.Y = mousePosition.Y - this.Location.Y;

    return area.Contains(relativePoint);
}
自定义窗体绘制全部由 OnFormPaint 方法完成,绘制到一个新创建的 Bitmap 对象上,该对象具有窗体的确切宽度和高度。 从 Bitmap 创建一个 Graphics 对象,并使用诸如 DrawString,DrawImage,DrawLine 和 DrawArc 等方法。 一旦所有绘制完成,缓冲的位图就会使用 DrawImageUnscaled 方法复制到窗体图形实例上。
// Create a new Pen object
p = new Pen(this.OutlineColor, this.OutlineSize);

// Draw the form outline
g.DrawArc(p, rectLeftCorner, 180, 90);
g.DrawArc(p, rectRightCorner, 270, 90);
g.DrawLine(p, edgeRadius, 0, this.Width - edgeRadius, 0);
g.DrawLine(p, 0, edgeRadius, 0, this.Height);
g.DrawLine(p, this.Width - 1, edgeRadius,
           this.Width - 1, this.Height);
g.DrawLine(p, 0, this.Height - 1,
           this.Width, this.Height - 1);

// Dispose the Pen object
p.Dispose();
p = null;
创建一个自定义的 Region 并将其应用于窗体,以产生圆角边缘效果。 为了创建所需的区域,我们必须逐像素迭代,并将一个 1x1 的矩形添加到 GraphicsPath 对象(该对象将用于创建 Region 对象),当当前选定的像素的颜色与透明颜色不同时。 为了优化代码,仅检查窗体的顶角是否存在透明颜色的像素。
// Create GraphicsPath to be used to crop the region required
gpRegion = new GraphicsPath();

// Loop through every pixel in the top left corner.
// Create a 1 x 1 rectangle regions of pixels
// that do not match the transparent color
for (int x = rectLeftCorner.X; x < rectLeftCorner.Width; x++)
{
    for (int y = rectLeftCorner.Y; y < rectLeftCorner.Height / 2; y++)
    {
        if (isSameColor(bmp.GetPixel(x, y),
            this.transparentColor) == false)
        {
            gpRegion.AddRectangle(new Rectangle(x, y, 1, 1));
        }
    }
}

// Loop through every pixel in the top right corner.
// Create a 1 x 1 rectangle regions of pixels
// that do not match the transparent color
for (int x = rectRightCorner.X + 1; x <
             rectRightCorner.X +
             rectRightCorner.Width + 1; x++)
{
    for (int y = rectRightCorner.Y; y <
         rectRightCorner.Y + rectRightCorner.Height / 2; y++)
    {
        if (isSameColor(bmp.GetPixel(x, y),
            this.transparentColor) == false)
        {
            gpRegion.AddRectangle(new Rectangle(x, y, 1, 1));
        }
    }
}

// Create the remaining rectangular regions
// to complete cover all the windows form area
gpRegion.AddRectangle(new Rectangle(rectLeftCorner.Width, 0,
         this.Width - (edgeRadius * 4), rectLeftCorner.Height / 2));
gpRegion.AddRectangle(new Rectangle(0,
         rectLeftCorner.Height / 2, this.Width, this.Height));

// Apply region
this.Region = new Region(gpRegion);
历史
- 1.0 - 首次发布 - (2006年5月9日)。
- 1.1 - (2006年5月11日)。
- 创建了一个窗体设计器来控制窗体(和子控件)的行为。
- 修复了托管在 MDI 容器中的窗体的行为。
