
100% 反射类图创建工具
4.98/5 (487投票s)
100% 反射类图创建工具

- 版本 II
- 引言
- 本文内容
- AutoDiagrammer:功能
- 这一切是如何运作的“简而言之”
- 步骤1:打开文件
- 步骤2:确定文件是否为有效的 CLR 类型
- 步骤3:创建树和类
- 步骤3a:是否应包含类型
- 步骤4:单独的类分析(反射)
- 步骤5:用户选择应在图表上显示的类
- 它还能做什么?
- 自定义图表上显示的内容
- 保存图表
- 打印支持
- Reflector 插件
- 那么你觉得呢?
- 结论
- 历史
版本 II
现在我创建了此代码的更新版本,其中添加了许多新功能,例如
- 用户可以在设计界面上移动类,一旦布局完成,就不能再移动了
- 关联线不够清晰
- 用户无法更好地缩放生成的图表
- 在新的 AppDomain 中加载要绘制为类图的 Dll/Exe
- 检查 IL 以获得更好的关联
- 可以查看方法体 IL
- 正确的图表
这是新版本的屏幕截图

新文章的地址是 https://codeproject.org.cn/KB/WPF/AutoDiagrammerII.aspx
引言
本文是关于使用反射的。对于那些不知道反射是什么的人来说,它是在不真正了解所处理对象类型的情况下,获取有关对象类型信息的能力。例如,一个人可以简单地询问当前对象类型是否支持某个方法名,如果支持,则可以调用该方法。这听起来可能很奇怪,但它是一种非常强大的技术。假设我只是想查看一个类支持哪些方法,这也可以通过反射轻松实现。.NET 允许开发人员以多种方式利用反射。
我非常喜欢反射,并以许多不同的方式使用它。我见过的最令人印象深刻的反射用途之一是 Lutz Roeder 的 Reflector 工具(可在此处免费下载 此处)。Lutz Roeder 的 Reflector 基本允许用户将 Reflector 工具指向任何通用语言运行时 (CLR) 程序集,然后它会反编译该程序集,创建一个完全反射的树视图,其中包含来自源程序集的所有对象和代码。是的,带代码。很棒的东西。基本上,您可以使用此工具查看任何有效 CLR(假设它未被混淆)程序集的工作原理。
然而,前几天我使用 Reflector 反编译了一个相当复杂的 dll。Reflector 毫无问题地完成了这项工作(大约 2 秒),但我发现遍历生成的树(尽管完全正确)相当令人困惑,因为树中有许多节点。我心想,我可以用所有这些东西的类图。或者至少是那些听起来是我感兴趣的部分。这不是 Lutz Roeder 的 Reflector 提供的。我想有人可能会争辩说,如果提供了好的文档,就不需要类图。那么,如果没有文档,如果你只有 Dll/Exe,没有其他东西,该怎么办呢?这就是本文的出发点。
基于所有这些,我想到为什么不尝试创建一个能够使用反射绘制任何 CLR 程序集类图的工具呢?所以我做了。本文展示了我在这个领域的工作成果。
我还做了一些谷歌搜索,看看有什么已经可用的。有一个类似的项目可用(价格合理),即 Sun NetBeans SDE。但合理的价格仍然不是免费的,对吧?所以从理论上讲,这使得本文更好,因为它提供了可以自由使用和分发的免费代码。
本文内容
正如我所说,本文是关于使用反射创建类图的。这意味着附带的应用程序(代号为 AutoDiagrammer)甚至不需要源文件,它不关心源文件,因为它根本不需要它们。它只需要指向一个 CLR 程序集 (dll) 或一个 CLR 应用程序 (exe)。就是这样。完全不需要源文件。因此,它可以被视为 Lutz Roeder 的 Reflector 的补充。它只是提供了 Lutz Roeder 的 Reflector 中不存在的类图绘制功能。
记住,一图胜千言。
AutoDiagrammer:功能
我试图制作一个有用的产品:为此,支持以下功能
- 检测用户请求的非 CLR 类型
- 自定义类图上显示的内容
- 显示接口 [是/否]
- 显示构造函数参数 [是/否]
- 显示字段类型 [是/否]
- 显示方法参数 [是/否]
- 显示方法返回值 [是/否]
- 显示属性类型 [是/否]
- 显示事件 [是/否]
- 显示枚举
- 显示委托 [是/否]
- 生成的图表要使用的列数(1-5 之间的数字)
- 类背景起始颜色
- 类背景结束颜色
- 类边框颜色
- 可访问性修饰符选择(仅公共 / 公共与静态 / 所有)
- 自动绘制类关联线
- 自动绘制泛化(继承)箭头
- 展开类的各个部分(构造函数 / 字段 / 属性 / 方法 / 事件都可以单独折叠 / 展开)
- 展开整个类
- 类表示尽可能接近 Visual Studio 2005 的外观
- 允许将图表保存为以下图像格式(Bmp、Emf、Exif、Gif、Jpeg、Png)
这些是主要功能。这些将在以下部分中更详细地解释
这一切是如何运作的“简而言之”
我想你现在一定很好奇这一切是如何发生的,对吧?好吧,让我试着解释一下我是如何完成这一切的。让我先从一个简单的逐步说明开始。这可能会有所帮助,在我深入探讨细节之前。
- 要求用户选择一个文件,以反射性地绘制其中的类。
- 确定所选文件是否为有效的 CLR 类型。(附带应用程序中的 DotNetObject.cs 类执行此操作)。如果输入文件不是有效的 CLR
Type,则通知用户,不再执行任何操作。确定文件是否为“System”命名空间程序集,如果是,则提醒用户,不再执行任何操作。如果通过这两个检查,则继续执行步骤 3。 - 将每个允许的类型(在下面的子步骤 3 中获取)添加到主窗体 (frmMain.cs) 上的树视图中,并为看到的每个允许的
Type创建一个新的类对象 (ucDrawableClass.cs)。- 使用反射检查输入文件中包含的所有
Types。只包含来自当前输入文件中不属于“System”命名空间的Types。包含“System”类型将花费很长时间,这不是我们试图做的事情。Microsoft “System”命名空间对象有很多很好的文档可用。无论如何,这是我的看法。无论如何,我们跑题了,所以对于每个允许的 Type,创建一个新的类对象 (ucDrawableClass.cs),并将要表示的Type传递给它。请参阅步骤 4。
- 使用反射检查输入文件中包含的所有
- 当创建一个新的类对象 (ucDrawableClass.cs) 时,它将分析它应该表示的
Type,并使用反射提取所有构造函数 / 字段 / 属性 / 方法 / 事件信息,并存储这些详细信息。 - 用户从树视图中选择他们想查看的类(右键单击),然后创建一个新的类绘图面板 (ClassDrawerContainerPanel.cs),该面板布局用户请求的类(
ucDrawableClass控件)并绘制任何可用关联线的关联线 (ucAssociationDrawer.cs)。
这就是基本操作。但是还有很多可能对普通 codeproject 用户感兴趣的东西,所以让我们更详细地查看这些步骤,并查看前面提到的一些更高级的功能。
步骤 1:打开文件
我不会解释主窗体 (frmMain.cs) 的每一行代码,因为它都是相当标准的 WinForm 内容。但我会解释有趣的部分。
所以用户尝试打开一个文件,会显示以下 openFileDialog

假设用户选择了一个程序集 (Dll) 或应用程序 (Exe),然后会检查用户选择的文件是否实际上是一个有效的 CLR 类型。
主窗体 (frmMain.cs) 通过调用 DotNetObject 类来确定这一点。
if (DotNetObject.isDotNetAssembly(f.FullName))

{


//proceed

}

else

{


//not a valid CLR so tell user and do nothing more

}
步骤 2:确定文件是否为有效的 CLR 类型
那么 DotNetObject.isDotNetAssembly() 方法究竟是如何工作的呢?它按如下方式工作
/// <summary>
/// Returns true if the file specified is a real CLR type,
/// otherwise false is returned.
/// False is also returned in the case of an exception being caught
/// </summary>
/// <param name="file">A string representing the file to check for
/// CLR validity</param>

/// <returns>True if the file specified is a real CLR type,
/// otherwise false is returned.
/// False is also returned in the case of an exception being
/// caught</returns>
public static bool isDotNetAssembly(String file)
{
    uint peHeader;
    uint peHeaderSignature;
    ushort machine;
    ushort sections;
    uint timestamp;
    uint pSymbolTable;
    uint noOfSymbol;
    ushort optionalHeaderSize;
    ushort characteristics;
    ushort dataDictionaryStart;
    uint[] dataDictionaryRVA = new uint[16];
    uint[] dataDictionarySize = new uint[16];
    //get the input stream
    Stream fs = new FileStream(@file, FileMode.Open, FileAccess.Read);

    try
        {

        BinaryReader reader = new BinaryReader(fs);
        //PE Header starts @ 0x3C (60). Its a 4 byte header.
        fs.Position = 0x3C;
        peHeader = reader.ReadUInt32();
        //Moving to PE Header start location...
        fs.Position = peHeader;
        peHeaderSignature = reader.ReadUInt32();
        //We can also show all these value, but we will be
        //limiting to the CLI header test.
        machine = reader.ReadUInt16();
        sections = reader.ReadUInt16();
        timestamp = reader.ReadUInt32();
        pSymbolTable = reader.ReadUInt32();
        noOfSymbol = reader.ReadUInt32();
        optionalHeaderSize = reader.ReadUInt16();
        characteristics = reader.ReadUInt16();

        /*
        Now we are at the end of the PE Header and from here, the
        PE Optional Headers starts...
        To go directly to the datadictionary, we'll increase the
        stream's current position to with 96 (0x60). 96 because,
        28 for Standard fields
        68 for NT-specific fields
        From here DataDictionary starts...and its of total 128 bytes.
        DataDictionay has 16 directories in total,
        doing simple maths 128/16 = 8.
        So each directory is of 8 bytes.

        In this 8 bytes, 4 bytes is of RVA and 4 bytes of Size.
        btw, the 15th directory consist of CLR header! if its 0,
        it is not a CLR file :)
        */

        dataDictionaryStart = Convert.ToUInt16
                (Convert.ToUInt16(fs.Position) + 0x60);
        fs.Position = dataDictionaryStart;
        for (int i = 0; i < 15; i++)
            {
                dataDictionaryRVA[i] = reader.ReadUInt32();
                dataDictionarySize[i] = reader.ReadUInt32();
            }
        if (dataDictionaryRVA[14] == 0)
            {
                fs.Close();
                return false;
            }
        else
            {
                fs.Close();
                return true;
            }
        }
        catch (Exception ex)
            {
                return false;
            }
        finally
            {
                fs.Close();
            }
        }
我不得不说,这段代码很久以前是从某个地方获取的,我记不清具体来源了。但无论如何,还是要感谢那位作者。如果你读到这段话,并且认为是你写的,请告诉我,我会在本文中注明。
不管怎么说,结果就是我们得到了一个 boolean 值,表明当前文件是否有效,这是我们目前唯一关心的问题。所以,如果请求的文件不是有效的 CLR 类型,就会显示一个错误消息,并且不会再做其他事情。

然而,如果输入文件是有效的 CLR 文件,则会检查该文件是否为“System”程序集。由于时间/空间/理智原因,我没有允许这种情况。
以下代码执行此操作。
//load the assembly and check it is not System namespace
//we don't want to be here all year
Assembly ass = Assembly.LoadFrom(f.FullName);
if (ass.FullName.StartsWith("System"))
{
    Program.ErrorBox("System namespace assemblies not allowed");
}
//valid assembly that not a System one, so proceed
#region valid CLR type, non-system namespace
else
{
     //set UI state correctly
     ......
     ......
     //create a new BackgroundWorker thread to do the scanning
     BackgroundWorker bgw = new BackgroundWorker();
     bgw.DoWork += new DoWorkEventHandler(bgw_DoWork);
     bgw.RunWorkerCompleted += new RunWorkerCompletedEventHandler
          (bgw_RunWorkerCompleted);
     bgw.RunWorkerAsync(ass);
}
#endregion
可以看出,如果当前选定的输入文件是“System”命名空间程序集,则会向用户显示错误消息。但是,如果当前选定的程序集不是“System”命名空间程序集,则它是进一步探索的候选对象。因此,会创建一个新的 BackGroundWorker,以处理当前程序集的进一步分析。
步骤 3:创建树和类
创建了新的 BackGroundWorker,并且 bgw_DoWork 方法是启动分析过程的方法。所以让我们看看那个方法。
/// <summary>
/// The background worker thread start doing work, calls the
/// internal StartAnylsisProcess() method
/// </summary>
/// <param name="sender">The background worker thread</param>
/// <param name="e">the event args</param>
private void bgw_DoWork(object sender, DoWorkEventArgs e)
{
    //get Assembly from the workers argument
    Assembly a = (Assembly)e.Argument;
    //start the analysis process, making sure to marshall
    //to correct thread for GUI property change operation, which
    //will require the thread to be on the same thread as the handle
    //to the control
    if (this.InvokeRequired)
    {
        this.Invoke(new EventHandler(delegate
        {
            StartAnylsisProcess(a);
        }));
    }
    else
    {
        StartAnylsisProcess(a);
    }
}
可以看出,所有 BackGroundWorker 真正做的就是调用 StartAnylsisProcess(a); 方法,并将其传递给当前程序集。所以让我们看看那个。
/// <summary>/// Loop through each Type in the current Assembly/// adding each to the forms treeview by calling the/// internal addTypesToTree() method/// </summary>/// <param name="a">The current Assembly being examined</param>private void StartAnylsisProcess(Assembly a){
//loop through each Type in the current Assembly
//adding each to the forms treeview
foreach (Type t in a.GetTypes())
   {

   addTypesToTree(_tvnRoot, t.Name, t.Namespace, t);
   }
}
此方法还调用另一个方法,即 addTypesToTree(_tvnRoot, t.Name, t.Namespace, t);,所以我也将展示这个
/// <summary>
/// If namespace isn't empty, add the namspace to the current node and
/// <see cref="Namespaces">Namespaces</see> object. Then check the type
/// is actualy one that can be added to the diagram, could be System
/// (which is not allowed). Then add the type to the namespace by creating
/// a new <see cref="ucDrawableClass">ucDrawableClass</see> object,
/// for each allowable type
/// </summary>

/// <param name="nd">The current treenode to add new nodes to</param>
/// <param name="typename">the current typename</param>
/// <param name="nspace">the current namspace</param>
/// <param name="t">the Type to examine</param>

private void addTypesToTree(TreeNode nd, String typename,
                        String nspace, Type t)
{
    try
    {
        //if namspace isn't empty, add the namspace to the current node
        //and to the treeview and the Namspaces object
        if (nspace != null)
        {
            if (!nspace.Trim().Equals(String.Empty))
            {
                //1st add the new namespace
                if (!TreeContainsNode(nd, nspace))
                {
                    nd.Nodes.Add(new TreeNode(nspace, 1, 1));
                    _nspaces.addNameSpace(nspace, null);
                }

                //then check the type is actualy one that can be added
                //to the diagram, could be System (which is not allowed)
                if (IsWantedForDiagramType(t))
                {
                     //now add the type to the namespace,
             //by getting namespace from the list of nodes 1st
                     foreach (TreeNode tn in nd.Nodes)
                        {
                            if (tn.Text == nspace)
                            {
                                TreeNode currTypeNode = new TreeNode
                            (typename, 2, 2);
                                tn.Nodes.Add(currTypeNode);
                                 //create a new ucDrawableClass
                 //and add it to the current namespace
                                ucDrawableClass dc = new ucDrawableClass(t);
                                _nspaces.addNameSpace(nspace, dc);

                                lblStatus.Text = "Analysing type
                            [" + t.Name + "]";
                                pbStatus.Visible = true;
                                Refresh();
                                Application.DoEvents();
                             }
                         }
                  }
              }
          }
    }
    catch (Exception ex)
    {
         Program.ErrorBox(ex.Message);
    }

}
#endregion
上述方法中最重要的部分是,它不仅填充了主窗体 (frmMain.cs) 的树视图,还创建了新的 ucDrawableClass 对象(用于表示单个类)并将它们添加到 NameSpaces 对象中。这些将在后面更详细地解释。但目前,需要注意的是 NameSpaces 对象包含一个 ucDrawableClass 对象(类)列表。它就像 Visual Studio 中的普通层次结构一样,一个命名空间包含类。我试图使其与人们在对象层次结构中通常看到的内容尽可能匹配。实际上,如果我们查看 NameSpaces 对象 (NameSpaces.cs) 中的一行,我们可以看到它只是包含一个 Dictionary 对象,该对象存储一个字符串列表(唯一的命名空间)以及每个字符串对应的 ucDrawableClass 对象(类)列表。或者如果你喜欢代码
private Dictionary<string, List<ucDrawableClass>> _assObjects =
    new Dictionary<string, List<ucDrawableClass>>();
步骤 3a:是否应包含类型
回想一下我之前提到过某些 Types 不会被允许,那么这是如何做到的呢?请注意上面的代码中,有一个对某个方法的调用
if (IsWantedForDiagramType(t))
此方法调用决定了当前正在检查的 Type 是否应作为类包含在内,并添加到树视图中。让我们快速看一下此方法。
/// <summary>
/// Returns true if the Type specified by the t parameter is a valid
/// diagrammable type. e.i. Not System namespace, and is one that the
/// user wants on the current diagram
/// </summary>
/// <param name="t"></param>

/// <returns>true if the Type specified by the t parameter is a valid
/// diagrammable type. e.i. Not System namespace, and is one that the
/// user wants on the current diagram</returns>
private bool IsWantedForDiagramType(Type t)
{
    //don't really want user to trawl the standard System namespaces
    if (t.Namespace.StartsWith("System"))
        return false;

    //should Enums be shown, on final diagram
    if (!Program._AllowEnumOnDiagram)
    {
        if (t.BaseType != null)
        {
            if (t.BaseType.FullName.Equals("System.Enum"))
            {
                return false;
            }
        }
        else
        {
            return false;
        }
     }
     //should MulticastDelegates be shown, on final diagram
     if (!Program._AllowDelegatesOnDiagram)
     {
         if (t.BaseType != null)
         {
             if (t.BaseType.FullName.Equals("System.MulticastDelegate"))
             {
                 return false;
             }
         }
         else
         {
             return false;
         }
     }
     //check for ApplicationSettingsBase
     if (t.BaseType != null)
     {
         if (t.BaseType.FullName.Equals
            ("System.Configuration.ApplicationSettingsBase"))
         {
             return false;
         }
     }
     //if we get to here its an allowable Type
     return true;
}
所以,关于主窗体 (frmMain.cs) 的内容(目前)就差不多了。不过,当我们查看创建图表、保存图表以及选择图表上显示的内容时,我们还需要重新访问它。但现在,让我们只专注于步骤 4。
步骤 4:单独的类分析(反射)
回想一下,上面提到主窗体 (frmMain.cs) 创建了新的 ucDrawableClass 对象。那么 ucDrawableClass 对象是什么呢?答案是,它是一个相当深入的用户控件,它既使用了自定义绘制,又包含了子控件。为了理解 ucDrawableClass 控件的外观,请看下图。

可以看出,此控件模仿了 Visual Studio 2005 原生类图类的外观。它允许用户折叠各个部分(每个部分都是一个 ucExpander 控件)。它还允许整个类折叠/展开。
此控件是通过自定义绘制(重写 OnPaint(..))以及使用子控件,即子 ucExpander 控件来构建的。每个子 ucExpander 控件都只是传递一个字符串列表和一个检查类型。然后每个 ucExpander 都会处理自己的渲染。每个 ucExpander 将根据要求表示的内容显示不同的图标。例如,如果创建一个 ucExpander 控件并要求它显示方法,它将列出其源显示字符串列表中的方法字符串,并为源显示字符串列表中的每个条目显示一个方法图像。很不错,对吧。如果做得好,重用总是很有用的。
我解释过每个 ucExpander 都根据一些显示字符串列表渲染自己的内容。那么,最初传递给 ucExpander 控件的各个字符串列表是从哪里来的呢?它们来自 ucDrawableClass 对象完成的反射分析过程。回想一下,当主窗体创建一个新的 ucDrawableClass 对象时,它会传入在输入扫描中正在检查的当前 Type。
因此,ucDrawableClass 对象在构造时会传入一个 Type,例如
/// <summary>
/// Stores the type provided as an internal field and
/// calls the AnalyseType() internal method. And also
/// creates several <see cref="ucExpander">ucExpander </see>

/// controls to display the individual Properties,Events,Fields,
/// Constructors,Methods details. Finally an overall
/// collapse / expand image is created
/// </summary>
/// <param name="t">The Type to analyze</param>
public ucDrawableClass(Type t)
{
    ...
    AnalyseType();
    ...
}
构造函数调用一个名为 AnalyseType() 的方法。正是这个 AnalyseType() 方法执行所有 Type 信息的反射收集,并创建单独的列表以传递给子 ucExpander 控件。
分析过程创建以下列表
- 构造函数
- 字段
- 属性
- 接口
- 方法
- 事件
那么这些列表是如何创建的呢?反射,反射,反射,反射,一切都与反射有关。我们来看看吧。
/// <summary>
/// Returs a string which is the name of the type in its full
/// format. If its not a generic type, then the name of the
/// t input parameter is simply returned, if however it is
/// a generic method say a List of ints then the appropraite string
/// will be retrurned
/// </summary>
/// <param name="t">The Type to check for generics</param>

/// <returns></returns>
private string getGenericsForType(Type t)
{
    string name ="";
    if (!t.GetType().IsGenericType)
    {
        //see if there is a ' char, which there is for
        //generic types
        int idx  = t.Name.IndexOfAny(new char[] {'`','\''});
        if (idx >= 0)
        {
            name=t.Name.Substring(0,idx);
            //get the generic arguments
            Type[] genTypes =t.GetGenericArguments();
            //and build the list of types for the result string
            if (genTypes.Length == 1)
            {
                //name+="<" + genTypes[0].Name + ">";
                name+="<" + getGenericsForType(genTypes[0]) + ">";
            }
            else
            {
                name+="<";
                foreach(Type gt in genTypes)
                {
                    name+= getGenericsForType(gt) + ", ";
                }
                if (name.LastIndexOf(",") > 0)
                {
                    name = name.Substring(0,
                        name.LastIndexOf(","));
                }
                name+=">";
            }
        }
        else
        {
            name=t.Name;
        }
        return name;
    }
    else
    {
        return t.Name;
    }
}

/// <summary>
/// Analyses the current Type (which was supplied on construction)
/// and creates lists for its Constructors, Fields, Properties,
/// Interfaces, Methods, Events to provide to these lists to
/// <see cref="ucExpander">ucExpander </see>controls
/// </summary>

private void AnalyseType()
{

    // lists for containing get and set methods
    List<MethodInfo> propGetters = new List<MethodInfo>();
    List<MethodInfo> propSetters = new List<MethodInfo>();


#region Constructors
    //do constructors
    foreach (ConstructorInfo ci in
         _type_to_Draw.GetConstructors(Program.RequiredBindings))
    {
        if (_type_to_Draw == ci.DeclaringType)
        {

            string cDetail = _type_to_Draw.Name + "( ";
            string pDetail="";

            //add all the constructor param types to the associations List,
            //so that the association lines for this class can be
            //obtained, and possibly drawn on the container
            ParameterInfo[] pif = ci.GetParameters();
            foreach (ParameterInfo p in pif)
            {
                string pName=getGenericsForType(p.ParameterType);
                pName = LowerAndTrim(pName);
                if (!_Associations.Contains(pName))
                {
                    _Associations.Add(pName);
                }
                pDetail = pName + " " + p.Name + ", ";
                cDetail += pDetail;
            }
            if (cDetail.LastIndexOf(",") > 0)
            {
                cDetail = cDetail.Substring(0,
                    cDetail.LastIndexOf(","));
            }
            cDetail += ")";
            //do we want long or short field constructor displayed
            if (Program._FullConstructorDescribe)
            {

                //_Constructors.Add(ci.ToString().Replace(".ctor", ""));
                _Constructors.Add(cDetail);
            }
            else
                _Constructors.Add(_type_to_Draw.Name + "( )");
        }
    }
#endregion
#region Fields
    //do fields
    foreach (FieldInfo fi in
        _type_to_Draw.GetFields(Program.RequiredBindings))
    {
        if (_type_to_Draw == fi.DeclaringType)
        {
            //add all the field types to the associations List, so that
            //the association lines for this class can be obtained, and
            //possibly drawn on the container
            string fName=getGenericsForType(fi.FieldType);
            fName = LowerAndTrim(fName);
            if (!_Associations.Contains(fName))
            {
                _Associations.Add(fName);
            }
            //do we want long or short field description displayed
            if (Program._IncludeFieldType)
                _Fields.Add(fName + " " + fi.Name);
            else
                _Fields.Add(fi.Name);
        }
    }
#endregion
#region Properties
    //do properties
    foreach (PropertyInfo pi in
        _type_to_Draw.GetProperties(Program.RequiredBindings))
    {
        if (_type_to_Draw == pi.DeclaringType)
        {
            // add read method if exists
            if (pi.CanRead) { propGetters.Add(pi.GetGetMethod(true)); }
            // add write method if exists
            if (pi.CanWrite) { propSetters.Add(pi.GetSetMethod(true)); }

            string pName=getGenericsForType(pi.PropertyType);
            //add all the property types to the associations List, so that
            //the association lines for this class can be obtained, and
            //possibly drawn on the container
            pName = LowerAndTrim(pName);
            if (!_Associations.Contains(pName))
            {
                _Associations.Add(pName);
            }


            //do we want long or short property description displayed
            if (Program._IncludePropValues)
                _Properties.Add(pName + " " + pi.Name);
            else
                _Properties.Add(pi.Name);
        }
    }
#endregion
#region Interfaces
    //do interfaces
    if (Program._IncludeInterfaces)
    {
        Type[] tiArray = _type_to_Draw.GetInterfaces();
        foreach (Type ii in tiArray)
        {
            _Interfaces.Add(ii.Name.ToString());
        }
    }
#endregion
#region Methods
    //do methods
    foreach (MethodInfo mi in
        _type_to_Draw.GetMethods(Program.RequiredBindings))
    {
        if (_type_to_Draw == mi.DeclaringType)
        {
            string mDetail = mi.Name + "( ";
            string pDetail="";
            //do we want to display method arguments, if we do create the
            //appopraiate string
            if (Program._IncludeMethodArgs)
            {
                ParameterInfo[] pif = mi.GetParameters();
                foreach (ParameterInfo p in pif)
                {
                    //add all the parameter types to the associations List,
                    //so that the association lines for this class can
                    //be obtained, and possibly drawn on the container
                    string pName=getGenericsForType(p.ParameterType);
                    pName = LowerAndTrim(pName);
                    if (!_Associations.Contains(pName))
                    {
                        _Associations.Add(pName);
                    }
                    pDetail = pName + " " + p.Name + ", ";
                    mDetail += pDetail;
                }
                if (mDetail.LastIndexOf(",") > 0)
                {
                    mDetail = mDetail.Substring(0,
                        mDetail.LastIndexOf(","));
                }
            }
            mDetail += " )";
            //add the return type to the associations List, so that
            //the association lines for this class can be obtained, and
            //possibly drawn on the container
            string rName=getGenericsForType(mi.ReturnType);
            //dont want to include void as an association type
            if (!string.IsNullOrEmpty(rName))
            {
                rName=getGenericsForType(mi.ReturnType);
                rName = LowerAndTrim(rName);
                if (!_Associations.Contains(rName))
                {
                    _Associations.Add(rName);
                }
                //do we want to display method return types
                if (Program._IncludeMethodReturnType)
                    mDetail += " : " + rName;
            }
            else
            {
                //do we want to display method return types
                if (Program._IncludeMethodReturnType)
                    mDetail += " : void";
            }
            //work out whether this is a normal method, in which case add it
            //or if its a property get/set method, should it be added
            if (!Program._ShowPropGetters &&
                propGetters.Contains(mi)) { /* hidden get method */ }
            else if (!Program._ShowPropSetters &&
                propSetters.Contains(mi)) { /* hidden set method */ }
            else {
                _Methods.Add(mDetail);
            }
        }
    }
#endregion
#region Events
    //do events
    foreach (EventInfo ei in
        _type_to_Draw.GetEvents(Program.RequiredBindings))
    {
        if (_type_to_Draw == ei.DeclaringType)
        {
            //add all the event types to the associations List, so that
            //the association lines for this class can be obtained, and
            //possibly drawn on the container
            string eName=getGenericsForType(ei.EventHandlerType);
            eName = LowerAndTrim(eName);
            if (!_Associations.Contains(eName))
            {
                _Associations.Add(eName);
            }

            //do we want long or short event description displayed
            if (Program._IncludeEventType)
                _Events.Add(eName + " " + ei.Name);
            else
                _Events.Add(ei.Name);
        }
    }
#endregion
}
#endregion
}
希望您可以看到,这 6 个列表随后被简单地用于创建 6 个新的 ucExpander 控件,这些控件随后在当前 ucDrawableClass 对象中定位到正确的 X/Y 位置。
到目前为止的故事是什么?
我们现在有了一个只包含有效命名空间和有效类的树视图。我们还有一个漂亮的 NameSpaces 对象,它包含一个字符串字典(用于命名空间)和每个字符串对应的 ucDrawableClass 对象(用于类)列表。ucDrawableClass 对象列表已经创建,并准备好放置在合适的绘图画布上。
但到目前为止,我们还不知道用户想绘制哪些类,它可以是全部,也可以是其中一个,甚至可以是零个。这取决于用户从主窗体 (frmMain.cs) 上的树视图中选择什么。那是步骤 5,所以让我们继续我们愉快的旅程。
步骤 5:用户选择应在图表上显示的类
到目前为止的故事如上所述。但仍然没有图表。
那么用户需要做什么才能获得图表呢?他们需要执行以下操作
- 选择至少一个类
- 右键单击树中的命名空间(至少选择一个类),或者使用主窗体 (frmMain.cs) 上的按钮或菜单项
如下图所示(仅供娱乐,此树显示了 AutoDiagrammer.exe(即本文代码)通过反射获取的所有类)
使用树视图右键单击查看图表

使用菜单查看图表

使用工具栏查看图表

当用户点击“查看命名空间类图”右键菜单、按钮或菜单时,应用程序将(如果当前节点是命名空间节点,否则它不知道要绘制什么)在专用面板对象上绘制前面生成的(如上步骤 4)ucDrawableClass 对象。
专用面板作为容器,以网格形式显示 ucDrawableClass 对象。专用面板对象是标准 .NET 2.0 TableLayoutPanel 对象的子类,名为 ClassDrawerContainerPanel。它的行为与标准 TableLayoutPanel 对象非常相似,因为它会将内容组织成行/列,但 ClassDrawerContainerPanel 中还有自定义逻辑,可以根据包含的 ucDrawableClass 控件是处于折叠还是展开状态来调整行/列的大小。
ClassDrawerContainerPanel 容器将通过设置 ucDrawableClass 对象的两个公共属性,即 ContainerRow 和 ContainerColumn,自动设置其布局的所有 ucDrawableClass 对象的行/列位置。这些属性以后可以在尝试确定如何绘制关联线时使用。
ClassDrawerContainerPanel 对象中显示的内容示例如下。

可以看出,在行/列中(以编程方式)放置了单独的 ucDrawableClass 对象。同样重要的还有垂直和水平间隔符。这些是(有意为之的)空白区域,将用于绘制任何需要的关联箭头。
基本上,ClassDrawerContainerPanel 对象执行自定义绘制(重写 onpaint(..)),以便对于每个包含的 ucDrawableClass 对象,都会检索一个关联列表(每个 ucDrawableClass 的关联列表是在步骤 4 中创建的)。
因此,对于每个关联,我们最终会得到一个源 ucDrawableClass 对象和一个目标 ucDrawableClass 对象,我们必须为其绘制关联。那么,如何在不绘制到包含控件上层的情况下完成此操作呢?这正是垂直和水平间隔符的作用。它们允许在绘制关联线时无需担心覆盖任何 ucDrawableClass 控件。
那么,这是如何做到的呢?有一些基本规则可以正确绘制关联。这些规则如下图所示

所以这就是关联规则的工作方式。但是所有这些是如何转换为代码的呢?对于每个找到的关联,ClassDrawerContainerPanel 对象都会创建一个新的 AssociationDrawer 对象来绘制关联线。AssociationDrawer 类的构造函数如下所示
#region Constructor
/// <summary>
/// Creates a new AssociationDrawer object using the parameters provided and
/// then calls the internal Draw() method
/// </summary>

/// <param name="g">The graphics object of the
/// <see cref="ClassDrawerContainerPanel">
/// ClassDrawerContainerPanel</see>, so that this class
/// can draw an association
/// line on the panel where the classes are held</param>
/// <param name="ucdSrc">The source
/// <see cref="ucDrawableClass">class</see></param>

/// <param name="ucdDest">The destination
/// <see cref="ucDrawableClass">class</see></param>
/// <param name="genericSpace">The generic space between
/// classes used by the
/// <see cref="ClassDrawerContainerPanel">ClassDrawerContainerPanel</see>
/// when laying out the controls</param>

public AssociationDrawer(Graphics g,ucDrawableClass ucdSrc,
                                ucDrawableClass ucdDest,int genericSpace)
{
      this._ucdSrc = ucdSrc;
      this._ucdDest = ucdDest;
      this._GenericSpace = genericSpace;
      this._g = g;
      //do the draw
      GetDirectionAndDraw();
}
#endregion
可以看出,构造函数接受几个参数,允许 AssociationDrawer 对象绘制正确的关联线。所以让我们看看与 AssociationDrawer 类相关的两件事
GetDirectionAndDraw()方法- 以及其中一个关联(例如北)如何绘制的示例。
关联规则 -> 方法调用
可以看出,关联规则利用了先前为源和目标 ucDrawableClass 对象的每个 ContainerRow 和 ContainerColumn 设置的属性。属性 ContainerRow 和 ContainerColumn 是在 ClassDrawerContainerPanel 首次布局所有必需的 ucDrawableClass 对象时设置的。所以现在只是创建规则的问题,几乎是逐字逐句的。
/// <summary>
/// Works out which direction the association line should be based
/// on the source <see cref="ucDrawableClass">class</see> ContainerRow/
/// ContainerColumn and the destination
/// <see cref="ucDrawableClass">class</see>
/// ContainerRow/ ContainerColumn. When the direction is found,
/// one of the Draw
/// direction methods is called, for example DrawNorth(), DrawSouth()
/// </summary>

private void GetDirectionAndDraw()
{
    //NORTH = Row is 1 below the current row, but same column
    if (_ucdDest.ContainerRow == _ucdSrc.ContainerRow - 1 &&
        _ucdDest.ContainerColumn == _ucdSrc.ContainerColumn)
    {
        DrawNorth();
    }
    //SOUTH = Row is 1 above the current row, but same column
    if (_ucdDest.ContainerRow == _ucdSrc.ContainerRow + 1 &&
        _ucdDest.ContainerColumn == _ucdSrc.ContainerColumn)
    {
        DrawSouth();
    }
    //EAST = Column is 1 above the current column, but same row
    if (_ucdDest.ContainerColumn == _ucdSrc.ContainerColumn + 1 &&
        _ucdDest.ContainerRow == _ucdSrc.ContainerRow)
    {
        DrawEast();
    }
    //WEST = Column is 1 below the current column, but same row
    if (_ucdDest.ContainerColumn == _ucdSrc.ContainerColumn - 1 &&
        _ucdDest.ContainerRow == _ucdSrc.ContainerRow)
    {
        DrawWest();
    }
    //NORTH-EAST = Row is 1 or more below and the column is 1 or more above
    if (_ucdDest.ContainerRow <= _ucdSrc.ContainerRow - 1 &&
        _ucdDest.ContainerColumn >= _ucdSrc.ContainerColumn + 1)
    {
        DrawNorthEast_DrawSouthEast();
    }
    //SOUTH-EAST = Row is 1 or more above and the column is 1 or more above
    if (_ucdDest.ContainerRow >= _ucdSrc.ContainerRow + 1 &&

        _ucdDest.ContainerColumn >= _ucdSrc.ContainerColumn + 1)
    {
        DrawNorthEast_DrawSouthEast();
    }
    //NORTH-WEST = Row is 1 or more below and the column is 1 or more below
    if (_ucdDest.ContainerRow <= _ucdSrc.ContainerRow - 1 &&
        _ucdDest.ContainerColumn <= _ucdSrc.ContainerColumn - 1)
    {
        DrawNorthWest_DrawSouthWest();
    }
    //SOUTH-WEST = Row is 1 or more above and the column is 1 or more below
    if (_ucdDest.ContainerRow >= _ucdSrc.ContainerRow + 1 &&
        _ucdDest.ContainerColumn <= _ucdSrc.ContainerColumn - 1)
    {
        DrawNorthWest_DrawSouthWest();
    }
    //NORTH-NON-DIRECT = Row is 2 or more below the current row,
    //but same column
    if (_ucdDest.ContainerRow <= _ucdSrc.ContainerRow - 2 &&
        _ucdDest.ContainerColumn == _ucdSrc.ContainerColumn)
    {
        DrawNorthNonDirect_DrawSouthNonDirect();
    }
    //SOUTH-NON-DIRECT = Row is 2 or more above the current row,
    //but same column
    if (_ucdDest.ContainerRow >= _ucdSrc.ContainerRow + 2 &&

        _ucdDest.ContainerColumn == _ucdSrc.ContainerColumn)
    {
        DrawNorthNonDirect_DrawSouthNonDirect();
    }
    //EAST-NON-DIRECT = Column is 2 or more above the current column,
    //but same row
    if (_ucdDest.ContainerRow == _ucdSrc.ContainerRow &&
        _ucdDest.ContainerColumn >= _ucdSrc.ContainerColumn+2)
    {
        DrawEastNonDirect_DrawWestNonDirect();
    }
    //WEST-NON-DIRECT = Column is 2 or more below the current column,
    //but same row
    if (_ucdDest.ContainerRow == _ucdSrc.ContainerRow &&
        _ucdDest.ContainerColumn <= _ucdSrc.ContainerColumn - 2)
    {
        DrawEastNonDirect_DrawWestNonDirect();
    }
}
所以让我们看看一个更简单的关联规则/结果线。比如说北。所有关联线都遵循类似的原则,但有些可能需要更多的线。
/// <summary>

/// Draws a North association line and arrow
/// </summary>
private void DrawNorth()
{
    //      /\
    //      |
    //      |
    int xStart = 0;
    int xEnd = 0;
    if (_ucdDest.Right <= _ucdSrc.Right)
    {
        xStart = _ucdDest.Right - 20;
        xEnd = _ucdDest.Right - 20;
    }
    else
    {
        xStart = _ucdSrc.Right - 20;
        xEnd = _ucdSrc.Right - 20;
    }
    int yStart = _ucdSrc.Top;
    int yEnd = _ucdDest.Bottom;
    //create a dasked line
    Pen p = new Pen(new SolidBrush(Color.Black));
    p.DashStyle = DashStyle.Dash;
    //and drawn the association
    _g.DrawLine(p,new Point(xStart, yStart), new Point(xEnd, yEnd));
    //draw the end arrow
    _g.DrawLine(p, new Point(xEnd, yEnd), new Point(xEnd - 5, yEnd + 10));
    _g.DrawLine(p, new Point(xEnd, yEnd), new Point(xEnd + 5, yEnd + 10));
}
以下图表说明了一个示例应用程序(实际上是自我反射,AutoDiagrammer.exe)的类图关联,其中仅选择了 5 个实际命名空间类进行查看。它还演示了在各种状态下(完全展开/完全折叠,部分折叠(单个 ucExpander 控件折叠))类(ucDrawableClass 控件)的外观。

它还能做什么?
所以,基本内容已经涵盖。但我还没有向您展示如何修改图表上显示的内容,或者如何保存图表。所以如果您还想了解更多,请继续。
让我们从如何修改图表上显示的内容开始。
自定义图表上显示的内容
要自定义图表中实际包含的内容,有一个额外的设置窗体 (frmSettings.cs),可通过主窗体 (frmMain.cs) 上的工具栏或主窗体 (frmMain.cs) 的菜单访问。
这个设置窗体 (frmSettings.cs) 如下图所示。在这里,可以打开/关闭图表功能

有以下设置
- 显示接口 [是/否]
- 显示构造函数参数 [是/否]
- 显示字段类型 [是/否]
- 显示方法参数 [是/否]
- 显示方法返回值 [是/否]
- 将现有属性的获取方法显示为方法 [是/否]
- 将现有属性的设置方法显示为方法 [是/否]
- 显示属性类型 [是/否]
- 显示事件 [是/否]
- 显示枚举
- 显示委托 [是/否]
- 类背景起始颜色 [颜色]
- 类背景结束颜色 [颜色]
- 类边框颜色 [颜色]
- 可访问性修饰符选择(仅公共 / 公共与静态 / 所有)
让我们来看一个或两个示例类,并打开其中一些附加项。

可以看出,现在显示了方法参数和属性类型。您想看到多少细节完全取决于您。显然,显示细节越多,图表就越大。
保存图表
我决定,尽管这个工具很方便,但如果人们不能实际保存图表,它就会毫无用处。为此,该应用程序支持保存为以下图像格式:Bmp、Emf、Exif、Gif、Jpeg、Png。为了保存图表,有一个额外的保存窗体 (frmSave.cs),可以从主窗体 (frmMain.cs) 的工具栏或菜单中访问。
这个保存窗体 (frmSave.cs) 如下图所示。

我最初尝试通过编程滚动并抓取单独的图像片段(然后将其粘贴到整个图像中)来保存专用面板 ClassDrawerContainerPanel(本质上是 ScrollableControl)的内容。这相当混乱和噩梦。
后来,一位名叫“James Curran”的 codeproject 用户前来救援(我曾在原始文章内容中声明,应该有人在这方面提供帮助)。所以,非常感谢 James。
James 简单地说,一个控件可以存在而不依附于窗体(哎呀,我似乎完全错过了这一点,这是个小学生错误)。
因此,凭借这一小小的建议,保存代码大大减少了。不过,我确实不得不进行一项更改(v 1.2),以应对应用程序将图像保存到文件名时,会保持锁定状态,导致尝试保存到同一文件名时引发“General GDI+ error”异常的事实。现在这已修复,完整的 SaveTheDiagram() 方法如下所示
/// <summary>

/// Saves the entire contents of the pnlFlowClasses to an image, specified
/// by the input parameters
/// </summary>
/// <param name="filename">the filename to save the diagram to</param>
/// <param name="imgFormat">the image format to save the diagram as</param>
/// <returns></returns>

private bool SaveTheDiagram(string filename, ImageFormat imgFormat)
{
    Cursor.Current = Cursors.WaitCursor;
    int bmpSrcWidth = pnlFlowClasses.MaxSize.Width;
    int bmpSrcHeight = pnlFlowClasses.MaxSize.Height;
    //create a new ClassDrawerContainerPanel (which will not be shown
    //on the form)
    ClassDrawerContainerPanel pnl = new ClassDrawerContainerPanel();
    pnlFlowClasses.SuspendLayout();
    Rectangle newBounds = new Rectangle(0, 0, bmpSrcWidth, bmpSrcHeight);
    pnl.Height = bmpSrcHeight;
    pnl.Width = bmpSrcWidth;
    pnl.Bounds = newBounds;
    pnl.BackColor = Color.White;
    pnl.SetBounds(0, 0, bmpSrcWidth, bmpSrcHeight);
    pnl.ClassesToDraw = pnlFlowClasses.ClassesToDraw;
    pnl.LayoutControls();

    Bitmap SrcBmp=null;
    Bitmap bmpNew = null;
    Graphics gfx = null;

    //save the image, however if we are saving the image
    //to the save file name
    //the Bitmap object maintains a lock on the physical file,
    //so we need to use another dummy Bitmap
    //to hold the original image, so that the lock creates
    //by the original image saving process can be released,
    //then we can savethe dummy Bitmap contents
    //back to the original image and conduct the save.

    //This is a well documented feature, see the following resources
    //http://blog.vishalon.net/
    //http://support.microsoft.com/?id=814675
    try
    {
        SrcBmp = new Bitmap(bmpSrcWidth, bmpSrcHeight);
        pnl.DrawToBitmap(SrcBmp, newBounds);
        bmpNew = new Bitmap(SrcBmp.Width, SrcBmp.Height);
        gfx = Graphics.FromImage(bmpNew);
        gfx.DrawImage(SrcBmp, new Rectangle
            (0, 0, bmpNew.Width, bmpNew.Height),
        0, 0, SrcBmp.Width, SrcBmp.Height, GraphicsUnit.Pixel);
        // As original SrcBmp keeps lock on file,
    // we need to copy the original image
        // to a second image, and then release the lock on the image file.
    // Of course,image from the initial image file
        // is now existing on the new Graphics object
        // which points to the second image,
    //ready to copy back to the original image
        SrcBmp.Dispose();
        SrcBmp = bmpNew;
        gfx.Dispose();
        //do the save (now that the original lock has been dealt with)
        SrcBmp.Save(filename, imgFormat);
        SrcBmp.Dispose();
        pnlFlowClasses.ResumeLayout();
        return true;
    }
    catch (Exception ex)
    {
        if (SrcBmp != null) { SrcBmp.Dispose(); }
        if (bmpNew != null) { bmpNew.Dispose(); }
        if (gfx != null) { gfx.Dispose(); }
        GC.Collect();
        return false;
    }
}
这比我最初保存图像的方式好多了。因为我原来的代码依赖于 GDI32.Dll BitBlt,但那是一个很好的练习。
但这种新方法好得多,而且都是纯 C# 代码,所以这也很好。
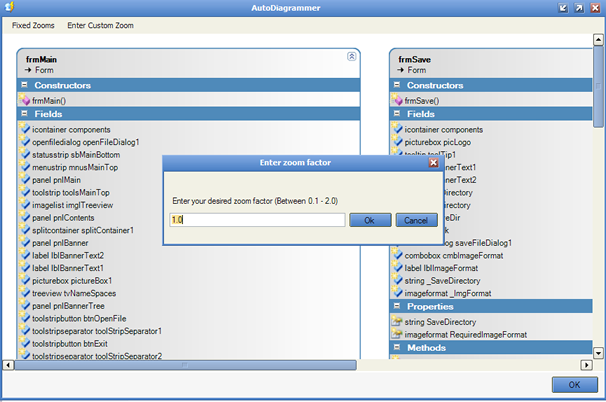
还有一个新的窗体,允许用户在新窗体上查看初始图表,并可以放大或缩小。这个新窗体可以通过主窗体 (frmMain.cs) 上的按钮或菜单项访问。缩放窗体 (frmZoom.cs) 如下所示。
还有一个最后的窗体,就是关于窗口 (frmAbout.cs),如果有人想联系我,可以在那里联系。不过我敢打赌,大概不会。

打印支持
现在支持打印。

Reflector 插件
是的,现在支持反射器插件功能,这主要归功于一位名叫“Andre Seibel”的同事,他实际上将 dll 信息从 Reflector 导入了我的代码。我成功创建了一个 Reflector 插件,但我无法从 Reflector 中获取程序集数据。但是“Andre Seibel”做到了,所以谢谢你 Andre。

操作方法如下:解压并将本文顶部的 AutoDiagrammer.dll 复制到您的 Reflector 安装目录。打开 Reflector,然后进入附加组件菜单,搜索 AutoDiagrammer.dll,并将其添加为有效的 Reflector 附加组件。然后,在工具菜单下,会出现一个名为 AutoDiagrammer 的新菜单。点击它即可开始。
根据 Lutz Roeder 的指示,我现在已将我的电子邮件包含在附带的 Reflector 插件程序集信息中,因此 Lutz Roeder 的 Reflector 将自动通过电子邮件向我发送任何错误。但请记住,我仍然是一名学生,因此还有其他承诺/优先事项。我确实打算修复错误,但我不能保证它们会以极快的速度完成。所以我真正想说的是,尽管使用 Reflector 插件,但如果它偶尔出现问题,请告诉我,我会查看,但你可能需要等待一段时间才能获得修复。
您可能会注意到,这个 Reflector 插件看起来与独立应用程序不太一样。这是因为在独立应用程序中,我正在进行反射。而在插件中,反射是由 Lutz Roeder 的代码完成的。因此,我无法提前显示树视图,因为反射代码在那时已经完成。所以当用户点击插件按钮时,反射已经完成,这与独立应用程序相当不同。再次反射似乎没有什么意义,只是为了让用户从树视图中选择要显示的类。我同意这是一个不错的选择,但这个功能需要更多的工作。看看大家怎么想;告诉我。如果有足够多的人希望在 Reflector 插件版本中恢复该功能,我会考虑的。您可以使用并且永远可以使用独立应用程序。我将维护这两个版本。
我还必须说我更喜欢独立应用程序,因为我知道独立应用程序中的一切,但我对 Reflector 插件不能这样说。
另一个新功能是,我现在为类添加了工具提示,以便当用户将鼠标悬停在类上时,其关联会显示为工具提示,因此更容易跟踪绘制的关联。
就这些
好了,差不多就是这样了。我希望我只详细介绍了应用程序的有趣部分,而没有让大家感到厌烦致死。这个应用程序花了我大约两个兼职周的时间才完成,我花了很多时间思考如何做事,所以我希望这能体现在我尝试与大家讨论设计的方式中。总会有更好的方法,然而,这就是我所走的旅程。所以我认为为什么不与大家分享呢。但最终,由大家来告诉我你们的想法。
您怎么看?
我只想问,如果您喜欢这篇文章,请为它投票,因为这能让我知道这篇文章是否处于正确的水平。
结论
我非常喜欢撰写这篇文章。我希望大家喜欢它。我认为它相当有用。即使它只是为了帮助您了解一些关于反射的知识。我喜欢反射,并且有更多关于它的文章要写,但我将首先关注 XAML 和 LINQ/DLINQ/XLINQ 的内容。所以在写更多 AI 和反射之前,请期待这些领域的更多文章。好了,现在真的结束了,感谢大家听我唠叨。
历史
v1.10 08/04/07:尝试修复一些用户在使用 Reflector AddIn Dll 时遇到的 NullPointerException。
- 尽管它对我来说一直有效,如文章中的屏幕截图所示。但我收到了错误报告,所以我尝试查看这些错误发生在哪里,并尝试采取一些措施。
v1.9 01/04/07:修复了我在作为 Reflector AddIn 运行代码时发现的一个小问题,即绘图数学问题
- 修复了线条绘制数学,以防止其在类对象上方绘制线条。
- 另一个新功能是,我现在为类添加了工具提示,以便当用户将鼠标悬停在类上时,其关联会显示为工具提示,因此更容易跟踪绘制的关联。
- 还修复了 v1.8 中桌面版本不再绘制类的问题。现在只有一个应用程序,在顶部压缩。根据您需要独立版本还是反射器版本,只需更改 Visual Studio 中的构建选项即可。对于独立应用程序,使用 WindowsApplication 和 Program 作为启动类。或者对于 Reflector 插件,使用 ClassLibrary。尽管独立应用程序可以使用本文顶部的自动更新链接安装,并且 Reflector 插件也可以作为单独的下载在本文顶部获得。
v1.8 31/03/07:现在可作为 Reflector 的插件使用
- 将本文顶部的 AutoDiagrammer.dll 复制到您的 Reflector 安装目录。打开 Reflector,然后进入附加组件菜单,搜索 AutoDiagrammer.dll,并将其添加为有效的 Reflector 附加组件。然后,在工具菜单下,会出现一个名为 AutoDiagrammer 的新菜单。点击它即可开始。
- 允许用户选择对于给定属性,是否应在类图上显示相关的 get/set 反射方法。由于显示相关的 get/set 反射方法实际上是多余的,因为属性已经显示。这个新解决方案使用了 codeproject 用户 AlwiNus 提供的一些代码。所以谢谢 AlwiNus。做得好。我实际上是想解决一个完全不同的问题,或者以为人们在问别的东西。哎呀。
v1.6 15/03/07:增加了对泛型的支持
- 允许正确探索和显示泛型数据类型,因此例如,“list'1”现在将显示为“list<string>”。这主要归因于我前几天发现的一个东西,即以下方法调用
Type.IsGenericType()<code> 和 <code>Type.GetGenericArguments()<code>。所以现在我非常满意了。因为那件事总是困扰着我。呜。不过现在已经修复了。
v1.5 11/03/07:包含更多 CodeProject 用户评论。具体如下
- 现在支持打印
- 现在支持自动更新
- 允许自定义类绘制颜色(可能用于更好的打印)
- 允许根据可访问性修饰符(Public / Private / Static)自定义显示的类数据
v1.4 06/03/07:包含更多 codeproject 用户评论。具体如下
- 保存表单现在有“取消”或“确定”按钮
- 缩放和设置表单现在允许鼠标滚动,Focus() 在错误的表单事件中被调用。现在一切正常
- 主窗体上的退出快捷键更改为 CTRL + X
- “工具”菜单更改为“设置”
- “用户设置”菜单更改为“配置设置”
- 设置页面添加了附加设置,允许用户调整图表上显示的列数
- 当用户在设置页面上点击“确定”时,会自动重新扫描当前文件,以便使用新设置
- 图表最初显示时,所有类都以折叠状态显示
- 如果用户没有点击命名空间子节点,应用程序假定要绘制当前节点的所有子节点
- 现在可以通过菜单或新垂直面板(你看到的灰色面板)上的垂直图钉按钮隐藏树视图
v1.3 04/03/07:修复了一个 bug,具体如下
- 注意到当所有类都折叠时保存图像,图像的最右侧部分没有被保存。追溯到 ClassDrawerContainerPanel 类中的一个问题。现在已纠正。
v1.2 03/03/07:修复了一个 bug,具体如下
- 解决了一个由 codeproject 用户“RealStranger”提到的,保存图片时抛出“General GDI+ error”的问题。经追溯,问题在于当图片保存到同一文件名时,原始 Bitmap (.NET 对象) 对文件保持锁定。为此,主窗体的保存方法必须更改,以包含第二个虚拟 Bitmap 对象来保存原始图片,然后释放锁定。之后,原始图片会重新分配存储的图片数据,图片即可保存。
- 现在有一个新的缩放窗体。但不要期望图像能像初始图表那样工作。它只是原始图表的图像表示,因此您可以缩放。但您无法在缩放窗体上折叠/展开控件。
v1.1 02/03/07:整合了 Codeproject 首次发布时的评论。具体如下
- “关于”窗体现在有“确定”按钮
- “设置”窗体现在有“确定”和“取消”按钮
- 主窗体现在允许通过新的菜单项和新的工具栏按钮进行保存(但您仍然必须选择一个命名空间树视图节点,因为这用于告诉应用程序实际绘制什么)
- 主窗体现在可以调整为用户希望的任何大小,并且可以最小化或最大化
- 图表的保存已完全更改,现在全部是原生 C# 代码。感谢 James Curran
- 任何没有命名空间的类,现在都添加到一个名为“无命名空间类”的新树视图节点中
v1.0 01/03/07:首次发布