
带设计师支持的 Alpha 通道合成的 Windows 窗体
4.96/5 (121投票s)
用于基于图像的窗口框架的 alpha 通道合成窗体
下载说明
请将 AlphaForm_1_1_3_Part2.zip 中的解压后的文件夹 (Help 和 SlidingPanes) 添加到 AlphaForm_1_1_3_Part1.zip 的主项目文件夹中。
引言
Windows 长期以来一直具有指定区域或透明色键的功能,允许您定义任意的窗口边框。这通常用于背景图像,将图像轮廓定义为窗口框架。然而,此边框以一位掩码与桌面合成,导致像素化边界。尤其 unattractive 的是曲线边框,它需要抗锯齿和逐像素合成。除了难看之外,定义区域和/或透明色键以实现基于图像的复杂窗口框架并不容易。
这是一个 Windows Forms 控件,它使用 Win32 API,不使用 WPF。该控件允许您在 Forms 设计器中布局带 Alpha 通道的 32 位图像,并在图像的用户指定区域内排列其他控件。在运行时,该控件将生成一个逐像素 Alpha 合成的窗体与桌面。窗体的 Region 属性定义了用于托管其他控件的窗体区域,并且该区域是根据图像的 Alpha 通道即时计算的。该控件还支持运行时更改图像。在讨论代码细节之前,让我们先了解如何使用它。
如何使用
- 有两个控件:
AlphaFormTransformer和一个辅助控件AlphaFormMarker。在您的项目中引用 AlphaFormTransformer.dll 并将它们添加到工具箱。 - 在设计器中从一个 Form 开始,并将其
FormBorderStyle设置为 None。 - 将
AlphaFormTransformer控件 (AFT) 的一个实例拖到 Form 上并将其停靠以填充。AFT 必须与 Form 大小相同。 - 在 Form 的
Load事件处理程序(或OnLoad重载)中,添加对TransformForm()的调用。
alphaFormTransformer1.TransformForm();
- 选择一个带 Alpha 通道的 32 位 PNG 或 TIF 图像作为 AFT 控件的背景图像。此图像需要将所需的窗口框架元素通过其 Alpha 通道进行遮罩,并在内部的透明区域中容纳其他控件。

- 选择窗体,并将其宽度和高度设置为与图像的宽度和高度相同。这是一个重要的先决条件。窗体、AFT 控件和 AFT 的背景图像都必须具有相同的尺寸。
- 单独的 Alpha 通道不足以让 AFT 计算主窗体的 Region 来显示您将要添加的控件。但我们使其变得容易。将
AlphaFormMarker(AFM) 控件拖到将显示控件的每个透明区域中。这些区域必须完全由非透明边框界定。每个标记只需要位于透明区域中的任何位置,并且其中心(由十字准线显示)必须落在透明像素上。定位后,可以将其设置为所需的最小尺寸,或将其发送到后面以使其不再碍事。重要的是要注意,它们必须添加到 AFT 中,而不是添加到任何其他容器控件中。如果您决定稍后添加它们,请注意这一点。最后,它们在运行时会被隐藏。
标记的FillBorder属性指定了将构建区域的非透明像素边框的深度。合成图像通常有半透明的边缘。因此,需要从标记位置构建的区域需要扩展一定数量的像素进入(从合成的角度来看是*下方*)半透明区域,否则您会透过这些边缘看到桌面。您希望边框值足够大以覆盖半透明边缘的厚度(通常是几个像素),但又不能太大,以免其超出图像框架的另一侧。
- 现在,将您喜欢的任何其他控件添加到图像的内部透明区域。AFT 是一个容器控件(继承自
Panel),因此您会将控件添加到其中。图像在运行时将始终遮罩出控件区域,但在设计时则不一定。如果您不将控件的背景颜色设置为透明,它可能会在设计器中覆盖图像的遮罩边框,因为它位于顶部,而在运行时它位于 Alpha 通道图像的下方。通过将控件的背景颜色设置为透明,您可以有效地模拟运行时行为。这样做有助于您进行布局,即使您之后将其更改为非透明颜色。并非所有控件都支持非透明背景颜色,因此在某些情况下,您的控件可能会在设计器中覆盖图像边框。
- 就这样,让我们运行并看看我们有什么。

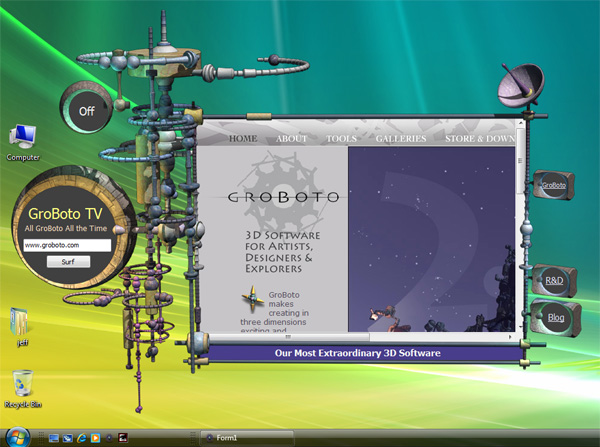
- 可选地,我们可以设置主 Form 的背景图像属性,并将每个控件的背景颜色设置为透明。这允许我们拥有自定义背景,如下所示。您也可以通过使用额外的控件(如面板)并为每个面板设置自己的背景来实现这一点。

运行时换肤
在运行时,您可以通过调用 UpdateSkin 并传递一个新的位图作为窗口框架来更改窗体的 Alpha 通道图像。但是,如果新位图的 Alpha 通道与当前位图不同,则必须在调用此方法 *之前* 执行以下操作:
- 如果图像大小已更改,请重新调整主 Form 和 AFT 的大小以匹配(如果 AFT 已停靠,则只需调整 Form)。
- 重新定位所有 AFM 标记,以便可以计算窗体的区域。
- 根据需要重新定位所有其他控件。
另一方面,如果您的新图像具有相同的大小和 Alpha 值,但 RGB 值不同,那么您只需要调用此方法。源解决方案中有一个示例项目,演示了如何更改运行时图像。
工作原理
正如您可能已经猜到的,我们实际上是在创建一个第二个窗口,该窗口将合成的图像放置在主 Form 的顶部。这一切都发生在 TransformForm() 中,它执行以下操作:
- 创建了一个分层窗口 Form。这是一个设置了
WS_EX_LAYERED扩展样式位的窗口。Windows 将在窗口内容通过 Win32 调用UpdateLayeredWindow()设置后,在桌面上进行 Alpha 通道合成。我们已经用一个名为LayeredWindowForm的类包装了它。m_lwin = new LayeredWindowForm(); // Setting the layered Window's TopMost to the main // Form's value keeps the relative Z order the same for // the pair of Windows m_lwin.TopMost = ParentForm.TopMost; // We don't want the layered Window Form to show in the taskbar m_lwin.ShowInTaskbar = false; // These will handle dragging for both the layered Window // and the main Form. m_lwin.MouseDown += new MouseEventHandler(LayeredFormMouseDown); m_lwin.MouseMove += new MouseEventHandler(LayeredFormMouseMove); m_lwin.MouseUp += new MouseEventHandler(LayeredFormMouseUp); ParentForm.Move += new EventHandler(ParentFormMove); // Layered form shown with same size and location // It's not necessary to set the size of the layered // Window as LayeredWindowForm.SetBits() will do this. m_lwin.Show(ParentForm); m_lwin.Location = ParentForm.Location;
- 从 AFT 的背景图像属性中提取一个位图。在某些情况下,它可能会被缩放(参见此处关于 DPI 支持的注释)。之后,将调用
UpdateSkin()。
if (BackgroundImage != null) { // A prerequisite with this control is that the main Form's size // is set equal to the background image size. However, if the main // Form's AutoScaleMode is set to DPI, and the application is run // on a system where the font or DPI resolution differs from the // design time values, then .NET will scale the form and all its // controls. However the background image is not scaled, so we'll // catch that condition here and scale the image accordingly. // Again, this logic works *assuming* you always set the main Form's // size equal to the image size at design time. if (BackgroundImage.Size != ParentForm.Size) { aphaBmap = new Bitmap(ParentForm.Width, ParentForm.Height); Graphics gr = Graphics.FromImage(aphaBmap ); gr.SmoothingMode = SmoothingMode.HighQuality; gr.CompositingQuality = CompositingQuality.HighQuality; gr.InterpolationMode = InterpolationMode.HighQualityBicubic; gr.DrawImage(BackgroundImage, new Rectangle(0, 0, ParentForm.Width, ParentForm.Height), new Rectangle(0, 0, BackgroundImage.Width, BackgroundImage.Height), GraphicsUnit.Pixel); gr.Dispose(); } else aphaBmap = new Bitmap(BackgroundImage); } // Update the layered Window bits and Form region UpdateSkin(aphaBmap); - 在
UpdateSkin中,将创建一个来自图像 Alpha 通道的数组。这将在下一步中用于构建主 Form 的Region。// Seems faster albeit somewhat wasteful to marshal to a // managed array than to use Bitmap.GetPixel. If you're // OK with unsafe code, then define FAST_ALPHA_BUILD and // enable unsafe compilation. byte[] mngImgData = new byte[m_alphaBitmap.Height * bData.Stride]; Marshal.Copy(bData.Scan0, mngImgData, 0, mngImgData.Length); for (int j = 0; j < m_alphaBitmap.Height; j++) { int ai = j * bData.Stride + 3; for (int i = 0; i < m_alphaBitmap.Width; i++, ai += 4) { alphaArr[i, j] = mngImgData[ai]; } } - 仍在
UpdateSkin中,主 Form 的Region被构建。Region将定义您放置控件的 Form 的可见区域(控件托管在 AFT 中,但一切都由主 Form 的区域裁剪)。Region是通过从用户指定的 AFM 标记执行种子填充类型的操作即时构建的,该操作发生在UpdateRectListFromAlpha()中。这些标记只不过是您在设计模式下拖到 Form 上的特殊辅助控件。本质上,我们正在填充图像 Alpha 通道的特定透明区域。对于每个这样“填充”的像素,我们都会生成一个矩形来用于构建主 Form 的Region。Rectangle bounds = new Rectangle(); ArrayList rectList = new ArrayList(); // The location of each AlphaFormMarker control serves as a seed point // location for building the set of rectangles that describe the // enclosed transparent region (within the background image's alpha // channel) around that point. foreach (Control cntrl in Controls) { if (typeof(AlphaFormMarker).IsInstanceOfType(cntrl)) { AlphaFormMarker marker = (AlphaFormMarker)cntrl; UpdateRectListFromAlpha( rectList, ref bounds, new Point(marker.Location.X + marker.Width / 2, marker.Location.Y + marker.Height / 2), alphaArr, m_alphaBitmap.Width, m_alphaBitmap.Height, (int)marker.FillBorder); // Hide the marker as we don't want to see it at run time. marker.Visible = false; } } // Build the main Form's region ParentForm.Region = RegionFromRectList(rectList, bounds); - 最后,在
UpdateSkin中,Alpha 通道图像位图被设置为分层 Form。// Set the layered Window bitmap m_lwin.SetBits(m_alphaBitmap);
- 在
TransformForm()的底部,AFT 的背景图像和磁贴从主 Form 复制。这允许我们拥有自定义背景图像(如果需要)。// Swap in the main form's background image (if any) and layout BackgroundImage = ParentForm.BackgroundImage; BackgroundImageLayout = ParentForm.BackgroundImageLayout;
关注点
窗口的拖动是通过拖动分层窗口(我们的窗口框架)的任何可见部分来完成的。当 LayeredFormMouseMove() 中发生鼠标拖动事件时,它会移动主 Form,但让 Move 事件处理程序 ParentFormMove() 来移动分层窗口。这处理了在拖动操作之外移动 Form 的情况。例如,当任务栏的自动隐藏未选中时,Windows 可能会导致 Form 被重新定位。
在 Windows XP 上,ParentFormMove() 还会尝试帮助桌面和底层 Windows 赶上重绘已失效的区域(请记住,我们实际上在移动两个窗口,尽管其中分层窗口是双缓冲的)。如果检测到我们正在拖动 Form,它会根据 DragSleep 属性使主线程休眠。一个合理的 30 毫秒的值可以减少无效桌面部分的重绘干扰。在 Vista 下,此属性被忽略,因为 DWM 会对所有内容进行双缓冲。
最后,PInvoke 是不可避免的,因为分层窗口 API 和 ExtCreateRegion() 都需要使用,这是因为从 GraphicsPath 或 Region.Union() 构建 Region 的性能很差。
摘要
在本文中,我们介绍了一个 Windows Forms 控件,它允许您在具有设计器级别支持和运行时 Alpha 通道合成的情况下,构建任意复杂的基于图像的窗口元素。
历史
- 版本 1.0
- 首次发布
- 版本 1.1.1
- 2009/7/15:本文中的代码是一个名为“AlphaForm”的共享软件组件的基础,我现在根据 CodeProject 1.02 许可证免费发布。这是 1.1.1 版本,与原始 CodeProject 文章相比,它包含了一些新功能和错误修复。还提供了扩展的教程和编译的帮助文件。
- 1.1.3 版本包含了一些新功能和错误修复,即:
- 显示和隐藏 Alpha 窗体的例程
- x64 的错误修复
- 演示多个、动画 Alpha 窗体的新示例