
VBDwgImageExtractor
3.88/5 (9投票s)
2007年11月18日
4分钟阅读
62849
2066
一篇关于尝试从 Autocad (R13C3 及更高版本) DWG 图形中读取 BMP 预览图像数据的文章。
引言
不久前,我的一个朋友和同事需要从 Visual Basic 应用程序中的 DWG Autocad 图形中获取预览图像,以自动执行 AutoCAD 中的一些任务。 在互联网上搜索时,我们找到了来自 OpenDWG 规范 (rtf),该规范来自 Open Design Alliance 网站,并成功完成了这项工作。 我们尝试在此处使用 Visual Basic .NET 将 BMP 图形预览图像放入 pictureBox 中。
创建 Visual Basic 应用程序项目
- 文件 -> 新建 -> 新项目
- 创建一个新的
VBDwgImageExtractorVisual Basic Windows 应用程序 - 将
Form1的 Text 字段更改为VBDwgImageExtractor - 从
工具箱中,将一个PictureBox拖放到窗体中 - 将一个
Button和一个openFileDialog拖放到窗体中 - 将
openFileDialog1的 Filter 属性设置为Drawing files (*.dwg)|*.dwg|All files (*.*)|*.*,并将DefaultExt设置为dwg - 现在双击
Button1按钮,以创建和编辑Button1_Click事件
使用以下代码更改 Button1_Click 方法以打开并显示 BMP 预览
Private Sub Button1_Click(ByVal sender As System.Object, _
    ByVal e As System.EventArgs) Handles Button1.Click

        If (OpenFileDialog1.ShowDialog() = DialogResult.OK) Then
            Dim path As String = OpenFileDialog1.FileName
            ' Create the reader for data.

            Dim fs As FileStream = _
                New FileStream(path, FileMode.Open, FileAccess.Read,
                    FileShare.ReadWrite)
            Dim r As BinaryReader = New BinaryReader(fs)

            ' Get the image position in the DWG file

            r.BaseStream.Seek(&HD, SeekOrigin.Begin)
            Dim imgPos As Int32 = r.ReadInt32()
            r.BaseStream.Seek(imgPos, SeekOrigin.Begin)

            ' Image sentinel to check if the image data

            ' is not corrupted

            Dim imgBSentinel() As Byte = _
                {&H1F, &H25, &H6D, &H7, &HD4, &H36, &H28, _
                &H28, &H9D, &H57, &HCA, &H3F, &H9D, &H44, &H10, &H2B}

            ' Read Image sentinel

            Dim imgCSentinel(16) As Byte
            imgCSentinel = r.ReadBytes(16)

            ' if image sentinel is correct

            If (imgBSentinel.ToString() = imgCSentinel.ToString()) Then
                ' Get image size

                Dim imgSize As UInt32 = r.ReadUInt32()

                ' Get number of images present

                Dim imgPresent As Byte = r.ReadByte()

                ' header

                Dim imgHeaderStart As Int32 = 0
                Dim imgHeaderSize As Int32 = 0

                ' bmp data

                Dim imgBmpStart As Int32 = 0
                Dim imgBmpSize As Int32 = 0
                Dim bmpDataPresent As Boolean = False

                ' wmf data

                Dim imgWmfStart As Int32
                Dim imgWmfSize As Int32
                Dim wmfDataPresent As Boolean = False

                ' get each image present

                For I As Integer = 1 To imgPresent

                    ' Get image type

                    Dim imgCode As Byte = r.ReadByte()
                    Select Case imgCode

                        Case 1
                            ' Header data

                            imgHeaderStart = r.ReadInt32()
                            imgHeaderSize = r.ReadInt32()
                        Case 2
                            ' bmp data

                            imgBmpStart = r.ReadInt32()
                            imgBmpSize = r.ReadInt32()
                            bmpDataPresent = True
                        Case 3
                            ' wmf data

                            imgWmfStart = r.ReadInt32()
                            imgWmfSize = r.ReadInt32()
                            wmfDataPresent = True
                    End Select
                Next

                If (bmpDataPresent) Then

                    r.BaseStream.Seek(imgBmpStart, SeekOrigin.Begin)

                    Dim tempPixelData(imgBmpSize + 14) As Byte

                    ' indicate it is a bit map

                    tempPixelData(0) = &H42
                    tempPixelData(1) = &H4D

                    ' offBits

                    tempPixelData(10) = &H36
                    tempPixelData(11) = &H4

                    Dim tempBuffData(imgBmpSize) As Byte

                    tempBuffData = r.ReadBytes(imgBmpSize)

                    tempBuffData.CopyTo(tempPixelData, 14)

                    Dim memStream As MemoryStream = _
                            New MemoryStream(tempPixelData)

                    Dim bmp As Bitmap = New Bitmap(memStream)

                    PictureBox1.Image = bmp

                End If

                If (wmfDataPresent) Then
                    ' read imgWmfSize wmf data

                End If

                Dim imgESentinel() As Byte = _
                    {&HE0, &HDA, &H92, &HF8, &H2B, &HC9, &HD7, _
                    &HD7, &H62, &HA8, &H35, &HC0, &H62, &HBB, &HEF, &HD4}

                imgCSentinel = r.ReadBytes(16)

                ' if image sentinel is correct

                If (imgESentinel.ToString() = imgCSentinel.ToString()) Then

                    ' Image data is not corrupted

                End If

            End If

            fs.Close()

        End If
    End Sub
将以下 Imports 添加到 Form1.vb 代码的顶部
    Imports System.Drawing
    Imports System.IO
生成解决方案 (F7),然后运行应用程序 (F5)。
单击 Button1 并浏览 DWG 文件,然后打开它。
解释
Autocad DWG 结构
正如 Open Design Alliance 发现的那样,在 &HD 处有一个寻址器,它是一个 4 字节长的绝对地址,指向图像数据的开头。 因此,我们打开一个文件流并从中创建一个二进制读取器来访问 DWG 文件。 然后,我们查找地址 &HD,并读取预览图像数据的第一个 sentinel 的 Int32 寻址位置。
sentinel 只是一个 16 字节长的常量数组,用于检查文件的一致性或用作标记。 我们有一个用于图像的开头,另一个用于图像的结尾。
因此,我们再次查找图像位置 imgPos 并读取第一个 sentinel 的 16 个字节并进行比较。
然后在 sentinel 之后,出现一个带有图像区域总大小的 header Int32 值。 紧随其后的是一个 Byte,它是存在的图像数据格式数量的计数器 (1-3) imgPresent。
我们重复 imgPresent 次,以首先获取文件中图像 header 的起始位置和 header 大小; 其次,BMP 数据的起始位置和大小; 第三,WMF 数据的位置和大小(如果存在)。
如果我们发现存在 BMP 数据,我们查找 BMP 数据 imgBmpStart 的起始位置,然后分配一个字节数组缓冲区以从二进制读取器获取 BMP 数据。
我们从 BMP 数据缓冲区创建一个内存流,并从该内存流创建一个位图。 我们必须使用一种技巧来做到这一点,如下所述。
最后,我们再次读取结束 sentinel 以检查完整性。
BMP 结构
当从流读取时,Bitmap 类构造函数解释的 BMP 结构似乎与 DWG 文件中存在的实际数据略有不同。
标准 BMP 结构
-
文件信息 header:一个 14 字节长的 header 记录,具有以下结构
WORD bfType , It must be set to &H4D42, to indicate that the file is a Bitmap DWORD bfSize , Total size of the file WORD bfReserved1 WORD bfReserved2 DWORD bfOffBits , Offset of the image data from start of the file - 位图信息 Header
DWORD biSize , Size of the image header, should be 40. LONG biWidth , Width of the image in pixels. LONG biHeight , Height, this is also the stride of the bitmap. WORD biPlanes , number of bit planes, always 1 WORD biBitCount , bits per pixel 1, 4, 8 or 24 DWORD biCompression , 0 for no compression. DWORD biSizeImage , Size of image data LONG biXPelsPerMeter , X resolution LONG biYPelsPerMeter , Y resolution DWORD biClrUsed, Number of colours DWORD biClrImportant , number of colour indexes that are important. If 0, all indexes are important. - 调色板
- 实际图像数据
DWG BMP 结构
通过篡改 DWG 二进制文件中存在的数据,我们发现 BMP 的文件信息 Header 不存在。 因此,当将结构作为内存流传递给 Bitmap 构造函数时,我们会收到“传递的参数无效”的错误。
因此,我们通过在 tempPixelData 缓冲区的前 14 个字节中创建此 header 来找到解决方案。 我们将对应于第一个 WORD bfType 的字节设置为 &H4D42。 这是一个指示这是一个 BMP 文件的常量。 我们将对应于最终 WORD bfOffBits 的字节设置为 &H0436,这是 256 BMP 图像数据偏移的常量。
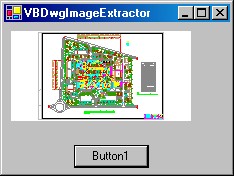
然后我们读取图像数据,将其附加到 header 之后的 tempPixelData 缓冲区数组,从中创建一个内存流并将其传递给 Bitmap 构造函数,该构造函数能够读取 BMP,正如您可以在本文顶部的示例图像中看到的那样。
关注点
就是这样! 有关完整的 BMP 结构,请参见 Mark Bernard 的 如何加载位图。
历史
- 2007 年 11 月 18 日 -- 原始发布
- 2007 年 11 月 22 日 -- 图像已完全解释