
Axiom
2.14/5 (4投票s)
如何设置 Axiom 应用程序
引言
本示例将重点介绍如何将一个可调整大小的 Axiom 窗口设置为独立控件。为此,大部分设置工作将在后台进行。我建议您先阅读 Axiom 的基础教程,因为在示例应用程序的上下文中,我不会介绍 Axiom 的其他任何内容,只介绍设置过程。
背景
Axiom 是伟大的 Ogre3D 引擎的 C# 移植版本。这有许多优点,例如比 MOGRE 等包装器更快。但这也意味着要跟上 Ogre3D 的更新需要付出更多努力,因为所有东西都必须从头开始编写。有关 Axiom 和 Ogre3D 的更多信息,请参阅下面的参考资料。
安装
下载 Axiom (完整版 0.7.3) 并将其解压到C:\Program Files\Axiom,然后将bin目录中的所有 debug DLL 文件复制到提供的“Axiom DLLs”目录中。另外,请确保您已安装 Managed DirectX SDK。
示例应用
该示例应用程序包含三个主要组件——Axiom Manager、Axiom Window 和 Test Form。Axiom Manager 负责配置和初始化 Axiom。Axiom Window 是一个可以放置在任何 Windows Form 上的自定义控件。最后,Test Form 是应用程序的主窗口。
Axiom Manager
Axiom manager 是一个单例类,负责处理配置并自动为AxiomWindow(自定义控件)设置引擎。
配置管理
目前,配置管理尚未完成/不存在,因为它只提供了一些初始化引擎的默认值,例如日志文件名和资源配置文件。
安装
AxiomManager的这部分负责使用默认配置初始化引擎并加载资源配置文件。
private void SetupAxiom(Configuration.AxiomConfiguration axiomConfig)
{
    // create root element
    m_root = new Root(axiomConfig.ConfigFile, axiomConfig.LogFile);

    // load resources
    SetupAxiomResources(axiomConfig.ConfigFile);

    // initialize root
    RenderSystem temp = m_root.RenderSystems[ 0 ];
    m_root.RenderSystem = temp;
    m_root.Initialize(false);
}
Axiom Window (自定义控件)
AxiomWindow控件是一个完全可调整大小的用户控件。Axiom window 有两个主要部分——初始化和大小调整支持。
初始化部分仅使用 Axiom Manager 和当前配置创建一个与控件尺寸相同的新RenderWindow。
public void Init()
{
    // get the manager and configuration
    AxiomManager axiomManager = AxiomManager.Instance;
    Configuration.AxiomConfiguration axiomConfig = axiomManager.Config.AxiomConfig;

    // create a render window of the same size
    m_currentSize = new Size(Width, Height);
    m_window = axiomManager.Engine.CreateRenderWindow(Name, m_currentSize.Width,
        m_currentSize.Height, axiomConfig.ColorDepth, false, 0, 0,
        axiomConfig.DepthBuffer, axiomConfig.VSynch, this);
    m_initialized = true;
}
有趣的部分是发生在OnResize中的大小调整支持代码。如果启用了AutoAspectRatio,它会更新摄像机的纵横比(这样,如果窗口的纵横比发生变化,图像仍然看起来不错),然后如果渲染窗口的新尺寸比当前尺寸大 15% 或小 15%,则会重建渲染窗口。这意味着图像总是看起来不错,因为它的大小永远不会小于或大于 15%。
protected override void OnResize(EventArgs e)
{
    base.OnResize(e);
    if(m_initialized) {
        // update the camera's aspect ratio (so the image doesn't look distorted).
        if(Camera != null && AutoAspectRatio) {
            Camera.AspectRatio = (float)Width / Height;
        }

        // Check if the window has grown or shrunk by more than 15%.
        if(Width > m_currentSize.Width * 1.15 || Width < m_currentSize.Width * 0.85 ||
            Height > m_currentSize.Height * 1.15 ||
            Height < m_currentSize.Height * 0.85 ) {
            // we need to rebuild renderwindow
            // save current size and camera
            m_currentSize = Size;
            Camera camera = Camera;

            // destroy render window
            AxiomManager.Instance.Engine.DetachRenderTarget(m_window);
            m_window.Dispose();
            m_window = null;
            m_viewPort = null;
            m_initialized = false;

            // initialize window
            Init();

            // update camera
            Camera = camera;
        }

        m_window.Update();
    }
}
Test Form
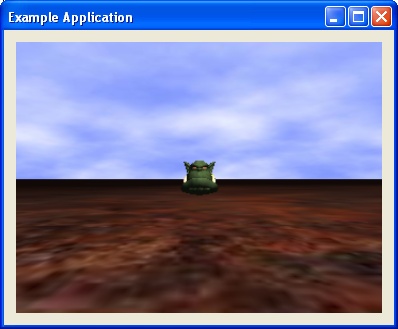
Test form 是应用程序的主窗口,其中包含一个 Axiom Window(尽管当然也可以包含更多)。大部分工作都发生在OnLoad中,该函数初始化 Axiom window,设置示例场景,最后启动渲染过程。请注意,场景代码直接来自 Axiom 的一个示例。
protected override void OnLoad(EventArgs e)
{
    base.OnLoad(e);
    try
    {
        // initialize window
        this.axiomWindow1.Init();

        scene = AxiomManager.Instance.Engine.SceneManagers.GetSceneManager(
            SceneType.Generic);

        // create a camera and initialize its position
        camera = scene.CreateCamera( "MainCamera" );
        camera.Position = new Vector3( 0, 0, 500 );
        camera.LookAt( new Vector3( 0, 0, -300 ) );

        // set the near clipping plane to be very close
        camera.Near = 5;

        // create a new viewport and set it's background color
        axiomWindow1.Camera = camera;

        // set default mipmap level
        TextureManager.Instance.DefaultNumMipMaps = 5;

        // call the overridden CreateScene method
        // set some ambient light
        scene.AmbientLight = new ColorEx( 1.0f, 0.2f, 0.2f, 0.2f );

        // create a skydome
        scene.SetSkyDome( true, "Examples/CloudySky", 5, 8 );

        // create a simple default point light
        Light light = scene.CreateLight( "MainLight" );
        light.Position = new Vector3( 20, 80, 50 );

        // create a plane for the plane mesh
        Plane plane = new Plane();
        plane.Normal = Vector3.UnitY;
        plane.D = 200;

        // create a plane mesh
        MeshManager.Instance.CreatePlane( "FloorPlane", plane, 200000, 200000, 20,
            20, true, 1, 50, 50, Vector3.UnitZ );

        // create an entity to reference this mesh
        Entity planeEntity = scene.CreateEntity( "Floor", "FloorPlane" );
        planeEntity.MaterialName = "Examples/RustySteel";
        scene.RootSceneNode.CreateChildSceneNode().AttachObject( planeEntity );

        // create an entity to have follow the path
        Entity ogreHead = scene.CreateEntity( "OgreHead", "ogrehead.mesh" );

        // create a scene node for the entity and attach the entity
        headNode = scene.RootSceneNode.CreateChildSceneNode( "OgreHeadNode",
            Vector3.Zero, Quaternion.Identity );
        headNode.AttachObject( ogreHead );

        // retrieve and initialize the input system
        axiomWindow1.InitInput(true, true, false, false);

        this.Show();

        // Start rendering
        AxiomManager.Instance.Engine.StartRendering();
    }
    catch ( System.Reflection.ReflectionTypeLoadException ex )
    {
        // This catches directx missing (or too old) to log :)
        for ( int i = 0; i < ex.LoaderExceptions.Length; i++ )
            if ( LogManager.Instance != null )
                LogManager.Instance.Write( ex.LoaderExceptions[ i ].Message );
    }
    catch ( Exception ex )
    {
        if ( LogManager.Instance != null )
            LogManager.Instance.Write( ex.ToString() );
    }
}
还有一些其他功能,但我将留给您去发现(让寻宝游戏开始吧!)。
用户挑战
- 通过添加持久化配置的能力并使用某种对话框对其进行编辑来改进配置支持。
- 添加输入事件处理程序。
- 实现一个“示例应用程序”窗体,该窗体提供与 Axiom 网站上的基础教程中的“示例应用程序”相同的接口。
- 创建一个更有趣的示例场景。
参考文献
历史
- 2007-12-08 首次发布