
使用 ATL 的完全可脚本化的 ActiveX Web 控件教程
4.61/5 (13投票s)
一篇关于使用 ATL 构建可脚本化 ActiveX 网页控件的文章。
引言
ActiveX 控件 是一个术语,用于表示基于 Microsoft 组件对象模型 (COM) 的可重用软件组件,它允许开发人员创建对象或控件,这些对象或控件可用于“激活”万维网上的内容。
我在网上阅读了大量资料,但没有找到一个完整的指南或示例,介绍我如何使用 ATL 和 VC++6.0 为 Web 构建 ActiveX 控件。我写这篇文章是因为我在网上任何地方都找不到关于这个过程的统一描述。我将向您展示一个包含必要内容的完整示例。希望这将帮助您了解如何使用 ATL 构建可脚本化 ActiveX 控件,并且您还将对 ActiveX 安全细节有一个清晰的认识。文章尽可能详细地撰写,但假设读者已经掌握了基本知识。
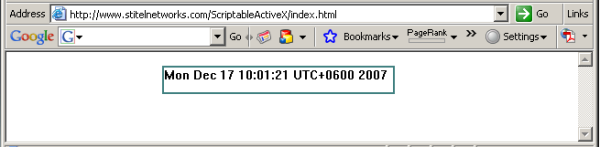
在本文中,我将尝试向您展示一个使用 ATL 构建可脚本化 ActiveX 网页控件的示例,该控件将在您的 Internet Explorer 中显示一个标签控件,其中包含当前日期和时间。此外,您还将看到一个使用 Microsoft VC++6.0 创建控件的循序渐进的指南,使其成为“网页安全”的控件。
安全性和保护
与 ActiveX 控件相关的安全顾虑主要源于 ActiveX 控件可以执行与普通应用程序几乎相同的所有操作。因此,既存在恶意软件也存在有用的 ActiveX 控件;因此,ActiveX 控件的威胁级别与作者的可信度有关。
然而,有一个著名的 ActiveX 控件安全顾虑的例子:Internet Explorer。Internet Explorer 能够在网页中运行 ActiveX 控件。这是一个福音,也是一个祸患。
ActiveX 控件,如 Adobe Reader、Adobe Flash Player、Apple QuickTime Player、Microsoft Windows Media Player、Real Networks RealPlayer 和 Sun Java Virtual Machine,每天都被全球的 Internet 冲浪者定期使用。
然而,打开一个包含有害 ActiveX 控件的网页,然后允许 Internet Explorer 运行该有害控件,就相当于在计算机上运行恶意软件。幸运的是,Internet Explorer 6 和 Windows Vista 已经采取措施降低了此类风险。
可脚本化 ActiveX 控件的要求
Microsoft 发布了一份文档,其中描述了有关脚本化 ActiveX 控件的组件对象安全性的所有方面。
在将您的控件注册为“脚本安全”之前,您必须确保您的控件不会执行任何在被脚本客户端使用时可能不安全的操作。不安全的操作包括暴露通常保持私密的信息(如密码和其他敏感信息)、执行文件以及进行危险的系统调用。
另一种对象安全顾虑涉及参数和属性与控件的结合使用。当与脚本客户端一起使用时,安全控件必须确保控件能够继续使用用户定义的任何可能的属性组合来运行。
设计一个可脚本化的 ActiveX 控件
可脚本化的 ActiveX 控件是指被构建成适合脚本客户端使用的控件。可脚本化控件被设计为在 Web 浏览器(如 Internet Explorer)中使用或被为 Windows Scripting Host (WSH) 编写的脚本使用时是安全的。可脚本化控件还支持通过脚本语言简化将参数传递给控件的机制。
默认情况下,ActiveX 控件不被视为对脚本客户端安全。如果您有一个可以被脚本客户端使用的 ActiveX 控件,采取一些简单的步骤就可以扩展您控件的可用性。如果您使用的是 ATL,这些更改通常只需要几分钟。
要使 ActiveX 控件可脚本化,必须满足以下要求:
- 在被任意脚本客户端执行时是安全的。
- 注册为“脚本安全”。
- 支持
IPersistPropertyBag接口。这在技术上不是必需的,但它简化了将参数传递给控件的任务。
创建可脚本化的 ActiveX 控件
要创建可脚本化的 ActiveX 控件,请使用 Microsoft Visual C++ 6.0 执行以下步骤:
- 文件 -> 新建 -> 项目。
- 在“新建项目”对话框中,如图 1 所示,选择“ATL COM 应用程序向导”。
- 将项目命名为 ScriptableActiveX;对于“位置”,输入项目的源代码的工作文件夹,然后单击“确定”按钮。
- 您将看到一个屏幕,如图 2 所示,其中提供了几个选项。第一个选项是“服务器类型”。我们将构建一个服务器 DLL,因此请确保“服务器类型”设置为“动态链接库”。
- 下面的其他三个复选框与我们当前的项目无关,因此可以忽略它们。单击“完成”按钮,让向导生成适当的文件。
- 将出现一个“新建项目信息”窗口,如图 3 所示,告知您将创建哪些文件。单击“确定”按钮以接受。


创建新的 ATL 对象
- 从“插入”菜单中,选择“新建 ATL 对象”菜单项。将出现“ATL 对象向导”窗口,如图 4 所示。
- 在向导的“类别”列表框中选择“控件”,然后选择“完整控件”作为控件类型。单击“下一步”开始将
ScriptableLabel控件添加到项目中。 - 将出现“ATL 对象向导属性”对话框,如图 5 所示,以便您可以定义控件的属性。对于完整的控件,例如
ScriptableLabel,对话框提供了四个选项卡。 - 所有组件类型都提供一个名称属性页,其中包含 ATL 组件的命名属性。您只需要为
ScriptableLabel填写“短名称”属性,其他字段将自动填写。 - 第二个选项卡,如图 6 所示,对于大多数组件类型是 `Attributes` 属性页,用于收集有关组件的信息。所有这些值都是默认选项,除了组件的“支持连接点”属性。连接点用于向控件的容器提供事件。
- 第三个选项卡,如图 7 所示,是“杂项”选项卡。它包含 ActiveX 控件特有的属性。
- 对话框中的最后一个选项卡,如图 8 所示,是“库存属性”。它包含一个可以由 ActiveX 控件实现的库存属性列表。
ScriptableLabel控件使用以下库存属性:- 背景颜色
- 标题
- 字体
- 前景色


选择此处列出的库存属性后,单击“确定”关闭对话框。ATL 新对象向导然后生成必要的代码并将其添加到您的项目中。
修改控件属性
默认的 OnCreate 处理程序将对 Windows CStatic 类的默认实例进行超类化。将以下窗口样式更改应用到 ScriptableLabel 控件的 OnCreate() 成员函数:
m_ctlStatic.Create( m_hWnd,
                    rc,
                    _T("Static"),
                    WS_CHILD|WM_PAINT);
检索环境属性
当控件最初加载时,它会从其容器收集当前的前景色、背景色和字体。收集环境属性的一个好时机是当控件和它的容器协商客户端站点时。将以下源代码添加到 ScriptableLabel.cpp 源文件中。此函数将覆盖 SetClientSite() 的基类实现,并存储这三个属性的环境值。
STDMETHODIMP CScriptableLabel::SetClientSite(LPOLECLIENTSITE pSite)
{
    HRESULT hr = CComControlBase::IOleObject_SetClientSite(pSite);
    if(!m_pFont && pSite)
    {
        hr = GetAmbientFontDisp(&m_pFont);
    }
    GetAmbientBackColor(m_clrBackColor);
    GetAmbientForeColor(m_clrForeColor);
    return hr;
}
将以下成员函数声明添加到 CScriptableLabel 类:
STDMETHOD(SetClientSite)(LPOLECLIENTSITE pSite);
绘制控件
OnDraw() 函数由 ATL 框架调用,传入一个结构,该结构包含在屏幕上实际绘制信息所需的各种信息。我们的实现并不比仅仅显示当前日期和时间复杂多少。将以下控件绘制代码添加到 ScriptableLabel.h 头文件中。
void DrawString( HDC hdc, RECT* rc, BSTR caption )
{
USES_CONVERSION;
TCHAR* pCaption = OLE2T(caption);
DrawText( hdc,
pCaption,
lstrlen( pCaption ),
rc,
DT_WORDBREAK );
}
HRESULT OnDraw(ATL_DRAWINFO& di)
{
RECT& rc = *(RECT*)di.prcBounds;
HDC hdc = di.hdcDraw;
COLORREF clrFore, clrBack;
OleTranslateColor(m_clrForeColor, NULL, &clrFore);
OleTranslateColor(m_clrBackColor, NULL, &clrBack);
SetTextColor(hdc, m_clrForeColor);
HBRUSH hbrBtn = CreateSolidBrush(m_clrBackColor);
FillRect(hdc, &rc, hbrBtn);
DrawString(hdc, &rc, m_bstrCaption);
DeleteObject(hbrBtn);
return 0;
}
Implementing IPersistPropertyBag
To simplify the use of ScriptableLabel in a scripting client, such as Internet Explorer, the control must support the
IPersistPropertyBag interface. The ATL class library includes a class, IPersistPropertyBagImpl, that provides a default implementation
of IPersistPropertyBag that is sufficient in most cases.
- Add the following line to your class derivation list:
public IPersistPropertyBagImpl<CScriptableLabel>
- Add the following lines to your COM_MAP:
COM_INTERFACE_ENTRY(IPersistPropertyBag)
Marking the control safe for scriptable clients
You can easily add support for marking the control safe for scriptable clients by implementing the IObjectSafety interface. This is done by deriving
your control from the default ATL implementation, IObjectSafetyImpl.
You can use two methods to mark a control as safe for scripting clients:
- Make appropriate entries directly in the System Registry.
- Implement the IObjectSafety interface.
- Add the following line to your class derivation list:
- The name of the class deriving from IObjectSafetyImpl.
- The type of safety to be applied to the control.
- INTERFACESAFE_FOR_UNTRUSTED_CALLER specifies that your control can be used safely by a scripting client and does not violate any of Microsoft's security or safety guidelines.
- INTERFACESAFE_FOR_UNTRUSTED_DATA specifies that your control will work (or at least degrade gracefully) in the presence of any possible set of paramaters.
- Add the following lines to your COM_MAP:
public IObjectSafetyImpl<CScriptableLabel,
                        INTERFACESAFE_FOR_UNTRUSTED_CALLER |
                        INTERFACESAFE_FOR_UNTRUSTED_DATA>
Two template arguments are passed to IObjectSafetyImpl:
COM_INTERFACE_ENTRY(IObjectSafety)
Compiling the scriptable ActiveX control
Compile the ScriptableActiveX project. The compiler will register your new DLL in the Registry so that other programs can make use of it. You can test the control in a variety of control containers, including Visual Basic and Visual C++. You will find lots of examples using Visual Basic and Visual C++. Better! we consider as web control. Because the ScriptableLabel control is scriptable, you can also use the control on an HTML page with Internet Explorer. Let's try it out.Building a signed ActiveX control
To use your control on web pages, it is very convenient to distribute it as a .cab (cabinet file). This is a compressed archive - the classic use is to put the .cab file on a web server, and refer to it from web pages that host the control. Internet Explorer is smart enough to download and install the control if it is not already installed on the client machine, and to selectively update any files that are newer in the .cab file. Microsoft provides CABARC.EXE for creating and editing .cab files.The contents of a CAB file
A CAB file contains at least two files in the archive: an ActiveX component file (.EXE, .DLL, or .OCX file), and an .INF file.- Component file (.EXE, .DLL, or .OCX): The type of ActiveX component you create determines the file extension of the file included here. All ActiveX controls have a .OCX extension. Other ActiveX components are either .EXEs or .DLLs. This file is your ActiveX component being installed.
- .INF: This is the information file that contains information about what other files your ActiveX component depends on (dependency files), where to get copies of those files, and how to install those files.
Creating a CAB file
This section describes creating CAB files for distributing ATL and MFC controls over the Internet. To create a CAB file:- Create an INF file.
- Run the CABARC utility.
1. Creating an INF file
The INF file is a text file that specifies the files (such as DLLs or other OCXs) that need to be present or downloaded for your control to run. An INF file allows you to bundle all the needed files in one compressed CAB file. By default, files with the same version numbers as existing files on the user's hard disk will not be downloaded. As an example, the following INF file will be used to create a CAB file for the ScriptableActiveX control.; Sample INF file for SCRIPTABLEACTIVEX.DLL
[version]
; version signature (same for both NT and Win95) do not remove
signature="$CHICAGO$"
AdvancedINF=2.0
[Add.Code]
ScriptableActiveX.dll=ScriptableActiveX.dll
ScriptableActiveX.inf=ScriptableActiveX.inf
[ScriptableActiveX.dll]
file-win32-x86=thiscab
clsid={B8748B60-E34D-42AA-9309-8012CA4964AC}
FileVersion=1,0,0,1
RegisterServer=yes
[ScriptableActiveX.inf]
file=thiscab
; end of INF file
clsid is the CLSID of the control to be installed.
2. Running the CABARC Utility
Once you have created an INF file, run the CABARC utility to create the CAB file. You should run CABARC in the directory that contains your source files. On the command line, put the source files in the order they appear in the INF and the INF file last. For example, to make a CAB file for the Polygon control from the INF above, use the following command:CABARC -s 6144 n ScriptableActiveX.cab ScriptableActiveX.dll ScriptableActiveX.inf
The -s option reserves space in the cabinet for code signing. The n command specifies that you want to create a CAB file.
Code signing tools
Microsoft provides code signing tools as part of the "Microsoft .NET Framework Software Development Kit (SDK) 1.1". To download the SDK, visit the following Microsoft website: .NET Framework SDK Version 1.1. After you install the SDK, you will be able to find the code signing files in the following location on your PC: "\Program Files\Microsoft.NET\SDK\v1.1\Bin". From the many files found in the above BIN directory, the following are of interest to us:- signcode.exe
- makecert.exe
- cert2spc.exe
- chktrust.exe
- signtool.exe
- makecert.exe
- cert2spc.exe
Signing a CAB file
Security is becoming increasingly important for software and media developers. "Code Signing" enables end users of your software to verify that the code you provide comes from the rightful source and that it has not been maliciously altered or accidentally corrupted. Code signing technology has been available for many years, but many software vendors refrained from using it because of the complexity involved in the process. However, since the release of "Windows XP Service Pack 2", code signing can not be ignored any more. With XP SP2, when downloading an unsigned program with Internet Explorer and choosing to open it (or even if saved to a file and later opened via Windows Explorer), the browser will display the "Security Warning" dialog. But when downloading a signed program, the browser does not result in annoying error messages complaining that it is an unsigned or unsafe control. You have two options to sign your code:- Option 1: Using a test certificate
- Option 2: Using a public certificate
Option 1: Using a test certificate
Before you start with the process, it is highly recommended that you create a "Test certificate" and use it to sign your program as a test run. A program signed by this certificate must not be distributed on the net. Use the following steps to sign and validate the .cab file:- Type the following at a command prompt to create a private key file, Mycert.pvk.
- Create a .spc file from the certificate file with the correct password. To do so, type the following line at a command prompt:
- Create a Personal Information Exchange file. This step is optional. You will need it only if you select to sign your code using SIGNTOOL.EXE as described above. The following command line may be used to create a "Personal Information Exchange" (PFX) file:
makecert -sv "mycert.pvk" -n "CN=My Company" mycert.cer
The file created in this step, Mycert.cer, is used to create a .spc file. Type the password in the dialog box.
cert2spc mycert.cer mycert.spc
Note that this step involves creation of a test private key. Alternatively, valid certificates can be created through a Microsoft Certificate Server
for Intranet use or purchased from external vendors for Internet use.
pvk2pfx -pvk mycert.pvk -pi Pass1 -spc mycert.spc -pfx mycert.pfx -po Pass2 -f
- Pass1: Provide the same password you used when creating the private and public keys.
- Pass2: Provide a new password to protect the PFX file.
Option-2: Using a public certificate
To be able to sign your code, you will need a certificate. Certificates are issued by special Internet organizations called CA (Certificate Authority). There are many such organizations, the most prominent ones are: verisign.com and tawthe.com. You can get a full list of CAs by going to: Microsoft Root Certificate Program Members. However, acquiring a certificate is quite a tedious and time consuming process. (The CA has to identify you or your organization before it can issue a certificate.) And you should expect to pay a few hundred of dollars for the certificate.Finishing touches
Now, use the key information to sign the .cab file:signcode -v mycert.pvk -spc mycert.spc ScriptableActiveX.cab -t [Timestamp server URL]
Or, the following commands may be used to sign your code using SIGNTOOL.EXE:
signtool sign /f mycert.pfx /p Pass2 /v ScriptableActiveX.cab /t [Timestamp server URL]
Pass2: Enter here the second password you used when creating the PFX file.
Note: Specify the timestamp server URL at this step. The timestamp server URL provides a place to enter or edit the location of a timestamp server.
A timestamp server validates the date and time that the cabinet file was signed. Certificate files can expire after a certain period of time.
Contact your certificate file provider (certificate authority) for the location of their timestamp server.
The URL of a time stamping service is provided for free by verisign.com: http://timestamp.verisign.com/scripts/timstamp.dll.
Validate a CAB file
Follow this procedure to validate a .cab file:Option-A: Using CHKTRUST
- Type the following at a command prompt to run SETREG.EXE on the client system with the TRUE value so that the test certificates are recognized:
- Run CHECKTRUST.EXE to ensure that the CAB file is signing correctly:
setreg -q 1 TRUE
chktrust ScriptableActiveX.cab
Expected results:
ScriptableActiveX.cab: Succeeded
Option-B: Using SIGNTOOL
Run SIGNTOOL.EXE to verify the signing:signtool verify /v /a ScriptableActiveX.cab
Expected results:
ScriptableActiveX.cab: Succeeded
Option-C: Using properties
You can also use the following method to verify your digital signature:- Open Explorer.
- Browse to the file you just signed.
- Right click the file name and select "Properties".
Embedding a signed CAB file on a web page
ATL and MFC controls are embedded in web pages using the <OBJECT> tag. Within the <OBJECT> tag, you need to specify three attributes for the control:<OBJECT classid=B8748B60-E34D-42AA-9309-8012CA4964AC
id=ScriptableLabelControl
CODEBASE ="ScriptableActiveX.cab#version=1,0,0,1">
</OBJECT>
The ID parameter refers to the name of the control. The CLASSID parameter refers to the CLSID of the control. And, the
CODEBASE parameter refers to the location from which to download the control. Note: that CODEBASE can point at a number of different file types successfully.
If you include the optional version number with a CAB file, the version number should refer to the control being downloaded.
For example, since ScriptableActiveX.dll has a version number of 1, 0, 0, 1, the version for the CAB is also 1, 0, 0, 1.
If you do not include the version number, older versions of the same control will not be replaced if they are found on the client machine.
Testing the Scriptable ActiveX Web Control
Adding controls by hand is not a simple process. The CLSID numbers are unwieldy to type, and it can be difficult to visualize the effects of the parameter settings on the control. To help with these difficulties, Microsoft created the ActiveX Control Pad, which can be obtained from their website at Microsoft ActiveX Control Pad. To test the Scriptable ActiveX Web Control with JavaScript, you may use ActiveX Control Pad to create one or you may find it easier to lay out your page in your preferred HTML editor as the following HTML code:<HTML>
<HEAD>
<TITLE>Scriptable ActiveX Web Control</TITLE>
<SCRIPT LANGUAGE="JavaScript">
function NotifyActiveX(e)
{
if ( e.readyState != 4 ) return;
window.setInterval("document.all.ScriptableLabelControl.caption=(new Date()).toString()",1000);
}
</SCRIPT>
<STYLE TYPE="text/css">
#ScriptableLabelControl {
width: 250px;
height: 27px;
padding: 10px;
border: thin solid #408080;
margin-left: 10em;
}
</STYLE>
</HEAD>
<BODY>
<OBJECT
ID="ScriptableLabelControl"
onReadyStateChange="NotifyActiveX(this)"
CLASSID="CLSID:B8748B60-E34D-42AA-9309-8012CA4964AC"
CODEBASE="ScriptableActiveX.cab">
</OBJECT>
</BODY>
</HTML>
Save this HTML code in your web server, and browse it!
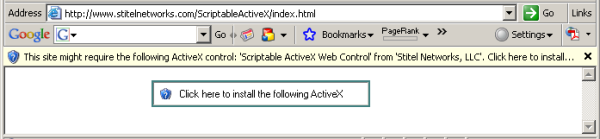
Internet Explorer will prompt the user before downloading and installing the ActiveX control. If Internet Explorer is attempting to install the Signed ActiveX control
automatically, it shows a prompt as shown in Figure 9.
- If you see a date and time but it isn't the right time, your PC's clock is set wrong! Double-click the time in the system tray to correct it.
- If you see a blank space, ActiveX is probably working properly, but not scripting.
- If you see the message ActiveX is not supported, then your browser doesn't recognize ActiveX at all. Netscape, Opera, or other browsers usually do not support ActiveX.
- When you think you've corrected any problem you are having with this, simply refresh the page [press F5] to try again.