
Fountain OpenGL应用程序演练
使用 OpenGL ES 1.1 创建一个基本的喷泉场景
引言
本教程将涵盖 OpenGL 应用程序的创建,包括以下主题:
- 角度计算
- 透视
- 摄像机对准
- 深度缓冲区
- 多通道渲染
- 动画
- 加速度计
- 触摸事件
- 持久化用户设置
该应用程序允许用户:
- 在场景中任意移动相机
- 旋转场景或相机
- 显示和隐藏场景中的对象
- 显示 FPS
- 更改摄像机对准方法
- 使用手机角度设置视角
该项目使用 Eclipse 和 Android SDK 构建。
背景
我创建此应用程序是为了练习学习 OpenGL。我在 Android 上找不到喷泉应用程序,所以我觉得这是一个很好的起点。大约 10% 的 Android 用户仍在使用 OpenGL ES 1.1,所以我用该版本编写了这个应用程序。
本教程假定您已经设置好了 Eclipse 环境。如果您是 Eclipse 和 Android 开发新手,我建议您先学习温度转换器教程,该教程可以在此处找到。
Using the Code
您可以通过遵循以下步骤来创建项目。如果您希望加载整个项目,请下载并解压项目文件,然后打开 Eclipse,选择 File->Import..->General->Existing Projects,然后选择 FountainGL 项目的根文件夹。
开始吧
启动 Eclipse(我使用的是 Eclipse Classic 版本 3.6.2)。
选择 File -> New -> Project -> Android -> Android Project

单击“下一步”。
填写字段,如下图所示。您可以使用 Android 2.1 或更高版本的任何版本。

单击“完成”。
项目创建后,将此图标添加到 AutoRing\res\drawable-hdpi 文件夹。您可以直接将其拖到 Eclipse 中的文件夹,也可以使用 Windows 资源管理器。覆盖该文件夹中已有的文件。
![]() icon.png
icon.png
如果您没有使用高分辨率设备(您可能正在使用),也可以将图标复制到 drawable-mdpi 和 drawable-ldpi 文件夹。
右键单击 FountainGL 项目,选择 New->Class。

输入名称、包和父类,如下图所示。还请勾选指示的两个复选框(尽管我们将覆盖这些方法存根)。

单击“完成”。
编写 FountainGLRenderer 类
此类将包含我们应用程序的大部分代码。
打开 FountainGLRenderer.java。

删除该文件中的所有现有代码。
添加我们的应用程序所需的包名和导入。
package droid.fgl;

import java.nio.ByteBuffer;
import java.nio.ByteOrder;
import java.nio.FloatBuffer;

import javax.microedition.khronos.egl.EGLConfig;
import javax.microedition.khronos.opengles.GL10;
import javax.microedition.khronos.opengles.GL11;

import android.app.Activity;
import android.content.Context;
import android.content.res.Configuration;
import android.hardware.Sensor;
import android.hardware.SensorEvent;
import android.hardware.SensorEventListener;
import android.hardware.SensorManager;
import android.opengl.GLSurfaceView;
import android.opengl.GLSurfaceView.Renderer;
import android.opengl.GLU;
import android.os.Handler;
import android.os.SystemClock;
import android.view.MotionEvent;
import android.widget.FrameLayout;
import android.widget.TextView;
创建 FountainGLRenderer 类。我们的类将实现 Renderer,因此我们可以将渲染代码和 OpenGL 回调合并到一个类中。
//extend GLSurfaceView and implement Renderer to keep all code in single class
public class FountainGLRenderer extends GLSurfaceView implements Renderer
{
添加喷泉和球体动画所需的变量。elapsedRealtime() 返回自系统启动以来的毫秒数。
private static float mAngCtr = 0; //for animation
long mLastTime = SystemClock.elapsedRealtime();
添加处理触摸/拖动事件所需的变量。
//for touch event - dragging
float mDragStartX = -1;
float mDragStartY = -1;
float mDownX = -1;
float mDownY = -1;
添加用于存储相机角度和位置的变量。我们在初始值上加 .0001,因为精确的右(或 0)角度可能导致除以零错误。我们可以在每次计算时检查 0,但这更简单。
//we add the .0001 to avoid divide by 0 errors
//starting camera angles
static float mCamXang = 0.0001f;
static float mCamYang = 180.0001f;
//starting camera position
static float mCamXpos = 0.0001f;
static float mCamYpos = 60.0001f;
static float mCamZpos = 180.0001f;
添加用于设置相机视图方向的变量。
//distance from camera to view target
float mViewRad = 100;
//target values will get set in constructor
static float mTargetY = 0;
static float mTargetX = 0;
static float mTargetZ = 0;
添加用于设置场景旋转角度的变量。
//scene angles will get set in constructor
static float mSceneXAng = 0.0001f;
static float mSceneYAng = 0.0001f;
添加用于存储屏幕信息的变量。
float mScrHeight = 0; //screen height
float mScrWidth  = 0; //screen width
float mScrRatio  = 0; //width/height
float mClipStart = 1; //start of clip region
添加用于角度转换的常量。
final double mDeg2Rad = Math.PI / 180.0; //Degrees To Radians
final double mRad2Deg = 180.0 / Math.PI; //Radians To Degrees
添加 mResetMatrix 标志。每当相机向前或向后移动时,都会设置此标志,以便我们可以更新剪裁区域。onSurfaceChanged 会执行实际的更新。
boolean mResetMatrix = false; //set to true when camera moves
添加用于 FPS(每秒帧数)计算和显示的变量。请注意,TextView 也可用于显示调试信息。
int[] mFrameTime = new int[20]; 		//frames used for avg fps
int mFramePos = 0; 			//current fps frame position
long mStartTime = SystemClock.elapsedRealtime(); //for fps
int mFPSDispCtr = 0; 			//fps display interval
float mFPS = 0; 				//actual fps value

TextView mTxtMsg = null; 			//for displaying FPS
final FountainGLRenderer mTagStore = this; 	//for SetTextMessage
Handler mThreadHandler = new Handler(); 	//used in SetTextMessage
添加对象索引常量和缓冲区长度数组。我们将顶点数组存储在 GPU 内存中,读取时需要索引和长度。我们不能使用 0 作为索引,因为它已被 OpenGL 保留。
//constants for scene objects in GPU buffer
final int mFLOOR = 1;
final int mBALL  = 2;
final int mPOOL  = 3;
final int mWALL  = 4;
final int mDROP  = 5;
final int mSPLASH = 6;

//need to store length of each vertex buffer
int[] mBufferLen = new int[] {0,0,0,0,0,0,0}; //0/Floor/Ball/Pool/Wall/Drop/Splash
添加用于对象创建的参数。这些参数已针对我的 Hauwei Ideos 进行了优化。mBallHSliceCnt 必须是偶数,因为我们将球体渲染为两半。
//ball parameters
int mBallRad = 10; //radius
int mBallVSliceCnt = 32; //slices vertically - latitude line count
int mBallHSliceCnt = 32;  //slices horizontally - longitude line count - must be even

//fountain parameters
int mStreamCnt = 10; //should divide evenly into 360
int mDropsPerStream = 30; //should divide evenly into 180
int mRepeatLen = 180/mDropsPerStream; //distance loop for drop
float mArcRad = 30; //stream arc radius
//for storing drop positions //3 floats per vertex [x/y/z]
float[][] dropCoords = new float[mStreamCnt*mDropsPerStream][3];

//pool parameters
int mPoolSliceCnt = mStreamCnt; //side count
float mPoolRad = 57f; //radius
添加用于存储加速度计值的变量。加速度计可用于设置相机视角。mOrientation 存储当前的手机方向。
//accelerometer value set by activity
public float AccelZ = 0;
public float AccelY = 0;
int mOrientation = 0; //portrait\landscape
添加用于存储用户选项的变量。
//options menu defaults
public boolean ShowBall = true;
public boolean ShowFloor = true;
public boolean ShowFountain = true;
public boolean ShowPool = true;
public boolean RotateScene = true;
public boolean UseTiltAngle = false;
public boolean MultiBillboard = true;
public boolean ShowFPS = true;
public boolean Paused = false;
添加 FountainGLRenderer 的构造函数。将 activity 传递进来,以便我们可以修改布局并添加一个 TextView 用于显示 fps。setRenderer() 告诉 OpenGl 该类将执行渲染并初始化表面。我们还创建了加速度计的监听器,以便可以根据手机倾斜度调整视角。请注意,加速度计返回的 X\Y 值与方向无关,因此我们需要选择要使用的传感器。
FountainGLRenderer(Activity pActivity)
{
	super(pActivity);

	//use FrameLayout so we can put a TextView on top of the openGL screen
	FrameLayout layout = new FrameLayout(pActivity);

	//create view for text message (fps)
	mTxtMsg = new TextView(layout.getContext());
	mTxtMsg.setBackgroundColor(0x00FFFFFF); //transparent
	mTxtMsg.setTextColor(0xFF777777); //gray

	layout.addView(this); //add openGL surface
	layout.addView(mTxtMsg); //add text view
	pActivity.setContentView(layout);
	setRenderer(this); //initialize surface view

	//create listener for accelerometer sensor
	((SensorManager)pActivity.getSystemService
		(Context.SENSOR_SERVICE)).registerListener(
		new SensorEventListener() {
			@Override
			public void onSensorChanged(SensorEvent event) {
				//accelerometer does not change orientation
				//so need to switch sensors
				if (mOrientation ==
				Configuration.ORIENTATION_PORTRAIT)
					AccelY = event.values[1]; //use Y sensor
				else
					AccelY = event.values[0]; //use X sensor
				AccelZ = event.values[2]; //Z
			}
			@Override
			public void onAccuracyChanged
				(Sensor sensor, int accuracy) {} //ignore this event
		},
		((SensorManager)pActivity.getSystemService(Context.SENSOR_SERVICE))
		.getSensorList(Sensor.TYPE_ACCELEROMETER).get(0),
				SensorManager.SENSOR_DELAY_NORMAL);
}
添加 onSurfaceCreated 回调。这仅在表面首次创建时调用一次。我们设置背景颜色并为我们的对象创建顶点数组。
//called once
@Override
public void onSurfaceCreated(GL10 gl1, EGLConfig pConfig)
{
	GL11 gl = (GL11)gl1; //we need 1.1 functionality
	//set background frame color
	gl.glClearColor(0f, 0f, 0f, 1.0f); //black
	//generate vertex arrays for scene objects
	BuildFloor(gl);
	BuildBall(gl);
	BuildPool(gl);
	BuildWall(gl);
	BuildDrop(gl);
	BuildSplash(gl);
}
添加 BuildFloor 方法。此方法生成构成地板的三角形的顶点。地板是一个 7x7 网格与一个 6x6 网格合并。为了创建棋盘格图案,我们只绘制交替的方块。其他方块是空的。创建顶点数组后,将其存储在 GPU 内存中。

void BuildFloor(GL11 gl)
{
	//7*7+6*6 = 85 quads = 170 triangles = 510 vertices = 1530 floats[x/y/z]
	int sqrSize = 20;
	float vtx[] = new float[1530];
	int vtxCtr = 0;
	//we use the offset to produce the checkered pattern
	for (int x=-130, offset=0; x<130; x+=sqrSize, offset=sqrSize-offset)
	{
		for (int y=-130+offset; y<130; y+=(sqrSize*2))
		{
			//each square is 2 triangles = 6 vertices = 18 floats [x/y/z]
			vtx[vtxCtr]    = x;
			vtx[vtxCtr+ 1] =-2; //floor is 2 points below 0
			vtx[vtxCtr+ 2] = y;
			vtx[vtxCtr+ 3] = x+sqrSize;
			vtx[vtxCtr+ 4] =-2;
			vtx[vtxCtr+ 5] = y;
			vtx[vtxCtr+ 6] = x;
			vtx[vtxCtr+ 7] =-2;
			vtx[vtxCtr+ 8] = y+sqrSize;
			vtx[vtxCtr+ 9] = x+sqrSize;
			vtx[vtxCtr+10] =-2;
			vtx[vtxCtr+11] = y;
			vtx[vtxCtr+12] = x;
			vtx[vtxCtr+13] =-2;
			vtx[vtxCtr+14] = y+sqrSize;
			vtx[vtxCtr+15] = x+sqrSize;
			vtx[vtxCtr+16] =-2;
			vtx[vtxCtr+17] = y+sqrSize;
			vtxCtr+=18;
		}
	}

	StoreVertexData(gl, vtx, mFLOOR); //store in GPU buffer
}
添加 BuildBall 方法。球体被创建为一个网格(经度/纬度)。该方法上半部分计算球体中的所有顶点。下半部分安排顶点以生成三角形(每个四边形是 2 个三角形)。我们只为交替的四边形生成顶点。绘制球体时,我们将渲染相同的顶点两次,中间旋转球体并更改颜色。请注意,顶部和底部行被创建为四边形(4 个角),尽管它们被渲染为三角形(3 个角)。这是因为顶部行中的每个四边形都具有相同的顶部顶点。OpenGL 会忽略没有面积的三角形,因此性能不是问题。 |
 |
void BuildBall(GL11 gl)
{
	//need to add 1 to include last vertex
	float x[][] = new float[mBallVSliceCnt+1][mBallHSliceCnt+1];
	float y[][] = new float[mBallVSliceCnt+1][mBallHSliceCnt+1];
	float z[][] = new float[mBallVSliceCnt+1][mBallHSliceCnt+1];

	//create grid of vertices as if sphere was laid flat
	//start at top, go down by slice (180 degrees top to bottom)
	for (int vCtr = 0; vCtr <= mBallVSliceCnt; vCtr++)
	{
		double vAng = 180.0 / mBallVSliceCnt * vCtr;
		float sliceRad = (float) (mBallRad * Math.sin(vAng * mDeg2Rad));
		float sliceY = (float) (mBallRad * Math.cos(vAng * mDeg2Rad));
		float vertexY = sliceY;
		float vertexX = 0;
		float vertexZ = 0;
		//go around entire sphere, 360 degrees
		for (int hCtr = 0; hCtr <= mBallHSliceCnt; hCtr++)
		{
			double hAng = 360.0 / mBallHSliceCnt * hCtr;
			vertexX = (float) (sliceRad * Math.sin(hAng * mDeg2Rad));
			vertexZ = (float) (sliceRad * Math.cos(hAng * mDeg2Rad));
			y[vCtr][hCtr]=vertexY+60;
			x[vCtr][hCtr]=vertexX;
			z[vCtr][hCtr]=vertexZ;
		}
	}
	int hCnt = x[0].length;
	int vCnt = x.length;;

	//calculate triangle vertices for each quad
	//colors are drawn separately, only create vertices for one color
	//16*8 = 128 quads = 256 triangles = 768 vertices = 2304 floats [x/y/z]
	float vtx[] = new float[mBallVSliceCnt*mBallHSliceCnt/2*2*3*3];
	int vtxCtr = 0;
	for (int vCtr = 1; vCtr < vCnt; vCtr++)
		//use %2 to create checker pattern, hCtr+=2 to skip quads
		for (int hCtr = 1+vCtr%2; hCtr < hCnt; hCtr += 2)
		{
			vtx[vtxCtr]    = x[vCtr-1][hCtr-1];
			vtx[vtxCtr+ 1] = y[vCtr-1][hCtr-1];
			vtx[vtxCtr+ 2] = z[vCtr-1][hCtr-1];
			vtx[vtxCtr+ 3] = x[vCtr][hCtr-1];
			vtx[vtxCtr+ 4] = y[vCtr][hCtr-1];
			vtx[vtxCtr+ 5] = z[vCtr][hCtr-1];
			vtx[vtxCtr+ 6] = x[vCtr-1][hCtr];
			vtx[vtxCtr+ 7] = y[vCtr-1][hCtr];
			vtx[vtxCtr+ 8] = z[vCtr-1][hCtr];
			vtx[vtxCtr+ 9] = x[vCtr][hCtr-1];
			vtx[vtxCtr+10] = y[vCtr][hCtr-1];
			vtx[vtxCtr+11] = z[vCtr][hCtr-1];
			vtx[vtxCtr+12] = x[vCtr-1][hCtr];
			vtx[vtxCtr+13] = y[vCtr-1][hCtr];
			vtx[vtxCtr+14] = z[vCtr-1][hCtr];
			vtx[vtxCtr+15] = x[vCtr][hCtr];
			vtx[vtxCtr+16] = y[vCtr][hCtr];
			vtx[vtxCtr+17] = z[vCtr][hCtr];
			vtxCtr+=18;
		}

	StoreVertexData(gl, vtx, mBALL); //store in GPU buffer
}
添加 BuildPool 方法。此方法将水创建为三角形扇形,其中每个三角形都有一个共同的中心顶点。
void BuildPool(GL11 gl)
{
	//center+10+end vertices = 12 vertices = 36 floats[x/y/z]
	float vtx[] = new float[(mPoolSliceCnt+2)*3];
	int vtxCtr = 0;
	//center vertex
	vtx[vtxCtr]   = 0;
	vtx[vtxCtr+1] = 4f; //6 points above floor
	vtx[vtxCtr+2] = 0;
	for (float fAngY = 0;fAngY <= 360;fAngY += 360/mPoolSliceCnt)
	{
		//vertices that create triangle fan, first vertex is repeated (0=360)
		vtxCtr+=3;
		vtx[vtxCtr] = mPoolRad*(float)Math.sin(fAngY*mDeg2Rad); //X
		vtx[vtxCtr+1] = 4f; //Y
		vtx[vtxCtr+2] = mPoolRad*(float)Math.cos(fAngY*mDeg2Rad); //Z
	}

	StoreVertexData(gl, vtx, mPOOL); //store in GPU buffer
}
添加 BuildWall 方法。此方法将水池壁创建为三角形带,其中每个三角形与相邻的三角形共享一边。请注意,半径比水池大 2 个点,以防止 Z 轴冲突(三角形重叠)。我们将在本教程稍后讨论 Z 轴冲突。
void BuildWall(GL11 gl)
{
	int wallSliceCnt = mPoolSliceCnt; //divides nicely into 360
	float wallRad = mPoolRad+2; //2 points larger than water to prevent Z-fight
	//wall is a triangle strip
	//defines start line then each square has 2 vertices
	//startline+10 squares = 22 vertices = 66 floats[x/y/z]
	float vtx[] = new float[(wallSliceCnt+1)*2*3];
	int vtxCtr = 0;
	//start line (left side of first square)
	//bottom vertex
	vtx[vtxCtr]   = 0;
	vtx[vtxCtr+1] = -1; //bottom of wall is below 0
	vtx[vtxCtr+2] = wallRad;
	//top vertex
	vtxCtr+=3;
	vtx[vtxCtr]   = 0;
	vtx[vtxCtr+1] = 9; //wall is 10 units high
	vtx[vtxCtr+2] = wallRad;
	//rotate around fountain center
	for (float ftnAngY = 360/wallSliceCnt;
		ftnAngY <= 360; ftnAngY += 360/wallSliceCnt)
	{
		//right side of each square (left side is from previous square)
		//bottom vertex
		vtxCtr+=3;
		vtx[vtxCtr] = wallRad*(float)Math.sin(ftnAngY*mDeg2Rad); //X
		vtx[vtxCtr+1] = -1; //Y
		vtx[vtxCtr+2] = wallRad*(float)Math.cos(ftnAngY*mDeg2Rad); //Z
		//top vertex
		vtxCtr+=3;
		vtx[vtxCtr] = wallRad*(float)Math.sin(ftnAngY*mDeg2Rad); //X
		vtx[vtxCtr+1] = 9; //Y
		vtx[vtxCtr+2] = wallRad*(float)Math.cos(ftnAngY*mDeg2Rad); //Z
	}

	StoreVertexData(gl, vtx, mWALL); //store in GPU buffer
}
添加 BuildDrop 方法。此方法创建喷泉中单个水滴的顶点。每个水滴都具有相同的坐标。绘制喷泉时,我们使用 glTranslate 和 glRotate 来调整每个水滴的位置/角度。
void BuildDrop(GL11 gl)
{
	//every drop has the same coordinates
	//we glRotate and glTranslate when drawing
	float vtx[] = {
		// X,  Y, Z
		  0f, 0f, 0,
		 -1f,-1f, 0,
		  1f,-1f, 0
		};

	StoreVertexData(gl, vtx, mDROP); //store in GPU buffer
}
添加 BuildSplash 方法。此方法创建所有飞溅三角形的顶点。单个飞溅只是围绕水滴落入水中点的三角形环。飞溅三角形永远不会移动,但在绘制时会在水池中按比例放大。我们将在本教程稍后讨论。
void BuildSplash(GL11 gl)
{
	//splashes never move
	//all splash triangles stored together
	int triCnt = 6; //must divide into 180
	int vtxCnt = mStreamCnt*9*triCnt;
	float[] vtx = new float[vtxCnt];
	int vtxCtr = 0;
	//for each stream
	for (float ftnAngY = 0;ftnAngY < 360;ftnAngY += 360/mStreamCnt)
	{
		//get coordinates of fountain drop (end of stream)
		float dropX = mArcRad*1.5f*(float)Math.sin(ftnAngY*mDeg2Rad);
		float dropZ = mArcRad*1.5f*(float)Math.cos(ftnAngY*mDeg2Rad);
		float mid = 0; //toggle for edge\middle vertex
		int triCtr = 0;
		//get angle for triangle edges and centers
		for (float sAngY = 0;sAngY < 360;sAngY += 360/(2*triCnt))
		{
			float realAngY = sAngY+ftnAngY; //shift angle to match stream angle
			//middle vertex have larger radius then edge vertices
			//use mid to toggle radius length
			float sX = (float)Math.sin(realAngY*mDeg2Rad)*(1+2*mid)+dropX;
			float sZ = (float)Math.cos(realAngY*mDeg2Rad)*(1+2*mid)+dropZ;

			vtx[vtxCtr] = sX;
			vtx[vtxCtr+1] = 0+mid*3; //Y, middle vertex is higher then edges
			vtx[vtxCtr+2] = sZ;

			if (mid%2==0) //edge vertex
			{
				if (triCtr == 0) //first triangle for this drop
				{  //connect to last triangle in loop
					vtx[vtxCtr+triCnt*9-3] = sX;
					vtx[vtxCtr+triCnt*9-2] = 0; //Y
					vtx[vtxCtr+triCnt*9-1] = sZ;
				}
				else //next triangle shares a corner
				{
					vtx[vtxCtr+3] = sX;
					vtx[vtxCtr+4] = 0; //Y
					vtx[vtxCtr+5] = sZ;
					vtxCtr+=3; //we set 2 corners, so skip ahead
				}
				triCtr++; //keep track of which triangle we're creating
			}
			else
				if (triCtr == triCnt) vtxCtr+=3; //for loop skips last vtx
			vtxCtr+=3; //next corner
			mid = 1-mid; //toggle
		}
	}

	StoreVertexData(gl, vtx, mSPLASH); //store in GPU buffer
}
添加 StoreVertexData 方法。此方法将每个对象的顶点数据存储在 GPU 内存中。使用 GPU 内存可以极大地提高性能,因为我们无需每次渲染场景时都将顶点数据传递给 GPU。顶点数据使用对象索引存储在内存中。渲染对象时,我们将使用相同的索引。我们还存储缓冲区长度,检索数据时需要该长度。GL_STATIC_DRAW 表示顶点不会被更改。
void StoreVertexData(GL11 gl, float[] pVertices, int pObjectNum)
{
	FloatBuffer buffer = ByteBuffer.allocateDirect
			(pVertices.length * 4) //float is 4 bytes
	 .order(ByteOrder.nativeOrder())// use the device hardware's native byte order
	 .asFloatBuffer()  // create a floating point buffer from the ByteBuffer
	 .put(pVertices);    // add the coordinates to the FloatBuffer

	(gl).glBindBuffer(GL11.GL_ARRAY_BUFFER, pObjectNum); //bind as current object
	buffer.position(0); //reset buffer position to buffer start
	//allocate memory and write buffer data
	(gl).glBufferData(GL11.GL_ARRAY_BUFFER,
		buffer.capacity()*4, buffer, GL11.GL_STATIC_DRAW);
	(gl).glBindBuffer(GL11.GL_ARRAY_BUFFER, 0); //unbind from buffer
	mBufferLen[pObjectNum] = buffer.capacity()/3; //store for retrieval
}
添加 onSurfaceCreated 回调。这在 onSurfaceCreated 之后以及每次手机方向更改时调用。我们初始化视口和投影矩阵。glLoadIdentity() 会清除我们设置的任何变换或旋转。我们计算相机与场景中心之间的距离,以便设置剪裁区域。glFrustumf(稍后讨论)设置投影视图的参数。然后,我们启用深度测试,以便前景对象绘制在背景对象之上。我们将 ModelView 添加到矩阵堆栈,以便可以使用标准笛卡尔坐标绘制对象。最后,我们用当前手机方向设置 mOrientation。
//this is called when the user changes phone orientation (portrait\landscape)
@Override
public void onSurfaceChanged(GL10 gl, int pWidth, int pHeight)
{
	gl.glViewport(0, 0, pWidth, pHeight); //the viewport is the screen
	// make adjustments for screen ratio, default would be stretched square
	mScrHeight = pHeight;
	mScrWidth = pWidth;
	mScrRatio = mScrWidth/mScrHeight;

	//set to projection mode to set up Frustum
	gl.glMatrixMode(GL11.GL_PROJECTION);	// set matrix to projection mode
	gl.glLoadIdentity();	// reset the matrix to its default state
	//calculate the clip region to minimize the depth buffer range (more precise)
	float camDist = (float)Math.sqrt(mCamXpos*mCamXpos+mCamYpos*
			mCamYpos+mCamZpos*mCamZpos);
	mClipStart = Math.max(2, camDist-185); 	//max scene radius is 185 points
						//at corners
	//set up the perspective pyramid and clip points
	gl.glFrustumf(
		-mScrRatio*.5f*mClipStart,
		mScrRatio*.5f*mClipStart,
		-1f*.5f*mClipStart,
		1f*.5f*mClipStart,
		mClipStart,
		mClipStart+185+Math.min(185, camDist));

	//foreground objects are bigger and hide background objects
	gl.glEnable(GL11.GL_DEPTH_TEST);

	//set to ModelView mode to set up objects
	gl.glMatrixMode(GL11.GL_MODELVIEW);
	mOrientation = getResources().getConfiguration().orientation;
}
开始 onDrawFrame 回调。我们在这里渲染场景。OpenGL 系统会持续调用此方法。OpenGL 假定存在持续的动画,需要持续更新屏幕。可以通过调用 setRenderMode(RENDERMODE_WHEN_DIRTY) 然后调用 requestRender() 来渲染场景来关闭持续渲染。
我们将 gl1 参数强制转换为 OpenGL 1.1,以便获得额外的 1.1 功能。如果设备不支持 1.1,此强制转换将失败。根据 Android 网站,所有 Android 设备现在都支持 OpenGL ES 1.1。
//this is called continuously
@Override
public void onDrawFrame(GL10 gl1)
{
	GL11 gl = (GL11)gl1; //we need 1.1 functionality
添加标志检查,以防用户移动了相机。如果相机距离发生变化,我们需要更新剪裁区域,使其与场景对齐。onSurfaceChanged 会执行实际的更新。
if (mResetMatrix) //camera distance changed
{
	//recalc projection matrix and clip region
	onSurfaceChanged(gl, (int)mScrWidth, (int)mScrHeight);
	mResetMatrix = false;
}
添加代码以清除颜色和深度缓冲区并重置矩阵。颜色和深度缓冲区为每个帧重新计算。
//reset color and depth buffer
gl.glClear(GL11.GL_COLOR_BUFFER_BIT | GL11.GL_DEPTH_BUFFER_BIT);
gl.glLoadIdentity();   //reset the matrix to its default state
添加代码以计算基于手机倾斜度的 X 轴角度。我们将在本教程的后面讨论角度计算。AccelY 和 AccelZ 在构造函数中创建的传感器监听器中设置。请注意,我们不允许角度超过 90 度,因为场景会颠倒。
if (UseTiltAngle) //use phone tilt to determine X axis angle
{
	//float hyp = (float)Math.sqrt(AccelY*AccelY+AccelZ*AccelZ);
	if (RotateScene) //rotate camera around 0,0,0
	{
		//calculate new X angle
		float HypLen = (float)Math.sqrt
			(mCamXpos*mCamXpos+mCamZpos*mCamZpos); //across floor
		mSceneXAng = 90-(float)Math.atan2(AccelY,AccelZ)*(float)mRad2Deg;
		// stop at 90 degrees or scene will go upside down
		if (mSceneXAng > 89.9) mSceneXAng = 89.9f;
		if (mSceneXAng < -89.9) mSceneXAng = -89.9f;

		float HypZLen = (float)Math.sqrt(mCamXpos*mCamXpos+
				mCamYpos*mCamYpos+mCamZpos*mCamZpos); //across floor
		//HypZLen stays same with new angle
		//move camera to match angle
		mCamYpos = HypZLen*(float)Math.sin(mSceneXAng*mDeg2Rad);
		float HypLenNew = HypZLen*
				(float)Math.cos(mSceneXAng*mDeg2Rad); //across floor
		mCamZpos *= HypLenNew/HypLen;
		mCamXpos *= HypLenNew/HypLen;
	}
	else //rotate camera
	{
		mCamXang = (float)Math.atan2(AccelY,AccelZ)*(float)mRad2Deg - 90;
		//don't let scene go upside down
		if (mCamXang > 89.9) mCamXang = 89.9f;
		if (mCamXang < -89.9) mCamXang = -89.9f;
		ChangeCameraAngle(0, 0); //set target position
	}
}
添加 gluLookAt 调用。这会告诉 OpenGL 系统相机的位置及其观察方向。目标变量的实际值无关紧要;只有从相机发出的方向才重要(如果相机在 0,0,0 处,则目标 1,2,3 的结果与目标 2,4,6 相同)。100 值用于设置向上向量。在我们的场景中,正 Y 轴是向上的,所以我们将 Y 设置为 100。它可以是任何正数。
//gluLookAt tells openGL the camera position and view direction (target)
//target is 0,0,0 for scene rotate
//Y is up vector, so we set it to 100 (can be any positive number)
GLU.gluLookAt(gl, mCamXpos, mCamYpos, mCamZpos, mTargetX, mTargetY,
		mTargetZ, 0f, 100.0f, 0.0f);
添加代码以计算自上一帧渲染以来经过的时间。mAngCtr 基于时间变化设置。我们这样做是因为某些帧比其他帧花费的时间长,并且我们希望维持平滑的动画。较大的时间间隔会导致较大的角度跳跃,从而使动画赶上。如果动画暂停,我们会跳过角度更改。请注意,即使在暂停时,onDrawFrame 仍在持续调用。
//use clock to adjust animation angle for smoother motion
//if frame takes longer, angle is greater and we catch up
long now = SystemClock.elapsedRealtime();
long diff = now - mLastTime;
mLastTime = now;

//if paused, animation angle does not change
if (!Paused)
{
	mAngCtr += diff/100.0;
	if (mAngCtr > 360) mAngCtr -= 360;
}
调用 DrawSceneObjects。这是我们场景中的所有对象绘制到屏幕的地方。
DrawSceneObjects(gl);
通过添加计算和显示 FPS(每秒帧数)的代码来完成 onDrawFrame 方法。mFrameTime 数组存储过去 20 帧的帧时间。为了获得平均帧时间,我们只需获取当前帧与 20 帧之前的帧之间的时间,然后除以 20。FPS 显示每 10 帧更新一次。我们将在稍后详细讨论此计算。
if (ShowFPS) //average fps across last 20 frames
{
	//elapsedRealtime() returns milliseconds since phone boot
	int thisFrameTime = (int)(SystemClock.elapsedRealtime()-mStartTime);
	//mFrameTime array stores times for last 20 frames
	mFPS = (mFrameTime.length)*1000f/(thisFrameTime-mFrameTime[mFramePos]);
	mFrameTime[mFramePos] = (int)(SystemClock.elapsedRealtime()-mStartTime);
	if (mFramePos < mFrameTime.length-1) //move pointer
		mFramePos++;
	else //end of array, jump to start
		mFramePos=0;
	if (++mFPSDispCtr == 10) //update fps display every 10 frames
	{
		mFPSDispCtr=0;
		SetStatusMsg(Math.round(mFPS*100)/100f+" fps"); //2 decimal places
	}
}
}
添加 DrawSceneObjects 方法。此处绘制所有场景对象。对于每个对象(喷泉除外),我们设置颜色,然后调用 DrawObject 来渲染对象的顶点。对于球体,我们使用 mAngCtr 来设置当前的旋转角度。我们只存储了半个球体的顶点,所以我们旋转球体一个切片,然后用不同的颜色重新渲染相同的顶点。对于飞溅,飞溅三角形是在 Y=0 处创建的。我们想在 Y=0 处进行缩放,然后将缩放后的飞溅移动到表面。这里操作的顺序似乎是错误的(先移动后缩放),但似乎 OpenGL 会以相反的顺序执行某些操作。mRepeatLen 用于使飞溅与水滴运动同步。飞溅三角形不使用摄像机对准,因为它们环绕水滴。只有当喷泉和水池显示时,飞溅才会显示。
void DrawSceneObjects(GL11 gl)
	{
		if (ShowBall)
		{
			//draw first color
			gl.glPushMatrix();
			gl.glColor4f(.5f, .5f, .5f, 1); //gray
			gl.glRotatef(mAngCtr, 0.0f, 1.0f, 0f);
			DrawObject(gl, GL11.GL_TRIANGLES, mBALL);
			gl.glPopMatrix();

			//rotate by one slice and draw second color
			gl.glPushMatrix();
			gl.glColor4f(0.7f, 1f, 0.7f, 1f); //light green
			gl.glRotatef(mAngCtr+360f/mBallHSliceCnt, 0.0f, 1.0f, 0f);
			DrawObject(gl, GL11.GL_TRIANGLES, mBALL);
			gl.glPopMatrix();
		}

		if (ShowFountain)
			DrawFountain(gl);

		if (ShowPool) //pool and wall
		{
			gl.glColor4f(0.2f, 0.0f, 0.0f, 1f); //dark red
			DrawObject(gl, GL11.GL_TRIANGLE_STRIP, mWALL);
			gl.glColor4f(0.2f, 0.0f, 0.6f, 1f); //blue\red
			DrawObject(gl, GL11.GL_TRIANGLE_FAN, mPOOL);
		}

		if (ShowFountain && ShowPool) //splashes if both
		{
			gl.glPushMatrix(); //scale only the splash triangles
			gl.glColor4f(.9f, 0.9f, 0.9f, 1f); //off-white
			gl.glTranslatef(0, 3, 0); //move splash to pool surface
			//the splash scales up then down (3 ⇒ 0 ⇒ 3)
			//use abs value of (-3 ⇒ 0 ⇒ 3), scale Y only
			gl.glScalef(1f, Math.abs((
				mRepeatLen/2f-mAngCtr%(mRepeatLen))*0.4f), 1f);
			DrawObject(gl, GL11.GL_TRIANGLES, mSPLASH);
			gl.glPopMatrix();
		}

		if (ShowFloor)
		{
			gl.glColor4f(0.0f, 0.0f, 0.4f, 1f); //dark blue
			DrawObject(gl, GL11.GL_TRIANGLES, mFLOOR);
		}
	}
添加 DrawObject 方法。此方法渲染 GPU 缓冲区中指定对象索引的顶点。传入的形状类型(GL_TRIANGLES/GL_TRIANGLE_STRIP/GL_TRIANGLE_FAN)告诉 OpenGL 顶点在内存中的组织方式。
void DrawObject(GL11 gl, int pShapeType, int pObjNum)
{
	//activate vertex array type
	gl.glEnableClientState(GL10.GL_VERTEX_ARRAY);
	//get vertices for this object id
	gl.glBindBuffer(GL11.GL_ARRAY_BUFFER, pObjNum);
	//each vertex is made up of 3 floats [x\y\z]
	gl.glVertexPointer(3, GL11.GL_FLOAT, 0, 0);
	//draw triangles
	gl.glDrawArrays(pShapeType, 0, mBufferLen[pObjNum]);
	//unbind from memory
	gl.glBindBuffer(GL11.GL_ARRAY_BUFFER, 0);
}
添加 SetStatusMsg 方法。此方法使用新文本更新 TextView。mTagStore 用于将新文本传递给 Runnable 类。如果我们使用非 final 的局部变量,编译器会报错。我们需要使用 Runnable 类,这样文本更新就不会阻塞渲染过程。
public void SetStatusMsg(String pMsg)
{
	//mTagStore = this. We just need an object to pass text to the anonymous method
	mTagStore.setTag(pMsg);
	mThreadHandler.post(new Runnable() {
		public void run() { mTxtMsg.setText(mTagStore.getTag().toString()); }
		});
}
添加 SetShowFPS 方法。此方法设置 ShowFPS 标志并清除 TextView(以防 ShowFPS 为 false)。
//if user hides FPS, then clear text
public void SetShowFPS(boolean pShowFPS)
{
	ShowFPS = pShowFPS;
	SetStatusMsg(""); //clear message
}
添加 SwapCenter 方法。此方法在相机和场景之间交替旋转中心。如果旋转设置为场景,相机始终看向场景中心(0,0,0),相机绕中心移动(我们实际上并不旋转场景)。如果旋转设置为相机,相机会转动,我们移动视点。
//rotate scene or rotate camera
public void SwapCenter()
{
	RotateScene = !RotateScene;
	if (RotateScene) //rotate around fountain
	{
		//calculate scene angles based on camera position
		//hypotenuse using 2 dimensions
		float hypLen = (float)Math.sqrt(mCamXpos*mCamXpos+
				mCamZpos*mCamZpos); //across floor
		mSceneYAng = (float)Math.atan2(mCamXpos,mCamZpos)*(float)mRad2Deg;
		//3rd dimension
		mSceneXAng = (float)Math.atan2(mCamYpos,hypLen)*(float)mRad2Deg;

		mTargetX = mTargetY = mTargetZ = 0; //camera always looks at 0,0,0
	}
	else //rotate camera
	{
		//camera angle is reverse of scene angle
		mCamYang = mSceneYAng+180;
		mCamXang = -mSceneXAng;
		ChangeCameraAngle(0,0); //set camera view target
	}
}
添加 ChangeSceneAngle 方法。当 RotateScene 标志设置且用户旋转视图时,将调用此方法。我们绕场景中心(0,0,0)移动相机,保持相同的距离。我们将在本教程的后面讨论角度计算。
//rotate camera around fountain
void ChangeSceneAngle(float pChgXang, float pChgYang)
{
	//hypotenuse using 2 dimensions
	float hypLen = (float)Math.sqrt(mCamXpos*mCamXpos+
			mCamZpos*mCamZpos); //across floor
	//process X and Y angles separately
	if (pChgYang != 0)
	{
		mSceneYAng += pChgYang;
		if (mSceneYAng < 0) mSceneYAng += 360;
		if (mSceneYAng > 360) mSceneYAng -= 360;
		//move camera according to new Y angle
		mCamXpos = hypLen*(float)Math.sin(mSceneYAng*mDeg2Rad);
		mCamZpos = hypLen*(float)Math.cos(mSceneYAng*mDeg2Rad);
	}

	if (pChgXang != 0)
	{
		//hypotenuse using all 3 dimensions
		float hypZLen = (float)Math.sqrt
			(hypLen*hypLen+mCamYpos*mCamYpos); // 0,0,0 to camera
		mSceneXAng += pChgXang;
		if (mSceneXAng > 89.9) mSceneXAng = 89.9f;
		if (mSceneXAng < -89.9) mSceneXAng = -89.9f;
		//hypZLen stays same with new angle
		//move camera according to new X angle
		mCamYpos = hypZLen*(float)Math.sin(mSceneXAng*mDeg2Rad);
		float HypLenNew =
		    hypZLen*(float)Math.cos(mSceneXAng*mDeg2Rad); //across floor
		mCamZpos *= HypLenNew/hypLen;
		mCamXpos *= HypLenNew/hypLen;
	}
}
添加 ChangeCameraAngle 方法。当 RotateScene 标志未设置且用户旋转视图时,将调用此方法。我们绕其中心点旋转相机。然后,我们根据更新后的角度更新相机目标视点。相机与目标之间的距离保持不变。
//change camera view direction
void ChangeCameraAngle(float pChgXang, float pChgYang)
{
	mCamXang += pChgXang;
	mCamYang += pChgYang;
	//keep angle within 360 degrees
	if (mCamYang > 360) mCamYang -= 360;
	if (mCamYang < 0) mCamYang += 360;
	//don't let view go upside down
	if (mCamXang > 89.9) mCamXang = 89.9f;
	if (mCamXang < -89.9) mCamXang = -89.9f;
	// move view target according to new angles
	mTargetY = mCamYpos+mViewRad*(float)Math.sin(mCamXang*mDeg2Rad);
	mTargetX = mCamXpos+mViewRad*(float)Math.cos(mCamXang*mDeg2Rad)*
			(float)Math.sin(mCamYang*mDeg2Rad);
	mTargetZ = mCamZpos+mViewRad*(float)Math.cos(mCamXang*mDeg2Rad)*
			(float)Math.cos(mCamYang*mDeg2Rad);
}
添加 MoveCamera 方法。当相机向前或向后移动时调用此方法。如果设置了 RotateScene 标志,相机始终朝向场景中心(0,0,0)移动。它永远不会穿过中心。如果未设置 RotateScene,相机会朝向相机目标前后移动,并调整目标以匹配(到目标的距离保持不变)。我们将 mResetMatrix 设置为 true,以便在下一次帧渲染期间更新剪裁区域。
void MoveCamera(float pDist)
{
	//move camera along line of sight toward target vertex
	if (RotateScene) //move towards\away from 0,0,0
	{
		//distance from 0,0,0
		float curdist = (float)Math.sqrt(
				mCamXpos*mCamXpos +
				mCamYpos*mCamYpos +
				mCamZpos*mCamZpos);
		//if camera will pass center than reduce distance
		if (pDist < 0 && curdist + pDist < 0.01) //can't go to exact center
			pDist = 0.01f-curdist;//0.01 closest distance
		float ratio = pDist/curdist;
		float chgCamX = (mCamXpos)*ratio;
		float chgCamY = (mCamYpos)*ratio;
		float chgCamZ = (mCamZpos)*ratio;
		mCamXpos += chgCamX;
		mCamYpos += chgCamY;
		mCamZpos += chgCamZ;
	}
	else //move towards\away from target
	{
		//mViewRad is 100, so do percentage
		float ratio = pDist/mViewRad;
		float chgCamX = (mCamXpos-mTargetX)*ratio;
		float chgCamY = (mCamYpos-mTargetY)*ratio;
		float chgCamZ = (mCamZpos-mTargetZ)*ratio;
		mCamXpos += chgCamX;
		mCamYpos += chgCamY;
		mCamZpos += chgCamZ;
		mTargetX += chgCamX;
		mTargetY += chgCamY;
		mTargetZ += chgCamZ;
	}

	mResetMatrix = true; //recalc depth buffer range
}
添加 onTouchEvent 回调。当用户触摸屏幕或在屏幕上拖动时调用此方法。如果用户在没有拖动的情况下触摸并释放(拖动 5 像素或更少),我们认为这是一个点击,然后前后移动相机。如果用户拖动,我们将根据拖动距离更新视角。点击屏幕顶部会使相机向前移动。点击屏幕底部会使相机向后移动。
public boolean onTouchEvent(final MotionEvent pEvent)
{
	if (pEvent.getAction() == MotionEvent.ACTION_DOWN) //start drag
	{
		//store start position
		mDragStartX = pEvent.getX();
		mDragStartY = pEvent.getY();
		mDownX = pEvent.getX();
		mDownY = pEvent.getY();
		return true; //must have this
	}
	else if (pEvent.getAction() == MotionEvent.ACTION_UP) //drag stop
	{
		//if user did not move more than 5 pixels, assume screen tap
		if ((Math.abs(mDownX - pEvent.getX()) <= 5) &&
			(Math.abs(mDownY - pEvent.getY()) <= 5))
		{
			if (pEvent.getY() < mScrHeight/2.0) //top half of screen
				MoveCamera(-5); //move camera forward
			else if (pEvent.getY() >
				mScrHeight/2.0) //bottom half of screen
				MoveCamera(5); //move camera back
		}
		return true; //must have this
	}
	else if (pEvent.getAction() == MotionEvent.ACTION_MOVE) //dragging
	{
		//to prevent constant recalcs, only process after 5 pixels
		//if user moves less than 5 pixels, we assume screen tap, not drag
		//we divide by 3 to slow down scene rotate
		if (Math.abs(pEvent.getX() - mDragStartX) > 5) //process Y axis rotation
		{
			if (RotateScene) //rotate around fountain
				ChangeSceneAngle(0,
				(mDragStartX - pEvent.getX())/3f); //Y axis
			else //rotate camera
				ChangeCameraAngle(0,
				(mDragStartX - pEvent.getX())/3f); //Y axis
			mDragStartX = pEvent.getX();
		}
		if (Math.abs(pEvent.getY() -
			mDragStartY) > 5) //process X axis rotation
		{
			if (RotateScene) //rotate around fountain
				ChangeSceneAngle(
					(pEvent.getY() - mDragStartY)/3f, 0); //X axis
			else //rotate camera
				ChangeCameraAngle(
					(mDragStartY - pEvent.getY())/3f, 0); //X axis
			mDragStartY = pEvent.getY();
		}
		return true; //must have this
	}
	return super.onTouchEvent(pEvent);
}
添加 DrawFountain 方法。此方法计算(0,0,0)处的摄像机对准角度,并计算每个水滴的位置。我们假设每个水滴都沿着弧线运动,所以我们只需将弧线(180 度)除以水滴数,然后将其用作水滴位置。每个水滴只移动一小段距离(mRepeatLen),然后重复。mAngCtr(在 onDrawFrame 中设置)用于在每一帧中增加角度偏移量,从而创建动画。您可以在此处添加一些随机性,使每个水滴具有略微不同的路径,但目前,所有水滴都将遵循相同的弧线。
void DrawFountain(GL11 gl)
{
	//get billboard angles for 0,0,0
	//calculate angle from 0,0,0 to camera, used if single billboard
	float angY = 270-(float)Math.atan2(mCamZpos,mCamXpos)*
			(float)mRad2Deg; //around Y axis

	float hypLen = (float)Math.sqrt(mCamXpos*mCamXpos+
			mCamZpos*mCamZpos); //across floor
	float angX = (float)Math.atan2(mCamYpos,hypLen)*(float)mRad2Deg; //X axis

	int dropCtr = 0;
	//rotate around fountain center
	for (float ftnAngY = 0;ftnAngY < 360;ftnAngY += 360/mStreamCnt)
	{
		//draw each arc
		//arcAng will cycle through single segment and repeat
		float arcAng = mAngCtr%(mRepeatLen);
		for (;arcAng < 180;arcAng += mRepeatLen)
		{
			//default arc is half circle
			//use 0.75 to reduce arc width
			float dropRad = 0.75f*(mArcRad-mArcRad*
				(float)Math.cos(arcAng*mDeg2Rad));
			//use 1.5 to increase arc height
			dropCoords[dropCtr][1] = 1.5f*mArcRad*
				(float)Math.sin(arcAng*mDeg2Rad); //Y
			dropCoords[dropCtr][0] = dropRad*
				(float)Math.sin(ftnAngY*mDeg2Rad); //X
			dropCoords[dropCtr][2] = dropRad*
				(float)Math.cos(ftnAngY*mDeg2Rad); //Z
			dropCtr++;
		}
	}
	gl.glColor4f(0.5f, 0.5f, 1f, 1f); //light blue
	DrawDropTriangles(gl, angX, angY, dropCoords); //draw all triangles at once
}
添加 DrawDropTriangles 方法。此方法将每个水滴渲染为单独的三角形。pDropCoords 数组只有每个三角形的顶顶点。如果设置了 MultiBillboard 标志,我们将为每个水滴重新计算摄像机对准角度,以便每个水滴看起来都是一个完美的面朝相机的三角形。如果未设置 MultiBillboard,我们只使用(0,0,0)的摄像机对准角度。我们稍后将讨论摄像机对准。
//each triangle has the same dimensions, only location and rotation are different
void DrawDropTriangles(GL11 gl, float pAngX, float pAngY, float[][] pDropCoords)
{
	//DropCoords array only contains top vertex of each drop triangle
	//for each triangle, just translate to top vertex and redraw
	//same triangle each time
	int TriCnt = pDropCoords.length; //triangle count
	// initialize vertex Buffer for triangle
	gl.glEnableClientState(GL10.GL_VERTEX_ARRAY);
	gl.glBindBuffer(GL11.GL_ARRAY_BUFFER, mDROP);
	gl.glVertexPointer(3, GL11.GL_FLOAT, 0, 0);

	for (int ctr = 0;ctr < TriCnt;ctr++)
	{
		gl.glPushMatrix(); //translate\rotate only affects this single triangle
		gl.glTranslatef(
			pDropCoords[ctr][0], pDropCoords[ctr][1],pDropCoords[ctr][2]);
		if (MultiBillboard) //calc each triangle billboard angle separately
		{
			float hypLen = 0;
			float distX = mCamXpos-pDropCoords[ctr][0];
			float distY = mCamYpos-pDropCoords[ctr][1];
			float distZ = mCamZpos-pDropCoords[ctr][2];

			//hypotenuse in 2D
			hypLen =
				(float)Math.sqrt(distX*distX+distZ*distZ); //across floor
			pAngY = 270-(float)Math.atan2(distZ,distX)*(float)mRad2Deg;
			//3rd dimension
			pAngX = (float)Math.atan2(distY,hypLen)*(float)mRad2Deg;
		}
		gl.glRotatef(pAngY, 0, 1, 0);
		gl.glRotatef(pAngX, 1, 0, 0);
		gl.glDrawArrays(GL11.GL_TRIANGLES, 0, mBufferLen[mDROP]); //single drop
		gl.glPopMatrix(); //done with this triangle
	}
	gl.glBindBuffer(GL11.GL_ARRAY_BUFFER, 0); //unbind from buffer
}
添加 ShowMaxDepthBits 方法。此方法将确定您设备上深度缓冲区的最大尺寸。它在我们的应用程序中未调用,但可用于测试。
void ShowMaxDepthBits() //resolution of depth buffer
{
	EGL10 egl = (EGL10)EGLContext.getEGL();
	EGLDisplay dpy = egl.eglGetDisplay(EGL10.EGL_DEFAULT_DISPLAY);
	EGLConfig[] conf = new EGLConfig[100]; //buffer for surface configs
	//get all possible configs for this OpenGL surface
	egl.eglGetConfigs(dpy, conf, 100, null);
	int maxBits = 0;
	int[] value = new int[1]; //for return value
	//scan all possible configs for maximum depth bit count
	for(int i = 0; i < 100 && conf[i] != null; i++)
	{
		//get depth bit size for this config
		egl.eglGetConfigAttrib(dpy, conf[i], EGL10.EGL_DEPTH_SIZE, value);
		maxBits = value[0]>maxBits ? value[0] : maxBits;
	}
	SetStatusMsg("DepthBits "+maxBits); //display
}
使用两个测试方法完成 FountainGLRenderer 类。这些方法在测试期间使用,但不再由应用程序调用。它们可能有助于调试或向场景添加其他对象。为了获得最大性能,最好使用 StoreVertexData/DrawObject 方法,尽管这需要更复杂的设置。
	//utility function for drawing a square
	void DrawQuad(GL11 gl, float[] pX, float[] pY,
		float[] pZ) //clockwise starting top left
	{
		float[] vtx = new float[12];
		int i = 0;
		vtx[i++]=pX[0]; vtx[i++]=pY[0]; vtx[i++]=pZ[0];
		vtx[i++]=pX[1]; vtx[i++]=pY[1]; vtx[i++]=pZ[1];
		vtx[i++]=pX[3]; vtx[i++]=pY[3]; vtx[i++]=pZ[3];
		vtx[i++]=pX[2]; vtx[i++]=pY[2]; vtx[i++]=pZ[2];

		FloatBuffer buffer;
		ByteBuffer vbb =
			ByteBuffer.allocateDirect(vtx.length * 4); //float is 4 bytes
		//use the device hardware's native byte order
		vbb.order(ByteOrder.nativeOrder());
		//create a floating point buffer from the ByteBuffer
		buffer = vbb.asFloatBuffer();
		buffer.put(vtx); //add the coordinates to the FloatBuffer
		buffer.position(0); //set the buffer to read the first coordinate
		//3 values per vertex [x/y/z]
		gl.glVertexPointer(3, GL11.GL_FLOAT, 0, buffer);
		gl.glDrawArrays(GL11.GL_TRIANGLE_STRIP, 0, 4); //4 vertices
	}

	//draw single point
	void DrawPoint(GL11 gl, float pVertexX, float pVertexY, float pVertexZ)
	{
		FloatBuffer buffer;
		float[] vtx = new float[3];
		int i=0;
		vtx[i++]=pVertexX; vtx[i++]=pVertexY; vtx[i++]=pVertexZ;
		ByteBuffer vbb =
			ByteBuffer.allocateDirect(vtx.length * 4); //float is 4 bytes
		//use the device hardware's native byte order
		vbb.order(ByteOrder.nativeOrder());
		//create a floating point buffer from the ByteBuffer
		buffer = vbb.asFloatBuffer();
		buffer.put(vtx); //add the coordinates to the FloatBuffer
		buffer.position(0); //set the buffer to read the first coordinate
		//3 values per vertex [x/y/z]
		gl.glVertexPointer(3, GL11.GL_FLOAT, 0, buffer);
		gl.glDrawArrays(GL11.GL_POINTS, 0, 1); //only one point
	}
}
编写 FountainGLActivity 类
这是应用程序首次启动时使用的类。对于我们的应用程序,它用于创建 FountainGLRenderer 类并处理选项菜单。
打开 FountainGLActivity.java。
删除该文件中的所有现有代码。
添加 Activity 所需的 package 名称和 import。
package droid.fgl;

import droid.fgl.FountainGLRenderer;
import android.app.Activity;
import android.os.Bundle;
import android.view.Menu;
import android.view.MenuItem;
import android.view.Window;
import android.view.WindowManager.LayoutParams;
开始 FountainGLActivity 类并添加两个变量。mRenderer 将是 FountainGLRenderer 实例的指针,mMenuList 将用于存储选项菜单的项。
public class FountainGLActivity extends Activity
{
	FountainGLRenderer mRenderer = null;
	MenuItem[] mMenuList = new MenuItem[10]; //options menu
添加 onCreate 回调。这在应用程序首次启动时以及手机方向更改时(纵向/横向)调用。首先,我们将应用程序设置为全屏并禁用屏幕保护程序,然后调用父构造函数。我们创建 FountainGLRenderer 实例,并传递 Activity 的实例。然后,我们加载用户首选项。如果首选项不可用,则使用默认值。然后,我们调用 SwapCenter 两次,以确保相机和场景角度设置正确。
@Override
 public void onCreate(Bundle savedInstanceState) {
	requestWindowFeature(Window.FEATURE_NO_TITLE); //hide title bar
	getWindow().setFlags(0xFFFFFFFF, //hide status bar and keep phone awake
		LayoutParams.FLAG_FULLSCREEN|LayoutParams.FLAG_KEEP_SCREEN_ON);

	super.onCreate(savedInstanceState);

	//onCreate is called when phone orientation changes
	//no need to recreate render class
	if (mRenderer == null)
		mRenderer = new FountainGLRenderer(this); //openGL surface

	//retrieve options
	SharedPreferences sp = getSharedPreferences("FountainGL", 0);
	mRenderer.ShowBall = sp.getBoolean("ShowBall", mRenderer.ShowBall);
	mRenderer.ShowFountain = sp.getBoolean("ShowFountain", mRenderer.ShowFountain);
	mRenderer.ShowFloor = sp.getBoolean("ShowFloor", mRenderer.ShowFloor);
	mRenderer.ShowPool = sp.getBoolean("ShowPool", mRenderer.ShowPool);
	mRenderer.ShowFPS = sp.getBoolean("ShowFPS", mRenderer.ShowFPS);
	mRenderer.UseTiltAngle = sp.getBoolean("UseTiltAngle", mRenderer.UseTiltAngle);
	mRenderer.RotateScene = sp.getBoolean("RotateScene", mRenderer.RotateScene);
	//calculate angle and position of camera
	mRenderer.SwapCenter();
	mRenderer.SwapCenter();
}
添加 onPrepareOptionsMenu 回调。每次显示菜单时都会调用此方法,以便我们可以根据需要更改菜单。所有用户选项都是布尔值开关,因此我们只需根据当前的开关设置来设置每个菜单选项。请注意,菜单最多只能容纳 5 项,因此最后五项将转到溢出菜单(用户必须单击“更多”)。前五项应该是最常用的。
//this method called every time menu is shown
@Override
public boolean onPrepareOptionsMenu(Menu menu)
{
	menu.clear(); //reset menu
	//set menu items based on current settings
	mMenuList[0] = menu.add((mRenderer.ShowBall?"Hide":"Show")+" Ball");
	mMenuList[1] = menu.add((mRenderer.ShowFloor?"Hide":"Show")+" Floor");
	mMenuList[2] = menu.add((mRenderer.ShowFountain?"Hide":"Show")+" Fountain");
	mMenuList[3] = menu.add((mRenderer.ShowPool?"Hide":"Show")+" Pool");
	mMenuList[4] = menu.add("Rotate "+(mRenderer.RotateScene?"Camera":"Scene"));
	mMenuList[5] = menu.add("Use "+(mRenderer.UseTiltAngle?"Touch":"Tilt")+" Angle");
	mMenuList[6] = menu.add((mRenderer.MultiBillboard?"Single":"Multi")+" Billboard");
	mMenuList[7] = menu.add((mRenderer.ShowFPS?"Hide":"Show")+" FPS");
	mMenuList[8] = menu.add(mRenderer.Paused?"Unpause":"Pause");
	mMenuList[9] = menu.add("Exit");
	return super.onCreateOptionsMenu(menu);
}
通过添加 onOptionsItemSelected 回调来完成 FountainGLActivity 类。当用户选择菜单项时调用此方法。对于 RotateScene 选项,我们调用 SwapCenter,因为当旋转中心更改时,我们需要重新计算相机或场景角度。对于其他选项,我们只切换当前设置。对于退出,调用 finish 来关闭应用程序。更改设置后,这些设置将被持久化,以便在下一次应用程序运行时保持不变。
	//listener for menu item clicked
	@Override
	public boolean onOptionsItemSelected(MenuItem item)
	{
		if (item == mMenuList[0]) //Show\Hide Ball
			mRenderer.ShowBall = !mRenderer.ShowBall;
		else if (item == mMenuList[1]) //Show\Hide Floor
			mRenderer.ShowFloor = !mRenderer.ShowFloor;
		else if (item == mMenuList[2]) //Show\Hide Fountain
			mRenderer.ShowFountain = !mRenderer.ShowFountain;
		else if (item == mMenuList[3]) //Show\Hide Pool
			mRenderer.ShowPool = !mRenderer.ShowPool;
		else if (item == mMenuList[4]) //Rotate Camera\Scene
			mRenderer.SwapCenter();
		else if (item == mMenuList[5]) //Use Touch\Tilt Angle
			mRenderer.UseTiltAngle = !mRenderer.UseTiltAngle;
		else if (item == mMenuList[6]) //Single\Multi Billboard
			mRenderer.MultiBillboard = !mRenderer.MultiBillboard;
		else if (item == mMenuList[7]) //Show\Hide FPS
			mRenderer.SetShowFPS(!mRenderer.ShowFPS);
		else if (item == mMenuList[8]) //Pause\Unpause
			mRenderer.Paused = !mRenderer.Paused;
		else if (item == mMenuList[9]) //Exit
			finish();

		//store options
		getSharedPreferences("FountainGL", 0).edit()
		 .putBoolean("ShowBall", mRenderer.ShowBall)
		 .putBoolean("ShowFountain", mRenderer.ShowFountain)
		 .putBoolean("ShowPool", mRenderer.ShowPool)
		 .putBoolean("ShowFloor", mRenderer.ShowFloor)
		 .putBoolean("ShowFPS", mRenderer.ShowFPS)
		 .putBoolean("UseTiltAngle", mRenderer.UseTiltAngle)
		 .putBoolean("RotateScene", mRenderer.RotateScene)
		 .commit();
		return super.onOptionsItemSelected(item);
	 }
}
这样就完成了应用程序代码,现在我们可以运行应用程序并查看我们创建的场景了。
构建项目(Project->Build All)。如果您启用了自动构建,项目将在每次保存源文件时重建。
运行应用程序
在 Eclipse 中,按 Ctrl-F11 启动应用程序(或按 F11 进行调试)。
几秒钟后(如果一切顺利),应用程序应该会在模拟器(或已连接的手机)上启动。
要更改模拟器的方向,请使用数字键盘 9(必须关闭 NumLock)。要测试手机倾斜功能,您需要使用您的实际手机。模拟器不会倾斜。
要退出应用程序,请使用手机上的返回按钮(或“退出”)或在 Eclipse 中选择 Run->Terminate。
要通过 APK 文件将应用程序安装到手机上。
在手机上,在 Settings->Applications 中,启用“未知来源”以允许手机安装非市场应用程序。
在 Eclipse 中,选择 File->Export..->Android-> Export Android Application。

单击“下一步”。
输入 FountainGL 作为项目名称。

单击“下一步”。
如果您已经有密钥库,请选择 Use existing keystore。如果没有,请按照以下步骤创建密钥库。
选择 Create new keystore。输入文件名(不需要扩展名)和密码。

单击“下一步”。
对于 Alias 和 Password,您可以使用在上一屏幕中输入的值。将有效期设置为 100 年。在 Name 字段中输入任何名称。如果您计划使用此密钥库发布任何应用程序,您应该使用您的真实信息。

单击“下一步”。
输入您的 apk 文件的文件名。

单击“完成”。
要将 apk 文件安装到手机上,请使用 android-sdk\platform-tools 文件夹中的 adb 工具。如果您不知道文件夹位置,只需在计算机上搜索 adb.exe。
要安装 apk 文件,请使用此命令行
adb install C:\FountainGL.apk
您还可以使用 Android Market 上的(免费)安装程序应用程序之一,该应用程序允许您从手机的 SD 卡安装 apk 文件。
安装完成后,FountainGL 应该可以在手机的应用程序列表中找到。
恭喜您完成了新应用程序。请务必测试选项,看看 FPS 如何受到影响以及摄像机对准的效果。
本教程的其余部分将讨论此应用程序中使用的一些概念
计算角度和坐标
对于那些自高中以来就没有接触过几何的人来说,这里有一个快速回顾。我将 arccos\arcsin\arctan 缩写为 acos\asin\atan 以匹配 Java 函数。
|
|
给定一个直角三角形
|

Atan2 函数
上面用于计算 x 和 y 的方程在 360 度范围内都是准确的。用于计算角度(a*xxx*)的函数仅在 180 度范围内准确。另外 180 度会产生相同的角度。
考虑下图
|
|
这里我们有两个角度,45度和225度。如果我们从角度计算坐标,结果是正确的 h = √(5² + 5²) = 7.07 x = 7.07*cos(45) = 5 y = 7.07*sin(45) = 5 x = 7.07*cos(225) = -5 y = 7.07*sin(225) = -5 如果我们从坐标计算角度,我们会遇到一个问题 θ = acos(5/7.07) = 45 正确 θ = acos(-5/7.07) = 135 错误!我们想要 225(或 -135)。 这是因为公式中只使用了一个坐标符号。另一个使用的变量是斜边(h),它总是正的。如果我们尝试使用 atan,也会出现同样的问题:atan(5/5) = atan(-5/-5) 我们可以通过在代码中添加一个检查来解决这个问题 if (y<0) Angle = -Angle; 幸运的是,大多数编程语言都包含 Atan2 函数来解决这个问题。Atan2 在计算角度时会同时考虑两个坐标符号 θ = atan2(y,x) θ = atan2(5,5) = 45 正确 θ = atan2(-5,-5) = -135 正确 请注意,在 Excel 中,ATAN2 函数的参数是颠倒的(x,y)。 |

在 3D 中工作
我们 OpenGL 程序中的场景基于 3D,因此我们需要在三维空间中计算角度和坐标。
|
|
以下是从相机坐标计算场景角度的过程。 β = atan2(cz, cx) h = √(cx² + cy²) α = atan2(cy, h) hz = √(cx² + cy² + cz²) 要从场景角度(和 hz)计算相机坐标,我们只需反转过程。 h = hz * cos(α) cx = h * sin(β) cz = h * cos(β) 当我们在旋转相机时,计算方法相同,只是相机位于中心,相机目标绕相机移动。 请注意,在 Java 中,这些数学函数以弧度计算角度,其中 PI (3.141592) 弧度 = 180 度。 另请注意,在图中,Z 轴沿着地板延伸。这是因为 Android 屏幕(相机)是从侧面观察场景的,而在 OpenGL 中,Z 轴穿过屏幕。 |

顶点排序
当坐标(顶点)存储在 GPU 缓冲区中时,它们可以以几种方式组织以创建不同的形状。所有形状都由三角形组成,某些三角形可以共享顶点,从而减少存储并加快渲染速度。OpenGL 将根据 glDrawArrays 调用中传递的常量来渲染坐标。在 FountainGL 项目中,我们使用了三种顶点排序类型。
| GL_TRIANGLE_STRIP | GL_TRIANGLE_FAN | GL_TRIANGLES | ||
 |
 |
 |
GL_TRIANGLE_STRIP 用于每个三角形与相邻的三角形共享一边的情况。此排序用于创建我们应用程序中的水池壁。
GL_TRIANGLE_FAN 用于每个三角形共享一个共同中心顶点的情况。此排序用于创建我们应用程序中的水池水面。
GL_TRIANGLES 用于创建不相互连接的三角形,因此没有任何共享。这三种排序类型需要最多的存储和渲染时间。此排序用于创建我们应用程序中的地板、球体和喷泉水滴。
摄像机对准
摄像机对准是一种使 2D 对象看起来像 3D 的方法。这会提高性能,因为 OpenGL 引擎不需要渲染完整的 3D 对象。例如,一个球体看起来就像一个面向相机的圆形,并且圆形渲染起来要快得多。摄像机对准的诀窍是旋转 2D 对象,使其始终面向相机,并看起来与 3D 对象相同。在我们的程序中,我们通过两种方式实现了摄像机对准:单摄像机对准和多摄像机对准。
单摄像机对准
在这里,我们在喷泉中心(0,0,0)计算到相机的摄像机对准角度,然后将该角度用于每个喷泉水滴。
我们可以更快地渲染喷泉,因为我们只需要计算一次摄像机对准角度。从远处看,效果还可以,但近距离看,我们的捷径就很明显了。水滴会远离相机旋转,不再看起来像三角形。
| Distance | 近景 | ||||||||
 |
 |
 |
 |
多摄像机对准
在这里,我们为每个水滴计算摄像机对准角度,这会增加渲染时间。从远处看,场景与单摄像机对准渲染几乎相同,但在近距离观察时,效果明显更好。水滴面向相机,看起来是完整的三角形。
| Distance | 近景 | ||||||||
 |
 |
 |
 |
在喷泉始终位于背景中的场景中,单摄像机对准方法就足够了,并且可以提高渲染时间。由于我们的应用程序允许相机靠近喷泉,因此我们为用户提供了多摄像机对准选项。
飞溅
 |
应 ErrolErrol 的要求,在场景中添加了飞溅效果。飞溅是通过在飞溅点周围使用一圈三角形创建的。 要创建三角形顶点,我们只需围绕水滴点旋转并计算每个三角形顶点的坐标。我们使用 6 个三角形,因此我们将圆分成 12。对于奇数步,我们使用较小的半径计算三角形的边缘顶点。对于偶数步,我们使用较大的半径计算三角形的中间顶点。中间顶点也比边缘顶点高(在 Y 轴上),因此三角形从水池表面向上指向。 通过创建向上倾斜的三角形,我们可以通过在 Y 轴上缩放三角形来创建飞溅效果 gl.glScalef(1f, Math.abs((mRepeatLen/2f - mAngCtr%(mRepeatLen)) * 0.4f), 1f); 如果 mRepeatLen 为 10,则缩放因子从 5 ⇒ 0 ⇒ 5(我们取 -5 ⇒ 0 ⇒ 5 的绝对值)。我们只在 Y 轴上缩放,所以飞溅变得更高,而不是更宽。mAngCtr 用于与水滴周期保持同步。整个场景的所有飞溅三角形都存储在一起,并同时绘制。绘制飞溅时未使用摄像机对准,因为飞溅从大多数角度看都还可以,而且我们节省了 CPU 时间。 |
透视和 glFrustumf
透视
在我们的应用程序中,我们使用 glFrustumf 方法来设置相机的透视。透视基本上是相机的视野(或角度)。较大的 FOV 允许相机看到场景的更多内容,但对象看起来更小,近距离和远距离对象的大小差异也更明显。您可以将其视为在相机上安装广角镜头。较小的 FOV 会产生相反的效果;相机能看到的场景更少,近距离和远距离对象的大小变化也更小。这与使用相机的变焦镜头产生的效果相同。
在这两张屏幕截图中,场景角度相同,但 FOV 的差异产生了明显不同的视图。
 |
 |
|
| 视锥体长度 = 1 大 FOV |
视锥体长度 = 2 小 FOV |
|
 |
 |
glFrustumf
glFrustumf 调用使用 5 个参数来设置透视(我们将稍后讨论 zFar)。这些参数定义了透视的锥体(视锥体)。
| glFrustumf(left, right, bottom, top, zNear, zFar) |

创建透视时,锥体的形状很重要,而不是大小。只要比例相同,透视就相同
| glFrustumf(-2, 2, -4, 4, 100, 500) |
创建的透视与
| glFrustumf(-4, 4, -8, 8, 200, 500) |
这两个命令之间的区别在于剪裁区域。zNear 有助于确定透视的形状,但它也指示了近剪裁区域。任何比这条线更近的像素都不会显示。任何比 zFar 剪裁区域更远的像素也不会显示。zNear 不能为零或负数。
深度缓冲区
当 OpenGL 渲染场景时,它使用深度缓冲区根据距离相机的距离对像素进行排序。一旦像素排序完毕,OpenGL 将从远到近渲染它们,以便近处的对象会隐藏远处的对象(如果 OpenGL 知道像素将被隐藏,它也可以跳过像素)。
深度缓冲区由从 zNear 到 zFar 的存储桶组成,场景中的所有像素区域都将进入其中一个存储桶。然后,这些存储桶将从远到近渲染。同一存储桶中的像素被认为距离相机相等,并将被渲染为单个平面。存储桶的数量始终相同,它们被分成剪裁区域(zNear 到 zFar)。大剪裁区域拥有的存储桶数量与小剪裁区域相同,但存储桶会更大。
深度缓冲区的精度(存储桶数量)可能因设备而异。我的 Huawei 有一个 16 位缓冲区,表示 65,536 个存储桶。某些设备将拥有 24 位或 32 位缓冲区,这将提供更高的精度。
Z 轴冲突
重要的是要知道缓冲区的存储桶大小并不相等。存储桶在 zNear 处非常密集(较小的存储桶),在 zFar 处则分散开。这是为了使靠近相机的对象具有更高的精度,减少像素重叠的风险。重叠问题称为 Z 轴冲突。
以下是 FountainGL 应用程序在模拟器上运行时截取的两张屏幕截图。相机位于喷泉下方向上看,水池比地板高 6 个单位。
| 剪裁区域 = 300 glFrustumf(-1, 1, -1, 1, 1, 300) |
剪裁区域 = 1000 glFrustumf(-1, 1, -1, 1, 1, 1000) |
|
 |
 |
正如您所见,右侧的图像看起来不正确。看起来水池正在穿过地板。问题在于剪裁区域非常大(1000),存储桶更大,而且彼此靠近的像素会落入同一个存储桶并被渲染在同一平面上。左侧图像看起来是正确的,因为剪裁区域小得多(300),创建了更小的存储桶和更好的深度分辨率。
存储桶大小
如前所述,相机附近的存储桶大小非常小(zNear),而远处的存储桶大小则非常大(zFar)。随着距离相机距离的增加,存储桶大小呈指数增长。如果我们设置 zNear 为 1,zFar 为 100,以下是每 10 个单位增量的相对存储桶大小。

第一个存储桶太小以至于在条形图中都无法显示。最后一个存储桶,涵盖 0.0015 个单位,比第一个存储桶大 10,000 倍,第一个存储桶涵盖微小的 0.00000015 个单位。对于 16 位深度缓冲区,将有 65,536(2^16)个存储桶。
从图中可以看出,随着对象远离 zNear,场景的深度分辨率会迅速下降。创建场景时,目标是使对象靠近 zNear,并将剪裁区域(zFar-zNear)保持尽可能小。
移动剪裁区域
不幸的是,我们的应用程序允许相机绕整个场景移动,并从任何距离查看喷泉。如果我们使用 300 作为剪裁区域,当相机向后移动时,场景就会开始被剪裁,而使用 1000 则会导致过度的 Z 轴冲突。为了解决这个问题,当相机向前或向后移动时,我们会移动剪裁区域,以便剪裁区域的长度(和深度分辨率)保持不变。
近剪裁区域

远剪裁区域

多通道渲染
在某些情况下,要渲染的场景很大,我们不希望牺牲深度分辨率来正确渲染场景。这就是多通道渲染的用武之地。这是指您将场景分成块进行渲染,从远距离对象开始,到近距离对象结束。每个块将使用单独的深度缓冲区,以便每个块都能更准确地渲染(Z 轴冲突更少)。代价是渲染完整场景所需的额外处理时间。
使用远剪裁区域渲染远距离对象。

重置深度缓冲区,然后使用近剪裁区域渲染近距离对象。

使用单独的深度缓冲区创建的完整场景。

如果您想在 FountainGL 应用程序中测试多通道渲染,请注释掉对 glMatrixMode(两者)和 DrawSceneObjects 的现有调用,然后在 onDrawFrame 中 gluLookAt 调用之后插入此代码。如果您想在渲染区域之间看到一个间隙,请在下面的代码块中将 glFrustumf 的远剪裁区域设置为 98。在此场景中,所有对象的中心点都相同,因此我们实际上将相同的对象渲染了两次(像素将根据每个剪裁区域进行剪裁)。
//=== Multipass Render ===
//remove other calls to glMatrixMode and DrawSceneObjects
// --- Draw far objects ---
gl.glPushMatrix();
gl.glMatrixMode(GL10.GL_PROJECTION);
gl.glClear(GL11.GL_DEPTH_BUFFER_BIT);
gl.glLoadIdentity();
//set clip region for 100 - 500 units from camera
gl.glFrustumf(-mScrRatio*100, mScrRatio*100, -1f*100, 1f*100, 1f*100, 500);
gl.glMatrixMode(GL10.GL_MODELVIEW);
gl.glLoadIdentity();   // reset the matrix to its default state
GLU.gluLookAt(gl, mCamXpos, mCamYpos, mCamZpos, mTargetX, mTargetY,
		mTargetZ, 0f, 100.0f, 0.0f);
DrawSceneObjects(gl); // <----- Far objects
gl.glPopMatrix();

// --- Draw near objects ---
gl.glPushMatrix();
gl.glMatrixMode(GL10.GL_PROJECTION);
gl.glClear(GL11.GL_DEPTH_BUFFER_BIT);
gl.glLoadIdentity();
//set clip region for 1 - 100 units from camera
gl.glFrustumf(-mScrRatio, mScrRatio, -1f, 1f, 1f, 100); //set to 98 for gap
gl.glMatrixMode(GL10.GL_MODELVIEW);
gl.glLoadIdentity();   // reset the matrix to its default state
GLU.gluLookAt(gl, mCamXpos, mCamYpos, mCamZpos, mTargetX, mTargetY,
		mTargetZ, 0f, 100.0f, 0.0f);
DrawSceneObjects(gl); // <----- Near objects
gl.glPopMatrix();
计算 FPS(每秒帧数)
在 FountainGL 应用程序中,FPS 是过去 20 帧的平均渲染时间。这是通过将每帧的结束时间存储在一个数组中来完成的。20 帧之后,我们取当前帧的结束时间,减去第一帧(第 1 帧)的结束时间,然后除以 20。在应用程序运行 20 帧之前,FPS 结果将不正确。
为了简化起见,让我们假设我们正在基于 10 帧进行计算。在此示例中,我们假设每帧需要 5 秒(在现实生活中会快得多)。
应用程序启动时,帧数组中没有帧数据,帧指针指向槽 0。
| 帧指针 | ⇓ | |||||||||
| 数组槽 | 0 | 1 | 2 | 3 | 4 | 5 | 6 | 7 | 8 | 9 |
| 帧时间 | 0 | 0 | 0 | 0 | 0 | 0 | 0 | 0 | 0 | 0 |
5 帧之后,我们填充了 5 帧数据,并在每帧移动了指针。第一帧结束于启动时间+100 秒。每帧需要 5 秒。由于零值,FPS 计算仍然是错误的。
| 帧指针 | ⇓ | |||||||||
| 数组槽 | 0 | 1 | 2 | 3 | 4 | 5 | 6 | 7 | 8 | 9 |
| 帧时间 | 100 | 105 | 110 | 115 | 120 | 0 | 0 | 0 | 0 | 0 |
9 帧之后,我们填充了 9 帧数据。
| 帧指针 | ⇓ | |||||||||
| 数组槽 | 0 | 1 | 2 | 3 | 4 | 5 | 6 | 7 | 8 | 9 |
| 帧时间 | 100 | 105 | 110 | 115 | 120 | 125 | 130 | 135 | 140 | 0 |
10 帧之后,我们填充了整个数组。FPS 计算现在将是正确的。当前帧将在 150 秒,因此 FPS 平均值为 10/(150-100) = 0.2 帧每秒。在 FPS 计算之后,我们将帧指针处的值设置为当前帧时间,因此槽 0 将设置为 150。
| 帧指针 | ⇓ | |||||||||
| 数组槽 | 0 | 1 | 2 | 3 | 4 | 5 | 6 | 7 | 8 | 9 |
| 帧时间 | 100 | 105 | 110 | 115 | 120 | 125 | 130 | 135 | 140 | 145 |
15 帧之后,我们绕过数组,但帧指针仍然正确指向 10 帧之前。FPS 平均值为 10/(175-125) = 0.2 帧每秒。在 FPS 计算之后,我们将帧指针处的值设置为当前帧时间,因此槽 5 将设置为 175。
| 帧指针 | ⇓ | |||||||||
| 数组槽 | 0 | 1 | 2 | 3 | 4 | 5 | 6 | 7 | 8 | 9 |
| 帧时间 | 150 | 155 | 160 | 165 | 170 | 125 | 130 | 135 | 140 | 145 |
如前所述,实际代码使用 20 帧,但这里我们使用 10 帧来节省一些空间。在应用程序中,FPS 值每 10 帧显示一次。如果您在设备上获得很高的 FPS,您可能希望增加帧数,这样 FPS 显示就不会变成一连串的数字。
其他想法
- 喷泉水滴会显著增加渲染时间。我找不到绕过这个问题的方法,因为所有的水滴都在每一帧中移动和旋转。
- 多通道渲染可能有一种更有效的方法。这个应用程序并没有真正受益于它,因为所有的对象都具有相同的 Y 轴。
- 模拟器具有糟糕的深度精度。总是存在 Z 轴冲突。在我实施剪裁区域移动后,我的手机表现好得多。
- 使用 VBO(GPU 内存)存储顶点带来了惊人的性能提升。如果仅渲染地板,与使用主内存缓冲区相比,FPS 提高了一倍。
- 存储桶大小图表基于此网站的准确数据。我使用 Excel 计算/创建了条形图。
- 3D 图形使用 3D Studio Max 创建。2D 图形使用 Paint.Net(免费软件)创建。
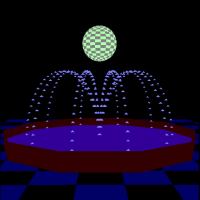
- 本教程顶部的动画使用 DropBox(屏幕截图)和 UnFREEz(gif 创建器)创建。两者都是免费软件。
- 请投票/评论。我感谢您的任何反馈。
资源
“分享你的知识。这是获得永生的一种方式。” - 达赖喇嘛
- OpenGL 视图
- Z 缓冲区
- Z 缓冲区
- 摄像机对准
- Atan2
- GLSurfaceView
- 顶点缓冲区
- 顶点排序
- 视角
- OpenGL 1.0 教程
- OpenGL 分布
- 已知的 OpenGL ES 问题
- OpenGL ES 1.1 参考
- 模拟器热键
- HTML 4 实体参考
我想我们完成了。希望您觉得本教程很有用。如果您觉得有任何地方令人困惑,或者认为我遗漏了什么,请告诉我,以便我更新此页面。