
HTML5多生命游戏
4.56/5 (10投票s)
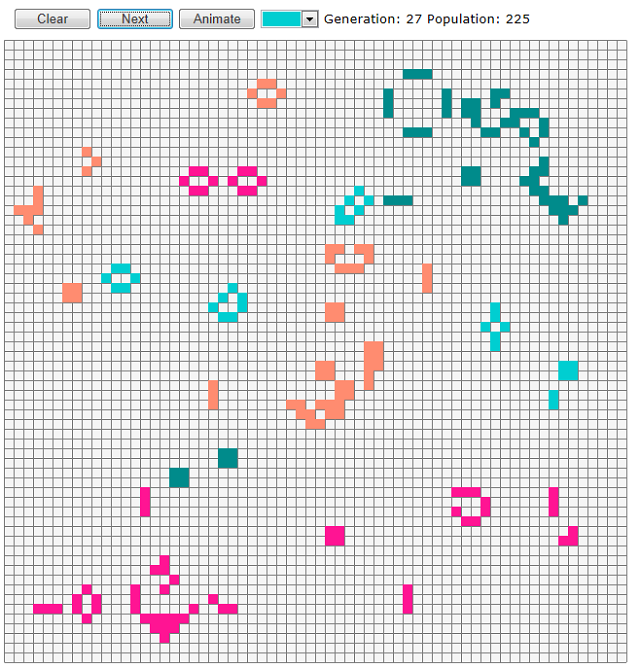
Conway生命游戏的HTML5版本,但有多个生命形式!
引言
本文介绍使用新的 Canvas 元素实现的 Conway 生命游戏的 HTML5 版本。我之前写过一篇介绍 WPF/XBAP 版本生命游戏文章,可以在 这里 查看。我并非显示缺乏想象力,而是为了对比两种不同的编码风格。我的结论是,对于小型应用程序,HTML5/JavaScript 编码大约是 WPF 的两倍容易,并且具有真正跨平台的优势。在我尝试的五种主流浏览器上的性能也非常出色。
背景
有关更多细节,请参阅我之前的 WPF 文章,或者直接谷歌搜索“Conway 生命游戏”。本质上,生命游戏模拟的是在网格上生存的简单自动机,它们根据周围邻居的数量来决定生死。你需要恰好有三个邻居才能诞生,有两个或三个邻居才能继续存活。为了避免边缘效应,网格通常有两种模型:要么是无限网格,要么是环面,其中每个边缘都与它的对面边缘相连。
在这个版本的生命游戏中,我试图使其尽可能地与 WPF 版本相似,但我做了一个重要的改变,即实现了多生命形式版本。在这个游戏中,有四种可能的生命形式,每种都显示为不同的颜色。每种生命形式都遵循正常的规则,并且它们之间不相互作用,除了如果一个单元格被一种类型占据,就不能被另一种类型填充。另外,当一种类型诞生时,我使用了简单的规则,即在固定的顺序中,第一个拥有三个邻居的类型会诞生。我曾想过尝试开发某种捕食者/猎物版本的生命游戏规则,但认为最好还是坚持基本规则,只做上述一种变体。
Using the Code
代码只包含一个文件,文件大小仅为 8KB!核心代码是环面或网格,我将其实现为一个名为 LifeTorus 的 JavaScript 类,如下所示:
function LifeTorus(size) {
    this.size = size;
    var count = size * size;
    this.torus = new Array(count);

    this.clear = function () {
        for (var i = 0; i < count; i++)
            this.torus[i] = 0;// 0 means empty for convenience and speed
    };

    // returns count of the number of neighbours of each kind
    this.getNeighbours = function (x, y) {
        var count = [0, 0, 0, 0, 0];
        // prev row
        count[this.get(x - 1, y - 1)]++;
        count[this.get(x, y - 1)]++;
        count[this.get(x + 1, y - 1)]++;

        // this row
        count[this.get(x - 1, y)]++;
        count[this.get(x + 1, y)]++;

        // next row
        count[this.get(x - 1, y + 1)]++;
        count[this.get(x, y + 1)]++;
        count[this.get(x + 1, y + 1)]++;

        return count;
    };

    this.get = function (x, y) {
        return this.torus[this.getIndex(x, y)];
    };

    this.set = function (x, y, value) {
        this.torus[this.getIndex(x, y)] = value;
    };

    // Treats the two dimensional array as a torus, i.e.
    // the top and bottom edges of the array are adjacent and the left and right edges
    // are adjacent.
    this.getIndex = function (x, y) {
        if (x < -1 || y < -1 || x > size || y > size)
            throw "Index out of bounds";
        if (x == -1)
            x = size - 1;
        else if (x == size)
            x = 0;
        if (y == -1)
            y = size - 1;
        else if (y == size)
            y = 0;
        return x + y * this.size;
    };

    this.clear();
}
该类实现了一个 NxN 数组,但内部存储为一个一维数组,因此要访问元素 (i, j),你需要访问索引 = i * N + j。这基本上就是 getIndex() 函数所做的,但有一个小技巧来实现环面。所以,行 -1 被映射到行 N-1,行 N 被映射到行 0,列也是如此。getIndex 函数接着被一个简单的设置值和获取值函数使用,这些函数又被名为 getNeighbours() 的主函数使用,该函数返回一个长度为 5 的数组,第一个元素不使用,其余四个元素是每种生命形式的数量。第一个元素不使用的原因是简化代码,因为生命形式以整数形式存储在网格中,例如,单元格值为 0 表示为空,值为 1 表示生命形式类型 1。唯一另一个函数是 clear() ,它将所有值设置为 0 (空)。
LifeTorus 类实现了我的模型,编写起来相对容易。将其渲染到 Canvas 也并不难,但我确实遇到了一个问题,即将任何鼠标函数(如 mousedown 或 mousemove)得到的全局鼠标坐标转换为相对于我的 Canvas 元素的坐标。经过一番搜索,我在 www.stackoverflow.com 上找到了 Ryan Artecona 提供的一个优雅的解决方案,如下所示:
function relMouseCoords(event) {
    var totalOffsetX = 0;
    var totalOffsetY = 0;
    var canvasX = 0;
    var canvasY = 0;
    var currentElement = this;

    do {
        totalOffsetX += currentElement.offsetLeft;
        totalOffsetY += currentElement.offsetTop;
    }
    while (currentElement = currentElement.offsetParent)

    canvasX = event.pageX - totalOffsetX;
    canvasY = event.pageY - totalOffsetY;

    return { x: canvasX, y: canvasY }
}
HTMLCanvasElement.prototype.relMouseCoords = relMouseCoords;
上面的代码在我测试的浏览器上都能正常工作,并且考虑了页面滚动。简单来说,它将所有父级的偏移量相加,然后从提供的坐标中减去。
顺便提一下:为了使事情更有趣和更高效,我使用了两个 Canvas 元素,一个叠在另一个上面,而不是单个 Canvas。Z 顺序(显示顺序)靠下的 Canvas 是第一个,我用它来绘制网格和背景颜色,第二个 Canvas 仅用于渲染生命形式。用于实现此目的的 HTML 如下所示:
<div style="position:relative">
<canvas id='canvas2' width='641' height='641' on></canvas>
<!-- Lowest in Z-order - provides background -->
<canvas id='canvas1' width='641' height='641' on>
Canvas is not supported by this browser.</canvas>
</div>
我使用 CSS 定位了两个 Canvas 元素。关键是它们需要放置在一个具有 position: relative 的 <div> 中,并且嵌入的 Canvas 样式表设置为 position: absolute,top 和 bottom 都设置为 0。
其余代码的大部分如下所示:
function advance() {
	// torus1 contains the current model, process into torus2 then swap the
	// references so torus1 refers to the next generation
	var _population = 0;
	for (var x = 0; x < _size; x++)
		for (var y = 0; y < _size; y++) {
			var neighbours = _torus1.getNeighbours(x, y);// dim 5 array
			var alive = 0;
			var kind = _torus1.get(x, y);
			if (kind > 0) {
				// it's alive - it will stay alive if it has
				// 2 or 3 neighbours
				var count = neighbours[kind];
				alive = (count == 2 || count == 3) ? kind : 0;
			}
			else {
				// It's dead but will be born
				// if any "kind" has exactly 3 neighbours
				// This isn't "fair" but we use the
				// first kind that has three neighbours
				for (kind = 1; kind <= 4 && alive == 0; kind++) {
					if (neighbours[kind] == 3)
						alive = kind;
				}
			}
			_torus2.set(x, y, alive);
			if (alive)
				_population++;
		}

	var temp = _torus1; // arrays are only references!
	_torus1 = _torus2;
	_torus2 = temp;
	render();
	generation.textContent = "Generation: " + String(++_generation);
	population.textContent = "Population: " + String(_population);
	if (_animate)
		setTimeout("advance()", 50);
}

function renderCanvas(canvas, size, torus) {
	// read from LifeTorus and write to canvas
	var context = canvas.getContext('2d');
	context.fillStyle = '#ff7f50';
	context.clearRect(0, 0, size * _cellSize, size * _cellSize);
	for (var x = 0; x < size; x++)
		for (var y = 0; y < size; y++) {
			var kind = _torus1.get(x, y) - 1;
			if (kind >= 0) {
				context.fillStyle = color_menu0.options[kind].value;
				context.fillRect(x * _cellSize, y * _cellSize,
					_cellSize, _cellSize);
			}
		}
}

function render() {
	renderCanvas(canvas1, _size, _torus1);
}

function drawGrid() {
	// Only ever called once!
	var context = canvas2.getContext('2d'); // canvas2 is the background canvas
	context.strokeStyle = '#808080';
	context.beginPath();
	for (var i = 0; i <= _size; i++) {
		// Draw vertical lines
		context.moveTo(i * _cellSize + 0.5, 0.5);
		context.lineTo(i * _cellSize + 0.5, _size * _cellSize);
		// Draw horizontal lines
		context.moveTo(0.5, i * _cellSize + 0.5);
		context.lineTo(_size * _cellSize, i * _cellSize + 0.5);
	}
	context.stroke();
}
上面代码中主要关注的函数是 advance()、render() 和 drawGrid()。advance() 函数简单地遍历每个单元格,获取当前生命形式的类型(如果为空则为 0)以及每种类型的邻居数量。然后,它遵循我前面提到的规则来设置该单元格为空或以适当的类型存活。函数结束时,它会检查 animate 标志是否为 true - 如果是,它调用 setTimeout 来调用自身(即 advance),延迟 50ms - 这与我在 WPF 版本中使用的方法类似。
render() 函数遍历单元格,如果存活,则用该类型的相应颜色填充单元格的矩形。我们在这里采取了一个捷径,使用类型减一作为颜色选择器 color_menu0 附加选项数组的索引。
最后,drawGrid() 函数绘制一系列垂直和水平线来分隔单元格边界。唯一值得一提的是,它只绘制一次,并且绘制到 canvas1 - 请记住 canvas2 在 canvas1 之上,而 canvas2 用于绘制生命形式。另一个小细节是,为了获得清晰的线条,你需要将偏移量绘制为 0.5,否则,如果偏移量为 0.0,则厚度为 1 的线条会出现在每条线两侧的单元格中(这与 WPF 中的情况相同)。
关注点
我没有尝试让我的按钮看起来与 WPF 按钮相同。我了解到可以使用 CSS3 制作一些漂亮的按钮,但如果你只想要一个带有图像和文本的简单按钮,那么同时垂直居中文本和图像是困难的。但这只是一个小问题,因为整体开发相对简单,事实上,由于所有现代浏览器似乎都内置了开发者工具,你甚至不需要像 VS2010 这样的 IDE。顺便说一句,Firefox 有一个名为 Firebug 的漂亮的开发者附加组件。
历史
除了考虑不同的游戏规则外,我还考虑过包含一些知名模式列表,并允许用户将它们拖放到画布上。这当然是可能的,例如使用第三个 canvas 叠加在另外两个和列表之上。最终,我决定不让intended to be a comparison of HTML5 and WPF 的内容变得混乱。顺便说一句,我无法将 Silverlight 纳入比较,因为它没有 Canvas 元素的等价物。