
在位图上渲染文本(和其他内容)
将文本放入位图,让您的 Winform 应用程序全屏显示,并向一些简单的 LINQ 代码问好。
引言
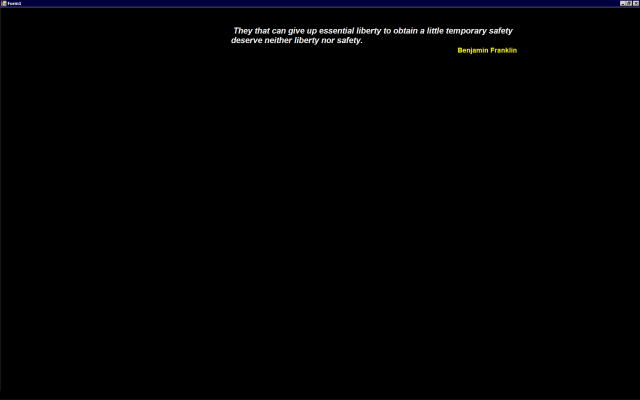
几周前,我决定做一个屏幕保护程序,可以将名言在屏幕上淡入淡出。之后我失去了对这个项目的兴趣,但在变得无聊的过程中,我学到了一些有用的东西。这肯定不是什么高科技,但我看到一些人在询问,所以我想分享我的发现。
将文本放入位图
这非常简单,几乎不需要描述。基本上,您只需要五行代码(额外三行代码是为了完整性和让文本“漂亮”。
	Bitmap bitmap = new Bitmap(800, 600);
	Graphics g = Graphics.FromImage(bitmap);

	g.SmoothingMode = System.Drawing.Drawing2D.SmoothingMode.AntiAlias;
	g.TextRenderingHint = System.Drawing.Text.TextRenderingHint.ClearTypeGridFit;
	g.Clear(Color.Transparent);

	TextRenderer.DrawText(g, "This is my text", myFont, new Point(0, 0), Color.Red);

	// assign the bitmap to a globally defined one
	m_bitmap = bitmap;

	g.Dispose();
就这样。简单吧?是啊,我也这么觉得。但是,如果我到此为止,这篇文章就不会很有趣了,对吧?因此,我将谈谈本文提供的示例应用程序。
示例应用程序始终最大化运行,并在屏幕上的随机位置显示随机选择的名言。这意味着我们需要了解名言位图的宽度和高度,以便在不被屏幕边缘切断的情况下显示它。一些名言很长,一些很短,所以这意味着我们需要在显示每句名言之前动态计算其矩形的大小。最重要的是,应用程序支持程序员(或用户,如果提供了设置窗体)指定的宽度限制。在此应用程序中,为了演示方便,它是硬编码的。
选择名言后,应用程序会调用名为 GetConstrainedTextHeight 的方法。此函数接受一个字体、原始文本字符串和一个 ref 参数,该参数将包含原始文本字符串的修改版本。该方法返回一个足够大的矩形对象,可以容纳渲染后的文本。只需按照注释来了解我们的操作。
private Rectangle GetConstrainedTextHeight(Font font, string textToParse, ref string resultText)
{
	// to ease typing, we set a local variable to the value specified in the
	// settings object
	int quoteAreaWidth = m_saverSettings.QuoteAreaWidth;

	// create a new bitmap - I don't knowe if the size matters, but just to
	// be safe, I set it to be larger than the expected height, and the max
	// area width
	Bitmap bitmap = new Bitmap(100, quoteAreaWidth);

	// create a graphics object from the image. This gives us access to the
	// GDI drawing functions needed to do what we're here to do.
	Graphics g = Graphics.FromImage(bitmap);

	// Get the size of the area needed to display the original text as a
	// single line.
	SizeF sz = g.MeasureString(textToParse, font);

	// Make sure we actually have work to do. If the quote width is smaller
	// than the desired max width, we can exit right now. This should almost
	// always happen for author text.
	if (sz.Width <= quoteAreaWidth)
	{
		resultText = textToParse;
		// don't forget to clean up our resources
		g.Dispose();
		bitmap.Dispose();
		return new Rectangle(new Point(0, 0), new Size((int)sz.Width+5, (int)sz.Height));
	}

	// make sure our resultText is empty
	resultText = "";

	// split the orginal text into separate words
	string[] words = textToParse.Trim().Split(' ');
	string nextLine = "";
	string word = "";

	for (int i = 0; i < words.Length; i++)
	{
		word = words[i];

		// get the size of the current line
		SizeF lineSize = g.MeasureString(nextLine, font);

		// get the size ofthe new word
		SizeF wordSize = g.MeasureString(" " + word, font);

		// if the line including the new word is smaller than our constrained size
		if (lineSize.Width + wordSize.Width < quoteAreaWidth)
		{
			// add the word to the line
			nextLine = string.Format("{0} {1}", nextLine, word);

			// If it's the last word in the original text, add the line
			// to the resultText
			if (i == words.Length - 1)
			{
				resultText += nextLine;
			}
		}
		else
		{
			// Add the current line to the resultText *without* the new word,
			// but with a linefeed
			resultText += (nextLine + "\n");

			// Start a new current line
			nextLine = word;

			// If it's the last word in the original text, add the line
			// to the resultText
			if (i == words.Length - 1)
			{
				resultText += nextLine;
			}
		}
	}

	// It's time to get a new measurement for the string. The Graphics.MeasureString
	// method takes into account the linefeed characters we inserted.
	sz = g.MeasureString(resultText, font);

	// Cleanup our resources
	g.Dispose();
	bitmap.Dispose();

	// Return the rectangle to the calling method
	return new Rectangle(new Point(0, 0), new Size((int)sz.Width, (int)sz.Height));
}
我们调用 GetConstrainedTextHeight() 方法两次——一次用于名言文本本身,一次用于作者文本。毕竟,没有必要冒险。此外,我们需要作者的矩形来完成定位计算。获取两个矩形后,我们就可以处理位图在屏幕上的定位了。请记住,在示例应用程序中,它始终以最大化窗口状态运行。因此,我们只需使用屏幕分辨率作为约束矩形。
	// rectangle for quote
	string newQuoteText = "";
	Rectangle quoteRect = GetConstrainedTextHeight(m_saverSettings.QuoteFont,
							quoteItem.Text,
							ref newQuoteText);

	//rectangle for author text
	string newAuthorText = "";
	Rectangle authorRect = GetConstrainedTextHeight(m_saverSettings.AuthorFont,
							quoteItem.Author,
							ref newAuthorText);

	// set the author rectangle origin
	authorRect.X = quoteRect.Right - authorRect.Width;
	authorRect.Y = quoteRect.Bottom;
最后,设置一些质量属性,并将文本实际渲染到位图。
	// Create a new bitmap that contains both the quote and the author text
	Bitmap bitmap	= new Bitmap(quoteRect.Width, quoteRect.Height + authorRect.Height + 2);
	Graphics g	= Graphics.FromImage(bitmap);

	// Set the text rendering characteristics - we want it to be attractive
	g.SmoothingMode		= System.Drawing.Drawing2D.SmoothingMode.AntiAlias;
	g.TextRenderingHint	= System.Drawing.Text.TextRenderingHint.ClearTypeGridFit;
	g.Clear(Color.Transparent);

	// Draw the text
	TextRenderer.DrawText(g,
			      newQuoteText,
			      m_saverSettings.QuoteFont,
			      new Point(quoteRect.X, quoteRect.Y),
			      m_saverSettings.QuoteColor);

	TextRenderer.DrawText(g,
			      newAuthorText,
			      m_saverSettings.AuthorFont,
			      new Point(authorRect.X, authorRect.Y+2),
			      m_saverSettings.AuthorColor);

	// Set our global bitmap
	m_bitmap = bitmap;

	// Cleanup the graphics object
	g.Dispose();
其他值得关注的点
本文介绍了一个简单的 Windows 窗体应用程序,我用它来测试核心功能。除了演示位图的动态创建和显示外,本文还说明了一种使您的 Windows 窗体应用程序全屏显示的方法,使用了用于执行实际工作的 BackgroundWorker 对象,以及在加载和保存 XML 文件时对 LINQ 的一些基本使用。
全屏模式
在工作中,我需要使一个应用程序占据整个屏幕,包括任务栏。这需要将边框样式更改为“无”,将窗体设置为最顶层窗口,最后,使用整个屏幕。我知道的要*真正*全屏的唯一方法是使用 .Net 的互操作功能,因此我在网上找到了这个类,它可以完全满足我们的需求。
public class WinAPI
{
	[DllImport("user32.dll", EntryPoint = "GetSystemMetrics")]
	public static extern int GetSystemMetrics(int which);

	[DllImport("user32.dll")]
	public static extern void
		SetWindowPos(IntPtr hwnd, IntPtr hwndInsertAfter,
						 int X, int Y, int width, int height, uint flags);

	private const int SM_CXSCREEN = 0;
	private const int SM_CYSCREEN = 1;
	private static IntPtr HWND_TOP = IntPtr.Zero;
	private const int SWP_SHOWWINDOW = 64; // 0×0040

	public static int ScreenX
	{
		get { return GetSystemMetrics(SM_CXSCREEN);}
	}

	public static int ScreenY
	{
		get { return GetSystemMetrics(SM_CYSCREEN);}
	}

	public static void SetWinFullScreen(IntPtr hwnd)
	{
		SetWindowPos(hwnd, HWND_TOP, 0, 0, ScreenX, ScreenY, SWP_SHOWWINDOW);
	}
}
为了实现这一切,我们编写以下代码。
	// go full screen
	WinAPI.SetWinFullScreen(this.Handle);
	// make the window top-most (prevents the user from getting to the task bar
	this.TopMost = true;
	// delete the window border
	this.FormBorderStyle = FormBorderStyle.None;
当然,这并不能阻止用户通过 Alt+Tab 切换出应用程序,但 CodeProject 上有一篇广受好评的文章讨论了如何使用 C# 钩取键盘,如果您想解决这个问题,我建议您从那里开始。
基本框架
我们从一个标准的 Windows 窗体应用程序开始。由于我们只处理一个没有控件的窗体,所以没有必要在 IDE 中设置窗体属性。因此,我们需要手动输入到窗体的构造函数中,进行一次手动输入的冒险(来吧——我知道您更喜欢这样)。
首先,我们想设置一些关于窗体内部绘制的样式。出于某种原因,我从未能在 IDE 中完全实现这些属性的设置,所以将其移到了对象构造函数中。
	SetStyle(ControlStyles.AllPaintingInWmPaint |
		 ControlStyles.UserPaint |
		 ControlStyles.DoubleBuffer, true);
我们还需要重写 Paint 方法,以便显示位图。
private void Form1_Paint(object sender, PaintEventArgs e)
{
	// if we have a bitmap
	if (m_bitmap != null)
	{
		try
		{
			// present it
			e.Graphics.DrawImage(m_bitmap, m_rect, 0, 0, m_rect.Width, m_rect.Height, GraphicsUnit.Pixel, m_attributes);
		}
		catch (Exception ex)
		{
			// eat the exception
			if (ex != null) {}
		}
	}
}
最后,我们使用 BackgroundWorker 对象来控制位图的淡入淡出。
private void fader_DoWork(object sender, DoWorkEventArgs e)
{
	BackgroundWorker worker = sender as BackgroundWorker;

	if (m_bitmap != null)
	{
		m_bitmap.Dispose();
	}

	m_bitmapType = BitmapType.Quote;

	switch (m_saverSettings.QuoteOrder)
	{
		case OrderSelector.Random:
			{
				m_nextQuoteIndex = RandomQuoteIndex();
			}
			break;

		default:
			{
				m_nextQuoteIndex = NextQuoteIndex();
			}
			break;
	}
	if (m_nextQuoteIndex < 0 || m_nextQuoteIndex > m_quotes.Count)
	{
		return;
	}
	PrepareQuoteImage(m_quotes[m_nextQuoteIndex]);

	// randomize the rectangle's origin (only the proimary monitor is considered
	int x = m_random.Next(0, Math.Max(0, WinAPI.ScreenX - m_bitmap.Width));
	int y = m_random.Next(0, Math.Max(0, WinAPI.ScreenY - m_bitmap.Height));
	m_rect = new Rectangle(x, y, m_bitmap.Width, m_bitmap.Height);

	// how much the alph is changed in each step
	float delta = 0.05f;
	// current alpha value
	m_alpha = 0.0f;

	while (m_alpha != 1.0f && !worker.CancellationPending)
	{
		// set the current alpha value
		m_colorMatrix.Matrix33 = m_alpha;
		try
		{
			m_attributes.SetColorMatrix(m_colorMatrix, ColorMatrixFlag.Default, ColorAdjustType.Bitmap);
		}
		catch (Exception ex)
		{
			if (ex != null) {}
		}
		// bump the alpha value up
		m_alpha += delta;
		// make sure the alpha doesn't exceed 1.0
		m_alpha = Math.Min(1.0f, m_alpha);
		// make it paint
		this.Invalidate(m_rect);
		// sleep a little so the fade doesn't hppen too quickly - this is
		// even more important when you're fading large images
		Thread.Sleep(35);
	}

	// sleep for the specified amount of time before fading the item off the screen
	int sleeper = 0;
	int sleepTime  = 100;
	while (sleeper <= m_saverSettings.OnDuration && !worker.CancellationPending)
	{
		Thread.Sleep(sleepTime);
		sleeper += sleepTime;
	}

	// fade the item off the screen (essentially counts the alpha down
	// from 1.0 to 0.0
	m_alpha = 1.0f;
	while (m_alpha != 0.0f && !worker.CancellationPending)
	{
		m_alpha -= delta;
		m_alpha = Math.Max(0.0f, m_alpha);
		m_colorMatrix.Matrix33 = m_alpha;
		m_attributes.SetColorMatrix(m_colorMatrix, ColorMatrixFlag.Default, ColorAdjustType.Bitmap);
		this.Invalidate(m_rect);
		Thread.Sleep(35);
	}
}
加载数据 - LINQ 拯救!
我喜欢爱国名言。尽管其中大部分已经有 200 年历史,有些来源可疑,但我喜欢阅读它们。知道自己是一个曾经不寻常(甚至不受欢迎)的想法的一部分,让我感觉很好。我可以理解这类东西不一定适合每个人,但既然这是我的文章,我保留创意许可的权利。
至于名言,我们的需求很简单——我们有名言文本本身,以及名言的作者。在我撰写本文的过程中,我在工作中不得不开始使用 LINQ,并决定将 LINQ 添加到这个示例应用程序中可能会很有趣。最初,我使用一个简单的逗号分隔的文本文件来存储名言,一切都很好。但是,为了真正体验 LINQ,我决定改用 XML 文件,因为目前大多数人就是这样加载非数据库数据。这是 QuoteItem 类。
public class QuoteItem
{
	private string m_text;
	private string m_author;

	public string Text		{ get { return m_text; } }
	public string Author	{ get { return m_author; } }

	public XElement XmlElement
	{
		get
		{
			return new XElement("QUOTE",
					new XElement("TEXT", Text),
					new XElement("AUTHOR", Author));
		}
	}

	public QuoteItem(string text, string author)
	{
		m_text		= text;
		m_author	= author;
	}

	public QuoteItem (XElement element)
	{
		m_text = element.Element("TEXT").Value;
		m_author = element.Element("AUTHOR").Value;
	}
}
请注意,有一个属性返回 XElement 格式的数据。这有助于使类外部的代码更清晰。同样,还有一个构造函数重载接受 XElement 对象。
我一开始使用的是 .txt 文件,我首先想自动化它到 XML 的转换,但首先,我必须加载文本文件。由于已经编写了代码来执行此操作,我决定对其进行足够的修改以实现转换。
private void LoadQuotes()
{
	m_quotes.Clear();
	if (File.Exists(m_quotesFileName))
	{
		LoadQuotesFromXML();
	}
	if (m_quotes.Count == 0)
	{

		// ... load the text file here

		// if we have quotes from the quotes.txt file
		if (m_quotes.Count > 0)
		{
			// save them to an xml file
			SaveQuotesToXML();
			// clear the list
			m_quotes.Clear();
			// reload from the xml file
			LoadQuotesFromXML();
		}
	}
首先,我检查 XML 文件是否存在,如果存在则从中加载数据。如果加载 XML 文件后没有加载任何名言,它会尝试读取 .txt 版本的文件。最后,如果我们加载了一些名言,我们将它们保存到 XML 文件,清空列表,然后从 XML 文件中重新填充它。这使我们能够验证 XML 文件确实已创建。
使用 LINQ 加载 XML 数据轻而易举。我们的 LoadQuotes() 函数需要二十多行代码才能从逗号分隔的文本文件中加载数据,这还不包括字符串解析类中的代码。使用 LINQ,代码行数减少到只有六行。
private void LoadQuotesFromXML()
{
	XDocument quotes = XDocument.Load(m_quotesFileName);
	var dataSet = from data in quotes.Descendants("QUOTE") select data;
	foreach (var quote in dataSet)
	{
		m_quotes.Add(new QuoteItem(quote));
	}
}
使用 LINQ 保存 XML 数据相当简单。
private void SaveQuotesToXML()
{
	// create our document
	XDocument quotes = new XDocument(new XDeclaration("1.0", "utf-8", "yes"), new XComment("Quotes file"));
	// create the root element - notice that we populate the child elements
	// at the same time
	var root = new XElement("QUOTES", from q in m_quotes select q.XmlElement);
	// add the root element
	quotes.Add(root);
	// save the file
	quotes.Save(m_quotesFileName);
}
我记得在 LINQ 出现之前,创建 XML 并将其保存到文件是一件非常麻烦的事情。现在,只需四行代码。还记得我说过将细节隐藏在黑盒类中可以使代码更清晰吗?这是我所指的一个完美例子。
闭运算
示例应用程序没有实际用途,只是让我测试我将在我打算编写的屏幕保护程序中使用的代码。在此过程中,我使用了一些其他所有人都可以利用的技术和类。如果您想逐步了解创建 XML 文件的代码,只需从程序文件夹中删除 XML 文件即可。
历史
2008/09/29:修正了一些拼写错误,并修改了一些描述性文本。
2008/09/28:发布了原始文章。