
使用 WebGL 和 HTML5 构建分子 3D 查看器
5.00/5 (8投票s)
使用 JavaScript 和 HTML5 构建一个 3D 分子查看器。
引言
虽然很多人熟悉 OpenGL,但使用 WebGL 的人相对较少。 然而,OpenGL 的许多概念和格式也适用于 WebGL。 本文旨在测试使用 WebGL 编程的难度。 作为一个 WebGL 新手,并且只有很少的 OpenGL 经验,我花了不到 6 个小时就完成了它。 有许多蛋白质查看器以预打包的 Java applet 或 C++ 程序的形式提供。 该项目试图了解使用 JavaScript 和 WebGL 制作一个有多困难。 令人惊讶的是,它非常简单!
背景
WebGL 是 JavaScript 浏览器中图形处理代码的实现,允许浏览器利用 GPU。
Using the Code
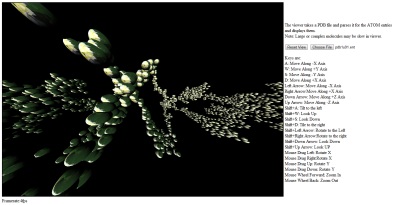
将代码安装在 Web 服务器上,无论是本地 Web 服务器还是远程服务器。 转到 index.html,单击“选择文件”按钮,选择计算机上的本地 PDB 文件,然后查看分子。
按键如下:
A: Move Along -X Axis
W: Move Along +Y Axis
S: Move Along -Y Axis
D: Move Along +X Axis
Left Arrow: Move Along -X Axis
Right Arrow:Move Along +X Axis
Down Arrow: Move Along +Z Axis
Up Arrow: Move Along -Z Axis
Shift+A: Tilt to the left
Shift+W: Look Up
Shift+S: Look Down
Shift+D: Tile to the right
Shift+Left Arrow: Rotate to the Left
Shift+Right Arrow:Rotate to the right
Shift+Down Arrow: Look Down
Shift+Up Arrow: Look UP
Mouse Drag Left: Rotate X
Mouse Drag Right:Rotate X
Mouse Drag Up: Rotate Y
Mouse Drag Down: Rotate Y
Mouse Wheel Forward: Zoom In
Mouse Wheel Back: Zoom Out
一个 PDB 文件示例
COMPND      PROPANE
AUTHOR      DAVE WOODCOCK  95  12 18
ATOM      1  C           1       1.241   0.444   0.349  1.00  0.00
ATOM      2  C           1      -0.011  -0.441   0.333  1.00  0.00
ATOM      3  C           1      -1.176   0.296  -0.332  1.00  0.00
ATOM      4  H           1       1.516   0.699  -0.675  1.00  0.00
ATOM      5  H           1       2.058  -0.099   0.827  1.00  0.00
ATOM      6  H           1       1.035   1.354   0.913  1.00  0.00
ATOM      7  H           1      -0.283  -0.691   1.359  1.00  0.00
ATOM      8  H           1       0.204  -1.354  -0.225  1.00  0.00
ATOM      9  H           1      -0.914   0.551  -1.359  1.00  0.00
ATOM     10  H           1      -1.396   1.211   0.219  1.00  0.00
ATOM     11  H           1      -2.058  -0.345  -0.332  1.00  0.00
TER      12              1
END
第一步是选择一个文件并解析该文件以获取 ATOM 条目。 我们使用文件输入按钮的 onclick 操作符选择一个文件。 接下来,我们设置一个 FileReader 对象并解析该文件。 获得文件内容后,我们调用 var lines = contents.split("\n"); 将文件拆分为行。 接下来,我们必须遍历这些行并使用空格将其拆分为数组。 然后,我们创建一个数组来保存我们的 ATOM 对象,并用行条目填充它。 当我们分隔行时,会有空白的数组条目,因此我们必须循环遍历该行,并且只复制我们想要的值。 此外,有些行比其他行有更多的空格,因此我们不能使用固定的位置。 因此,我们只复制所有非空值。 该过程如下所示:
for (y = 0; y < singleLine.length; y++)//loop through the line
{
	if (singleLine[y]!="" && singleLine[y]!=",")//is this a value or empty?
		objects[object_count][counter++] = singleLine[y];//has a value so lets copy it
}
下一步是循环遍历我们的对象数组并找到原子并绘制它们。 请注意,我们尚未将原子分开,而是复制了**所有**非空值。 所以现在我们需要找到我们想要绘制的 ATOM 结构。 查看上面的文件格式,我们可以看到每个原子的 x、y、z 坐标分别位于第 5th、6th、7th 列中。 代码如下所示:
for (i = 0; i < object_count; ++i) {
	if (objects[i][0] == "ATOM")
	{
		if (setcamera != true)
		//have we set the camera to focus
		//on an atom yet? if not pick the first one
		{
            //look at the 0,0,zPosition of the atom
			g.perspectiveMatrix.lookat(0, 0, objects[i][7], 0, 0, 0, 0, 1, 0);
			setcamera = true;
		}

		//draw one molecule
		drawOne(ctx, 30,
			objects[i][5],//x coord
			objects[i][6],//y coord
			objects[i][7],//z coord
			0.75,
			molTexture);//our texture
	}
}
接下来,我们需要将相机和对象设置在正确的位置。 为此,我们使用模型-视图矩阵并将其设置为按相机进行平移和旋转,然后再次按我们绘制的原子进行平移。 看起来是这样的:
// Add in camera controller's position and rotation
var pos = controller.getPosition();//get the camera position
mvMatrix.translate(pos[0],pos[1],pos[2]);//translate by the camera position if needed
mvMatrix.rotate(controller.getRoll(), 1, 0, 0);//rotate if needed
mvMatrix.rotate(controller.getYaw(), 0, 1, 0);//rotate if needed
mvMatrix.rotate(controller.getPitch(), 0, 0, 1);//rotate if needed
mvMatrix.translate(-x,-y,-z);//set the object in the proper place in view
好的,我们有了绘制原子的矩阵,现在我们绘制原子,在任何最终投影之后
ctx.bindTexture(ctx.TEXTURE_2D, texture);
ctx.drawElements(ctx.TRIANGLES, g.sphere.numIndices, ctx.UNSIGNED_SHORT, 0);
剩下的就是使用按键移动我们的相机
function keyCamera(event){//a key is released
	var cam = controller;
	if(event.shiftKey) {
		switch(event.keyCode) {//determine the key pressed
			case 65://a key
				cam.roll(-Math.PI * 0.25);//tilt to the left
				break;
			case 37://left arrow
				cam.yaw(Math.PI * 0.25);//rotate to the left
				break;
			case 68://d key
				cam.roll(Math.PI * 0.25);//tilt to the right
				break;
			case 39://right arrow
				cam.yaw(-Math.PI * 0.25);//rotate to the right
				break;
			case 83://s key
			case 40://down arrow
				cam.pitch(Math.PI * 0.25);//look down
			break;
			case 87://w key
			case 38://up arrow
				cam.pitch(-Math.PI * 0.25);//look up
			break;
		}
	}
	else {
		var pos = cam.getPosition();
		//alert(pos);
		switch(event.keyCode) {//deterime the key pressed
			case 65://a key
			case 37://left arrow
				cam.setPosition(pos[0]-0.5,pos[1],pos[2]);//move - along the X axis
			break;
			case 68://d key
			case 39://right arrow
				cam.setPosition(pos[0]+0.5,pos[1],pos[2]);//more + along the X axis
			break;
			case 83://s key
				cam.setPosition(pos[0],pos[1]-0.5,pos[2]);//move - along the Y axis (down)
			break;
			case 40://down arrow
				cam.setPosition(pos[0],pos[1],pos[2]+0.5);//move + on the Z axis
			break;
			case 87://w key
				cam.setPosition(pos[0],pos[1]+0.50,pos[2]);//move + on the Y axis (up)
			break;
			case 38://up arrow
				cam.setPosition(pos[0],pos[1],pos[2]-0.5);//move - on the Z axis
			break;
		}
	}
}
要初始化 WebGL,我们使用类似这样的东西:
var gl = initWebGL("molview");
if (!gl) {
	return;
}
var c = document.getElementById("molview");//canvas where we will draw

c.addEventListener('webglcontextlost', handleContextLost, false);
c.addEventListener('webglcontextrestored', handleContextRestored, false);
g.program = simpleSetup(gl, "vshader", "fshader",
					[ "vNormal", "vTexCoord", "vPosition"],
					[ 0, 0, 0, 1 ], 10000);
gl.uniform3f(gl.getUniformLocation(g.program, "lightDir"), 0, 0, 1);
gl.uniform1i(gl.getUniformLocation(g.program, "sampler2d"), 0);

if (g.program) {
	g.u_normalMatrixLoc = gl.getUniformLocation(g.program, "u_normalMatrix");
	g.u_modelViewProjMatrixLoc = gl.getUniformLocation(g.program, "u_modelViewProjMatrix");
}

g.sphere = makeSphere(gl, 1, 30, 30);

// get the images
molTexture = loadImageTexture(gl, "./h1.jpg");
最后是相机,我们只需实现一些东西来跟踪我们的位置和旋转,然后就可以开始了。 相机中的代码太多,无法发布,因此我将由感兴趣的各方查看附加的源代码。 为了保持简洁,我省略了一些功能。 附加的代码具有所需的一切和一些 PDB 文件示例。
关注点
我了解了使用 WebGL 编程是多么的相对容易。 对于在短时间内创建可见内容的一个很好的介绍。 WebGL 和 HTML5 都是我期待将来使用的东西。
历史
版本 0.1:为 PDB 文件实现了基本的 ATOM 查看器。