
MFC 应用程序的自定义窗口
4.37/5 (29投票s)
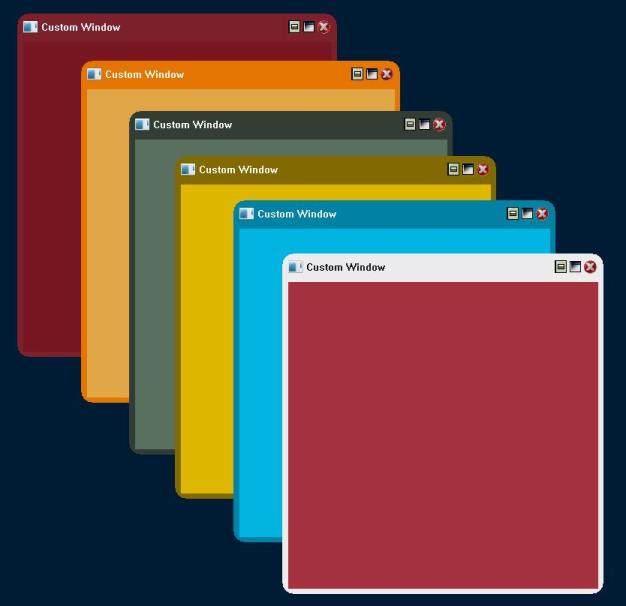
本文档主要解释如何在MFC应用程序中创建自定义绘制的窗口。
引言
这篇文章的产生源于尝试为MFC应用程序创建自定义边框。定制应用程序窗口的最简单方法是将其绑定到特定的主题,从而赋予其我们想要的外观和感觉。但有时我们无法获得我们想要的确切设计,更重要的是,我们想要的形状。因此,产生了移除现有边框和标题栏,并让窗口处理边框和标题栏可以执行的基本操作的想法。
因此,当我们移除窗口的标题栏和边框时,我们必须处理它们执行的一些基本操作。这些操作包括:
- 移动窗口
- 调整窗口大小
- 关闭、还原和最小化
代码
首先,我们可以移除标题栏并剪裁窗口的区域
BOOL CCustomFrame::OnCreateClient(LPCREATESTRUCT lpcs, CCreateContext* pContext)
{
	CRect rect;
	GetClientRect(rect);
	//Create the custom region for the window
	m_CustomRgn.CreateRoundRectRgn(rect.left + winStats.frm_clp_wdth,
		rect.top + winStats.frm_clp_wdth,
		rect.right - winStats.frm_clp_wdth,
		rect.bottom - winStats.frm_clp_wdth,
		20, 20);
		//Set the window region
        VERIFY(SetWindowRgn(m_CustomRgn , TRUE ));
	return CFrameWnd::OnCreateClient(lpcs, pContext);
}
BOOL CCustomFrame::LoadFrame(UINT nIDResource, DWORD dwDefaultStyle ,
			CWnd* pParentWnd , CCreateContext* pContext)
{
	BOOL bRet = CFrameWnd::LoadFrame
		(nIDResource, dwDefaultStyle, pParentWnd, pContext);
	if(bRet)
	{
	    //Remove the titlebar from the frame using the ModifyStyle
		ModifyStyle(WS_CAPTION, WS_CLIPCHILDREN);
	    //Remove the border
		ModifyStyleEx(WS_EX_CLIENTEDGE,0);
	}
	return true;
}
如上所述,我们可以重写函数 OnCreateClient 和 LoadFrame 来修改窗口。
接下来,由于我们移除了边框和标题栏,我们可以使用基本事件来捕获现在无边框窗口无法执行的操作。为此,我们可以使用...
afx_msg void OnLButtonDown(UINT nFlags, CPoint point)
...并捕获默认的消息处理。根据点击的区域,我们可以让窗口处理不同的消息,从而执行任务。为了处理消息,可以使用 DefWindowProc。
if (r_windRects.r_Move.PtInRect(point)){
		DefWindowProc(WM_SYSCOMMAND,
				SC_MOVE + 1 ,MAKELPARAM(point.x,point.y));
		return 0;
	}
	if (Val == -1)
		return 0;

	::SetCursor(AfxGetApp()->LoadStandardCursor(cursor));
	//Send the resize messages
	DefWindowProc(WM_SYSCOMMAND, SC_SIZE + Val ,MAKELPARAM(point.x ,point.y));
	return 0;
通过这部分代码,调整大小和移动操作得以处理。由于它处理了调整大小,现在我们可以调整窗口大小并剪裁它,以便保持我们想要的基本形状。
void CCustomFrame::OnSize(UINT nType, int cx, int cy)
{
	CRect rect;
	GetClientRect(rect);
         //Detach the previous region
	m_CustomRgn.Detach();
	//Create and set the new region for the window!
	m_CustomRgn.CreateRoundRectRgn(rect.left + winStats.frm_clp_wdth,
		rect.top + winStats.frm_clp_wdth
		, rect.right- winStats.frm_clp_wdth,
		rect.bottom - winStats.frm_clp_wdth, 30, 30);

	SetWindowRgn(m_CustomRgn, TRUE);
	CFrameWnd::OnSize(nType, cx, cy);
}
另一件需要处理的事情是框架的最大化和还原。我们不能使用 ShowWindow(SW_SHOWMAXIMIZED),因为我们已经从窗口剪裁了一些区域。因此,以下代码用于此目的:
int CCustomFrame::maximize(void)
{
	//The custom maximize function.
	//This is needed since we clipped the frame and the border.
	CRect rect,rectD, rect1;
	GetClientRect(rect);
	GetWindowRect(m_PrevRect);
	//Get the screen size!
	int scrWidth  = GetSystemMetrics(SM_CXSCREEN);
	int scrHeight = GetSystemMetrics(SM_CYSCREEN);

	rect.right = scrWidth + winStats.frm_clp_wdth;
	rect.bottom = scrHeight + winStats.frm_clp_wdth;
	rect.left -= winStats.frm_clp_wdth;
	rect.top -= winStats.frm_clp_wdth;
	//Get the taskbar rect and set the bottom to taskbar rect top parameter
	CWnd* pTray = FindWindow(_T("Shell_TrayWnd"), _T(""));
	pTray->GetWindowRect(&rectD);
	rect.bottom = rectD.top + winStats.frm_clp_wdth;
	MoveWindow(rect);
	b_maximized = TRUE;
	return 0;
}
关注点
这样做的好处是,通过处理一些基本的窗口操作和事件,我们可以创建我们喜欢的边框。由于我们绘制边框,它们不会在运行的Windows平台上发生变化(例如:XP或Vista)。我们还可以使用 CDialog 类代替 CFrameWnd 来创建自定义窗口。
但缺点是处理大量消息。此外,在绘制事物时可能会出现一些小的缺陷,例如闪烁。因此,这段代码可能没有商业价值,但它可以成为一个很好的学习材料!
历史
- 2008年11月30日:初始版本