
使用 Windows 8 和 Visual Studio 2011 设计 Metro 应用
4.56/5 (5投票s)
使用 Windows 8 和 Visual Studio 2011 设计 Metro 应用
引言
本文档面向使用 Windows 8 和 Visual Studio 2011 开发 Metro 风格应用.NET 开发者。在本文中,我将简要介绍 Metro 应用,并演示一个示例 Metro 应用设计。
什么是 Metro 应用?
Metro 风格的应用是全屏应用,针对用户的需求、运行设备、触摸交互以及 Windows 用户界面进行了优化。Windows 帮助您与用户互动,您的用户与您的应用互动。”摘自 MSDN:MSDN。
关于 Windows 8 开发:http://www.buildwindows.com/
开发 Metro 应用时,您可以选择多种语言和技术。
- HTML + JS + CSS
- XAML + (C# 或 VB)
- XAML + (C++ 或 C)
必备组件
关于我的示例 Facebook 照片相册 Metro 应用
- 此示例 Metro 应用有三个屏幕:第一个是“Facebook 登录”屏幕,接着是“相册”屏幕,最后一个是“照片”屏幕。
- 由于我喜欢 XAML 和 C#,因此我使用 XAML 和 C# 开发了这个示例 Metro 应用。
- 我正在使用 Facebook C# SDK 从 Facebook 获取相册和照片。
步骤 1:创建项目
借助新的 VS 2011 开发工具,您将能够使用 C#、XAML、JavaScript、VB 创建 Windows Metro 风格的应用。在此,我将使用 C# 网格模板来设计示例 Facebook 照片相册 Metro 风格的应用。

步骤 2:添加客户端 Internet 功能
由于我的 Metro 应用从 Facebook 获取数据,因此应用需要客户端 Internet 连接才能从 Facebook 获取数据。
要在 Metro 应用中启用 Internet 功能,请双击 Package.appxmanifest 文件,然后在“功能”选项卡下,将“Internet (客户端)”标记为选中状态。

步骤 3:添加登录页面
此页面用于显示 Facebook 登录对话框并验证 Facebook 用户。

LoginPage.xaml 页面包含 Login() 方法,该方法用于显示 Facebook 登录对话框、验证 Facebook 用户以及从 Facebook 获取相册和照片。
以下代码显示了 Facebook 登录框:
//Facebook AppId
                string faceBookAppId = "285516851528865";
                //Facebook Extended Permissions
                string[] extendedPermissions = new[] { "user_about_me", "offline_access", "user_photos", "publish_stream", "friends_photos" };
                string redirectUri = "https://#/connect/login_success.html";
                System.Uri EndUri = new Uri(redirectUri);
                var oauth = new FacebookClient { AppId = faceBookAppId };
                var parameters = new Dictionary<string, object>
                        {
                            {"client_id",faceBookAppId},
                            { "response_type", "token" },
                            { "display", "popup" },
                            {"redirect_uri",redirectUri}
                        };

                if (extendedPermissions != null && extendedPermissions.Length > 0)
                {
                    var scope = new StringBuilder();
                    scope.Append(string.Join(",", extendedPermissions));
                    parameters["scope"] = scope.ToString();
                }

                Uri loginUrl = oauth.GetLoginUrl(parameters);
                //Show facebook login Dialogue box
                WebAuthenticationResult WebAuthenticationResult = await WebAuthenticationBroker.AuthenticateAsync(
                                                         WebAuthenticationOptions.None,
                                                         loginUrl, EndUri
                                                         );
以下代码显示,一旦 Facebook 身份验证成功,它将导航到“相册”屏幕 (GroupedItemsPage.xaml): //Show Albums if Facebook login successfull
if (WebAuthenticationResult.ResponseStatus == WebAuthenticationStatus.Success)
{
FacebookOAuthResult fbAuthResult = oauth.ParseOAuthCallbackUrl(new Uri(WebAuthenticationResult.ResponseData.ToString()));
var fbClient = new FacebookClient(fbAuthResult.AccessToken);
//Get Facebook Albums
dynamic fbAlbums = await fbClient.GetTaskAsync("/me/albums");
DataSource dataSource = new DataSource();
foreach (var a in fbAlbums.data)
{
//Get Facebook Photos
var fbPhotos = await fbClient.GetTaskAsync(a.id + "/photos");
string albumPath="";
foreach (var p in fbPhotos.data)
{
albumPath = p.source;
break;
}
var album = new Album(a.name, albumPath);
foreach (var p in fbPhotos.data)
album.Photos.Add(new Photo("", p.source, album));
dataSource.Albums.Add(album);
}
Frame.Navigate(typeof(GroupedphotosPage), dataSource.Albums);
步骤 4:自定义 GroupedItemsPage.xaml 和 ItemDetailPage.xaml 文件以显示相册和照片
- GroupedItemsPage.xaml 页面用于显示 Facebook 用户相册。
- ItemDetailPage.xaml 页面用于显示 Facebook 用户相册照片。
相册屏幕预览

当 GroupedItemPage 页面加载时,将传入的数据存储到 DataViewModel["Albums"] 中,我们将在设计页面中使用此值来显示用户相册。
 /// <summary>
        /// Invoked when this page is about to be displayed in a Frame.
        /// </summary>
        /// <param name="e">Event data that describes how this page was reached.  The Parameter
        /// property provides the grouped collection of photos to be displayed.</param>
        protected override void OnNavigatedTo(NavigationEventArgs e)
        {
            this.DefaultViewModel["Albums"] = e.Parameter;
        }
创建相册集合的用户控件资源,我们将在 GridView 中使用此资源来显示相册。
 <UserControl.Resources>

        <!-- Collection of grouped photos displayed by this page -->
        <CollectionViewSource
            x:Name="groupedphotosViewSource"
            Source="{Binding Albums}"
            IsSourceGrouped="False"
            ItemsPath="Photos"
            d:Source="{Binding Albums, Source={d:DesignInstance Type=data:DataSource, IsDesignTimeCreatable=True}}"/>
    </UserControl.Resources>
在 Gridview 中显示相册
<GridView
                x:Name="itemGridView"
                AutomationProperties.AutomationId="ItemGridView"
                AutomationProperties.Name="Face Book Photo Album"
                Margin="116,0,40,46"
                ItemsSource="{Binding Source={StaticResource groupedphotosViewSource}}"
                ItemTemplate="{StaticResource Standard250x250ItemTemplate}"
                SelectionMode="None"
                IsItemClickEnabled="True"
                ItemClick="ItemView_ItemClick">

                  <GridView.ItemsPanel>
                    <ItemsPanelTemplate>
                        <VirtualizingStackPanel Orientation="Horizontal"/>
                    </ItemsPanelTemplate>
                </GridView.ItemsPanel>
                <GridView.GroupStyle>
                    <GroupStyle>

                        <GroupStyle.Panel>
                            <ItemsPanelTemplate>
                                <VariableSizedWrapGrid Orientation="Vertical" Margin="0,0,80,0"/>
                            </ItemsPanelTemplate>
                        </GroupStyle.Panel>
                    </GroupStyle>
                </GridView.GroupStyle>
            </GridView>
当用户单击相册时,将调用以下方法,该方法导航到照片屏幕。
/// <summary>
        /// Invoked when an item within a group is clicked.
        /// </summary>
        /// <param name="sender">The GridView (or ListView when the application is snapped)
        /// displaying the item clicked.</param>
        /// <param name="e">Event data that describes the item clicked.</param>
        void ItemView_ItemClick(object sender, ItemClickEventArgs e)
        {
            // Navigate to the appropriate destination page, configuring the new page
            // by passing required information as a navigation parameter

            this.Frame.Navigate(typeof(ItemDetailPage), e.ClickedItem);
        }
ItemDetailPage.xaml
照片屏幕预览
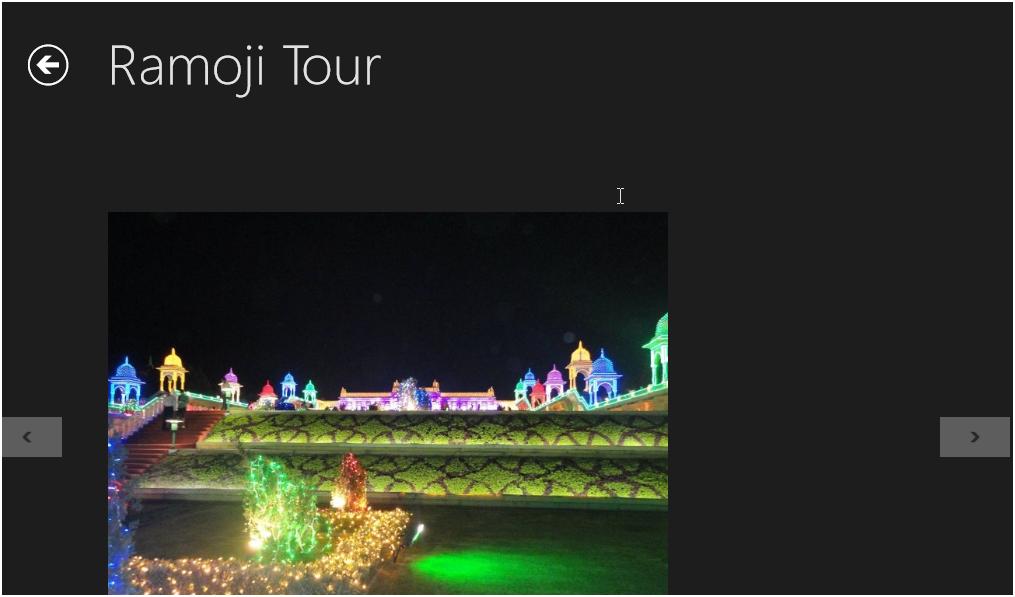
当 ItemDetailPage 页面加载时,将选定的相册和照片对象存储到 DefaultViewModel 中,我们将使用这些对象在屏幕上显示照片。
 /// <summary>
        /// Invoked when this page is about to be displayed in a Frame.
        /// </summary>
        /// <param name="e">Event data that describes how this page was reached.  The Parameter
        /// property provides the initial item to be displayed.</param>
        protected override void OnNavigatedTo(NavigationEventArgs e)
        {
            var album = (Album)e.Parameter;
            this.DefaultViewModel["Album"] = album;
            this.DefaultViewModel["Photos"] = album.Photos ;
            //this.flipView.SelectedItem = item;
        }
创建照片的静态资源,我们将在 FlipView 中使用此资源来显示照片。
<UserControl.Resources>

        <!-- Collection of items displayed by this page -->
        <CollectionViewSource
            x:Name="itemsViewSource"
            Source="{Binding Photos}"
            d:Source="{Binding Album[0].Photos, Source={d:DesignInstance Type=data:DataSource, IsDesignTimeCreatable=True}}"/>
    </UserControl.Resources>
在 FlipView 中显示照片
 <FlipView
            x:Name="flipView"
            AutomationProperties.AutomationId="ItemsFlipView"
            AutomationProperties.Name="Item Details"
            Grid.Row="1"
            Margin="0,-3,0,0"
            ItemsSource="{Binding Source={StaticResource itemsViewSource}}">

            <FlipView.ItemTemplate>
                <DataTemplate>

                    <!--
                        UserControl chosen as the templated item because it supports visual state management
                        Loaded/unloaded events explicitly subscribe to view state updates from the page
                    -->
                    <UserControl Loaded="StartLayoutUpdates" Unloaded="StopLayoutUpdates">
                        <ScrollViewer x:Name="scrollViewer" Style="{StaticResource HorizontalScrollViewerStyle}" Grid.Row="1">

                            <!-- Content is allowed to flow across as many columns as needed -->
                            <common:RichTextColumns x:Name="richTextColumns" Margin="117,0,117,47">
                                <RichTextBlock x:Name="richTextBlock" Width="560" Style="{StaticResource ItemRichTextStyle}">

                                    <Paragraph LineStackingStrategy="MaxHeight">
                                        <InlineUIContainer>
                                            <Image x:Name="image" MaxHeight="480" Margin="0,20,0,10" Stretch="Uniform" Source="{Binding Image}"/>
                                        </InlineUIContainer>
                                    </Paragraph>

                                </RichTextBlock>

                                <!-- Additional columns are created from this template -->
                                <common:RichTextColumns.ColumnTemplate>
                                    <DataTemplate>
                                        <RichTextBlockOverflow Width="560" Margin="80,0,0,0">
                                            <RichTextBlockOverflow.RenderTransform>
                                                <TranslateTransform X="-1" Y="4"/>
                                            </RichTextBlockOverflow.RenderTransform>
                                        </RichTextBlockOverflow>
                                    </DataTemplate>
                                </common:RichTextColumns.ColumnTemplate>
                            </common:RichTextColumns>

                            <VisualStateManager.VisualStateGroups>

                                <!-- Visual states reflect the application's view state inside the FlipView -->
                                <VisualStateGroup>
                                    <VisualState x:Name="FullScreenLandscape"/>
                                    <VisualState x:Name="Filled"/>

                                    <!-- Respect the narrower 100-pixel margin convention for portrait -->
                                    <VisualState x:Name="FullScreenPortrait">
                                        <Storyboard>
                                            <ObjectAnimationUsingKeyFrames Storyboard.TargetName="richTextColumns" Storyboard.TargetProperty="Margin">
                                                <DiscreteObjectKeyFrame KeyTime="0" Value="97,0,87,57"/>
                                            </ObjectAnimationUsingKeyFrames>
                                            <ObjectAnimationUsingKeyFrames Storyboard.TargetName="image" Storyboard.TargetProperty="MaxHeight">
                                                <DiscreteObjectKeyFrame KeyTime="0" Value="400"/>
                                            </ObjectAnimationUsingKeyFrames>
                                        </Storyboard>
                                    </VisualState>

                                    <!-- When snapped, the content is reformatted and scrolls vertically -->
                                    <VisualState x:Name="Snapped">
                                        <Storyboard>
                                            <ObjectAnimationUsingKeyFrames Storyboard.TargetName="richTextColumns" Storyboard.TargetProperty="Margin">
                                                <DiscreteObjectKeyFrame KeyTime="0" Value="17,0,17,57"/>
                                            </ObjectAnimationUsingKeyFrames>
                                            <ObjectAnimationUsingKeyFrames Storyboard.TargetName="scrollViewer" Storyboard.TargetProperty="Style">
                                                <DiscreteObjectKeyFrame KeyTime="0" Value="{StaticResource VerticalScrollViewerStyle}"/>
                                            </ObjectAnimationUsingKeyFrames>
                                            <ObjectAnimationUsingKeyFrames Storyboard.TargetName="richTextBlock" Storyboard.TargetProperty="Width">
                                                <DiscreteObjectKeyFrame KeyTime="0" Value="280"/>
                                            </ObjectAnimationUsingKeyFrames>
                                            <ObjectAnimationUsingKeyFrames Storyboard.TargetName="image" Storyboard.TargetProperty="MaxHeight">
                                                <DiscreteObjectKeyFrame KeyTime="0" Value="160"/>
                                            </ObjectAnimationUsingKeyFrames>
                                        </Storyboard>
                                    </VisualState>
                                </VisualStateGroup>
                            </VisualStateManager.VisualStateGroups>
                        </ScrollViewer>
                    </UserControl>
                </DataTemplate>
            </FlipView.ItemTemplate>
        </FlipView>
步骤 5:将 LoginPage.xaml 页面设置为启动页
打开 App.xaml.cs 并将 LoginPage 设置为启动页,如下图所示:
  protected override void OnLaunched(LaunchActivatedEventArgs args)
        {
            // TODO: Create a data model appropriate for your problem domain to replace the sample data
            var sampleData = new DataSource();

            if (args.PreviousExecutionState == ApplicationExecutionState.Terminated)
            {
                //TODO: Load state from previously suspended application
            }

            // Create a Frame to act navigation context and navigate to the first page,
            // configuring the new page by passing required information as a navigation
            // parameter
            var rootFrame = new Frame();
            rootFrame.Navigate(typeof(LoginPage));

            // Place the frame in the current Window and ensure that it is active
            Window.Current.Content = rootFrame;
            Window.Current.Activate();
        }