
如何创建 Windows 事件日志并编写自定义消息
4.92/5 (38投票s)
一个简单的类,用于创建 Windows 事件日志并编写自定义消息。
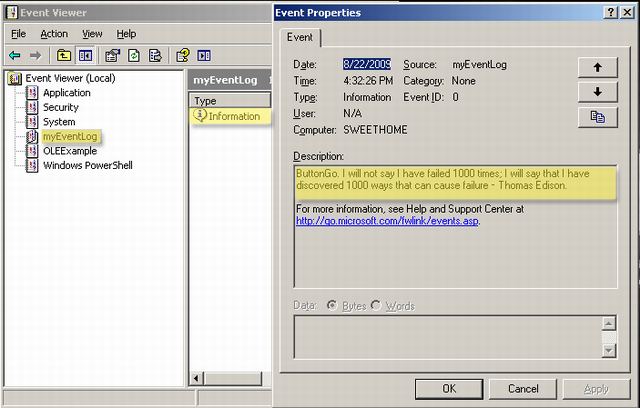
图1(事件查看器 - 显示带有示例信息的新日志)
引言
本文将介绍如何创建一个Windows事件日志,以及如何在其中写入自定义消息。
背景
大多数开发人员都非常熟悉Windows事件日志API。当开发人员创建基于Windows的应用程序(例如ActiveX组件、任何自定义DLL库、服务应用程序等)时,通常的做法是将应用程序运行时生成的各种信息写入事件日志,以便我们轻松跟踪所有信息。
Using the Code
在开始了解代码之前,我们需要了解一下System.Diagnostics命名空间。我们将使用此命名空间来管理事件日志。System.Diagnostics命名空间提供了一个名为“EventLog”的类,用于创建事件日志和向其中写入消息。
让我们来看一个例子,我们的目标是编写一个简单的C# .NET类,它将创建一个名为“myEventLog”的新日志,并写入一条消息“我不会说我失败了1000次;我会说我发现了1000种可能导致失败的方法——托马斯·爱迪生。”作为信息。
为此,我们需要使用以下方法、属性和enum,这些都可以在System.Diagnostics命名空间中找到。
方法
SourceExists:确定事件源是否在本地计算机上注册。CreateEventSource:将应用程序设置为能够将事件信息写入系统上的特定日志。
更多详情请访问此链接。WriteEntry:在事件日志中写入条目,即使用给定的消息文本向事件日志写入信息类型条目。
更多详情请访问此链接。
属性
Source:获取或设置注册并用于写入事件日志的源名称。Log:获取或设置要从中读取或写入的日志的名称。
枚举
EventLogEntryType:指定事件日志条目的事件类型。
更多详情请访问此链接。
示例代码
  public class ClsEventLog
    {
        public bool CreateLog(string strLogName)
        {
            bool Result = false;

            try
            {
                    System.Diagnostics.EventLog.CreateEventSource(strLogName, strLogName);
                    System.Diagnostics.EventLog SQLEventLog =
				new System.Diagnostics.EventLog();

                    SQLEventLog.Source = strLogName;
                    SQLEventLog.Log = strLogName;

                    SQLEventLog.Source = strLogName;
                    SQLEventLog.WriteEntry("The " + strLogName + " was successfully
			initialize component.", EventLogEntryType.Information);

                    Result = true;
            }
            catch
            {
                Result = false;
            }

            return Result;
        }
        public void WriteToEventLog(string strLogName
                                  , string strSource
                                  , string strErrDetail)
        {
            System.Diagnostics.EventLog SQLEventLog = new System.Diagnostics.EventLog();

            try
            {
                if (!System.Diagnostics.EventLog.SourceExists(strLogName))
						this.CreateLog(strLogName);


                SQLEventLog.Source = strLogName;
                SQLEventLog.WriteEntry(Convert.ToString(strSource)
                                      + Convert.ToString(strErrDetail),
				EventLogEntryType.Information);

            }
            catch (Exception ex)
            {
                SQLEventLog.Source = strLogName;
                SQLEventLog.WriteEntry(Convert.ToString("INFORMATION: ")
                                      + Convert.ToString(ex.Message),
				EventLogEntryType.Information);
            }
            finally
            {
                SQLEventLog.Dispose();
                SQLEventLog = null;
            }
        }
    }
结论
我希望本文对您有所帮助。 祝您愉快!
历史
- 2009年8月22日:初始发布