
用于构建网页和网站的 Canvas 控件库和新的基于窗体的系统
4.98/5 (105投票s)
Canvas控件库使用HTML5 Canvas元素提供高度可定制的控件。还包含一个基于表单的新系统,这是一种构建网页和网站的新方法。
** 已提供演示网站的链接。
重要提示
我不再进行开源,并且不再正式支持Canvas控件库。感谢您投出的5星好评,我对此表示感谢。祝所有看过本文、阅读、修改或使用我的想法来创建自己软件的人,以及在您所有事业中使用我代码的人,好运。
演示网站
以下是演示网站的链接,展示了Canvas控件库控件的实际应用
- http://akshays2112.github.io/canvascontrollibrary/Default.html
- http://akshays2112.github.io/canvascontrollibrary/Default2.html
- http://akshays2112.github.io/canvascontrollibrary/Default3.html
- http://akshays2112.github.io/canvascontrollibrary/Default4.html
新系统
现在有一个新系统,它与Visual Studio 2015中的ASP.NET MVC Web API系统协同工作。有一个新的Canvas控件库JavaScript文件以及后端模型文件和控制器。该系统现在还依赖于jQuery的$.post ajax方法,该方法在客户端(浏览器)和后端ASP.NET之间交换数据。要获取软件,请访问https://github.com/akshaysrin/CanvasControlLibrary。
引言
上述警告的解决方法
我之前推荐使用的元标记是IE=edge。这仍然适用,除非您使用的是Windows 7并且自动更新已将IE更新到Windows 7的10版本。如果您使用的是Windows 7和IE 10,那么要继续使用IE,请将元标记属性从IE=edge更改为IE=EmulateIE9。基本上,正如这描述的那样,浏览器现在将像IE9浏览器一样工作,在这种情况下,您的Canvas控件库ajax Post调用将不会中断,并且您的网站将在该客户端上运行。
导致此新版本的文章更改
由于文章很长,它记录了Canvas控件库的整个系统,我将使用本节来描述文章从上一版本到当前版本的变化,这样您就不必再次阅读整篇文章。为此,以下是更改
- 所有控件都具有制表符焦点功能,但那些不需要的除外,例如滚动条和文字处理器控件。还更新了ASP.NET/C#、JSP/Java和PHP的服务器端逻辑。
- 添加了在
textbox之间切换制表符焦点的功能。在Web Wunder Mail示例的登录屏幕中,有三个textbox,您必须单击才能在填写完第一个之后获得焦点,这非常令人痛苦。现在您只需制表。Combobox也支持,但还没有实现。所有有意义的制表需求控件都将包含在内。还更新了自定义控件创建部分的说明,以包括如何将自定义控件包含在制表过程中。 - 我创建了一个名为“如何使用Button控件作为示例创建控件”的部分,以鼓励那些想编写自己的自定义控件并将其贡献回CCL社区的人。
目录
- 引言
- Using the Code
- Label控件
- Button控件
- Grid/ListBox控件
- ComboBox控件
- CheckBox控件
- Radio Button Group控件
- Image控件
- TreeView控件
- ProgressBar控件
- Slider控件
- Panel控件
- Calender控件
- DatePicker控件
- Animated Bar Graph控件
- Animated Pie Chart控件
- Animated Multi Line Graph控件
- Animated Gauge Chart控件
- Animated Radar Graph控件
- Animated Line Area Graph控件
- Candlesticks Graph控件
- Doughnut Chart控件
- Stacked Bar Chart控件
- Bars mixed with Labeled Line Chart控件
- Tab Control
- Image Map Control
- Menu Bar Control
- TextBox Control
- Image Fader Control
- Image Slider Control
- Boundary Fillable Map Control
- Multi Line Label Control
- Word Processor Control
- Virtual Keyboard Control
- Splitter Control
- Simple XML Viewer Control
- Voting Control
- Window Draw System Changed for Performance on Mobile Devices
- Example of a Customized ComboBox Control With Pictures in the Dropdown
- How to Use the New Forms Based System
- PHP Example
- An Example of a Working Form With Postback
- How to Work With Sessions in the New Forms Based System
- How to Create a Control Using Button Control as an Example
- Supports the Following Browsers
引言
目前,如果您想在HTML5中使用Button或ComboBox等控件,您可以使用HTML5元素在网页上放置它们。HTML5自带的这些控件在变得花哨方面受到限制,或者像ComboBox那样,如果您希望text和dropdown列表包含图像作为背景或复杂控件,您会发现这非常困难。HTML5中引入的另一个新元素是canvas元素。该元素允许使用JavaScript在其上绘制任何您想要的内容。然而,目前的情况是,没有纯粹基于canvas的可用控件。为了弥补这一空白,我创建了一个Canvas控件库,其中包含所有常见控件以及TreeView等高级控件,由于canvas的特性,可以很好地控制控件及其项目内容的图形表示。因此,对于我Canvas控件库的ComboBox示例,在文本区域和列表下拉菜单的背景中添加图像非常容易。此外,动画图形和图表控件已被移植为一流的Canvas控件库控件。
主要示例是FormsBased.aspx(ASP.NET/PHP on Apache/PHP on IIS/PHP on Ubuntu Linux),如果您查看此内容,您会注意到我的这个新系统与目前传统的网页设计方式之间存在以下区别,即表单用户输入需要服务器回发并显示新结果在客户端
- 您不会离开页面,它就像一个Windows应用程序。
- 它具有更好的可用性:用户可以输入信息,并在服务器处理后更快地获得信息,更像Windows WPF应用程序的可用性体验。
- 由于您在示例中点击预订机票时不会一遍又一遍地下载整个网页,因此它对用户来说更快、响应更快。换句话说,性能有所提高。
- 最终卖点是,您摆脱了使用常规HTML5控件构建基于表单的网站页面时会遇到的图形显示限制,即使您是最好的CSS3皮肤专家。因此,您可以提供最佳的外观和感觉,唯一的限制是您的艺术想象力,而不是迄今为止一直限制技术。
Using the Code
JavaScript的代码可以从Canvas控件库的GitHub存储库链接下载。ASP.NET的示例目前在同一个GitHub存储库中。

Label控件
最简单的元素是Label控件,要将label添加到您的canvas,您可以在canvas元素之后,在canvas元素上绘制label的网页中使用以下JavaScript调用,如下所示
createLabel(elemId, 'l1', 150, 10, 100, 20, 'Label 1',
           '#000000', 12, '12pt Ariel', null, highestDepth);
创建标签的基本函数调用是
function createLabel(canvasid, controlNameId, x, y, width, height, text,
  textColor, textHeight, textFontString, drawFunction, depth, alignment, clickFunction,
  backgroundColor, autoAdjustWidth, tag,
 isHyperlink, url, nobrowserhistory, isnewbrowserwindow,
  nameofnewbrowserwindow, widthofnewbrowserwindow,
 heightofnewbrowserwindow, newbrowserwindowisresizable,
  newbrowserwindowhasscrollbars, newbrowserwindowhastoolbar,
 newbrowserwindowhaslocationorurloraddressbox,
  newbroserwindowhasdirectoriesorextrabuttons, newbrowserwindowhasstatusbar,
  newbrowserwindowhasmenubar, newbrowserwindowcopyhistory)
这意味着,canvas的id,例如“canvas1”,被传递给函数调用,它是您要绘制的canvas。第二和第三个参数x,y是您要在canvas上绘制标签左上角的点位置。标签的width和height。text参数是要为标签显示的文本。在这种情况下,绘制的标签将在canvas1 canvas上的位置150, 50显示文本Label 1。textColor是您想要绘制的文本颜色。textHeight基本上与textFontString字体点值相同,在本例中为12,因为我们使用12点Ariel字体来绘制label文本。drawFunction是一个覆盖,如果您想绘制自定义内容,可以提供自己的JavaScriptcanvas绘图代码以任何自定义方式绘制label。depth值是控件将绘制的层,通常您想要使用Canvas控件库内部JavaScript代码中定义和维护的highestDepth变量值。您还可以将label变成超链接并提供参数。请参阅button示例,其中提供了使用额外的超链接参数。
Button控件
要将button添加到您的canvas,您可以在canvas元素之后,在canvas元素上绘制button的网页中使用以下JavaScript调用,如下所示
createButton(elemId, 'b1', 10, 10, 100, 30, 'Google Search', '#0000FF', 12,
  '12pt Ariel', 5, highestDepth, 1, 0, null, null, '#bee6fd', '#a7d9f5',
  '#eaf6fd', '#d9f0fc', '#3c7fb1', null, 1, 'http://www.google.com');
createButton(elemId, 'b2', 50, 38, 100, 40, 'CodeProject', '#0000FF',
  12, '12pt Ariel', 10, highestDepth + 1, 1, 1, null, null, '#bee6fd', '#a7d9f5', '#eaf6fd',
  '#d9f0fc', '#3c7fb1', null, 1, 'https://codeproject.org.cn', 0, 1, 'CodeProject',
  '600', '400', 'no', 'no', 'no', 'no', 'no', 'no', 'no', 'no');
createButton(elemId, 'b8', 500, 74, 250, 56, 'Custom Click Function', '#0000FF',
  12, '12pt Ariel', 7, highestDepth + 1, 2, 1,
  function (canvasid, windowid) { invokeServerSideFunction('AjaxEx1.aspx',
  'ClickMe', elemId, windowid, function () { alert('Did Postback'); }); },
  null, '#bee6fd', '#a7d9f5', '#eaf6fd', '#d9f0fc', '#3c7fb1');
创建button的基本函数调用是
createButton(canvasid, controlNameId, x, y, width, height, text, textColor,
  textHeight, textFontString, edgeRadius, depth, theme, hasgloss, clickFunction, drawFunction,
  bottomColorStart, bottomColorEnd, topColorStart, topColorEnd, borderColor, tag, isHyperlink,
  url, nobrowserhistory, isnewbrowserwindow,    nameofnewbrowserwindow, widthofnewbrowserwindow,
  heightofnewbrowserwindow, newbrowserwindowisresizable,
  newbrowserwindowhasscrollbars, newbrowserwindowhastoolbar,
  newbrowserwindowhaslocationorurloraddressbox, newbroserwindowhasdirectoriesorextrabuttons,
  newbrowserwindowhasstatusbar, newbrowserwindowhasmenubar, newbrowserwindowcopyhistory)
第一个示例将在canvas1上绘制一个button,位置在10, 10,宽度为100像素,高度为40像素,带有蓝色12pt Ariel字体按钮标签文本Google Search。唯一的新功能是,当您单击按钮时,您将转到提供的URL www.google.com。我们不提供自定义绘图JavaScript函数,因此我们将drawFunction参数设置为null。参数bottomColorStart、bottomColorEnd、topColorStart和topColorEnd定义了按钮背景的下半部分渐变和上半部分渐变。borderColor参数以该颜色绘制边框线。当isnewbrowserwindow设置为1时,如第二个示例所示,您提供所有参数来自定义新浏览器窗口,以在第二个示例中显示URL www.codeproject.com。在第三个示例中,您不使用超链接,因此不提供任何这些参数,只提供一个自定义JavaScriptclick函数来执行自定义逻辑,在示例中,它会弹出警报框。
主题:美化从2个按钮主题开始,1和2,带有光泽,主题1的屏幕截图如下

主题2的屏幕截图如下,这是一个更复杂的主题

Grid/ListBox控件
要将网格添加到您的canvas,您可以在canvas元素之后,在canvas元素上绘制网格的网页中使用以下JavaScript调用,如下所示
createGrid(elemId, 'g1', 10, 150, 400, 90, highestDepth,
  [['123567891011121314', 'abcdefghijklmnopqrst',
 '000-89843-8983459'], ['2356789101112131415',
  'bcdefghijklmnopqrstu', '000-89843-8983459'],
 ['35678910111213141516', 'cdefghijklmnopqrstuv',
  '000-89843-8983459'], ['45678910111213141516',
 'defghijklmnopqrstuv', '000-89843-8983459'],
  ['5678910111213141516', 'efghijklmnopqrstuv',
 '000-89843-8983459'], ['678910111213141516',
  'fghijklmnopqrstuv', '000-89843-8983459']],
 ['Numbers', 'Alphabets', 'GUIDS'], '#000000', 12,
  '12pt Ariel', '#000000', 14, '14pt Ariel', null,
 null, function (canvasid, windowid, c, r) {
  alert('you clicked cell number ' + c + ' at row number ' + r); },
 20, 30, [150, 150, 200], 1,
  '#b7bfc8', 1, '#fbfbfb', '#d9dde1', '#f6f8fb', '#e7e7e7', '#eaf1ff', '#d7e5ff');
创建网格的基本函数调用是
createGrid(canvasid, controlNameId, x, y, width, height, depth, rowData,
    headerData, rowDataTextColor, rowDataTextHeight,
   rowDataTextFontString, headerDataTextColor,
    headerDataTextHeight, headerDataTextFontString,
   drawRowDataCellFunction, drawHeaderCellFunction,
    cellClickFunction, dataRowHeight, headerRowHeight,
    columnWidthArray, hasBorder, borderColor,
    borderLineWidth, headerbackgroundstartcolor,
   headerbackgroundendcolor, altrowbgcolorstart1,
    altrowbgcolorend1, altrowbgcolorstart2, altrowbgcolorend2, tag)
在createGrid函数中,一个新参数是rowData,它是一个简单的数组,包含每个行的数组,其中包含要为每个单元格绘制的单元格文本。下一个数组headerData是一个数组,包含要为每个表头行绘制的表头单元格文本。优点之一是表头行在滚动网格内容时会保持不变,只有rowData内容行和单元格会滚动。您可以自定义绘制单元格内容,方法是传递一个JavaScript函数,该函数为drawRowDataCellFunction绘制它们,在示例中,我们通过传递null来使用默认的绘图方法。您可以对绘制表头单元格执行相同的操作,在示例中为null,因此将使用默认的绘图方法。我提供了一个cellClickFunction,它只是弹出一个消息框,告知您单击了网格中哪个单元格的哪个行,但您可以根据需要更改它以执行任何复杂的业务或游戏逻辑。dataRowHeight是每行的像素高度,必须是均匀且固定的,在示例中设置为20像素。表头行高度相同,设置为30像素。columnWidthArray允许您传递一个包含网格中所有列宽度的数组。其余三个参数涉及如何绘制网格的边框。最后6个参数全部用于渐变填充表头和交替行背景。
在ListBox的情况下,您所要做的就是创建一个只有1列的网格。这就是为什么我没有为ListBox提供单独的控件。
ComboBox控件
要将ComboBox添加到您的canvas,您可以在canvas元素之后,在canvas元素上绘制ComboBox的网页中使用以下JavaScript调用,如下所示
createComboBox(elemId, 'cb1', 10, 280, 200, 20, highestDepth, ['Mumbai','Pune','Juhu',
  'Phoenix','London','New York','San Fransisco','Los Angeles','Houston','Boston'], null, null,
  null, null, null, '#364635', 10, '10pt Ariel', '#1b213b', 10, '10pt Ariel');
创建ComboBox的基本函数调用是
createComboBox(canvasid, controlNameId, x, y, width, height, depth, data,
  drawTextAreaFunction, drawButtonFunction, drawListAreaFunction, buttonClickFunction,
  listAreaClickFunction, textAreaTextColor, textAreaTextHeight,
 textAreaFontString, listAreaTextColor,
  listAreaTextHeight, listAreaFontString, onSelectionChanged, tag)
data参数是一个包含要在下拉列表区域显示的字符串列表的数组。这里一些新的参数是drawTextAreaFunction、drawButtonFunction、drawListAreaFunction,在示例中都通过null传递,使用默认的绘图功能。您可以覆盖这些以完全自定义ComboBox的绘图。
CheckBox控件
要将CheckBox添加到您的canvas,您可以在canvas元素之后,在canvas元素上绘制CheckBox的网页中使用以下JavaScript调用,如下所示
createCheckbox(elemId, 'chk1', 150, 320, highestDepth, 0);
创建CheckBox的基本函数调用是
createCheckbox(canvasid, controlNameId, x, y, depth, status, tag)
在这种情况下,新参数是status,对于已选中为1,对于未选中为0。
Radio Button Group控件
要将单选按钮组添加到您的canvas,您可以在canvas元素之后,在canvas元素上绘制单选按钮组的网页中使用以下JavaScript调用,如下所示
createRadioButtonGroup(elemId, 'rg1', 10, 350, 0, highestDepth, 'test1',
  ['Dog', 'Cat', 'Horse', 'Cow', 'Giraffe'], 0, '#000000', '10pt Ariel', 10, 10);
创建单选按钮组的基本函数调用是
createRadioButtonGroup(canvasid, controlNameId, x, y, alignment, depth, groupname,
  labels, selectedid, labelTextColor, labelFontString, labelTextHeight, radius, tag)
一些新参数是alignment,目前只能设置为0,在代码中被忽略,它将以水平线排列单选按钮。稍后,您将能够将其设置为1,并使其以垂直堆叠方式绘制单选按钮。groupname参数是用于轻松识别的单选按钮组的名称,在示例中为test1。labels参数是一个数组,包含每个单选按钮的labels文本,并将按提供的顺序绘制。selectedid参数是数组中的索引,用于起始选择。
Image控件
要将Image添加到您的canvas,您可以在canvas元素之后,在canvas元素上绘制Image的网页中使用以下JavaScript调用,如下所示
createImage(elemId, 'i1', 10, 400, 64, 64, highestDepth, 'test.png',
           function (canvasid, windowid) { alert('You clicked the image'); });
创建Image的基本函数调用是
createImage(canvasid, controlNameId, x, y, width, height, depth, imgurl,
  clickFunction, tile, tag, isHyperlink, url, nobrowserhistory,
  isnewbrowserwindow, nameofnewbrowserwindow,
  widthofnewbrowserwindow, heightofnewbrowserwindow,
  newbrowserwindowisresizable, newbrowserwindowhasscrollbars,
  newbrowserwindowhastoolbar, newbrowserwindowhaslocationorurloraddressbox,
  newbroserwindowhasdirectoriesorextrabuttons,
  newbrowserwindowhasstatusbar,
  newbrowserwindowhasmenubar, newbrowserwindowcopyhistory)
这里的新参数是imgurl,顾名思义,它是要绘制的图像的URL链接路径,clickFunction是图像被单击时要执行的函数,在示例中,它会弹出一个消息“You clicked the image”。同样,此图像就像button和label一样,可以变成超链接。有关如何指定可选参数,请参阅按钮。
TreeView控件
要将TreeView添加到您的canvas,您可以在canvas元素之后,在canvas元素上绘制TreeView的网页中使用以下JavaScript调用,如下所示
The example is still to be created by me.
创建TreeView的基本函数调用是
createTreeView(canvasid, controlNameId, x, y, width, height, depth, nodes, textcolor,
  textfontstring, textheight, clickNodeFunction, tag, hasicons, iconwidth, iconheight)
nodes参数替换了旧版本中的data参数。您不再自己创建它,而是使用辅助函数addChildNodes(nodes, parentnode, imageurl, expanded, label, customextrainfo)。每个节点格式为{ TreeviewNodeInstancesParentNode: parentnode, TreeviewNodeInstancesRootNodes: nodes, ImageURL: imageurl, Expanded: expanded, ChildNodes: new Array(), Label: label, CustomExtraInfo: customextrainfo }。这不言而喻。clickNodeFunction是单击节点时要执行的JavaScript函数,在示例中,它只是弹出一个消息,给出节点的id col索引值。现在,节点数组可以有一个额外的元素,即图标图像的URL,例如,一个节点将是[2,1,'Test',1,'MyImage.png']。如果您使用图标,则hasicons应为1,并且您必须提供宽度和高度,所有图标显然必须具有相同的宽度和高度,否则将出现显示错误。
ProgressBar控件
要将ProgressBar添加到您的canvas,您可以在canvas元素之后,在canvas元素上绘制ProgressBar的网页中使用以下JavaScript调用,如下所示
createProgressBar(elemId, 'pg2', 10, 290, 200, 20, highestDepth, '#33ec25', 100, 0, 60);
创建ProgressBar的基本函数调用是
createProgressBar(canvasid, controlNameId, x, y,
         width, height, depth, color, maxvalue, minvalue, currentvalue, tag)
Color是进度条的颜色。maxvalue参数是最大值,或者当进度为100%时,它就是控件的宽度。minvalue参数在此示例中为0,但如果您想将30/100视为显示0%的进度条(长度为0),那么此参数可能很有用。currentvalue是progressbar的值,您可以使用setProgressBarCurrentValue函数随时更改此值,以显示进度条为您测量的不同百分比的进度。此函数的windowid参数由createProgressBar函数返回,因此您可以将其保存在变量中并在需要时传入。
Slider控件
要将Slider添加到您的canvas,您可以在canvas元素之后,在canvas元素上绘制Slider的网页中使用以下JavaScript调用,如下所示
createSlider(elemId, 's2', 10, 350, 200, 20, highestDepth, 10, 100, 0, 50);
创建Slider的基本函数调用是
createSlider(canvasid, controlNameId, x, y, width,
            height, depth, handlewidth, maxvalue, minvalue, value, tag)
您可以通过height和handlewidth参数指定slider上handle的大小。最大值、最小值和当前值(即滑块上句柄的位置)也必须作为参数提供。
Panel控件
要将Panel添加到您的canvas,您可以在canvas元素之后,在canvas元素上绘制Panel的网页中使用以下JavaScript调用,如下所示
var panelwindowid = createPanel(elemId, 'p1', 5, 50, 150, 140,
  highestDepth, 1, '#c8c8c8', 1, '#d1ddff', '#a7afc6');
registerChildWindow(elemId, createProgressBar(elemId, 'pg1', 10, 100, 200, 20,
  highestDepth, '#33ec25', 100, 0, 60), panelwindowid);
registerChildWindow(elemId, createSlider(elemId, 's1', 10, 150, 200, 20,
  highestDepth, 10, 100, 0, 50), panelwindowid);

var panelwindowid2 = createPanel(elemId, 'p2', 5, 250, 150, 140,
   highestDepth, 1, '#c8c8c8', 1, '#d1ddff', '#a7afc6', 1, 150, 0, 'Test Panel',
   '#000000', 12, '12pt Ariel', '#cfcfcf', '#ababab', 20, '#495be5', 1, 7);
registerChildWindow(elemId, createProgressBar(elemId, 'pg2', 10, 290, 200, 20,
  highestDepth, '#33ec25', 100, 0, 60), panelwindowid2);
registerChildWindow(elemId, createSlider(elemId, 's2', 10, 350,
  200, 20, highestDepth, 10, 100, 0, 50), panelwindowid2);

var panelwindowid3 = createPanel(elemId, 'p3', 5, 400, 150, 140,
   highestDepth, 1, '#c8c8c8', 1, '#d1ddff',
  '#a7afc6', 1, 150, 0, 'Test Panel', '#000000', 12,
  '12pt Ariel', '#cfcfcf', '#ababab', 20, '#495be5', 0, 7);
registerChildWindow(elemId, createProgressBar(elemId, 'pg3', 10, 430, 200, 20,
  highestDepth, '#33ec25', 100, 0, 60), panelwindowid3);
registerChildWindow(elemId, createSlider(elemId, 's3', 10, 470, 200, 20,
  highestDepth, 10, 100, 0, 50), panelwindowid3);
var panelwindowid3 = createPanel(elemId, 5, 350,
  150, 140, highestDepth, 1, '#c8c8c8',
  1, '#d1ddff', '#a7afc6', 1, 150, 0, 'Test Panel', '#000000', 12,
  '12pt Ariel', '#cfcfcf', '#ababab', 20, '#495be5', 0, 7);
registerChildWindow(elemId, createProgressBar(elemId, 10, 380, 200, 20,
  highestDepth, '#33ec25', 100, 0, 60), panelwindowid3);
registerChildWindow(elemId, createSlider(elemId, 10, 420, 200, 20,
  highestDepth, 10, 100, 0, 50), panelwindowid3);
创建Panel的基本函数调用是
createPanel(canvasid, controlNameId, x, y,
  width, height, depth, hasBorder, borderColor,
  hasBackgroundGradient, backgroundStartColor,
  backgroundEndColor, iscollapsable, collapsedWidth,
  collapsedHeight, panellabel, panelLabelTextColor,
  panelLabelTextHeight, panelLabelTextFontString,
  headerBackgroundStartColor, headerBackgroundEndColor, headerheight,
  expandCollapseButtonColor, isexpanded, expandCollapseButtonRadius, tag)
panel创建的第一个示例只不过是一个矩形,它具有由参数指定的渐变填充。要将子控件添加到panel,请使用registerChildWindow函数。在此示例中,我将滑块和进度条控件附加到了面板。正如您在下面的屏幕截图中看到的,它们被裁剪到其父控件面板边界定义的区域。第二个和第三个示例显示了如何制作可展开/可折叠面板。第二个示例从展开的panel开始,第三个示例从折叠的panel开始。

Calender控件
要将Calender添加到您的canvas,您可以在canvas元素之后,在canvas元素上绘制TreeView的网页中使用以下JavaScript调用,如下所示
createCalendar(elemId, 'cal1', 10, 10, 358, 408, highestDepth, 'July', '2012',
  '3 July 2012', 50, 50, 50, '#7979AE', '#bbbbc8', '#202020', 16,
 '16pt Ariel', '#000000', 12, '12pt Ariel',
  '#D0D0D0', 12, '12pt Ariel', '#d2d2fd', 12, '12pt Ariel',
 '#9898b7', '#FFFFFF', 12, '12pt Ariel', '#b4b4ff',
  '#d3d3fb', function (canvasid, windowid, selectedDay) { alert('You selected the date ' +
  selectedDay.toString()); }, '#6f7791', 12, '12pt Ariel');
创建Calender的基本函数调用是
createCalendar(canvasid, controlNameId, x, y, width, height, depth, visibleMonth,
  visibileYear, selectedDay, dayCellWidth,
 dayCellHeight, headerHeight, headerBackgroundColor,
  bodyBackgroundColor, textHeaderColor, textHeaderHeight,
 textHeaderFontString, dayDateActiveColor,
  dayDateActiveTextHeight, dayDateActiveTextFontString,
  dayDateInactiveTextColor, dayDateInactiveTextHeight,
  dayDateInactiveTextFontString, selectedDayTextColor,
  selectedDayTextHeight, selectedDayTextFontString,
  selectedDayHighLightColor, todayTextColor,
  todayTextHeight, todayTextFontString, todayHighLightColor,
  mouseoverHightlightColor, ondayClickFunction,
  dayLabelTextColor, dayLabelTextHeight, dayLabelTextFontString, tag)
月份和年份通过visibleMonth和visibleYear参数以完整的月份名称(例如July)和年份数字(例如2012)提供。selectedDay参数在提供时会突出显示该日历上的该日,并在用户单击某天时更改。dayCellWidth和dayCellHeight参数提供一天单元格的width和height。标题的高度(其中包含月份名称和年份以及按钮)由headerHeight参数提供。dayDateActive...参数提供绘制可见月份日期信息。dayDateInactive...参数用于日历上非可见月份的日期。today...参数提供如何绘制今天的日期。ondayClickFunction提供了在日历上单击某一天时执行自定义逻辑的功能。dayLabel...参数提供如何绘制星期几的标题名称,例如Mon、Tue等。
日历示例的屏幕截图如下

小型日历示例JavaScript
createCalendar(elemId, 'cal2', 10, 500, 148, 168, highestDepth, 'July', '2012',
  '3 July 2012', 20, 20, 20, '#7979AE', '#bbbbc8', '#202020', 8, '8pt Ariel', '#000000', 8,
  '8pt Ariel', '#D0D0D0', 8, '8pt Ariel', '#d2d2fd', 8, '8pt Ariel', '#9898b7', '#FFFFFF', 8,
  '8pt Ariel', '#b4b4ff', '#d3d3fb', function (canvasid, windowid, selectedDay)
  { alert('You selected the date ' + selectedDay.toString()); }, '#6f7791', 8, '8pt Ariel');
小型日历示例的屏幕截图如下

DatePicker控件
要将DatePicker添加到您的canvas,您可以在canvas元素之后,在canvas元素上绘制DatePicker的网页中使用以下JavaScript调用,如下所示
createDatePicker(elemId, 'cdp1', 10, 700, 148, 20, highestDepth, 'July', '2012',
  '3 July 2012', 20, 20, 20, '#7979AE', '#bbbbc8', '#202020', 8,
 '8pt Ariel', '#000000', 8, '8pt Ariel',
  '#D0D0D0', 8, '8pt Ariel', '#d2d2fd', 8, '8pt Ariel', '#9898b7',
 '#FFFFFF', 8, '8pt Ariel', '#b4b4ff',
  '#d3d3fb', null, '#6f7791', 8, '8pt Ariel', '#000000', 12, '12pt Ariel', 168);
创建Calender的基本函数调用是
createDatePicker(canvasid, controlNameId, x, y, width, height, depth,
  visibleMonth, visibileYear, selectedDay, dayCellWidth,
 dayCellHeight, headerHeight, headerBackgroundColor,
  bodyBackgroundColor, textHeaderColor, textHeaderHeight,
 textHeaderFontString, dayDateActiveColor,
  dayDateActiveTextHeight, dayDateActiveTextFontString,
 dayDateInactiveTextColor, dayDateInactiveTextHeight,
  dayDateInactiveTextFontString, selectedDayTextColor,
 selectedDayTextHeight, selectedDayTextFontString,
  selectedDayHighLightColor, todayTextColor, todayTextHeight,
 todayTextFontString, todayHighLightColor,
  mouseoverHightlightColor, ondayClickFunction,
 dayLabelTextColor, dayLabelTextHeight, dayLabelTextFontString,
  textboxAreaTextColor, textboxAreaTextHeight,
 textboxAreaTextFontString, calenderHeight, tag)
所有参数与日历控件几乎相同。区别在于calenderHeight而不是height决定了下拉日历的高度。height决定了文本框区域的高度以及相应按钮的大小,该按钮是方形的。三个新参数textboxAreaTextColor、textboxAreaTextHeight和textboxAreaTextFontString都定义了所选日期(dd/mm/yyyy格式)的文本将如何绘制。
带有下拉日历的datepicker控件的屏幕截图如下

Animated Bar Graph控件
要将动画条形图控件添加到您的canvas,您可以在canvas元素之后,在canvas元素上绘制条形图的网页中使用以下JavaScript调用,如下所示
createBarGraph(elemId, 'bg1', 500, 500, 400, 300, highestDepth, [['GM', 50, '#FF0000'],
  ['Ford', 30, '#00FF00'], ['Chrysler', 20, '#0000FF']], 100, 5, "Auto Industry %'s", '#000000',
  12, '12pt Ariel', 50, '#000000', 10, '10pt Ariel', 50, 20, function (canvasid, windowid, i)
  { var barGraphProps = getBarGraphProps(canvasid, windowid);
  alert('You clicked on the bar labeled:: ' + barGraphProps.Data[i][0]); }, 1, 100);
创建条形图的基本函数调用是
createBarGraph(canvasid, controlNameId, x, y, width, height, depth, data,
  maxvalue, nummarksy, title, titletextcolor, titletextheigth, titletextfontstring, barwidth,
  axisLabelsTextColor, axisLabelsTextHeight, axisLabelsTextFontString, marginleft,
  gapbetweenbars, barClickFunction, haslegend, marginright, tag)
data参数是一个数组的数组。每个条形由一个标签、一个数字和条形的颜色定义。maxvalue是y轴maxvalue的参数。nummarksy是y轴上的标记数。Title参数提供如何绘制标题。barwidth是每个标签在数据数组中提供的条形的宽度。axislabel...参数提供如何绘制轴标签和每个条形内的标签。marginleft参数是y轴左侧的留白空间。gapbetweenbars参数定义了每个条形之间的间隔。barClickFunction允许您在单击条形时执行一些自定义操作。在示例中,它弹出一个警报,给出被单击条形的标签文本。
条形图示例的屏幕截图如下

Animated Pie Chart控件
要将动画饼图控件添加到您的canvas,您可以在canvas元素之后,在canvas元素上绘制饼图的网页中使用以下JavaScript调用,如下所示
createPieChart(elemId, 'pc1', 10, 10, 500, 336, highestDepth, [['GM', 50, '#FF0000'],
  ['Ford', 30, '#00FF00'], ['Chrysler', 20, '#0000FF']], "Auto Industry %'s", '#000000',
  10, '10pt Ariel', '#000000', 10, '10pt Ariel', function (c, w, i)
  { var p = getPieChartProps(c, w);
  alert("You clicked on slice for " + p.Data[i][0]); });
创建条形图的基本函数调用是
createPieChart(canvasid, controlNameId, x, y, width, height, depth, data, title,
  titletextcolor, titletextheight, titletextfontstring, labeltextcolor,
  labeltextheight, labeltextfontstring, sliceClickFunction, tag)
data参数是一个数组的数组。每个饼图切片由一个标签、一个数字和饼图切片的颜色定义。饼图的实际半径是通过控件的高度减去标题文本高度减去两次标签文本高度减去24来计算的,这基本上是标题和顶部/底部可能标签周围的四个像素的间距。所以,如果您想要一个更大或更小的圆圈,只需调整窗口的高度。切片点击函数是在用户点击饼图切片时调用的,您会获得canvas id、window id以及数据数组中被点击数据元素的索引。在示例中,它会弹出一个警报,说明您点击了GM、Ford或Chrysler的饼图切片。
未选择切片(即用户未单击)的示例饼图屏幕截图如下

Chrysler饼图切片被用户单击的示例屏幕截图如下

Animated Multi Line Graph控件
要将动画多线图控件添加到您的canvas,您可以在canvas元素之后,在canvas元素上绘制多线图的网页中使用以下JavaScript调用,如下所示
createLineGraph(elemId, 'lg1', 10, 550, 400, 336, highestDepth, [[[[10, 80], [20, 50],
  [30, 75], [40, 34], [50, 20], [60, 80], [70, 68], [80, 90],
 [90, 45]], '#00FF00'], [[[10, 45], [20, 70],
  [30, 35], [40, 64], [50, 50], [60, 30], [70, 40], [80, 70],
 [90, 90]], '#FF0000']], 100, 5, 100, 5,
  'Automotive Sales', '#000000', 10, '10pt Ariel', '#000000', 10, '10pt Ariel',
  function (canvasid1, windowid1, i) { alert(i.toString()); }, 50);

createLineGraph(elemId, 'lg2', 550, 10, 400, 336, highestDepth, [[[['A1', 80],
  ['A2', 50], ['A3', 75], ['A4', 34], ['A5', 20], ['A6', 80],
 ['A7', 68], ['A8', 90], ['A9', 45],
  ['A10', 68]], '#00FF00'], [[['A1', 45], ['A2', 70],
 ['A3', 35], ['A4', 64], ['A5', 50], ['A6', 30],
  ['A7', 40], ['A8', 70], ['A9', 90], ['A10', 28]], '#FF0000']],
 100, 5, 100, 5, 'Automotive Sales',
  '#000000', 10, '10pt Ariel', '#000000', 10, '10pt Ariel',
    function (canvasid1, windowid1, i) { alert(i.toString()); }, 50, 1);
创建多线图的基本函数调用是
createLineGraph(canvasid, controlNameId, x, y, width, height, depth, data, xmaxvalue,
  nummarksx, ymaxvalue, nummarksy, title, titletextcolor, titletextheight, titletextfontstring,
  axislabelstextcolor, axislabelstextheight, axislabelstextfontstring,
  clickFunction, marginleft, islabeledxvalues, tag)
data参数是一个数组的数组。每条线由x、y值数组和线的颜色定义。您可以为多条线提供多个此类集合,或只为一条线提供一个集合。click函数获得一个值i,它是被点击的线集的索引。因此,您可以根据用户点击哪条线(这是不同的数据集)来执行自定义逻辑。
带有数字而非标签的x轴的多线图示例屏幕截图如下(省略了最后一个可选参数)

第二个示例的屏幕截图,它在x轴上使用标签,因此将最后一个可选参数设置为1

Animated Gauge Chart控件
要将动画仪表盘图控件添加到您的canvas,您可以在canvas元素之后,在canvas元素上绘制仪表盘图的网页中使用以下JavaScript调用,如下所示
createGauge(elemId, 'g1', 10, 950, 350, 350, highestDepth, [0, 100, [0, 30, '#FF0000'],
  [30, 60, '#FFF000'], [60, 100, '#00FF00'], 10, 5, 80], 'Automotive Efficiency %',
  '#000000', 16, '16pt Ariel', 150, '#FFFFFF', 10, '10pt Ariel');
创建仪表盘图的基本函数调用是
createGauge(canvasid, controlNameId, x, y, width, height, depth, data, title,
  titletextcolor, titletextheight, titletextfontstring, gaugeradius,
  gaugelabeltextcolor, gaugelabeltextheight, gaugelabeltextfontstring, tag)
data参数是一个数组的数组。主数组的第一个元素(示例中为0)是最小值,第二个元素(示例中为100)是最大值。主数组的第二个元素是一个数组,定义了从左边开始的第一个弧,在示例中,它从值0到30,颜色填充为红色。第三个元素是一个数组,定义了仪表盘上的第二个弧,其范围从值30到60,颜色为黄色。下一个元素又是定义最后一个弧的数组,在示例中,它从值60到100,颜色为绿色。主数组中的下一个元素是10,这是主要标记的数量,下一个元素5在每个主要标记之间绘制标记。最后,最后一个元素是要指向的值,在示例中为80。
仪表盘图示例的屏幕截图如下

Animated Radar Graph控件
要将动画雷达图控件添加到您的canvas,您可以在canvas元素之后,在canvas元素上绘制雷达图的网页中使用以下JavaScript调用,如下所示
createRadarGraph(elemId, 'rg1', 400, 950, 350, 400,
 highestDepth, [10, 20, 30, 40, 50, 60],
  60, '#5f69b3', 6, 'Test Radar Graph', '#000000',
 16, '16pt Ariel', '#000000', 10, '10pt Ariel');
创建仪表盘图的基本函数调用是
createRadarGraph(canvasid, controlNameId, x, y, width, height, depth, data, maxvalue,
  colorstr, nummarks, title, titletextcolor, titletextheight, titletextfontstring,
  marklabeltextcolor, marklabeltextheight, marklabeltextfontstring, tag)
data参数是一个简单的数字列表,每个数字将在每个轴上绘制一个。maxvalue参数应该是每个轴的最大值。colorstr是要绘制雷达区域的颜色。

Animated Line Area Graph控件
要将动画面积图控件添加到您的canvas,您可以在canvas元素之后,在canvas元素上绘制面积图的网页中使用以下JavaScript调用,如下所示
createLineAreaGraph(elemId, 'lag1', 1000, 10, 400, 400, highestDepth, [[[10, [20, 30, 10]],
  [20, [50, 30, 20]], [30, [20, 40, 30]], [40, [10, 20, 40]],
 [50, [20, 20, 10]], [60, [40, 40, 20]],
  [70, [50, 10, 10]], [80, [10, 20, 10]], [90, [20, 30, 10]],
 [100, [40, 20, 10]]], ['#FF0000', '#00FF00',
  '#0000FF']], 100, 100, 5, 5, 'Regional Sales', '#000000', 16,
 "normal 16px 'Trebuchet MS', Verdana,
  Arial, Helvetica, sans-serif", '#000000', 10, '10pt Ariel', 50);
createLineAreaGraph(elemId, 'lag2', 1450, 10, 400, 400, highestDepth, [[['A1', [20, 30, 10]],
  ['A2', [50, 30, 20]], ['A3', [20, 40, 30]], ['A4', [10, 20, 40]],
 ['A5', [20, 20, 10]], ['A6', [40, 40, 20]],
  ['A7', [50, 10, 10]], ['A8', [10, 20, 10]], ['A9', [20, 30, 10]],
 ['A10', [40, 20, 10]]], ['#FF0000', '#00FF00',
  '#0000FF']], 100, 100, 5, 5, 'Regional Sales', '#000000', 16,
 "normal 16px 'Trebuchet MS', Verdana,
  Arial, Helvetica, sans-serif", '#000000', 10, '10pt Ariel', 50, 1);
创建面积图的基本函数调用是
createLineAreaGraph(canvasid, controlNameId, x, y, width, height, depth, data, xmaxvalue,
  ymaxvalue, nummarksx, nummarksy, title, titletextcolor,
  titletextheight, titletextfontstring, axislabelscolor,
  axislabelsheight, axislabelsfontstring, marginleft, islabeledonxaxis, tag)
data参数是一个数组的数组,以x值开头,然后是该x值的y值集合(在数组中)。限制是每个x必须具有相同数量的y值。主数组的第二个元素是一个颜色数组,用于区域,并且必须与每个x值的y值数量相同。如果您想在x轴上有标签(即文本),如第二个示例所示,只需将islabeledonxaxis设置为1;如果您提供数字,则不要提供它,如第一个示例所示,它在x轴上使用数字。
数字示例的屏幕截图如下

第二个示例的屏幕截图,它在x轴值上使用文本

请注意,两个图表之间的唯一区别在于x轴上的标签,因为两个图表之间的x值不同。
Candlesticks Graph控件
要将蜡烛图控件添加到您的canvas,您可以在canvas元素之后,在canvas元素上绘制蜡烛图的网页中使用以下JavaScript调用,如下所示
createCandlesticksGraph(elemId, 'cg1', 1000, 500, 350, 400, highestDepth, [[30, 70, 20, 80],
  [10, 30, 5, 35], [50, 30, 23, 80]], [[0, 'GM'], [1, 'Ford'],
  [2, 'Chrysler']], 75, 100, 5, 'Automotive Stocks',
  '#000000', 16, '16pt Ariel', 20, '#586d8c', '#305791', 50, '#000000', 10, '10pt Ariel');
创建蜡烛图的基本函数调用是
createCandlesticksGraph(canvasid, controlNameId, x, y,
  width, height, depth, data, xmarkslabeldata,
  xmarkswidth, ymaxvalue, nummarksy, title, titlecolor,
  titleheight, titlefontstring, candlebodywidth,
  candelbodycolorstr, candellinecolorstr, marginleft,
  axislabelscolor, axislabelsheight, axislabelsfontstring, tag)
data参数是一个数组的数组,其中每个数组都有一个开盘价、收盘价、最低价、最高价。如果开盘价小于收盘价,则蜡烛图将被填充;否则,它将被勾勒出来。您可以为蜡烛图提供颜色。
示例屏幕截图如下

Doughnut Chart控件
要将甜甜圈图控件添加到您的canvas,您可以在canvas元素之后,在canvas元素上绘制甜甜圈图的网页中使用以下JavaScript调用,如下所示
createDoughnutChart(elemId, 'dgc1', 1000, 950,
 450, 450, highestDepth, [['GM', 50, '#FF0000'],
  ['Ford', 30, '#00FF00'], ['Chrysler', 20, '#0000FF']],
 "Auto Industry %'s", '#000000', 16, '16pt Ariel',
  80, 25, '#000000', 10, '10pt Ariel', 100, 10, '10pt Ariel',
 function (c, w, i) { var p = getDoughnutChartProps(c, w);
  alert("You clicked on slice for " + p.Data[i][0]); });
创建甜甜圈图的基本函数调用是
createDoughnutChart(canvasid, controlNameId, x, y, width, height,
  depth, data, title, titlecolor,
  titletextheight, titlefontstring, innerradius,
  marginsides, labelcolor, labelheight, labelfontstring,
  legendwidth, legendheight, legendfontstring, sliceClickFunction, tag)
data参数的格式与饼图相同,请参考饼图。内半径参数定义了中间孔的内半径。因为甜甜圈图本质上是一个中间有孔的饼图。marginsides是指甜甜圈图绘制的左右两侧留出的空间。图例宽度参数是指右侧用于图例的空间。sliceClickFunction在用户单击切片时触发,参数与饼图相同。
未单击切片时示例屏幕截图如下

单击Chrysler切片时示例屏幕截图如下

Stacked Bar Chart控件
要将堆叠条形图控件添加到您的canvas,您可以在canvas元素之后,在canvas元素上绘制堆叠条形图的网页中使用以下JavaScript调用,如下所示
createStackedBarGraph(elemId, 'sbg1', 1450, 800, 400, 400, highestDepth,
  [['GM', [10, '#FF0000'], [20, '#0000FF'], [10, '#00FF00']],
   ['Ford', [20, '#FF0000'], [10, '#0000FF'],
  [30, '#00FF00']], ['Chrysler', [32, '#FF0000'],
   [25, '#0000FF'], [35, '#00FF00']]], 100, 5, 'Stacked Bar Graph',
  '#000000', 16, '16pt Ariel', 100, 40, '#000000', 10, '10pt Ariel', function (c, w, i)
  { var p = getstackedBarGraphProps(c, w); alert("You clicked on the " +
    p.Data[i][0] + " stacked bar!"); }, 50);
创建堆叠条形图的基本函数调用是
createStackedBarGraph(canvasid, controlNameId,
  x, y, width, height, depth, data, maxvalue,
  nummarksy, title, titlecolor, titleheight,
  titlefontstring, barwidth, gapbetweenbarssets, axislabelscolor,
  axislabelsheight, axislabelsfontstring, barClickFunction, marginleft, tag)
data参数是一个数组的数组,每个数组代表一个堆叠条形,以该条形的标签开头,然后是一个决定条形长度相对于maxvalue参数的最大值以及该条形段颜色的数组。调整条形宽度有点棘手,所以如果您想要更宽的条形,请同时增加barwidth和gapbetweenbars参数,但gapbetweenbars应始终小于barwidth。在此示例中,提供的barClickFunction只是显示一个消息,显示了被单击条形的标签。
示例屏幕截图如下

Bars mixed with Labeled Line Chart Control
要将条形混合带标签折线图控件添加到您的canvas,您可以在canvas元素之后,在canvas元素上绘制条形混合带标签折线图的网页中使用以下JavaScript调用,如下所示
createBarsMixedWithLabledLineGraph(elemId, 'mbwllg1', 1450, 450, 400, 300,
  highestDepth, [['GM', 50, '#FF0000'], ['Ford', 30, '#00FF00'],
 ['Chrysler', 20, '#0000FF']], 100, 5,
  "Auto Industry %'s", '#000000', 12, '12pt Ariel',
 50, '#000000', 10, '10pt Ariel', 50, 20,
  function (canvasid, windowid, i)
 { var barGraphProps = getBarGraphProps(canvasid, windowid);
  alert('You clicked on the bar labeled:: ' +
 barGraphProps.Data[i][0]); }, 1, 100, [[[['GM', 80],
  ['Ford', 50], ['Chrysler', 75]], '#00FF00'],
  [[['GM', 45], ['Ford', 70], ['Chrysler', 35]], '#FF0000']],
  function (c, w, i) { alert("You clicked on the line " + i); });
创建堆叠条形图的基本函数调用是
createBarsMixedWithLabledLineGraph(canvasid,
  controlNameId, x, y, width, height, depth, data, maxvalue,
  nummarksy, title, titletextcolor, titletextheigth,
  titletextfontstring, barwidth, axisLabelsTextColor,
  axisLabelsTextHeight, axisLabelsTextFontString, marginleft, gapbetweenbars,
  barClickFunction, haslegend, marginright, linesData, lineClickFunction, tag)
data参数是条形值,linesData参数保存绘制线的点。
示例屏幕截图如下

Tab Control
要将标签页控件添加到您的canvas,您可以在canvas元素之后,在canvas元素上绘制标签页控件的网页中使用以下JavaScript调用,如下所示
var tabwindowid = createTabControl(elemId, 'tab1', 200, 60, 250, 100, highestDepth,
  ['Tab 1', 'Tab 2', 'Tab 3'], '#000000', 10, '10pt Ariel', '#C0C0C0',
  '#D0D0D0', 1, '#6c6cde', 1, '#C0C0C0', '#D0D0D0', 0, 3, '#6c6cde', 1);
var tabp = getTabProps(elemId, tabwindowid);
registerChildWindow(elemId, createImage(elemId, 'i1', 250, 90, 50, 50, highestDepth,
  'Madras.png', function () { alert('You clicked Madras.png'); }), tabp.PanelWindowIDs[0]);
registerChildWindow(elemId, createImage(elemId, 'i2', 250, 90, 50, 50, highestDepth,
  'Bombay.png', function () { alert('You clicked Bombay.png'); }), tabp.PanelWindowIDs[1]);
registerChildWindow(elemId, createImage(elemId, 'i3', 250, 90, 50, 50, highestDepth,
  'Pune.png', function () { alert('You clicked Pune.png'); }), tabp.PanelWindowIDs[2]);
创建标签页控件的基本函数调用是
createTabControl(canvasid, controlNameId, x, y, width,
  height, depth, tablabels, tablabelcolor, tablabelheight,
 tablabelfontstring, tablabelgradientstartcolor,
  tablabelgradientendcolor, panelHasBorder, panelBorderColor, panelHasBackgroundGradient,
  panelBackgroundStartColor, panelBackgroundEndColor, selectedTabID, gapbetweentabs,
  selectedtabbordercolor, selectedtabborderlinewidth, tag)
tablabels是一个字符串数组,因为每个标签页都必须有一个名称。标签页的数量是tablabels数组的长度,按string列表中的顺序指定。selectedTabID是起始标签页在tablabels数组中的index。
在示例中,您首先将标签页控件的Window ID保存在一个名为tabwindowid的变量中。然后,您使用getTabProps获取标签页的所有属性。然后,对于您想要添加到特定标签页的每个控件,您调用registerChildWindow。此函数以canvas id名称作为第一个参数,第二个参数是子控件窗口的Window ID(在示例中直接调用以创建图像控件),最后一个参数是PanelWindowIDs属性的标签页数组索引,您从标签页属性中获取。因为每个标签页的控件区域都是一个面板,标签页通过在单击标签页标题时更改其隐藏状态来维护。在示例中,您可以检查只有特定标签页的图像才会显示,并且单击时会给出正确的图像单击标签页控件的警报。
示例屏幕截图如下

Image Map Control
要将图像地图控件添加到您的canvas,您可以在canvas元素之后,在canvas元素上绘制图像地图控件的网页中使用以下JavaScript调用,如下所示
createImageMapControl(elemId, 'im1', 250, 200, 200, 150, highestDepth, 'indiamap.gif',
  [[134, 261, 10, '#00FF00'], [219, 291, 7, '#FF0000'], [248, 361, 10, '#0000FF']],
  function (c, w, i) { alert("You clicked on " + (i == 0 ?
  "Mumbai" : (i == 1 ? "Hyderabad" : "Chennai"))); }, 1, 90, 240, 1, 0.1);
创建图像地图控件的基本函数调用是
createImageMapControl(canvasid, controlNameId, x, y, width,
  height, depth, imgurl, pinxys, pinClickFunction, hasZoom, imagetopleftxoffset,
  imagetopleftyoffset, scale, scaleincrementfactor, tag)
首先,当然要提供一个URL来加载图像。在这种情况下,我使用印度地图,因为我来自那个国家,但是您可以使用任何图像,不一定是您需要放置图钉或平移和缩放的地图。pinxys是一个数组,其中每个元素都是[x, y, radius, color]。x和y相对于图像的左上角(0, 0)进行计算。您可以使用Gimp或任何图像处理软件来查找图像内的x,y像素坐标,以提供您想要图钉的每个点。半径当然是在图像上以该x,y坐标绘制的图钉的半径。pinClickFunction在用户单击图钉时调用,您将获得标准的canvas id和window id以及pinxys数组中的索引i。在示例中,我将其简化为仅显示您单击其图钉的城市的名称。如果hasZoom为1,则可以使用鼠标滚轮进行缩放。这适用于Google Chrome等支持onmousewheel事件的浏览器,我正是使用它。imagetopleftxoffset和imagetopleftyoffset是图像的起点,用于在启动时在窗口中显示图像的一部分。同样,它遵循pinxys坐标的规则。Scale是您想要启动的任何比例,如果比例太小或您的初始窗口偏离图像,您将根本看不到图像,所以要小心并选择有意义的值,即会裁剪图像的一部分而不超出它的值。scaleincrementfactor是每次鼠标滚轮移动时您想要缩放的程度,所以在示例中,我选择0.1,因此在mousewheel上会缓慢缩放,因为我的示例图像不是很大。
示例屏幕截图如下

Menu Bar Control
要将菜单栏控件添加到您的canvas,您可以在canvas元素之后,在canvas元素上绘制菜单栏控件的网页中使用以下JavaScript调用,如下所示
createMenuBarControl(elemId, 'mb1', 0, 0, 800, 20, highestDepth, [['File', '#000000', 10,
  '10pt Ariel', 0, null, [['Save', '#000000', 10, '10pt Ariel', 0,
         function () { alert('You choose Save from the menu.'); },
  null], ['Save As', '#000000', 10, '10pt Ariel', 0,
         function () { alert('You choose Sava As from the menu'); },
  null], ['Options', '#000000', 10, '10pt Ariel', 0, null,
         [['Advanced', '#000000', 10, '10pt Ariel', 0,
  function () { alert('You choose Advanced from the menu'); },
                null], ['Configuration', '#000000', 10, '10pt Ariel', 0,
  function () { alert('You choose Configuration from the menu'); },
                null]]]]], ['Help', '#000000', 10, '10pt Ariel', 0,
  function () { alert('You choose Help from the menu'); }, null]],
                '#bec7ff', '#848ec9', '#515eac', '#e3e7ff', '#c5cdff', 0);
创建菜单栏控件的基本函数调用是
createMenuBarControl(canvasid, controlNameId, x, y, width, height,
  depth, data, barcolorstart, barcolormiddle, barcolorend,
  dropdowncolorstart, dropdowncolorend, orientation, tag)
数据格式很复杂,因为菜单中的每个项目的文本都可以配置为任何字体和大小规范。基本上,每个菜单项定义为一个数组,其第一个元素是要在菜单中显示的文本标签。第二个元素是文本的颜色。第三个元素是文本的高度。第四个元素是字体规范。第五个元素始终设置为0,因为它由代码在内部使用,以确定菜单项的子菜单(如果有)是否显示。第五个元素是用户单击菜单项时要调用的函数。第六个和最后一个元素是与此处定义的相同菜单项元素数组的数组。如果项目没有子菜单,则将第六个参数设置为null。方向参数尚未实现,但它允许在实现时在底部和侧面放置菜单栏。
已单击子菜单项的示例菜单栏的屏幕截图如下

TextBox Control
要将textbox控件添加到您的canvas,您可以在canvas元素之后,在canvas元素上绘制textbox控件的网页中使用以下JavaScript调用,如下所示
createTextBox(elemId, 'textbox1', 400, 10, 300, 60, highestDepth, 'Type your name here',
  '#F0F0F0', 18, '18pt Ariel', '#051329', 18, '18pt Ariel', 50,
  '[a-Z]+', 0, null, 1, '#2e3642', 1, 0,
  '#000000', 3, 3, 20, 1, 10, 1, '#9bacc6', '#d6e4f9',
  0, null, 0, null, 0, 0, 0, null, '', '#0d2952', '#0000F0', 1);
创建textbox控件的基本函数调用是
createTextBox(canvasid, controlNameId, x, y, width, height, depth,
  waterMarkText, waterMarkTextColor, waterMarkTextHeight,
 waterMarkTextFontString, textColor,
  textHeight, textFontString, maxChars, allowedCharsRegEx,
 isPassword, passwordChar, hasBorder,
  borderColor, borderLineWidth, hasShadow, shadowColor,
 shadowOffsetX, shadowOffsetY, shadowBlurValue,
  hasRoundedEdges, edgeRadius, hasBgGradient, bgGradientStartColor,
 bgGradientEndColor, hasBgImage,
  bgImageUrl, hasAutoComplete, listPossibles,
 dropDownPossiblesListIfThereIsInputText, limitToListPossibles,
  listPossiblesTextHeight, listPossiblesTextFontString, initialText,
  caretColor, textSelectionBgColor, hasFocusInitially)
Watermark属性定义了textbox为空时看起来的样子,将显示水印消息。Text属性是关于如何绘制用户输入到textbox中的文本的信息。maxChars限制您可以输入的char的数量。allowedCharsRegEx是一个正则表达式,用户输入的任何内容都将逐个字符地进行检查。如果字符无效,它将不会影响文本的值。Password属性是指文本是否应隐藏以及使用哪个字母。边框属性用于在textbox周围绘制边框。Shadow目前不起作用,但旨在为控件添加dropdown阴影。Edge属性定义textbox是否具有圆角。渐变属性定义您是否想要textbox背景的渐变。您可以使用图像属性在textbox的背景中插入图像。自动完成参数可选地限制用户只输入给定字符串数组中的文本值。initialText可以提供一些文本,以初始显示,好像用户已键入它一样。caretColor是用于绘制插入符的颜色。selectionColor用于绘制选择的背景。如果您希望此文本框在表单中初始获得焦点,请将hasFocusInitially设置为1。
示例文本(无用户输入)的屏幕截图

在textbox中输入我的名字的示例屏幕截图

Image Fader Control
要将图像淡入淡出控件添加到您的canvas,您可以在canvas元素之后,在canvas元素上绘制图像淡入淡出控件的网页中使用以下JavaScript调用,如下所示
createImageFader(elemId, 'MoviePosters', 500, 200, 135, 200,
 highestDepth, ['fantastic_four.jpg',
  'IncredibleHulk.jpg', 'Thor.jpg', 'xmen_first_class.jpg'],
 0, 1, 0.01, 100, function (canvasid, windowid, e, i)
  { var imageFaderProps = getImageFaderProps(canvasid, windowid);
 alert(imageFaderProps.ImageURLs[i]); }, 1);
创建图像淡入淡出控件的基本函数调用是
createImageFader(canvasid, controlNameId, x, y, width, height, depth,
  imageURLs, fadeStartValue, fadeEndValue, fadeStepValue,
 holdForTicks, clickFunction, overlayimages)
imageURLs是要显示的图像的URL数组。fadeStart值是一个介于0和1之间的alpha数字,它决定了在显示下一张图像之前图像淡出的程度。fadeEndValue同样介于0和1之间,这是图像显示的最高或最终alpha值。fadeStepValue是增量方式,它决定了图像的淡出速度,即淡出速度快慢。holdForTicks是图像在显示下一张图像之前以最大alpha值显示的绘制调用次数,在本例中完全不透明为1。clickFunction是您在当前图像被单击时执行的自定义代码,在本例中,我将警报显示被单击图像的URL,基本上可以访问属性以及被单击图像的索引,您可以执行任何操作,包括服务器端回发。如果overlayimages为1,则表示您希望前一张图像平滑地淡入到当前或下一张图像。
Image Slider Control
要将图像滑块控件添加到您的canvas,您可以在canvas元素之后,在canvas元素上绘制图像滑块控件的网页中使用以下JavaScript调用,如下所示
createImageSlider(elemId, 'MoviePosters2', 500, 500, 135, 200, highestDepth,
  ['fantastic_four.jpg', 'IncredibleHulk.jpg', 'Thor.jpg', 'xmen_first_class.jpg'],
  1, -1, 100, function (canvasid, windowid, e, idx) { alert(idx.toString()); });
创建图像淡入淡出控件的基本函数调用是
createImageSlider(canvasid, controlNameId, x, y,
  width, height, depth, imageURLs, direction, stepIncrement, holdForTicks, clickFunction)
imageURLs是要显示的图像的URL数组。方向为1或0。如果为1,则图像将横向滑动;如果为0,则图像将纵向滑动。如果stepIncrement为正且方向为1,则向右滑动;如果为负,则向左滑动。如果stepIncrement为正且方向为0,则从下向上滑动;如果为负,则从上向下滑动。holdForTicks是开始再次滑动图像之前需要保持的滴答次数。在示例clickFunction中,会显示一个警报消息,其中包含图像的索引,即imageURLs数组的索引。
Boundary Fillable Map Control
要将边界填充映射控件添加到您的canvas,您可以在canvas元素之后,在canvas元素上绘制边界填充映射控件的网页中使用以下JavaScript调用,如下所示
createBoundaryFillableMap(elemId, 'bfm1', 10, 420, 500, 389, highestDepth, [[95, 155,
  40, 130, 160, 185, 255, 255, 255, 255, 0, 0, 255, 255], [338, 180, 320, 160, 360,
  205, 255, 255, 255, 255, 0, 255, 0, 255]], 'WorldMap.png', 500, 389);
创建图像淡入淡出控件的基本函数调用是
createBoundaryFillableMap(canvasid, controlNameId, x, y, width,
           height, depth, fillpoints, imgurl, imgwidth, imgheight)
fillpoints是一个数组的数组。每个数组的格式是前2个元素是从地图开始填充的x,y坐标。接下来的2个元素是填充的边界框的左上角x,y坐标,当然,接下来的2个元素是边界框的右下角x,y坐标。接下来的4个元素是原始颜色的RGBA(0到255),当然,接下来的4个元素是要替换它的RGBA颜色。图像WorldMap.png是一个轮廓图,描绘了国家边界,而我的图像背景是白色的。当然,填充算法在一个单独的函数中可用,如果您想将其与任何控件结合使用,可以这样做。因为已经有一个可伸缩、可缩放且带有图钉和标签的地图控件,所以我没有让这个地图控件做所有这些,因为如果阅读代码,可以轻松地组合它们。

如果您想进行部分填充,那么fillpoints数组元素有三个附加元素,第一个是方向,如果为0,则水平填充x,在这种情况下,当然,接下来的两个元素是x的最小值和最大值。请注意数字,因为我为您提供了完全的控制,您必须知道图像内的点,否则将导致未知结果。类似地,如果方向为1,则下一个元素是y的最小值,然后是y的最大值。基本上,您为部分填充提供的起始点应介于水平x最小值和x最大值或垂直y最小值和y最大值之间,否则将产生未知结果。
以下示例是如何从左到右水平填充美国,颜色为蓝色
createBoundaryFillableMap(elemId, 'bfm1', 800, 400, 500, 389, highestDepth,
  [[95, 155, 40, 130, 160, 185, 255, 255, 255, 255, 0, 0, 255, 255, 0, 40, 100],
  [338, 180, 320, 160, 360, 205, 255, 255, 255, 255, 0, 255, 0, 255]],
  'WorldMap.png', 500, 389);
以下是生成的示例图像

以下示例是如何从右到左水平填充美国,颜色为蓝色
createBoundaryFillableMap(elemId, 'bfm1', 800, 800, 500, 389, highestDepth,
  [[95, 155, 40, 130, 160, 185, 255, 255, 255, 255, 0, 0, 255, 255, 0, 100, 160],
  [338, 180, 320, 160, 360, 205, 255, 255, 255, 255, 0, 255, 0, 255]],
 'WorldMap.png', 500, 389);
以下是生成的示例图像

Multi Line Label Control
要将多行标签控件添加到您的canvas,您可以在canvas元素之后,在canvas元素上绘制多行标签控件的网页中使用以下JavaScript调用,如下所示
createMultiLineLabel(elemId, 'mll1', 250, 400, 200, highestDepth, 0,
  'This is a very long sentence to test word wrap.  My name is \nAkshay Srinivasan\n and ' +
  'this is a multi line label control demo.
 It is a control that is one of the many controls ' +
  'in Canvas Control Library which is a system of building web pages that has been made ' +
  'possible by the new HTML5 element called canvas.', '#000000', 12, '12pt Ariel', 5, 1);
createMultiLineLabel(elemId, 'mll1', 250, 800, 200, highestDepth, 1,
  '<NT>This is a </NT><N><C>#FF0000</C><F>16pt ' +
  'Ariel</F><T>very long</T></N><NT> sentance to test word wrap. ' +
  ' My name is </NT><N><C>#00FF00</C><F>bold italic 14pt Tahoma<' +
  '/F><T>\nAkshay Srinivasan\n</T></N><NT> and this is a multi line label ' +
  'control demo.  It is a control that is one of the many controls in
  Canvas Control Library which' +
  ' is a system of building web pages that has been made possible by the new </NT><N>' +
  '<C>#0000FF</C><F>10pt Ariel</F><T>HTML5</T></N><NT>' +
  ' element called canvas.</NT>', '#000000', 16, '12pt Ariel', 5, 1);
创建多行标签控件的基本函数调用是
createMultiLineLabel(canvasid, controlNameId, x, y, width,
  depth, hasMarkup, text, textColor, textHeight,
 textFontString, lineSpacingInPixels, wordSensitive)
此控件可自动确定高度,因此它是少数几个您无需指定高度的控件之一。如果hasMarkup设置为0,则将按原样渲染text参数。如果设置为1,则它将假定text参数中包含标记,该标记是一堆标签,您可以在第二个示例中看到
<NT>- 这是普通文本,意味着它将使用传递给函数调用的参数的文本颜色、高度和字体。<N>这表示这是特殊格式的文本,其中包含用于指定文本格式的一堆标签<C>- 这是文本的颜色<F>- 这是字体字符串<T>- 这是实际的文本字符串
- 另外,要指定换行,您可以在文本字符串中使用
\n。
lineSpacingInPixels是行间距。如果wordSensitive参数设置为1,它将接受一个过长的单词,并在行尾查找空格,并将其断开到新行。如果设置为0,则单词将在中间断开到新行,没有连字符。
此控件允许您能够创建常规段落状文本,而无需诉诸于常规HTML5文本,这样您就可以留在系统中。
纯文本(未标记)的屏幕截图如下

标记文本的屏幕截图(具有不同字体度量和颜色的文本)

Word Processor Control
要将文字处理器控件添加到您的canvas,您可以在canvas元素之后,在canvas元素上绘制文字处理器控件的网页中使用以下JavaScript调用,如下所示
createWordProcessor(elemId, 'Wp1', 800, 400, 400, 224, highestDepth, 0, '',
  '#051329', 12, '12pt Ariel', 5, 1, 'Type a paragraph here.', '#F0F0F0', 14, '14pt Ariel',
  2000, 0, '#000000', 1, 1, 1, 10, 1, '#9bacc6',
  '#d6e4f9', 0, null, 10, 1, '#2e3642', 1, '.+', '#0d2952');
创建文字处理器控件的基本函数调用是
createWordProcessor(canvasid, controlNameId, x, y, width, height,
  depth, hasMarkup, text, textColor, textHeight, textFontString,
  lineSpacingInPixels, wordSensitive,
  waterMarkText, waterMarkTextColor, waterMarkTextHeight,
  waterMarkTextFontString, maxChars, hasShadow,
  shadowColor, shadowOffsetX, shadowOffsetY, hasRoundedEdges, edgeRadius, hasBgGradient,
  bgGradientStartColor, bgGradientEndColor, hasBgImage, bgImageUrl, margin, hasBorder,
  borderColor, borderLineWidth, allowedCharsRegEx, caretColor)
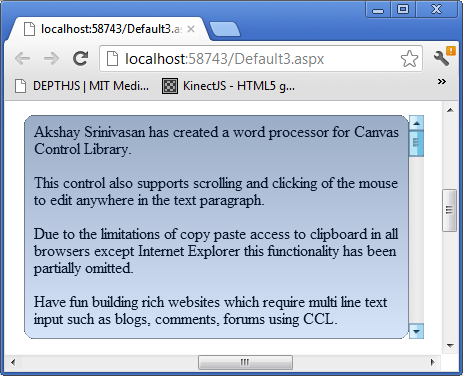
文字处理器控件本质上是一个多行文本框。目前,标记文本不可用,因此hasMarkup必须为0,直到标记代码正常工作。因此,它是根据textColor、textFontString度量提供的纯文本。它在很大程度上类似于textbox控件,但它是多行的,而不是单行的。在示例中,我允许任何字符,将allowedCharsRegEx设置为.+.局限性之一是,文字处理器/多行文本框的高度为了获得最佳显示效果,必须是双倍边距加上行数乘以文本高度加上每行像素间距之和的倍数。
文字处理器控件空白(无用户输入)的屏幕截图,显示了水印文本

用户输入一段文字的文字处理器屏幕截图
Virtual Keyboard Control
要将虚拟键盘控件添加到您的canvas,您可以在canvas元素之后,在canvas元素上绘制虚拟键盘控件的网页中使用以下JavaScript调用,如下所示
createVirtualKeyboard(elemId, 'vkb1', 500, 600, 360, 180, highestDepth, null,
  function (c, w, l) { alert(l); }, 5, 5, 1, 12, '12pt Ariel');
创建虚拟键盘控件的基本函数调用是
createVirtualKeyboard(canvasid, controlNameId, x, y,
  width, height, depth, keys, keypressFunc, gapbetweenbuttons, gapbetweenrows, hasgloss,
  textheight, textfontstring, customDrawLetterFunc)
虚拟键盘控件有一个keys数组,它定义了键盘布局。一个键被定义为一个数组,其中第一个元素是字母,然后是键的宽度、键的高度,以及可选的另一个键盘的索引。键盘数组是一个行数组,其中包含键数组,如前所述。keys数组最终是一个键盘数组。这样,您就可以索引到您的键盘数组,以获得特殊的键来切换键盘。我建议在示例中,将null传递给keys,这将为您提供默认键盘。示例定义了一个简单的keypress函数,该函数会警报虚拟键盘上按下的键的字母。
虚拟键盘的屏幕截图如下

按下“12#”按钮后虚拟键盘的屏幕截图,该按钮索引到虚拟键盘的另一个布局,如下所示

此外,如果浏览器是Android或iPhone/iPad/iPod,textbox和文字处理器控件也会进行检查,并相应显示。但是,使用此功能时要小心,因为在iPad2甚至HTC Sensation XL Android手机等旧设备上的响应很差。也许在更强大的设备上,如三星Galaxy S3和iPhone 5,它可能可用。但我没有办法购买这些平台,所以一些拥有更强大智能手机和平板电脑的幸运人士的反馈将非常有用。我认为问题在于这些移动设备浏览器中的JavaScript引擎不够快,或者只是处理器无法处理移动浏览器中的另一层抽象JavaScript。
新的窗口绘图系统在我的iPad2和HTC Sensation XL Android手机上的响应能力有了很大提高,现在在使用性方面是可以接受的,尽管它不像原生的浏览器HTML5元素或原生键盘那样快速响应。
要将分隔条控件添加到您的canvas,您可以在canvas元素之后,在canvas元素上绘制分隔条控件的网页中使用以下JavaScript调用,如下所示
var panelwindowid = createPanel(elemId, 'p1', 0, 0,
  200, 200, highestDepth, 1, '#c8c8c8', 1, '#d1ddff', '#a7afc6');
registerChildWindow(elemId, createProgressBar(elemId, 'pg1', 10, 100,
  200, 20, highestDepth, '#33ec25', 100, 0, 60), panelwindowid);
registerChildWindow(elemId, createSlider(elemId, 's1', 10, 150, 200,
  20, highestDepth, 10, 100, 0, 50), panelwindowid);
var panelwindowid2 = createPanel(elemId, 'p2', 204, 0, 200, 200,
  highestDepth, 1, '#c8c8c8', 1, '#d1ddff', '#a7afc6',
  1, 150, 0, 'Test Panel', '#000000', 12, '12pt Ariel',
  '#cfcfcf', '#ababab', 20, '#495be5', 1, 7);
registerChildWindow(elemId, createProgressBar(elemId, 'pg2', 210, 10,
  200, 20, highestDepth, '#33ec25', 100, 0, 60), panelwindowid2);
registerChildWindow(elemId, createSlider(elemId, 's2', 210, 100, 200,
  20, highestDepth, 10, 100, 0, 50), panelwindowid2);
createSplitter(elemId, 'spl1', 201, 0, 3, 200, highestDepth, '#D0D0D0');
创建分隔条的基本函数调用是
function createSplitter(canvasid, controlNameId, x, y, width, height, depth, linecolor)
分隔条是一条水平或垂直地放置在某些窗口之间的线。如果宽度大于高度,则表示它是水平对齐的分隔条。分隔条的作用是,它会找出哪些窗口在其线条的2像素范围内,并在拖动分隔条时调整它们的宽度或原点。
Simple XML Viewer Control
要将简单的XML查看器控件添加到您的canvas,您可以在canvas元素之后,在canvas元素上绘制简单的XML查看器控件的网页中使用以下JavaScript调用,如下所示
createSimpleXMLViewer(elemId, 'sxmlvr1', 10, 500, 200, 250, highestDepth,
  '<root><Databases><Employees><Tables><Employee><Column
   ColumnName="id">1</Column><Column
   ColumnName="FirstName">Akshay</Column><Column
   ColumnName="MiddleName"></Column><Column
   ColumnName="LastName">Srinivasan</Column><Column
   ColumnName="EmpId">42312345672892</Column></Employee>
   </Tables></Employees></Databases></root>',
  '#000000', '12pt Ariel', 12, null, null, 1, 16, 16, 'Node.png',
  'Value.png', 'Attribute.png');
创建简单XML查看器的基本函数调用是
function createSimpleXMLViewer(canvasid, controlNameId, x, y, width, height,
   depth, xml, textcolor, textfontstring, textheight, clickNodeFunction,
   tag, hasicons, iconwidth, iconheight, imgURLNode, imgURLValue, imgURLAttribute)
简单的XML查看器控件在其基础上使用treeview控件来接受用户提供的XML并将其绘制成tree。下载中有一个工作示例。XML必须以<root>标签开头,并以</root>标签结尾,基本上是DOMParser在JavaScript中理解的格式良好的XML,它只支持这一点。
代码示例的屏幕截图如下

Voting Control
要将投票控件添加到您的canvas,您可以在canvas元素之后,在canvas元素上绘制投票控件的网页中使用以下JavaScript调用,如下所示
createVotingControl(elemId, 'vc1', 450, 150, 300, 30, highestDepth,
  5, 10, 59, 172, 53, 255, 0, 5, 1, 0, 1, 180, 21, '#000000', '12pt Ariel',
  12, 0, 0, 6.7, 1, 0, 0, 1, 'duckoutline.png', [15, 13, 0, 0, 30, 26, 255,
  255, 255, 255, 59, 172, 53, 255], 30, 26, 0, 255, 255, 255, 255);
createVotingControl(elemId, 'vc2', 450, 200, 300, 30,
  highestDepth, 5, 5, 213, 210, 0, 255, 30, 5, 1, 1, 1, 180, 21, '#000000',
  '12pt Ariel', 12, 0, 0, 3.5, 1, 0, 0, 0, null, null, 30, 30, 0, 0, 0, 0, 0,
  function (canvasid, windowid, votingProps, clickx, clicky, value) {
  votingProps.InitialValue = value; invalidateRect(canvasid, null,
  votingProps.X, votingProps.Y, votingProps.Width, votingProps.Height); });
createVotingControl(elemId, 'vc3', 450, 250, 300, 30, highestDepth, 5, 5, 59,
172, 53, 255, 0, 5, 1, 1, 1, 180, 21, '#000000', '12pt Ariel', 12, 0,
0, 0.5, 1, 0, 0, 1, 'staroutline.png', [8, 8, 0, 0, 30, 26, 255, 255, 255, 255,
59, 172, 53, 255], 17, 17, 0, 255, 255, 255, 255, function (canvasid, windowid, votingProps,
clickx, clicky, value) { votingProps.InitialValue = value;
invalidateRect(canvasid, null, votingProps.X, votingProps.Y,
               votingProps.Width, votingProps.Height); }, 1);
invalidateRect(canvasid, -1, votingProps.X, votingProps.Y,
               votingProps.Width, votingProps.Height);
创建投票控件的基本函数调用是
function createVotingControl(canvasid, controlNameId, x, y, width,
  height, depth, numstars, maxvalueofallstars, starcolorred, starcolorgreen,
  starcolorblue, starcoloralpha, starsizeinpixels, spacinginpixelsbetweenstars,
  haspartialstars, editable, hasvaluelabel, labelxpos, labelypos, labeltextcolor,
  labeltextfontstring, labeltextheight, starsstartingposoffsetwhenlabel,
  starsyposwhenlabel, initialvalue, outlinethicknessofemptystar, starsorientation,
  fillorientation, iscustompattern, outlineimgurl, customfillpoint, imgwidth,
  imgheight, hasmouseoverlabel, staroutlinebgcolorred, staroutlinebgcolorgreen,
  staroutlinebgcolorblue, staroutlinebgcoloralpha, customclickfunction,
  rounddisplayedvaluetonumofdecimals)
numstars参数是要显示的形状数量。Maxvalueofallstars是所有星星的总填充值。然后提供填充形状/星星的RGBA颜色。如果您使用的是标准星形,那么星形的大小、宽度和高度默认是相同的。然后提供形状/星星之间的间距。如果您正在部分填充星形以获得分数,那么这将是1,否则为0。关于部分复杂形状填充的一点需要注意是,当水平填充时,图像的中心应该完全在标准星形的轮廓形状内,这是这种情况。对于鸭子轮廓,我使用的是更合适的方式是,图形艺术家将鸭子的一条腿抬起在中线。Editable基本上意味着可点击和值可更改。接下来的参数定义了标签,它将是“值/所有星的最大值”。如果您想偏移绘制星星的起始位置,请提供非0值。Initialvalue只是用于填充星星/复杂形状的起始值。如果您想要更厚的空星的轮廓线,请提供大于1的值。Starorientation是绘制星星的方式,0表示水平,1表示垂直。Fillorientation是填充星星的方式,水平0,垂直1。Iscustompattern表示您将提供一个带有轮廓形状的图像,就像我的鸭子示例一样。Customfillpoint在BoundaryFillableMap中定义,请参考那里关于如何构造数组。基本上,您提供一个点在空形状内来填充您的复杂形状。然后是图像的宽度和高度。然后是背景颜色的RGB值。如果您想在单击时执行自定义操作,请在此处传递您的自定义单击函数。然后是标签显示的十进制小数位数。
上面示例的屏幕截图,按从上到下的顺序

Window Draw System Changed for Performance on Mobile Devices
新的窗口绘制系统不是在canvas上绘制所有窗口,而是使用invalidateRect函数来使某个区域无效。落入该区域的所有窗口都将被重新绘制。此更改反映在新动画系统中,并且只有动画窗口将被重新绘制。为此,您现在必须为registerAnimatedWindow函数调用提供一个windowid。但这会使您的代码更复杂,如FormsBases.aspx示例所示,该示例现在具有更复杂的代码逻辑来重绘受影响的窗口,而系统不会知道它们已更改。
Example of a Customized ComboBox Control with Pictures in the dropdown
以下HTML创建了一个带有下拉列表中图片示例的ComboBox控件
<canvas id="canvas1" width="500"
   height="500" tabindex="0"></canvas>
<script type="text/javascript">
registerCanvasElementId('canvas1');
createComboBox('canvas1', 'cb1', 10, 10, 150, 20, highestDepth,
    ['Bombay', 'Pune', 'Madras', 'Delhi'], null, null, drawListAreaCustom, null,
    listAreaCustomClickFunction, '#364635', 10, '10pt Ariel', '#1b213b', 10, '10pt Ariel');
invalidateRect(elemId, null, 0, 0, 500, 500);
function drawListAreaCustom(canvasid, windowid) {
    var comboboxProps = getComboboxPropsByListAreaWindowId(canvasid, windowid);
    var vscrollBarProps = getScrollBarProps(canvasid, comboboxProps.VScrollBarWindowID);
    var ctx = getCtx(canvasid);
    ctx.fillStyle = '#FFFFFF';
    ctx.beginPath();
    ctx.rect(comboboxProps.X, comboboxProps.Y + comboboxProps.Height,
             comboboxProps.Width - 15, 100);
    ctx.fill();
    ctx.fillStyle = comboboxProps.ListAreaTextColor;
    ctx.font = comboboxProps.ListAreaFontString;
    for (var i = vscrollBarProps.SelectedID; i <
           comboboxProps.Data.length && ((comboboxProps.ListAreaTextHeight + 10) *
        (i - vscrollBarProps.SelectedID + 1)) + 4 < 100; i++) {
        switch (comboboxProps.Data[i]) {
            case 'Bombay':
                drawCustomImage(ctx, comboboxProps.X, comboboxProps.Y + 4 +
                    ((comboboxProps.ListAreaTextHeight + 10) *
                      (i - vscrollBarProps.SelectedID + 1)), 16, 16, 'Bombay.png');
                break;
            case 'Pune':
                drawCustomImage(ctx, comboboxProps.X, comboboxProps.Y + 4 +
                    ((comboboxProps.ListAreaTextHeight + 10) *
                      (i - vscrollBarProps.SelectedID + 1)), 16, 16, 'Pune.png');
                break;
            case 'Madras':
                drawCustomImage(ctx, comboboxProps.X, comboboxProps.Y + 4 +
                    ((comboboxProps.ListAreaTextHeight + 10) *
                      (i - vscrollBarProps.SelectedID + 1)), 16, 16, 'Madras.png');
                break;
            case 'Delhi':
                drawCustomImage(ctx, comboboxProps.X, comboboxProps.Y + 4 +
                    ((comboboxProps.ListAreaTextHeight + 10) *
                      (i - vscrollBarProps.SelectedID + 1)), 16, 16, 'Delhi.png');
                break;
        }
        ctx.fillText(comboboxProps.Data[i], comboboxProps.X + 20, comboboxProps.Y + 17 +
                    ((comboboxProps.ListAreaTextHeight + 10) *
                     (i - vscrollBarProps.SelectedID + 1)));
    }
    ctx.strokeStyle = '#b7bfc8';
    ctx.beginPath();
    ctx.rect(comboboxProps.X, comboboxProps.Y +
        comboboxProps.Height, comboboxProps.Width - 15, 100);
    ctx.stroke();
}
var preloadedImages = new Array();
function drawCustomImage(ctx, x, y, width, height, src) {
    for (var i = 0; i < preloadedImages.length; i++) {
        if (preloadedImages[i].Src == src) {
            ctx.drawImage(preloadedImages[i].Image, x, y);
            return;
        }
    }
    var image = new Image(width, height);
    image.src = src;
    image.onload = function () {
        preloadedImages.push({ Src: src, Image: image });
        ctx.drawImage(image, x, y);
    };
}
function listAreaCustomClickFunction(canvasid, windowid, e) {
    var comboboxProps = getComboboxPropsByListAreaWindowId(canvasid, windowid);
    var vscrollBarProps = getScrollBarProps(canvasid, comboboxProps.VScrollBarWindowID);
    var canvas = getCanvas(canvasid);
    var x = e.calcX;
    var y = e.calcY;
    for (var i = vscrollBarProps.SelectedID; i < comboboxProps.Data.length &&
          ((comboboxProps.ListAreaTextHeight + 10) *
          (i - vscrollBarProps.SelectedID + 1)) < 100; i++) {
        if (x > comboboxProps.X && y > comboboxProps.Y + 4 + comboboxProps.Height +
          ((comboboxProps.ListAreaTextHeight + 10) * (i - vscrollBarProps.SelectedID)) &&
            x < comboboxProps.X + comboboxProps.Width - 15 && y < comboboxProps.Y +
              comboboxProps.Height + 4 + ((comboboxProps.ListAreaTextHeight + 10) *
            (i - vscrollBarProps.SelectedID + 1))) {
            comboboxProps.SelectedID = i;
            setHiddenWindowStatus(canvasid, comboboxProps.VScrollBarWindowID, 1);
            setHiddenWindowStatus(canvasid, comboboxProps.ListAreaWindowID, 1);
            draw(canvasid);
            return;
        }
    }
}
</script>
注意:在新系统中,调用invalidate rect需要传递-1而不是null。
上面的JavaScript使用了4张名为Bombay.png、Pune.png、Madras.png、Delhi.png的图像。只要您更改函数drawListAreaCustom中的图像URL,您就可以使用不同文件名的任何图像。
上面的示例屏幕截图如下

How to Use the New Forms Based System
目前表单与网页工作的概念是,当您单击一个需要回发以在服务器端执行操作的按钮时,使用常规网页技术会发生的情况是,所有控件的值都会发送到服务器,并且在ASP.NET视图状态的情况下,控件的状态也会发送。控件值将被PHP或ASP.NET模块解包,并调用php或aspx服务器端页面和函数,在其中您的代码将进行一些更改。然后,整个新网页将被发送回客户端浏览器。
在这个新系统中,我发明了一种处理方式:当您对某个控件执行操作时,例如一个需要执行服务器端代码的按钮,所有控件的状态和值都会被打包并通过AJAX调用发送到服务器端,该调用会转到一个包含CanvasControlLibrary.cs文件的ASP.NET网页,该文件包含所有支持。您的C#函数(您提供其名称)将被调用,您将在控件值和状态中进行所有更改(在示例中更改标签的文本)。然后,所有控件的状态和值都将被打包成XML并发送回客户端所在的同一页面(因为它是AJAX调用),然后解包,用您在服务器端更改的新值替换所有旧的控件状态和值。UI会重绘,您对控件所做的更改会反映在同一网页上。客户端在回发到服务器端以转到另一个网页时永远不会离开该网页,这是常规做法。
以下是客户端代码,它是一个按钮,用于调用aspx页面上的服务器端C#函数
createLabel(elemId, 'l1', 150, 10, 100, 20, 'Label 1',
'#000000', 12, '12pt Ariel', null, highestDepth);
createButton(elemId, 'b3', 30, 74, 250, 40,
  'Custom Click Function', '#0000FF', 12, '12pt Ariel',
  2, highestDepth + 1, function (canvasid, windowid)
  { invokeServerSideFunction('AjaxEx1.aspx', 'ClickMe',
  elemId, windowid, function () { alert('Did Postback'); }); },
  null, '#bee6fd', '#a7d9f5', '#eaf6fd', '#d9f0fc', '#3c7fb1');
服务器端代码非常简单,如下所示
public partial class Default2 : System.Web.UI.Page
{
    CanvasControlLibrary ccl;

    protected void Page_Load(object sender, EventArgs e)
    {
        ccl = new CanvasControlLibrary(Request.InputStream);
        ccl.InvokeServerSideFunction(this.Page);
        ccl.SendVars(Response.OutputStream);
    }

    protected override void Render(HtmlTextWriter writer)
    {
    }

    public void ClickMe(string canvasid, int windowid)
    {
        CanvasControlLibrary.CCLLabelProps lp =
          ccl.getControlPropsByControlNameID("l1") as CanvasControlLibrary.CCLLabelProps;
        lp.Text = "Did Postback";
    }
}
JavaScript函数调用中的label声明是正常的。另一方面,当按钮被点击时,它会调用一个名为invokeServerSideFunction的JavaScript函数,在这里会发生回发的所有魔法。函数的第一参数是您的服务器端代码所在的网页名称。下一个是要在服务器端调用的aspx页面上的函数名称。第三个和第四个参数只是canvas id和window id,用于在服务器端识别哪个控件在客户端引发了事件。第五个参数是您编写的JavaScript函数,它将在回发完成后调用,以便您可以在需要时对客户端进行进一步更改。
在服务器端的aspx页面中,您在页面加载事件中调用了服务器端类,并在实例化后,调用页面上的ClickMe C#函数。在此示例中,只是一个简单的调用来获取标签控件并将其文本值更改为Did Postback。然后,您调用canvas控件库服务器端类,将所有更改发送回客户端。
当您下载并运行示例时,单击按钮后,服务器端标签文本会从Label 1更改为Did Postback。我将示例保持得非常简单,但有了这个系统,您可以创建功能齐全的页面。在需要表单的情况下,您只需有一个带有控件的启动面板。当您单击按钮并提交所有收集的信息时,您将保留第二个带有所有控件的面板,该面板是您显示和隐藏第一个表单的表单。有了这个功能,您就可以构建功能齐全的网页,其中包含服务器端回发自定义代码,并使用新的Canvas控件库构建任何当前的基于表单的网页。
系统基本概念的图示如下

PHP Example
此示例已在Apache和IIS上进行了测试。这与简单的ClickMe示例相同,但使用PHP而不是C# ASPX页面处理服务器端回发
<?php
include 'CanvasControlLibrary.class.php';

$parameters = array();
$ccl = new CanvasControlLibrary();
$ccl->InvokeServerSideFunction();
$ccl->SendVars($parameters);

function ClickMe($obj, $canvasid, $windowid)
{
    $lp = $obj->getControlPropsByControlNameID("l1");
    $lp->Text = "Did Postback";
}

?>
它使用与Default.aspx几乎相同的页面Default.php,因为它们都没有PHP或C#代码。当您单击按钮时,回发会转到上面列出的代码。在这里,所有内容都在PHP类文件中完成,所以您必须包含它。您将库实例化为一个类对象,并执行与服务器端ASPX页面几乎相同的操作。同样,只为演示更改了一个标签。
An Example of a Working Form With Postback
这是一个网页,它使用Canvas控件库及其基于表单的系统来创建一个虚构的Cinemas“Fake Cinemas”的简单网页。页面顶部有一个电影院公司的主页图片Logo。有一个菜单栏,链接到各种其他页面(目前尚未实现任何功能)。它在印度的四个城市设有电影院:孟买、德里、班加罗尔和金奈。起始页的目的是让客户选择城市,然后填充该城市影院的名称,然后客户选择影院。当客户选择多路影院时,将显示显示影院所有电影海报和放映时间的图像。如果您单击放映时间标签,它将高亮显示,并添加一个textbox控件和一个用于支付的按钮。textbox控件用于输入票数,并且只接受数字输入。当您填写完毕并单击支付按钮时,它会进行服务器端回发,并显示一条消息,告诉您预订了哪个影院、多少张票、什么电影名称和放映时间。废话不多说,这是客户端代码
<script type="text/javascript">
var elemId = 'canvas';
var selecteCinemaWindowID;
registerCanvasElementId(elemId);
function cityChanged(canvasid, windowid, index) {
    invokeServerSideFunction('AjaxEx1.aspx', 'onSelectCityChanged',
    canvasid, windowid, function () {
        var wprops = getWindowProps(elemId, selecteCinemaWindowID);
        invalidateRect(elemId, null, wprops.X, wprops.Y, wprops.Width, wprops.Height);
    });
}
function onSelectCinema(canvasid, windowid, index) {
    invokeServerSideFunction('AjaxEx1.aspx',
         'onSelectCinemaChanged', canvasid, windowid, showMoviesForCinema);
}
function selectMovieTime(canvasid, windowid) {
    var labelProps = getLabelProps(canvasid, windowid);
    var labelWindowProps = getWindowProps(canvasid, windowid);
    labelProps.BackGroundColor = '#899b0d';
    var labelWindowIDS = new Array();
    labelWindowIDS.push(createLabel(elemId, 'numTicketsLabel', 630, 220, 160, 30,
        'Number of Tickets:', '#131aa3', 16, '16pt Ariel', null, highestDepth));
    labelWindowIDS.push(createTextBox(elemId, 'numTicketsTextBox',
    800, 220, 50, 30, highestDepth, 'No.',
        '#F0F0F0', 12, '12pt Ariel', '#051329', 12,
        '12pt Ariel', 2, '[0-9]', 0, null, 1, '#2e3642',
        1, 0, '#000000', 3, 3, 20, 1, 10, 1,
        '#9bacc6', '#d6e4f9', 0, null, 0, null,
        0, 0, '#D0D000', 12, '12pt Ariel', '',
        '#0d2952', 'rgba(0, 0, 240, 0.2)', 1));
    labelWindowIDS.push(createButton(elemId, 'PaymentButton', 875, 220, 100, 30,
        'Book Tickets', '#0000FF', 12,
        '12pt Ariel', 2, highestDepth + 1, 1, 1,
        function (canvasid, windowid) {
            invokeServerSideFunction('AjaxEx1.aspx',
            'DoPaymentForTickets', elemId, windowid, afterPayment);
        }, null, '#bee6fd', '#a7d9f5', '#eaf6fd',
        '#d9f0fc', '#3c7fb1', labelWindowProps.ControlNameID));
    for (var i = 0; i < controlNameIDs.length; i++) {
        var window = getWindowByControlNameID(controlNameIDs[i]);
        if (window.ControlType == 'Label' && window.WindowCount != windowid) {
            var labelProps2 = getLabelProps(canvasid, window.WindowCount);
            labelProps2.BackGroundColor = null;
            labelWindowIDS.push(window.WindowCount);
        }
    }
    for (var i = 0; i < labelWindowIDS.length; i++) {
        var wprops = getWindowProps(elemId, labelWindowIDS[i]);
        invalidateRect(elemId, null, wprops.X, wprops.Y, wprops.Width, wprops.Height);
    }
}
function afterPayment(params) {
    suspendDraw = 1;
    for (var i = 0; i < controlNameIDs.length; i++) {
        destroyControlByNameID(controlNameIDs[i]);
    }
    controlNameIDs = new Array();
    destroyControlByNameID('numTicketsLabel');
    destroyControlByNameID('numTicketsTextBox');
    destroyControlByNameID('PaymentButton');
    destroyControlByNameID('label1');
    destroyControlByNameID('label2');
    destroyControlByNameID('selectCityComboBoxComboBoxTextArea');
    destroyControlByNameID('selectCinemaComboBoxComboBoxTextArea');
    suspendDraw = 0;
    createLabel(elemId, 'PaymentMessageLabel', 10, 220, 1024, 30, params[0],
                  '#131aa3', 16, '16pt Ariel', null, highestDepth);
    invalidateRect(elemId, null, 0, 0, 1024, 768);
}
var controlNameIDs = new Array();
function showMoviesForCinema(params) {
    suspendDraw = 1;
    for (var i = 0; i < controlNameIDs.length; i++) {
        destroyControlByNameID(controlNameIDs[i]);
    }
    controlNameIDs = new Array();
    suspendDraw = 0;
    var xoffset = 0;
    var labelWindowIDS = new Array();
    for (var i = 0; i < params.length; i++) {
        var windowid = createImage(elemId, 'Poster' + i.toString(), 10 +
                          xoffset, 300, 266, 200, highestDepth, params[i][0]);
        controlNameIDs.push('Poster' + i.toString());
        var timesoffset = 0;
        for (var j = 1; j < params[i].length; j++) {
            labelWindowIDS.push(createLabel
                (elemId, 'MovieTimeLabel' + j.toString() + 'Poster' +
                i.toString(), 10 + xoffset + timesoffset,
                510, 50, 20, params[i][j], '#cdc833',
                12, '12pt Ariel', null, highestDepth, null, selectMovieTime, null, 1));
            controlNameIDs.push('MovieTimeLabel' + j.toString() + 'Poster' + i.toString());
            timesoffset += 70;
        }
        xoffset += 296;
    }
    for (var i = 0; i < labelWindowIDS.length; i++) {
        var wprops = getWindowProps(elemId, labelWindowIDS[i]);
        invalidateRect(elemId, null, wprops.X, wprops.Y, wprops.Width, wprops.Height);
    }
}
function form1() {
    createImage(elemId, 'imgTitle', 312, 10, 400, 100, highestDepth + 1, 'Title.png');
    createMenuBarControl(elemId, 'menuBar1', 0, 120, 1024, 60,
    highestDepth, [['HOME', '#000000', 20,
         '20pt Ariel', 0, null, null], ['TICKETS',
         '#000000', 20, '20pt Ariel', 0, null, null],
        ['MOVIES', '#000000', 20, '20pt Ariel',
        0, null, null], ['CINEMAS', '#000000', 20, '20pt Ariel',
         0, null, null], ['TRAILERS', '#000000', 20, '20pt Ariel', 0, null, null],
        ['CONTACT US', '#000000', 20, '20pt Ariel', 0, null, null]],
         '#fdf2c0', '#f0cc75', '#d99839', '#e3e7ff', '#c5cdff', 0);
    createLabel(elemId, 'label1', 10, 220, 50, 30, 'City',
      '#131aa3', 16, '16pt Ariel', null, highestDepth);
    createComboBox(elemId, 'selectCityComboBox',
    75, 220, 200, 30, highestDepth, ['Cities'], null,
      null, null, null, null, '#131aa3', 16, '16pt Ariel',
      '#131aa3', 16, '16pt Ariel', cityChanged);
    createLabel(elemId, 'label2', 300, 220, 120, 30,
      'Multiplex', '#131aa3', 16, '16pt Ariel', null, highestDepth);
    selecteCinemaWindowID = createComboBox(elemId,
      'selectCinemaComboBox', 400, 220, 200, 30, highestDepth,
      ['Select a city first'], null, null, null,
      null, null, '#131aa3', 16, '16pt Ariel',
       '#131aa3', 16, '16pt Ariel', onSelectCinema);
    return selecteCinemaWindowID;
}
var windowid = form1();
invokeServerSideFunction('AjaxEx1.aspx', 'InitializeForm1', elemId, windowid, null);
invalidateRect(elemId, null, 0, 0, 1024, 768);
</script>
注意:在新系统中,调用invalidateRect需要传递-1而不是null。
这里正在发生的第一件事是声明了 canvas 元素。然后,在客户端调用 JavaScript 函数 registerCanvasElementId 来初始化 Canvas Control Library 系统。接下来,声明了一个方便的表单创建函数 form1,它会创建一个 Image、一个 MenuBar 和 2 个 ComboBox 控件,一个用于城市,一个用于所选城市的影院。该函数返回其中一个控件的任何有效 windowid。调用 form1 并实例化所有控件。然后调用 JavaScript 函数 invokeServerSideFunction,该函数通过 AJAX 调用调用服务器端 AjaxEx1.aspx 页面,并在 ASP.NET 页面上调用 C# 函数 InitializeForm1。接下来,声明一个 JavaScript 函数 cityChanged,它会在 AjaxEx1.aspx 页面上调用另一个服务器端函数 onSelectCityChanged。当用户选择电影院时,会向 onSelectCinemaChanged 发起服务器端调用。这会将海报图像 URL 数组以及放映时间信息发送回来。然后将此数组传递给客户端 JavaScript 函数 showMoviesForCinema。在这里,首先销毁任何用于显示上次选择的电影海报和放映时间的旧控件(如果存在)。然后,我们继续创建一个图像控件来显示第一张电影海报,然后为每个放映时间创建标签,并遍历 params 数组。最后,我们调用 draw 来显示新控件。
接下来是服务器端页面 AjaxEx1.aspx 上的代码
/*
    Canvas Control Library Copyright 2012
    Created by Akshay Srinivasan [akshay.srin@gmail.com]
    This javascript code is provided as is with no warranty implied.
    Akshay Srinivasan are not liable or responsible for any consequence of
    using this code in your applications.
    You are free to use it and/or change it for both commercial and non-commercial
    applications as long as you give credit to Akshay Srinivasan the creator
    of this code.
*/

using System;
using System.Collections.Generic;
using System.Linq;
using System.Web;
using System.Web.UI;
using System.Web.UI.WebControls;
using System.Text;
using System.IO.Compression;
using System.IO;
using System.Text.RegularExpressions;
using System.Xml;
using System.Reflection;
using System.Collections;

public partial class Default2 : System.Web.UI.Page
{
    CanvasControlLibrary ccl;
    ArrayList parameters = new ArrayList();
    ArrayList movieIndexes = new ArrayList();

    protected void Page_Load(object sender, EventArgs e)
    {
        movieIndexes = new ArrayList { new ArrayList { "Phoenix Mills",
          new ArrayList { "Fantastic Four", "Ferris Bueller's Day Off",
          "Incredible Hulk" } }, new ArrayList { "Juhu", new ArrayList { "Iron Man",
          "Point Break", "Spider Man 2" } }, new ArrayList {"Nariman Point",
          new ArrayList{"Spider Man 4", "Spider Man 3", "The Avengers"}},
          new ArrayList{"Chitrapur",
          new  ArrayList{"Thor", "Wolverine", "X-Men First Class"}},
          new ArrayList{"Khari Baoli",
          new ArrayList{"GI Joe Rise of Cobra", "The Avengers",
          "Wolverine"}}, new ArrayList{"Lakshmi Garden",
          new ArrayList{"Thor", "Point Break", "Iron Man"}},
          new ArrayList{"Gandhi Nagar", new ArrayList{"Spider Man 2",
          "Incredible Hulk", "GI Joe Rise of Cobra"}}, new ArrayList{"Lake City",
          new ArrayList{"The Avengers", "X-Men First Class", "Iron Man"}},
          new ArrayList{"Rajaji Nagar",
          new ArrayList{"Fantastic Four", "Wolverine", "Thor"}},
          new ArrayList{"Harrington Road",
          new ArrayList{"The Avengers", "X-Men First Class", "Iron Man"}},
          new ArrayList{"Boat Club",
          new ArrayList{"GI Joe Rise of Cobra",
              "Spider Man 3", "Incredible Hulk"}},
          new ArrayList{"Chetpet",
          new ArrayList{"Thor", "Fantastic Four", "The Avengers"}}};
        ccl = new CanvasControlLibrary(Request.InputStream);
        ccl.InvokeServerSideFunction(this.Page);
        ccl.SendVars(Response.OutputStream, parameters);
    }

    protected override void Render(HtmlTextWriter writer)
    {
    }

    public void ClickMe(string canvasid, int windowid)
    {
        CanvasControlLibrary.CCLLabelProps lp =
          ccl.getControlPropsByControlNameID("l1") as CanvasControlLibrary.CCLLabelProps;
        lp.Text = "Did Postback";
    }

    public void InitializeForm1(string canvasid, int windowid)
    {
        CanvasControlLibrary.CCLComboBoxProps selectCityComboBox =
          ccl.getControlPropsByControlNameID("selectCityComboBoxComboBoxTextArea")
          as CanvasControlLibrary.CCLComboBoxProps;
        selectCityComboBox.Data = new System.Collections.ArrayList();
        selectCityComboBox.Data.Add("Select a city");
        selectCityComboBox.Data.Add("Mumbai");
        selectCityComboBox.Data.Add("Delhi");
        selectCityComboBox.Data.Add("Bangalore");
        selectCityComboBox.Data.Add("Chennai");
        ((CanvasControlLibrary.CCLScrollBarProps)ccl.getControlPropsByWindowID(canvasid,
          selectCityComboBox.VScrollBarWindowID)).MaxItems =
                                 selectCityComboBox.Data.Count.ToString();
    }

    public void onSelectCityChanged(string canvasid, int windowid)
    {
        CanvasControlLibrary.CCLComboBoxProps selectCityComboBox =
          ccl.getControlPropsByControlNameID("selectCityComboBoxComboBoxTextArea")
          as CanvasControlLibrary.CCLComboBoxProps;
        CanvasControlLibrary.CCLComboBoxProps selectCinemaComboBox =
                                        ccl.getControlPropsByControlNameID(
          "selectCinemaComboBoxComboBoxTextArea") as CanvasControlLibrary.CCLComboBoxProps;
        selectCinemaComboBox.Data = new System.Collections.ArrayList();
        switch (selectCityComboBox.Data
               [Convert.ToInt32(selectCityComboBox.SelectedID)].ToString())
        {
            case "Mumbai":
                selectCinemaComboBox.Data.Add("Select a Theater");
                selectCinemaComboBox.Data.Add("Juhu");
                selectCinemaComboBox.Data.Add("Phoenix Mills");
                selectCinemaComboBox.Data.Add("Nariman Point");
                break;
            case "Delhi":
                selectCinemaComboBox.Data.Add("Select a Theater");
                selectCinemaComboBox.Data.Add("Chitrapur");
                selectCinemaComboBox.Data.Add("Khari Baoli");
                selectCinemaComboBox.Data.Add("Lakshmi Garden");
                break;
            case "Bangalore":
                selectCinemaComboBox.Data.Add("Select a Theater");
                selectCinemaComboBox.Data.Add("Gandhi Nagar");
                selectCinemaComboBox.Data.Add("Lake City");
                selectCinemaComboBox.Data.Add("Rajaji Nagar");
                break;
            case "Chennai":
                selectCinemaComboBox.Data.Add("Select a Theater");
                selectCinemaComboBox.Data.Add("Harrington Road");
                selectCinemaComboBox.Data.Add("Boat Club");
                selectCinemaComboBox.Data.Add("Chetpet");
                break;
            default:
                selectCinemaComboBox.Data.Add("Select a city");
                break;
        }
        ((CanvasControlLibrary.CCLScrollBarProps)ccl.getControlPropsByWindowID(canvasid,
           selectCinemaComboBox.VScrollBarWindowID)).MaxItems =
                  selectCinemaComboBox.Data.Count.ToString();
    }

    public void DoPaymentForTickets(string canvasid, int windowid)
    {
        CanvasControlLibrary.CCLButtonProps buttonProps =
          ccl.getControlPropsByWindowID(canvasid, windowid.ToString())
          as CanvasControlLibrary.CCLButtonProps;
        CanvasControlLibrary.CCLLabelProps lp =
          ccl.getControlPropsByControlNameID((string)buttonProps.Tag)
          as CanvasControlLibrary.CCLLabelProps;
        CanvasControlLibrary.CCLTextBoxProps textbox =
          ccl.getControlPropsByControlNameID("numTicketsTextBox")
          as CanvasControlLibrary.CCLTextBoxProps;
        CanvasControlLibrary.CCLComboBoxProps selectCinemaComboBox =
          ccl.getControlPropsByControlNameID("selectCinemaComboBoxComboBoxTextArea")
          as CanvasControlLibrary.CCLComboBoxProps;
        Regex regex = new System.Text.RegularExpressions.Regex(
          "MovieTimeLabel[0-9]+Poster(?<PosterIndex>[0-9]+)");
        Match m = regex.Match((string)buttonProps.Tag);
        int movieIndex = Convert.ToInt32(m.Groups["PosterIndex"].Value);
        string movieName = "";
        for (int i = 0; i < movieIndexes.Count; i++)
        {
            if (((ArrayList)movieIndexes[i])[0].ToString() ==
               selectCinemaComboBox.Data[Convert.ToInt32
                          (selectCinemaComboBox.SelectedID)].ToString())
            {
                movieName =
                   ((ArrayList)((ArrayList)movieIndexes[i])[1])[movieIndex].ToString();
            }
        }
        parameters.Add("The payment was successful.  You have " +
            textbox.UserInputText + " tickets to see " + movieName + " at " +
            selectCinemaComboBox.Data[Convert.ToInt32
                       (selectCinemaComboBox.SelectedID)].ToString() +
            " showing at time " + lp.Text + ".");
    }

    public void onSelectCinemaChanged(string canvasid, int windowid)
    {
        CanvasControlLibrary.CCLComboBoxProps selectCinemaComboBox =
          ccl.getControlPropsByControlNameID("selectCinemaComboBoxComboBoxTextArea")
          as CanvasControlLibrary.CCLComboBoxProps;
        switch (selectCinemaComboBox.Data[Convert.ToInt32
                       (selectCinemaComboBox.SelectedID)].ToString())
        {
            case "Phoenix Mills":
                parameters = new ArrayList{new ArrayList { "fantastic_four.jpg",
                  "1:30 pm", "5:45 pm" }, new ArrayList { "ferrisbuellersdayoff.jpg",
                  "9:00 pm", "11:30 pm" },
                  new ArrayList { "IncredibleHulk.jpg", "6:00 pm", "8:30 pm" }};
                break;
            case "Juhu":
                parameters = new ArrayList { new ArrayList { "ironman.jpg", "4:30 pm",
                  "9:45 pm" }, new ArrayList { "pointbreak.jpg", "6:00 pm",
                  "7:30 pm" },
                  new ArrayList { "Spider-Man-2.jpg", "5:00 pm", "10:30 pm" } };
                break;
            case "Nariman Point":
                parameters = new ArrayList { new ArrayList { "spider-man4.jpg", "7:30 pm",
                  "8:45 pm" }, new ArrayList { "spider_man3.jpg", "2:00 pm",
                  "5:30 pm" }, new ArrayList { "The-Avengers.jpg", "9:00 pm",
                    "9:30 pm", "10:30 pm", "11:30 pm" } };
                break;
            case "Chitrapur":
                parameters = new ArrayList { new ArrayList { "thor.jpg", "8:30 pm",
                  "10:45 pm" },
                  new ArrayList { "wolverine.jpg", "2:00 pm",
                  "5:30 pm" },
                  new ArrayList { "xmen_first_class.jpg", "9:00 pm", "11:30 pm" } };
                break;
            case "Khari Baoli":
                parameters = new ArrayList { new ArrayList { "gijoeriseofcobra.jpg",
                  "2:30 pm", "5:45 pm" },
                  new ArrayList { "The-Avengers.jpg",
                  "8:00 pm", "9:15 pm" },
                  new ArrayList { "wolverine.jpg", "7:30 pm", "10:15 pm" } };
                break;
            case "Lakshmi Garden":
                parameters = new ArrayList {
                  new ArrayList { "Thor.jpg", "8:30 pm", "10:45 pm" },
                  new ArrayList { "pointbreak.jpg", "3:00 pm", "4:15 pm" },
                  new ArrayList { "ironman.jpg", "8:45 pm", "9:15 pm" } };
                break;
            case "Gandhi Nagar":
                parameters = new ArrayList {
                  new ArrayList { "Spider-Man-2.jpg", "4:30 pm", "6:45 pm" },
                  new ArrayList { "IncredibleHulk.jpg", "7:00 pm", "9:15 pm" },
                  new ArrayList { "gijoeriseofcobra.jpg", "3:45 pm", "4:15 pm" } };
                break;
            case "Lake City":
                parameters = new ArrayList {
                  new ArrayList { "The-Avengers.jpg", "9:30 pm", "9:45 pm" },
                  new ArrayList { "xmen_first_class.jpg", "6:00 pm", "8:15 pm" },
                  new ArrayList { "ironman.jpg", "8:45 pm", "10:15 pm" } };
                break;
            case "Rajaji Nagar":
                parameters = new ArrayList {
                  new ArrayList { "fantastic_four.jpg", "9:30 pm", "11:45 pm" },
                  new ArrayList { "wolverine.jpg", "8:00 pm", "9:15 pm" },
                  new ArrayList { "Thor.jpg", "6:45 pm", "10:15 pm" } };
                break;
            case "Harrington Road":
                parameters = new ArrayList {
                  new ArrayList { "The-Avengers.jpg", "10:30 pm", "10:45 pm" },
                  new ArrayList { "xmen_first_class.jpg", "9:00 pm", "10:15 pm" },
                  new ArrayList { "ironman.jpg", "8:45 pm", "11:15 pm" } };
                break;
            case "Boat Club":
                parameters = new ArrayList {
                  new ArrayList { "gijoeriseofcobra.jpg", "8:30 pm", "8:45 pm" },
                  new ArrayList { "spider_man3.jpg", "10:00 pm", "11:15 pm" },
                  new ArrayList { "IncredibleHulk.jpg", "8:45 pm", "9:15 pm" } };
                break;
            case "Chetpet":
                parameters = new ArrayList {
                  new ArrayList { "Thor.jpg", "7:30 pm", "8:45 pm" },
                  new ArrayList { "fantastic_four.jpg", "5:00 pm", "6:15 pm" },
                  new ArrayList { "The-Avengers.jpg", "10:45 pm", "11:15 pm" } };
                break;
        }
        ((CanvasControlLibrary.CCLScrollBarProps)ccl.getControlPropsByWindowID(canvasid,
           selectCinemaComboBox.VScrollBarWindowID)).MaxItems =
           selectCinemaComboBox.Data.Count.ToString();
    }
}
在页面加载时,会实例化 CanvasControlLibrary.cs 中定义的服务器端类。C# 函数 InitializeForm1 所做的就是用城市名称填充 Select City 组合框。onSelectCityChanged 函数获取对 select city 组合框的引用,以找出选择了哪个城市,并获取对 select cinema 组合框的引用,然后根据选择了哪个城市来填充它。现在,实际上,您可以通过调用 RDBMS 来获取值并从中填充,或者从 SAP 等远程系统的 Web 服务中获取值,而不是硬编码城市和影院的名称。在 onSelectCinemaChanged 中,我们所做的只是将一个包含要显示的电影海报图像 URL 的数组以及放映时间发送回客户端。当您点击电影下的时间标签时,它会被高亮显示,并且会向页面添加 2 个新控件:一个 textbox 用于存放座位数量,以及一个按钮用于通过服务器端回发购买门票。服务器端代码简单地获取从客户端浏览器传递过来的关于城市、影院、电影、放映时间以及座位数量的信息,构建一个简单的消息字符串,然后将其传递回显示成功消息的客户端浏览器。在真实的网站中,您当然会通过支付网关逻辑等。
页面截图如下,在我从事该示例的过程中,它会不断变化

选择 Delhi 和 Delhi Nagar 1 后,将显示电影、海报和放映时间。示例截图如下

如何在基于新表单的系统中处理会话
以下是有关如何在 ASP.NET 中执行此操作的指南。本质上,在具有 HTML 和 JavaScript 的网页中,您可以覆盖 render 方法,并调用 static 方法 CanvasControlLibrary.StartSession,并将 HtmlTextWriter 传递进去。这将为您连接到一个 session 对象。然后,您的 Ajax 回调 ASPX 页面(例如,我将使用简单的 ClickMe 函数)可以更改为仅检查 CurrentSessionObj.Data 对象是否具有任何数据,如果没有,则添加一个键和一个值,该值是一个简单的计数器。如果存在,则递增并将其值设置为标签。现在,作为测试,您可以打开页面并点击按钮,标签中的数字会随着点击次数而计数。打开另一个页面或浏览器并执行相同的操作,您将得到不同的数字,因为它们是不同的会话,并且值不同,并且会正确显示。因此,以下是代码的 HTML/JavaScript 页面及其代码隐藏文件
using System;
using System.Collections.Generic;
using System.Linq;
using System.Web;
using System.Web.UI;
using System.Web.UI.WebControls;

public partial class _Default : System.Web.UI.Page
{
    protected void Page_Load(object sender, EventArgs e)
    {
    }

    protected override void Render(HtmlTextWriter writer)
    {
        base.Render(writer);
        CanvasControlLibrary.StartSession(writer);
    }
}
下一个代码是 ASPX 文件中的 AJAX 回调 ClickMe 函数
public void ClickMe(string canvasid, int windowid)
{
    CanvasControlLibrary.CCLLabelProps lp =
      ccl.getControlPropsByControlNameID("l1") as CanvasControlLibrary.CCLLabelProps;
    if (ccl.CurrentSessionObj.Data.Count == 0)
    {
        ccl.CurrentSessionObj.Data.Add("Counter", 1);
    }
    else
    {
        ccl.CurrentSessionObj.Data["Counter"] =
           (int)ccl.CurrentSessionObj.Data["Counter"] + 1;
    }
    lp.Text = ccl.CurrentSessionObj.Data["Counter"].ToString();
}
这项技术可以替代使用普通的 ASP.NET 会话,因为它更轻量且速度更快。对于 PHP,只需使用支持 AJAX 调用常规 PHP 会话,因为 PHP 不支持由于其设计性质(为每个请求创建一个单独的进程)而能够保留的全局变量。PHP 的设计使其为每个请求创建一个单独的进程。
How to Create a Control Using Button Control as an Example
关于您的控件,首先是它的视觉表现,基本上是在窗口中绘制的。此外,除非该控件仅仅是视觉上的,即只显示数据,否则它可能有一些交互,例如在点击事件上执行某些操作。Button 控件就是一个简单的例子。
因此,当您创建按钮控件时,第一步是设置一个数组来保存控件的属性。对于按钮控件,它是以下数组
var buttonPropsArray = new Array();
由于存在多个画布和多个控件(在本例中为按钮),您除了属性(这是一个对象)之外,还保存 windowid 和 canvasid 属性。然后,您需要获取控件的属性,以便您可以操作它,甚至在绘制控件时引用它。因此,您需要设置一个 getYourControlTypeNameProps() 函数,在按钮的示例中,它看起来像这样
function getButtonProps(canvasid, windowid) {
    for (var i = 0; i < buttonPropsArray.length; i++) {
        if (buttonPropsArray[i].CanvasID == canvasid &&
                 buttonPropsArray[i].WindowID == windowid) {
            return buttonPropsArray[i];
        }
    }
}
接下来要做的是创建一个 create 函数,以便用户可以创建自定义控件的实例。有一些最小参数,例如 canvasid、controlNameId(这是控件的 ID 名称,用于唯一标识 CCL 子系统中该控件的用户实例)、窗口坐标(由 x、y、width、height 指定)以及窗口的深度(分层定义了该窗口将位于哪个窗口之上或之下),由 depth 参数给出。因此,最小的 create 函数签名将如下所示
function createCustomControlTypeName(canvasid, controlNameId, x, y, width, height, depth);
但是,您的控件,就像按钮的示例一样,需要一些额外的信息来根据用户的意愿自定义控件。对于按钮,这将是显示在 button 上的文本,以及诸如宽度、高度和颜色等各种参数。基于事件的信息,就像按钮一样,当按钮被点击时您希望发生什么。因此,您创建了额外的参数来收集这些用户信息,并将其传递给 create control 函数。此外,为了允许对 create control 函数进行面向对象的访问,您将添加一个 OO 包装器。命名约定是 CCLCustomControlTypeName。最简单的示例如下
function CCLControlTypeName() { }

CCLControlTypeName.prototype = {
	CanvasID: null,	ControlNameID: null, X: null, Y: null,
                    Width: null, Height: null, Depth: null,
	CustomParam1: null, CustomParam2: null,
	Initialize: function () {
		createControlTypeName(this.CanvasID, this.ControlNameID,
                     this.X, this.Y, this.Width, this.Height, this.Depth);
	}
}
之所以称为包装器,是因为 Initialize 参数只是调用底层的 create control 函数,传递参数。您可以允许您的控件的最终用户使用 OO 创建控件,或者直接调用 JavaScript 函数,这两种方式都将得到支持。如果您想提供默认值,请不要将它们放在 OO 原型属性级别,而是将其编码在 create control 函数调用内部,这样两种方式都将得到支持。
create control 函数调用的过程基本上是设置窗口,这是对 createWindow 函数的调用,在按钮的示例中,它是这样的
var windowid = createWindow
    (canvasid, x, y, width, height, depth, null, 'Button', controlNameId);
注意:在新系统中,调用 createWindow 时需要使用 -1 而不是 null。
这里需要注意的一点是字符串 'Button'。您应该为控件命名,以便底层系统使用它来标识您的控件类型。您需要保存唯一标识控件实例窗口的窗口 ID,并在 create control 函数结束时将其传回。接下来的事情是将传入的参数填充到一个具有属性的对象中,然后将其添加到您创建的用于保存控件属性的数组中。对于 button 控件,它是这样的
buttonPropsArray.push({
    CanvasID: canvasid, WindowID: windowid, X: x, Y: y,
              Width: width, Height: height, Text: text,
    EdgeRadius: edgeRadius,
    BottomColorStart: bottomColorStart, BottomColorEnd: bottomColorEnd,
    TopColorStart: topColorStart, TopColorEnd: topColorEnd,
    TextHeight: textHeight, TextFontString: textFontString,
    TextColor: textColor, IsPressed: 0, BorderColor: borderColor,
    IsHyperlink: isHyperlink, URL: url,
    NoBrowserHistory: nobrowserhistory, IsNewBrowserWindow: isnewbrowserwindow,
    NameOfNewBrowserWindow: nameofnewbrowserwindow,
    WidthOfNewBrowserWindow: widthofnewbrowserwindow,
    HeightOfNewBrowserWindow: heightofnewbrowserwindow,
    NewBrowserWindowIsResizable: newbrowserwindowisresizable,
    NewBrowserWindowHasScrollBars: newbrowserwindowhasscrollbars,
    NewBrowserWindowHasToolbar: newbrowserwindowhastoolbar,
    NewBrowserWindowHasLocationOrURLOrAddressBox: newbrowserwindowhaslocationorurloraddressbox,
    NewBrowserWindowHasDirectoriesOrExtraButtons: newbrowserwindowhasdirectoriesorextrabuttons,
    NewBrowserWindowHasStatusBar: newbrowserwindowhasstatusbar,
    NewBrowserWindowHasMenuBar: newbrowserwindowhasmenubar,
    NewBrowserWindowCopyHistory: newbrowserwindowcopyhistory,
    Tag: tag, Theme: theme, HasGloss: hasgloss
});
此时,您已经具备了控件的最小功能。但它什么也不做,因为它没有绘制任何东西。因此,任何普通控件最想做的事情是绘制用户可以在网页上看到的控件的表示。为此,您调用 registerWindowDrawFunction,它接受 canvasid、windowid 和一个函数,该函数将在 CCL 需要重绘控件到其所属的网页或 canvas 元素时被调用。您还可以在 create control 函数的参数中进行可选操作,为控件用户提供一个可选的自定义绘图函数,他们可以传入该函数,该函数将被调用来绘制控件。按钮示例如下
if (drawFunction != undefined && drawFunction != null)
    registerWindowDrawFunction(windowid, function ()
    { drawFunction(canvasid, windowid); }, canvasid);
else
    registerWindowDrawFunction(windowid, function ()
    { defaultButtonDrawFunction(canvasid, windowid); }, canvasid);
您可以使用 HTML5 规范中的普通 JavaScript canvas 绘图函数来绘制控件。尽量坚持所有浏览器都支持的最低标准。然后,在 button 示例中,您有一个 click 函数,它基本上执行指定的动作,调用用户提供的 click 函数来执行,或者像超链接一样调用另一个网页等。我将包含一个小讨论,click button 示例没有提供,但在更复杂的控件中您需要它,那就是计算点击的 x y 坐标是否落在矩形内。您应该始终将控件的各个可点击区域划分为矩形区域。在我创建的许多控件中,我都使用了 ClickExtents 数组,我在 draw 函数中填充了它。然后,您遍历这些数组,检查点击是否落在矩形区域内,例如在以下代码中
var xm = e.calcX;
var ym = e.calcY;
if (xm > scrollBarProps.X && xm < controlProps.X + controlProps.Width &&
    ym > controlProps.Y && ym < controlProps.Y + controlProps.Height) {
        //Do some custom code logic here
    }
}
逻辑很简单,如果 x 大于矩形区域左上角的 x 坐标且小于右上角 x 值,则它落在了两者之间,这意味着 x 轴上有点击命中。对 y 坐标也执行相同的检查。如果两者都为真,则表示在矩形区域内有命中,现在您可以执行特定于控件的点击函数代码。
另一个需要注意的事情是,在处理自引用对象时,不要将它们包含在控件的属性中,这些属性将通过回发系统进行处理,因为它会因无限循环而失败。另一件不应包含的是实际的图像二进制数据或任何类型的二进制数据,它们将通过回发系统进行处理。而是将这些数据本地存储,因为它们始终可用,因为我们永远不会离开页面,并且在 ajax 回发调用期间不会丢失。
因此,回发系统是第一步,有一个对 invokeServerSideFunction 的调用,该调用使客户端 JavaScript 执行一个 ajax 服务器端调用。然后,它调用 getEncodedVariables 来包装所有控件数组中的所有属性及其值,并将它们作为 POST 数据发送到服务器端的 ajax 调用中。因此,您需要为控件做的第一件事是在 getEncodedVariables 函数中添加代码,以便您的控件属性和值也能被发送过去。例如,对于 button,这是在 getEncodedVariables 函数调用中与 postback 系统配合使用的代码
strVars += '[/labelPropsArray][buttonPropsArray]';
for (var i = 0; i < buttonPropsArray.length; i++) {
    strVars += '[i]' + stringEncodeObject(buttonPropsArray[i]) + '[/i]';
}
strVars += '[/buttonPropsArray][scrollBarPropsArray]';
然后我们到达服务器端,所有这些数据都会被解包以便在 C# 等中使用。现在您需要修改 CanvasControlLibrary.cs 文件。这发生在 UnwrapVars 函数中。对于按钮,代码是
case "buttonPropsArray":
    foreach (XmlNode child2 in child1.ChildNodes)
    {
        CCLButtonProps b = new CCLButtonProps();
        ButtonPropsArray.Add(b);
        FillClassObject(child2, b);
    }
    break;
注意到一些正在发生的事情,按钮控件属性的名称是 buttonPropsArray。因此,在 JavaScript 端,我们在伪 XML 中进行了 '[buttonPropsArray]',现在 C# 服务器端代码正在将其作为 XML 节点名称进行键控,它使用反射来递归遍历一个类,您必须在其中定义该类,对于按钮,它是 CCLButtonProps,并且您还必须创建一个数组来保存它,按钮就是这样做的,代码如下
public List
有时,我们会回传数组,有时甚至是对象,对于对象,将其类型定义为非 string 而是 List<object>,对于 JavaScript 对象,将其定义为 LightWeightDictionary 类型。您也可以看到对象是可以的,因为按钮的 Tag 属性就是这样用的。这无关紧要,因为所有的反射代码逻辑都会透明地处理其余部分。
在 Ajax aspx 页面上发生任何自定义 C# 逻辑,其中包含您的控件的最终用户代码之后,就该打包所有控件并将长伪 XML 字符串发送回发出 ajax 请求的客户端了。所有这些操作都发生在 SendVars 中。因此,现在您当然必须在此函数中添加对您的控件的支持。按钮示例代码在 SendVars 函数中如下
strVars.Append("[/labelPropsArray][buttonPropsArray]");
foreach (CCLButtonProps b in ButtonPropsArray)
{
    strVars.Append("[i]").Append(encodeObject(b)).Append("[/i]");
}
strVars.Append("[/buttonPropsArray][scrollBarPropsArray]");
需要更改的另一项是 getControlPropsByControlNameID 函数。这基本上允许用户传入唯一的控件名称 ID,并在服务器端代码中获取属性。在按钮示例中,代码如下
case "Button":
foreach (CCLButtonProps o in ButtonPropsArray)
{
    if (o.CanvasID == w.CanvasID && o.WindowID == w.WindowCount)
    {
        return (object)o;
    }
}
break;
现在您回到了客户端,Web 浏览器和 JavaScript 将 XML 解包到网页上的控件中,设置它们的属性等。因此,在这里您也必须修改 JavaScript 客户端函数 UnWrapVars。这里有一些逻辑可以恢复在 ajax 回发调用之前保存的、具有函数逻辑的丢失属性,而现在需要恢复它们。因此,有一个循环,您需要在其中为您的控件添加支持。下面展示了按钮的示例
var o = getButtonProps(savedFunctionsOnPostback[i].CanvasID,
        savedFunctionsOnPostback[i].WindowID);
if (setSavedFunctionOnPostback(o, savedFunctionsOnPostback, i) == 1) { continue; }
如果您正在创建一个需要制表符停止的控件,请在您的 create control 函数中添加一个参数 tabstopindex,并将其传递给您控件的 createwindow 函数调用。如果您有一个复杂的控件,如 combobox,它有多个窗口,那么您还需要将您的 windowid 传递给 createwindow 函数,作为代表您控件的主窗口。在 combobox 的情况下,它是 textareawindowid,文本是您选择的或默认预选的。您还需要更新您的 OO 调用以支持新参数,并将参数保存到您的控件实例属性中。这意味着在服务器端,您将不得不更新您的控件属性的类定义,以也包含这个新的 tabstopindex 属性。然后您的控件将支持制表符停止。
现在您拥有了一个完全支持的控件。它将绘制到 canvas 网页,它将与用户交互,它将通过 ajax 回发系统将信息发送回服务器端进行进一步处理,并且更改的数据和属性将从服务器端反映回客户端网页。
这是为 Canvas Control Library 创建自定义控件的过程,虽然我提供了许多控件,但您总是需要根据您的想象力的天空是无限的自定义控件来满足您独特的网页需求,现在您可以轻松地做到这一点。
Supports the Following Browsers
截至 2012 年 8 月 12 日的最新版本支持 Google Chrome、Safari、Opera、Firefox、SeaMonkey、Maxthon 和 IE9/IE10,基本上这意味着所有主要浏览器都已支持。为了便于直观总结,下面显示了支持浏览器的图标

现在支持 iPad、iPhone 和 iPod。
为了使 IE9 工作,您必须在您的网页 HTML 中包含以下 meta 标签
<meta http-equiv="X-UA-Compatible" content="chrome=1, IE=edge" />