
电子邮件通知类库
4.72/5 (11投票s)
用于读取电子邮件模板以发送电子邮件通知的类库。
引言
在本文中,我将解释我为我们的项目开发的一个类库。我使用 Visual Studio 2008 用 C# 编写了它。我们的大多数 .NET 应用程序都有电子邮件通知,例如在注册过程中、在线订购、论坛和博客等。
我想到一个在我们的项目中管理电子邮件通知开发部分的想法。代码非常简单,但想法很好,开发人员真的很喜欢它。这个想法是,当开发人员希望在其应用程序中具有电子邮件通知功能时,他们可以使用该 DLL,而不是在其代码中硬编码电子邮件正文文本,或使用资源文件来构建他们的电子邮件消息,该 DLL 将允许他们指定电子邮件模板文件并传递他们想要的任何参数来构建他们的消息。这样,他们将具有以下优势
- 他们可以随时管理他们的电子邮件模板,而无需参考源代码
- 一个用于多个电子邮件模板和多种语言的单一函数。
Using the Code
首先,让我解释一下电子邮件类。源代码已经附在这篇文章中,并且也添加了注释。但在这里我想重点介绍主要功能。
将格式化电子邮件模板文件并发送电子邮件的函数是 "SendNotificationEmail"。请参阅下面的代码
/// <summary>
/// This function will send the email notification by reading the email template
/// and substitute the arguments
/// </summary>
/// <param name=""EmailTemplateFile"">Email Template File</param>
/// <param name=""SenderEmail"">Sender Email</param>
/// <param name=""SenderName"">Sender Name</param>
/// <param name=""RecepientEmail"">Recipient Email ID</param>
/// <param name=""CC"">CC IDs</param>
/// <param name=""Subject"">EMail Subject</param>
/// <param name=""Args"">Arguments</param>
/// <returns>String: Return the body of the email to be send</returns>
public string SendNotificationEmail(string EmailTemplateFile,
	string SenderEmail, string SenderName, string RecepientEmail,
	string CC, string Subject, params string[] Args)
{
    string retVal = null;

    //reading the file
    string FileContents = ReadEmailFile(EmailTemplateFile);

    //concatenate the email Header  and Email Body and Email Footer
    string emailBody = emailheader() + FileContents + emailfooter();

    //setting formatting the string
        retVal = string.Format(emailBody, Args);

    try
    {
        //check if we are in debug mode or not. to send email
        if (!_debugmode)
            SendEmail(SenderEmail, SenderName, RecepientEmail, CC,
		(!string.IsNullOrEmpty(Subject) ? Subject : _subject), retVal);
    }
    catch (Exception ex)
    {
        throw ex;
    }

    return retVal;
}
在函数中,请注意以下行
string FileContents = ReadEmailFile(EmailTemplateFile);
此函数是读取用户传递的模板文件的函数。请参阅下面的函数
/// <summary>
/// This function will read the content of a file name
/// </summary>
/// <param name=""FileName"">File Name</param>
/// <returns>String: Containing the Entire content of the file</returns>
protected string ReadEmailFile(string FileName)
{
    string retVal = null;
    try
    {
        //setting the file name path
        string path = _TemplatesPath + FileName;

        //check if the file exists in the location.
        if (!File.Exists(path))
            throw new Exception("Could Not Find the file : " + FileName +
		" in the location " + _TemplatesPath); // throw an exception here.

        //start reading the file. i have used Encoding 1256 to support arabic text also.
        StreamReader sr = new StreamReader(@path, System.Text.Encoding.GetEncoding(1256));
        retVal = sr.ReadToEnd(); // getting the entire text from the file.
        sr.Close();
    }

    catch (Exception ex)
    {
        throw new Exception("Error Reading File." + ex.Message);
    }
    return retVal;
}
回到函数 "SendNotificationEmail"。我们将读取电子邮件模板,并与电子邮件标题和电子邮件页脚连接起来。然后,我们将使用 string.Format 方法来格式化我们的电子邮件消息。请参阅下面的代码
//concatenate the email Header  and Email Body and Email Footer
string emailBody = emailheader() + FileContents + emailfooter();

//setting formatting the string
retVal = string.Format(emailBody, Args);
"emailheader()" 和 "emailfooter()" 是 private 函数,只是为了从硬编码文件 "email_header.txt" 和 "email_footer.txt" 中读取默认的电子邮件标题和页脚。我这样做是为了方便定制我们的电子邮件模板,这样如果我们有 10 个电子邮件模板共享相同的标题和页脚,并且想要更改标题或页脚中的某些内容,我们只在一个文件中进行更改。
在此处查看函数代码
/// <summary>
/// This function will return the default email header specified in the "email_header.txt"
/// </summary>
/// <returns>String: Contains the entire text of the "email_header.txt"</returns>
protected string emailheader()
{
    string retVal = null;
    if (File.Exists(_TemplatesPath + "email_header.txt"))
    {
        retVal = ReadEmailFile("email_header.txt");
    }
    else
        throw new Exception("you should have a file called
        	'email_header.txt' in the location :" + _TemplatesPath);

    return retVal;
}

/// <summary>
/// This function will return the default email footer specified in the "email_footer.txt"
/// </summary>
/// <returns>String: Contains the entire text of the "email_footer.txt"</returns>
protected string emailfooter()
{
    string retVal = null;
    if (File.Exists(_TemplatesPath + "email_footer.txt"))
        retVal = ReadEmailFile("email_footer.txt");
    else
        throw new Exception("you should have a file called
        	'email_footer.txt' in the location :" + _TemplatesPath);

    return retVal;
}
再次回到 "SendNotificationEmail"。在格式化电子邮件消息之后,它最后一部分,我们仅在未处于调试模式时发送,否则,它只会以 string 形式返回电子邮件消息。请参阅下面的代码
//check if we are in debug mode or not. to send email
if (!_debugmode)
    SendEmail(SenderEmail, SenderName, RecepientEmail, CC,
    (!string.IsNullOrEmpty(Subject) ? Subject : _subject), retVal);
"SendEmail" 函数在这里
/// <summary>
/// this function will send email. it will read the mail setting from the web.config
/// </summary>
/// <param name=""SenderEmail"">Sender Email ID</param>
/// <param name=""SenderName"">Sender Name</param>
/// <param name=""Recep"">Recipient Email ID</param>
/// <param name=""cc"">CC ids</param>
/// <param name=""email_title"">Email Subject</param>
/// <param name=""email_body"">Email Body</param>
protected void SendEmail(string SenderEmail, string SenderName,
	string Recep, string cc, string email_title, string email_body)
{
    // creating email message
    MailMessage msg = new MailMessage();
    msg.IsBodyHtml = true;// email body will allow html elements

    // setting the Sender Email ID
    msg.From = new MailAddress(SenderEmail, SenderName);

    // adding the Recipient Email ID
    msg.To.Add(Recep);

    // add CC email ids if supplied.
    if (!string.IsNullOrEmpty(cc))
        msg.CC.Add(cc);

    //setting email subject and body
    msg.Subject = email_title;
    msg.Body = email_body;

    //create a Smtp Mail which will automatically get the smtp server details
    //from web.config mailSettings section
    SmtpClient SmtpMail = new SmtpClient();

    // sending the message.
    SmtpMail.Send(msg);
}
构造函数函数、变量和属性。查看代码
#region Variabls
protected string _subject = null;
protected string _TemplatesPath = null;
protected bool _debugmode = false;
#endregion

/// <summary>
/// Email subject
/// </summary>
public string EmailSubject
{
    set { _subject = value; }
}

/// <summary>
/// A Switch to toggle Debug Mode or Production Mode.
/// In Debug mode no emails will be sent only the email body will be
/// returned to be written in the page.
/// </summary>
public bool DebugMode
{
    set { _debugmode = value; }
}

/// <summary>
/// The Constructor Function
/// </summary>
/// <param name=""EmailHeaderSubject"">Email Header Subject</param>
/// <param name=""TemplatesPath"">Emails Files Templates</param>
public EmaislNotifications(string EmailHeaderSubject, string TemplatesPath)
{
    _subject = EmailHeaderSubject;
    _TemplatesPath = TemplatesPath;
}
在 ASP.NET 应用程序中使用 DLL
在解释如何使用 DLL 之前,为了演示目的,我创建了三个 TXT 文件并将它们保存到我们 Web 服务器中的 "d:\emailing" 文件夹中。这些文件是


请注意,在这些文件中,您可以看到 {0}、{1}、{2} 等。这些将被用户传递给该函数的参数参数替换。
因此,在我的 ASPX 页面中,我有一个按钮,onclick 事件是
        //here just simulating a registration process.
        //after a user register in the website and email notification
        //will goes to him containing the registration details,
        // creating the class of the email notification
        EmaislNotifications en = new EmaislNotifications
        ("Registration", ConfigurationManager.AppSettings["EmailTemplatesPath"]);

#if (debug)
        en.DebugMode = true;
        Literal1.Text = en.SendNotificationEmail
        ("register.txt", "sender@company.com", "
        Demo", "recep@company.com", null, "Registration",
        ConfigurationManager.AppSettings["CompanyLogoURL"],
        DateTime.Now.ToString("dddd dd, MMMM, yyyy"), "
        Hussain Attiya", "hussain.attiya", "991001");
#endif

        //this will send an email
        //en.SendNotificationEmail("register.txt", "sender@company.com",
        //"Demo", "recep@company.com", null, "Registration",
        //ConfigurationManager.AppSettings["CompanyLogoURL"], DateTime.Now.ToString
        //("dddd dd, MMMM, yyyy"), "Hussain Attiya", "hussain.attiya", "991001");
我在 web.config 中定义了以下 appSetting 键
<appSettings>
<add key ="EmailTemplatesPath" value ="d:\emails\"/>
<add key ="CompanyLogoURL" value ="http://www.alhawaj.com/en/images/alhawaj_logo.gif"/>
</appSettings >
此外,电子邮件设置需要在 web.config 中定义
<system.net>
<mailSettings>
<smtp from="noreply@companydomain.com">
<network host="mail.companydomain.com" userName="xxx" password="xxx" port="25"/>
</smtp>
</mailSettings>
</system.net>
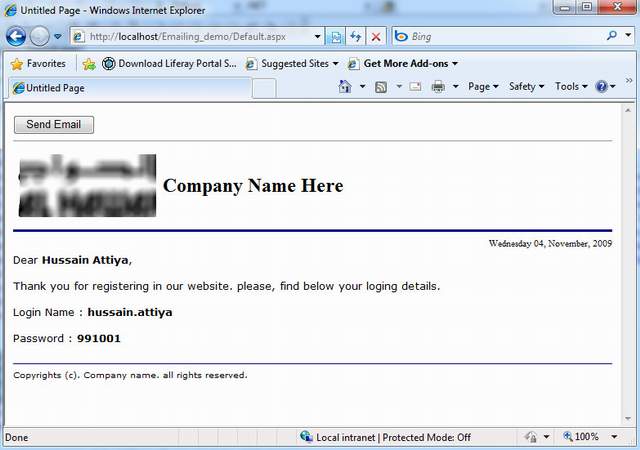
这是生成的电子邮件消息
历史
- 2009 年 11 月 4 日:初始发布