
作为行为在 WPF 中进行 RichTextBox 自动完成
4.87/5 (16投票s)
本文描述了类似 Intellisense 的行为。我将讨论如何扩展 RichTextBox 的显示行为,而不干扰控件本身,不覆盖任何成员,完全可以通过 XAML 代码进行配置,并具有动态控制的可能性。
动机
在创建文档时,我们经常需要插入一些已有的常用项,这些项会在使用特定手势后被提示出来。对于文本,微软实现了一项名为 Intellisense 的技术。这是一个强大的工具,没有它,高性能的程序员就无法想象,而程序员则是这项技术最大的受益者。
使用 WPF(经过一些修正后,在 Silverlight 中也能工作),我们可以非常轻松地添加模仿 MS Intellisense 的独立行为。这会引发一个问题:为什么,当微软在 WPFToolkit 和 SDK 5.12(针对 Silverlight)中提供了 AutoCompleteBox 控件时?我不得不说,它并没有完全满足我的期望。该控件很难用,并且需要代码后置以及大量的协作。控件本身非常棒,并且在大多数场景下都能很好地工作。最大的麻烦在于它是一个独立的旋转控件,实现其行为相当困难。
在本文中,我想介绍一种稍有不同的方法来解决这个问题。我将讨论如何扩展 RichTextBox 的显示行为,而不干扰控件本身,不覆盖任何成员,完全可以通过 XAML 代码进行配置,并具有动态控制的可能性。作为画布,它使用了一种插入特定标签到编辑文本中的行为实现,这些标签稍后由另一个解析器转换为具体数据(未实现)。
本文仅描述了类似 Intellisense 的行为。我将在未来的文章中介绍我在这里创建的其他行为。最接近的是在与 RichTextBox 协作的显示小部件中体现样式。
工作原理
类似状态


这是一个附加窗口,它会在宿主对象的游标位置打开。该窗口用于显示指定的列表,我们可以从中选择感兴趣的标签,然后按指定按键或单击此项,它将被插入到宿主文档中。操作完成后,窗口将关闭。此外,它还有自己的附加到宿主上下文菜单的元素、快捷键以及不正确的调用保护机制。
要求
为了正确理解我刚才介绍的原理,需要一些基本知识
- WPF
- XAML
整个过程基于 WPF 对象吸收不同行为的能力。 - 与元素增强的协作,通过创建基于 BehaviorBase 的对象,并明确指示我们将支持的类。在这种情况下,它将包含在 System.Windows.Interactivity 库中,并带有对宿主(此处为 RichTextBox 显示)的强类型化的 Behavior 类。
using System.Windows;
using System.Windows.Interactivity;
using System.Windows.Controls;
namespace IntellisenseDemo.Behaviorlibrary
{
    public class MyIntellisenseBehavior : Behavior<RichTextBox>
    {
        public MyIntellisenseBehavior()
        {

        }
        protected override void OnAttached()
        {
            base.OnAttached();
        }
        protected override void OnDetaching()
        {
            base.OnDetaching();
        }
    }
}
当您添加这样一个对象时,对象会被构建并具备宿主适配能力。
<RichTextBox x:Name="templateRichTextBox">
 <i:Interaction.Behaviors>
   <beh:MyIntellisenseBehavior x:Name="myIntellisense”/>
 </i:Interaction.Behaviors>
</RichTextBox>
通过这种方式,我们为宿主提供了新功能。当然,目前什么也不会发生。上述操作不会以任何方式干扰宿主控件,不会覆盖其任何功能或成员。对于宿主来说,它完全是惰性的。
开始工作
重要提示:本文中的代码完全由我编写,其中少量片段可能与 VisualStudio 帮助中的代码示例重叠。同时,我告知您,示例中的代码就是代码本身,不对其误用造成的后果负责。它是我的一个大型项目中的一部分,可能会出现功能疏忽或不恰当的响应。不过,我们已经对合同进行了分析并进行了基本的单元测试。
图片精灵感谢:http://www.gentleface.com/free_icon_set.html。
第一步是创建一个新项目
- Visual Studio(我使用的是 VS 2010)。
- 如果使用 Visual Studio 2010 Express,我们称之为 WPF 设计和 IntellisenseDemo。编辑器和解决方案称为 IntellisenseDemo。在其他情况下,我们首先创建一个新的空白解决方案,命名为 IntellisenseDemo,然后添加新项目。
- 我们在解决方案中添加一个新的类库项目。称之为 MyBehaviorsLibrary。我们将其命名为主库,因为我们很可能将其附加到其他解决方案。
- 我们需要为 MyBehaviorsLibrary 项目添加引用
- WindowsBase
- PresentationCore
- PresentationFrame
- System.Windows.Interactivity(如果我们系统中没有,可以从微软网站获取)
- System.XAML
- 在 IntellisenseDemo.Editor 项目中,向新库添加对 System.Windows.Interactivity 的引用。
- 在 IntellisenseDemo.Editor 项目中,打开文件并在 MainWindow.xaml 中向
RichTextBox显示添加一个新控件。 - 我们添加来自库的新属性关联。
- 然后,在同一个项目中,我们添加以下目录:Model、Extension、Helper 和 ModelView。这不是必须的,但在某些环境中,我们的代码需要这样做。
- 在 Model 目录中,我们将添加用户模型类(正如我最初提到的,它将是插入标签的行为)。
- 在 Extensions 目录中,我们将添加 User 类的 Expander 类。
- 我们将向 ViewModels 目录添加 TagsViewModel 类。
<Window x:Class="IntellisenseDemo.MainWindow"
        xmlns="http://schemas.microsoft.com/winfx/2006/xaml/presentation"
        xmlns:x="http://schemas.microsoft.com/winfx/2006/xaml"
        Title="MainWindow" Height="350" Width="525">
    <Grid>
        <RichTextBox>
        </RichTextBox>
    </Grid>
</Window>
xmlns:i="clr-namespace:System.Windows.Interactivity;assembly=System.Windows.Interactivity"
public class User
{
    public User() { }
    public int Id { get; set; }
    public string Name { get; set; }
    public string Surname { get; set; }
    public string PhoneMobil { get; set; }
    public string SecondaryPhone { get; set; }
    public string Job { get; set; }
    public string Sex { get; set; }
    public string DepartmentName { get; set; }
}
public static class SuggestionExtension
{
    public static IEnumerable<string> Suggestions<t>(this T user) where T : class
    {
        var query = from p in user.GetType().GetProperties()
                    select p.Name;
        return query.AsEnumerable();
    }
}
using System;
using System.Linq;
using System.Collections.Generic;
using System.Collections.ObjectModel;
using System.ComponentModel;
using System.Windows.Documents;
using IntellisenseDemo.Extensions;
using IntellisenseDemo.Model;
namespace IntellisenseDemo.ViewModels
{
    public class TagsViewModel : INotifyPropertyChanged
    {
        #region Private field
        readonly string[] signTemplate = new string[] { "Pozdrawiam\n",
           "[Sex] [Name] [Surname]\n", "[JobTitle]" };
        readonly ReadOnlyObservableCollection<String> _tagsReadOnly;
        readonly ObservableCollection<string> _tags;
        #endregion
        #region Ctor
        public TagsViewModel()
        {
            Paragraph par = new Paragraph();
            // Insert signTemplate
            par.Inlines.AddRange(new Run[] { new Run(signTemplate[0]),
              new Run(signTemplate[1]), new Run(signTemplate[2]) }.AsEnumerable());
            this._signDocument = new FlowDocument(par);
            // ToDo: For Test
            this._tags = new ObservableCollection<string>(new User().Suggestions());
            this._tagsReadOnly = new ReadOnlyObservableCollection<string>(this._tags);
        }
        #endregion
        public ReadOnlyObservableCollection<string> ListTagsToSignature
        {
            get { return _tagsReadOnly; }
        }
        public FlowDocument SignDocument
        {
            get { return _signDocument; }
        }
        private FlowDocument _signDocument;

        #region INotifyPropertyChanged Members
        public event PropertyChangedEventHandler PropertyChanged;
        protected void OnPropertyChanged(string propertyName)
        {
            PropertyChangedEventHandler handler = PropertyChanged;
            if (handler != null)
            {
                handler(this, new PropertyChangedEventArgs(propertyName));
            }
        }
        #endregion
    }
}
如果一切准备就绪,我们就创建了环境。构建并运行(F5)后,我们将启动一个带有旋转控件的窗口,您可以在其中输入文本,但仅此而已。
确定假设
现在是晚上,我们来确定我们想要的东西及其内容。因此,以下是管理功能:
- 面板在其左上角打开,位于游标矩形右下角的位置。大部分情况下,游标显示为垂直条,但是,我们的宿主或 RichTextBox 显示将其定义为一个矩形,因此采用这种命名法。
- 面板在以下情况下打开:
- 当在键盘上按下特定按键时(我们将通过 XAML 标记添加定义这些按键的能力)。顺便说一句,所有配置都可以在 XAML 中完成。
- 通过宿主窗口打开的上下文菜单(已添加到 RichTextBox 显示的上下文菜单中)。
- 通过按下指定按键组合。在本例中是 Ctrl+J。
- 面板在按下特定按键时关闭(也可以在 XAML 中定义)。
- 列表中项目是动态提供的,并根据输入的文本动态过滤。在此不应用适当的文化以适应功能,您需要自己完成。原因是最大程度的简化并突出最重要的任务。当然,文化是最重要的方面之一,但并非我们任务的重点。
- 可以直接通过键盘从宿主控件面板导航到 Intellisense,选择特定标签,或通过鼠标单击或拖动指示的另一个设备来选择。
要配置打开 Intellisense 窗口、关闭和确认选择的特定按键,我们使用自己的 XAML 标记扩展解决方案。在本篇文章稍后将进行说明。
Intellisense 的核心
期望很简单,所以我们开始编写代码。
在 IntellisenseDemo.BehaviorLibrary 项目中,我们创建 MyIntellisenseBehavior 类,与文章开头完全相同。
重要提示:文章主体中并未展示所有代码,因此应结合文章附带的源代码进行阅读。
每个行为的主要部分都附属于行为宿主控件。这是基类 BehaviorBase 的重写函数。这些方法是:
protected override void OnAttached()
{
    base.OnAttached();
}
protected override void OnDetaching()
{
    base.OnDetaching();
}
OnAttached 方法在宿主控件创建时被调用。 **重要**:.Net 引擎首先创建子元素,然后才创建容器中的主控件。这种情况会发生在每个实现 IAddChild 的对象(如 Window 或 Popup 等)上。所以请记住,在子控件创建完成之前,我们无法获取父宿主控件的任何事件。
OnDetching 方法在其被销毁或我们的行为与宿主软件断开连接时调用。在前者中,我们可以编写代码来等待宿主的行为,以获取特定事件、调用等。在我们的例子中:
protected override void OnAttached()
{
    base.OnAttached();
    // KeyDown is overidde in TextBox and has limited functionality used PreviewKeyDown
    this.AssociatedObject.PreviewKeyDown += new KeyEventHandler(associatedObject_KeyDown);
    this.AssociatedObject.PreviewKeyUp += new KeyEventHandler(associatedObject_PreviewKeyUp);
    this.AssociatedObject.LostFocus += new RoutedEventHandler(associatedObject_LostFocus);
    // Here attaching ContextMenu
    this.AssociatedObject.ContextMenuOpening += new ContextMenuEventHandler(associatedObject_ContextMenuOpening);
    this.AssociatedObject.ContextMenuClosing += new ContextMenuEventHandler(associatedObject_ContextMenuClosing);
    setGesture();
}
第一行是调用基对象方法。然后,我们添加对按键、释放按键、焦点丢失、上下文菜单打开和关闭事件的引用,最后是为响应手势而设置的功能。我们将响应其中一个按键、移动光标到列表选择器功能,现在已经打开的光标键将是 Intellisense 面板,以及向上和向下键。为什么只选择这些,为什么按下,而 PreviewKeyDown 和 KeyDown 不行?首先,我们必须领先于宿主一步,控制事件并转移焦点到打开的面板,以便您可以安全地在其中导航。其次,宿主或 RichTextBox 本身会更改按键的功能,并使我们无法使用光标键和其他一些功能,而 PreviewKeyDown 隧道使用策略并且完全可供我们原始使用(释放按键也一样)。释放按键用于打开、关闭和检查列表(面板)。为什么会出现例外?我们想控制用户输入的文本,以便控制宿主,因此我们必须等到宿主完成相关任务,然后我们接管这些事件。打开和关闭上下文菜单事件是显而易见的,并将保持不变,以便讨论设置手势的响应。我们将在讨论 DelegateCommand 时这样做。
要进一步解释,我们应该使用专门用于行为对象的内部资源。大多数变量是类私有的,并对类中的所有方法成员可用(出于显而易见的原因,不包括静态成员)。主要理念是只处理一组变量,这些变量依次由各个功能处理。它利用了所有内容都封装在单个结构中,不需要传递数据进行评估,便于工作和测试(这可能影响单元测试,因为碎片化是在没有宿主对象的情况下进行的,而如果没有宿主对象,这将是不可能的。在一组变量上,我们可以测试所有方法,但很遗憾,项目本身不包含任何测试)。
以下是类资源的主要变量:
// main items
Popup _container;
protected Selector _Child;
protected Panel _Panel;
//intellisense core
int _filterIndex = 0;
object _selectedValue;
List<string> _filterList;
//intellisense core for insert
TextPointer _insertStart, _insertEnd;
// Context menu
Control _intellisenseContextMenu;
Separator _sep;
BehaviorDelegateCommand _open;
InputBinding _ib_open;
Image _icon;
Let: Popup _container; 是面板的主容器。我们不在此类派生中使用此变量。变量 protected Selector _Child;, protected Panel _Panel; 是派生自此类并代表选择器面板的共享对象,其中包含选择器,并且看起来像是弹出面板。Popup 是一个 ContentControl(即内容),它允许我们只添加一个子项。在我们的示例中,我们不使用多个子项,但是,我保留了 Panel,可以向 Panel 添加其他项,例如,一个用于移动字段以进行演示的矩形(当然,我们可以实现额外的 TipTool)等。然后我们有来自过滤列表的选定项的索引和选定对象。List filterList 代表当前在我们的面板数据源中的列表。TextPointer _insertStart, _insertEnd; TextPointer 类是定义选定文本或对象在宿主控件中的开始和结束位置的实例。也表示包含我们标签的位置。intellisenseContextMenu 类型的变量 Control 是我们添加到宿主上下文菜单的对象菜单的位置,它允许我们在菜单中的对象列表中找到它,因为它很可能不是宿主上下文菜单中唯一的客户。_ib_open 类型的变量 InputBinding 是快捷键组合(手势)的表示,它将使我们能够使用 Crtl+J 快捷键打开我们的弹出窗口,因为它就是这样设置的。_icon 存储图像,该图像放置在上下文菜单上。最后,我们剩下 BehaviorDelegateCommand 类的实例,它代表内部使用的命令,用于支持手势快捷键和轨迹球单击。
using System;
using System.Diagnostics.CodeAnalysis;
using System.Windows.Input;
namespace Behaviorlibrary
{
    internal class BehaviorDelegateCommand : ICommand
    {
        // Specify the keys and mouse actions that invoke the command.
        public Key GestureKey { get; set; }
        public ModifierKeys GestureModifier { get; set; }
        public MouseAction MouseGesture { get; set; }
        public string InputGestureText { get; set; }
        Action<object> _executeDelegate;
        Func<object, bool> _canExecuteDelegate;
        public BehaviorDelegateCommand(Action<object> executeDelegate)
            : this(executeDelegate, null){}
        public BehaviorDelegateCommand(Action<object> executeDelegate,
                   Func<object, bool> canExecuteDelegate)
        {
            //Contract.Requires<ArgumentNullException>(executeDelegate == null);
            _executeDelegate = executeDelegate;
            _canExecuteDelegate = canExecuteDelegate;
        }
        public void Execute(object parameter)
        {
            _executeDelegate(parameter);
        }
        public bool CanExecute(object parameter)
        {
            return _canExecuteDelegate(parameter);
        }
        [SuppressMessage("Microsoft.Contracts", "CS0067",
          Justification = "The event 'BehaviorDelegateCommand.CanExecuteChanged' is never used.")]
        public event EventHandler CanExecuteChanged;
    }
}
现在我们来看构造函数,它创建了大多数带有特定值的实例变量。
public MyIntellisenseBehavior()
{
     _container = null;
     _Child = null;
     _selectedValue = null;
     _insertStart = null;
     _insertEnd = null;
     _filterList = new List<string>();
     _icon = new Image();
     _icon.BeginInit();
     _icon.Source = new BitmapImage(new Uri(
       @"/Behaviorlibrary;component/brackets_icon16.png",
       UriKind.RelativeOrAbsolute));
     _icon.EndInit();
     _open = new BehaviorDelegateCommand(OnOpen, CanOnOpen)
     {
       // internal using
       GestureKey = Key.J,
       GestureModifier = ModifierKeys.Control,
       MouseGesture = MouseAction.LeftClick,
       InputGestureText = "Ctrl+J"
     };
}
实际上,这里的一切都很清楚,除了创建 DelegateCommand _open 的对象变量。我们通过将两个委托方法传递给构造函数来创建实例;第一个执行响应它的工作,并且通过 OnAttached 方法中的 _ib_open 手势,我们将这些手势添加到了 System Manager;第二个委托指向一个方法,该方法检查是否可以响应此手势。InputGestureText = "Ctrl + J" 代表上下文菜单中的一个可见项。换句话说,当我们按下 Ctrl + J 时,我们会打开带有我们的列表(类似 Intellisense)的面板,或者单击上下文菜单时,会添加我们的标题。当面板打开时,无法响应快捷键,系统根本不会将它们传输给我们,并且菜单中的位置将被锁定(静音但存在)。

进一步的按键过滤器
// handle key
void associatedObject_PreviewKeyDown(object sender, KeyEventArgs e)
{
    // The Focus for the ListBox in popup
    if ((e.Key == Key.Down || e.Key == Key.Up) && _container != null) this._Child.Focus();
}
// handle key
[SuppressMessage("Microsoft.Contracts", "CC1015",
  MessageId = "if (_container == null) return",
  Justification = "Return statement found in contract section.")]
[SuppressMessage("Microsoft.Contracts", "CC1057",
  MessageId = "KeyEventArgs e",
  Justification = "Has custom parameter validation but assembly mode
    is not set to support this. It will be treated as Requires<e>.")]
void associatedObject_PreviewKeyUp(object sender, KeyEventArgs e)
{
Key m_key = e.Key;
// Initialization popup
if (KeysOpened == null) throw new ArgumentNullException("KeysOpened");
if (_container == null && (this.KeysOpened.Count() >= 0 &&
   this.KeysOpened.Any(k => k == m_key))) startIntellisense();// Generate intellisense
// CC1015 = "Return statement found in contract section."
if (_container == null) { this.endIntellisense(); return; }
// is wanting the closing
if (KeysClosed == null) throw new ArgumentNullException("KeysClosed");
if (this.KeysClosed.Count() >= 1 && this.KeysClosed.Any(k => k == m_key)) this.endIntellisense();// Closed intellisense
 // core the work
 if (KeysReturned == null) throw new ArgumentNullException("KeysReturned");
 if (_container != null && !this.KeysReturned.Any(k => k == m_key)) coreIntellisense();// logic intellisense
 // to selecting
if (this.KeysReturned.Count() >= 1 && this.KeysReturned.Any(k => k == m_key)) insertValue();  // Key to selecting
}
后续测试以控制焦点位置。我必须承认,有些“丢失”了,但这归因于系统状态和其他应用程序以及我们在应用程序中的方式。对于简单的应用程序,一切都井然有序,但对于非常复杂的应用程序,当有多个行为和子系统控制焦点位置时,就会出现“神保佑——只有上帝知道焦点在哪里”。
void associatedObject_LostFocus(object sender, RoutedEventArgs e)
{
    // _no exist
    if (_Child == null)
    {
        this.IsOpen = false;
        return;
    }
    // Where is focus
    var m_wind = GetAncestorTop<Window>(this.AssociatedObject);
    IInputElement m_inputElem = FocusManager.GetFocusedElement(m_wind);

    // If selected mouse or other touch device
    if (typeof(ListBoxItem) == m_inputElem.GetType())
    {
        var m_testAnces = GetAncestorTop<ListBox>(m_inputElem as ListBoxItem);
        if (_Child.Equals(m_testAnces)) return;
    };
    // is exist
    if (!_Child.Equals(m_inputElem))
        this.IsOpen = false;
}
请记住,用户可以通过不同方式关闭应用程序,因此为了避免引用和资源泄露,我们需要处理未关闭的情况。
private void closeAncestorTopHandler()
{
  GetAncestorTop<window>(this.AssociatedObject).Closing +=
        new System.ComponentModel.CancelEventHandler(topWindow_Closing);
}
void topWindow_Closing(object sender, System.ComponentModel.CancelEventArgs e)
{
   endIntellisense();
}
我们在 startIntellisense() 函数中执行此操作,并在每次关闭时释放资源。我们在 endIntellisense() 方法中执行此操作。
我们仍然只是向上下文菜单添加和移除功能,并将其附加到宿主的手势上。
private void setGesture()
{
    _ib_open = new InputBinding(
        _open,
        new KeyGesture(
            _open.GestureKey,
            _open.GestureModifier));
    this.AssociatedObject.InputBindings.Add(_ib_open);
}
此处包含的绑定集合提供了文本输入设备事件管理器。键盘。当管理器发现有有趣的键盘事件时,它将执行来自委托 _open 的方法,即委托 BehaviorDelegateCommand。
void associatedObject_ContextMenuClosing(object sender, ContextMenuEventArgs e)
{
    	// removing all intellisense items
    	this.AssociatedObject.ContextMenu.Items.Remove(_intellisenseContextMenu);
    	this.AssociatedObject.ContextMenu.Items.Remove(_sep);
}
void associatedObject_ContextMenuOpening(object sender, ContextMenuEventArgs e)
{
  if (_intellisenseContextMenu == null)
  {
     MenuItem menuItem = new MenuItem()
      {
        Header = "Intellisense",
        InputGestureText = this._open.InputGestureText,
        Command = this._open,
        Icon = _icon
      };

  // first separator
  this.AssociatedObject.ContextMenu.Items.Add(_sep = new Separator());
  // temp pointer for removing
  _intellisenseContextMenu = menuItem;
  // now item
  this.AssociatedObject.ContextMenu.Items.Add(_intellisenseContextMenu);
 }
}
这两个方法负责处理宿主上下文菜单。列出的方法响应打开操作,创建菜单项,赋予其标题 Intellisense,提供手势匹配测试或“Ctrl + J”,在手势发生时分配要执行的命令,并将图像附加到该项。我们添加分隔符,并保留对名为 intellisenseContextMenu 的控件的引用,该控件将用于一个减去菜单项的方法,以便在上下文菜单中识别我们的项。
现在我们准备我们的 Popup 或容器,它将显示标签列表,您可以从中选择正确的标签。
void startIntellisense()
{
     closeAncestorTopHandler();
     // creating instantion visual
     InitUIElements();
     _container = new Popup();
     ((IAddChild)_container).AddChild(_Panel);
     // set functionality child - attach events
     functionalityDefaultChild();
     // layout popup
     _container.Placement = PlacementMode.Custom;
     _container.CustomPopupPlacementCallback = new CustomPopupPlacementCallback(placePopup);
     _container.PlacementTarget = this.AssociatedObject;
     // default setting data source for list to display
     if (this.ItemsSource != null)
     {
         this._filterList = this.ItemsSource.Cast<string>().OrderBy(s => s).ToList();
     }
     if (!this.IsOpen) this.IsOpen = true;
     // appears popup
     _container.IsOpen = true;
}
如我之前提到的,我们必须确保在关闭宿主时不会出现打开窗口的引用泄露。垃圾回收器将检查引用并跟踪我们翻译到其他对象,最后将它们删除,这也很重要。因此,我将添加对主事件关闭的订阅,并在 endIntellisense() 方法中释放我的资源。
接下来,我们初始化我们可视化元素的数值。然后将它们添加到容器中。
/// <summary>
/// In a class that inherits from this class overriding this method, you can change some graphics.
/// The panel inside the popup, and selector.
/// </summary>
protected virtual void InitUIElements()
{
     _Panel = new StackPanel();
     _Child = new ListBox();
     _Panel.Children.Add(_Child);
}
然后,我们需要为我们的 UI 添加一些功能。我们将添加对我们选择器(ListBox)的几个事件的订阅。如果用户单击元素上的鼠标光标,我们将选择宿主中的位置,并将其传递给插入指定选择到宿主文本的方法。
// Add handle to list selector
private void functionalityDefaultChild()
{
 // PreviewMouseDoubleClick because MouseDoubleClick not is for me using
 _Child.PreviewMouseDoubleClick += (s_child, e_child) =>
 {
     _insertStart = this.AssociatedObject.CaretPosition;
     insertValue();
 };
 // no coments
 _Child.SelectionChanged += (s_child, e_child) => setSelectedValue();
 // as above MouseDoubleClick
 _Child.PreviewKeyDown += (s_child, e_child) =>
 {
     switch (e_child.Key)
     {
         default:
             this.AssociatedObject.Focus();
             this.IsOpen = false;
             break;
         case Key.Down:
             break;
         case Key.Up:
             break;
         case Key.Tab:
             insertValue();
             e_child.Handled = true;
             this.AssociatedObject.Focus();
             break;
     }
 };
 // correct size
 if (_width >= 0 || double.IsNaN(_width))
     _Child.Width = _width;
 if (_height >= 0 || double.IsNaN(_height))
     _Child.Height = _height;
}
按键事件控制列表选择器。此处 Tab 键已被编码为选择键。我做得更简单,因为想法很简单,但动态改变非常困难,让我们难以阅读代码。
核心保存
我们 Intellisense 的核心是一个 coreIntellisense() 方法,它确定插入指定标签的位置。借助来自文本位置的宿主位置指示器,我们需要调整原始位置。正如我们所知,我们的行为是对按键的反应,宿主在引入每个新字符时都会更改位置指示器,这迫使我们将索引减少一个字符。我们只设置一次起始位置指示器,并且无论初始化行为的类型如何。如果我们是在上下文菜单中执行此操作,则位置保持不变,我们将不进行调整;如果是键盘,则需要进行更正。
结束指针是动态调整的。在下一步中,我们的指示器将文本作为过滤选择的基础。此处还将更改哪些字符应该被清理,以及与过滤文本一起被清除。接下来,我们进行异步过滤列表,因为我们可能希望使用非常复杂的过滤,因此有可能进一步向用户发出通知。
void coreIntellisense()
{
    // start position to inserting tag
    if (_insertStart == null) _insertStart =
      this.AssociatedObject.CaretPosition.GetPositionAtOffset(-1, LogicalDirection.Backward);
    // ending selection to reverse at new run
    _insertEnd = this.AssociatedObject.CaretPosition;
    string m_textFilter = new TextRange(_insertStart, _insertEnd).Text;
    // this is Hard Code
    // TODO: trim from list KeysOpened and KeysClosed as will request
    string m_newFlter = m_textFilter.Trim(new char[] { '[', '{', ' ', ']', '}' });
    IEnumerable<object> m_newFilter = null;
    // set filterList to visable
    _Child.ItemsSource = this._filterList;
    // asynch
    this.Dispatcher.BeginInvoke(
        new Action(() =>
        {
            if (!String.IsNullOrWhiteSpace(m_newFlter))
            {
                //update filterList
                m_newFilter = this._filterList.Where(s => s.ToLower().StartsWith(m_newFlter.ToLower()));
                // set filterList to visable
                if (m_newFilter != null && m_newFilter.Count() > 0) _Child.ItemsSource = m_newFilter;
                    // actual index in list
                      _Child.SelectedIndex = this._filterIndex;
                 }
                }));
            // actual index in list
       _Child.SelectedIndex = this._filterIndex;
}
在 auxiliary 方法中,我们为成员设置值,这些成员可以向子系统其他参与者显示我们行为的当前状态。
// Actualize values selecting
void setSelectedValue()
{
    // selected index
    _filterIndex = _Child.SelectedIndex;
    this.SelectedIndex = _filterIndex;
    _selectedValue = _Child.SelectedItem;
    this.SelectedItem = _selectedValue;
    // this system ignore args
    this.OnSelectedItemChanged(null);
}
insertValue() 方法用于插入指定的文本到标签并完成宿主。
// Inserting selected tip
void insertValue()
{
     this.AssociatedObject.CaretPosition = _insertStart;
     this.AssociatedObject.Selection.Select(_insertStart, _insertEnd);
     this.AssociatedObject.Selection.Text = String.Empty;
     setSelectedValue();
     this.AssociatedObject.CaretPosition.InsertTextInRun(String.Format("[{0}] ", _selectedValue));
            this.AssociatedObject.Focus();
            endIntellisense();
}
趣味收尾
然而,重要的是,或者可能更重要的是,在每次操作后都要清理。最大限度地释放资源,并尽量删除无用的引用。请记住,我们的垃圾回收器将链接作为对象适用性的主要标准。GC 可能需要一些时间才能找到我们的垃圾。所以,作为环保主义者,我们自己收集垃圾。这里不需要使用 IDispose 模式,只需将“nothing”-“null”并将订阅断开。
void endIntellisense()
{
    this._filterIndex = 0;
    this._filterList = null;
    this._insertEnd = null;
    this._insertStart = null;
    this.IsOpen = false;
    _Child = null;
    _Panel = null;
    _container = null;
    GetAncestorTop<Window>(this.AssociatedObject).Closing -=
       new System.ComponentModel.CancelEventHandler(topWindow_Closing);
}
这大概就是主要目标了。我们还有一些收尾工作要做,关于任务。
IsOpen
如果您需要将我们的行为附加到应用程序的主菜单或其他任务触发器(包括测试 UIAutomation),我们已开发了名为 IsOpen 的功能。IsOpen 接受两个值:true 或 false。当 IsOpen 为 true 时,它会映射到成员,从而初始化 Intellisense 系统;当为 false 时,它会终止工作。同时,它会通知订阅者关于其当前状态的事件。该功能基于 DependencyProperty,因此无法注册,并且您可以将其集成到 XAML 标记环境中,并享受其所有优势和后果。
#region DependencyProperty IsOpen
[CustomPropertyValueEditorAttribute(System.Windows.Interactivity.CustomPropertyValueEditor.PropertyBinding)]
public bool IsOpen
{
    get { return (bool)GetValue(IsOpenProperty); }
    set { SetValue(IsOpenProperty, value); }
}
// Using a DependencyProperty as the backing store for IsOpen. This enables binding.
public static readonly DependencyProperty IsOpenProperty =
    DependencyProperty.Register("IsOpen", typeof(bool), typeof(MyIntellisenseBehavior),
    new UIPropertyMetadata(false,
        new PropertyChangedCallback(onIsOpenChanged),
        new CoerceValueCallback(coerceValue)));
private static object coerceValue(DependencyObject element, object value)
{
    bool newValue = (bool)value;
    return newValue;
}
private static void onIsOpenChanged(DependencyObject obj, DependencyPropertyChangedEventArgs args)
{
    MyIntellisenseBehavior control = (MyIntellisenseBehavior)obj;
    RoutedPropertyChangedEventArgs<bool> e = new RoutedPropertyChangedEventArgs<bool>(
        (bool)args.OldValue, (bool)args.NewValue, IsOpenChangedEvent);
    control.OnIsOpenChanged(e);
}
#endregion
ItemsSource
这是无法注册的 DependencyProperty,用于提供将显示在列表中的对象列表,Intellisense。
#region DependencyProperty ItemsSource
// Attribute for Blend Expression
[CustomPropertyValueEditorAttribute(System.Windows.Interactivity.CustomPropertyValueEditor.PropertyBinding)]
  public IEnumerable<object> ItemsSource
  {
      get { return (IEnumerable<object>)GetValue(ItemsSourceProperty); }
      set { SetValue(ItemsSourceProperty, value); }
  }
  // Using a DependencyProperty as the backing store for ItemsSource.  This enables binding.
  public static readonly DependencyProperty ItemsSourceProperty =
      DependencyProperty.Register("ItemsSource", typeof(IEnumerable<object>),
        typeof(MyIntellisenseBehavior), new UIPropertyMetadata(new List<object>()));
#endregion
还有其他本文未描述的功能。
- SelectedIndex
- SelectedItem
- region Property Size
在客户端代码中
为了让所有这些工作,我们还需要将我们的行为适配到宿主。一个好方法是使用 XAML。通过 Interaction 方法,我们将其他行为添加到库中。首先,我们需要通过将它们添加到头文件中来告知客户端我们的资源。
xmlns:beh="clr-namespace:BehaviorLibrary;assembly=BehaviorLibrary"
xmlns:i="clr-namespace:System.Windows.Interactivity;assembly=System.Windows.Interactivity"
对之前编写的代码进行重构,如下所示:
<RichTextBox x:Name="templateRichTextBox"
             AcceptsTab="True"
             VerticalScrollBarVisibility="Auto">
    <RichTextBox.ContextMenu>
        <ContextMenu x:Name="contextMenu">
            <MenuItem Command="ApplicationCommands.Undo"
                      Header="Undo"
                      Icon="{StaticResource undoImage}"
                      Style="{StaticResource cMenuButton}" />
            <MenuItem Command="ApplicationCommands.Redo"
                      Header="Redo"
                      Icon="{StaticResource redoImage}"
                      Style="{StaticResource cMenuButton}" />
            <Separator />
            <MenuItem Command="ApplicationCommands.Cut"
                      Header="Cut"
                      Style="{StaticResource cMenuButton}"
                      Icon="{StaticResource cutImage}" />
            <MenuItem Command="ApplicationCommands.Copy"
                      Header="Copy"
                      Style="{StaticResource cMenuButton}"
                      Icon="{StaticResource copyImage}" />
            <MenuItem Command="ApplicationCommands.Paste"
                      Header="Paste"
                      Style="{StaticResource cMenuButton}"
                      Icon="{StaticResource pasteImage}" />
        </ContextMenu>
    </RichTextBox.ContextMenu>
    <i:Interaction.Behaviors>
        <beh:RichTextBoxIntellisense x:Name="rtbIntelliseanse"
                                     KeysOpened="{beh:KeysFromChar ‘[,OemPipe}’"
                                     KeysClosed="{beh:KeysFromChar ]\,OemBackslash\,Escape}"
                                     KeysReturned="{beh:KeysFromChar Tab Return}"
                                     ItemsSource="{Binding ListTagsToSignature}" />
    </i:Interaction.Behaviors>
    <FlowDocument>
        <Paragraph />
    </FlowDocument>
</RichTextBox>
Light 已配备宿主上下文菜单,我们动态地添加和删除项。在这方面,我们不再需要做任何事情。所有事情都将由我们的新行为实例来处理。请注意,新行为的声明语法很奇怪。
KeysOpened="{beh:KeysFromChar ‘[,OemPipe}’"
KeysClosed="{beh:KeysFromChar ]\,OemBackslash\,Escape}"
KeysReturned="{beh:KeysFromChar Tab Return}"
这些是用于设置打开、关闭和确认选择的按键的声明。大括号使用专门为此行为编写的,以表示 MarkupExtension 值,该值负责读取、转换并将指示的值传递给适当的变量。我们看到三种传递值的方式给构造函数来表示 MarkupExtension 值。第一种传递方式被视为字符串 '[, OemPipe',在构造函数中进行编码;第二种也是字符串类型,正如构造函数所需的那样,并且等同于 '], OemBackslash, Escape'。反斜杠字符是 Expression Blend 所必需的,这与我们在该程序中编辑客户端时相同。关于行为和 Expression Blend 的内容将在后续文章中介绍。第三种也是最后一种变体是 MarkupExtension 值,例如“Tab Return”或由空格分隔的单词字符串。从 XAML 标记设置按键。
/// <summary>
/// Extension for xaml. Specially written for RichTextBoxIntellisense.
/// </summary>
public sealed class KeysFromCharExtension : MarkupExtension
{
    //IDictionary<string, Key> dictionaryKey = KeysFromCharExtension.GetDictionaryKeys();
    Func<string, Key> _comparer;
    IEnumerable<Key> _keys;
    private string[] _keysChar;
    public KeysFromCharExtension(String keysChar)
    {
        if (String.IsNullOrEmpty(keysChar)) throw new ArgumentNullException("keysChar");
       // hard code char ' ' and ',' only
       if (keysChar.Any(c => c == ',')) _keysChar = keysChar.Trim(' ').Split(',');
       else _keysChar = keysChar.Trim(' ').Split();
       _keys = new List<Key>();
       _comparer = ConvertKeyFromString;
       _keys = _keysChar.Select(k => ConvertKeyFromString(k.Trim(' '))).ToList();
   }
   // Important
   //Key ConvertKeyFromString(string stringKey, CultureInfo culture)
   Key ConvertKeyFromString(string stringKey)
   {
       Key m_key;
       KeyConverter cov = new KeyConverter();
       m_key = KeysFromCharExtension.GetDictionaryCodeKeys().FirstOrDefault(k => k.Key == stringKey).Value;
       if (m_key == Key.None)
           try
           {
               m_key = (Key)cov.ConvertFromInvariantString(stringKey.ToUpper());
           }
           catch
           {
               // if not know set to Key.None
               m_key = Key.None;
           }
       return m_key;
   }
   public override object ProvideValue(IServiceProvider serviceProvider)
   {
       return _keys;
   }
}
Expression Blend 中的行为
当在 Expression Blend 4 中编辑我们的解决方案时,我们可以通过 Inspector 直观地配置我们的行为。


对象选择器和选定对象的 Inspector。
我们的 Intellisense 是我们应用程序的完全成熟的组件,能够使用其他技术而无需额外转换。
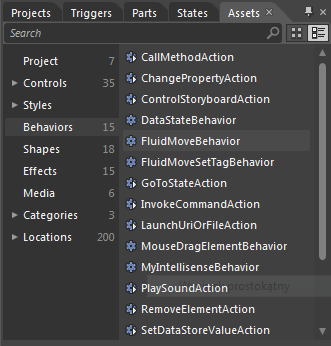
将我们的类库添加到行为中,作为解决方案中的一个开放项目,或作为程序集(.dll)的引用,并在 Expression Blend 的 Assets 列表中进行访问,然后将其添加到宿主中,我们就可以通过 Inspector 配置对象完全访问其属性并进行工作。
请随意阅读下一集,其中标识的行为旨在反映分配给当前指示器所拥有文本的样式,并在协作小部件中显示此样式。这类字体、大小、粗细、效果、字母颜色和背景等。
此致,Andrzej Skutnik