
示例中的HTML5/JavaScript单页应用程序剖析(基础、导航、组合、与服务器通信)
4.99/5 (44投票s)
描述了单页应用程序(SPA)以及帮助开发SPA的新BPF框架。
引言
什么是单页应用程序(SPA)?
普通的HTML应用程序/网站每次用户想要转到新页面时都会从服务器获取页面。然而,SPA应用程序在开始时会在客户端浏览器加载应用程序的所有页面,并使用JavaScript来切换页面,根据所选页面使HTML的某些部分可见或不可见。这使得HTML应用程序像原生应用程序或Silverlight应用程序一样响应迅速,因为页面之间的导航不需要与服务器进行往返。这种优势的代价是应用程序加载时间较长。有一些方法可以加速SPA应用程序的加载,使SPA的加载体验与加载普通HTML应用程序时相同,但这个主题超出了本文的范围。
如果您仔细考虑,SPA应用程序与Silverlight应用程序非常相似,因为大多数Silverlight应用程序会在开始时加载所有页面,然后允许用户在页面之间导航而无需调用服务器。因此,Silverlight开发人员应该能够非常自然地理解SPA的概念。
导航状态
在其通用形式中,浏览器导航将唯一URL映射到浏览器应用程序的特定导航状态。“应用程序的导航状态”决定了应用程序内哪些页面或区域显示或隐藏,或者它们如何显示。
浏览器解释URL并使应用程序进入相应状态。这对于例如让用户通过按浏览器“后退”和“前进”导航按钮来导航浏览器应用程序是必需的(浏览器存储URL,当用户按下浏览器导航按钮之一时,URL会更改,应用程序状态也会相应更改)。此外,当某些外部页面引用应用程序内的特定页面(或状态)而不是应用程序的默认页面时,这也是有用的。
反之亦然:一旦应用程序状态发生变化,例如因为用户按下选项卡或超链接移动到不同页面,浏览器URL也应该更改为与新状态相对应的URL。
对于普通的(非SPA)HTML应用程序,导航是自然发生的(页面根据相应的URL从服务器加载)。然而,SPA应用程序需要使用一些JavaScript技巧来实现URL与应用程序导航状态之间的一对一映射。在这里,我们介绍了一种新功能,可以比使用其他现有框架更容易地实现SPA导航。
相同的导航概念可以适用于任何原生的单窗口/多页面应用程序,特别是那些为智能手机和平板电脑构建的应用程序,如果时间允许,我将撰写更多关于它的文章。
SPA应用程序的组合
根据我的经验,构建SPA应用程序会导致大型HTML文件,因为应用程序由多个页面组成,并且所有页面都被一起加载。大型HTML文件可能难以理解和修改。我创建了一个功能,允许将SPA拆分成多个文件,并在客户端将它们全部加载和组装起来。此功能在此处也有讨论。
BPF框架
作为WPF和Silverlight的忠实粉丝,我雄心勃勃地将新框架命名为BPF,代表Browser Presentation Foundation。其最终目的是提供WPF和Silverlight中可以找到的功能,甚至更多。目前,它提供了一些通用实用功能、导航和组合功能,将在下面进行描述。框架的组合部分依赖于JQuery,框架的其余部分是独立的,并且可以在没有安装JQuery的情况下使用。
有两个SPA是使用早期版本的BPF库构建的:我自己的业务网站 - awebpros.com 和 paperplusne.com。请注意,paperplusne.com网站尚未为所有商品提供正确的价格数据(对于没有价格数据的商品,我将其价格设为1000美元)。您仍然可以通过它订购一些塑料制品,然后会有人与您联系以获取价格。
SPA服务器通信
就像Silverlight或桌面应用程序一样,SPA应用程序可以通过仅从服务器获取所需数据(通常以JSON格式)而不是像普通HTML应用程序那样获取生成的HTML代码来最小化从服务器加载的信息量。我在本文中提供了一些SPA与服务器通信的示例。
本文组织结构
我们展示了普通HTML/JavaScript站点和SPA的最简单的可能示例。我们讨论了它们之间的区别。
我们讨论了导航,并展示了BPF框架的导航功能。
我们讨论了使用BPF框架进行组合。
我们讨论了使用ASP.NET MVC的SPA与服务器通信,并提供了相应的示例。
重要提示:本文侧重于业务逻辑,而不是UI设计。我们以最简单的方式构建SPA,而不考虑它们的外观有多么难看。
必备组件
您需要具备HTML和JavaScript的知识才能阅读和理解本文。我将参考HTML5, JavaScript, Knockout, JQuery, 适用于Silverlight/WPF/C#爱好者的指南。第一部分 - JavaScript和DOM作为良好的HTML/JavaScript入门。
在本文中,我使用了一些非常基本的JQuery功能来检测HTML文档何时加载完成,以及提供一个多平台的方式来绑定DOM事件,因此需要对JQuery功能有所了解。来自JQuery和DOM事件的几段内容应该足以涵盖这些信息。
在讨论组合时,我们还使用JQuery选择器。您可以按照JQuery选择器链接来学习它们。
我广泛使用JQuery UI的tabs控件进行导航,但与之相关的内容将在文本中进行解释。
涵盖与服务器通信的部分可能需要对ASP MVC有一些基本了解,尽管我们将在文章中尽量解释所有内容。
更大系列文章的一部分
本文可视为“HTML5, JavaScript, Knockout, JQuery, 适用于Silverlight/WPF/C#爱好者的指南”系列的第三部分,其中还包含 HTML5, JavaScript, Knockout, JQuery, 适用于Silverlight/WPF/C#爱好者的指南。第一部分 - JavaScript和DOM和 HTML5, JavaScript, Knockout, JQuery, 适用于Silverlight/WPF/C#爱好者的指南。第二部分 - 使用SVG, Knockout和MVVM模式构建的太阳系动画。
SPA基础
展示两个页面的SPA和两个页面的普通HTML应用程序示例
在这里,我们展示了两个非常简单的两页HTML应用程序:一个普通的,另一个是SPA。普通HTML应用程序的代码位于TwoPageOrdinaryHTMLApp解决方案下,而SPA的代码位于TwoPageSPA解决方案下。
两个应用程序提供完全相同的用户体验。HTML窗口顶部有两个超链接,对应于两个页面。点击顶部的超链接会显示第一个页面的文本,而点击另一个会显示另一个页面的文本。


普通HTML应用程序有两个HTML页面Page1.htm和Page2.htm。两者都在页面顶部有超链接(一个指向自身,一个指向另一个页面)和页面文本。对于page1.htm,页面文本是“This is page 1”,颜色为红色。对于page2.htm,文本是“This is page 2”,颜色为蓝色。这是page1.htm的代码。
<body>
    <!-- hyper links for choosing the page -->
    <ul>
        <li><a href="Page1.htm">choose page1</a></li>
        <li><a href="Page2.htm">choose page2</a></li>
    </ul>

    <!-- page 1 message colored in red -->
    <p style="font-size:40px;color:red">This is page 1</p>
</body>
要启动TwoPageOrdinaryHTMLApp,右键单击Visual Studio解决方案资源管理器中的Page1.htm文件,然后选择“在浏览器中查看”选项,如果您想在默认浏览器中查看它,或者选择“浏览方式”选项,如果您想选择浏览器。您可以通过点击顶部的超链接在页面之间切换。
SPA解决方案使用JQuery(如果您打开Scripts文件夹,您会看到一堆JQuery文件)。您可以按照JQuery中描述的方式,作为NuGet包安装JQuery。
TwoPageSPA项目只有一个HTML文件:Index.html。您可以通过右键单击解决方案资源管理器中的该文件并选择“在浏览器中运行”来启动应用程序。Index.html包含HTML部分,其中包含两个页面的超链接和文本。它还包含用于在页面之间切换的JavaScript代码。
这是Index.html文件中的HTML代码。
<body>
    <ul>
        <!-- href='#' is needed only to help the links look like links -->
        <li><a id="page1Link" href="#">choose page1</a></li>
        <li><a id="page2Link" href="#">choose page2</a></li>
    </ul>

    <!-- page 2 message colored in blue -->
    <!-- in the beginning page2 is not visible (display set to 'none') -->
    <p id="page2" style="font-size:40px;color:blue;display:none">This is page 2</p>

    <!-- page 1 message colored in red -->
    <p id="page1" style="font-size:40px;color:red" >This is page 1</p>

</body>
正如您所见,页面链接不包含有效引用 - 它们的href属性被设置为“#”,以便它们看起来和行为都像链接(具有蓝色的颜色,并将鼠标光标更改为“手形”)。
两个页面的文本都位于链接下方。页面2的文本最初是不可见的(其display属性设置为none,因此它首先被放置,以便它后面的任何HTML代码都不会因为它的存在而被向下移动)。
页面切换由HTML代码下方的JavaScript代码完成。
    // use $(document).ready function to
    // make sure that the code executes only after the document's
    // DOM has been loaded into the browser.
    $(document).ready(function () {
        // when page1Link link is clicked, page1 shows,
        // page2 hides
        $(page1Link).bind("click", function () {
            $(page1).show();
            $(page2).hide();
        });

        // when page2Link link is clicked, page2 shows,
        // page1 hides
        $(page2Link).bind("click", function () {
            $(page1).hide();
            $(page2).show();
        });
    });
我们使用JQuery的bind函数将事件处理程序绑定到超链接的click事件。当事件触发时,我们会显示其中一个页面的内容并隐藏另一个页面的内容。
然而,可以看到两个应用程序的行为存在差异。当您在普通HTML应用程序中更改页面时,浏览器URL也会更改(例如,从https://:23033/Page1.htm到https://:23033/Page2.htm)。切换页面后,您可以使用浏览器上的“后退”按钮返回到上一个页面。另外,如果您希望用户在不访问Page2(应用程序的默认页面)的情况下访问Page2.htm,您可以简单地提供一个指向Page2的超链接https://:23033/Page2.htm。
但是,如果您尝试切换SPA中的页面,您会注意到URL没有改变,后退按钮不起作用,并且没有办法为用户提供指向page2的直接链接。这个问题将在稍后关于SPA导航的文章专门一节中解决。
使用JQuery UI Tabs进行SPA页面
如果您想在页面之间切换,使用选项卡而不是超链接会更美观。JQuery UI Tabs可以为此目的使用。
JQuery UI是一个构建在JQuery之上的GUI包。您可以像安装JQuery一样通过NuGet安装它。
使用JQuery UI Tabs的代码示例位于TwoPagesSPAWithTabs解决方案下。它包含Index.htm文件以及JQuery和JQuery UI包中的文件。Index.htm文件在页面顶部包含对JQuery UI样式表的引用:<link href="Content/themes/base/jquery.ui.all.css" rel="stylesheet" type="text/css" />(样式表是JQuery UI包安装的一部分)。
这是Index.htm文件中的HTML代码。
<body>
    <ul id="pageTabs">
        <!-- hrefs of the links point to the ids of the pages' contents -->
        <li><a href="#page1">choose page1</a></li>
        <li><a href="#page2">choose page2</a></li>
    </ul>


    <!-- page 1 message colored in red -->
    <p id="page1" style="font-size:40px;color:red" >This is page 1</p>

    <!-- page 2 message colored in blue -->
    <p id="page2" style="font-size:40px;color:blue">This is page 2</p>
</body>
请注意,代码顶部超链接的href属性指向包含页面内容的HTML标签的id(例如,href="#page1"的超链接指向标签<p id="page1" ...)。这是为了让JQuery UI功能确定哪个内容属于哪个选项卡。
JavaScript代码也非常简单。
    $(document).ready(function () {
        $("body").tabs(); // turns the hyperlinks into tabs
    });
应用程序外观如下。

与之前的SPA示例一样,URL与选项卡没有关联 - 更改选项卡不会更改URL,更改URL也不会更改选项卡。
BPF框架和导航
在这里,我们展示了BPF框架的导航功能。
许多SPA使用Sammy.js框架进行导航。Sammy.js允许将不同的URL哈希映射到各种JavaScript函数。当SPA具有许多不同的导航状态并且可能存在层次结构时,这种映射可能难以实现。然而,BPF库以自然的方式和非常少的额外代码实现了导航状态和URL哈希之间的映射。
BPF框架的当前版本有一个限制,即它依赖于hashchange文档事件来检测哈希的变化并更改SPA的导航状态。IE7不支持hashchange事件,因此导航功能将无法在其上工作。IE7浏览器用户的份额目前小于1%并且在迅速下降,所以我认为这个问题不需要解决。
BPF框架的代码位于BPF文件夹下。它也可以从github.com/npolyak/bpf获取。您唯一需要访问其所有功能的文件是bpf.min.js;到目前为止(截至2012年12月初,它相当小 - 大约12Kb)。此文件是通过捆绑和最小化其他JavaScript文件获得的,这些文件也可以在BPF文件夹中找到,并且我将不时地引用它们。
带导航的Two Page SPA
我们将首先使用BPF功能来修改上面所示的带有选项卡的两页简单SPA,使其可以导航。该示例位于TwoPageSPAWithNavigation解决方案下。该项目与TwoPageSPAWithTabs项目之间的唯一区别在于Index.html文件底部的JavaScript代码。在TwoPageSPAWithTabs项目中,JavaScript代码由一行$("body").tabs();组成,位于$(document).ready()方法中。此行的目的是将超链接转换为带有相应内容的JQuery选项卡。TwoPageSPAWithNavigation中的JavaScript代码更复杂。
// get the tabs DOM elements
var tabs = $("body").tabs(); // turns the hyperlinks into tabs

// JQTabsNavAdaptor is a special constructro that adapts
// the JQuery tabs to become usable by the navigation framework
var tabsAdaptor = new bpf.nav.JQTabsNavAdaptor(tabs);

// create the navigation framework node
var tabNode = new bpf.nav.Node(tabsAdaptor);

// connect the navigation framework node to the browser's url hash
bpf.nav.connectToUrlHash(tabNode);

// set the url to correspond to the
return bpf.nav.setKeySegmentToHash(tabNode);
不要试图完全理解它,因为详细的导航功能设计将在稍后讨论。简而言之,我们使用bpf.nav.Node功能将导航状态连接到浏览器URL的各个部分。bpf.nav.JQTabsNavAdaptor适配JQuery选项卡,以便生成的适配对象具有bpf.nav.Node所期望的方法。bpf.nav.connectToUrlHash(tabNode)行在节点和URL之间建立了双向连接(节点响应URL,反之亦然)。最后一行bpf.nav.setKeySegmentToHash(tabNode)将初始URL设置为匹配从bpf.nav.Node结构获得的URL。
运行示例显示SPA非常类似于TwoPageSPAWithTabs,但选项卡具有唯一的URL映射,并且当您更改选项卡时,URL也会更改。相应地,“后退”和“前进”浏览器按钮现在可以工作并切换选项卡。另外,在浏览器中键入URL“https://:48476/Index.html#page2.”会将您直接带到第二个选项卡。
更复杂的JQuery Tabs示例
HierarchicalSPAWithNavigation示例呈现了一个更有趣的选项卡层次结构。顶层选项卡包含子选项卡。每个选项卡/子选项卡组合都映射到其自己的URL。
尝试启动应用程序并玩弄选项卡。应用程序外观如下。

请注意,我们在Page2中显示了SubPage2。此组合对应于URL哈希:“#page2.page2SubTab2.”。如果我们更改选项卡,哈希也会相应更改。
您可以看到哈希始终以“#”开头并以“.”结尾。此样本中的链接对应于导航状态层次结构的各个级别,通过句点('.')字符分隔。这些链接匹配选项卡链接的href值(去除“#”前缀字符)。
这是创建导航连接的代码(再次,不要太费力去理解它,因为我们将在下一小节中讨论它)。
// get the tabs DOM elements
var tabs = $("body").tabs(); // turns top level hyperlinks into tabs

var page1SubTabs = $("#page1SubTabs").tabs(); // turns page 1 hyperlinks into tabs

var page2SubTabs = $("#page2SubTabs").tabs(); // turns page 2 hyperlink into tabs

// creates the top level node (JQTabsNavAdaptor is used).
var topLevelNode = bpf.nav.getJQTabsNode(tabs);

// creates a child node and adds it to top level node
// as child of "page1".
bpf.nav.addJQTabsChild(topLevelNode, "page1", page1SubTabs);

// creates a child node and adds it to top level node
// as child of "page2".
bpf.nav.addJQTabsChild(topLevelNode, "page2", page2SubTabs);

// connect the navigation framework to the browser's url hash
bpf.nav.connectToUrlHash(topLevelNode);

// set the url to correspond to the current selection pattern
return bpf.nav.setKeySegmentToHash(topLevelNode);
导航功能的详细设计
导航功能位于BPF库的“命名空间”bpf.nav下。它依赖于bpf.utils功能,部分功能也依赖于JQuery和JQuery UI(尽管它可以在没有它们的情况下工作)。
导航功能的目的是允许开发人员在SPA中定义一组导航状态,并将每个状态映射到唯一的浏览器URL,以便在状态更改时URL也会更改,反之亦然 - URL更改会触发导航状态更改。
导航状态被假定为层次化的 - 顶层可以有多个状态(例如,前面示例中的页面1和页面2)。每个状态都可以有子状态(子页面)。每个子状态都可以有自己的子状态等。应用程序的整体导航状态由每个级别(或级别状态)的唯一选择确定。每个级别状态映射到URL哈希中由句点('.')字符分隔的链接。它附加到对应于父级别状态的链接。下图描绘了一个状态层次结构的示例,其中树链接对应于级别状态,并且哈希字符串显示在相应的终端节点旁边:例如,Page1/SubPage2选择将导致哈希为“#Page1.SubPage2.”

我们称URL哈希中由句点分隔的每个部分为哈希段。例如,哈希“#Page1.SubPage2”有两个段:“Page1”和“SubPage2”。每个段映射到在该级别选择的级别状态。在每个级别,最多只能选择一个级别状态(有时,假定在某个级别没有选择级别状态会很方便)。
导航状态由级别状态组成。每个导航节点可以有属于它的多个级别子状态。一个或没有这些级别子状态可能被选为当前级别状态。每个级别状态都有一个与之关联的字符串。此字符串唯一标识该状态在其同级子状态中。当选择级别状态时,此字符串将成为URL哈希中由两个句点字符分隔的段。总哈希由对应于级别状态的这些段的序列唯一确定,从更高级别的状态向下到更精细的级别。
捕获级别状态树信息的关键功能是位于NavigationNode.js文件中的bpf.nav.Node。它 kind of 扩展或继承(在C#意义上)了NavigationNodeBase.js文件中提供的bpf.nav.NodeBase功能。这种继承是通过bpf.nav.Node构造函数在其代码中调用bpf.nav.NodeBase构造函数来实现的。我们需要继承,因为另一个类bpf.nav.ProductNode也派生自同一个bpf.nav.NodeBase类。bpf.nav.ProductNode的功能将在下文讨论。此继承关系如下图所示。

bpf.nav.Node引用其父节点和子节点(如果有)。bpf.nav.Node的父节点和子节点也派生自bpf.nav.NodeBase类。bpf.nav.Node的子节点可以通过字符串键通过函数bpf.nav.NodeBase.getChild(key)访问。键映射到URL哈希中相应的段。
每个bpf.nav.Node对象包装了另一个对象,该对象负责在节点的级别进行状态切换。正如上面的示例所示, such object 可以是JQuery UI选项卡对象。bpf.nav.Node假定包装的对象满足某些要求 - 它应该具有某些方法和字段 - 在Java或C#中,这个要求是包装的对象应该实现某个接口。下面是用C#表示法写的接口。
public interface ISelectable
{
    // event that fires when a selection changes at the selectable
    // object's level.
    // This event is implemented as bpf.nav.SimpleEvent in JavaScript
    event Action onSelectionChagned;

    // returns the currently selected key (hashSegment)
    // if no key is selected, it returns null
    string getSelectedKey();

    // does the selection specified by the key (or hashSegment)
    void select(string key);

    // unselects the currently selected key (if any and if the object allows it).
    void unselect();
}
JavaScript中的大多数实体不支持上述接口,因此我们必须使用适配器来将我们正在处理的对象适配到ISelectable接口。JQuery UI选项卡对象的适配器称为bpf.nav.JQTabsNavAdaptor,它是BPF库的一部分。

适配器包含控制选择的对象(在这种情况下是JQuery UI选项卡对象),并通过提供bpf.nav.Node期望的方法来实现ISelectable接口。
BPF中内置的另一个适配器 - 复选框适配器 comes with bpf.nav.CheckboxNavAdaptor类。它提供了一种将级别状态与复选框的选中和未选中状态相关联的方法。
bpf.nav.Node(通过bpf.nav.NodeBase)具有以下重要方法。
setSelectedKeySegments(urlHash)- 设置节点及其后代的选择,使其与传递给函数的URL哈希字符串中的段匹配。-
getTotalHash()- 返回与节点本身及其后代中的选择对应的URL哈希。哈希包含前导的“#”和尾随的“.”字符。
bpf.nav.Node层次结构中的选择更改后更改URL。
视图模型选择示例
本节需要一些关于Knockoutjs库的知识。您可以通过此链接或其他许多资源(包括使用SVG, Knockout和MVVM模式构建的太阳系动画。)来了解Knockoutjs。
本节的示例位于ParamNavigationTest解决方案下。我们在Scripts/ViewModels目录下的StudentViewModel.js文件中创建了一个视图模型。它定义了一个studentVM.students对象集合,类型为Student。每个Student都有一个name字段和一个course对象集合。每个课程有两个字段courseName和grade。视图模型studentVM有一个selectedStudentKnockoutjs可观察字段。此外,每个Student对象都有一个可观察的selectedCourse字段。
视图位于HTML/Index.html文件中。它在HTML窗口顶部提供了指向Student对象的超链接。链接显示学生的姓名。一旦点击链接,就会选择相应的学生,浏览器窗口会在选定学生的超链接下方显示该学生所修课程的名称。点击课程链接后,浏览器会显示学生姓名、课程名称以及该课程的学生成绩。

我们的任务是为每个学生-课程选择提供一个唯一的URL哈希。
当然,我们可以为每个学生和课程对象使用上面描述的bpf.nav.Node功能。但是,如果这些对象的数量非常多,或者学生或课程集合在应用程序中发生变化,这可能会有问题。
BPF库有一个类bpf.nav.FactoryNode,位于NavigationFactoryNode.js文件中,该类在应用程序需要时生成bpf.nav.Node对象,并将它们添加到父节点的childNodes集合中。
我们使用bpf.nav.KoObservableNavAdaptor作为适配器对象来适配可观察对象。bpf.nav.KoObservableNavAdaptor构造函数接受3个参数。
- 可观察对象
- 根据哈希段(或键)从视图模型集合中获取对象的函数
- 从视图模型集合中的每个对象获取键的函数
这是我们在Index.html文件中将导航状态连接到视图模型的方式。
// we create the adaptor for the selected student observable
var studentLevelObservableAdaptor =
    new bpf.nav.KoObservableNavAdaptor
    (
        studentVM.selectedStudent,

        // key to student function
        function (key) {
            var foundStudent = _.chain(studentVM.students).filter(function (student) {
                return student.name === key;
            }).first().value();

            return foundStudent;
        },

        // student to key function
        function (student) {
            return student.name;
        }
    );

var topLevelNode = new bpf.nav.FactoryNode(
    studentLevelObservableAdaptor,
    null,

    // child node producing function
    function (key, data) {

        var childObj = data.getChildObjectByKey(key);

        if (!childObj)
            return;

        // create adapted child object
        var adaptedChildObj =
            new bpf.nav.KoObservableNavAdaptor
            (
                childObj.selectedCourse,
                function (courseKey) {
                    return _.chain(childObj.courses).
                        filter(function (universityCourse) {
                            return universityCourse.courseName === courseKey;
                        }).first().value();
                },
                function (course) {
                    return course.courseName;
                }
            );

        // create the node
        return new bpf.nav.Node(
            adaptedChildObj
        );
    }
);

bpf.nav.connectToUrlHash(topLevelNode);

bpf.nav.setKeySegmentToHash(topLevelNode);
笛卡尔积导航
假设您的浏览器分为两半。每半都有选项卡。您可以选择每半中的一个选项卡。您还希望为每个可能的选项卡组合分配一个URL。生成的导航状态空间将是浏览器每半个状态的笛卡尔积。
我们可以通过将浏览器分成多个部分来进一步复杂化任务。我们也可以假设这种笛卡尔积不仅可以发生在顶层状态,也可以发生在任何状态级别。
SimpleProductNavigationTest解决方案包含我们开始时描述的场景。浏览器页面分为两部分。每个部分都有选项卡。我们记录了页面中每个选项卡选择的组合。

请注意,上图的总URL哈希为“#(topics/TopicA)(othertopics/SomeOtherTopicA).”。哈希中对应于笛卡尔积组件的部分包含在括号中。括号内的哈希部分以一个唯一标识笛卡尔积该部分的键开头。该键与括号内的其余字符串用正斜杠分隔。
我们使用bpf.nav.ProductNode将URL哈希映射到状态的笛卡尔积。它的使用示例位于SimpleProductNavigationTest项目中的Index.html文件底部。
// create topics JQuery UI tabs
var topics = $("#MyTopics").tabs();

// create otherTopics tabs
var otherTopics = $("#SomeOtherTopics").tabs();

// top level node is a product node for
// the Cartesian product of the states
var topLevelNode = new bpf.nav.ProductNode();

// add "topics" node to be a child of topLevelNode under key "topics"
bpf.nav.addJQTabsChild(topLevelNode, "topics", topics);

// add "otherTopics" node to be a child of topLevelNode under key "othertopics"
bpf.nav.addJQTabsChild(topLevelNode, "othertopics", otherTopics);

// create the one to one relationship between the states and the URL
bpf.nav.connectToUrlHash(topLevelNode);

// change the original URL to be based on the navigation states
bpf.nav.setKeySegmentToHash(topLevelNode);
bpf.nav.ProductNode位于ProductNavigationNode.js文件中。就像bpf.nav.Node一样,它 kind of 是bpf.nav.NodeBase的一个子类。它重写了setSelectedKeySegmentsRecursive、getUrlRecursive和chainUnselect函数的实现。
在ComplexProductNavigationTest解决方案中可以找到一个更为复杂的示例。它涉及一系列嵌套选项卡,其中两个级别发生笛卡尔积 - 顶层级别和TopicA选项卡下的级别。
SPA外观如下。

上图的总URL哈希部分为“#(topics/TopicA.(a1subs1/A1Subtopic1.A1Sub1Sub2)(a1subs2/A2Subtopic2))(othertopics/SomeOtherTopicA).”。您可以尝试使用该应用程序来查看浏览器导航按钮确实在工作。
这是应用程序的HTML代码。
<table>
    <tr>
        <td style="vertical-align: top">
            <div id="MyTopics">
                <ul>
                    <li><a href="#TopicA">TopicA</a></li>
                    <li><a href="#TopicB">TopicB</a></li>
                </ul>

                <div id="TopicA">
                    My topic A
                    <table>
                        <tr>
                            <td style="vertical-align: top;">
                                <div id="A1Subtopics">
                                    <ul>
                                        <li><a href="#A1Subtopic1">A1Sub1</a></li>
                                        <li><a href="#A1Subtopic2">A1Sub2</a></li>
                                    </ul>

                                    <div id="A1Subtopic1">
                                        A1 Sub Topic1
                                        <div id="A1Sub1Sub">
                                            <ul>
                                                <li><a href="#A1Sub1Sub1">A1S1S1</a></li>
                                                <li><a href="#A1Sub1Sub2">A1S1S2</a></li>
                                            </ul>
                                            <div id="A1Sub1Sub1">A1 Sub1 Sub1</div>
                                            <div id="A1Sub1Sub2">A1 Sub1 Sub2</div>
                                        </div>
                                    </div>
                                    <div id="A1Subtopic2">A1 Sub Topic2</div>
                                </div>
                            </td>
                            <td style="vertical-align: top;">
                                <div id="A2Subtopics">
                                    <ul>
                                        <li><a href="#A2Subtopic1">A2Sub1</a></li>
                                        <li><a href="#A2Subtopic2">A2Sub2</a></li>
                                    </ul>

                                    <div id="A2Subtopic1">A2 Sub Topic1</div>
                                    <div id="A2Subtopic2">A2 Sub Topic2</div>
                                </div>

                            </td>
                        </tr>
                    </table>
                </div>
                <div id="TopicB">
                    The Topic B
                </div>
            </div>
        </td>
        <td style="vertical-align: top">
            <div id="SomeOtherTopics">
                <ul>
                    <li><a href="#SomeOtherTopicA">AnotherA</a></li>
                    <li><a href="#SomeOtherTopicB">AnotherB</a></li>
                </ul>
                <div id="SomeOtherTopicA">Some Other A </div>
                <div id="SomeOtherTopicB" style="background-color: pink">Some Other B</div>
            </div>
        </td>
    </tr>
</table>
这是$(document).ready()函数中的JavaScript代码。
  // create topics JQuery UI tabs
var topics = $("#MyTopics").tabs();

// create otherTopics tabs
var otherTopics = $("#SomeOtherTopics").tabs();

var A1Subtopics = $("#A1Subtopics").tabs();

var A2Subtopics = $("#A2Subtopics").tabs();

var A1Sub1Sub = $("#A1Sub1Sub").tabs();

// top level node is a product node for
// the Cartesian product of the states
var topLevelNode = new bpf.nav.ProductNode();

// add "topics" node to be a child of topLevelNode under key "topics"
var topicsNode = bpf.nav.addJQTabsChild(topLevelNode, "topics", topics);

// add "otherTopics" node to be a child of topLevelNode under key "othertopics"
bpf.nav.addJQTabsChild(topLevelNode, "othertopics", otherTopics);

var aSubtopicsProductNode = new bpf.nav.ProductNode();

topicsNode.addChildNode("TopicA", aSubtopicsProductNode);

var A1SubNode = bpf.nav.addJQTabsChild(aSubtopicsProductNode, "a1subs1", A1Subtopics);
bpf.nav.addJQTabsChild(aSubtopicsProductNode, "a1subs2", A2Subtopics);

bpf.nav.addJQTabsChild(A1SubNode, "A1Subtopic1", A1Sub1Sub);

// create the one to one relationship between the states and the URL
bpf.nav.connectToUrlHash(topLevelNode);

// change the original URL to be based on the navigation states
bpf.nav.setKeySegmentToHash(topLevelNode);
使用BPF框架进行SPA组合
正如我在引言中提到的,SPA可能会导致大型HTML文件,因为它的所有页面都一起加载,而切换页面只是改变HTML部分的可见性。
BPF框架提供了一种方法,可以将HTML功能分解成更小的文件(称为BPF插件或简称插件),并在客户端将它们全部组装起来。它还允许插件引用其他插件,从而创建插件层次结构。此外,您可以将处理插件功能提供的JavaScript代码放在同一个HTML文件中,然后稍后在组合过程中或在稍后阶段调用此功能。这是我试图在HTML/JavaScript世界中模仿WPF/Silverlight代码后端的尝试。
所有BPF组合相关的功能都位于Composite.js文件中,并且严重依赖于JQuery。
简单插件示例
让我们看一下SimpleCompositionSample项目下的示例。该项目的HTML目录包含两个html文件:Index.html - 主文件,以及APlugin.html - 包含插件代码的文件。要启动应用程序,请右键单击解决方案资源管理器中的Index.html文件,然后选择“在浏览器中查看”选项。
这是Index.html文件中的HTML代码。
<div style="font-size:30px;color:red">This is the main Module</div>
<img id="busyIndicator" src="../Images/busy_indicator.gif" style="vertical-align:central;margin-left:50%" />

<!-- plugin will get into this div below -->
<div id="APluginContainer1"></div>

<!-- call plugin's function to change its color to 'blue' for the plugin above -->
<button id="changePluginColorButton1">Change 1st Plugin Text to Blue</button>

<!-- plugin will get into this div below -->
<div id="APluginContainer2" style="margin-top:40px"></div>

<!-- call plugin's function to change its color to 'blue' for the plugin above -->
<button id="changePluginColorButton2">Change 2nd Plugin Text to Blue</button>
主HTML文件中唯一可见的文本是“This is the main Module”。有两个<div>标签用于插入插件内容:“APluginContainer1”和“APluginContainer2”。每个标签下面都有一个按钮,用于调用插件的代码后端,将相应插件实例的文本颜色更改为蓝色。
您可能会注意到,同一个插件被插入到主模块的两个地方。
这是Index.html的JavaScript代码。
// this event will fire after all the plugins and their
// descendant plugins are loaded
var compositionReady = new bpf.utils.EventBarrier();

// the composition ready event fires after everything all the plugins
// and their descendants have been loaded into the main module.
compositionReady.addSimpleEventHandler(function (success) {
    $("#busyIndicator").hide();

    $("#changePluginColorButton1").click(function () {

        // after changePluginColorButton1 is clicked, the
        // the function changeColorBackToBlue defined within the plugin
        // will be called and will only affect APluginContainer1
        bpf.control("#APluginContainer1").call("changeColorToBlue");
    });

    // after changePluginColorButton2 is clicked, the
    // the function changeColorBackToBlue defined within the plugin
    // will be called and will only affect APluginContainer2
    $("#changePluginColorButton2").click(function () {
        bpf.control("#APluginContainer2").call("changeColorToBlue");
    })
});

// gets the plugin from file APlugin.html and inserts it into the
// element pointed to by the selector "#APluginContainer1"
bpf.cmpst.getPlugin("APlugin.html", null, "#APluginContainer1", compositionReady);

// gets the plugin from file APlugin.html and inserts it into the
// element pointed to by the selector "#APluginContainer2"
bpf.cmpst.getPlugin("APlugin.html", null, "#APluginContainer2", compositionReady);
底部的两个bpf.cmpst.getPlugin调用将插件加载到主模块中,并将其插入到DOM中的两个不同位置。compositionReady事件处理程序在所有插件及其后代加载到主模块后被调用。它会隐藏“busyIndicator”,并为按钮事件分配一个回调,调用插件代码后端的changeColorToBlue函数。
bpf.control("#APluginContainer1").call("changeColorToBlue");
函数bpf.control(jquery-selector)返回包含在由传递给它的jquery-selector指向的元素中的插件的代码后端。我们使用BPF框架创建的call()函数来调用代码后端的特定方法。该函数的第一参数是要调用的方法的名称。如果方法有输入参数,则可以在方法名称之后添加它们。
现在,让我们看一下插件代码。
<div id="aPlugin" style="font-size:25px">
    This is a plugin
</div>

<!--script tag should be marked by data-type="script-interface" in
    order for it to be recognized as containing the plugin's 'code-behind' -->
<script type="text/javascript" data-type="script-interface">
    (function () {
        // this function returns the plugin's 'code-behind' -
        // a JSON object consisting the functions. Two function names are
        // reserved "preRender" and "postRender" - the first executes
        // before the plugin is inserted into the parent module's DOM
        // the second executes after the plugin is inserted into the parent's
        // module dome.
        // other functions can be called at any later stage - at the developer's will
        // 'this' object for every function except for preRender contains the parameters
        // of the element into which this plugin attached. The most important parameter is
        // currentDOM - the DOM of the parent element.
        // All the JQuery selectors acting within the plugin should start with
        // this.currentDOM.find(... to make sure that we are only modifying our instance
        // of the plugin and not some other instances.
        // The other important field within "this" object is "codeBehind". It gives
        // access to the code-behind function returned below.
        // Note that all the function names should be in quotes in order for eval method
        // to work at the moment when the plugin is inserted into the plugin cache.
        return {
            "postRender": function (compositionReadyEventBarrier) {
                // change color to blue
                this.currentDOM.find("#aPlugin").css("color", "green");
            },
            "changeColorToBlue": function () {
                // change the color to blue
                this.currentDOM.find("#aPlugin").css("color", "blue");
            }
        };
    })();
</script>
插件的HTML仅显示文本“This is a plugin”。
标记为data-type="script-interface"属性的<script>标签被认为是插件的代码后端。应该只有一个这样的<script>属性。其余脚本属性可以添加到插件中以增强intellisense,但在插件加载到主模块时将被删除。插件正常工作所需的所有JavaScript引用应放在主模块中。
代码后端<script>标签包含一个匿名函数,该函数返回一个JSON对象,定义了各种方法。有两个预定义的代码后端方法(如果存在)会在插件加载到主模块时被调用:preRender和postRender - 第一个在插件加载之前调用,第二个在插件加载之后调用。
除了preRender之外,所有代码后端方法都接收一个特殊对象作为它们的this变量。该对象包含currentDOM字段,该字段是JQuery DOM对象,指向插件附加到的父模块中的元素。
重要提示:如果您想在代码后端中找到属于插件的DOM元素,您应该通过调用this.currentDOM.find(selector)函数来实现,而不是使用$(selector)。原因是,如果同一个插件被插入到主模块中的多个位置,除非您使用this.currentDOM.find方法,否则您可能会找到同一个插件的多个实例,而不是您需要的特定实例,因此您所有的修改都将应用于多个实例而不是您需要的那个实例。顺便说一下,请注意,由于我们的插件有一个ID:id="aPlugin",并且插件被插入到主模块中两次,您将有两个具有相同ID的元素在主模块中。根据我的经验,这似乎工作正常,因为我一直使用this.currentDOM.find来解析实例。如果您认为这是错误的(毕竟,HTML的基本规则是在DOM中不应该有两个具有相同ID的元素),您可以在插件中使用唯一的类名而不是ID来避免使用ID。
postRender函数在插件被插入到主模块后,将插件文本的颜色更改为绿色。
代码后端的方法changeColorToBlue将插件文本的颜色更改为蓝色。
这是我们如何从主模块(Index.html文件)的JavaScript代码中调用changeColorToBlue函数。
bpf.control("#APluginContainer1").call("changeColorToBlue");
当您运行应用程序时,您将看到两个插件实例的文本都显示为绿色。当您点击相应插件实例下方的按钮时,该插件实例将变为蓝色,而另一个保持相同的颜色。这是在点击顶部插件实例的按钮后应用程序的图像。

顶部插件实例的文本变为蓝色,而底部插件实例的文本保持绿色。
插件组合链示例
ChainOfPluginsCompositionSample解决方案包含一个示例,其中主模块加载一个插件,该插件又加载另一个插件,我们称之为子插件。样本的所有HTML文件都位于HTML文件夹下。Index.html是包含主模块的文件。您可以通过右键单击它并选择“在浏览器中查看”选项来启动应用程序。这是应用程序启动时的图像。

按钮相应地更改插件和子插件的文本颜色。
Index.html文件的代码与前一个示例相比没有任何新内容。大部分“有趣”的代码位于APlugin.html文件中。
<div id="aPlugin" style="font-size:25px">
    This is a plugin

    <div id="subPluginContainer"></div>

    <Button id="changePluginColorButton">Change Plugin Color to Blue</Button>
    <Button id="changeSubPluginColorButton">Change SUB Plugin Color to Black</Button>
</div>
<script src="../Scripts/jquery-1.8.3.js"></script>
<script src="../Scripts/BPF/bpf.js"></script>
<script type="text/javascript" data-type="script-interface">
    (function () {
        return {
            "postRender": function (compositionReadyEventBarrier) {
                var self = this;

                // change color to green
                self.currentDOM.find("#aPlugin").css("color", "green");

                // create a child event barrier - it will fire
                // once the sub-plugin and all of its
                // descendants are loaded.
                // And the parent event barrier won't fire until it fires.
                var subCompositionReady =
                    compositionReadyEventBarrier.createChildEventBarrier();

                subCompositionReady.addSimpleEventHandler(function () {
                    // changes the color of the plugin itself to blue.
                    $("#changePluginColorButton").click(function () {
                        self.currentDOM.find("#aPlugin").css("color", "blue");
                    });

                    // on changeSubPluginColorButton click call the sub-plugin's
                    // method changeColorToBlack
                    $("#changeSubPluginColorButton").click(function () {
                        bpf.control("#subPluginContainer", self).call("changeColorToBlack");
                    });
                });

                // get sub-plugin note that you need to pass 'this' object
                // as the second argument to getPlugin function
                bpf.cmpst.getPlugin("ASubPlugin.html", self, "#subPluginContainer", subCompositionReady);
            }
        };
    })();
</script>
请注意,当我们调用插件内的getPlugin()函数时,我们将self(它与this变量相同)作为第二个参数传递,而不是像在主模块中那样传递null。此外,为了在插件中访问子插件的代码后端对象,我们需要将self作为第二个参数传递给bpf.control()函数:bpf.control("#subPluginContainer", self).call("changeColorToBlack");。
组合与导航示例
CompositionAndNavigationSample解决方案展示了如何结合BPF组合和导航。我们在主模块级别创建了两个选项卡。我们还在插件中创建了选项卡。该插件被添加到主模块中某个选项卡的内容中。我们使用bpf.nav.Node对象围绕插件的选项卡创建一个导航节点,并将其作为主模块节点结构的子节点连接起来。这是Index.html文件中的主模块代码。
<!DOCTYPE html>
<html xmlns="http://www.w3.org/1999/xhtml">
<head>
    <link href="../Content/themes/base/jquery-ui.css" rel="stylesheet" />
    <title></title>
</head>
<body>
    <!-- links to be converted to tabs -->
    <ul id="pageTabs">
        <li><a href="#page1">Page1</a></li>
        <li><a href="#page2">Page2</a></li>
    </ul>


    <!-- page 1 message colored in red -->
    <div id="page1" style="color:red" >
        This is page 1

        <div id="pluginContainer"></div>
    </div>

    <!-- page 2 message colored in blue -->
    <div id="page2" style="color:blue">This is page 2</div>
</body>
</html>
<script src="../Scripts/jquery-1.8.3.min.js"></script>
<script src="../Scripts/jquery-ui-1.9.2.min.js"></script>
<script src="../Scripts/BPF/bpf.js"></script>

<script>
    $(document).ready(function () {

        // create the tabs, store a reference to the tabs.
        var topLevelTabs = $("body").tabs();

        // create the top level bpf.nav.Node object around the tabs.
        var topLevelNode = bpf.nav.getJQTabsNode(topLevelTabs);

        var compositionReady = new bpf.utils.EventBarrier();

        compositionReady.addSimpleEventHandler(function () {
            // this function is called after all the plugins are loaded (rendered)

            // we call "connectToParentNode" function on the plugin
            // passing the topLevelNode to it, in order to connect
            // the plugin's tabs to the bpf navigation framework.
            bpf.control("#pluginContainer").call("connectToParentNode", topLevelNode);

            // connect the navigation framework with the URL's hash
            bpf.nav.connectToUrlHash(topLevelNode);

            // update the current URL
            bpf.nav.setKeySegmentToHash(topLevelNode);
        });

        // get the plugin
        bpf.cmpst.getPlugin("APlugin.html", null, "#pluginContainer", compositionReady);
    });
</script>
为了将插件的导航节点连接到主模块的导航节点,我们调用插件代码后端的connectToParentNode函数,并将父节点(topLevelNode)作为参数传递给它。
bpf.control("#pluginContainer").call("connectToParentNode", topLevelNode);
这是插件的代码(来自APlugin.html文件)。
 <div id="subTabPlugin">
    <ul id="subTabs">
        <li><a href="#subPage1">SUB Page1</a></li>
        <li><a href="#subPage2">SUB Page2</a></li>
    </ul>


    <!-- page 1 message colored in red -->
    <div id="subPage1" style="color:green" >This is SUB page 1</div>

    <!-- page 2 message colored in blue -->
    <div id="subPage2" style="color:purple">This is SUB page 2</div>
</div>
<script src="../Scripts/jquery-1.8.3.min.js"></script>
<script src="../Scripts/jquery-ui-1.9.2.min.js"></script>
<script src="../Scripts/BPF/bpf.js"></script>
<script type="text/javascript" data-type="script-interface">
    (function () {
        var pluginTabs;

        return {
            "postRender": function (compositionReadyEventBarrier) {
                // create tabs within the plugin and store the
                // tab object to be used later
                pluginTabs = this.currentDOM.find("#subTabPlugin").tabs();
            },
            "connectToParentNode": function (parentNode) {
                // create the navigation node at the plugin level and
                // connect it with the parent navigation node.
                bpf.nav.addJQTabsChild(parentNode, "page1", pluginTabs);
            }
        };
    })();
</script>
方法postRender创建选项卡(从超链接生成)并将它们引用存储在插件中,通过调用pluginTabs = this.currentDOM.find("#subTabPlugin").tabs();。
与父导航节点的连接由connectToParentNode方法处理。此方法从主模块调用。(当然,我们也可以在postRender函数中连接导航节点,但我们想通过创建一个单独的方法connectToParentNode并从主模块调用它来演示更多的组合功能)。
参数化插件
ParameterizedPluginSample展示了如何创建外观不同的同一插件的实例。与SimpleCompositionSample一样,同一插件的两个实例被插入到Index.html文件包含的主模块中。
// gets the plugin from file APlugin.html and inserts it into the
// element pointed to by the selector "#APluginContainer1"
bpf.cmpst.getPlugin(
    "APlugin.html",
    null,
    "#APluginContainer1",
    compositionReady,
    {
        fontSize: "50px",
        color: "blue"
    }
);

// gets the plugin from file APlugin.html and inserts it into the
// element pointed to by the selector "#APluginContainer2"
bpf.cmpst.getPlugin(
    "APlugin.html",
    null,
    "#APluginContainer2",
    compositionReady,
    {                      // pass the object containing postRenderArguments
        fontSize: "20px",
        color: "green"
    }
);
bpf.cmpst.getPlugin函数的最后一个参数是JSON对象,该对象可以在插件代码后端的postRender函数中通过this.postRenderArguments对象访问。这是插件的代码后端。
 {
    "postRender": function (compositionReadyEventBarrier) {
        var fontSize = this.postRenderArguments.fontSize; // get font size from the arguments
        var color = this.postRenderArguments.color; // get color from the arguments

        this.currentDOM.find("#aPlugin").css("font-size", fontSize);
        this.currentDOM.find("#aPlugin").css("color", color);
    }
}
结果是,我们看到相同的插件文本显示为不同的字体大小和颜色。

顶部插件实例的字体大小为50px,颜色为蓝色,而底部实例为20px,颜色为绿色。
通用Silverlight插件示例
在此,我描述了一个通用的BPF插件,用于Silverlight应用程序。
Silverlight应用程序通常打包成一个扩展名为.xap的文件。为了将Silverlight应用程序嵌入到一个页面中,您需要引用Silverlight.js文件(来自Microsoft)。您还需要在HTML应用程序中编写以下HTML代码。
<object type="application/x-silverlight-2"
        style="display: block; text-align: center; width: 100%; height: 100%">
    <param name="source" value="../ClientBin/MySilverlightApp.xap" /> <!-- url to Silverlight app -->
    <param name="onError" value="onSilverlightError" />
    <param name="background" value="white" />
    <param name="minRuntimeVersion" value="5.0.61118.0" />
    <param name="autoUpgrade" value="true" />
    <a href="http://go.microsoft.com/fwlink/?LinkID=149156&v=5.0.61118.0" style="text-decoration: none">
        <img src="http://go.microsoft.com/fwlink/?LinkId=161376" alt="Get Microsoft Silverlight"
            style="border-style: none" />
    </a>
</object>
这是一大块HTML代码,我的想法是创建一个BPF参数化插件,以便在HTML应用程序中的多个位置重用它。BPF插件的一个参数将是Silverlight应用程序的URL。其他参数可能用于定位应用程序,例如宽度、高度、边距。
您可能想知道为什么Silverlight插件与其他BPF插件不同。为什么我们不能使用上一节的信息创建一个参数化插件?我的回答是“请将您的问题转达给微软”。<object>标签与IE8和IE9的JQuery结合使用时表现非常奇怪 - 尝试使用JQuery解析object标签的DOM会完全搞乱它。此外,根据我的经验,Silverlight应用程序URL必须在HTML代码插入到主模块之前设置 - 如果代码已经插入,IE将不会更改Silverlight应用程序,即使Silverlight URL更改。事实上,正是由于这些问题,我才向代码后端添加了preRender函数,以便在插件插入到主模块之前调用它。
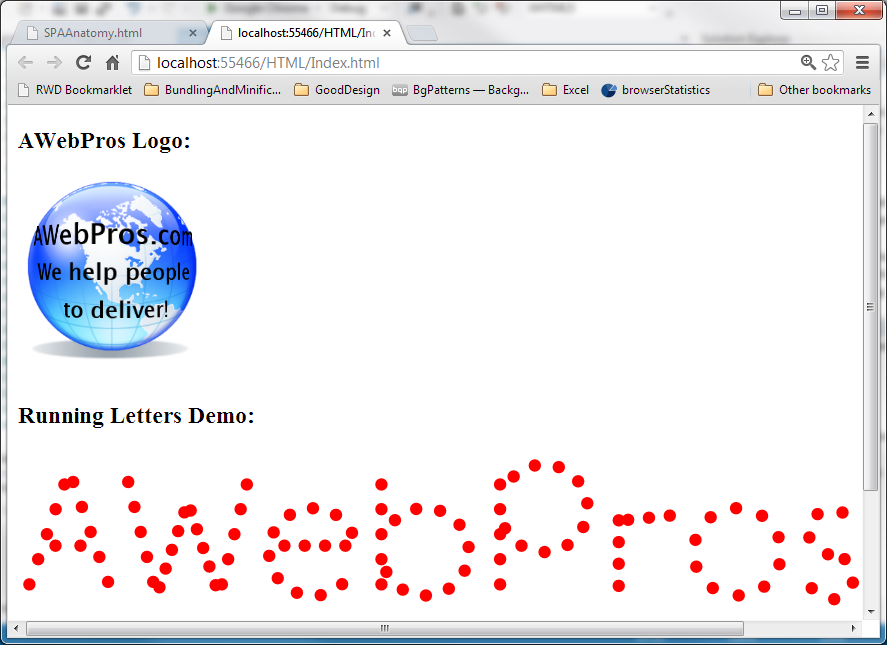
此示例的代码位于SilverlighPluginSample解决方案下。如果您运行该应用程序,您会得到以下结果 -(嘿,经过一周的辛勤工作写这篇文章,我可以允许自己一点点自我推销 - AWebPros.com是我的公司)。
为了解决我上面描述的Silverlight插件问题,我们更改了插件代码,用<myobject>替换了<object>标签。此外,为了将URL参数放在正确的位置,我们使用“___XAPFilePlaceHolder___”字符串作为占位符。在preRender方法中,在代码插入到主模块之前,会进行这些字符串的替换。我们通过使用this.getDownloadedHtml()函数获取Silverlight插件的HTML代码(该函数在preRender方法中确实返回了完整的插件HTML代码)。
这是SilverlightContainerPlugin.html文件中的代码。
<div class="slContainerDiv">
    <myobject type="application/x-silverlight-2"
            style="display: block; text-align: center; width: 100%; height: 100%">
        <param name="source" value="___XAPFilePlaceHolder___" />
        <param name="onError" value="onSilverlightError" />
        <param name="background" value="white" />
        <param name="minRuntimeVersion" value="5.0.61118.0" />
        <param name="autoUpgrade" value="true" />
        <a href="http://go.microsoft.com/fwlink/?LinkID=149156&v=5.0.61118.0" style="text-decoration: none">
            <img src="http://go.microsoft.com/fwlink/?LinkId=161376" alt="Get Microsoft Silverlight"
                style="border-style: none" />
        </a>
    </myobject>
</div>
<script src="../Scripts/jquery-1.8.2.js"></script>
<script type="text/javascript" data-type="script-interface">
    (function () {
        return {
            "preRender": function (preRenderArgs) {

                // get original html of the plugin
                var originalHtml = this.getDownloadedHtml()

                // replace "myobject" string with "object" and
                // ___XAPFilePlaceHolder___ with the Silverlight app url parameter.
                var modifiedHtml = originalHtml.replace(/myobject/gi, "object").replace("___XAPFilePlaceHolder___", preRenderArgs.slAppUrl);

                // replace the HTML code of the plugin
                this.setDownloadedHtml(modifiedHtml);
            },
            "postRender": function () {
                var args = this.postRenderArguments;

                var slContainerDiv = this.currentDOM.find(".slContainerDiv");

                // position the plugin
                if (args) {
                    slContainerDiv.css("margin-top", args.marginTop);
                    slContainerDiv.css("margin-bottom", args.marginBottom);
                    slContainerDiv.css("width", args.width);
                    slContainerDiv.css("height", args.height);
                }
            },
        }
    })();
</script>
这是插件在主模块中的插入方式。
bpf.cmpst.getPlugin(
    "SilverlightContainerPlugin.html",
    this,
    "#AWebProsLogo",
    compositionReady,
    {   // post-render args
        marginTop: "auto",
        marginBottom: "auto",
        width: "150px",
        height: "150px"
    },
    {   // pre-render args
        slAppUrl: "../ClientBin/AnimatedBanner.xap"
    }
);
此插件不是BPF库的一部分(它只包含JavaScript文件),但它非常有用,因此它发布在 github.com/npolyak/bpf/tree/master/BPF/UsefulBPFPlugins上。
使用ASP.NET MVC进行SPA服务器通信
在这里,我们展示了SPA如何与ASP.NET MVC服务器通信。与前两个部分不同,本节不包含任何新内容 - 它只是一个教程,提供了SPA与服务器通信的多种示例。
简单的GET请求示例,从服务器返回字符串
正如引言中所提到的,一旦SPA运行,它应该只加载应用程序的字符串或JSON数据,而不是HTML代码。在SPAServerStringCommunications解决方案下可以找到一个SPA发送和获取ASP服务器上字符串数据的非常简单的示例。
要启动解决方案,右键单击Index.html文件并选择“在浏览器中查看”。应用程序启动后的外观如下。

在编辑区域输入您的名字并点击“Get Server String”按钮后,浏览器会将您的名字发送到服务器,并从服务器接收字符串“Hello <yourname>”,然后显示在按钮上方,颜色为红色。

SPAServerStringCommunications项目是作为ASP.NET MVC 4空项目创建的。创建项目后,我删除了Model和Views文件夹,并在Controllers文件夹中添加了一个“Hello”控制器。我还删除了Scripts文件夹中的所有脚本,并将JQuery安装为NuGet包。
HelloControler只包含一个方法GetHelloMessage,该方法接受name参数,并返回字符串"Hello" + name,该字符串被包装在Json函数中。
public ActionResult GetHelloMessage(string name)
{
    // AllowGet flag states that the method can be accessed
    // by GET HTTP request.
    return Json("Hello " + name, JsonRequestBehavior.AllowGet);
}
在这种情况下,Json函数只是包装一个字符串,因此字符串会返回到服务器。
GetHelloMessage函数的相对URL是通过连接控制器名称、正斜杠和函数名称获得的:“/hello/gethellomessage”。
项目的HTML/JavaScript客户端位于Index.html文件中。这是客户端代码的HTML部分。
<body>
    <div>Enter name</div>

    <!-- name input -->
    <input id="nameInput" type="text" name="value" style="width:200px" />

    <!-- div to display the text returning from the server -->
    <div id="serverText" style="min-height:50px;color:red;margin-top:10px"></div>

    <!-- button to trigger communication with the server -->
    <button id="getHelloStringButton">Get Server String</button>
</body>
这是JavaScript。
    $(document).ready(function () {
        $("#getHelloStringButton").click(function () { // on button click

            // get name value
            var name = nameInput.value;

            // send query string to the server.
            // /hello/gethellomessag is the relative url
            // second argument is the query string
            // 3rd argument is the function called on successful reply from the server
            $.get("/hello/gethellomessage", "name=" + name, function (returnedMessage) {

                // write the text coming fromt he server into
                // serverText element.
                $("#serverText").text(returnedMessage);
            });
        });
    });
JavaScript代码使用JQuery的$.get函数向相对URL“/hello/gethellomessage”发送GET请求,并调用一个函数将服务器返回的任何内容插入到serverText元素中。查询的结构(它是客户端GET请求的一部分)是“name=<您输入的值>”。查询中的name将映射到控制器函数的name参数,值将成为控制器函数name参数的值,因此服务器端不需要额外的解析。
一般来说,当GET查询有多个参数时,查询应构建为name1=<val1>&name2=<val1>...,服务器端的控制器函数参数应与GET查询中的参数名称相同。在这种情况下,解析将自动发生,参数的值将与查询中的值相同。
从服务器获取复杂对象
在上一个示例中,我们发送了一个字符串到服务器以获取一个字符串。SPAComplexObjectGetter项目响应GET HTTP请求返回一个具有一定结构的JSON对象。要运行该项目,请在Visual Studio中打开它,右键单击解决方案资源管理器中的Index.html文件,然后选择“在浏览器中查看”。点击“Get Cinema Info”按钮后,您将看到以下内容。

与上一个示例不同,SPAComplexObjectGetter项目有一个非空的Models文件夹,其中包含两个类:Cinema和Movie。每个Movie都有一个Title和一个发布年份Year。Cinema有一个Name、Description和一个名为Movies的Movie对象集合。Cinema的默认构造函数创建一个Cinema对象并用一些数据(包括两个Movie对象)填充它。本示例的目的是展示如何通过客户端请求此影院信息,将其从服务器以JSON格式传输,并在客户端显示。
“Controllers”文件夹包含DataController.cs文件,只有一个方法。
public ActionResult GetCinema()
{
    // create a cinema object populated with data
    Cinema cinema = new Cinema();

    // send it in JSON form back to the client
    return Json(cinema, JsonRequestBehavior.AllowGet);
}
调用DataController中的GetCinema方法的相对URL是“/data/getcinema”。
现在让我们看一下Index.html文件中的客户端代码。HTML代码非常简单,由一个div标签用于添加影院信息,以及一个用于触发与服务器进行通信的按钮。
<body>
    <div id="cinemaInfo" style="margin-bottom:20px"></div>

    <Button id="getCinemaInfoButton">Get Cinema Info</Button>
</body>
JavaScript代码更复杂,但与上一个示例的代码一样,它使用JQuery函数$.get向服务器发送GET请求,并处理从服务器返回的任何信息。
$(document).ready(function () {
    $("#getCinemaInfoButton").click(function () { // on button click

        // send query string to the server.
        // /hello/gethellomessag is the relative url
        // second argument an empty string since our query does not have parameters
        // 3rd argument is the function called on successful reply from the server
        $.get("/data/getcinema", "", function (cinema) {

            // clear the info displayed from
            // the previous click (if any).
            $("#cinemaInfo").contents().remove();

            // add cinema information to "cinemaInfo" div element
            $("#cinemaInfo").append("Name: " + cinema.Name);
            $("#cinemaInfo").append("<div></div>");
            $("#cinemaInfo").append("Description: " + cinema.Description);
            $("#cinemaInfo").append("<div style='margin-top:5px'></div>");
            $("#cinemaInfo").append("Movies:");
            $("#cinemaInfo").append("<div></div>");
            // add information about individual movies
            for (var idx = 0; idx < cinema.Movies.length; idx++) {
                var movie = cinema.Movies[idx];

                $("#cinemaInfo").append
                (
                    "    " +
                    "Title: " + movie.Title +
                    ",    " +
                    "year: " + movie.Year
                    );
                $("#cinemaInfo").append("<div></div>");
            }
        });
    });
});
$.get函数的查询部分为空,因为我们的GET请求没有参数。
从服务器返回的对象由变量cinema表示,它是GET请求成功时调用的函数的一个输入变量。在该函数中,我们构造文本并将其追加到“cinemaInfo”div标签。返回的cinema对象具有Name和Description字段,以及一个名为Movies的movie对象数组。每个movie对象都有Title和Year字段。实际上,返回的JSON对象模仿了服务器端的Cinema类型的C#对象。
您可以通过打开浏览器(例如Chrome)并输入到控制器函数GetCinema的URL:“https://:29863/data/getcinema”来查看从服务器返回的JSON对象。您将在浏览器中看到返回的JSON字符串。
将复杂对象POST到服务器
前两个示例中介绍的GET请求将查询构建为URL的一部分,因此GET请求非常适合您想要将一组名称和值发送到服务器的情况。当需要将复杂的JSON对象从客户端传输到服务器时,应使用POST请求。
在此小节中,我们将考虑与上一个示例相同的Cinema模型,只是模型将在客户端创建,发送到服务器进行修改,然后由服务器返回给客户端并在客户端显示。
本小节的示例位于SPA_POSTingObjectToServer解决方案下。
服务器具有相同的模型类:Cinema和Movie,但Cinema的默认构造函数是空的,因为数据来自客户端。DataController的ChangeCinemaData方法通过向电影集合添加另一部电影“Anne of Planet Mars”来更改来自客户端的数据。然后它将修改后的Cinema对象返回给客户端。
为了覆盖服务器失败的情况,我还让服务器请求每隔一次失败。为了标记失败,服务器更改Response的StatusCode并返回“serverError”作为字符串。这是服务器代码。
static bool evenRequest = true;

// url=/data/changecinemadata
public ActionResult ChangeCinemaData(Cinema cinema)
{
    evenRequest = !evenRequest;

    // report error on every even request
    if (evenRequest)
    {
        Response.StatusCode = (int)System.Net.HttpStatusCode.InternalServerError;

        return Json("serverError");
    }

    // add movie "Anne of Planet Mars"
    // to Cinema data coming from the client
    // and return the modified Cinema data
    // back to the client
    cinema.Movies.Add
    (
        new Movie
        {
            Title = "Anne of Planet Mars",
            Year = 3000
        }
    );

    return Json(cinema);
}
请注意,只要对象的结构正确,服务器就会将来自客户端的数据解释为Cinema类型的对象。
客户端代码位于Index.html文件中。HTML包含两个div标签 - 一个用于原始Cinema对象的视觉表示,另一个用于保存从服务器返回的修改后的Cinema对象的视觉表示。在它们之间还有一个按钮用于触发与服务器的通信。服务器回复的视觉表示显示为红色。
<body>
    <!-- Here we place the original cinema data-->
    <div id="originalCinemaInfo" style="margin-bottom:20px"></div>

    <!-- clicking this button sends the cinema object to the server
         and places the result returning from the server under
         serverCinemaInfo tag -->
    <Button id="changeCinemaInfoFromServerButton">Change Cinema Info via Server</Button>

    <div style="color:blue;margin-top:20px">Reply from the Server:</div>

    <!-- here we create a visual representation for Cinema object
         coming from the server -->
    <div id="serverCinemaInfo" style="margin-bottom:20px;color:Red">

    </div>
</body>
这是JavaScript代码。
$(document).ready(function () {
    // we create a Cinema object on the client
    var cinema = {
        Name: "Mohawk Mall Cinema",
        Description: "An OK Cinema",

        Movies: [
            {
                Title: "Anne of Green Gables",
                Year: 1985
            },
            {
                Title: "Anne of Avonlea",
                Year: 1987
            }
        ]
    };

    // display the visual representation of the original
    // cinema object
    displayCinemaInfo($("#originalCinemaInfo"), cinema);

    var cinemaJsonString = JSON.stringify(cinema);

    $("#changeCinemaInfoButton").click(function () {
        $.ajax({
            type: "POST",
            dataType: "json",
            contentType: "application/json; charset=utf-8;",
            url: "/data/changecinemadata",
            data: cinemaJsonString,
            success: function (changedCinemaFromServer) {

                // display the visual representation of the server modified
                // cinema object
                displayCinemaInfo($("#serverCinemaInfo"), changedCinemaFromServer);
            },
            error: function (resultFromServer) {

                // clear the previous contet of serverCinemaInfo element
                $("#serverCinemaInfo").contents().remove();

                // display the error message
                $("#serverCinemaInfo").append("Server Error");
            }
        });
    });
});
我们使用通用的$.ajax方法向服务器发送POST请求。该方法还允许我们指定在服务器错误时要调用的函数以及请求的内容类型。
我们在消息正文中发送的数据是我们的Cinema JSON对象,通过JSON.stringify函数转换为字符串。一些旧的浏览器仍然不支持此函数,因此,添加了对json2.min.js文件的引用。此文件来自json2包的NuGet安装。
这是SPA在收到服务器成功回复后的样子。

以及在失败情况下的样子。

摘要
本文讨论了单页应用程序(SPA)。我们定义了SPA并提供了大量的SPA示例。文章中的所有信息和功能都是我在刚开始构建SPA的几个月前希望知道和拥有的。
本文介绍了一个名为BPF(Browser Presentation Foundation)的新JavaScript库。该库用于两个目的:
- 导航 - 使您可以使用浏览器URL和导航按钮来导航您的SPA。
- 组合 - 展示了如何使用BPF库在客户端将SPA从不同的HTML页面组合起来。
在文章的最后,我谈到了SPA应用程序如何与服务器通信。