
使用 VS for Mac 创建 MVC Core Web 应用程序
5.00/5 (1投票)
.NET Core 使用 Entity Framework
引言
本文将介绍为 Mac 用户创建 MVC Core Web 应用程序的步骤。请确保安装 Visual Studio for Mac。
最重要的先决条件之一是 .NET Core。安装 Visual Studio for Mac 时会自动安装它。
我将涵盖以下主题
背景
在阅读本文之前,您需要了解 MVC 架构。以下是来自 Microsoft 网站的建议参考 (MVC 教程)。
Using the Code
1. 创建新的 MVC Core Web 应用程序
我使用了 Visual Studio 2019 for Mac 版本 8.3.6 和 .NET Core 3.0。
在 Visual Studio 中,点击新建
选择Web 应用程序 (Model-View-Controller)。然后点击下一步。

选择目标框架 .NET Core 3.0 或更高版本。然后点击下一步。

命名您的解决方案。然后点击创建。

2. 安装 Nuget 包
要为您的解决方案添加 EF Core 支持,您需要安装数据库提供程序。
对于我们的解决方案,我们需要以下 Nuget 包
   Microsoft.EntityFrameworkCore.Design
   Microsoft.EntityFrameworkCore.Sqlite
   Microsoft.EntityFrameworkCore.SqlServer
如何安装上述包?
在主菜单中,点击项目 > 管理 Nuget 包。

搜索目标包,然后点击安装,并确保选择版本 3.0 (以匹配 .NET Core 版本)。

对剩余的包重复这两个步骤。
3. 创建 EF 数据模型
EF (Entity Framework) Core 可以作为对象关系映射器 (ORM),使您能够将数据库作为 .NET 对象进行处理。
在此步骤中,我们将为每个表创建一个模型类。
我们将为每个表添加一个类。对于测试解决方案,我们将添加两个表。右键单击Models文件夹,然后选择添加 -> 新类。

表 #1:Hospitals
第一个类代表 `Hospitals` 表。
您可以通过将列命名为 `hospitalid` 或 `id` 来定义主键。它将被设置为主键。
- `[Stringlength(100)]` 属性:可以应用于实体类的 `string` 属性,用于指定字符串属性允许的最大字符数。
- `[Required]` 属性:可以应用于实体类中的一个或多个属性。EF 将为应用了 `required` 属性的属性在数据库表中创建一个 `not null` 列。
Using System;
Using System.ComponentModel.DataAnnotations;

Namespace CRUD.Models
{
    Public Class Hospitals
    {
        Public Int Hospitalid { Get; Set; }
        [Stringlength(100)]
        [Display(name = "Hospital Name")]
        Public String Hospitalname { Get; Set; }
        [Required]
        [Stringlength(100)]
        [Display(name = "Decision Maker")]
        Public String Decisionmaker { Get; Set; }
        [Required]
        [Stringlength(100)]
        [Display(name = "Email")]
        Public String Email { Get; Set; }
        [Required]
        [Stringlength(100)]
        [Display(name = "Phone")]
        Public String Phone { Get; Set; }
    }
}
表 #2:Hospitaldetails
第二个类代表 `Hospitaldetails` 表。
我们通过在 `hospitaldetails` 类中添加 (hospitalid) 列作为外键,定义了 `hospitals` 和 `hospitaldetails` 表之间的一对多关系。
`Hospitals`:是导航属性,它定义在主实体和/或从属实体上,引用相关实体。
要了解有关导航属性和 EF 关系的更多信息,请遵循本教程。
Using System;
Using System.ComponentModel.DataAnnotations;

Namespace CRUD.Models
{
    Public Class Hospitaldetails
    {
       Public Int Hospitaldetailsid { Get; Set; }
       Public Int Hospitalid { Get; Set; }
       Public Hospitals Hospitals { Get; Set; }

        Public Int Available { Get; Set; }
        Public Int Unavailable { Get; Set; }
    }
}
添加数据库上下文类
右键单击解决方案名称并创建新文件夹。命名为 `Data`。
右键单击Data文件夹并添加两个类 (CRUDContext.cs & `Dbinitialize`)。

CRUDContext.cs
命名 `Context` 类的公式是 ("解决方案名称" 后跟 "Context")。
Using System;
Using Microsoft.EntityFrameworkCore;
Using CRUD.Models;

Namespace CRUD.Data
{
    Public Class Crudcontext : Dbcontext
    {
        Public Crudcontext(dbcontextoptions<crudcontext> Options)
           : Base(options)
        {
        }

        Public Dbset<hospitaldetails> Hospitaldetails { Get; Set; }
        Public Dbset<hospitals> Hospitals { Get; Set; }

        Protected Override Void Onmodelcreating(modelbuilder Modelbuilder)
        {
            modelBuilder.Entity<Hospitals>().ToTable("Hospitals");

            modelBuilder.Entity<HospitalDetails>().ToTable("HospitalDetails");
        }
    }
}
添加连接字符串
打开 `appsettings.json` 文件并进行如下修改 (在代码中,对文件的修改以粗体显示)。
- 从连接字符串中添加名称。
- 添加数据库名称,在本解决方案中为 `CRUD.db`。
{
  "Logging": {
    "Loglevel": {
      "Default": "Information",
      "Microsoft": "Warning",
      "Microsoft.Hosting.Lifetime": "Information"
    }
  },
  "Allowedhosts": "*",
  "Connectionstrings": {
    "Crudcontext": "Data Source=CRUD.db"
  }
}
4. 初始化数据
Dbinitialize.cs
我通过创建一个类并定义 `Hospitals` 表的新对象来初始化表,其中包含演示数据。
Using System;
Using CRUD.Models;

Namespace CRUD.Data
{
    Public Class Dbinitializer
    {
        Public Dbinitializer()
        {
        }

        Public Static Void Initialize(crudcontext Context)
        {
         Var Hospitals = New Hospitals[]
          {
            New Hospitals{ Hospitalid=12, Hospitalname="hospital A" ,
            Decisionmaker="dr Saad ",
                Email="hospitala@moh.sa", Password="123456",
                Phone=" ",  Services="service 1"},
            New Hospitals{ Hospitalid=11, Hospitalname="hospital B" ,
            Decisionmaker="dr Mohammad ",
                Email="hospitalb@moh.sa", Password="123456",
                Phone=" ",  Services="service 2" }
          };
           Foreach (Hospitals H in Hospitals)
           {
               context.Hospitals.Add(h);
           }
           context.SaveChanges();
        }
    }
}
5. 迁移
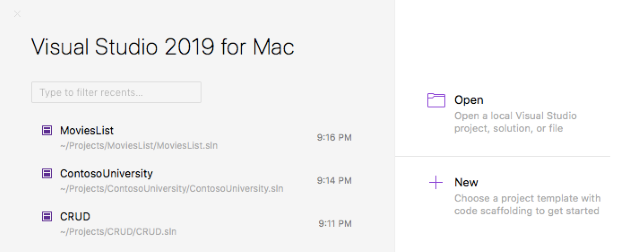
我的项目位于 (Users > Projects > Myproject,名为 `CRUD`)。
我使用终端按如下方式应用迁移。
在终端窗口中,我输入了以下 `cmd` 命令来进入正确的路径。
- cd projects,然后按回车
- cd solution name,然后按回车
- cd src,然后按回车
- cd ls,然后按回车
- cd solution name,然后按回车
- cd ls,然后按回车

之后,您现在可以输入迁移命令,该命令是
Dotnet EF Migrations Add Initialcreate
您可以更改迁移的名称。
您会注意到创建了一个属于解决方案的新文件夹,名为 `Migrations`,以及一个名为 `crud.db` 的数据库文件。

Migrations 文件夹包含一个名为 `20200412210335_initialCreate.cs` 的类,该类是自动生成的。
6. 添加控制器
HospitalsController.cs:
处理将应用于 `hospitals` 模型的所有方法。
右键单击Controller文件夹 > 添加新类。
- 使用 `CRUD.Models` 命名空间:允许使用 `Hospitals` 模型类
- 使用 `CRUD.Data` 命名空间:允许使用 `Crudcontext` 类
- `Index()` 操作:返回索引视图
- `Create()` 操作:返回创建视图
- `Createhospital` 操作:检索用户输入的数据并创建新的医院
- `Update()` 操作:返回更新视图
- `Updatehospital` 操作:检索用户输入的数据并对选定的医院应用修改
Using System;
Using System.Linq;
Using Microsoft.AspNetCore.Mvc;
Using CRUD.Data;
Using CRUD.Models;

Namespace CRUD.Controllers
{
    Public Class Hospitalscontroller : Controller
    {
        Private Readonly Crudcontext _Context;
        Public Hospitalscontroller(crudcontext Context)
        {
            _Context = Context;
        }
        // GET: /<Controller>/
        Public Iactionresult Index()
        {
            Var Hospitalslist = _context.Hospitals.ToList();
            Return View(hospitalslist);
        }

        Public Actionresult Create()
        {
            Return View();
        }

        [Httppost]
        Public Actionresult Createhospital(hospitals Hospitals)
        {
            _context.Hospitals.Add(hospitals);
            _context.SaveChanges();
            Return Redirecttoaction("index", "Hospitals");
        }

        Public Actionresult Update(int id)
        {
            Return View(_context.Hospitals.Where(s => s.HospitalsID == id).First());
        }
        [Httppost]
        Public Actionresult Updatehospital(hospitals Hospital)
        {
            Hospitals D = _context.Hospitals.Where
                          (s => s.HospitalsID == hospital.HospitalsID).First();
            d.HospitalName = hospital.HospitalName;
            d.DecisionMaker = hospital.DecisionMaker;
            d.Email = hospital.Email;
            d.Phone = hospital.Phone;
            d.Password = hospital.Password;
            d.Services = hospital.Services;
            _context.SaveChanges();
            Return Redirecttoaction("index", "Hospitals");
        }
    }
}
7. 添加视图
右键单击 View 文件夹并添加新文件夹。命名为 `Hospitals`。

右键单击 `Hospitals` 文件夹 > 添加新项 > MVC 视图页。
为 `Hospitalscontroller` 类中的每个操作添加三个 MVC 视图页。
- `Index`:显示 Hospitals 数据
- `Create`:创建新的 Hospital
- `Update`:修改现有 Hospital 的数据
index.cshtml
@Model IEnumerable<CRUD.Models.Hospitals>

<Section >
        <Div >
            <H3 >Manage Hospital</h3>
        </Div>

        <Div >
            <Table Id="example1" >
            <Thead>
            <Tr>
                <Th>hospitalsid</th>
                <Th>hospitalname</th>
                <Th>decisionmaker</th>
                <Th>email</th>
                <Th>phone</th>
                <Th>password</th>
                <Th>services</th>
            </Tr>
            </Thead>
            <Tbody>
                @Foreach (Var Item in Model)
                {
                    <Tr>
                    <td>@Html.DisplayFor
                    (modelItem => item.HospitalsID)</td>
                    <td>@Html.DisplayFor
                    (modelItem => item.HospitalName)</td>
                    <td>@Html.DisplayFor
                    (modelItem => item.DecisionMaker)</td>
                    <td>@Html.DisplayFor
                    (modelItem => item.Email)</td>
                    <td>@Html.DisplayFor
                    (modelItem => item.Phone)</td>
                    <td>@Html.DisplayFor
                    (modelItem => item.Password)</td>
                          <td>@Html.DisplayFor
                          (modelItem => item.Services)</td>
                    <Td><a href="Hospitals/Update/@item.HospitalsID">Update
                    </a></td>
                    </Tr>
                }
            </Table>
        </Div>
</Section>
Create.cshtml:
@model CRUD.Models.Hospitals

<Section >
    <Form  Method="post" Action="createhospital">
        <Div >
            <Label For="hospitalname" >Hospitalname</label>
            <Input Type="text"
            Name="hospitalname" Placeholder="hospitalname">
        <Div >
            <Label For="decisionmaker" >Decisionmaker</label>
            <Input Type="text"
            Name="decisionmaker" Placeholder="decisionmaker">
        </Div>
               <Div ">
            <Label For="email" >Email</label>
            <Input Type="email"
            Name="email" Placeholder="email">
        </Div>
                <Div >
            <Label For="phone" >Phone</label>

            <Input Type="text" Class="form-Control"
            Name="phone" Placeholder="phone">
        </Div>
        <Div >
            <Label For="password"
            Class="col-Sm-2 Control-Label">password</label>
            <Input Type="password" Class="form-Control"
            Name="password" Placeholder="password">
        </Div>
        <Div >
            <Label For="services" >Services</label>
            <Input Type="text"
            Name="services" Placeholder="services">
        </Div>
        </Div>
        <Div >
        <Button Type="submit" ">Cancel</button>
        <Button Type="submit" ">Create</button>
        </Div>
    </Form>
    </Div>
</Section>
update.cshtml:
@Model CRUD.Models.Hospitals;

<Section >
    <Div >
    <Form  Method="post" Action="/hospitals/updatehospital">
        <Div >
            <Label For="hospitalname" >Hospitalname</label>
            <Input Type="text"
            Name="hospitalname" value="@Model.HospitalName">
        </Div>
        <Div >
            <Label For="decisionmaker" >Decisionmaker</label>
            <Input Type="text" Name="decisionmaker"
            Placeholder="decisionmaker" value="@Model.DecisionMaker">
        </Div>
              <Div >
            <Label For="email" Class="col-Sm-2 Control-Label">email</label>
            <Input Type="email"  Name="email"
            Placeholder="email" value="@Model.Email">
        </Div>
        <Div >
            <Label For="phone" >Phone</label>
            <Input Type="text"  Name="phone"
            Placeholder="phone" value="@Model.Phone">
        </Div>
             <Div >
            <Label For="password" Class="col-Sm-2 Control-Label">password</label>
            <Input Type="password"  Name="password"
            Placeholder="password" value="@Model.Password">
        </Div>
        <Div >
            <Label For="services" Class="col-Sm-2 Control-Label">services</label>
            <Input Type="text"  Name="services"
            Placeholder="services" value="@Model.Services">
        </Div>
        <Input Type="hidden" Name="hospitalsid" value="@Model.HospitalsID"/>
        </Div>
        <Div >
        <Button Type="submit" >Cancel</button>
        <Button Type="submit" >Update</button>
        </Div>
    </Form>
    </Div>
</Section>
参考文献
历史
- 2020 年 5 月 16 日:初始版本