
显示源文件名中引用的图片的 C# Visual Studio 插件
5.00/5 (2投票s)
C# 实现和使用 Visual Studio 插件来显示源文件名中引用的图片
介绍与动机
程序员的一个由来已久的愿望是能够在代码中插入图片,而不是使用繁琐的ASCII“图表”来解释代码的功能。这个愿望可以通过Visual Studio Add-In(一个扩展集成开发环境(IDE)功能的动态链接库(DLL))间接实现。在Visual Studio中构建后,插件会在IDE的工具菜单中有一个条目,并且在被选中时像工具菜单中的其他条目一样运行。
为了说明即将实现的插件的实用性,考虑一个典型的编程面试问题,例如“给定一个32位十六进制数,编写代码来反转它。”例如,给定数字0x1234BCDA,结果应该是0xADCB4321。
这个问题可以通过熟悉的交换操作来解决。解决方案实现的步骤,用文字描述如下:
- 交换数字的16位半部分,
- 在每个半部分中,交换高8位和低8位,以及
- 在每个8位四分之一部分中,交换高4位和低4位。
所有交换都可以通过位运算和适当的掩码以及逻辑移位来执行。问题很简单,一个实现该解决方案的完整程序可以编写如下:
// C:\Documents\C#\HexNumbers\Program.cs
//
// Solution to a typical interview question:
//
// Given an unsigned 32-bit integer such as 0x010A1234, write code to reverse it:
// 0x4321A010.
//
// Programmer:  Jorge L. Orejel
//
// Last update: 07/23/2020

using System;

namespace HexNumbers
{
   class Program
   {
      static void Main( string[] args )
      {
         UInt32 number1 = (UInt32)0x010A1234,
                number2 = (UInt32)0x10010055;

         ReverseHexNumber( number1 );
         ReverseHexNumber( number2 );

         Console.WriteLine();
      }// Main

      static void ReverseHexNumber( UInt32 number )
      {
         UInt32 upper16bitMask = (UInt32)0xFFFF0000,
                lower16bitMask = (UInt32)0x0000FFFF,

                 upper8bitMask = (UInt32)0xFF00FF00,
                 lower8bitMask = (UInt32)0X00FF00FF,

                 upper4bitMask = (UInt32)0xF0F0F0F0,
                 lower4bitMask = (UInt32)0x0F0F0F0F;

         Console.WriteLine( "\nReverseHexNumber: " );
         Console.WriteLine( "\n   Original number: 0x{0,8}",
                            number.ToString( "X" ).PadLeft( 8, '0' ) );

         // Swap 16-bit halves (16-bit masks.JPG)

         UInt32 swappedBits =   ( ( number & upper16bitMask ) >> 16 )
                              | ( ( number & lower16bitMask ) << 16 );

         Console.WriteLine( "Apply 16-bit masks: 0x{0,8}",
                            swappedBits.ToString( "X" ).PadLeft( 8, '0' ) );

         // Swap 8-bit quarters (8-bit masks.JPG)

         swappedBits =   ( ( swappedBits & upper8bitMask ) >> 8 )
                       | ( ( swappedBits & lower8bitMask ) << 8 );

         Console.WriteLine( " Apply 8-bit masks: 0x{0,8}",
                            swappedBits.ToString( "X" ).PadLeft( 8, '0' ) );

         // Swap 4-bit eighths (4-bit masks.JPG)

         swappedBits =   ( ( swappedBits & upper4bitMask ) >> 4 )
                       | ( ( swappedBits & lower4bitMask ) << 4 );

         Console.WriteLine( " Apply 4-bit masks: 0x{0,8}  <-- reversed number",
                            swappedBits.ToString( "X" ).PadLeft( 8, '0' ) );
      }// ReverseHexNumber
   }// Program (class)
}// HexNumbers (namespace)
程序执行后的输出是
反转十六进制数:
Original number: 0x010A1234
Apply 16-bit masks: 0x1234010A
 Apply 8-bit masks: 0x34120A01
 Apply 4-bit masks: 0x4321A010  <-- reversed number
反转十六进制数:
Original number: 0x10010055
Apply 16-bit masks: 0x00551001
 Apply 8-bit masks: 0x55000110
 Apply 4-bit masks: 0x55001001  <-- reversed number
按任意键继续 . . .
请注意,在关于交换32位十六进制数的注释中,提到了.JPG文件,即(16位masks.JPG)、(8位masks.JPG)和(4位masks.JPG)。括号并非必要,仅用于帮助选择图名。
现在假设程序员高亮显示其中一个.JPG文件的名称,例如16位masks.JPG,然后选择Visual Studio的“工具”菜单,在该菜单中点击一个名为DisplayFigure的插件条目,其左侧图标是一个黄色的笑脸。如果插件能在适当的位置找到该文件,一个图(JPG图片)将显示在Visual Studio IDE的源代码编辑器窗口顶部,说明所用掩码的目的,如下图所示:

该图说明了代码正在实现的功能:红色半部分用于屏蔽相应的位,而32位十六进制数的绿色半部分被交换。对于8位和4位掩码的图引用也会发生类似的行为。因此,这部分满足了程序员在代码中拥有不繁琐的ASCII“插图”的愿望。
在讨论了插件的实现之后,将会很明显,图像引用不仅彼此独立,而且可以同时显示。
Visual Studio显示图片插件的实现
Visual Studio 插件可以手动实现,但这个过程容易出错。最好的方法是使用插件向导,它是 Visual Studio 的一部分。要做到这一点,启动 Visual Studio 并选择 文件->新建->项目。在“新建项目”窗口中,在“其他项目类型”下选择“扩展性”,保持选中中间面板中的“Visual Studio Add-in”选项。键入 DisplayFigure 作为插件名称,并确保位置是 Visual Studio 目录中的 Addins 目录。取消选中标有 为解决方案创建目录 的框,然后单击 确定。所有这些步骤都如下图所示:

下一个窗口显示了多个单选按钮,其中“使用 Visual C# 创建插件”已被选中。点击下一步。然后出现选择应用程序主机窗口。取消选中“Microsoft Visual Studio xxxx Macros”旁边的框,然后点击下一步。(xxxx代表您的Visual Studio版本。)

下一个窗口标题是“输入名称和描述”。键入 DisplayFigure 作为插件名称,并根据您的喜好键入描述。然后点击 Next。

在下一个窗口“选择插件选项”中,选中标有“是,创建‘工具’菜单项”和“我希望我的插件在主机应用程序启动时加载”的复选框,然后点击下一步。

接下来会显示一个名为“选择‘帮助关于’信息”的窗口。除非您有提供插件帮助的方式,否则请保持复选框未选中,然后点击“下一步”。最后的“摘要”窗口应如下图所示:

当您点击 完成 后,插件向导将为插件生成一个代码骨架。这个过程可能需要一些时间。代码生成完成后,Visual Studio 编辑器窗口将显示插件的 C# 源代码。当您看到 Connect.cs 中的代码时,点击 IDE 中的 构建 菜单,然后点击 构建解决方案。
构建成功结束后,点击“工具”菜单,然后点击“Add-in Manager”,这将打开一个列出可用插件的窗口。除非您或其他人之前在您的计算机上创建过插件,否则“Add-in Manager”窗口将如下图所示:

选中标签 DisplayFigure 左侧的复选框,然后点击 OK。窗口关闭后,关闭解决方案并退出 Visual Studio。再次运行 Visual Studio 并重新打开解决方案 DisplayFigure。如果您像以前一样进入 Add-in Manager 窗口,您会看到 DisplayFigure 和 Startup 两个框都被选中,这意味着插件已随 Visual Studio 加载并且处于活动状态(即已准备好运行),尽管此时它什么也不做。
编辑器窗口中显示的 Connect.cs 文件中定义了几个函数。其中,您将关注的只有文件开头的构造函数 Connect 和文件末尾的函数 Exec。
构造函数 Connect 是放置任何初始化代码的地方。对于显示图片的插件,不需要任何初始化。但是,文件开头必须添加一些 using 语句。在解决方案资源管理器中,右键单击 引用,然后单击 添加引用。在出现的窗口中,选择 .NET 选项卡,向下滚动找到 System.Drawing 条目并单击它。再次右键单击 引用,并执行相同的操作以添加对 System.Windows.Forms 的引用。第一个引用用于处理图像文件(如 BMP 和 JPG),第二个引用是必需的,因为稍后会向解决方案添加一个用于显示图片的 Windows 窗体。解决方案资源管理器面板应包含以下内容:

添加引用后,在 Connect.cs 文件开头添加相应的 using 语句,如下所示:
using System;
using Extensibility;
using EnvDTE;
using EnvDTE80;
using Microsoft.VisualStudio.CommandBars;
using System.Resources;
using System.Reflection;
using System.Globalization;

using System.ComponentModel; // For object-sharing among applications.
using System.Drawing;        // For images.
using System.IO;             // For file I/O.
using System.Windows.Forms;  // For Windows forms.

using System.Threading;      // For thread creation and execution.

namespace DisplayFigure
{
   /// <summary>Add-in to display BMP or JPG images referenced in
   ///          source-code files.
   /// </summary>
   /// <seealso class='IDTExtensibility2' />
   public class Connect : IDTExtensibility2, IDTCommandTarget
   {
      /// <summary>Implements the constructor for the Add-in object.
      ///          Place your initialization code within this method.
      /// </summary>
      public Connect()
      {
      }
像之前一样,点击 Build,然后点击 Build Solution。构建结束时,在“错误列表”选项卡中出现以下错误。

错误的原因是 DisplayFigure 插件已加载并准备运行,因此在此条件下无法删除 DLL。所以,在进一步操作之前,每次修改和重新构建活动插件的代码时,都必须执行以下步骤。该步骤是原始开发插件中的一条注释。
// NOTE: If there is a need to make changes and re-build, the add-in must be stopped
//       with the Visual Studio Add-in Manager:
//
//          Tools->Add-in Manager
//
//       1. Uncheck the checkbox next to the DisplayFigure add-in name, and under the
//             Startup option.
//
//       2. Exit the Visual Studio IDE and run it again.
//
//       3. Verify that the check boxes remain unchecked.
//
//       4. Make the changes and re-build the add-in.
//
//       5. Check the boxes that were unchecked and exit the Visual Studio IDE.
//
//       6. Run Visual Studio again and verify that the boxes are checked.
下一步,也是最后一步,是编写执行插件实际工作的代码。这些代码必须放在函数 Connect.Exec 中,目前它的样子如下(其后是类的两个 private 数据成员)。
/// <summary>Implements the Exec method of the IDTCommandTarget interface.
///          This is called when the command is invoked.
/// </summary>
/// <param term='commandName'>The name of the command to execute.</param>
/// <param term='executeOption'>Describes how the command should be run.</param>
/// <param term='varIn'>Parameters passed from the caller to the command handler.</param>
/// <param term='varOut'>Parameters passed from the command handler to the caller.</param>
/// <param term='handled'>Informs the caller if the command was handled or not.</param>
/// <seealso class='Exec' />
public void Exec( string commandName, vsCommandExecOption executeOption,
                  ref object varIn, ref object varOut, ref bool handled )
{
    handled = false;
    if(executeOption == vsCommandExecOption.vsCommandExecOptionDoDefault)
    {
        if( commandName == "DisplayFigure.Connect.DisplayFigure" )
        {
           handled = true;
           return;
        }
    }
}
private DTE2 _applicationObject;
private AddIn _addInInstance;
函数 Connect.Exec 的作用描述起来相当简单。当程序员高亮显示源代码中引用的图片名称(在 Visual Studio 代码编辑器中显示),点击 工具,然后点击菜单中的 DisplayFigure 条目时,插件必须 (1) 打开一个适合显示图片的 Windows 窗体,读取图片(例如,从 .BMP 或 .JPG 文件),并将其加载到窗体中。
首先,将一个 Windows 窗体作为新项添加到插件的解决方案中。右键单击 DisplayFigure 解决方案名称,然后选择 添加->新项。在出现的窗口中,在中间面板中选择 Windows 窗体,将其命名为 LoadImage.cs,然后点击 添加。

Visual Studio 将显示一个名为 LoadImage 的空 Windows 窗体。将鼠标悬停在 Visual Studio 窗口左边缘的工具箱选项卡上,然后双击 PictureBox 条目。一个图片框将出现在 Windows 窗体活动区域的左上角。定位并调整图片框的大小,使窗体和图片框看起来如下图所示。(保持图片框的名称为 pictureBox1。)
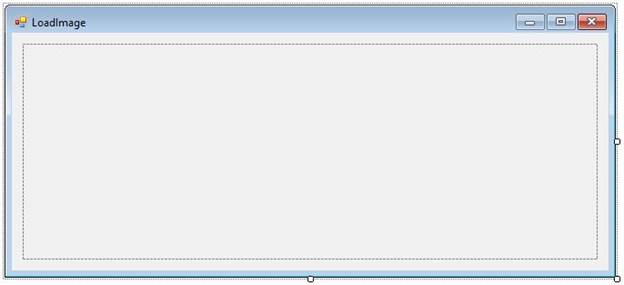
LoadImage 窗体大小为 (672, 300),pictureBox1 的大小为 (632, 237)。将 pictureBox1 的 SizeMode 属性设置为 Zoom。这将强制图像在大于图片框区域时缩小。目前,LoadImage 窗体的代码不会改变。
点击代码编辑器中的 Connect.cs 选项卡,并向下滚动到 Exec 函数的定义处。在语句 handled = true 之前,键入函数调用 DoDisplay()。然后,在类的两个 private 数据成员声明之后,从下载的代码中复制以下 DoDisplay 和 ChildThread 函数定义。
      private void DoDisplay()
      {
         Document doc = _applicationObject.ActiveDocument;

         if ( doc != null )
         {
            var selection = (TextSelection)doc.Selection;

            if ( selection != null )
            {
               string text = selection.Text;

               if ( !String.IsNullOrEmpty( text ) )
               {
                  string docPath = doc.Path; // Path to the document open in Visual Studio

                  System.Threading.Thread thread
                     = new System.Threading.Thread( () => ChildThread( docPath, text ) );

                  thread.Start();
               }
               else MessageBox.Show( "Null or empty selection" );
            }
            else MessageBox.Show( "Nothing selected in document" );
         }
         else MessageBox.Show( "No active document" );
      }// DoDisplay

      private void ChildThread( string filePath, string fileName )
      {
         LoadImage imageLoad = new LoadImage( filePath, fileName );

         imageLoad.ImageToPictureBox();
      }// ChildThread
函数 DoDisplay 获取当前在 Visual Studio 中打开的文档引用以及文档中选定(高亮显示)文本的引用。如果选中了某些文本(希望是图名),该函数会获取文档路径的引用,并启动一个执行 ChildThread 函数的线程,该线程接收路径和图名作为参数。ChildThread 函数创建一个 LoadImage Windows 窗体实例,并调用其 public 函数 ImageToPictureBox。使用线程的原因是,源代码文件中引用的多个图可以同时显示,每个图由一个单独的线程显示。
现在点击 LoadImage.cs [设计] 选项卡。点击 pictureBox1 外部和 LoadImage 区域内部。然后,右键点击并选择“查看代码”。Visual Studio 将显示一个名为 LoadImage.cs 的选项卡。将 LoadImage 类的整个主体更改为以下内容:
      private string filePath;
      private string fileName;

      /// <summary>
      /// Create an instance of the LoadImage Windows form.
      /// </summary>
      /// <param name="_filePath"> Path to the document opened in Visual Studio.
      /// </param>
      /// <param name="_fileName"> Name of a file (figure) selected in the document.
      /// </param>
      public LoadImage( string _filePath, string _fileName )
      {
         InitializeComponent();

         filePath = _filePath;
         fileName = _fileName;
      }// LoadImage

      /// <summary>
      /// Set the Image property of pictureBox1 to a BMP or JPG image read from a file.
      /// </summary>
      public void ImageToPictureBox()
      {
         string subDir = String.Empty;

         if ( fileName.EndsWith( ".bmp", StringComparison.InvariantCultureIgnoreCase ) )
         {
            subDir = @"_BMP\";
         }
         else if ( fileName.EndsWith( ".jpg", StringComparison.InvariantCultureIgnoreCase ) )
         {
            subDir = @"_JPG\";
         }
         string fullName = filePath + subDir + fileName;

         if ( File.Exists( fullName ) )
         {
            Text = fullName;
            Image image = Image.FromFile( fullName );
            pictureBox1.Image = image;
            this.ShowDialog();
         }
         else
         {
            MessageBox.Show( String.Format( "The file '{0}' does not exist", fullName ) );
         }
      }// ImageToPictureBox
如所写,函数 LoadImage.ImageToPictureBox 只处理 .BMP 或 .JPG 文件。对于 .BMP 文件,函数假定它们位于 Visual Studio 中打开的解决方案的 _BMP 子目录中,而 .JPG 文件则假定位于 _JPG 子目录中。下图显示了处理十六进制数反转的解决方案的目录结构。

_JPG 子目录包含 4 位 masks.JPG、8 位 masks.JPG 和 16 位掩码文件,这些文件在实现反转的程序中被引用。
为了验证一切是否按预期工作,保存 Visual Studio 编辑器中所有打开的文件,选择 工具->Add-in Manager,取消选中所有已勾选的框,点击 OK 关闭 Add-in Manager,然后退出 Visual Studio。重新启动 Visual Studio,加载 DisplayImage 解决方案,并选择 构建->构建解决方案。如果构建成功(应该如此),再次打开 Add-in Manager,选中 DisplayImage 和 Startup 复选框,点击 OK,然后再次退出 Visual Studio。
重新启动 Visual Studio 并打开 HexNumbers 解决方案,该解决方案应该有一个 _JPG 子目录。然后在代码编辑器中,高亮显示 16 位 masks.JPG 图像名称,并选择 工具->DisplayImage。对应 16 位掩码的图片应该出现在代码上方。对其余两个图像名称执行相同的操作。您必须移动每个打开的图片,以便在选择另一个名称时它不会被 Visual Studio 窗口遮挡。在代码上方以级联方式显示时,HexNumbers 程序中引用的三张图片将如下图所示:

这些图形可以移动和在一定程度上调整大小。
Using the Code
通常情况下,人们会下载一个包含一些代码的 .ZIP 文件,解压,构建并开始使用。对于插件,这种方式行不通。插件必须使用 Visual Studio 插件向导从头开始构建。一旦向导构建了插件的骨架,下载的源代码就可以复制并粘贴到适当的位置。Windows 窗体的创建也同样适用。
结论
本文介绍了 C# Visual Studio 插件的实现和使用,该插件允许程序员显示图片,以文档化代码片段的功能。如前所述,该插件只是部分满足了许多程序员希望在代码中包含图片的愿望,因为图片是显示在代码上方的。然而,显示图片的能力远优于在代码中创建繁琐的 ASCII“图表”的耗时任务。本文通过一个简单的 C# 程序演示了该插件的使用,但该插件可用于 Visual Studio 支持的任何语言编写的源代码。
历史
- 2020年7月27日:初始版本