
使用 Blazor 构建人脸识别应用程序
5.00/5 (7投票s)
如何使用 Blazor 和 Azure Cognitive Services 构建人脸识别应用程序

引言
Azure 人脸 API 是云端功能强大的人脸识别服务。在本文中,我们将学习如何与该库交互,并构建一个利用人脸 API 功能的 Blazor 应用程序。
您可以在下一个 Blazor 应用程序中使用这些强大的图像识别和机器学习技术。
我们将探索人脸 API 的不同部分,在此项目中,我们将重点关注人脸检测。我们将构建一个可以检测人脸并返回一些实用属性的应用程序。
Azure 认知服务入门
人脸 API 是 Azure 认知服务的一部分,您可以创建一个帐户并在免费层级试用。
认知服务工具涵盖了广泛的 AI 服务,而人脸 API 只是其中一小部分。但它带来了易于开发人员学习的 AI 服务,无需机器学习专业知识。
如果您还没有 Azure 免费帐户,请在此处创建一个。
创建 Azure 人脸 API 帐户
在 Azure 门户中,单击“创建资源”。

在“创建资源”对话框中,只需输入“人脸”一词

这将显示人脸 API。

创建 API 时,您需要输入一些字段

以下是创建服务所需的信息
- 订阅:您将使用的订阅计划
- 资源组:要使用的资源组(我创建了一个新的)
- 区域:您的应用程序将托管在全球哪个地区
- 名称:您将为应用程序命名。这将创建一个带有此名称的子域。
- 定价层:选择免费(每分钟 20 次调用,每月 3 万次调用)或标准(每秒 10 次调用)
请注意,如果在美国,警察部门目前使用此服务是不合法的。
填写所有字段后,单击“审查并创建”。
您的人脸 API 现已准备就绪。
连接到 API
您可以连接到此 API 并立即向其发送 POST 或 GET 命令。您可以使用 CURL 或任何您通常用于此目的的工具。在此示例中,我将使用 Postman,您可以免费使用它来测试您的 API 或 API 服务。
要连接到此 API,您需要以下信息
- 您的认知服务终结点 URL
- 您的 API 密钥
- 您希望返回的属性
您可以通过选择您的人脸 API 服务,然后从左侧菜单中选择“密钥和终结点”来获取此信息

我们将复制此信息以在 Postman 中构建我们的请求。
在 Postman 中创建一个新的 POST 请求。使用您的终结点 URL。它应该看起来像这样
https://[Your Service Name].cognitiveservices.azure.com/
然后,我们将在其末尾添加以下内容以访问人脸 API
face/v1.0/detect?

然后,我们可以添加 我们想要的属性 并将它们放入名为 returnFaceAttributes 的键中。

接下来,我们将选择标头。然后添加我们上面检索到的 API 密钥,并将其放入名为 Ocp-Apim-Subscription-Key 的键中

接下来,在正文中,选择“raw”,然后选择“JSON”作为数据类型。创建一个包含 URL 参数的对象,该参数包含您要分析的图像的 URL。
{
    url: "[URL to Image]"
}

当您单击发送时,您将获得一个包含 faceId 和一组属性的 JSON 响应

现在,我们已成功连接到人脸 API。让我们构建一个 Blazor 应用程序来实现这一点!
如果您想了解更多关于 Azure 人脸 API 的信息,Pluralsight 有一门很棒的课程您可以查看,Microsoft Azure 认知服务:人脸 API。
创建新的 Blazor Server 应用程序
打开 Visual Studio 并创建一个新的 Blazor 应用程序。

确保选中 .NET 5.0 和 Blazor Server App。

并创建应用程序。
清理应用程序
默认的 Blazor 服务器应用程序很好,但我们想摆脱其中一些我们不会使用的组件。
删除以下文件。
/Data 文件夹
- /Data/WeatherForecast.cs
- /Data/WeatherForecastService.cs
/Pages 文件夹
- /Pages/Counter.razor
- /Data/FetchData.razor
然后,打开 /Shared/NavMenu.razor
删除以下代码
  <li class="nav-item px-3">
    <NavLink class="nav-link" href="counter">
      <span class="oi oi-plus" aria-hidden="true"></span> Counter
    </NavLink>
  </li>
  <li class="nav-item px-3">
    <NavLink class="nav-link" href="fetchdata">
      <span class="oi oi-list-rich" aria-hidden="true"></span> Fetch data
    </NavLink>
  </li>
这些是导航链接。我们将用指向我们即将构建的页面的链接替换它们。
  <li class="nav-item px-3">
    <NavLink class="nav-link" href="attributes">
      <span class="oi oi-plus" aria-hidden="true"></span>Image Attributes
    </NavLink>
  </li>
最后,打开 Startup.cs 并删除该行
using blazorfacerec.Data;
然后查找 ConfigureServices 方法
public void ConfigureServices(IServiceCollection services)
{
  services.AddRazorPages();
  services.AddServerSideBlazor();
  services.AddSingleton<WeatherForecastService>();
}
并删除此行
services.AddSingleton<WeatherForecastService>();
并保存文件。现在它已经全部清理完毕,可以供我们添加页面了。
存储我们的 API 密钥
Azure 人脸 API 使用您不想存储在源代码中的 API 密钥。以下是您可以避免这种情况的方法。
在您的程序包管理器控制台中,输入以下内容
dotnet user-secrets init
您应该会看到类似这样的内容

您将在 .csproj 文件中看到一个新条目,如下所示
<UserSecretsId>xxxxxxx-xxxx-xxxxxxxx-xxxx-xxxxxxxx</UserSecretsId>
现在使用以下命令保存您的 API 密钥
dotnet user-secrets set "FaceApiKey" "[ Your API Key ]"
要验证,请输入
dotnet user-secrets list
您应该会看到类似这样的内容

现在我们将创建一个小型服务,将该密钥注入到我们的应用程序中。
创建一个名为 AppConfiguration.cs 的文件并添加以下内容
namespace (Your namespace name)
{
    public class AppConfiguration
    {
        public string ApiKey { get; set; }
    }
}
打开 Startup.cs 并找到 ConfigureServices 方法。添加以下内容
var config = new AppConfiguration {ApiKey = Configuration["FaceApiKey"]};
services.AddSingleton<AppConfiguration>(config);
现在您可以在任何地方注入它,并访问该密钥而无需将其留在您的源代码中。这只是在 Blazor 中存储秘密的一种方法。
创建 Razor 组件
现在是有趣的部分。我们将添加一个 Blazor 页面,该页面调用 Azure 人脸 API 并将结果返回到我们的页面上。
此代码将全部包含在一个 Razor 组件中。
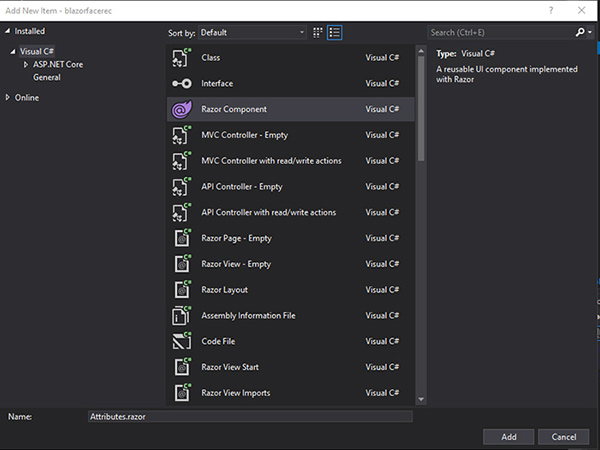
创建 Razor 页面
在 Pages 文件夹中创建一个新文件,并将其命名为 Attributes.razor。
将以下内容添加到页面顶部
@page "/attributes"
<h3>Get Attributes from Image</h3>
现在,您应该能够运行 Blazor 应用程序并看到页面上显示的标题。
让我们将以下 HTML 添加到页面中
<label>Image Url: </label>
<input @bind="imageUrl" />
<br />
<br />
<button @onclick="@processImage">Process Image</button>
<br />
<br />
这将提供一个接口,用于输入要处理的图像 URL。请注意,我们绑定到 imageUrl 属性和 processImage 方法。我们将创建这些。
显示结果
在这里,我们将在页面上显示 API 调用的结果。这将位于我们刚刚编写的代码下方。
  @if (faces != null)
  {
      @foreach (var face in faces)
      {
          <div class="row">
              <div class="col-md-8">
                  <h2>Jeremy</h2>
                  <div style="float: left;">
                      <img src="@imageUrl" height="100" width="100" />
                  </div>
                  <div style="margin-left: 10px; float: right;">
                      <ul>
                          <li><strong>Image ID:</strong> @face.faceId</li>
                          <li><strong>Gender: </strong>@face.faceAttributes.gender</li>
                          <li><strong>Age:</strong> @face.faceAttributes.age</li>
                          <li><strong>Glasses?:</strong> @face.faceAttributes.glasses</li>
                          <li><strong>Emotion:</strong> @face.topEmotion</li>
                      </ul>
                  </div>
              </div>
          </div>
      }
  }
这是用户将看到的显示代码。现在我们将添加后端代码以使其实现。
创建模型
接下来,我们将创建一些模型来存储我们的数据。
此代码将位于组件底部的代码括号之间
@code {

}
我们将创建一些类来存储人脸 API 返回的数据。我们需要存储
- 要处理的图像的 URL
- 一个人脸对象
- 人脸属性
- 检测到的情绪
我们将创建一个名为“Payload”的对象
public class DataPayload
{
    public string Url { get; set; }
}
这只是将一个 URL 存储在字符串中,我们可以在 POST 命令中发送它。
接下来,我们将创建一个人脸属性对象。它包含我们要求服务返回的属性。
我们将存储人脸服务在图像中发现的性别、年龄和情绪。
public class FaceAttribute
{
    public string Gender { get; set; }
    public float Age { get; set; }
    public string Glasses { get; set; }
    public Emotion Emotion { get; set; }
}
情绪以集合形式返回,每个属性都有分配的值,如下所示
"emotion": {
  "anger": 0.0,
  "contempt": 0.0,
  "disgust": 0.0,
  "fear": 0.0,
  "happiness": 1.0,
  "neutral": 0.0,
  "sadness": 0.0,
  "surprise": 0.0
}
所以我们将把这些值存储在一个 Emotion 对象中
public class Emotion
{
  public float Anger { get; set; }
  public float Contempt { get; set; }
  public float Disgust { get; set; }
  public float Fear { get; set; }
  public float Happiness { get; set; }
  public float Neutral { get; set; }
  public float Sadness { get; set; }
  public float Surprise { get; set; }
}
接下来,我们将创建一个“Face”对象。它包含人脸服务返回的 GUID 以及属性。
我们还将为“最高情绪”创建一个字符串。我们将遍历 Emotion 类并找到具有最高值的情绪,并将其存储在此处。
public class Face
{
  public Guid FaceId { get; set; }
  public FaceAttribute FaceAttributes { get; set; }
  public string TopEmotion { get; set; }
}
这些是处理我们信息的主要对象。那么让我们来做点什么吧。
属性
我们希望在组件的根部存储一些属性。让我们在顶部,紧随 @code { 之后添加这些属性
private readonly string _baseUrl = "https://[Your Subdomain].cognitiveservices.azure.com/";
这是您在上面 Azure 门户中创建的终结点的基本 URL。
private string ImageUrl { get; set; }
这是我们上面创建的表单中提交的图像 URL。这是将由人脸 API 处理的图像。
private Face[] _tmpfaces;
这是临时存储,我们将把 API 返回的人脸放入其中。我们将遍历它,处理数据并将其存储在此列表中以供最终检索
private List<Face> _faces;
然后我们将为我们的情绪创建一个字典
private Dictionary<string, float> _emotions;
这将在下一节中构建处理系统时更有意义。
[Inject]
private AppConfiguration _config { get; set; }
在这里我们将注入配置,以便我们可以获取 API 密钥以发送给 Azure 人脸服务。
处理情绪
对于这一步,我决定从我们的列表中只选择一种情绪
"emotion": {
  "anger": 0.0,
  "contempt": 0.0,
  "disgust": 0.0,
  "fear": 0.0,
  "happiness": 1.0,
  "neutral": 0.0,
  "sadness": 0.0,
  "surprise": 0.0
}
从这里我们将找到最大值并选择该情绪。您可能会选择显示所有数据,但这是我找到的确定图片传达何种情绪的最佳方式。
创建一个名为 ProcessEmotions() 的方法
public void ProcessEmotions()
{
}
我们首先要做的是遍历 _tmpfaces 中的每个人脸(我们将临时存储结果的地方)
foreach (Face face in _tmpfaces)
{
}
在该循环中,我们将创建一个字典来存储值
var emotionValues = new Dictionary<string, float> {
  {"Anger", face.FaceAttributes.Emotion.Anger},
  {"Contempt", face.FaceAttributes.Emotion.Contempt},
  {"Disgust", face.FaceAttributes.Emotion.Disgust},
  {"Fear", face.FaceAttributes.Emotion.Fear},
  {"Happiness", face.FaceAttributes.Emotion.Happiness},
  {"Neutral", face.FaceAttributes.Emotion.Neutral},
  {"Sadness", face.FaceAttributes.Emotion.Sadness},
  {"Surprise", face.FaceAttributes.Emotion.Surprise}
};
接下来,我们将遍历这些值以找到最高值
float topValue = 0;
string topValueName = "";

foreach (var emotion in emotionValues)
{
  if (emotion.Value > topValue)
  {
    topValue = emotion.Value;
    topValueName = emotion.Key;
  }
}
最后,我们将创建一个新的“人脸”并将其添加到供 UI 使用的最终人脸列表中。
Face ourFace = new Face { FaceId = face.FaceId, FaceAttributes = face.FaceAttributes, TopEmotion = topValueName };
_faces.Add(ourFace);
太棒了,现在我们可以找到返回的最高情绪,让我们构建最终方法来调用 API 并获取我们需要的数据。
调用 API
现在我们将所有内容连接起来,并创建对人脸 API 的调用,并将该数据发送到我们的 UI。
我们将创建一个异步方法来处理从 UI 发送的图像。
private async Task ProcessImage()
{
}
在此方法中,我们将初始化我们的 _faces 列表。首先,我们要确保它清除任何以前的结果
_faces = null;
然后我们将初始化它
_faces = new List<Face>();
接下来,我们将创建一个 HttpClient 来与 API 通信
HttpClient client = new HttpClient { BaseAddress = new Uri(_baseUrl + "/face/v1.0/detect?returnFaceAttributes=age,glasses,emotion,gender&ReturnFaceLandmarks=true") };
在此语句中,我们正在创建一个新客户端,并设置我们的 BaseAddress。这将是我们的基本 URL(由 Azure 创建的子域),然后我们添加文件夹以转到人脸 API。
最后,我们添加所有我们希望它返回的 属性。
然后我们将创建一条响应消息
HttpResponseMessage response = null;
接下来,我们想创建一个负载并将我们的信息插入其中。然后我们将将其序列化为 JSON
var payload = new DataPayload { Url = ImageUrl };
var payloadString = new StringContent(System.Text.Json.JsonSerializer.Serialize(payload), Encoding.UTF8, MediaTypeNames.Application.Json);
接下来,我们将添加我们的 API 密钥以与人脸 API 进行身份验证。我们将从我们之前创建的配置对象中的秘密密钥中提取此密钥
client.DefaultRequestHeaders.Add("Ocp-Apim-Subscription-Key", _config.ApiKey);
然后我们将使用我们的负载向 API 发送 POST
response = await client.PostAsync(client.BaseAddress, payloadString);
最后,我们将检查是否收到了正确的 JSON 响应。如果是,我们将读取内容并构建我们的临时人脸列表。
然后我们将调用 ProcessEmotions() 来插入最高情绪并完成我们的人脸对象。
if (response.Content is object && response.Content.Headers.ContentType.MediaType == "application/json")
{
  var content = await response.Content.ReadAsStringAsync();
  _tmpfaces = JsonSerializer.Deserialize<Face[]>(content, new JsonSerializerOptions { PropertyNameCaseInsensitive = true });
  ProcessEmotions();
}
现在我们的 ProcessImage() 方法已完成。
最终组件应如下所示
  @page "/attributes"
  @using System.Text.Json;
  @using System.Net.Mime;
  @using System.Text;

  <h3>Get Attributes from Image</h3>

  <label>Image Url: </label>
  <input @bind="ImageUrl" />
  <br />
  <br />
  <button @onclick="@ProcessImage">Process Image</button>
  <br />
  <br />

  @if (_faces != null)
  {

      @foreach (var face in _faces)
      {
        <div class="row">
            <div class="col-md-8">
                <div style="float: left;">
                    <img src="@ImageUrl" height="100" width="100" />
                </div>
                <div style="margin-left: 10px; float: right;">
                    <ul>
                        <li><strong>Image ID:</strong> @face.FaceId</li>
                        <li><strong>Gender: </strong>@face.FaceAttributes.Gender</li>
                        <li><strong>Age:</strong> @face.FaceAttributes.Age</li>
                        <li><strong>Glasses?:</strong> @face.FaceAttributes.Glasses</li>
                        <li><strong>Emotion:</strong> @face.TopEmotion</li>
                    </ul>
                </div>
            </div>
        </div>
      }
  }

  @code {

      private readonly string _baseUrl = "https://blazorfacerec.cognitiveservices.azure.com/";
      private string ImageUrl { get; set; }
      private Face[] _tmpfaces;
      private List<Face> _faces;
      private Dictionary<string, float> _emotions;

      [Inject]
      private AppConfiguration _config { get; set; }


      private async Task ProcessImage()
      {
          _faces = null;
          _faces = new List<Face>();

          HttpClient client = new HttpClient { BaseAddress = new Uri(_baseUrl + "/face/v1.0/detect?returnFaceAttributes=age,glasses,emotion,gender&ReturnFaceLandmarks=true") };

          HttpResponseMessage response = null;

          var payload = new DataPayload { Url = ImageUrl };

          var payloadString = new StringContent(System.Text.Json.JsonSerializer.Serialize(payload), Encoding.UTF8, MediaTypeNames.Application.Json);

          client.DefaultRequestHeaders.Add("Ocp-Apim-Subscription-Key", _config.ApiKey);

          response = await client.PostAsync(client.BaseAddress, payloadString);

          if (response.Content is object && response.Content.Headers.ContentType.MediaType == "application/json")
          {
              var content = await response.Content.ReadAsStringAsync();
              _tmpfaces = JsonSerializer.Deserialize<Face[]>(content, new JsonSerializerOptions { PropertyNameCaseInsensitive = true });
              ProcessEmotions();
          }
      }

      public void ProcessEmotions()
      {
          foreach (Face face in _tmpfaces)
          {
              var emotionValues = new Dictionary<string, float> {
                  {"Anger", face.FaceAttributes.Emotion.Anger},
                  {"Contempt", face.FaceAttributes.Emotion.Contempt},
                  {"Disgust", face.FaceAttributes.Emotion.Disgust},
                  {"Fear", face.FaceAttributes.Emotion.Fear},
                  {"Happiness", face.FaceAttributes.Emotion.Happiness},
                  {"Neutral", face.FaceAttributes.Emotion.Neutral},
                  {"Sadness", face.FaceAttributes.Emotion.Sadness},
                  {"Surprise", face.FaceAttributes.Emotion.Surprise}

              };

              float topValue = 0;
              string topValueName = "";

              foreach (var emotion in emotionValues)
              {
                  Console.WriteLine("Key: " + emotion.Key + "Value: " + emotion.Value);

                  if (emotion.Value > topValue)
                  {
                      topValue = emotion.Value;
                      topValueName = emotion.Key;
                  }
              }

              Face ourFace = new Face { FaceId = face.FaceId, FaceAttributes = face.FaceAttributes, TopEmotion = topValueName };
              _faces.Add(ourFace);
          }
      }

      public class DataPayload
      {
          public string Url { get; set; }
      }

      public class Face
      {
          public Guid FaceId { get; set; }
          public FaceAttribute FaceAttributes { get; set; }
          public string TopEmotion { get; set; }
      }

      public class FaceAttribute
      {
          public string Gender { get; set; }
          public float Age { get; set; }
          public string Glasses { get; set; }
          public Emotion Emotion { get; set; }
      }

      public class Emotion
      {
          public float Anger { get; set; }
          public float Contempt { get; set; }
          public float Disgust { get; set; }
          public float Fear { get; set; }
          public float Happiness { get; set; }
          public float Neutral { get; set; }
          public float Sadness { get; set; }
          public float Surprise { get; set; }
      }
  }
现在它已经准备好了,让我们运行它!
完成的应用程序
我们现在可以运行应用程序,我可以看到图像 URL 字段和“处理图像”按钮。

现在我可以放入我的脸部图片 URL 并试用它
如您所见,我们现在有了我发送的图像,人脸 API 返回的“图像 ID”,以及从图像中推断出的属性。
它猜测我是一个男性,43 岁,戴着老花镜。最高情绪是“幸福”。
我可以上传任何我想要的图像并对其进行分析。
结论
在这个项目中,我们
- 创建了一个 Azure 认知服务(人脸 API)
- 使用 Postman 向服务发送了一些测试调用
- 构建了一个 Blazor 应用程序来与之交互
我们的 Blazor 应用程序可以将 URL 发送到服务,让它分析并返回我们可以用于显示的属性。这是一种分析图像并查看返回哪些属性的好方法。
在本系列的下一篇文章中,我们将对 Azure 人脸 API 做更多的事情,并为我们的 Blazor 应用程序添加功能。
如果您想了解更多关于 Azure 人脸 API 的信息,Pluralsight 有一门很棒的课程您可以查看,Microsoft Azure 认知服务:人脸 API。
如果您想了解更多关于构建 Blazor 应用程序的信息,请查看 Blazor:入门。