
wexCommerce - 极简强大的电子商务平台
4.78/5 (10投票s)
极简强大的电子商务平台。
目录
引言
wexCommerce 是一个简约而强大的电子商务平台,使用 React(带 SSR)、MongoDB 和 Stripe 进行支付。
使用此解决方案,您可以在至少1GB内存的 Docker droplet 上托管,以极低的成本构建一个完全可定制、针对 SEO 优化并具有可操作的 Stripe 支付网关的电子商务网站。
wexCommerce 由前端和管理仪表板组成。在前端,客户可以搜索他们想要的产品,将其添加到购物车并结账。客户可以使用 Google、Facebook、Apple 或电子邮件注册,并使用信用卡、货到付款、银行转账、PayPal、Google Pay、Apple Pay、Link 或其他 Stripe 支付方式付款。登录后,他们可以访问他们的购买历史并跟踪他们的订单。在管理仪表板中,管理员可以管理订单、支付、产品、类别、客户和通用设置,例如默认语言、货币、配送、运输和接受的支付方式。
出于其诸多优点,我们做出了一个关键的设计决策,即使用 TypeScript 而非 JavaScript。TypeScript 提供了强类型、工具和集成,从而生成高质量、可扩展、更易读和可维护的代码,且易于调试和测试。
wexCommerce 可以在 Docker 容器中运行。请按照此分步指南,了解如何构建 wexCommerce Docker 镜像并在 Docker 容器中运行它。
在本文中,您将学习 wexCommerce 的制作过程,包括源代码主要部分和软件架构的描述、如何部署它以及如何运行源代码。但在深入探讨之前,我们将从平台的快速概述开始。
特点
- 库存管理
- 订单管理
- 支付管理
- 客户管理
- 多种支付选项(信用卡、货到付款、银行转账、PayPal、Google Pay、Apple Pay、Link)
- 运营中的 Stripe 支付网关
- 多种配送选项(送货上门、门店自提)
- 多语言支持(英语、法语)
- 多种登录选项(Google、Facebook、Apple、电子邮件)
- 响应式后端和前端
实时演示
- 网址:https://wexcommerce.dynv6.net:8002/
- 登录:jdoe@wexcommerce.com
- 密码:sh0ppingC4rt
必备组件
- Node.js
- Express
- MongoDB
- Next.js
- SSR
- React
- MUI
- TypeScript
- MVC
- JWT
- Docker
- NGINX
- Git
快速概览
在本节中,您将快速了解后端和前端的主要页面。
前端
在前端,用户可以搜索可用产品,将产品添加到购物车并结账。
以下是前端的登录页面

以下是前端的搜索页面

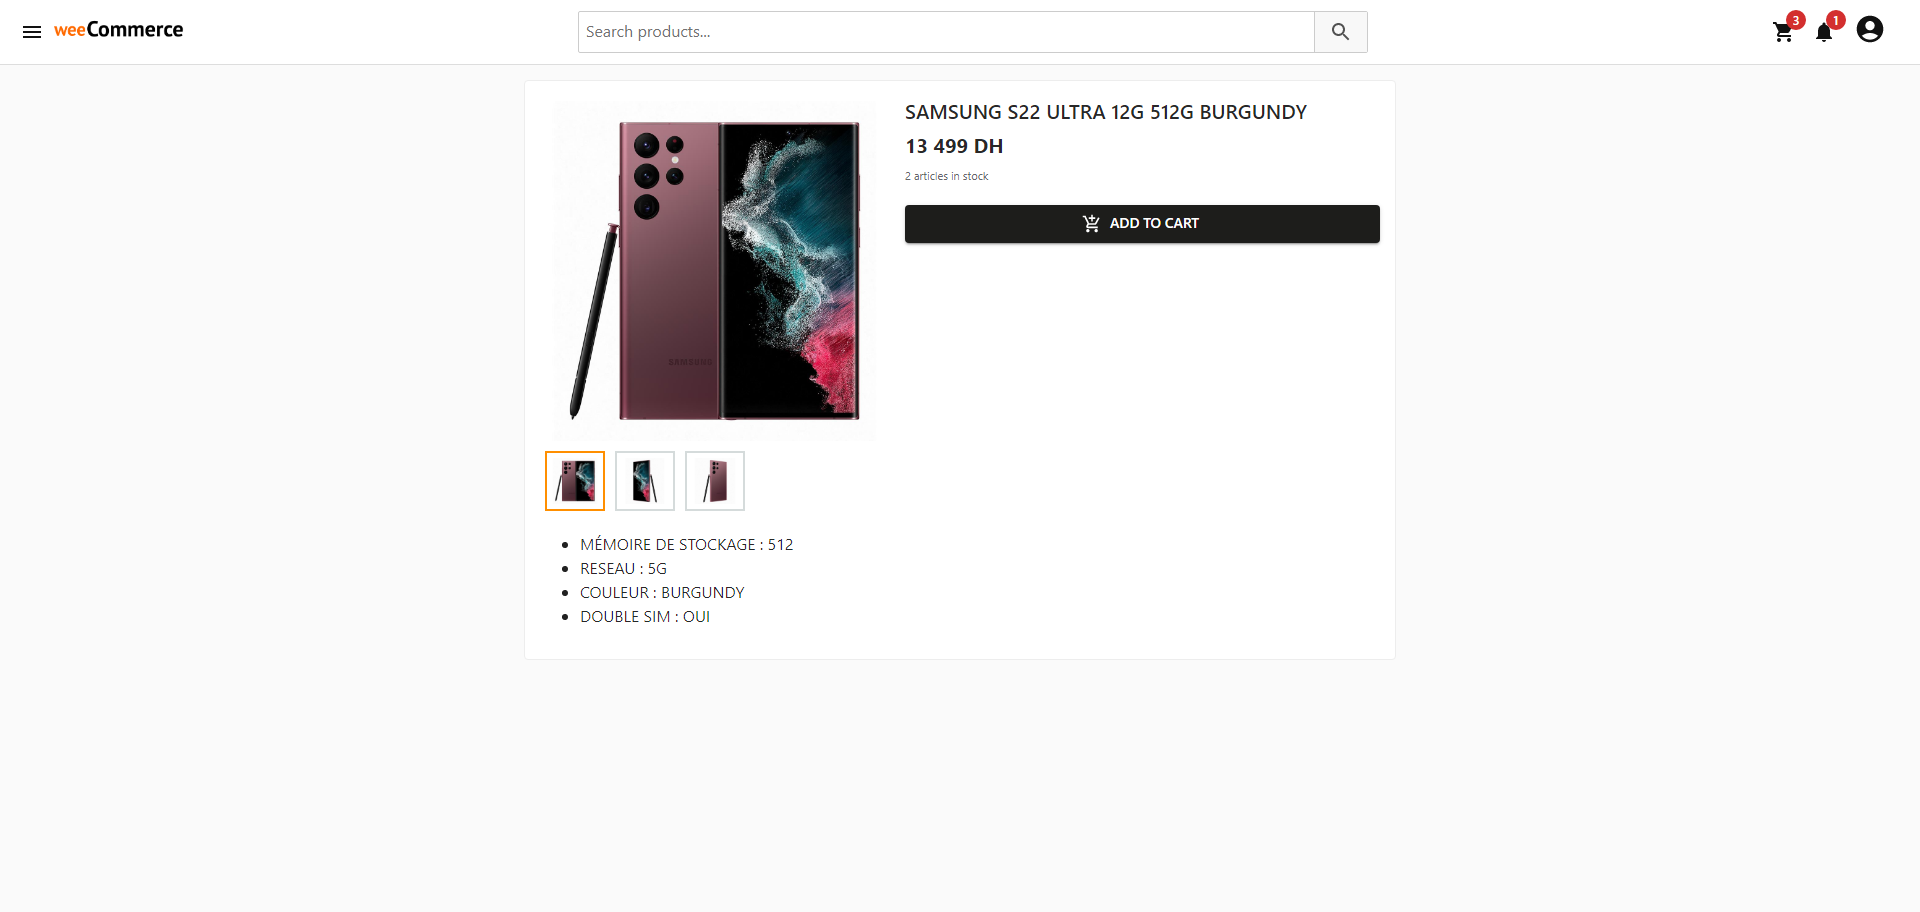
以下是一个示例产品页面
以下是产品图片的全屏视图

以下是购物车页面

以下是结账页面

以下是登录页面

以下是注册页面
以下是用户可以查看其订单的页面

就是这样!这些是前端的主要页面。
后端
在后端,管理员可以管理类别、产品、用户和订单。
管理员还可以管理以下设置
- 区域设置:平台语言(英语或法语)和货币
- 配送设置:启用的配送方式及其成本
- 支付设置:启用的支付方式(信用卡、货到付款或银行转账)
- 银行设置:银行转账的银行信息(IBAN 和其他信息)
以下是后端登录页面

以下是后端仪表板页面,管理员可以在其中查看和管理订单

以下是管理员管理类别的页面

以下是管理员可以查看和管理产品的页面

以下是管理员编辑产品的页面

以下是产品图片的全屏视图

以下是后端设置页面

就是这样。这些是后端的主要页面。
背景
wexCommerce 的基本思想非常简单
- 后端:管理员在其中创建和管理类别和产品。一个仪表板,管理员可以在其中查看新订单并通过电子邮件收到新订单通知。
- 前端:用户可以在其中搜索他们想要的产品,将其添加到购物车,然后使用多种支付方式和多种配送方式结账。
后端和前端都依赖于 wexCommerce API,这是一个 RESTful API,公开了访问 wexCommerce 数据库的功能。
安装(自托管)
wexCommerce 是跨平台的,可以在 Windows、Linux 和 macOS 上运行和安装。
以下是在 Ubuntu Linux 上的安装说明。
必备组件
-
安装 git、Node.js、NGINX 或 IIS、MongoDB 和 mongosh。如果您想使用 MongoDB Atlas,可以跳过安装和配置 MongoDB。
- 配置 MongoDB
mongosh
创建管理员用户
db = db.getSiblingDB('admin')
db.createUser({ user: "admin" , pwd: "PASSWORD",
roles: ["userAdminAnyDatabase", "dbAdminAnyDatabase", "readWriteAnyDatabase"]})
将
PASSWORD替换为强密码。安全 MongoDB
sudo nano /etc/mongod.conf
按如下方式更改配置
net:
  port: 27017
  bindIp: 0.0.0.0

security:
  authorization: enabled
重启 MongoDB 服务
sudo systemctl restart mongod.service
sudo systemctl status mongod.service
说明
- 克隆 wexCommerce 仓库
cd /opt
sudo git clone https://github.com/aelassas/wexcommerce.git
- 添加权限
sudo chown -R $USER:$USER /opt/wexcommerce
sudo chmod -R +x /opt/wexcommerce/__scripts
- 创建部署快捷方式
sudo ln -s /opt/wexcommerce/__scripts/wc-deploy.sh /usr/local/bin/wc-deploy
- 创建 wexCommerce 服务
sudo cp /opt/wexcommerce/__services/wexcommerce.service /etc/systemd/system
sudo systemctl enable wexcommerce.service

sudo cp /opt/wexcommerce/__services/wexcommerce-backend.service /etc/systemd/system
sudo systemctl enable wexcommerce-backend.service

sudo cp /opt/wexcommerce/__services/wexcommerce-frontend.service /etc/systemd/system
sudo systemctl enable wexcommerce-frontend.service
- 添加 /opt/wexcommerce/api/.env 文件
NODE_ENV=production
WC_PORT=4005
WC_HTTPS=false
WC_PRIVATE_KEY=/etc/ssl/wexcommerce.key
WC_CERTIFICATE=/etc/ssl/wexcommerce.crt
WC_DB_URI=mongodb://127.0.0.1:27017/wexcommerce?authSource=admin&appName=wexcommerce
WC_DB_SSL=false
WC_DB_SSL_KEY=/etc/ssl/wexcommerce.key
WC_DB_SSL_CERT=/etc/ssl/wexcommerce.crt
WC_DB_SSL_CA=/etc/ssl/wexcommerce.ca.pem
WC_DB_DEBUG=false
WC_COOKIE_SECRET=COOKIE_SECRET
WC_AUTH_COOKIE_DOMAIN=localhost
WC_JWT_SECRET=JWT_SECRET
WC_JWT_EXPIRE_AT=86400
WC_TOKEN_EXPIRE_AT=86400
WC_SMTP_HOST=in-v3iljet.com
WC_SMTP_PORT=587
WC_SMTP_USER=USER
WC_SMTP_PASS=PASSWORD
WC_SMTP_FROM=admin@wexcommerce.com
WC_CDN_USERS=/var/www/cdn/wexcommerce/users
WC_CDN_TEMP_USERS=/var/www/cdn/wexcommerce/temp/users
WC_CDN_CATEGORIES=/var/www/cdn/wexcommerce/categories
WC_CDN_TEMP_CATEGORIES=/var/www/cdn/wexcommerce/temp/categories
WC_CDN_PRODUCTS=/var/www/cdn/wexcommerce/products
WC_CDN_TEMP_PRODUCTS=/var/www/cdn/wexcommerce/temp/products
WC_BACKEND_HOST=https://:8005/
WC_FRONTEND_HOST=https:///
WC_DEFAULT_LANGUAGE=en
WC_DEFAULT_CURRENCY=$
WC_DEFAULT_STRIPE_CURRENCY=USD
WC_STRIPE_SECRET_KEY=STRIPE_SECRET_KEY
WC_STRIPE_SESSION_EXPIRE_AT=82800
WC_ADMIN_EMAIL=admin@wexcommerce.com
WC_RECAPTCHA_SECRET=RECAPTCHA_SECRET
您必须配置以下选项
WC_DB_URI=mongodb://127.0.0.1:27017/wexcommerce?authSource=admin&appName=wexcommerce
WC_SMTP_HOST=in-v3iljet.com
WC_SMTP_PORT=587
WC_SMTP_USER=USER
WC_SMTP_PASS=PASSWORD
WC_STRIPE_SECRET_KEY=STRIPE_SECRET_KEY
WC_BACKEND_HOST=https://:8001/
WC_FRONTEND_HOST=https:///
如果您想启用 SSL,您必须配置以下选项
WC_HTTPS=true
WC_PRIVATE_KEY=/etc/ssl/wexcommerce.key
WC_CERTIFICATE=/etc/ssl/wexcommerce.crt
如果您想使用 MongoDB Atlas,请将您的 MongoDB Atlas URI 放入
WC_DB_URI,否则将WC_DB_URI中的PASSWORD替换为您的 MongoDB 密码。将JWT_SECRET替换为一个秘密令牌。最后,设置 SMTP 选项。SMTP 选项对于注册是必需的。您可以使用 sendgrid 或任何其他事务性电子邮件提供商。如果您选择 sendgrid,请在 sendgrid.com 上创建一个帐户,登录并转到仪表板。在左侧面板上,点击电子邮件 API,然后点击集成指南。然后,选择SMTP 中继并按照步骤操作。系统将提示您创建一个 API 密钥。创建 API 密钥并验证 smtp 中继后,将 API 密钥复制到 ./api/.env 中的
WC_SMTP_PASS中。Sendgrid 的免费计划允许每天发送最多 100 封电子邮件。如果您需要每天发送超过 100 封电子邮件,请切换到付费计划或选择其他事务性电子邮件提供商。COOKIE_SECRET和JWT_SECRET至少应为 32 个字符长,但越长越好。您可以使用在线密码生成器并将密码长度设置为 32 个或更长。以下设置非常重要,如果设置不正确,身份验证将无法工作
WC_AUTH_COOKIE_DOMAIN=localhost
WC_BACKEND_HOST=https://:8001/
WC_FRONTEND_HOST=https:///
要启用 Stripe 支付网关,请注册一个 Stripe 账户,填写表格并从 Stripe 仪表板保存可发布密钥和秘密密钥。然后,在 api/.env 中的以下选项中设置秘密密钥
WC_STRIPE_SECRET_KEY=STRIPE_SECRET_KEY
不要在网站上公开 Stripe 密钥或将其嵌入移动应用程序中。它必须保密并安全地存储在服务器端。
在 Stripe 中,所有账户默认共有四个 API 密钥 - 两个用于测试模式,两个用于实时模式
测试模式密钥:默认情况下,您可以使用此密钥在测试模式下对服务器上的请求进行身份验证。默认情况下,您可以使用此密钥不受限制地执行任何 API 请求。
测试模式发布密钥:在 Web 或移动应用程序的客户端代码中,可以使用此密钥进行测试。
实时模式密钥:在实时模式下,您可以使用此密钥在服务器上对请求进行身份验证。默认情况下,您可以使用此密钥不受限制地执行任何 API 请求。
实时模式发布密钥:当您准备好启动应用程序时,可以使用此密钥在 Web 或移动应用程序的客户端代码中。
仅使用您的测试 API 密钥进行测试。这样可以确保您不会意外修改您的实时客户或交易。
如果您要启用 HTTPS,则必须设置以下选项
WC_HTTPS=true
WC_PRIVATE_KEY=/etc/ssl/wexcommerce.com.key
WC_CERTIFICATE=/etc/ssl/wexcommerce.com.crt
将
localhost替换为 IP 或 FQDN。也就是说,如果您从 https://<FQDN>:8001/ 访问后端。WC_BACKEND_HOST应该是 https://<FQDN>:3001/。WC_FRONTEND_HOST也是如此。WC_AUTH_COOKIE_DOMAIN应该是 FQDN。
- 添加 /opt/wexcommerce/backend/.env 文件并设置以下选项
NEXT_PUBLIC_WC_SERVER_API_HOST=https://:4005
NEXT_PUBLIC_WC_CLIENT_API_HOST=https://:4005
NEXT_PUBLIC_WC_CDN_USERS=https:///cdn/wexcommerce/users
NEXT_PUBLIC_WC_CDN_TEMP_USERS=https:///cdn/wexcommerce/temp/users
NEXT_PUBLIC_WC_CDN_CATEGORIES=https:///cdn/wexcommerce/categories
NEXT_PUBLIC_WC_CDN_TEMP_CATEGORIES=https:///cdn/wexcommerce/temp/categories
NEXT_PUBLIC_WC_CDN_PRODUCTS=https:///cdn/wexcommerce/products
NEXT_PUBLIC_WC_CDN_TEMP_PRODUCTS=https:///cdn/wexcommerce/temp/products
将
localhost替换为 IP、主机名或 FQDN。 - 添加 /opt/wexcommerce/frontend/.env 文件并设置以下选项
NEXT_PUBLIC_WC_SERVER_API_HOST=https://:4005
NEXT_PUBLIC_WC_CLIENT_API_HOST=https://:4005
NEXT_PUBLIC_WC_PAGE_SIZE=30
NEXT_PUBLIC_WC_CDN_USERS=https:///cdn/wexcommerce/users
NEXT_PUBLIC_WC_CDN_CATEGORIES=https:///cdn/wexcommerce/categories
NEXT_PUBLIC_WC_CDN_PRODUCTS=https:///cdn/wexcommerce/products
NEXT_PUBLIC_WC_FB_APP_ID=XXXXXXXXXX
NEXT_PUBLIC_WC_APPLE_ID=XXXXXXXXXX
NEXT_PUBLIC_WC_GG_APP_ID=XXXXXXXXXX
NEXT_PUBLIC_WC_STRIPE_PUBLISHABLE_KEY=STRIPE_PUBLISHABLE_KEY
NEXT_PUBLIC_WC_GOOGLE_ANALYTICS_ENABLED=false
NEXT_PUBLIC_WC_GOOGLE_ANALYTICS_ID=G-XXXXXXXXXX
将
localhost替换为 IP、主机名或 FQDN。 -
将您的域名添加到 backend/next.config.mjs
/** @type {import('next').NextConfig} */
const nextConfig = {
  reactStrictMode: false,
  poweredByHeader: false,
  images: {
    //
    // Add your backend domain here
    //
    remotePatterns: [
      {
        protocol: 'http',
        hostname: 'localhost',
        pathname: '**',
      },
      {
        protocol: 'https',
        hostname: 'wexcommerce.com',
        pathname: '**',
      },
    ],
    unoptimized: true,
  },
  //
  // Nginx will do gzip compression. We disable
  // compression here so we can prevent buffering
  // streaming responses
  //
  compress: false,
  //
  // Add your backend domain here
  //
  experimental: {
    serverActions: {
      allowedOrigins: ['localhost:8001', 'wexcommerce.com:8001'],
    },
  },
}

export default nextConfig
将 wexcommerce.com 替换为您的域名。
-
将您的域名添加到 frontend/next.config.mjs
/** @type {import('next').NextConfig} */
const nextConfig = {
  reactStrictMode: false,
  poweredByHeader: false,
  images: {
    //
    // Add your frontend domain here
    //
    remotePatterns: [
      {
        protocol: 'http',
        hostname: 'localhost',
        pathname: '**',
      },
      {
        protocol: 'https',
        hostname: 'wexcommerce.com',
        pathname: '**',
      },
    ],
    unoptimized: true,
  },
  //
  // Nginx will do gzip compression. We disable
  // compression here so we can prevent buffering
  // streaming responses
  //
  compress: false,
  //
  // Add your frontend domain here
  //
  experimental: {
    serverActions: {
      allowedOrigins: ['localhost', 'wexcommerce.com'],
    },
  },
}

export default nextConfig
将 wexcommerce.com 替换为您的域名。
- 配置 NGINX
sudo nano /etc/nginx/sites-available/default
按如下方式更改配置 (NGINX 反向代理)
#
# redirect http to https
#
server
{
    listen 80 default_server;
    server_name _;
    return 301 https://$host$request_uri;
}

#
# frontend
#
server
{
    listen 443 ssl;
    server_name _;

    ssl_certificate_key /etc/letsencrypt/live/wexdev.dynv6.net/privkey.pem;
    ssl_certificate /etc/letsencrypt/live/wexdev.dynv6.net/fullchain.pem;

    include /etc/letsencrypt/options-ssl-nginx.conf; # managed by Certbot
    ssl_dhparam /etc/letsencrypt/ssl-dhparams.pem; # managed by Certbot

    error_page 497 301 =307 https://$host:$server_port$request_uri;

    access_log /var/log/nginx/wexcommerce.frontend.access.log;
    error_log /var/log/nginx/wexcommerce.frontend.error.log;

    location /cdn
    {
        alias /var/www/cdn;
    }

    location /
    {
        proxy_pass http://127.0.0.1:8006;

        proxy_http_version 1.1;
        proxy_read_timeout 900;

        proxy_set_header Upgrade $http_upgrade;
        proxy_set_header Connection 'upgrade';
        proxy_set_header Host $host;
        proxy_set_header X-Forwarded-Host $host;
        proxy_set_header X-Forwarded-For $proxy_add_x_forwarded_for;
        proxy_set_header X-Real-IP $remote_addr;

        proxy_cache_bypass $http_upgrade;
    }
}

#
# backend
#
server
{
    listen 8001 ssl;
    server_name _;

    error_page 497 301 =307 https://$host:$server_port$request_uri;

    ssl_certificate_key /etc/letsencrypt/live/wexdev.dynv6.net/privkey.pem;
    ssl_certificate /etc/letsencrypt/live/wexdev.dynv6.net/fullchain.pem;

    include /etc/letsencrypt/options-ssl-nginx.conf; # managed by Certbot
    ssl_dhparam /etc/letsencrypt/ssl-dhparams.pem; # managed by Certbot

    access_log /var/log/nginx/wexcommerce.backend.access.log;
    error_log /var/log/nginx/wexcommerce.backend.error.log;

    location /
    {
        proxy_pass http://127.0.0.1:8005;

        proxy_http_version 1.1;
        proxy_read_timeout 900;

        proxy_set_header Upgrade $http_upgrade;
        proxy_set_header Connection 'upgrade';
        proxy_set_header Host $host;
        proxy_set_header X-Forwarded-Host $host;
        proxy_set_header X-Forwarded-For $proxy_add_x_forwarded_for;
        proxy_set_header X-Real-IP $remote_addr;

        proxy_cache_bypass $http_upgrade;
    }
}
然后,检查 nginx 配置并启动 nginx 服务
sudo nginx -t
sudo systemctl restart nginx.service
sudo systemctl status nginx.service
启用防火墙并打开 wexCommerce 端口sudo ufw enable sudo ufw allow 4005/tcp sudo ufw allow 80/tcp sudo ufw allow 443/tcp sudo ufw allow 8001/tcp
- 部署 wexCommerce
wc-deploy all
wexCommerce 后端可在端口 3000 访问,如果启用 SSL,前端可在端口 80 或 443 访问。
-
您可以从后端设置页面更改语言和货币。
安装(Docker)
wexCommerce 可以在 Linux 上的 Docker 容器中运行,也可以在 Windows 或 Mac 的 Docker Desktop 中运行。
Docker 镜像
本节描述了如何构建 wexCommerce Docker 镜像并在 Docker 容器中运行它。
- 确保主机上没有其他应用程序使用端口 80、443、8001、4005 和 27017。
- 克隆 wexCommerce 仓库
git clone https://github.com/aelassas/wexcommerce.git
- 在 ./docker-compose.yml 中设置您的 MongoDB 密码
version: "3.8"
services:
  api:
    build:
      context: .
      dockerfile: ./api/Dockerfile
    restart: always
    ports:
      - 4005:4005
    depends_on:
      - mongo
    volumes:
      - cdn:/var/www/cdn/wexcommerce

  mongo:
    image: mongo:latest
    command: mongod --quiet --logpath /dev/null
    restart: always
    environment:
      # Provide your credentials here
      MONGO_INITDB_ROOT_USERNAME: admin
      MONGO_INITDB_ROOT_PASSWORD: PASSWORD
    ports:
      - 27017:27017

  backend:
    build:
      context: .
      dockerfile: ./backend/Dockerfile
    depends_on:
      - api
    ports:
      - 8005:8005
    restart: always

  nginx-backend:
    build:
      context: .
      dockerfile: ./backend/nginx/Dockerfile
    depends_on:
      - backend
    ports:
      - 8001:8001
    restart: always

  frontend:
    build:
      context: .
      dockerfile: ./frontend/Dockerfile
    depends_on:
      - api
    ports:
      - 8006:8006
    volumes:
      - cdn:/var/www/cdn/wexcommerce
    restart: always

  nginx-frontend:
    build:
      context: .
      dockerfile: ./frontend/nginx/Dockerfile
    depends_on:
      - frontend
    ports:
      - 80:80
      - 443:443
    volumes:
      - cdn:/var/www/cdn/wexcommerce
    restart: always

volumes:
  cdn:
- 创建 ./api/.env.docker
NODE_ENV=development
WC_PORT=4005
WC_HTTPS=false
WC_PRIVATE_KEY=/etc/ssl/wexcommerce.key
WC_CERTIFICATE=/etc/ssl/wexcommerce.crt
WC_DB_URI=mongodb://admin:PASSWORD@mongo:27017/wexcommerce?authSource=admin&appName=wexcommerce
WC_DB_SSL=false
WC_DB_SSL_KEY=/etc/ssl/wexcommerce.key
WC_DB_SSL_CERT=/etc/ssl/wexcommerce.crt
WC_DB_SSL_CA=/etc/ssl/wexcommerce.ca.pem
WC_DB_DEBUG=false
WC_COOKIE_SECRET=COOKIE_SECRET
WC_AUTH_COOKIE_DOMAIN=localhost
WC_JWT_SECRET=JWT_SECRET
WC_JWT_EXPIRE_AT=86400
WC_TOKEN_EXPIRE_AT=86400
WC_SMTP_HOST=in-v3iljet.com
WC_SMTP_PORT=587
WC_SMTP_USER=USER
WC_SMTP_PASS=PASSWORD
WC_SMTP_FROM=admin@wexcommerce.com
WC_CDN_USERS=/var/www/cdn/wexcommerce/users
WC_CDN_TEMP_USERS=/var/www/cdn/wexcommerce/temp/users
WC_CDN_CATEGORIES=/var/www/cdn/wexcommerce/categories
WC_CDN_TEMP_CATEGORIES=/var/www/cdn/wexcommerce/temp/categories
WC_CDN_PRODUCTS=/var/www/cdn/wexcommerce/products
WC_CDN_TEMP_PRODUCTS=/var/www/cdn/wexcommerce/temp/products
WC_BACKEND_HOST=https://:8001/
WC_FRONTEND_HOST=https:///
WC_DEFAULT_LANGUAGE=en
WC_DEFAULT_CURRENCY=$
WC_DEFAULT_STRIPE_CURRENCY=USD
WC_STRIPE_SECRET_KEY=STRIPE_SECRET_KEY
WC_STRIPE_SESSION_EXPIRE_AT=82800
WC_ADMIN_EMAIL=admin@wexcommerce.com
WC_RECAPTCHA_SECRET=RECAPTCHA_SECRET
设置以下设置
WC_DB_URI=mongodb://admin:PASSWORD@mongo:27017/wexcommerce?authSource=admin&appName=wexcommerce
WC_SMTP_HOST=in-v3iljet.com
WC_SMTP_PORT=587
WC_SMTP_USER=USER
WC_SMTP_PASS=PASSWORD
WC_STRIPE_SECRET_KEY=STRIPE_SECRET_KEY
- 创建 ./backend/.env.docker
NEXT_PUBLIC_WC_SERVER_API_HOST=http://api:4005
NEXT_PUBLIC_WC_CLIENT_API_HOST=https://:4005
NEXT_PUBLIC_WC_PAGE_SIZE=30
NEXT_PUBLIC_WC_CDN_USERS=https:///cdn/wexcommerce/users
NEXT_PUBLIC_WC_CDN_CATEGORIES=https:///cdn/wexcommerce/categories
NEXT_PUBLIC_WC_CDN_TEMP_CATEGORIES=https:///cdn/wexcommerce/temp/categories
NEXT_PUBLIC_WC_CDN_PRODUCTS=https:///cdn/wexcommerce/products
NEXT_PUBLIC_WC_CDN_TEMP_PRODUCTS=https:///cdn/wexcommerce/temp/products
- 创建 ./frontend/.env.docker
NEXT_PUBLIC_WC_SERVER_API_HOST=http://api:4005
NEXT_PUBLIC_WC_CLIENT_API_HOST=https://:4005
NEXT_PUBLIC_WC_PAGE_SIZE=30
NEXT_PUBLIC_WC_CDN_USERS=https:///cdn/wexcommerce/users
NEXT_PUBLIC_WC_CDN_CATEGORIES=https:///cdn/wexcommerce/categories
NEXT_PUBLIC_WC_CDN_PRODUCTS=https:///cdn/wexcommerce/products
NEXT_PUBLIC_WC_FB_APP_ID=XXXXXXXXXX
NEXT_PUBLIC_WC_APPLE_ID=XXXXXXXXXX
NEXT_PUBLIC_WC_GG_APP_ID=XXXXXXXXXX
NEXT_PUBLIC_WC_STRIPE_PUBLISHABLE_KEY=STRIPE_PUBLISHABLE_KEY
NEXT_PUBLIC_WC_GOOGLE_ANALYTICS_ENABLED=false
NEXT_PUBLIC_WC_GOOGLE_ANALYTICS_ID=G-XXXXXXXXXX
- 运行 compose
docker compose up
如果您想重建并运行镜像,请运行以下命令
docker compose up --build --force-recreate --no-deps api backend frontend
如果您想在没有缓存的情况下重建并运行镜像,请运行以下命令
docker compose build --no-cache api backend frontend
docker compose up --force-recreate --no-deps api backend frontend
演示数据库
要恢复演示数据库,请按照这些说明操作。
SSL
本节将引导您了解如何为 API、后端和前端启用 SSL。
将您的私钥 wexcommerce.key 和证书 wexcommerce.crt 复制到 ./ 中。
wexcommerce.key 将作为 /etc/ssl/wexcommerce.key 加载,wexcommerce.crt 将作为 /etc/ssl/wexcommerce.crt 加载到 ./docker-compose.yml 中。
API
对于 API,按如下方式更新 ./api/.env.docker 以启用 SSL
WC_HTTPS=true
WC_PRIVATE_KEY=/etc/ssl/wexcommerce.key
WC_CERTIFICATE=/etc/ssl/wexcommerce.crt
WC_BACKEND_HOST=https://domain.com:8001/
WC_FRONTEND_HOST=https://domain.com/
后端
对于后端,更新 ./backend/.env.docker 中的以下选项
NEXT_PUBLIC_WC_CLIENT_API_HOST=https://domain.com:4005
NEXT_PUBLIC_WC_PAGE_SIZE=30
NEXT_PUBLIC_WC_CDN_USERS=https://domain.com/cdn/wexcommerce/users
NEXT_PUBLIC_WC_CDN_CATEGORIES=https://domain.com/cdn/wexcommerce/categories
NEXT_PUBLIC_WC_CDN_TEMP_CATEGORIES=https://domain.com/cdn/wexcommerce/temp/categories
NEXT_PUBLIC_WC_CDN_PRODUCTS=https://domain.com/cdn/wexcommerce/products
NEXT_PUBLIC_WC_CDN_TEMP_PRODUCTS=https://domain.com/cdn/wexcommerce/temp/products
然后,按如下方式更新 ./backend/nginx/nginx.conf 以启用 SSL
server
{
    listen 8001 ssl;

    ssl_certificate_key /etc/ssl/wexcommerce.key;
    ssl_certificate /etc/ssl/wexcommerce.crt;

    error_page 497 301 =307 https://$host:$server_port$request_uri;

	location /
	{
		proxy_pass http://backend:8005;

		proxy_http_version 1.1;
		proxy_read_timeout 900;

		proxy_set_header Upgrade $http_upgrade;
		proxy_set_header Connection 'upgrade';
		proxy_set_header Host $host;
		proxy_set_header X-Forwarded-Host $host;
		proxy_set_header X-Forwarded-For $proxy_add_x_forwarded_for;
		proxy_set_header X-Real-IP $remote_addr;

		proxy_cache_bypass $http_upgrade;
	}
}
前端
对于前端,更新 ./frontend/.env.docker 中的以下选项
NEXT_PUBLIC_WC_CLIENT_API_HOST=https://domain.com:4005
NEXT_PUBLIC_WC_PAGE_SIZE=30
NEXT_PUBLIC_WC_CDN_USERS=https://domain.com/cdn/wexcommerce/users
NEXT_PUBLIC_WC_CDN_CATEGORIES=https://domain.com/cdn/wexcommerce/categories
NEXT_PUBLIC_WC_CDN_PRODUCTS=https://domain.com/cdn/wexcommerce/products
NEXT_PUBLIC_WC_FB_APP_ID=XXXXXXXXXX
NEXT_PUBLIC_WC_APPLE_ID=XXXXXXXXXX
NEXT_PUBLIC_WC_GG_APP_ID=XXXXXXXXXX
NEXT_PUBLIC_WC_STRIPE_PUBLISHABLE_KEY=STRIPE_PUBLISHABLE_KEY
NEXT_PUBLIC_WC_GOOGLE_ANALYTICS_ENABLED=false
NEXT_PUBLIC_WC_GOOGLE_ANALYTICS_ID=G-XXXXXXXXXX
然后,按如下方式更新 ./frontend/nginx.conf 以启用 SSL
server {
    listen 80;
    return 301 https://$host$request_uri;
}
server
{
    listen 443 ssl;

    ssl_certificate_key /etc/ssl/wexcommerce.key;
    ssl_certificate /etc/ssl/wexcommerce.crt;

	location /
	{
		proxy_pass http://frontend:8006;

		proxy_http_version 1.1;
		proxy_read_timeout 900;

		proxy_set_header Upgrade $http_upgrade;
		proxy_set_header Connection 'upgrade';
		proxy_set_header Host $host;
		proxy_set_header X-Forwarded-Host $host;
		proxy_set_header X-Forwarded-For $proxy_add_x_forwarded_for;
		proxy_set_header X-Real-IP $remote_addr;

		proxy_cache_bypass $http_upgrade;
	}

	location /cdn
	{
		alias /var/www/cdn;
	}
}
docker-compose.yml
更新 ./docker-compose.yml 以加载您的私钥 wexcommerce.key 和证书 wexcommerce.crt,并按如下方式将端口 443 添加到前端
version: "3.8"
services:
  api:
    build:
      context: .
      dockerfile: ./api/Dockerfile
    restart: always
    ports:
      - 4005:4005
    depends_on:
      - mongo
    volumes:
      - cdn:/var/www/cdn/wexcommerce
      - ./wexcommerce.key:/etc/ssl/wexcommerce.key
      - ./wexcommerce.crt:/etc/ssl/wexcommerce.crt

  mongo:
    image: mongo:latest
    command: mongod --quiet --logpath /dev/null
    restart: always
    environment:
      # Provide your credentials here
      MONGO_INITDB_ROOT_USERNAME: admin
      MONGO_INITDB_ROOT_PASSWORD: PASSWORD
    ports:
      - 27017:27017

  backend:
    build:
      context: .
      dockerfile: ./backend/Dockerfile
    depends_on:
      - api
    ports:
      - 8005:8005
    restart: always

  nginx-backend:
    build:
      context: .
      dockerfile: ./backend/nginx/Dockerfile
    depends_on:
      - backend
    ports:
      - 8001:8001
    restart: always
    volumes:
      - ./wexcommerce.key:/etc/ssl/wexcommerce.key
      - ./wexcommerce.crt:/etc/ssl/wexcommerce.crt

  frontend:
    build:
      context: .
      dockerfile: ./frontend/Dockerfile
    depends_on:
      - api
    ports:
      - 8006:8006
    volumes:
      - cdn:/var/www/cdn/wexcommerce
    restart: always

  nginx-frontend:
    build:
      context: .
      dockerfile: ./frontend/nginx/Dockerfile
    depends_on:
      - frontend
    ports:
      - 80:80
      - 443:443
    volumes:
      - cdn:/var/www/cdn/wexcommerce
      - ./wexcommerce.key:/etc/ssl/wexcommerce.key
      - ./wexcommerce.crt:/etc/ssl/wexcommerce.crt
    restart: always

volumes:
  cdn:
重建并运行 Docker 镜像
docker compose up --build --force-recreate --no-deps api nginx-backend nginx-frontend
设置 Stripe
如果您想启用 Stripe 支付网关,请注册一个 Stripe 账户,填写表格并从 Stripe 开发者仪表板保存可发布密钥和秘密密钥。
不要在网站上公开秘密密钥或将其嵌入移动应用程序中。它必须是秘密的,并安全地存储在服务器端。
在 Stripe 中,所有账户默认共有四个 API 密钥——两个用于测试模式,两个用于实时模式
- 测试模式密钥:默认情况下,您可以使用此密钥在测试模式下对服务器上的请求进行身份验证。默认情况下,您可以使用此密钥不受限制地执行任何 API 请求。
- 测试模式发布密钥:在 Web 或移动应用程序的客户端代码中,可以使用此密钥进行测试。
- 实时模式密钥:在实时模式下,您可以使用此密钥在服务器上对请求进行身份验证。默认情况下,您可以使用此密钥不受限制地执行任何 API 请求。
- 实时模式发布密钥:当您准备好启动应用程序时,可以使用此密钥在 Web 或移动应用程序的客户端代码中。
您可以在 Stripe 开发者仪表板的 API 密钥页面找到您的密钥和发布密钥。
仅使用您的测试 API 密钥进行测试和开发。这样可以确保您不会意外修改您的实时客户或交易。
在生产环境中,API、后端和前端都使用 HTTPS,以便能够使用 Stripe 支付网关。
API
在 api/.env 的以下选项中设置 Stripe 秘密密钥
WC_STRIPE_SECRET_KEY=STRIPE_SECRET_KEY
前端
在 frontend/.env 的以下选项中设置 Stripe 可发布密钥和货币
NEXT_PUBLIC_WC_STRIPE_PUBLISHABLE_KEY=STRIPE_PUBLISHABLE_KEY
更改语言和货币
要更改语言和货币,请从管理员仪表板的设置页面,在“区域设置”部分更改语言(英语或法语)、货币和 Stripe 货币。
对于 Stripe 货币,它应该是以下支持的货币之一。
添加新语言
要添加新语言,请按以下步骤操作
API
- 将新的语言 ISO 639-1 代码 添加到 api/src/config/env.config.ts 中的
LANGUAGES设置。 - 在 src/lang 文件夹中创建一个新文件 <ISO 639-1 code>.ts 并在此文件中添加翻译。
- 将您的翻译添加到 src/lang/i18n.ts
后端
- 将新的语言 ISO 639-1 代码 及其标签添加到 src/config/env.config.ts 的
LANGUAGES常量中。 - 将翻译添加到 src/lang/*.ts。
前端
将翻译添加到 src/lang/*.ts。
演示数据库
Windows, Linux, macOS
- 下载并安装 MongoDB 命令行数据库工具。
- 在 Windows 上,将 MongoDB 命令行数据库工具文件夹添加到
Path环境变量。 - 下载 wexcommerce-db.zip 到您的机器上。
- 使用以下命令恢复 wexCommerce 演示数据库
mongorestore --verbose --drop --gzip --host=127.0.0.1 --port=27017 --username=admin --password=$PASSWORD --authenticationDatabase=admin --nsInclude="wexcommerce.*" --archive=wexcommerce.gz
不要忘记设置 $PASSWORD。
如果您正在使用 MongoDB Atlas,请将您的 MongoDB Atlas URI 放入 --uri= 命令行参数中
mongorestore --verbose --drop --gzip --uri="mongodb://admin:$PASSWORD@127.0.0.1:27017/wexcommerce?authSource=admin&appName=wexcommerce" --nsInclude="wexcommerce.*" --nsFrom="wexcommerce.*" --nsTo="wexcommerce.*" --archive=wexcommerce.gz
将 cdn.zip 解压到您的 Web 服务器上,以便可以通过 https:///cdn/wexcommerce/ 访问文件
cdn/wexcommerce/ 包含以下文件夹
- cdn/wexcommerce/users:此文件夹包含用户图片。
- cdn/wexcommerce/categories:此文件夹包含类别图片。
- cdn/wexcommerce/products:此文件夹包含产品图片。
- cdn/wexcommerce/temp:此文件夹包含临时文件。
管理员用户:admin@wexcommerce.com
密码:sh0ppingC4rt
前端用户:jdoe@wexcommerce.com
密码:sh0ppingC4rt
Docker
要在 Docker 容器中恢复 wexCommerce 演示数据库,请按以下步骤操作
-
确保端口 80、8001、4005 和 27017 未被任何应用程序使用。
-
在主机上下载并安装 MongoDB 命令行数据库工具。
-
将 MongoDB 命令行数据库工具文件夹添加到主机上的 Path 环境变量中。
-
将 wexcommerce-db.zip 下载到您的主机并解压。
-
运行 compose
docker compose up
-
进入 wexcommerce-db 文件夹并使用以下命令恢复演示数据库
mongorestore --verbose --drop --gzip --host=127.0.0.1 --port=27017 --username=admin --password=$PASSWORD --authenticationDatabase=admin --nsInclude="wexcommerce.*" --archive=wexcommerce.gz
将 $PASSWORD 替换为在 docker-compose.yml 中设置的 MongoDB 密码。
-
使用以下命令获取 API Docker 容器名称
docker container ls
名称应类似于:src-api-1 -
进入 wexcommerce-db/cdn 文件夹,并使用以下命令将该文件夹的内容复制到 API 容器中
docker cp ./cdn/categories src-api-1:/var/www/cdn/wexcommerce
docker cp ./cdn/products src-api-1:/var/www/cdn/wexcommerce
将 src-api-1 替换为您的 API 容器名称。
-
访问后端 https://:8001 并使用以下凭据登录
管理员用户:admin@wexcommerce.com
密码:sh0ppingC4rt -
访问前端 https:// 并使用以下凭据登录
前端用户:jdoe@wexcommerce.com
密码:sh0ppingC4rt
从源码运行
以下是从代码运行 wexCommerce 的说明。
必备组件
安装 git、Node.js、NGINX 或 IIS、MongoDB 和 mongosh。如果您想使用 MongoDB Atlas,可以跳过安装和配置 MongoDB。
配置 MongoDB
mongosh
创建管理员用户
db = db.getSiblingDB('admin')
db.createUser({ user: "admin" , pwd: "PASSWORD",
roles: ["userAdminAnyDatabase", "dbAdminAnyDatabase", "readWriteAnyDatabase"]})
将 PASSWORD 替换为强密码。
通过更改 mongod.conf 以如下方式安全 MongoDB
net:
  port: 27017
  bindIp: 0.0.0.0

security:
  authorization: enabled
重启 MongoDB 服务。
说明
- 克隆 wexCommerce 仓库
sudo git clone https://github.com/aelassas/wexcommerce.git
- 添加 api/.env 文件
NODE_ENV=development
WC_PORT=4005
WC_HTTPS=false
WC_PRIVATE_KEY=/etc/ssl/wexcommerce.key
WC_CERTIFICATE=/etc/ssl/wexcommerce.crt
WC_DB_URI=mongodb://127.0.0.1:27017/wexcommerce?authSource=admin&appName=wexcommerce
WC_DB_SSL=false
WC_DB_SSL_KEY=/etc/ssl/wexcommerce.key
WC_DB_SSL_CERT=/etc/ssl/wexcommerce.crt
WC_DB_SSL_CA=/etc/ssl/wexcommerce.ca.pem
WC_DB_DEBUG=false
WC_COOKIE_SECRET=COOKIE_SECRET
WC_AUTH_COOKIE_DOMAIN=localhost
WC_JWT_SECRET=JWT_SECRET
WC_JWT_EXPIRE_AT=86400
WC_TOKEN_EXPIRE_AT=86400
WC_SMTP_HOST=in-v3iljet.com
WC_SMTP_PORT=587
WC_SMTP_USER=USER
WC_SMTP_PASS=PASSWORD
WC_SMTP_FROM=admin@wexcommerce.com
WC_CDN_USERS=/var/www/cdn/wexcommerce/users
WC_CDN_TEMP_USERS=/var/www/cdn/wexcommerce/temp/users
WC_CDN_CATEGORIES=/var/www/cdn/wexcommerce/categories
WC_CDN_TEMP_CATEGORIES=/var/www/cdn/wexcommerce/temp/categories
WC_CDN_PRODUCTS=/var/www/cdn/wexcommerce/products
WC_CDN_TEMP_PRODUCTS=/var/www/cdn/wexcommerce/temp/products
WC_BACKEND_HOST=https://:8005/
WC_FRONTEND_HOST=https://:8006/
WC_DEFAULT_LANGUAGE=en
WC_DEFAULT_CURRENCY=$
WC_DEFAULT_STRIPE_CURRENCY=USD
WC_STRIPE_SECRET_KEY=STRIPE_SECRET_KEY
WC_STRIPE_SESSION_EXPIRE_AT=82800
WC_ADMIN_EMAIL=admin@wexcommerce.com
WC_RECAPTCHA_SECRET=RECAPTCHA_SECRET
您必须配置以下选项
WC_DB_URI=mongodb://127.0.0.1:27017/wexcommerce?authSource=admin&appName=wexcommerce
WC_SMTP_HOST=in-v3iljet.com
WC_SMTP_PORT=587
WC_SMTP_USER=USER
WC_SMTP_PASS=PASSWORD
WC_STRIPE_SECRET_KEY=STRIPE_SECRET_KEY

WC_CDN_USERS=/var/www/cdn/wexcommerce/users
WC_CDN_TEMP_USERS=/var/www/cdn/wexcommerce/temp/users
WC_CDN_CATEGORIES=/var/www/cdn/wexcommerce/categories
WC_CDN_TEMP_CATEGORIES=/var/www/cdn/wexcommerce/temp/categories
WC_CDN_PRODUCTS=/var/www/cdn/wexcommerce/products
WC_CDN_TEMP_PRODUCTS=/var/www/cdn/wexcommerce/temp/products
在 Windows 上,安装 IIS 并使用以下值更新以下设置
WC_CDN_USERS=C:\inetpub\wwwroot\cdn\wexcommerce\users
WC_CDN_TEMP_USERS=C:\inetpub\wwwroot\cdn\wexcommerce\temp\users
WC_CDN_CATEGORIES=C:\inetpub\wwwroot\cdn\wexcommerce\categories
WC_CDN_TEMP_CATEGORIES=C:\inetpub\wwwroot\cdn\wexcommerce\temp\categories
WC_CDN_PRODUCTS=C:\inetpub\wwwroot\cdn\wexcommerce\products
WC_CDN_TEMP_PRODUCTS=C:\inetpub\wwwroot\cdn\wexcommerce\temp\products
授予运行 wexCommerce API 的用户对
C:\inetpub\wwwroot\cdn\wexcommerce的完全访问权限。如果您想使用 MongoDB Atlas,请将您的 MongoDB Atlas URI 放入
WC_DB_URI,否则将WC_DB_URI中的PASSWORD替换为您的 MongoDB 密码。将JWT_SECRET替换为一个秘密令牌。最后,设置 SMTP 选项。SMTP 选项对于注册是必需的。您可以使用 sendgrid 或任何其他事务性电子邮件提供商。如果您选择 sendgrid,请在 sendgrid.com 上创建一个帐户,登录并转到仪表板。在左侧面板上,点击电子邮件 API,然后点击集成指南。然后,选择SMTP 中继并按照步骤操作。系统将提示您创建一个 API 密钥。创建 API 密钥并验证 smtp 中继后,将 API 密钥复制到 ./api/.env 中的
WC_SMTP_PASS中。Sendgrid 的免费计划允许每天发送最多 100 封电子邮件。如果您需要每天发送超过 100 封电子邮件,请切换到付费计划或选择其他事务性电子邮件提供商。COOKIE_SECRET和JWT_SECRET至少应为 32 个字符长,但越长越好。您可以使用在线密码生成器并将密码长度设置为 32 个或更长。要启用 Stripe 支付网关,请注册一个 Stripe 账户,填写表格并从 Stripe 仪表板保存可发布密钥和秘密密钥。然后,在 api/.env 中的以下选项中设置秘密密钥
WC_STRIPE_SECRET_KEY=STRIPE_SECRET_KEY
不要在网站上公开 Stripe 密钥或将其嵌入移动应用程序中。它必须保密并安全地存储在服务器端。使用 Stripe 的测试模式。
仅使用您的测试 API 密钥进行测试。这样可以确保您不会意外修改您的实时客户或交易。
运行 api
cd ./api
npm install
npm run dev
- 添加 backend/.env 文件并设置以下选项
NEXT_PUBLIC_WC_SERVER_API_HOST=https://:4005
NEXT_PUBLIC_WC_CLIENT_API_HOST=https://:4005
NEXT_PUBLIC_WC_PAGE_SIZE=30
NEXT_PUBLIC_WC_CDN_USERS=https:///cdn/wexcommerce/users
NEXT_PUBLIC_WC_CDN_TEMP_USERS=https:///cdn/wexcommerce/temp/users
NEXT_PUBLIC_WC_CDN_CATEGORIES=https:///cdn/wexcommerce/categories
NEXT_PUBLIC_WC_CDN_TEMP_CATEGORIES=https:///cdn/wexcommerce/temp/categories
NEXT_PUBLIC_WC_CDN_PRODUCTS=https:///cdn/wexcommerce/products
NEXT_PUBLIC_WC_CDN_TEMP_PRODUCTS=https:///cdn/wexcommerce/temp/products
运行后端
cd ./backend
npm install
npm run dev
- 添加 frontend/.env 文件
NEXT_PUBLIC_WC_SERVER_API_HOST=https://:4005
NEXT_PUBLIC_WC_CLIENT_API_HOST=https://:4005
NEXT_PUBLIC_WC_PAGE_SIZE=30
NEXT_PUBLIC_WC_CDN_USERS=https:///cdn/wexcommerce/users
NEXT_PUBLIC_WC_CDN_CATEGORIES=https:///cdn/wexcommerce/categories
NEXT_PUBLIC_WC_CDN_PRODUCTS=https:///cdn/wexcommerce/products
NEXT_PUBLIC_WC_FB_APP_ID=XXXXXXXXXX
NEXT_PUBLIC_WC_APPLE_ID=XXXXXXXXXX
NEXT_PUBLIC_WC_GG_APP_ID=XXXXXXXXXX
NEXT_PUBLIC_WC_STRIPE_PUBLISHABLE_KEY=STRIPE_PUBLISHABLE_KEY
NEXT_PUBLIC_WC_GOOGLE_ANALYTICS_ENABLED=false
NEXT_PUBLIC_WC_GOOGLE_ANALYTICS_ID=G-XXXXXXXXXX
您必须配置以下选项
NEXT_PUBLIC_WC_CDN_USERS=https:///cdn/wexcommerce/users
NEXT_PUBLIC_WC_CDN_CATEGORIES=https:///cdn/wexcommerce/categories
NEXT_PUBLIC_WC_CDN_PRODUCTS=https:///cdn/wexcommerce/products
NEXT_PUBLIC_WC_STRIPE_PUBLISHABLE_KEY=STRIPE_PUBLISHABLE_KEY
要使用社交登录,请设置这些选项
NEXT_PUBLIC_WC_FB_APP_ID=XXXXXXXXXX
NEXT_PUBLIC_WC_APPLE_ID=XXXXXXXXXX
NEXT_PUBLIC_WC_GG_APP_ID=XXXXXXXXXX
要启用 Stripe 支付网关,请在
NEXT_PUBLIC_WC_STRIPE_PUBLISHABLE_KEY中设置 Stripe 可发布密钥。您可以从 Stripe 仪表板中检索它。运行前端
cd ./frontend
npm install
npm run dev
- 配置 https:///cdn
- 在 Windows 上,安装 IIS 并创建 C:\inetpub\wwwroot\cdn 文件夹。
- 在 Linux 上,安装 NGINX 并通过按如下方式更改 /etc/nginx/sites-available/default 来添加 cdn 文件夹
server { listen 80 default_server; server_name _; ... location /cdn { alias /var/www/cdn; } } - 从 https://:8005/sign-up 创建一个管理员用户
您可以从后端设置页面更改语言和货币。
日志
所有 API 日志都写入 ./api/logs/all.log。
API 错误日志也写入 ./api/logs/error.log。
Using the Code

本节描述了 wexCommerce 的软件架构,包括 API、前端和后端。
wexCommerce API 是一个 Node.js 服务器应用程序,它使用 Express 公开一个 RESTful API,提供对 wexCommerce MongoDB 数据库的访问。
wexCommerce 前端是一个 Next.js Web 应用程序,它是搜索和购买产品的主要 Web 界面。
wexCommerce 后端是一个 Next.js Web 应用程序,允许管理员管理类别、产品、订单、客户、支付和设置。
API

wexCommerce API 公开了后端和前端所需的所有 wexCommerce 功能。API 遵循 MVC 设计模式。JWT 用于身份验证。有些功能需要身份验证,例如与管理产品和订单相关的功能,而另一些功能则不需要身份验证,例如为非身份验证用户检索类别和可用产品。
- ./api/src/models/ 文件夹包含 MongoDB 模型。
- ./api/src/routes/ 文件夹包含 Express 路由。
- ./api/src/controllers/ 文件夹包含控制器。
- ./api/src/middlewares/ 文件夹包含中间件。
- ./api/src/app.ts 是加载路由的主服务器。
- ./api/src/index.ts 是 wexCommerce API 的主要入口点。
index.ts
index.ts 在主服务器中
import 'dotenv/config'
import process from 'node:process'
import fs from 'node:fs/promises'
import http from 'node:http'
import https, { ServerOptions } from 'node:https'
import * as env from './config/env.config'
import * as databaseHelper from './common/databaseHelper'
import app from './app'
import * as logger from './common/logger'

if (
  await databaseHelper.connect(env.DB_URI, env.DB_SSL, env.DB_DEBUG) && await databaseHelper.initialize()
) {
  let server: http.Server | https.Server

  if (env.HTTPS) {
    https.globalAgent.maxSockets = Number.POSITIVE_INFINITY
    const privateKey = await fs.readFile(env.PRIVATE_KEY, 'utf8')
    const certificate = await fs.readFile(env.CERTIFICATE, 'utf8')
    const credentials: ServerOptions = { key: privateKey, cert: certificate }
    server = https.createServer(credentials, app)

    server.listen(env.PORT, () => {
      logger.info('HTTPS server is running on Port', env.PORT)
    })
  } else {
    server = app.listen(env.PORT, () => {
      logger.info('HTTP server is running on Port', env.PORT)
    })
  }

  const close = () => {
    logger.info('Gracefully stopping...')
    server.close(async () => {
      logger.info(`HTTP${env.HTTPS ? 'S' : ''} server closed`)
      await databaseHelper.close(true)
      logger.info('MongoDB connection closed')
      process.exit(0)
    })
  }

  ['SIGINT', 'SIGTERM', 'SIGQUIT'].forEach((signal) => process.on(signal, close))
}
这是一个 TypeScript 文件,它使用 Node.js 和 Express 启动一个服务器。它导入了多个模块,包括 dotenv、process、fs、http、https、mongoose 和 app。然后它建立与 wexCommerce MongoDB 数据库的连接。然后它检查 HTTPS 环境变量是否设置为 true,如果是,则使用 https 模块和提供的私钥和证书创建一个 HTTPS 服务器。否则,它使用 http 模块创建一个 HTTP 服务器。服务器监听 PORT 环境变量中指定的端口。
定义了 close 函数,以便在收到终止信号时优雅地停止服务器。它关闭服务器和 MongoDB 连接,然后以状态码 0 退出进程。最后,它注册 close 函数,以便在进程收到 SIGINT、SIGTERM 或 SIGQUIT 信号时调用。
app.ts
app.ts 是 wexCommerce API 的主要入口点
import express from 'express'
import compression from 'compression'
import helmet from 'helmet'
import nocache from 'nocache'
import cookieParser from 'cookie-parser'
import i18n from './lang/i18n'
import * as env from './config/env.config'
import cors from './middlewares/cors'
import allowedMethods from './middlewares/allowedMethods'
import userRoutes from './routes/userRoutes'
import categoryRoutes from './routes/categoryRoutes'
import productRoutes from './routes/productRoutes'
import cartRoutes from './routes/cartRoutes'
import orderRoutes from './routes/orderRoutes'
import notificationRoutes from './routes/notificationRoutes'
import deliveryTypeRoutes from './routes/deliveryTypeRoutes'
import paymentTypeRoutes from './routes/paymentTypeRoutes'
import settingRoutes from './routes/settingRoutes'
import stripeRoutes from './routes/stripeRoutes'
import * as helper from './common/helper'

const app = express()

app.use(helmet.contentSecurityPolicy())
app.use(helmet.dnsPrefetchControl())
app.use(helmet.crossOriginEmbedderPolicy())
app.use(helmet.frameguard())
app.use(helmet.hidePoweredBy())
app.use(helmet.hsts())
app.use(helmet.ieNoOpen())
app.use(helmet.noSniff())
app.use(helmet.permittedCrossDomainPolicies())
app.use(helmet.referrerPolicy())
app.use(helmet.xssFilter())
app.use(helmet.originAgentCluster())
app.use(helmet.crossOriginResourcePolicy({ policy: 'cross-origin' }))
app.use(helmet.crossOriginOpenerPolicy())

app.use(nocache())
app.use(compression({ threshold: 0 }))
app.use(express.urlencoded({ limit: '50mb', extended: true }))
app.use(express.json({ limit: '50mb' }))

app.use(cors())
app.options('*', cors())
app.use(cookieParser(env.COOKIE_SECRET))
app.use(allowedMethods)

app.use('/', userRoutes)
app.use('/', categoryRoutes)
app.use('/', productRoutes)
app.use('/', cartRoutes)
app.use('/', orderRoutes)
app.use('/', notificationRoutes)
app.use('/', deliveryTypeRoutes)
app.use('/', paymentTypeRoutes)
app.use('/', settingRoutes)
app.use('/', stripeRoutes)

i18n.locale = env.DEFAULT_LANGUAGE

await helper.mkdir(env.CDN_USERS)
await helper.mkdir(env.CDN_TEMP_USERS)
await helper.mkdir(env.CDN_CATEGORIES)
await helper.mkdir(env.CDN_TEMP_CATEGORIES)
await helper.mkdir(env.CDN_PRODUCTS)
await helper.mkdir(env.CDN_TEMP_PRODUCTS)

export default app
首先,我们创建一个 Express app 并加载 cors、compression、helmet 和 nocache 等中间件。我们使用 helmet 中间件库设置了各种安全措施。我们还导入了应用程序不同部分的各种路由文件,例如 productRoutes、orderRoutes、categoryRoutes、notificationRoutes、userRoutes。最后,我们加载 Express 路由并导出 app。
路由
wexCommerce API 中有 10 条路由。每条路由都有自己的控制器,遵循 MVC 设计模式和 SOLID 原则。以下是主要路由
userRoutes:提供与用户相关的 REST 函数categoryRoutes:提供与类别相关的 REST 函数productRoutes:提供与产品相关的 REST 函数cartRoutes:提供与购物车相关的 REST 函数deliveryTypeRoutes:提供与配送方式相关的 REST 函数paymentTypeRoutes:提供与支付方式相关的 REST 函数orderRoutes:提供与订单相关的 REST 函数notificationRoutes:提供与通知相关的 REST 函数settingRoutes:提供与设置相关的 REST 函数stripeRoutes:提供与 Stripe 支付网关相关的 REST 函数
我们不会逐一解释每条路由。我们将以 categoryRoutes 为例,看看它是如何制作的
import express from 'express'
import multer from 'multer'
import routeNames from '../config/categoryRoutes.config'
import authJwt from '../middlewares/authJwt'
import * as categoryController from '../controllers/categoryController'

const routes = express.Router()

routes.route(routeNames.validate).post(authJwt.verifyToken, categoryController.validate)
routes.route(routeNames.checkCategory).get(authJwt.verifyToken, categoryController.checkCategory)
routes.route(routeNames.create).post(authJwt.verifyToken, categoryController.create)
routes.route(routeNames.update).put(authJwt.verifyToken, categoryController.update)
routes.route(routeNames.delete).delete(authJwt.verifyToken, categoryController.deleteCategory)
routes.route(routeNames.getCategory).get(authJwt.verifyToken, categoryController.getCategory)
routes.route(routeNames.getCategories).get(categoryController.getCategories)
routes.route(routeNames.getFeaturedCategories).get(categoryController.getFeaturedCategories)
routes.route(routeNames.searchCategories).get(authJwt.verifyToken, categoryController.searchCategories)
routes.route(routeNames.createImage).post([authJwt.verifyToken, multer({ storage: multer.memoryStorage() }).single('image')], categoryController.createImage)
routes.route(routeNames.updateImage).post([authJwt.verifyToken, multer({ storage: multer.memoryStorage() }).single('image')], categoryController.updateImage)
routes.route(routeNames.deleteImage).post(authJwt.verifyToken, categoryController.deleteImage)
routes.route(routeNames.deleteTempImage).post(authJwt.verifyToken, categoryController.deleteTempImage)

export default routes
首先,我们创建一个 Express Router。然后,我们使用其名称、方法、中间件和控制器创建路由。
routeNames 包含 categoryRoutes 路由名称
export default {
    validate: '/api/validate-category',
    checkCategory: '/api/check-category/:id',
    create: '/api/create-category',
    update: '/api/update-category/:id',
    delete: '/api/delete-category/:id',
    getCategory: '/api/category/:id/:language',
    getCategories: '/api/categories/:language/:imageRequired',
    getFeaturedCategories: '/api/featured-categories/:language/:size',
    searchCategories: '/api/search-categories/:language',
    createImage: '/api/create-category-image',
    updateImage: '/api/update-category-image/:id',
    deleteImage: '/api/delete-category-image/:id',
    deleteTempImage: '/api/delete-temp-category-image/:image',
}
categoryController 包含关于类别的主要业务逻辑。我们不会查看控制器的所有源代码,因为它相当大,但我们将以 create 和 getCategories 控制器函数为例。
以下是 Category 模型
import { Schema, model } from 'mongoose'
import * as env from '../config/env.config'

const categorySchema = new Schema<env.Category>({
  values: {
    type: [Schema.Types.ObjectId],
    ref: 'Value',
    validate: (value: any) => Array.isArray(value),
  },
  image: {
    type: String,
  },
  featured: {
    type: Boolean,
    default: false,
  },
}, {
  timestamps: true,
  strict: true,
  collection: 'Category',
})

const Category = model<env.Category>('Category', categorySchema)

export default Category
一个 Category 有多个值。每种语言一个值。默认支持英语和法语。
以下是 Value 模型
import { Schema, model } from 'mongoose'
import * as env from '../config/env.config'

const locationValueSchema = new Schema<env.Value>(
  {
    language: {
      type: String,
      required: [true, "can't be blank"],
      index: true,
      trim: true,
      lowercase: true,
      minLength: 2,
      maxLength: 2,
    },
    value: {
      type: String,
      required: [true, "can't be blank"],
      index: true,
      trim: true,
    },
  },
  {
    timestamps: true,
    strict: true,
    collection: 'Value',
  },
)

const Value = model<env.Value>('Value', locationValueSchema)

export default Value
一个 Value 包含一个 language 代码(ISO 639-1)和一个字符串 value。
以下是 create 控制器函数
/**
 * Create a category.
 *
 * @async
 * @param {Request} req
 * @param {Response} res
 * @returns {unknown}
 */
export const create = async (req: Request, res: Response) => {
  const { body }: { body: wexcommerceTypes.UpsertCategoryPayload } = req
  const { values, image, featured } = body

  try {
    if (image) {
      const _image = path.join(env.CDN_TEMP_CATEGORIES, image)

      if (!await helper.exists(_image)) {
        logger.error(i18n.t('CATEGORY_IMAGE_NOT_FOUND'), body)
        return res.status(400).send(i18n.t('CATEGORY_IMAGE_NOT_FOUND'))
      }
    }

    const _values = []
    for (const value of values) {
      const _value = new Value({
        language: value.language,
        value: value.value,
      })
      await _value.save()
      _values.push(_value._id)
    }

    const category = new Category({ values: _values, featured })
    await category.save()

    if (image) {
      const _image = path.join(env.CDN_TEMP_CATEGORIES, image)

      if (await helper.exists(_image)) {
        const filename = `${category._id}_${Date.now()}${path.extname(image)}`
        const newPath = path.join(env.CDN_CATEGORIES, filename)

        await fs.rename(_image, newPath)
        category.image = filename
        await category.save()
      }
    }

    return res.sendStatus(200)
  } catch (err) {
    logger.error(`[category.create] ${i18n.t('DB_ERROR')} ${req.body}`, err)
    return res.status(400).send(i18n.t('DB_ERROR') + err)
  }
}
在此函数中,我们检索请求的正文,我们遍历正文中提供的值(每种语言一个值),并创建一个 Value。最后,我们根据创建的值和图像文件创建类别。
以下是 getCategories 控制器函数
/**
 * Get categories.
 *
 * @async
 * @param {Request} req
 * @param {Response} res
 * @returns {unknown}
 */
export const getCategories = async (req: Request, res: Response) => {
  try {
    const { language, imageRequired } = req.params
    const _imageRequired = helper.StringToBoolean(imageRequired)

    let $match: mongoose.FilterQuery<env.Category> = {}
    if (_imageRequired) {
      $match = { image: { $ne: null } }
    }

    const categories = await Category.aggregate([
      {
        $match,
      },
      {
        $lookup: {
          from: 'Value',
          let: { values: '$values' },
          pipeline: [
            {
              $match: {
                $and: [
                  { $expr: { $in: ['$_id', '$$values'] } },
                  { $expr: { $eq: ['$language', language] } },
                ],
              },
            },
          ],
          as: 'value',
        },
      },
      { $unwind: { path: '$value', preserveNullAndEmptyArrays: false } },
      { $addFields: { name: '$value.value' } },
      { $project: { value: 0, values: 0 } },
      { $sort: { name: 1 } },
    ], { collation: { locale: env.DEFAULT_LANGUAGE, strength: 2 } })

    return res.json(categories)
  } catch (err) {
    logger.error(`[category.getCategories] ${i18n.t('DB_ERROR')}`, err)
    return res.status(400).send(i18n.t('DB_ERROR') + err)
  }
}
在此控制器函数中,我们根据提供的语言使用 aggregate MongoDB 函数从数据库中检索类别。
前端
前端是一个使用 Node.js、Next.js、React 和 MUI 构建的 Web 应用程序。在前端,用户可以搜索可用产品,将其添加到购物车并根据配送和支付方式进行结账。
- ./frontend/public/ 文件夹包含公共资产。
- ./frontend/src/styles/ 文件夹包含 CSS 样式。
- ./frontend/src/components/ 文件夹包含 React 组件。
- ./frontend/src/lang 包含语言环境文件。
- ./frontend/src/app/ 文件夹包含 Next.js 页面。
- ./frontend/src/lib/ 包含服务器操作。
- ./frontend/next.config.mjs 是前端的主要配置文件。
前端是使用 create-next-app 创建的
npx create-next-app@latest
在 Next.js 中,页面是从 .js、.jsx、.ts 或 .tsx 文件中导出的 React 组件,位于 pages 目录中。每个页面都根据其文件名与路由相关联。
默认情况下,Next.js 会预渲染每个页面。这意味着 Next.js 会提前为每个页面生成 HTML,而不是全部由客户端 JavaScript 完成。预渲染可以带来更好的性能和 SEO。
每个生成的 HTML 都与该页面所需的最小 JavaScript 代码相关联。当浏览器加载页面时,其 JavaScript 代码运行并使页面完全交互。(此过程称为hydration。)
wexCommerce 使用服务器端渲染进行 SEO 优化,以便搜索引擎可以索引产品。
后端
后端是一个使用 Node.js、Next.js、React 和 MUI 构建的 Web 应用程序。在后端,管理员可以管理类别、产品、订单和用户。当创建新订单时,管理员用户会在后端收到通知,并收到自动电子邮件。
- ./backend/public/ 文件夹包含公共资产。
- ./backend/src/styles/ 文件夹包含 CSS 样式。
- ./backend/src/components/ 文件夹包含 React 组件。
- ./backend/src/lang 包含语言环境文件。
- ./backend/src/app/ 文件夹包含 Next.js 页面。
- ./backend/src/lib/ 包含服务器操作。
- ./backend/next.config.mjs 是后端的主要配置文件。
后端也是使用 create-next-app 创建的
npx create-next-app@latest
就是这样!希望您喜欢阅读这篇文章。