
Home Assistant 常见问题解决方案
0/5 (0投票)
在设置 Home Assistant 的过程中,我遇到过各种各样的问题。很多时候,你需要通过 Google 来搜索你遇到的具体问题。如果搜索无果,以下一些论坛可能会有所帮助:
- Home Assistant Subreddit - 我觉得这里能获得最快最好的帮助。
- Home Assistant 社区论坛 - 非常棒的资源,用户知识渊博。据我有限的经验,响应速度稍慢。
然而,由于我自行解决了一些问题,因此我将我遇到的并已解决的问题整理到本文中,以防你遇到相同的问题。
如果你有更多问题,请随时在下方评论区提问。如果我能帮到,我会尽力而为。
错误列表
- 我的 Home Assistant 容器配置文件在哪里?
- balena Etcher 错误 - 注意:出现问题
- 解决 socket.gaierror: [Errno -2] Name does not resolve 错误
- 如何创建 docker-compose.yml 文件
我的 Home Assistant 容器配置文件在哪里?
如果你正在设置 Home Assistant Container,那么你需要在操作系统中运行一个特定的 Docker 命令来建立 Home Assistant 的 config 文件夹。你需要 config 文件夹才能编辑 Home Assistant 的 configuration.yaml 文件,这对于设置 Home Assistant 的许多集成是必需的。
我们首先需要为 Home Assistant 创建一个配置文件夹。

配置文件夹将位于你运行 Docker pull 的驱动器上,在我这里是 C:\ 驱动器。所以,打开 Windows 文件资源管理器,转到 C:\ 驱动器,在文件夹区域右键单击,然后选择 新建 -> 文件夹。输入你想要的文件夹名称,我将其命名为“haconfig”。
现在转到 Windows 的 **开始** 按钮,输入“CMD”并打开命令提示符。然后键入
docker run -d --name homeassistant --privileged --restart=unless-stopped -e TZ=America/Edmonton -v c:\haconfig:/config -p 8123:8123 homeassistant/home-assistant:latest
其中 --name homeassistant 是你的容器名称,TZ=America/Edmonton 是 Home Assistant 的时区(只需输入你自己的时区即可),而 -v c:\haconfig:/config 是配置文件夹的路径(如果你在 C:\Users\Joseph\haconfig 中创建了文件夹,则应为 -v C:\Users\Joseph\haconfig:/config)。
balena Etcher 错误 - 注意:出现问题
如果你使用 balena Etcher 来设置 Home Assistant OS,你可能尝试使用 从 URL 刷写。对大多数人来说,这应该是可行的。对我来说,我遇到了一个错误。
它显示:
Attention. Something went wrong. if it is a compressed image, please check that the archive is no corrupted. Command failed: cmd /c "C:\Users\AppData\Local\Temp\etcher\balena-etcher-electron-78afb6aee66.cmd"
我搜索了这个错误。在 balena 论坛上,我发现了一个 2020 年的长帖子,里面充满了遇到类似/相同问题的人。在我查询的七天前,一位用户回复说他们下载了第一个镜像,而不是指向 Git URL。我们来试试这个。

将 URL https://github.com/home-assistant/operating-system/releases/download/10.0/haos_rpi4-64-10.0.img.xz 复制到浏览器窗口中。它会自动下载。回到 balena Etcher。这次,选择 从文件刷写 而不是从 URL 刷写。选择自动下载的 haos_rpi4-64-10.0.img.xz 文件。
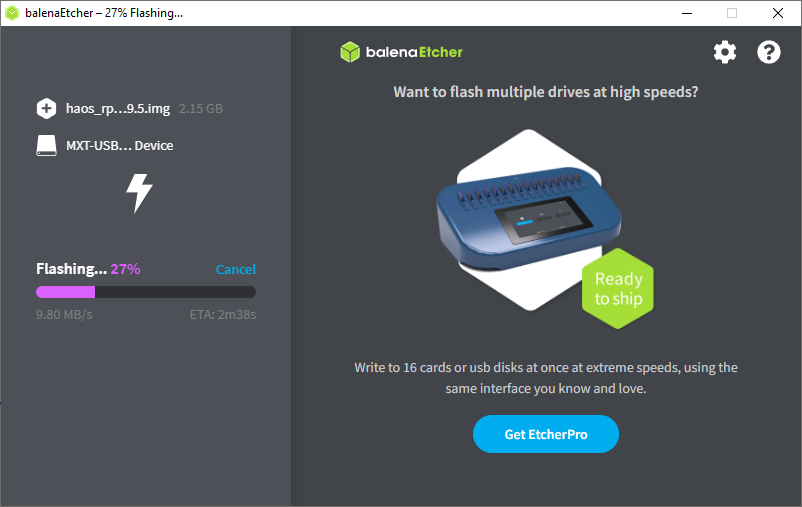
搞定!自动成功了。感谢 balena Etcher 论坛的用户 DirkJam。非常感谢。一旦 balena Etcher 显示“刷写完成!”就表示 Home Assistant OS 镜像已成功刷写到 microSD 卡上。
socket.gaierror: [Errno -2] 名称无法解析
对我而言,我需要在与 Home Assistant 不同的机器上设置 CodeProject.AI Server。我是在 Windows 上设置的 CodeProject.AI Server。然后,当我尝试调用 CodeProject.AI Server 时,即使我的 Raspberry Pi 在同一个网络上,也无法访问 CodeProject.AI。我在 Home Assistant 的日志中看到了一个错误。
这是 Home Assistant home-assistant.log 的完整日志错误。你可以在左侧导航栏的 文件编辑器 中找到它,与编辑 configuration.yaml 的位置相同,点击 浏览文件系统 按钮即可。
2023-04-28 09:33:30.468 ERROR (MainThread) [homeassistant.helpers.entity] Update for image_processing.codeproject_ai_object_10_0_0 fails
Traceback (most recent call last):
  File "/usr/local/lib/python3.10/site-packages/urllib3/connection.py", line 174, in _new_conn
    conn = connection.create_connection(
  File "/usr/local/lib/python3.10/site-packages/urllib3/util/connection.py", line 72, in create_connection
    for res in socket.getaddrinfo(host, port, family, socket.SOCK_STREAM):
  File "/usr/local/lib/python3.10/socket.py", line 955, in getaddrinfo
    for res in _socket.getaddrinfo(host, port, family, type, proto, flags):
socket.gaierror: [Errno -2] Name does not resolve

During handling of the above exception, another exception occurred:

Traceback (most recent call last):
  File "/usr/local/lib/python3.10/site-packages/codeprojectai/core.py", line 103, in post_image
    return requests.post(url, files={"image": image_bytes}, data=data, timeout=timeout)
  File "/usr/local/lib/python3.10/site-packages/requests/api.py", line 115, in post
    return request("post", url, data=data, json=json, **kwargs)
  File "/usr/local/lib/python3.10/site-packages/requests/api.py", line 59, in request
    return session.request(method=method, url=url, **kwargs)
  File "/usr/local/lib/python3.10/site-packages/requests/sessions.py", line 587, in request
    resp = self.send(prep, **send_kwargs)
  File "/usr/local/lib/python3.10/site-packages/requests/sessions.py", line 701, in send
    r = adapter.send(request, **kwargs)
  File "/usr/local/lib/python3.10/site-packages/requests/adapters.py", line 565, in send
    raise ConnectionError(e, request=request)
requests.exceptions.ConnectionError: HTTPConnectionPool(host='http', port=80): Max retries exceeded with url: //10.0.0:32168/v1/vision/detection (Caused by NewConnectionError('<urllib3.connection.HTTPConnection object at 0x7f9fd21990>: Failed to establish a new connection: [Errno -2] Name does not resolve'))

During handling of the above exception, another exception occurred:

Traceback (most recent call last):
  File "/config/custom_components/codeproject_ai_object/image_processing.py", line 365, in process_image
    predictions = self._cpai_object.detect(image)
  File "/usr/local/lib/python3.10/site-packages/codeprojectai/core.py", line 209, in detect
    response = process_image(
  File "/usr/local/lib/python3.10/site-packages/codeprojectai/core.py", line 122, in process_image
    response = post_image(url=url, image_bytes=image_bytes, timeout=timeout, data=data)
  File "/usr/local/lib/python3.10/site-packages/codeprojectai/core.py", line 108, in post_image
    raise CodeProjectAIException(f"CodeProject.AI Server connection error, check your IP and port: {exc}")
codeprojectai.core.CodeProjectAIException: CodeProject.AI Server connection error, check your IP and port: HTTPConnectionPool(host='http', port=80): Max retries exceeded with url: //10.0.0:32168/v1/vision/detection (Caused by NewConnectionError('<urllib3.connection.HTTPConnection object at 0x7f9fd21990>: Failed to establish a new connection: [Errno -2] Name does not resolve'))

During handling of the above exception, another exception occurred:

Traceback (most recent call last):
  File "/usr/src/homeassistant/homeassistant/helpers/entity.py", line 550, in async_update_ha_state
    await self.async_device_update()
  File "/usr/src/homeassistant/homeassistant/helpers/entity.py", line 755, in async_device_update
    raise exc
  File "/usr/src/homeassistant/homeassistant/components/image_processing/__init__.py", line 193, in async_update
    await self.async_process_image(image.content)
  File "/usr/src/homeassistant/homeassistant/components/image_processing/__init__.py", line 174, in async_process_image
    return await self.hass.async_add_executor_job(self.process_image, image)
  File "/usr/local/lib/python3.10/concurrent/futures/thread.py", line 58, in run
    result = self.fn(*self.args, **self.kwargs)
  File "/config/custom_components/codeproject_ai_object/image_processing.py", line 366, in process_image
    except cpai.CodeProjectAIServerException as exc:
AttributeError: module 'codeprojectai.core' has no attribute 'CodeProjectAIServerException'
我开始搜索。我在 Home Assistant subreddit 和 Home Assistant 社区页面 上发帖求助。没有回应。孤立无援,我将错误信息发送给了 Matthew。他说:“你可能需要在你的 Windows 机器上打开 32168 端口。或者更简单的办法是配置 CPAI 在 80 端口运行。”
由于在我的配置中,CodeProject.AI Server 是作为 Windows 机器上的服务运行,而不是直接在 Raspberry Pi 4 上本地运行,所以我需要打开 32168 端口以便它能与 Pi 通信。在 Windows 10 上,你可以这样做:
从 Windows 开始 按钮,选择 设置。然后选择 更新和安全。然后从左侧导航栏选择 Windows 安全中心,然后点击 打开 Windows 安全中心 按钮。然后从左侧导航栏选择 防火墙和网络保护,再选择 高级设置。点击 是 以允许应用进行更改。现在点击 入站规则。

在这里,点击 新建规则…。

我们要为 32168 端口创建一个规则,所以选择 端口,然后点击 下一步。

确保选中了 TCP,然后在 特定本地端口 中输入“32168”,然后点击 下一步。

默认选择是 允许连接,这是正确的。点击 下一步。

网络不是我的强项。我讨厌它,它也讨厌我。我不能 100% 确定这里哪种网络选择是正确的。我比较确定它只是 专用,这可能是最安全的选择,也是唯一必需的选择,但我想让它工作,所以我勾选了所有这些框,然后点击 下一步。

你可以给规则起任何你喜欢的名字。最好给它起一个以后容易识别的名字。我称之为“CPAI 规则”。点击 完成。好了!现在 Home Assistant OS 就可以从我的 Raspberry Pi 4 调用 CodeProject.AI Server 了。
如何创建 docker-compose.yml 文件
我不知道为什么网上对于如何创建 docker-compose.yml 文件如此含糊不清。这可能是因为你实际上必须自己从零开始创建这个文件,而那些已经知道的人会隐含地理解这一点。我以为在创建 Docker 容器时必须遵循某种设置,这可能是有的,但我找不到方法。所以,我将尽可能简单地分解我创建它的步骤。
仅为演示目的,我将演示如何创建一个 docker-compose.yml 文件,该文件用于设置 Wyze Cam v3,使用 docker-wyze-bridge。docker-wyze-bridge 是一个容器,你必须先设置它,Home Assistant 才能使用 Wyze Cam。
转到 GitHub 主页 https://github.com/mrlt8/docker-wyze-bridge。
在 基本用法 下,你会找到一些关于如何使用 Docker Compose 设置 docker-wyze-bridge 的说明。这些说明还 链接到你可以使用的示例 docker-compose.yml。这是我使用版本的基础,但我修改了它,如下所示:
version: '2.4'
services:
    wyze-bridge:
        container_name: wyze-bridge
        restart: unless-stopped
        image: mrlt8/wyze-bridge:latest
        ports:
            - 1935:1935 # RTMP
            - 8554:8554 # RTSP
            - 8888:8888 # HLS
            - 8889:8889 #WebRTC
            - 8189:8189/udp # WebRTC/ICE
            - 5001:5000 # WEB-UI
        environment:
            # [REQUIRED] Fill the following two lines:
            - WYZE_EMAIL=
            - WYZE_PASSWORD=
            # [OPTIONAL] IP Address of the host to enable WebRTC e.g.,:
            - WB_IP=youripaddress
打开记事本。将此粘贴进去。确保你在 WYZE_EMAIL= 后面输入用于创建 Wyze 帐户的电子邮件,并在 WYZE_PASSWORD= 中输入该帐户的密码。由于 CodeProject.AI Server 使用 5000 端口,你需要将下一行更改为 - 5001:5000。如果你尝试使用 5000 端口,当你打开为你 Wyze Cam 创建的本地流时,它会打开 CodeProject.AI Server。我还将我的 IP 地址包含在 - WB_IP= 行中。如果你不知道你的 IP 地址,请转到 Windows 的 开始 按钮,然后开始输入“CMD”,然后选择 命令提示符。然后,输入 ipconfig。你需要的地址是 IPv4 地址。

打开 Windows 文件资源管理器。创建一个新文件夹来存放你的 docker-compose.yml 文件。我将其命名为“docker-wyze-bridge”。

回到记事本。转到 文件,然后选择 另存为。在 保存类型 字段中,将下拉菜单从 文本文档 (*.txt) 更改为 所有文件 (*)。输入“docker-compose.yml”。点击 保存。
好了。这就是创建 docker-compose.yml 的方法。去吧,互联网!