
Arduino (ESP32) 与 C# (ASP.NET) 之间的 AES 加密数据传输
通过使用 AES 加密的 HTTP GET 请求在 Arduino 和 C# (ASP.NET) 之间进行通信。

Arduino 和 C# 都有可用的 AES 加密库。因此,它们之间的数据传输可以进行消息加密。
我以前有过 AES 加密经验,我写了一篇关于 C# 中 AES 256 位实现的 文章。以下是该文章的链接:
然而,这是我第一次在 Arduino 项目中使用 AES。如果我的理解是正确的,AES 算法的基本原理在两种编程语言(C/C++ 和 C#)中实现方式相同。因此,用 C/C++ 加密并在 C# 中解密,反之亦然,用 C# 加密并在 C/C++ 中解密,应该没有问题。
好的,让我们开始吧
有五个元素(参数)会影响 AES 的工作方式。让我们识别它们:
- 密码模式
- 块/密钥大小(128 位、192 位、256 位)
- 密钥字节
- IV 字节(初始向量)
- 填充模式
通过在两端(C# 和 C/C++)正确设置,它们应该产生相同的结果。
首先,密码模式
反编译 C# 程序集,得到以下结果:
namespace System.Security.Cryptography
{
    [Serializable]
    [ComVisible(true)]
    public enum CipherMode
    {
        CBC = 1,
        ECB,
        OFB,
        CFB,
        CTS
    }
}
CBC 是 C# AES 中使用的默认密码模式。
好的,让我们探索 Arduino 中的 AES 密码模式。
经过一番搜索,我找到并安装了 Matej Sychra 提供的名为 AESLib 的库。
Arduino 参考页面:https://www.arduino.cc/reference/en/libraries/aeslib/
作者的 Github:https://github.com/suculent/thinx-aes-lib

密钥/块大小和密码模式
根据描述,它使用 128 位 的密钥大小和 CBC 密码模式。
密钥和 IV
由于 AESLib 使用 128 位密钥大小,这意味着 Key 和 IV 将由 16 个字节组成。16 个字节等于 128 位。每个字节可以表示 0 到 255 范围内的任何数字。
随机 16 字节,好的,这很容易。例如:
C# (ASP.NET)
byte[] aesKey = { 48, 85, 92, 36, 73, 111, 127, 18, 64, 38, 54, 89, 72, 105, 78, 15 };
byte[] aesIv = { 145, 33, 51, 67, 24, 173, 52, 209, 63, 42, 13, 115, 220, 3, 8, 10 };
C/C++ (Arduino)
byte aesKey[] = { 48, 85, 92, 36, 73, 111, 127, 18, 64, 38, 54, 89, 72, 105, 78, 15 };
byte aesIv[] = { 145, 33, 51, 67, 24, 173, 52, 209, 63, 42, 13, 115, 220, 3, 8, 10 };
KEY 和 IV 有什么作用?
KEY:它是用于打乱(加密)和解密数据的秘密密码。- 初始向量 (
IV):这通常是一个随机数,用于确保相同的数据在两次加密时看起来不同。然而,在我们的例子中,我们将硬编码IV,因此相同的数据在每次加密时看起来都相同。
在加密过程中,原始字节(或文本)将被分成多个块。KEY 和 IV 都会影响每个块的打乱结果。
在解密(反转/解密)块时,必须使用相同的 KEY 和 IV 来显示原始上下文,否则你会得到一堆乱七八糟的外星语言!
当一个块完全打乱后,一个新的 IV (一个向量)将被生成,通过遵循来自前一个数据块的特定模式来影响下一个块的打乱。每个块将始终使用相同的 KEY。

KEY 通常被称为 Password,通常由最终用户(使用软件的人)提供。没有人,包括您(开发人员),会知道 KEY 数据是什么,它可以反转打乱。(除非您将用户的“密码”保存在数据库中)。
至于 IV,它通常在软件中硬编码。只有您(开发人员)会知道 IV 数据是什么。(当然,除非源代码泄露或有人逆向工程或反编译软件二进制代码)。
让我们用这个类比:KEY 就像第一个密码(公开的),而 IV 是第二个密码(私有的)。
然而,在这个 Arduino 项目中,两个“密码”(KEY 和 IV)都将被硬编码并保密。
填充模式
我们将检查的最后一个元素是“填充模式”。
在 C# 中,可用的填充模式如下:
namespace System.Security.Cryptography
{
    [Serializable]
    [ComVisible(true)]
    public enum PaddingMode
    {
        None = 1,
        PKCS7,
        Zeros,
        ANSIX923,
        ISO10126
    }
}
PKCS7 是 C# AES 默认使用的填充模式。
然而,在 Arduino AESLib 中,通过探索作者提供的源代码(在此处找到:https://github.com/suculent/thinx-aes-lib/blob/master/src/AES.h),可用的填充模式列出如下(见第 41 行):
enum class paddingMode {
CMS,
Bit,
ZeroLength,
Null,
Space,
Random,
Array
};
有趣的是,这些似乎与 C# 中可用的不直接匹配。
然后,我继续探索另一个 C++ 源文件:https://github.com/suculent/thinx-aes-lib/blob/master/src/AES.cpp。
在第 442 行:
...

* CMS (Cryptographic Message Syntax).
*     This pads with the same value as the number of padding bytes.
*     Defined in RFC 5652, PKCS#5, PKCS#7 (X.509 certificate) and RFC 1423 PEM.

...
PKCS#7 关键字在 CMS 填充模式的描述中提及,这与 C# 中的 PKCS7 填充模式一致。因此,我们将选择 CMS 填充模式在 Arduino C/C++ 中实现。
到此,所有参数都已确定。
- 密码模式:CBC
- 块/密钥大小:128 位
- 密钥:16 字节
- IV:16 字节
- 填充模式:C# 中为 PKCS7,Arduino C/C++ 中为 CMS
让我们开始编码
我使用了一个名为 base64_encode 的库,由 dojyorin 提供,用于执行 base64 编码。
- Arduino 参考页面:https://www.arduino.cc/reference/en/libraries/base64_encode/
- 作者的 Github:https://github.com/dojyorin/arduino_base64

让我们从 Arduino C/C++ 中的加密开始。代码解释在代码行中的注释中提供:
// import AES encryption library
#include "AESLib.h"

// import base64 conversion library
#include "arduino_base64.hpp"

// declare a global AESLib object
AESLib aesLib;

// the text encryption function
String encrypt(String inputText) {

    // calculate the length of bytes of the input text
    // an extra of byte must be added for a null character
    // a null character will be filled as a text terminator
    // so that the process will not overflow to other parts of memory
    int bytesInputLength = inputText.length() + 1;

    // declare an empty byte array (a memory storage)
    byte bytesInput[bytesInputLength];

    // convert the text into bytes, a null char is filled at the end
    inputText.getBytes(bytesInput, bytesInputLength);

    // calculate the length of bytes after encryption done
    int outputLength = aesLib.get_cipher_length(bytesInputLength);

    // declare an empty byte array (a memory storage)
    byte bytesEncrypted[outputLength];

    // initializing AES engine

    // Cipher Mode and Key Size are preset in AESLib
    // Cipher Mode = CBC
    // Key Size = 128

    // declare the KEY and IV
    byte aesKey[] = { 23, 45, 56, 67, 67, 87, 98, 12, 32, 34, 45, 56, 67, 87, 65, 5 };
    byte aesIv[] = { 123, 43, 46, 89, 29, 187, 58, 213, 78, 50, 19, 106, 205, 1, 5, 7 };

    // set the padding mode to paddingMode.CMS
    aesLib.set_paddingmode((paddingMode)0);

    // encrypt the bytes in "bytesInput" and store the output at "bytesEncrypted"
    // param 1 = the source bytes to be encrypted
    // param 2 = the length of source bytes
    // param 3 = the destination of encrypted bytes that will be saved
    // param 4 = KEY
    // param 5 = the length of KEY bytes (16)
    // param 6 = IV
    aesLib.encrypt(bytesInput, bytesInputLength, bytesEncrypted, aesKey, 16, aesIv);

    // declare a empty char array
    char base64EncodedOutput[base64::encodeLength(outputLength)];

    // convert the encrypted bytes into base64 string "base64EncodedOutput"
    base64::encode(bytesEncrypted, outputLength, base64EncodedOutput);

    // convert the encoded base64 char array into string
    return String(base64EncodedOutput);
}
C# 版本的加密
using System.Security.Cryptography;

static byte[] aesKey = { 23, 45, 56, 67, 67, 87, 98, 12, 32, 34, 45, 56, 67, 87, 65, 5 };
static byte[] aesIv = { 123, 43, 46, 89, 29, 187, 58, 213, 78, 50, 19, 106, 205, 1, 5, 7 };

public static string AesEncrypt(string originalText)
{
    // add a null character at the end
    // this is required by Arduino C/C++ as a string terminator
    // prevent Arduino process to overflow to other memory's data
    originalText += "\0";

    // convert the string into bytes (byte array)
    byte[] data = System.Text.Encoding.UTF8.GetBytes(originalText);

    // initialize AES encryption
    using (Aes aes = Aes.Create())
    {
        // set the AES parameters
        aes.KeySize = 128;
        aes.BlockSize = 128;
        aes.Mode = CipherMode.CBC;
        aes.Padding = PaddingMode.PKCS7;
        aes.Key = aesKey;
        aes.IV = aesIv;

        // Create an encryptor to encrypt the data
        ICryptoTransform encryptor = aes.CreateEncryptor(aes.Key, aes.IV);

        // create a memory stream for AES to store the encrypted bytes
        using (MemoryStream msEncrypt = new MemoryStream())
        {
            using (CryptoStream csEncrypt =
                   new CryptoStream(msEncrypt, encryptor, CryptoStreamMode.Write))
            {
                // begin the encryption process
                csEncrypt.Write(data, 0, data.Length);
                csEncrypt.FlushFinalBlock();

                // get the encrypted bytes
                data = msEncrypt.ToArray();
            }
        }
    }

    // convert the encrypted bytes into base64 string
    // sending this text to Arduino
    return Convert.ToBase64String(data);
}
接下来是解密,首先是 Arduino 版本
// the decryption function
String decrypt(String encryptedBase64Text) {

    // calculate the original length before it was coded into base64 string
    int originalBytesLength = base64::decodeLength(encryptedBase64Text.c_str());

    // declare empty byte array (a memory storage)
    byte encryptedBytes[originalBytesLength];
    byte decryptedBytes[originalBytesLength];

    // convert the base64 string into original bytes
    // which is the encryptedBytes
    base64::decode(encryptedBase64Text.c_str(), encryptedBytes);

    // initializing AES engine

    // Cipher Mode and Key Size are preset in AESLib
    // Cipher Mode = CBC
    // Key Size = 128

    // declare the KEY and IV
    byte aesKey[] = { 23, 45, 56, 67, 67, 87, 98, 12, 32, 34, 45, 56, 67, 87, 65, 5 };
    byte aesIv[] = { 123, 43, 46, 89, 29, 187, 58, 213, 78, 50, 19, 106, 205, 1, 5, 7 };

    // set the padding mode to paddingMode.CMS
    aesLib.set_paddingmode((paddingMode)0);

    // decrypt bytes in "encryptedBytes" and save the output in "decryptedBytes"
    // param 1 = the source bytes to be decrypted
    // param 2 = the length of source bytes
    // param 3 = the destination of decrypted bytes that will be saved
    // param 4 = KEY
    // param 5 = the length of KEY bytes (16)
    // param 6 = IV
    aesLib.decrypt(encryptedBytes, originalBytesLength,
                   decryptedBytes, aesKey, 16, aesIv);

    // convert the decrypted bytes into original string
    String decryptedText = String((char*)decryptedBytes);

    return decryptedText;
}
C# 版本的解密
public static string AesDecrypt(string base64str)
{
    byte[] data = null;

    // the base64 string into bytes that's encrypted at Arduino
    byte[] encryptedData = Convert.FromBase64String(base64str);

    // initialize AES encryption
    using (Aes aes = Aes.Create())
    {
        // set the AES parameters
        aes.KeySize = 128;
        aes.BlockSize = 128;
        aes.Mode = CipherMode.CBC;
        aes.Padding = PaddingMode.PKCS7;
        aes.Key = aesKey;
        aes.IV = aesIv;

        // Create a decryptor to decrypt the data
        ICryptoTransform decryptor = aes.CreateDecryptor(aes.Key, aes.IV);

        // initialize memory stream to read data from the encrypted bytes
        using (MemoryStream msDecrypt = new MemoryStream(encryptedData))
        {
            // initialize the AES decryption engine
            using (CryptoStream csDecrypt =
              new CryptoStream(msDecrypt, decryptor, CryptoStreamMode.Read))
            {
                // declare a memory stream for AES to save the decrypted data
                using (MemoryStream originalMemoryStream = new MemoryStream())
                {
                    byte[] buffer = new byte[1024];
                    int readBytes;
                    while ((readBytes = csDecrypt.Read(buffer, 0, buffer.Length)) > 0)
                    {
                        originalMemoryStream.Write(buffer, 0, readBytes);
                    }

                    // extract the decrypted data from the memory stream
                    data = originalMemoryStream.ToArray();
                }
            }
        }
    }

    // Convert the bytes into string
    string text = System.Text.Encoding.UTF8.GetString(data);

    // remove the last null character (added by Arduino as line terminator)
    text = text.Remove(text.Length - 1, 1);

    return text;
}
构建应用程序
首先,ASP.NET 网站
现在,让我们构建 ASP.NET WebForms 应用程序来处理从 Arduino 发送的请求。
在 ASP.NET 解决方案资源管理器中,添加两个页面:
aes-decrypt.aspx
aes-encrypt.aspx
(你可以随意命名。)

如果您愿意,可以路由页面。通过在项目中添加 Global.asax 并像这样路由页面:
protected void Application_Start(object sender, EventArgs e)
{
    RouteTable.Routes.MapPageRoute("aes-encrypt", "aes-encrypt", "~/aes-encrypt.aspx");
    RouteTable.Routes.MapPageRoute("aes-decrypt", "aes-decrypt", "~/aes-decrypt.aspx");
}
因此,这些页面可以像这样访问:
http://192.168.1.100:8080/aes-encrypt
http://192.168.1.100:8080/aes-decrypt
我写了另一篇文章解释 ASP.NET WebForms 中的路由。请随时通过此链接查看:
上面显示的端口 8080 是我在演示项目中使用的一个自定义端口,并且该站点由 Windows IIS Web 服务器运行。由于该页面只处理 HTTP GET 请求,您可以轻松地将代码迁移到 ASP.NET Core,它也可以托管在 Linux 上。
当您打开两个页面(aes-encrypt.aspx 和 aes-decrypt.aspx)的前端时,您会发现以下代码:
<%@ Page Language="C#" AutoEventWireup="true"
    CodeBehind="WebForm1.aspx.cs" Inherits="System.WebForm1" %>

<!DOCTYPE html>

<html xmlns="http://www.w3.org/1999/xhtml">
<head runat="server">
    <title></title>
</head>
<body>
    <form id="form1" runat="server">
        <div>
        </div>
    </form>
</body>
</html>
删除所有内容,除了第一行:
<%@ Page Language="C#" AutoEventWireup="true" CodeBehind="WebForm1.aspx.cs"
   Inherits="System.WebForm1" %>
现在,编辑页面 aes-encrypt.aspx 的代码后台。这将模拟向 Arduino 发送加密消息的操作。
protected void Page_Load(object sender, EventArgs e)
{
    try
    {
        // this page will be initiated by GET request from Arduino

        string originalText = "mirror mirror on the wall who is the fairest of them all";

        string base64str = aes.AesEncrypt(originalText);

        // send out the encrypted string to Arduino
        Response.Write(base64str);
    }
    catch(Exception ex)
    {
        Response.Write("Error: " + ex.Message);
    }
}
接下来,编辑另一个页面 aes-decrypt.aspx。这将模拟接收 Arduino 发送的加密数据的操作:
protected void Page_Load(object sender, EventArgs e)
{
    try
    {
        // obtaining the GET request, the data appended after the symbol "?"
        // which is also called Query String
        string base64str = Request.Url.Query;

        // remove the 1st character "?"
        base64str = base64str.Remove(0, 1);

        // decode the URL characters of "%2B", "%2F", "%3D" into "+", "/", "="
        base64str = Server.UrlDecode(base64str);

        string text = aes.AesDecrypt(base64str);

        // send out the decrypted text to Arduino
        Response.Write(text);
    }
    catch (Exception ex)
    {
        Response.Write("Error: " + ex.Message);
    }
}
Web 服务器端已完成。
编写 Arduino 代码
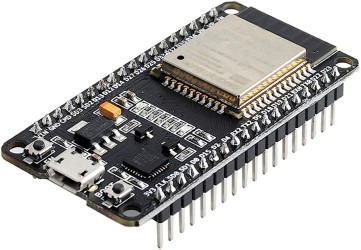
接下来,继续 Arduino 的编码。这里,我使用的是内置 WiFi 的 ESP32 模块。
// Provide HTTP Get request features
#include <WiFi.h>
#include <HTTPClient.h>

// The AES Encryption Library
#include "AESLib.h"
#include "arduino_base64.hpp"

// declare a global AESLib object
AESLib aesLib;

void setup() {

}
在 setup() 函数中,继续以下内容:
连接 WiFi
// begin the bit per second communication speed
// between Arduino and computer for serial port monitoring
Serial.begin(115200);

String encryptedText = "";
String decryptedText = "";
String url = "";

String wifi_ssid = "your_ssid";
String wifi_password = "your_ssid_pwd";

// begin connecting WiFi
WiFi.begin(wifi_ssid, wifi_password);

// check for WiFi connectivity status
while (WiFi.status() != WL_CONNECTED) {

    Serial.println("Connecting WiFi...");

    // wait for 1 second before re-checking WiFi status
    delay(1000);
}

Serial.println("WiFi connected!");
测试 1:本地 Arduino 加密和解密
Serial.println();
Serial.println("** Round 1: Local Test - Arduino Encrypt >> Arduino Decrypt");
Serial.println();

String text1 = "Luke, I am your father";
String text2 = encrypt(text1);
String text3 = decrypt(text2);

// send the output to the computer for monitoring & debugging
Serial.println("Original text: \"" + text1 + "\"");
Serial.println("Encrypted text: \"" + text2 + "\"");
Serial.println("Decrypted text: \"" + text3 + "\"");
测试 2:HTTP GET 请求 - Arduino 加密 >> C# 解密
Serial.println();
Serial.println("** Round 2: HTTP Get Request - Arduino Encrypt >> C# Decrypt");
Serial.println();

String originalText = "What if I told you everything you know to be true is wrong";

Serial.println("Original Text: \"" + originalText + "\"");
Serial.println("Begin arduino encryption process...");

encryptedText = encrypt(originalText);

Serial.println("Arduino encrypted text: \"" + encryptedText + "\"");

Serial.println("Sending encrypted text to server...");

// declare a http client
HTTPClient http;

// test server decryption

// encode the query data for URL
encryptedText.replace("+", "%2B");
encryptedText.replace("/", "%2F");
encryptedText.replace("=", "%3D");

// send the encrypted data to the ASP.NET Web Server
url = "http://192.168.1.100:8080/aes-decrypt?" + encryptedText;
Serial.println("URL: " + url);

http.begin(url);

// send a HTTP GET request
int httpResponseCode = http.GET();

// the ASP.NET web server received and responded to the message
if (httpResponseCode > 0) {
    Serial.print("HTTP success: ");
    Serial.println(httpResponseCode);

    decryptedText = http.getString();
    Serial.println("Returned server decrypted Text: \"" + decryptedText + "\"");

} else {
    Serial.print("Error occurred while sending HTTP request. Error code: ");
    Serial.println(httpResponseCode);
}

http.end();
测试 3:HTTP GET 请求 - C# 加密 >> Arduino 解密
Serial.println();
Serial.println("** Round 3: HTTP Get Request - C# Encrypt >> Arduino Decrypt");
Serial.println();

Serial.println("Downloading encrypted text from server...");

// get encrypted data from ASP.NET Web Server
url = "http://192.168.1.100:8080/aes-encrypt";
Serial.println("URL: " + url);

http.begin(url);

httpResponseCode = http.GET();

bool round2DownloadSuccess = false;

// encrypted data downloaded successfully
if (httpResponseCode > 0) {

    Serial.print("HTTP success: ");
    Serial.println(httpResponseCode);

    round2DownloadSuccess = true;

    encryptedText = http.getString();
    Serial.println("Received server encrypted text: \"" + encryptedText + "\"");

} else {
    Serial.print("Error occurred while sending HTTP request. Error code: ");
    Serial.println(httpResponseCode);
}

http.end();  // Close connection

if (round2DownloadSuccess) {
    Serial.println("Begin arduino decrypting process...");
    decryptedText = decrypt(encryptedText);
    Serial.println("Arduino decrypted Text: \"" + decryptedText + "\"");
}
完成。
如果您成功构建并设置了 ASP.NET Web 服务器,并运行 Arduino 代码,您应该会看到类似以下的输出:
(点击图片放大)

感谢阅读。编码愉快!