
从几行代码到构建一个功能齐全的网站
5.00/5 (12投票s)
创建网站的完整指南。
我想与您分享我如何构建和管理我的 Flask 项目的经验,这是一个歌词查找器 Web 应用程序。我试图专注于代码的可读性和最佳实践。
这是我的第一篇文章,因此欢迎任何建设性的批评和反馈。
引言
Flask 是一个用 Python 编写的微型 Web 框架。之所以这样命名,是因为它既不是一个包含大量工具的完整框架,也不是一个单一的 Python 库。它介于两者之间。要熟悉 Flask,我建议查看他们的网站。
我试图做到尽可能简单和极简,以便每个人都能理解。如果您在代码中遇到任何困难或错误,可以随时参考 GitHub 存储库并检查您的代码。
请注意,这不是 Python 或 HTML 教程,而是一个实践指南,将向您展示如何将不同的技术和库集成到一个完整的项目中。我相信真正的学习方式是通过构建项目并应用您的技能。我鼓励您尝试并玩转代码,以便了解真正发生的事情。废话不多说,我们开始吧。
必备组件
您需要了解以下技术才能继续学习。
- Python
- HTML、CSS、JS
请确保您的系统上已安装 Python。您可以在此处安装。
实现
要开始一个新项目,请启动您的终端并创建一个新目录,然后更改目录。这将是我们将创建项目的地方。
mkdir lyrics_finder
cd lyrics_finder
之后,使用以下命令创建一个新的虚拟环境:
python -m venv .venv
激活虚拟环境
. .venv/Scripts/activate
创建一个名为 src 的新目录,其中将包含我们的源代码,然后更改目录
mkdir src
cd src
要求
要安装依赖项,请下载此文件并将其放在当前目录 requirements.txt。话虽如此,请使用以下命令安装所需的包:
pip install -r requirements.txt
首先,创建一个新文件
touch main.py
打开您选择的编辑器并打开上一个文件 (main.py)。写下以下代码:
from flask import Flask

app = Flask(__name__)

@app.route("/")
def index():
    return 'Hey there, it seems to work!'

if __name__ == "__main__":
    app.run(debug=True)
以下命令将启动 Web 服务器:
python main.py
然后……瞧,您已经构建了第一个服务器。应出现以下消息:

第一行将导入 Flask 函数,该函数将初始化您的 Web 应用程序,然后我们创建 main index 函数并返回上述消息。请注意,我们如何使用 @app 装饰器来处理 HTTP 请求,如果没有它,此函数将不起作用,如果您打开网页。
但是……我们想做的不仅仅是打印一条简单的消息,对吧?让我们尝试渲染一个 HTML 文件。
在 src 中创建一个名为 (templates) 的新目录,并在其中创建一个名为 base.html 的新文件。
您可以使用编辑器执行此操作,或者直接复制粘贴此命令:
mkdir templates
cd templates
touch base.html
cd ..
复制并粘贴 base html5 代码:
<!DOCTYPE html>
<html lang="en">
  <head>
    <meta charset="UTF-8" />
    <meta name="viewport" content="width=device-width, initial-scale=1.0" />
    <title>Lyrics Finder</title>
  </head>
  <body>
    {% block content %} {% endblock %}
  </body>
</html>
block content 和 endblock 标签将包含我们稍后将编写的代码,因此我们不必一遍又一遍地编写代码。现在在 templates 文件夹中创建一个名为 index.html 的文件(不要与 main.py 中的 index 函数混淆)。在此文件中,我们将编写我们的第一个渲染内容。
{% extends 'base.html' %} {% block content %}
<header class="section">
  <h1>Lyrics Finder</h1>
  <h2 class="title-second">Find your favorite song lyrics with no hassle.</h2>
</header>

{% endblock %}
extends 标签将允许我们将 base.html 中的代码引入我们的页面,使代码更加简洁。block 标签内是我们的内容。要实际渲染 HTML 代码,我们需要更新服务器代码 (main.py)。
from flask import Flask, render_template

app = Flask(__name__)

@app.route("/")
def index():
    return render_template('index.html')

if __name__ == "__main__":
    app.run(debug=True)
运行服务器:
python main.py
您应该会看到网站的基本标题。您可能已经注意到我们包含了一些类,因此让我们添加一个 CSS 样式表。为了使网站对用户更具吸引力,我们将创建一个 CSS 样式表。在 src 目录中,创建一个名为 static 的文件夹和一个名为 style.css 的新文件(确保您在 src 中)。
mkdir static
cd static
touch style.css
cd ..
将以下代码复制并粘贴到 style.css 中:
body {
    background-image: linear-gradient(to right, black, darkblue);
    color: lightblue;
    padding: 10px;
}

.title-second {
    color: gray;
    margin-top: -15px;
}

.section {
    width: 100%;
    margin-bottom: 5vh;
    display: flex;
    flex-direction: column;
    align-items: center;
    justify-content: center;
}

.search {
    display: flex;
    align-items: center;
    justify-content: center;
    margin-top: -10px;
    width: 100%;
}

.query-bar-input {
    width: 30%;
    min-width: 400px;
    margin: 15px;
}

.lyrics {
    text-align: center;
    font-size: x-large;
    white-space: pre-line;
}

.hot-tracks {
    display: flex;
    width: 80%;
    overflow: auto;
}

.hot-track {
    display: block;
    margin: 8px;
}

.hot-track-title {
    margin-top: -2px;
}

.hot-track-artist {
    margin-top: -2px;
}

.cover-image {
    width: 170px;
    height: 170px;
}

button {
    background-color: blue;
    color: white;
    border-radius: 20px;
    padding-inline: 20px;
    padding-block: 10px;
    font-size: large;
    border: 0;
}

button:hover {
    filter: brightness(150%);
    cursor: pointer;
}

input {
    padding: 8px;
    border-radius: 20px;
    font-size: large;
    outline: none;
}
要查看更改,请更新 base.html,使其包含 CSS 样式表。
<!DOCTYPE html>
<html lang="en">
  <head>
    <meta charset="UTF-8" />
    <meta name="viewport" content="width=device-width, initial-scale=1.0" />
    <title>Lyrics Finder</title>
    <link rel="shortcut icon" href="{{ url_for('static', filename='favicon.ico') }}">
    <link rel="stylesheet" href="../static/style.css" />
  </head>
  <body>
    {% block content %} {% endblock %}

    <script src="../static/script.js"></script>
  </body>
</html>
之后,我们需要调整 main.py 以渲染 favicon,即上面代表网站的小图标。更新代码:
from flask import Flask, send_from_directory, render_template

app = Flask(__name__)

#   Rendering the favicon of the website using send_from_directory
@app.route('/favicon.ico')
def favicon():
    return send_from_directory(os.path.join(app.root_path, 'static'),
                               'favicon.ico')

@app.route("/")
def index():
    return render_template('index.html')

if __name__ == "__main__":
    app.run(debug=True)
send_from_directory 的作用 pretty much self-explanatory。您提供目录和文件名,然后将其发送到客户端。现在,从此处下载 favicon 并将其放在 static 目录中。
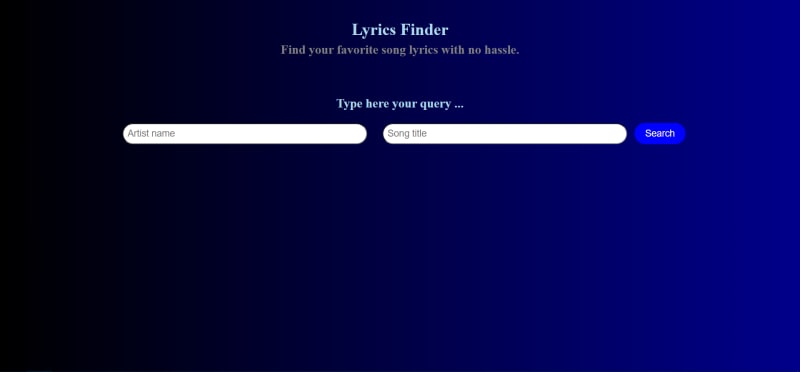
更新 index.html 中的 HTML 代码,以便我们可以向服务器发出查询。我们需要两个输入(艺术家姓名和歌曲名称):
{% extends 'base.html' %} {% block content %}
<header class="section">
  <h1>Lyrics Finder</h1>
  <h2 class="title-second">Find your favorite song lyrics with no hassle.</h2>
</header>

<div class="section">
  <h2 class="form-label">Type here your query ...</h2>
  <form class="search" action="{{ url_for("index")}}" method="post">
      <input name="artist-input" id="artist-input"
       class="form-text query-bar-input" type="text" placeholder="Artist name" />
      <input name="song-input" id="song-input"
       class="form-text query-bar-input" type="text" placeholder="Song title" />
      <button type="submit" id="search-btn" class="btn btn-primary">Search</button>
  </form>
</div>
{% endblock %}
当然,要渲染更改,我们需要更新 main.py。但在此之前,我们需要添加一个函数来使用 Beautiful Soup 获取所需的歌词。我建议您自己动手尝试,或者做一个快速入门指南。在 src 中创建一个名为 helper_funcs.py 的新文件,并写下以下代码:
from urllib.request import urlopen
from bs4 import BeautifulSoup

#   This function gets the artist name and song title as input and
#   returns the corresponding lyrics as output using Beautiful soup
#   otherwise it will print the error message and thus will return an empty string.
def get_lyrics(artist, song):
    try:
        artist = f'{artist.replace(" ", "").lower()}'
        song = f'{song.replace(" ", "").lower()}'
        url = f"https://www.azlyrics.com/lyrics/{artist}/{song}.html"
        page = urlopen(url)
        html = page.read().decode("utf-8")
        soup = BeautifulSoup(html, "html.parser")
        main = soup.find(class_="col-xs-12 col-lg-8 text-center")
        divs = main.find_all("div")
        results = [(len(div.text), div.text.strip()) for div in divs]
        lyrics = max(results, key=lambda x: x[0])[1]
        return lyrics
    except Exception as e:
        print(e)
        return ""
artist 和 song 变量之所以这样格式化,是因为网站不会返回有效的歌词,所以我们需要确保它们都是小写且没有空格。
之后,更新 main.py 以使用该函数并获取歌词。
from flask import Flask, request, send_from_directory, render_template
from helper_funcs import *
import os

app = Flask(__name__)

#   Rendering the favicon of the website using send_from_directory
@app.route('/favicon.ico')
def favicon():
    return send_from_directory(os.path.join(app.root_path, 'static'),
                               'favicon.ico')

#   Implementation of basic routing using the functions above.
@app.route("/", methods=["GET", "POST"])
def index():
    #   If the HTTP request method is Post then try to get the lyrics
    #   and render its template,
    #   otherwise return an error html page.
    if request.method == "POST":
        lyrics = get_lyrics(
            request.form["artist-input"], request.form["song-input"])
        if lyrics:
            return render_template(
                "lyrics.html",
                lyrics=lyrics,
                artist=request.form["artist-input"],
                title=request.form["song-input"],
            )
        else:
            return render_template("error.html")
    #   If the HTTP request method is not Post then get the hot tracks
    #   and render index html page
    else:
        return render_template("index.html")

if __name__ == "__main__":
    app.run(debug=True)
在服务器更新后,我们需要在 HTML 中渲染内容,以便最终用户可以看到它们。在 templates 中创建一个名为 lyrics.html 的新文件。复制并粘贴以下代码:
{% extends 'base.html' %} {% block content %}
<div class="section">
  <h1>{{title}} by {{artist}}</h1>
  <br />
  <br />
  <pre class="lyrics">
      {{lyrics}}
    </pre
  >
</div>
{% endblock %}
您应该会得到以下结果:
现在尝试输入艺术家和歌曲名称开始搜索。
您应该会在一个单独的网页 (lyrics.html) 上看到结果。
如果您注意到,输入表单在有拼写错误时会生成错误。要解决此问题,请在 templates 文件夹中创建一个名为 error.html 的文件,其中包含以下内容:
{% extends 'base.html' %} {% block content %}
<h1>An error has occurred!</h1>
<h2>Please check your query for misspelling or try again later ...</h2>
{% endblock %}
错误处理是避免崩溃和增强用户体验的好方法。
为了使网站更有趣,我创建了一个热门曲目部分,我们可以与之互动并获取相应的歌词。要渲染热门曲目,请转到 helper_funcs.py 并添加以下代码:
#   The function below fetches the top 100 tracks from Billboard.com with the
#   artist name, song title and cover image.
def get_hot_tracks():
    try:
        url = "https://www.billboard.com/charts/hot-100/"
        page = urlopen(url)
        html = page.read().decode("utf-8")
        soup = BeautifulSoup(html, "html.parser")
        top100 = soup.select(".o-chart-results-list-row-container")
        covers = [div.find("img")["data-lazy-src"] for div in top100]
        titles = [
            div.select("#title-of-a-story")[0]
            .decode_contents()
            .replace("\n", "")
            .replace("\t", "")
            for div in top100
        ]
        artists = [
            div.find_all("span")[1]
            .decode_contents()
            .replace("\n", "")
            .replace("\t", "")
            for div in top100
        ]
        hot_tracks = [
            {"cover": covers[i], "title": titles[i], "artist": artists[i]}
            for i in range(100)
        ]
        return hot_tracks
    except Exception as e:
        print(e)
        return []
更新 index.html,以便最终用户可以看到结果:
{% extends 'base.html' %} {% block content %}
<header class="section">
  <h1>Lyrics Finder</h1>
  <h2 class="title-second">Find your favorite song lyrics with no hassle.</h2>
</header>

<div class="section">
  <h2 class="form-label">Type here your query ...</h2>
  <form class="search" action="{{ url_for("index")}}" method="post">
      <input name="artist-input" id="artist-input"
       class="form-text query-bar-input" type="text" placeholder="Artist name" />
      <input name="song-input" id="song-input"
       class="form-text query-bar-input" type="text" placeholder="Song title" />
      <button type="submit" id="search-btn" class="btn btn-primary">Search</button>
  </form>
</div>

<div class="section">
  <h1>Hot Tracks</h1>
  <div class="hot-tracks">
      {% for hot_track in hot_tracks %}
      <div class="hot-track" onclick="searchHotTrack(event)">
          <img class="cover-image" src={{hot_track.cover}} />
          <h3 class="hot-track-title">{{hot_track.title}}</h3>
          <h4 class="hot-track-artist">{{hot_track.artist}}</h4>
      </div>
      {% endfor %}
  </div>
</div>
{% endblock %}
别忘了更新 main.py 来调用该函数并返回结果。index 函数的最终代码应如下所示:
#   Implementation of basic routing using the functions above.
@app.route("/", methods=["GET", "POST"])
def index():
    #   If the HTTP request method is Post then try to get the lyrics
    #   and render its template,
    #   otherwise return an error html page.
    if request.method == "POST":
        lyrics = get_lyrics(
            request.form["artist-input"], request.form["song-input"])
        if lyrics:
            return render_template(
                "lyrics.html",
                lyrics=lyrics,
                artist=request.form["artist-input"],
                title=request.form["song-input"],
            )
        else:
            return render_template("error.html")
    #   If the HTTP request method is not Post then get the hot tracks
    #   and render index html page
    else:
        hot_tracks = get_hot_tracks()
        return render_template("index.html", hot_tracks=hot_tracks)
几乎完成,我们需要添加一些 JavaScript 来增加交互性,以便当用户单击一个曲目时,它将显示该曲目的歌词。在 static 目录中创建一个名为 script.js 的新文件并填写代码:
//  This function will fetch the song and artist name, and then will submit them
//  to the form in order to get the lyrics
const searchHotTrack = async (e) => {
    const artist_input = document.getElementById('artist-input')
    const song_input = document.getElementById('song-input')
    const search_btn = document.getElementById('search-btn')

    song_input.value = e.target.nextElementSibling.innerText
    artist_input.value = e.target.nextElementSibling.nextElementSibling.innerText

    search_btn.click()
}
总结
好了!一个完整的网站,您可以使用它来获取您喜欢的歌词。我希望您学到了一些新东西。如果您有任何建议,或者想要后续教程,请在评论中告诉我。
请随时在下面的评论区提问。感谢您的时间。
我的 Github 个人资料:https://prouserr.github.io/
历史
- 2023 年 10 月 12 日:初始版本