
使用 Azure AI 在 Azure Container Apps 上部署智能应用(第一部分)
在这个由四部分组成的系列教程中,您将学习如何使用 Azure 创建智能应用。本教程的第一部分将引导您了解 Azure AI 和 Azure 容器应用是什么、如何设置 Azure 环境以及如何构建基本应用程序。
作为开发人员,我们都深切意识到人工智能 (AI) 如何改变和革新了应用程序开发。机器学习 (ML) 和自然语言处理 (NLP) 等 AI 技术使我们能够创建个性化、自适应的用户体验——即智能应用。智能应用利用 AI 算法从用户交互中学习并做出实时决策。
随着智能应用的需求持续飙升,我们将越来越需要将 AI 组件集成到我们的应用程序中。这项工作可能复杂且资源密集,但并非必须如此。
在本文中——这是关于使用 Azure 容器应用构建智能应用系列的第一部分——我们将探讨如何开始使用 Azure AI 和 Azure 容器应用。然后,我们将构建一个基础用户反馈应用程序,并将在本系列的第二部分中使其智能化。
解决方案架构
下图展示了本文的目标解决方案的架构。

了解 Azure AI 和 Azure 容器应用
在本教程中,我们将结合使用 Azure OpenAI(一种使用大型语言模型 (LLM) 创建智能应用的工具)和 Azure 容器应用(一个完全托管的基于 Kubernetes 的平台,可帮助我们从容器和代码部署)。这两个动态工具将在整个四部分系列中作为我们应用程序功能的主干。
Azure OpenAI 将通过处理我们数据的 API 为我们的应用程序注入智能。具体来说,我们将利用 情感分析 API 来评估客户反馈和评论中的客户情感。
在前端,我们将使用 Azure 容器应用来部署我们基于 Kubernetes 的应用程序。这种方法使我们无需担心任何基础设施编排,使我们的应用程序能够根据负载要求进行扩展和缩减。
最后,我们将使用 Azure SQL 数据库来存储反馈和情感数据集。
必备组件
要学习本教程,您需要
- 一个 Azure 账户。注册免费账户可在第一个月获得免费积分并访问许多基本服务。创建新账户时,您需要提供信用卡以验证交易,以防您使用的资源超出分配。对于这些文章,我们将尽可能减少开支。
- 已安装 Docker Desktop 3.5.1 或更高版本
- 已安装 Visual Studio。此演示使用社区版 2022。
要查看项目实际运行情况,请查看完整的项目代码。
设置您的 Azure 环境
在设计应用程序之前,我们需要配置 Azure 环境、Visual Studio 和一个基本的应用程序模板。
首先,我们需要一个已准备好部署应用程序的资源组的 Azure 帐户。我们将从创建一个新的资源组来存储所有项目项开始。登录,点击资源组,然后点击创建。

现在,命名您的资源组并设置位置。对于此演示,我们将资源组命名为“UserFeedbackApp”,并选择美国东部作为默认区域。接下来,点击查看 + 创建。
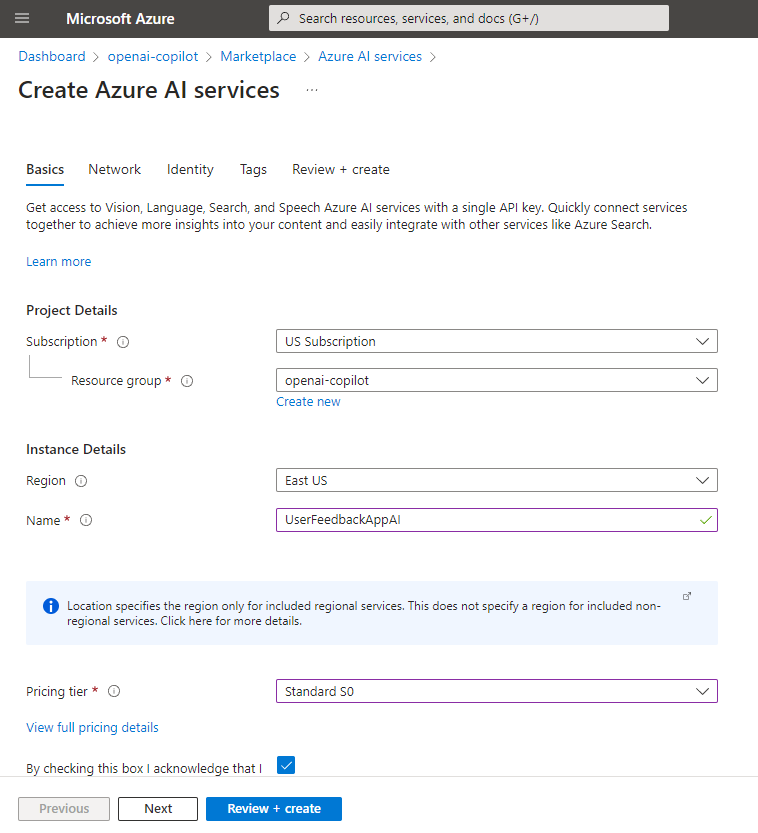
现在,导航到 Azure 门户左侧的资源组部分。打开它并创建一个新的 Azure AI 多服务实例。为此,请在 Azure Marketplace 中搜索“Azure AI”并添加它。
现在您需要命名并配置实例。对于此演示,我们将使用“UserFeedbackAppAI”并将其余所有内容保留为默认值。
注意:对于本教程,默认值即可,但在生产环境中,您可能希望在网络选项卡下配置实例以获得更好的访问权限。
我们还需要创建一个 SQL 数据库来存储我们的数据。回到 Azure Marketplace,搜索 Azure SQL 即可找到 SQL 数据库选项。创建一个数据库和一个服务器来将其托管在我们刚刚创建的同一资源组中。
此演示使用开发层和基本服务器以保持低成本。将 SQL 数据库命名为“UserFeedbackDatabase”并使用本地管理员帐户,而不是基于身份的访问选项。

接下来,我们需要为容器应用程序本身创建几个资源。打开 Visual Studio 并选择创建新项目。对于本教程,请选择新的标准 ASP.NET Core Web App (Model-View-Controller) 选项。找到该模板,命名您的项目,并选择一个位置来保存它。

为了将我们的应用程序容器化,我们需要在下一个屏幕上选择启用 Docker。此选项将我们的应用程序与 Dockerfile 捆绑在一起,这对于构建支持它的基础设施至关重要。将 Docker 容器的默认 Linux 操作系统保持选中状态。

现在,允许 Visual Studio 构建模板项目。
接下来,使用 Visual Studio 中的 Docker 运行应用程序。在那里,点击播放以构建并运行应用程序,将其推送到您的本地 Docker 环境,并启动一个 Web 浏览器以查看静态启动页面。

应用程序在本地运行后,是时候发布它了。我们这样做是为了创建所需的容器资源,并让 Visual Studio 将配置保存在我们的发布配置文件中。右键单击项目,选择发布,添加一个发布配置文件,点击Azure,并将其命名为Azure Container Apps (Linux)。
在容器应用屏幕上,仔细检查您是否已登录 Azure 帐户并且已填充订阅名称。点击新建。为您的应用程序和容器命名,确保选择了正确的订阅和资源组。您还可以通过选择新建来指定/命名容器应用环境。否则,保留默认名称。
最后,点击创建以完成容器应用设置。

我们还需要指定一个 容器注册表来存储我们将发布到容器中的应用程序及其配置。为注册表命名(例如,“UserFeedbackAppRegistry”)并点击创建。
在容器构建过程中,您必须为容器启用管理员权限。点击是并等待基础设施构建。
现在,您可以使用发布配置文件将 Azure Web App 推送到 Azure 上的容器应用。通过打开 Azure 门户并导航到资源文件夹来查看您创建的基础设施。

构建基本应用程序
基础设施已奠定,是时候设计和开发我们的应用程序了。本教程围绕一个简单的用例:构建一个商品商店反馈功能。它将允许用户选择产品并使用自由文本留下反馈。
接下来,我们会将该反馈保存到我们的数据库中。随后,我们将调用 Azure AI API 对反馈执行情感分析,然后将结果存储在我们的数据库中。最后,根据这些结果,我们将创建一个报告页面,显示我们的产品情感。
我们的目标是让用户可以对一系列产品留下反馈,以便将来进行情感分析。为了实现这一点,我们需要一个具有数据库读写功能的基本 Web 应用程序。
添加模型并连接数据库
我们清单上的第一个功能是从 SQL 数据库中检索各种产品的能力。这将使我们能够填充一个下拉菜单,显示我们的产品列表,用户可以为其编写评论。
要为我们的应用程序配置数据库连接,请使用 Visual Studio 中的包管理器安装以下包:
Microsoft.EntityFrameworkCoreMicrosoft.EntityFrameworkCore.ToolsMicrosoft.EntityFrameworkCore.SqlServer


接下来,通过将以下代码添加到 *Models* 文件夹中,为您的数据创建两个模型 — 一个 `Product` 和一个 `Review`。首先,创建一个 *Product.cs* 文件,其中包含以下代码:
namespace UserFeedbackApp.Models
{
    public class Product
    {
        public int Id { get; set; }
        public string Name { get; set; }
    }
}
然后,在模型目录中创建一个 *Review.cs* 文件,其中包含以下代码:
namespace UserFeedbackApp.Models
{
    public class Review
    {
        public int Id { get; set; }
        public int ProductId { get; set; }
        public string ProductName { get; set; }
        public string ReviewText { get; set; }
        public string PostDate { get; set; }

        public string Sentiment { get; set; }
        public float PositiveValue { get; set; }
        public float NeutralValue { get; set; }
        public float NegativeValue { get; set; }
    }
}
为了弥合我们的模型和接口之间的差距,我们需要一个 `DbContext` 类。在 *Models* 文件夹中创建一个 *DatabaseContext.cs* 文件并按如下方式填充它:
using Microsoft.EntityFrameworkCore;

namespace UserFeedbackApp.Models
{
    public class DatabaseContext : DbContext
    {
        private readonly string _connectionString;

        public DatabaseContext(DbContextOptions<DatabaseContext> options) : base(options)
        {
        }

        protected override void OnConfiguring(DbContextOptionsBuilder optionsBuilder)
        {
            base.OnConfiguring(optionsBuilder);
        }

        public DbSet<Product> Products => Set<Product>();
        public DbSet<Review> Reviews => Set<Review>();
    }
}
下一步是配置与我们刚刚创建的 Azure SQL 数据库的连接。双击项目层次结构中的连接服务并添加一个新的服务依赖项。选择Azure SQL 数据库并找到您之前创建的数据库。然后,编辑依赖项详细信息,确保您分配一个数据库连接字符串名称——您很快就会用到它。点击完成。

此操作将创建我们数据库的连接详细信息。
现在,修改 *Program.cs* 文件,使用以下代码建立与数据库的连接:
using Microsoft.EntityFrameworkCore;
using UserFeedbackApp.Models;

var builder = WebApplication.CreateBuilder(args);

// Add Database Context
if (builder.Environment.IsDevelopment())
{
    builder.Services.AddDbContext<DatabaseContext>(options =>
        options.UseSqlServer(builder.Configuration["userfeedbackdatabaseconnection"]));
}
else
{
    builder.Services.AddDbContext<DatabaseContext>(options =>
        options.UseSqlServer(Environment.GetEnvironmentVariable("AZURE_SQL_CONNECTIONSTRING")));
}
此代码使用 `if` 语句检查应用程序的环境,无论是开发环境还是生产环境。根据环境,它在开发中使用我们的本地连接秘密,或在发布时使用 Azure 连接字符串。
构建数据库结构并添加产品
配置好代码后,我们现在可以使用 Entity Framework 工具来构建数据库结构。通过选择视图 > 终端,在 Visual Studio 底部打开一个开发人员 PowerShell 窗口。确保在下拉列表中选择开发人员 PowerShell并导航到您的项目目录。运行以下命令:
dotnet tool install dotnet-ef –global
dotnet ef migrations add Initial
dotnet ef database update

这三个命令将使用先前为 `Products` 和 `Review` 定义的模型来创建我们的基本数据库结构。
接下来,我们手动预填充一些 `Product`。打开 Azure 控制台,导航到应用程序资源组中的数据库,并在左侧找到查询编辑器。使用以下查询来填充我们的 `Products` 表:
SET IDENTITY_INSERT Products ON;
INSERT INTO Products (id, name)
VALUES (1, 'Apple Laptops'), (2, 'Camcorders'), (3, 'Cell Phones & Smartphones'), (4, 'Circular Saws'), (5, 'Clippers & Trimmers'), (6, 'Cordless Drills'), (7, 'Digital Cameras'), (8, 'Electric Toothbrushes'), (9, 'Headphones'), (10, 'Headsets'), (11, 'Ink Cartridges'), (12, 'Internal Hard Disk Drives'), (13, 'Keyboards & Keypads'), (14, 'Lenses'), (15, 'Media Streamers'), (16, 'Mens Shavers'), (17, 'Mice, Trackballs & Touchpads'), (18, 'Monitors'), (19, 'Motherboards'), (20, 'Other Automotive Hand Tools'), (21, 'PC Laptops & Netbooks'), (22, 'Power Tool Sets'), (23, 'Prepaid Gaming Cards'), (24, 'Receivers'), (25, 'Reciprocating Saws'), (26, 'Smart Speakers'), (27, 'Smart Watches'), (28, 'Tablets and eBook Readers'), (29, 'Video Game Consoles'), (30, 'Video Games'), (31, 'Wireless Routers');
SET IDENTITY_INSERT Products OFF;
执行此查询后,我们的数据库中大约有 30 个产品可供应用程序使用。
创建视图
数据配置完成后,我们来创建一个带有视图的基本 MVC 控制器。右键单击 *Controllers* 文件夹并选择添加新的 Scaffold 项。选择带有视图的 MVC 控制器,使用 Entity Framework,然后单击添加。选择 `Model` 类为 `Product`,给控制器一个名称,然后单击添加。对 `Reviews Model` 重复此过程。

现在,在本地运行您的应用程序,并在将其发布到 Azure 容器应用程序后运行,以确保一切正常运行。
当您在本地运行应用程序时,您的 Web 浏览器将打开基础 URL。在 URL 末尾添加 */Products* 以查看手动输入的预填充数据列表。

框架建立后,您可以在 URL 末尾用 */Reviews* 替换 */Products* 来查看您拥有的任何评论。或者,您可以使用 */Reviews/Create* 来创建新评论。然而,目前,评论与我们提供的模型不符,因为我们期望产品列表填充产品字段。为了解决这个问题,我们需要调整评论视图以更好地符合我们的要求。
在 *ReviewsController* 文件中,按如下方式更改 `GET Create Action`:
 public async Task<IActionResult> Create()
        {
            var products = await _context.Products.ToListAsync<Product>();
            List<SelectListItem> productSelections = new List<SelectListItem>();

            foreach (var product in products)
            {
                productSelections.Add(new SelectListItem { Text = product.Name, Value = product.Id.ToString() });
            }

            ViewBag.Products = productSelections;

            return View();
        }
此代码从数据库中获取产品,并将其放入“评论”创建页面上的选择列表或下拉列表中。我们专注于让用户选择单个产品并编写评论,确保我们以后执行的情感分析与每个产品保持一致。因此,我们还需要修改 *Views/Reviews* 目录中的“创建”页面:
@model UserFeedbackApp.Models.Review

@{
    ViewData["Title"] = "Create";
}

<h1>Create</h1>

<h4>Review</h4>
<hr />
<div class="row">
    <div class="col-md-4">
        <form asp-action="Create">
            <div asp-validation-summary="ModelOnly" class="text-danger"></div>
            <div class="form-group">
                @Html.DropDownList("Products", (IEnumerable
                <SelectListItem>)ViewBag.Products)
            </div>
            <div class="form-group">
                <label asp-for="ReviewText" class="control-label"></label>
                <textarea rows="6" asp-for="ReviewText" class="form-control"></textarea>
                <span asp-validation-for="ReviewText" class="text-danger"></span>
            </div>
            <br />
            <div class="form-group">
                <input type="submit" value="Create" class="btn btn-primary" />
            </div>
        </form>
    </div>
</div>

<div>
    <a asp-action="Index">Back to List</a>
</div>

@section Scripts {
    @{await Html.RenderPartialAsync("_ValidationScriptsPartial");}
}
这会将页面限制为产品下拉列表和输入评论的区域。
最后,让我们调整 `Reviews` 控制器中的 `POST Create Action` 以处理两个接收到的值。为我们目前正在生成的元素添加占位符值:
[HttpPost]
        [ValidateAntiForgeryToken]
        public async Task<IActionResult> Create([Bind("Id,ProductId,ProductName,ReviewText,PostDate,Sentiment,PositiveValue,NeutralValue,NegativeValue")] Review review)
        {
            var selectedProductId = int.Parse(HttpContext.Request.Form["Products"].ToString());
            var product = await _context.Products.FirstOrDefaultAsync(p => p.Id == selectedProductId);

            review.ProductId = selectedProductId;
            review.ProductName = product.Name;
            review.PostDate = DateTime.Now.ToString("yyyy-MM-dd");
            review.Sentiment = "";
            review.PositiveValue = 0;
            review.NeutralValue = 0;
            review.NegativeValue = 0;

            _context.Add(review);
            await _context.SaveChangesAsync();
            return RedirectToAction(nameof(Index));
        }
现在,运行应用程序并转到 */Reviews/Create* 端点。您将看到您新编写的页面。如果您选择一个产品并填写评论,数据库将保存评论,但不包含任何情感信息。

最后,将您的更改发布到您的 Azure 实例。
后续步骤
在本文中,您了解了什么是智能应用,以及 Azure AI 和 Azure 容器应用是如何构建智能应用的重要工具。您还使用 Azure 构建了一个基础应用程序,它已准备好转变为一个智能、高性能的应用程序。
继续阅读本系列的第二部分,了解如何将此基础应用程序和智能应用程序——以及如何使用此应用程序分析用户反馈。