
使用 Entity Framework 4.1、控制反转、Unity Framework、存储库和工作单元模式以及 MVC3 Razor 视图的代码优先方法
4.90/5 (73投票s)
我在这篇文章中的努力是阐明使用 Entity Framework 4.1 和 MVC3 razor 视图引擎构建通用多层架构。
引言
在我之前的文章中,我讨论了为 .NET 应用程序开发一个简单的多层架构。但是,考虑到那篇文章是为初学者准备的,我省略了一些要点。当我们谈论应用程序架构时,在开始之前需要考虑一些要点。例如
- 架构是否松耦合?
- 它应该是基于服务的吗?
- 实体应该存放在哪里?
- 与数据库的通信模式是什么?
- 它需要设计模式吗?如果是,应该实现哪些模式?
- 它应该是基于关注点分离的吗?
为了回答这些类型的问题,.NET 4 已经提供了一个通用的解决方案,即利用 Entity Framework。
我在这篇文章中的努力是阐明使用 Entity Framework 4.1 和 MVC3 razor 视图引擎构建通用多层架构。我们将使用控制反转来解决层之间的依赖关系。本文将涵盖以下几点:
- 使用关注点分离,
- 使用代码优先方法,
- POCO 对象,
- 存储库模式,
- 依赖注入和控制反转。
架构概述
我已经创建了一个架构来解释以上所有要点,并且我们将坚持这个架构直到文章结束,从而实际实现我们的理解。
我创建了一个非常简单的应用程序来在数据库中添加学生详细信息。编辑和删除它,我的第一页显示了所有已添加学生列表。
该架构是基于服务的。以下是其组件和图示(图 1),我们将详细讨论每个组件。
- CodeFirstData 层。
- CodeFirstEntities 层。
- CodeFirstServices 层。
- MVC Portal 层。

架构组件
让我们详细讨论定义的架构的每一个组件,
1. CodeFirstData 层
数据层是一个类库,定义了一个负责与数据库交互的层,包含上下文类和用于与数据库交互的工厂模式实现。该层包含每个实体的存储库,用于映射到数据库,从而实现完整的 ORM(对象关系模型)解决方案。该类库引用 EntityFramework DLL 来实现 dbcontext 类。
2. CodeFirstEntities 层
实体层充当 MVC 应用程序的模型,并且在首次执行 dbset 时负责创建数据库对象。它包含 POCO 形式的实体类,具有关系和数据注解(要应用于数据库表/列的规则/约束)。
类的属性在数据库中产生列名,类名在数据库表中产生表名。主键要么由名为 Id 的属性定义,要么由“Classname[Id]”定义。在我们的例子中,它是“StudentId”,这是实体框架在创建实体时要记住的默认约定。由于此应用程序是代码优先的,因此我们需要先创建实体。
3. CodeFirstServices 层
该层包含使用存储库从数据库获取数据的服务。服务与存储库之间的交互保持松耦合,从而通过依赖注入实现控制反转。它是基于构造函数的依赖注入,不允许服务直接实例化我们的存储库。服务层充当控制器和存储库之间的接口,并将控制器的请求传递给存储库。
4. MVCPortal 层
MVCPortal 层是我们的 UI 层,它包含模型/视图模型、视图和控制器。我不会深入讨论 MVC 的细节,因为它不是我们的主要目标。我假设您已经知道如何创建和运行 MVC 应用程序。让我们快速回顾一下 MVC。
i. 模型/视图模型
模型类负责保存和操作数据,我们将模型/视图模型类绑定到视图以显示模型特定的数据。模型类由控制器预先填充,以便在视图的帮助下显示数据。
ii. 视图
视图包含我们的 UI 模板。我们为每个视图定义了控制器方法,这些方法使用数据填充视图设计,并根据需要请求特定类型的视图在用户端进行渲染。
iii. 控制器
基于 Web 的 MVC 框架以一种略有不同的方式将 URL 映射到服务器端代码。它们不将传入的 URL 映射到 HTML/aspx 文件,而是将 URL 映射到类中的方法。这些类称为“控制器”,它们负责处理传入的 HTTP 请求、处理用户输入、检索和保存数据以及确定要发回给客户端的响应(显示 HTML、下载文件、重定向到其他 URL 等)。
该层利用依赖注入来实现服务的控制反转,从而不允许控制器直接访问服务实例。IOC 是使用 Microsoft 的 UnityFramework 库通过 `global.asax` 文件实现的。
5. DLLs
我创建了 DLLs 文件夹,并将每个类库的输出生成路径设置为该文件夹,以便于访问 DLLs 以添加引用。现在每个 DLL 将创建在 DLLs 文件夹中,我们可以从同一个文件夹访问所需的 DLL。还将 EntityFramework、UnityConfiguration DLLs 放入其中。
IOC 和 DI
依赖注入是我应用程序中的一个重要组件。所有服务都需要通过依赖注入与模型层进行后期绑定。此外,IoC 容器管理服务对象的生命周期。例如,Context 对象。我在 Unity 配置中将生命周期类型设置为 `PerThreadLifetimeManager`。这使得在单个请求中仅创建一个上下文对象,而不同的请求有不同的上下文对象。另一件我想提的是 ASP.NET MVC3 有自己的方法来通过实现 DependencyResolver 接口来为控制器提供依赖注入。我在演示中使用的 IoC 容器是 Unity。
容器
“容器”或“IOC 容器”是用于创建对象并将其依赖项注入其中的主要对象。无论何时想要一个对 IoC 开放的对象,都必须使用容器来创建实例,使用 `container.Resolve<T>()` 方法而不是“new”关键字。
IService service = unityContainer.Resolve< Iservice>();
我添加了以下引用来实现相同的功能,
Microsoft.Practices.Unity
Microsoft.Practices.Unity.Configuration
IOC 的代码实现在 `global.asax` 文件中。
使用 EntityFramework 架构创建应用程序的步骤
应用程序概述
我们将尝试使用讨论的架构开发一个简单的 `studentDetails` 应用程序。该应用程序的主要模块将是创建新学生、编辑现有学生、删除现有学生以及显示所有学生列表。从更广泛/通用的角度来看,该应用程序通过 EF 执行数据库上的 CRUD 操作。
请注意,我们不会自己创建数据库,我们只编写类并在 `web.config` 文件中定义数据库服务器的连接配置,然后让 EntityFramework 完成创建数据库、管理数据库和将数据库映射到我们的实体的其余工作。
步骤 1. 创建解决方案和空白项目/逻辑/物理地将它们分离为层
我们的第一个举措是准备我们的初始级别架构,通过创建解决方案并向其中添加项目文件。我们创建一个名为 CodeFirstEntities 的解决方案,并向其中添加三个类库,从而定义我们的三个层:实体、数据和服务。我选择的类库名称分别为 `CodeFirstEntities`、`CodeFirstData` 和 `CodeFirstServices`。
现在向解决方案添加一个名为 MvcPortal 的 MVC3 应用程序,它将作为我们应用程序的 UI 层。参考图 2 实现第一步。

步骤 2. 创建实体
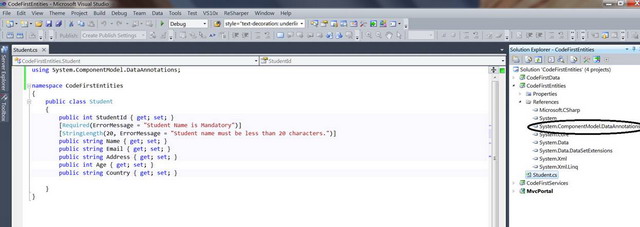
将 `Student.cs` 类添加到 CodeFirstEntities 项目。该类将包含学生详细信息特定的属性,这些属性将形成数据库表和列的形状。该类使用 DataAnnotation DLL 来放置数据注解(规则/约束)在属性上,这些属性将反映在数据库表中。约束(如最大长度和必需参数)以属性的形式提供在类的属性上,如图 3 和图 4 所示。

上面的实体是一个非常简单的 POCO(纯旧 CLR 对象)类,并且实体 Student 用 `System.ComponentModel.DataAnnotations` 命名空间中的验证属性进行装饰。现在我们要使用这些实体来为 Entity Framework 4 定义模型对象。使用 Entity Framework 的代码优先方法,我们可以通过简单地编写 POCO 类来定义实体,而无需与任何 API 或数据库库耦合。这种方法可以让你专注于领域模型,从而为应用程序实现领域驱动开发。EF 代码优先支持目前通过一个独立的 API 提供支持,该 API 运行在 Entity Framework 4 之上。
步骤 3. 创建存储库/上下文
我们的下一步是为我们的应用程序和将与数据库交互的类创建上下文/存储库。
A. 为 Entity Framework 创建上下文类
我们已经准备好了领域模型,现在让我们创建一个类来处理 Entity Framework 代码优先。我已将 `EntitFramework.dll` CTP 4.1 的引用添加到了这个类库项目。我们创建两个文件夹 `DBInteractions` 和 `EntityRepositories` 来隔离我们的类,如图 5 所示。我们稍后会处理这些,首先让我解释上下文类。


图 6 中的 `CodeFirstContext` 类派生自 DbContext,它可以将我们的模型类连接到数据库。`CodeFirstContext` 类使用 `DbSet<TEntity>` 将我们的 `Student` 类映射到 Student 数据库表,其中 `TEntity` 是任何 POCO 类。当我们第一次运行应用程序时,它会自动创建数据库。EF 代码优先在 `web.config` 或 `app.config` 中查找与 dbcontext 类同名的连接字符串。如果它找不到符合约定的连接字符串,它将默认在本地 SQL Express 数据库中自动创建数据库,并且数据库的名称将与 dbcontext 类同名。您也可以在 dbcontext 类的构造函数中定义数据库的名称。代码优先的模型类基于约定工作,我们也可以使用流畅 API 来优化我们的模型。主键的约定是“`Id`”或“`<classname>Id`”,正如我之前讨论过的。如果主键属性被检测为“`int`”、“`long`”或“`short”类型,它们将默认自动注册为数据库中的标识列。主键检测不区分大小写。我们可以使用 `System.ComponentModel.DataAnnotations` 命名空间中的验证属性来定义模型类,并在更新或保存模型对象时自动强制执行验证规则。
I)DBInteractions
B. EntityFramework 代码优先的通用存储库
我们现在已经创建了模型类和 dbcontext 类。现在我们创建一个通用的存储库模式,用于使用 EF 代码优先进行数据持久化。让我们创建一个通用存储库来处理 DbContext 和 DbSet,如下所示。为了便于理解逻辑,以下类将添加到 `DBInteractions` 文件夹中。

C. 数据库工厂
我们的数据库工厂类定义如下:


其中 `IDBFactory` 是由我们的工厂类 DBFactory 实现的接口。工厂类继承自 `Disposable` 类,如下面的图 10 所示,并负责释放数据库资源。

D. RepositoryBase – 通用实体存储库基类

以上是存储库基类,它包含了 CRUD 数据库操作所需的所有方法。我们可以在这里定义更多通用方法,现在考虑到我们的应用程序,这些方法对于正确理解工作原理已经足够了。
E. 工作单元
工作单元模式维护一个由业务事务影响的对象列表,并协调更改的写入以及并发问题的解决。我们创建一个类来处理工作单元模式,
接口

类

`UnitOfWork` 中的 `Commit` 方法将调用我们 Context 类的 commit 方法,它将执行 `DbContext` 类的 `SaveChanges` 方法。
II)存储库
在本文中,我们将主要关注针对 Student 实体的持久化。让我们创建一个存储库来处理 Student 的 CRUD 操作
using derive
from a generic Repository EntityRepositoryBase<T>.
Student 的存储库类
接口

类

步骤 4. 创建服务层
服务层定义了应用程序的范围及其从接口客户端层的角度可用的操作集。它封装了应用程序的业务逻辑,在执行其操作时控制事务并协调响应。控制器类应该保持轻量级,并且不要在其上放置太多业务逻辑。我们可以将服务层用作业务逻辑层,并可以封装应用程序的规则。我们定义接口以及相应的学生服务来处理我们的应用程序业务逻辑。由于我们针对的是 CRUD 操作,因此实现非常简单。
接口

正如我们在上面的接口中看到的,这些方法是获取学生详细信息、列表、更新和删除学生。
类
using System.Collections.Generic;
using CodeFirstData.DBInteractions;
using CodeFirstData.EntityRepositories;
using CodeFirstEntities;
using CodeFirstServices.Interfaces;

namespace CodeFirstServices.Services
{
    public class StudentService : IStudentService
    {
         private readonly IStudentRepository _studentRepository;
        private readonly IUnitOfWork _unitOfWork;
        public StudentService(IStudentRepository studentRepository, IUnitOfWork unitOfWork)
        {
            this._studentRepository = studentRepository;
            this._unitOfWork = unitOfWork;
        }
        #region IStudentService Members

        public IEnumerable<Student> GetStudents()
        {
            var students = _studentRepository.GetAll();
            return students;
        }

        public Student GetStudentById(int id)
        {
            var student = _studentRepository.GetById(id);
            return student;
        }

        public void CreateStudent(Student student)
        {
            _studentRepository.Add(student);
            _unitOfWork.Commit();
        }

        public void DeleteStudent(int id)
        {
            var student = _studentRepository.GetById(id);
            _studentRepository.Delete(student);
            _unitOfWork.Commit();
        }

        public void UpdateStudent(Student student)
        {
            _studentRepository.Update(student);
            _unitOfWork.Commit();
        }

        public void SaveStudent()
        {
            _unitOfWork.Commit();
        }

        #endregion
    }
}
类使用存储库和实体的引用,并且存储库的依赖项在服务本身的构造函数中解析。
步骤 5. MVC Portal
在开始 MVC Portal 之前,让我们清除 IOC 和 DI 的逻辑。由于我们已经在文章中讨论了 IOC。为了解决依赖关系,我们创建了如下一些类,以获得独立的 arequest,我们还为 Unity 创建了一个自定义生命周期管理器,用于将容器存储在当前的 `HttpContext` 中。
 public class HttpContextLifetimeManager<T> : LifetimeManager, IDisposable
    {
        public override object GetValue()
        {
            var assemblyQualifiedName = typeof (T).AssemblyQualifiedName;
            if (assemblyQualifiedName != null)
                return HttpContext.Current.Items[assemblyQualifiedName];
            return null;
        }

        public override void RemoveValue()
        {
            var assemblyQualifiedName = typeof (T).AssemblyQualifiedName;
            if (assemblyQualifiedName != null)
                HttpContext.Current.Items.Remove(assemblyQualifiedName);
        }

        public override void SetValue(object newValue)
        {
            var assemblyQualifiedName = typeof (T).AssemblyQualifiedName;
            if (assemblyQualifiedName != null)
                HttpContext.Current.Items[assemblyQualifiedName] = newValue;
        }

        public void Dispose()
        {
            RemoveValue();
        }
    }
}
我们创建一个依赖解析器来解决服务依赖关系,如下所示。
ASP.NET MVC 3 引入了一个新的接口 `IControllerActivator`,它允许您使用自定义行为激活控制器,并可以将其用于依赖注入目的。`IControllerActivator` 接口可以通过依赖解析器进行发现。让我们通过派生自 `IControllerActivator` 接口来创建一个自定义控制器激活器类。
using System;
using System.Web.Mvc;
namespace CodeFirstPortal.IoC
{
    public class CustomControllerActivator : IControllerActivator
    {
        IController IControllerActivator.Create(
            System.Web.Routing.RequestContext requestContext,
            Type controllerType){
            return DependencyResolver.Current
                .GetService(controllerType) as IController;
        }
    }
}
我们还创建一个 UnityController Factory 并在 `global.asax` 文件中配置 unity 的合同和具体类型。
ASP.NET MVC 3 还引入了一个新的接口 `IDependencyResolver`,它暴露了两个方法 - `GetService` 和 `GetServices`。`GetService` 方法解析支持任意对象创建的单个注册服务,`GetServices` 解析多个注册服务。`IDependencyResolver` 接口的实现应委托给底层依赖注入容器,以提供所请求类型的已注册服务。当没有所请求类型的已注册服务时,ASP.NET MVC 框架期望此接口的实现从 GetService 返回 null,并从 `GetServices` 返回一个空集合。让我们通过派生自 `IDependencyResolver` 接口来创建一个自定义依赖解析器类,以便与 Unity 一起提供依赖注入。
using System;
using System.Web;
using System.Web.Mvc;
using System.Web.Routing;
using Microsoft.Practices.Unity;

namespace CodeFirstPortal.IoC
{
    public class UnityControllerFactory : DefaultControllerFactory
    {
        IUnityContainer container;
        public UnityControllerFactory(IUnityContainer container)
        {
            this.container = container;
        }
        protected override IController GetControllerInstance(RequestContext reqContext, Type controllerType)
        {
            IController controller;
            if (controllerType == null)
                throw new HttpException(
                        404, String.Format(
                            "The controller for '{0}' could not be found" + "or it does not implement IController.",
                        reqContext.HttpContext.Request.Path));

            if (!typeof(IController).IsAssignableFrom(controllerType))
                throw new ArgumentException(
                        string.Format(
                            "Requested type is not a controller: {0}",
                            controllerType.Name),
                            "controllerType");
            try
            {
                controller= container.Resolve(controllerType) as IController;
            }
            catch (Exception ex)
            {
                throw new InvalidOperationException(String.Format(
                                        "Error resolving the controller {0}",
                                        controllerType.Name), ex);
            }
            return controller;
        }

    }
解析服务依赖
using System;
using System.Collections.Generic;
using System.Web.Mvc;
using Microsoft.Practices.Unity;

namespace CodeFirstPortal.IoC
{
public class UnityDependencyResolver : IDependencyResolver
{
    IUnityContainer container;
    public UnityDependencyResolver(IUnityContainer container)
    {
        this.container = container;
    }

    public object GetService(Type serviceType)
    {
        try
        {
            return container.Resolve(serviceType);
        }
        catch
        {
            return null;
        }
    }

    public IEnumerable<object> GetServices(Type serviceType)
    {
        try
        {
            return container.ResolveAll(serviceType);
        }
        catch
        {
            return new List<object>();
        }
    }
}
}
global.asax
向 Portal 添加服务项目引用、实体项目引用和数据项目引用。
`DependencyResolver` 类的 `SetResolver` 方法提供了一个用于依赖注入容器的注册点。在此方法中,我们配置 `UnityDependencyResolver` 类以使用 Unity 2.0 进行依赖注入。`SetResolver` 方法将与任何依赖注入容器一起工作。如果您想使用 `StructureMap` 作为依赖注入容器,您可以创建一个派生自 `IDependencyResolver` 接口的依赖解析器类,然后可以使用 `SetResolver` 方法配置该类。ASP.NET MVC 3 为使用依赖注入容器提供了良好的支持。
using System.Web.Mvc;
using System.Web.Routing;
using CodeFirstData.DBInteractions;
using CodeFirstData.EntityRepositories;
using CodeFirstPortal.IoC;
using CodeFirstServices.Interfaces;
using CodeFirstServices.Services;
using Microsoft.Practices.Unity;

namespace MvcPortal
{

    public class MvcApplication : System.Web.HttpApplication
    {
        public static void RegisterGlobalFilters(GlobalFilterCollection filters)
        {
            filters.Add(new HandleErrorAttribute());
        }

        public static void RegisterRoutes(RouteCollection routes)
        {
            routes.IgnoreRoute("{resource}.axd/{*pathInfo}");

            routes.MapRoute(
                "Default", // Route name
                "{controller}/{action}/{id}", // URL with parameters
                new { controller = "Home", action = "Index", id = UrlParameter.Optional } // Parameter defaults
            );

        }

        protected void Application_Start()
        {
            AreaRegistration.RegisterAllAreas();

            RegisterGlobalFilters(GlobalFilters.Filters);
            RegisterRoutes(RouteTable.Routes);
            IUnityContainer container = GetUnityContainer();
            DependencyResolver.SetResolver(new UnityDependencyResolver(container));
        }

        private IUnityContainer GetUnityContainer()
        {
            //Create UnityContainer
            IUnityContainer container = new UnityContainer()
            .RegisterType<IDBFactory, DBFactory>(new HttpContextLifetimeManager<IDBFactory>())
            .RegisterType<IUnitOfWork, UnitOfWork>(new HttpContextLifetimeManager<IUnitOfWork>())
            .RegisterType<IStudentService, StudentService>(new HttpContextLifetimeManager<IStudentService>())
            .RegisterType<IStudentRepository, StudentRepository>(new HttpContextLifetimeManager<IStudentRepository>());
            return container;
        }
    }
}
要开始 MVC,我们的第一步是在 `web.config` 文件中定义如下的连接字符串。

创建控制器和视图的步骤
- 我们从 Home Controller 开始,因为它是 global.asax 中设置的默认控制器,将首先被调用。

当调用控制器的 Index 操作时,我们会将其重定向到我们的 Student Controller,它会立即返回一个视图来显示学生列表(如果存在)。由于这是我们第一次创建控制器,它会显示一个空列表。Student 控制器的方法从数据库中获取学生列表,但首先它会创建数据库,从而实现我们的目标。
- 我们创建 Student Controller。我们为我们想要执行的每个操作在控制器中定义操作,如下所示:
using System;
using System.Linq;
using System.Web.Mvc;
using CodeFirstEntities;
using CodeFirstServices.Interfaces;

namespace CodeFirstPortal.Controllers
{
    public class StudentController : Controller
    {
        private readonly IStudentService _studentService;

        public StudentController(IStudentService studentService)
        {
            this._studentService = studentService;
        }

        [HttpGet]
        public ActionResult Details(int? id)
        {
            var studentDetails = _studentService.GetStudentById((int) id);
            if (studentDetails == null) throw new ArgumentNullException("Not Found");
            return View(studentDetails);
        }

        [HttpGet]
        public ActionResult Delete(int? id)
        {
            var studentDetails = _studentService.GetStudentById((int) id);
            if (studentDetails == null) throw new ArgumentNullException("Not Found");
            return View(studentDetails);
        }

        [HttpPost]
        public ActionResult Delete(Student student)
        {
            _studentService.DeleteStudent(student.StudentId);
            return RedirectToAction("List", "Student");
        }


        [HttpGet]
        public ActionResult Edit(int? id)
        {
            var studentDetails = _studentService.GetStudentById((int) id);
            if (studentDetails == null) throw new ArgumentNullException("Not Found");
            return View(studentDetails);
        }

        [HttpPost]
        public ActionResult Edit(Student student)
        {
            _studentService.UpdateStudent(student);
            return RedirectToAction("List", "Student");
        }

        [HttpGet]
        public ActionResult Create()
        {
            return View();
        }

        [HttpPost]
        public ActionResult Create(Student student)
        {
            var studentModel = new Student()
                                   {
                                       Address = student.Address,
                                       Country = student.Country,
                                       Name = student.Name,
                                       Age = student.Age,
                                       Email = student.Email
                                   };
            _studentService.CreateStudent(studentModel);
            return RedirectToAction("List", "Student");
        }

        [HttpGet]
        public ActionResult List()
        {
            var students = _studentService.GetStudents();
            if (students.Any())
            {
                return View("List", students);
            }

            return View("List");
        }
    }
}
对于负责数据更新的每个方法,都有 GET 请求和相应的 POST 请求。控制器的构造函数初始化了 Service,我们可以看到它没有直接实例化。
- 我们为每个操作创建视图。如果右键单击控制器操作并创建视图,它会自动创建一个名为 Constructor 的默认文件夹中的视图,因此我们可以创建所有操作的视图,我们的解决方案看起来像这样:

- 现在我们的应用程序已经准备好执行了。保持你的手指交叉,看看魔法,我使用了 `_layout` 作为主页面,为我的应用程序提供了有意义的外观和感觉。您也可以自定义它。当您按 F5 运行应用程序时,我们会重定向到 Student Controller 的 Index 视图,该视图显示学生列表。由于这是我们第一次运行,而且我们没有现有列表,所以我们的应用程序显示:

- 不用说,看看你的数据库。在我的例子中,我使用的是 SQL Server 2008。

我得到了一个名为 CodeFirstApp 的自动创建的数据库,其中包含 Student 表。现在您可以对照您的实体验证该表。它是相同的。所以我们击中了目标,我们的数据库已成功创建。
- 后续操作
您现在可以测试该应用程序并在应用程序中执行进一步的 CRUD 操作,并查看数据库正在更新(例如,创建学生)。

按“创建”提交后,我们得到:

因此,创建了一个学生。
我们可以通过按编辑链接来编辑同一个学生,我们得到视图:

同样,我们可以查看已创建学生的详细信息:

删除学生将重定向到:

我以同样的方式创建了三个学生。您可以创建更多并玩转该应用程序。

风险因素:在实现 EntityFramework 时也有风险因素。如果我们在实体中进行任何更改,例如删除、更改属性,上下文将删除并重新创建数据库,这可能导致现有数据丢失。为了避免这种情况,我们编写了更多代码。我们称 `DataBase` 类中的 `SetInitializer` 方法,并在我们的 `dataBase` Factory 类中将其设置为 null。
using System.Data.Entity;
namespace CodeFirstData.DBInteractions
{
public class DBFactory : Disposable, IDBFactory
{

    public DBFactory()
    {
        Database.SetInitializer<CodeFirstContext>(null);
    }
    private CodeFirstContext dataContext;
    public CodeFirstContext Get()
    {
        return dataContext ?? (dataContext = new CodeFirstContext());
    }
    protected override void DisposeCore()
    {
        if (dataContext != null)
            dataContext.Dispose();
    }
}
}
`DataBase` 类来自 `System.Data.Entity` 命名空间,它提供了这样的功能。
结论
在本文中,我们讨论了使用 EntityFramework 4.1 代码优先方法创建应用程序。我们使用了控制反转和依赖注入来解决层之间的依赖关系。我们使用 MVC 3 razor 视图引擎作为我们的 UI,并集成了这些层来实现我们的目标。该应用程序是对数据库进行简单 CRUD 操作的描述。我们学习了如何使用存储库模式、工作单元模式和 Unity Framework。您可以下载代码库并根据您的需求进一步增强/扩展它。编码愉快。
祝您编码愉快!