
Android Google Map API v2 设置
4.86/5 (4投票s)
本文档展示了如何在 Android 项目中添加 Google 地图 API v2。
介绍
如你所知,自 2013 年 3 月 18 日起,Android Google Api V1 密钥请求已不再可用。对于想要创建一个地图活动的用户,需要获取 Android Google Api V2 密钥。 因此,在本文中,我将展示获取 Android Google Api V2 密钥的步骤。
背景
读者了解 Eclipse 环境、Android SDK 和 Google API 将会很有帮助。
使用代码
需要遵循以下步骤:
- 创建新的 Android 应用程序(使用 Google API 编译)
- 导入 Google Play Services Lib
- 获取你的 SHA1 指纹
- 使用你的 SHA1 密钥获取你的 mapKey
- 修改 AndroidManifest.xml
就这样,你就可以开始了...
创建新的 Android 应用程序

导入 Google Play Services Lib
- 找到你的 google play services lib,路径如下:
2. 将此库导入到 Eclipse 中
文件\导入\将现有 Android 代码导入工作区

3. 通过右键单击你的项目属性\Android 添加 google play service lib,你会在右下角看到一个小按钮“添加”。只需添加 google play service lib 并点击确定即可。

获取你的 SHA1 指纹
前往:
窗口\首选项 Android\构建
找到你的 SHA1 指纹 并复制它。

前往 Google Apis Console 窗口。

- 创建新项目。

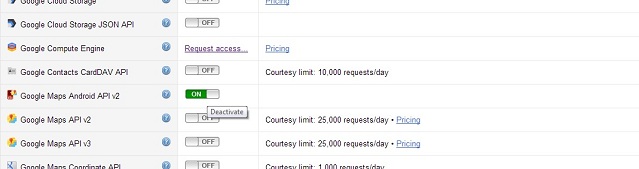
- 激活 “Google Maps Android API V2” 选项
- 点击 “创建新的 Android 密钥”

- 输入你的 SHA1 指纹,后跟 ‘ ; ’ 和你的应用程序包名。

修改 AndroidManifest.xml
1- 在 <application> 标签之前添加以下代码。
    <permission
        android:name="com.example.osman.permission.MAPS_RECEIVE"
        android:protectionLevel="signature"/>
<uses-permission android:name="com.example.osman.permission.MAPS_RECEIVE"/>

<uses-permission android:name="android.permission.INTERNET"/>
<uses-permission android:name="android.permission.ACCESS_NETWORK_STATE"/>
<uses-permission android:name="android.permission.WRITE_EXTERNAL_STORAGE"/>
<uses-permission android:name="com.google.android.providers.gsf.permission.READ_GSERVICES"/>
<!-- The following two permissions are not required to use
     Google Maps Android API v2, but are recommended. -->
<uses-permission android:name="android.permission.ACCESS_COARSE_LOCATION"/>
<uses-permission android:name="android.permission.ACCESS_FINE_LOCATION"/>

<uses-feature
        android:glEsVersion="0x00020000"
        android:required="true"/>
2- 在 </application> 标签之前添加此代码
      <meta-data
    android:name="com.google.android.maps.v2.API_KEY"
    android:value="YOUR_KEY"/>
3- 将此添加到你的 main_layout.xml
 <span style="color: black; font-family: Consolas, 'Courier New', Courier, mono; font-size: 9pt; white-space: pre;"> </span><RelativeLayout xmlns:android="http://schemas.android.com/apk/res/android"
    xmlns:tools="http://schemas.android.com/tools"
    android:layout_width="match_parent"
    android:layout_height="match_parent"
    android:paddingBottom="@dimen/activity_vertical_margin"
    android:paddingLeft="@dimen/activity_horizontal_margin"
    android:paddingRight="@dimen/activity_horizontal_margin"
    android:paddingTop="@dimen/activity_vertical_margin"
    tools:context=".MainActivity" >

<fragment
          android:id="@+id/map"
          android:layout_width="match_parent"
          android:layout_height="match_parent"
          class="com.google.android.gms.maps.SupportMapFragment"/>

</RelativeLayout>
你的 MainActivity 将如下所示:
import android.os.Bundle;
import android.app.Activity;
import android.support.v4.app.FragmentActivity;
import android.view.Menu;

public class MainActivity extends FragmentActivity {

	@Override
	protected void onCreate(Bundle savedInstanceState) {
		super.onCreate(savedInstanceState);
		setContentView(R.layout.activity_main);
	}


}
- 要在你的地图上使用标记,请将这些代码添加到你的 MainActivity 的构造函数中...
      GoogleMap googleMap;
        googleMap = ((SupportMapFragment)(getSupportFragmentManager().findFragmentById(R.id.map))).getMap();
        LatLng latLng = new LatLng(-33.796923, 150.922433);
        googleMap.setMapType(GoogleMap.MAP_TYPE_NORMAL);
        googleMap.addMarker(new MarkerOptions()
                .position(latLng)
                .title("My Spot")
                .snippet("This is my spot!")
                .icon(BitmapDescriptorFactory.defaultMarker(BitmapDescriptorFactory.HUE_AZURE)));
        googleMap.getUiSettings().setCompassEnabled(true);
        googleMap.getUiSettings().setZoomControlsEnabled(true);
        googleMap.animateCamera(CameraUpdateFactory.newLatLngZoom(latLng, 10));