
使用 C# .NET 中的 iTextSharp 创建/读取高级 PDF 报告:第一部分
4.79/5 (116投票s)
使用 iTextSharp.DLL 在桌面、移动、Web 应用程序中创建/读取/写入高级 PDF 报告
目录
- 引言
- 要求
- 安装
- 创建 PDF 文档的 6 个步骤
- 处理 PDF 文档的页面大小
- 设置 PDF 文档的背景颜色
- 设置 PDF 文档的页面边距
- 设置 PDF 文档中的文本对齐方式
- 设置 PDF 文档的元信息或属性
- 创建多页文档
- 从现有 PDF 文档创建新 PDF 文档
- 使用图层为 PDF 文档添加水印
- 通过移除图层从刚创建的带水印文档中移除水印
- 在创建过程中为每页添加水印
- 直接将 PDF 文件导出/打印/输出到客户端,而不将其保存到磁盘
- 设置 PDF 文档的查看器首选项
- 加密 PDF 文档
- 声明
- 参考文献
- 历史
以下两项内容已在此更新版本中添加引言
最近,我一直在寻找一个高级工具来用 C#.Net 创建复杂的 PDF 报告,我发现了 iTextSharp。主要问题是文档缺乏。是的,C# 中有一些例子,但这对于初学者来说是不够的,而且这些例子是旧版本的 iTextSharp,最新版本有很多变化。所以,初学者很难将旧版本转换为最新版本。此外,我认为如果我写一篇关于这个的文章,它也会帮助我作为未来的参考,因为我会用例子描述这个库的每个功能。坦率地说,在这篇文章中,你会找到来自《iText in Action, Second Edition》这本书第一章的所有例子,这本书是为 Java 开发人员写的。我将在我这篇文章的下一个版本中解释其余章节的所有例子。所以,如果有人有兴趣使用这个库,他们将有一个很好的开始。
要了解 iTextSharp 的历史或任何其他详细信息,请访问官方网站
要求
- 要编译此库,您需要 C# 2008 编译器或更高版本、Visual Studio 2008 或 Visual C# 2008 Express Edition
- 此库代码将在
- .NET 2.0
- .NET 3.0
- .NET 3.5
- .NET 4.0
- .NET 4.0 客户端配置文件
- .NET 4.5
- .NET 4.5 客户端配置文件
安装
- 只需安装 NuGet 包
或者,您可以从上面的链接或 SourceForge 下载库 DLL。然后执行以下操作
- 通过添加对该库 DLL 的引用,将以下库添加到您的项目中。只需查看下图
- 要在 C# 文件中执行本文中的操作,您需要添加以下命名空间:
iTextSharp.textiTextSharp.text.pdf
快速入门
创建 PDF 文档的 6 个步骤
- 步骤 1:创建一个
System.IO.FileStream对象
FileStream fs = new FileStream("Chapter1_Example1.pdf", FileMode.Create, FileAccess.Write, FileShare.None); - 步骤 2:创建一个
iTextSharp.text.Document对象
Document doc = new Document();
- 步骤 3:创建一个
iTextSharp.text.pdf.PdfWriter对象。它有助于将 Document 写入指定的 FileStream
PdfWriter writer = PdfWriter.GetInstance(doc, fs);
- 步骤 4:打开 Document
doc.Open();
- 步骤 5:通过创建 iTextSharp.text.Paragraph 对象来添加一个 Paragraph
doc.Add(new Paragraph("Hello World")); - 步骤 6:关闭 Document
doc.Close();
处理 PDF 文档的页面大小
要创建指定大小的页面,我们必须创建一个 iTextSharp.text.Rectangle 对象,并将大小作为参数传递给它的构造函数。有几种定义页面大小的方法
- 定义页面大小的第一种方法
通过像素或英寸创建页面大小。注意:在 iTextSharp 库中,单位是“点”。72 点 = 1 英寸。假设我们要创建一个宽度为 2 英寸、高度为 10 英寸的 PDF 文件,那么 2 英寸需要 144pt,10 英寸需要 72pt。让我们看看如何做到这一点
Rectangle rec = new Rectangle(144, 720);
- 定义页面大小的第二种方法
从内置的iTextSharp.text.PageSize类获取页面大小
Rectangle rec2 = new Rectangle(PageSize.A4);
以下是支持的内置页面大小。请阅读 页面大小的完整文档_11X17A0A1A10A2A3A4A4_LANDSCAPEA5A6A7A8A9ARCH_AARCH_BARCH_CARCH_DARCH_EB0B1B10B2B3B4B5B6B7B8B9CROWN_OCTAVOCROWN_QUARTODEMY_OCTAVODEMY_QUARTOEXECUTIVEFLSAFLSEHALFLETTERID_1ID_2ID_3LARGE_CROWN_OCTAVOLARGE_CROWN_QUARTOLEDGERLEGALLEGAL_LANDSCAPELETTERLETTER_LANDSCAPE注意PENGUIN_LARGE_PAPERBACKPENGUIN_SMALL_PAPERBACKPOSTCARDROYAL_OCTAVOROYAL_QUARTOSMALL_PAPERBACKTABLOID
- 定义页面大小的第三种方法
旋转 Document,即高度变成宽度,反之亦然
Rectangle rec3 = new Rectangle(PageSize.A4.Rotate());
现在,只需在创建对象时,将此 iTextSharp.text.Rectangle 对象(任意一个),即 'rec'、'rec2' 或 'rec3' 传递给 iTextSharp.text.Document 的构造函数,如下所示
Document doc = new Document(rec);
设置 PDF 文档的背景颜色
有几种设置背景颜色的方法
- 设置背景颜色的第一种方法
它接受iTextSharp.text.BaseColor对象。BaseColor 构造函数接受内置的 System.Drawing.Color 对象,或者您可以以不同形式将 RGB 值传递给构造函数
rec.BackgroundColor = new BaseColor(System.Drawing.Color.WhiteSmoke);
- 设置背景颜色的第二种方法
它接受iTextSharp.text.pdf.CMYKColor对象。CMYKColor 构造函数只接受不同形式的 CMYK 值
rec2.BackgroundColor = new CMYKColor(25, 90, 25, 0);
设置 PDF 文档的页面边距
边距可以在创建 Document 对象时设置,就像页面大小一样
假设我们按如下方式设置边距
- 左边距:0.5 英寸
- 右边距:1 英寸
- 上边距:1.5 英寸
- 下边距:2.5 英寸
所以,我们需要为左、右、上、下边距分别设置以下点数,因为我们已经知道 iTextSharp 库只识别点,其中 72 点 = 1 英寸。
- 左边距:36pt => 0.5 英寸
- 右边距:72pt => 1 英寸
- 上边距:108pt => 1.5 英寸
- 下边距:180pt => 2.5 英寸
让我们实现
Document doc = new Document(PageSize.A4, 36, 72, 108, 180);
设置 PDF 文档中的文本对齐方式
对齐方式 是 iTextSharp.text.Paragraph 对象的一个属性。iTextSharp 库提供了各种类型的对齐方式。这些对齐方式可以通过 iTextSharp.text.Element 类访问。以下是 iTextSharp 提供的对齐方式
ALIGN_BASELINE[^]ALIGN_BOTTOM[^]ALIGN_CENTER[^]ALIGN_JUSTIFIED[^]ALIGN_JUSTIFIED_ALL[^]ALIGN_LEFT[^]ALIGN_MIDDLE[^]ALIGN_RIGHT[^]ALIGN_TOP[^]ALIGN_UNDEFINED[^]
如前所述,iTextSharp.text.Document 的构造函数在创建 Document 时会接受 iTextSharp.text.Paragraph 对象。因此,在创建 Paragraph 对象并设置 Alignment 属性后,可以在创建 Document 对象时将其传递给 iTextSharp.text.Document 的构造函数。让我们实现
Paragraph para = new Paragraph("Hello World Hello World Hello World Hello World Hello World Hello World Hello World Hello World Hello World Hello World Hello World");
// Setting paragraph's text alignment using iTextSharp.text.Element class
para.Alignment = Element.ALIGN_JUSTIFIED;
// Adding this 'para' to the Document object
doc.Add(para);
设置 PDF 文档的元信息或属性
您可以通过创建其对象(例如,这里的 doc)的 iTextSharp.text.Document 方法来设置 PDF 文档的以下元信息
让我们来实现其中几个
// Setting Document properties e.g.
// 1. Title
// 2. Subject
// 3. Keywords
// 4. Creator
// 5. Author
// 6. Header
doc.AddTitle("Hello World example");
doc.AddSubject("This is an Example 4 of Chapter 1 of Book 'iText in Action'");
doc.AddKeywords("Metadata, iTextSharp 5.4.4, Chapter 1, Tutorial");
doc.AddCreator("iTextSharp 5.4.4");
doc.AddAuthor("Debopam Pal");
doc.AddHeader("Nothing", "No Header");
现在,在打开此 PDF 文件后,右键单击它并单击“属性”,您将看到以下内容

创建多页文档
我们可以通过创建其对象的 iTextSharp.text.Document 的 NewPage() 方法来创建新页面。让我们在 PDF 文档中添加五页
for (int i = 1; i <= 5; i++)
{
    doc.NewPage();
    doc.Add(new Paragraph(string.Format("This is a page {0}", i)));
}
从现有 PDF 文档创建新 PDF 文档
我们可以使用 iTextSharp.text.pdf.PdfReader 的对象从 PDF 文档中读取,并使用 iTextSharp.text.pdf.PdfStamper 的对象将其写入另一个 PDF 文档。让我们实现
string originalFile = "Original.pdf";
string copyOfOriginal = "Copy.pdf";
using (FileStream fs = new FileStream(originalFile, FileMode.Create, FileAccess.Write, FileShare.None))
using (Document doc = new Document(PageSize.LETTER))
using (PdfWriter writer = PdfWriter.GetInstance(doc, fs))
{
    doc.Open();
    doc.Add(new Paragraph("Hi! I'm Original"));
    doc.Close();
}
PdfReader reader = new PdfReader(originalFile);
using (FileStream fs = new FileStream(copyOfOriginal, FileMode.Create, FileAccess.Write, FileShare.None))
// Creating iTextSharp.text.pdf.PdfStamper object to write
// Data from iTextSharp.text.pdf.PdfReader object to FileStream object
using (PdfStamper stamper = new PdfStamper(reader, fs)) { }
使用图层为 PDF 文档添加水印
水印可以在 iTextSharp 库中创建 PDF 文档后添加。在这里,我将向现有 PDF 文档(即 Original.pdf)添加水印,方法是创建一个 iTextSharp.text.pdf.PdfLayer 对象。让我们实现
string watermarkedFile = "Watermarked.pdf";
// Creating watermark on a separate layer
// Creating iTextSharp.text.pdf.PdfReader object to read the Existing PDF Document
PdfReader reader1 = new PdfReader(originalFile);
using (FileStream fs = new FileStream(watermarkedFile, FileMode.Create, FileAccess.Write, FileShare.None))
// Creating iTextSharp.text.pdf.PdfStamper object to write Data from iTextSharp.text.pdf.PdfReader object to FileStream object
using (PdfStamper stamper = new PdfStamper(reader1, fs))
{
    // Getting total number of pages of the Existing Document
    int pageCount = reader1.NumberOfPages;

    // Create New Layer for Watermark
    PdfLayer layer = new PdfLayer("WatermarkLayer", stamper.Writer);
    // Loop through each Page
    for (int i = 1; i <= pageCount; i++)
    {
        // Getting the Page Size
        Rectangle rect = reader1.GetPageSize(i);

        // Get the ContentByte object
        PdfContentByte cb = stamper.GetUnderContent(i);

        // Tell the cb that the next commands should be "bound" to this new layer
        cb.BeginLayer(layer);
        cb.SetFontAndSize(BaseFont.CreateFont(
          BaseFont.HELVETICA, BaseFont.CP1252, BaseFont.NOT_EMBEDDED), 50);

        PdfGState gState = new PdfGState();
        gState.FillOpacity = 0.25f;
        cb.SetGState(gState);

        cb.SetColorFill(BaseColor.BLACK);
        cb.BeginText();
        cb.ShowTextAligned(PdfContentByte.ALIGN_CENTER, watermarkText, rect.Width / 2, rect.Height / 2, 45f);
        cb.EndText();

        // Close the layer
        cb.EndLayer();
    }
}
创建的 PDF 文档如下
通过移除图层从刚创建的带水印文档中移除水印
每当我们向 PDF 文档添加图层时,图层的内容就位于 OCG 组下方。因此,如果我们移除此图层,我们也可以移除该图层的内容,例如此处的水印文本。要从 PDF 文档中移除所有图层,您必须使用 reader.Catalog.Remove(PdfName.OCPROPERTIES) 完全从 Document 中移除 OCG 组。现在按照以下步骤从图层中移除水印文本
- 使用
iTextSharp.text.pdf.PdfReader的对象读取现有带水印的文档 - 使用
iTextSharp.text.pdf.PdfReader对象的GetPageN(int pageNumber)方法将每个页面获取到iTextSharp.text.pdf.PdfDictionary对象中。 - 使用
iTextSharp.text.pdf.PdfDictionary对象的GetAsArray(PdfName.CONTENTS)方法将页面的内容获取到iTextSharp.text.pdf.PdfArray对象中 - 循环遍历此数组,并使用
iTextSharp.text.pdf.PdfArray对象的GetAsStream(int arrayIndex)方法将每个元素获取为iTextSharp.text.pdf.PRStream对象 - 使用
iTextSharp.text.pdf.PdfReader类的静态方法GetStreamBytes(PRStream stream)将每个流转换为字节 - 使用
System.Text.Encoding.ASCII.GetString(byte[] bytes)方法将这些字节转换为字符串 - 搜索字符串 "/OC" 和
带水印的文本。如果找到,则通过使用iTextSharp.text.pdf.PRStream类的Put()和SetData()方法将其设置为零长度和零数据来移除它 - 使用
iTextSharp.text.pdf.PdfStamper的对象将此修改后的文档(存在于reader中)写入新文档
让我们来实现它
// Removing the layer created above
// 1. First we bind a reader to the watermarked file
// 2. Then strip out a branch of things
// 3. Finally use a simple stamper to write out the edited reader
PdfReader reader2 = new PdfReader(watermarkedFile);

// NOTE: This will destroy all layers in the Document, only use if you don't have any addtional layers
// Remove the OCG group completely from the Document: reader2.Catalog.Remove(PdfName.OCPROPERTIES);

// Clean up the reader, optional
reader2.RemoveUnusedObjects();

// Placeholder variables
PRStream stream;
string content;
PdfDictionary page;
PdfArray contentArray;

// Get the number of pages
int pageCount2 = reader2.NumberOfPages;

// Loop through each page
for (int i = 1; i <= pageCount2; i++)
{
    // Get the page
    page = reader2.GetPageN(i);

    // Get the raw content
    contentArray = page.GetAsArray(PdfName.CONTENTS);

    if (contentArray != null)
    {
        // Loop through content
        for (int j = 0; j < contentArray.Size; j++)
        {
            stream = (PRStream)contentArray.GetAsStream(j);

            // Convert to a String, NOTE: you might need a different encoding here
            content = System.Text.Encoding.ASCII.GetString(PdfReader.GetStreamBytes(stream));

            //Look for the OCG token in the stream as well as our watermarked text
            if (content.IndexOf("/OC") >= 0 && content.IndexOf(watermarkText) >= 0)
            {
                //Remove it by giving it zero length and zero data
                stream.Put(PdfName.LENGTH, new PdfNumber(0));
                stream.SetData(new byte[0]);
            }
        }
    }
}

// Write the content out
using (FileStream fs = new FileStream(unwatermarkedFile,
          FileMode.Create, FileAccess.Write, FileShare.None))
using (PdfStamper stamper = new PdfStamper(reader2, fs)) { }
在创建过程中为每页添加水印
现在,我们已经知道,水印不能在页面创建期间添加,必须在文档创建之后添加。因此,我创建了一个名为 PDFWriterEvents 的类,它实现了 iTextSharp.text.pdf.IPdfPageEvent 接口,并修改了 OnStartPage 事件。此接口包含一组事件,从打开 PDF 文档到关闭 PDF 文档。事件如下
public void OnOpenDocument(PdfWriter writer, Document document)public void OnCloseDocument(PdfWriter writer, Document document)public void OnStartPage(PdfWriter writer, Document document)public void OnEndPage(PdfWriter writer, Document document)public void OnParagraph(PdfWriter writer, Document document, float paragraphPosition)public void OnParagraphEnd(PdfWriter writer, Document document, float paragraphPosition)public void OnChapter(PdfWriter writer, Document document, float paragraphPosition, Paragraph title)public void OnChapterEnd(PdfWriter writer, Document document, float paragraphPosition)public void OnSection(PdfWriter writer, Document document, float paragraphPosition, int depth, Paragraph title)public void OnSectionEnd(PdfWriter writer, Document document, float paragraphPosition)public void OnGenericTag(PdfWriter writer, Document document, Rectangle rect, String text)
您可以根据需要修改其他事件,这些事件会在特定操作发生时触发。让我们看看我创建了什么
// Creating Watermark inside OnStartPage Event by implementing IPdfPageEvent interface
// So that, dusring Page Creation, Watermark will be create
class PDFWriterEvents : IPdfPageEvent
{
    string watermarkText;
    float fontSize = 80f;
    float xPosition = 300f;
    float yPosition = 800f;
    float angle = 45f;

    public PDFWriterEvents(string watermarkText, float fontSize = 80f,
       float xPosition = 300f, float yPosition = 400f, float angle = 45f)
    {
        this.watermarkText = watermarkText;
        this.xPosition = xPosition;
        this.yPosition = yPosition;
        this.angle = angle;
    }

    public void OnOpenDocument(PdfWriter writer, Document document) { }
    public void OnCloseDocument(PdfWriter writer, Document document) { }
    public void OnStartPage(PdfWriter writer, Document document)
    {
        try
        {
            PdfContentByte cb = writer.DirectContentUnder;
            BaseFont baseFont = BaseFont.CreateFont(BaseFont.HELVETICA, BaseFont.WINANSI, BaseFont.EMBEDDED);
            cb.BeginText();
            cb.SetColorFill(BaseColor.LIGHT_GRAY);
            cb.SetFontAndSize(baseFont, fontSize);
            cb.ShowTextAligned(PdfContentByte.ALIGN_CENTER, watermarkText, xPosition, yPosition, angle);
            cb.EndText();
        }
        catch (DocumentException docEx)
        {
            throw docEx;
        }
    }
    public void OnEndPage(PdfWriter writer, Document document) { }
    public void OnParagraph(PdfWriter writer, Document document, float paragraphPosition) { }
    public void OnParagraphEnd(PdfWriter writer, Document document, float paragraphPosition) { }
    public void OnChapter(PdfWriter writer, Document document, float paragraphPosition, Paragraph title) { }
    public void OnChapterEnd(PdfWriter writer, Document document, float paragraphPosition) { }
    public void OnSection(PdfWriter writer, Document document, float paragraphPosition, int depth, Paragraph title) { }
    public void OnSectionEnd(PdfWriter writer, Document document, float paragraphPosition) { }
    public void OnGenericTag(PdfWriter writer, Document document, Rectangle rect, String text) { }
}
让我们看看如何以及何时使用这个类的对象
using (FileStream fs = new FileStream(
"Watermark_During_Page_Creation.pdf", FileMode.Create, FileAccess.Write, FileShare.None))
using (Document doc = new Document(PageSize.LETTER))
using (PdfWriter writer = PdfWriter.GetInstance(doc, fs))
{
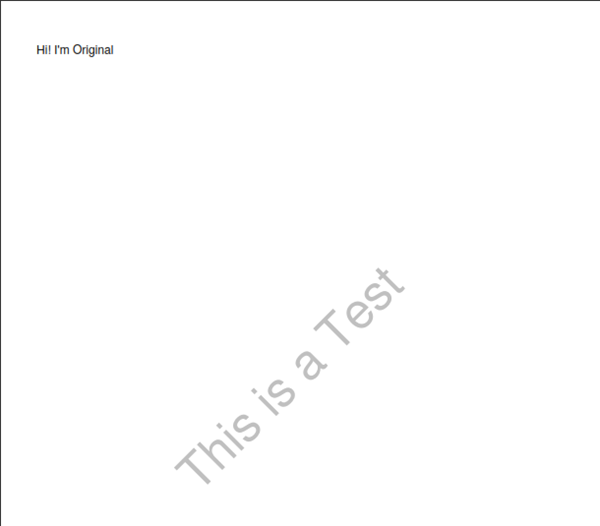
writer.PageEvent = new PDFWriterEvents("This is a Test");
doc.Open();
doc.Add(new Paragraph("This is a page 1"));
doc.Close();
}
看,OnStartPage 事件在添加新段落时被调用。所以我不必以后再添加水印:)
直接将 PDF 文件导出/打印/输出到客户端,而不将其保存到磁盘
通过创建 System.IO.MemorySystem 对象,我们可以创建内存中的 PDF 文件。让我们看看
using (MemoryStream ms = new MemoryStream())
using(Document document = new Document(PageSize.A4, 25, 25, 30, 30))
using(PdfWriter writer = PdfWriter.GetInstance(document, ms))
{
    document.Open();
    document.Add(new Paragraph("Hello World"));
    document.Close();
    writer.Close();
    ms.Close();
    Response.ContentType = "pdf/application";
    Response.AddHeader("content-disposition", "attachment;filename=First_PDF_document.pdf");
    Response.OutputStream.Write(ms.GetBuffer(), 0, ms.GetBuffer().Length);
}
设置 PDF 文档的查看器首选项
不同 ViewerPreferences 的值最初存储在 iTextSharp.text.pdf.PdfWriter 类中,作为整数常量。您可以通过以下两种方式设置 ViewerPreferences
- 通过设置
iTextSharp.text.pdf.PdfWriter类的ViewerPreferences属性。要了解所有ViewerPreferences及其用途,请先阅读 此链接。例如:
writer.ViewerPreferences = PdfWriter.HideMenubar;
- 通过调用
iTextSharp.text.pdf.PdfWriter对象的AddViewerPreference(PdfName key, PdfObject value)方法。要了解哪个value适合哪个key,请先阅读 此链接。例如:
writer.AddViewerPreference(PdfName.HIDEMENUBAR, new PdfBoolean(true));
加密 PDF 文档
通过 iTextSharp.text.pdf.PdfWriter 对象的 SetEncryption() 方法,我们可以加密 PDF 文档。在此处阅读此方法的完整文档 此处。要了解所有加密类型,请单击 此处。例如:
writer.SetEncryption(PdfWriter.STRENGTH40BITS, null, null, PdfWriter.ALLOW_COPY);
声明
请下载源代码以获取详细信息。希望您能理解,因为源代码是经过注释的。如果您有任何疑问,请在下方发表评论。谢谢。
参考文献
- iText 官方网站
- iText in Action, Second Edition
- 核心 iText API 文档
- RubyPdf Blog - iText# in Action
- 在 ASP.NET 中创建 PDF - iTextSharp 入门
- 使用 iTextSharp 进行基本 PDF 创建 - 第一部分