
WPF:时间线控件
4.97/5 (151投票s)
我认为可能有用的简单 WPF 时间线控件。
目录
引言
在我们公司有一个正在进行的排期项目,我们需要向用户显示这些项目。现在我们可以获得成千上万的这类重复项,您猜猜为了让用户更容易查看,我们选择了哪种显示方式?您猜不到,对吧。好吧,我们选择了列表。嗯。
我对这一点并不满意,一直在思考是否有更好的方法来显示跨越时间间隔的数据。也许可以将其称为时间线控件。所以我启动了我可靠的浏览器,并在 Google 上搜索了一下。我在 http://timeline.codeplex.com/ 找到了一个非常棒的控件,不幸的是,它目前只适用于 Silverlight(WPF 版本即将推出,但尚未发布)。虽然它很棒,但并非我想要的,所以我心想,也许我可以尝试一下,看看能有什么新发现。
结果是我创建了一个我认为相当可重用的 WPF 时间线控件。请注意,它仅适用于 WPF,而且由于依赖一个第三方库的 DLL,我怀疑它永远无法在 Silverlight 中运行。
本文的其余部分将概述该控件的工作原理以及您在自己的项目中使用它需要做些什么。我还会讨论如何重新样式化该控件,以防万一您不喜欢我自己的样式。
先决条件
该控件只有一个前提条件,那就是 VS2008 或 VS2010(如果您有的话)。
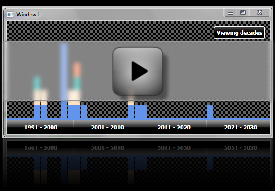
演示视频
本文最好通过视频来演示(注意,没有音频),但我将在本文中详细解释视频中的所有工作内容。
只需点击此图像,即可进入一个显示视频的新页面。但在您这样做之前,我强烈建议您在观看视频之前先阅读一下视频中需要注意的要点,因为关注这些要点将帮助您更好地理解本文相关的代码是如何工作的。
以下是观看视频时应注意的一些事项。
- 用户能够围绕几十年进行平移
- 用户能够沿着日期路径向下/向上导航
- 用户通过单击条形图可以精确检查构成单个条形图的
ITimeLineItem(稍后会详细介绍)。 - 单击条形图中的弹出窗口内的单个
ITimeLineItem,或者单击ViewingSpecificDayState内的ITimeLineItem项目。
如果您错过了所有这些(我相信您第一次观看时会如此),我强烈建议您重新观看视频,因为它将帮助您更好地理解本文的其余部分。
它有什么功能
简单来说,这个 TimeLineControl 允许用户以易于导航的方式查看一系列基于 ITimeLineItem(稍后会详细介绍)的项目。有多种不同的视觉表示方式,允许用户深入了解数据,并且还允许用户向后导航。在每个阶段(除了最终的视觉表示),所有符合给定查看条件的 ITimeLineItem 项目都以简单的条形图(大多数人都理解)显示,单击该条形图将显示一个包含构成条形图的所有 ITimeLineItem 项目的弹出窗口。
附带的 TimeLineControl 最初显示几十年,用户可以深入某个特定的几十年。然后,几十年可视化器将被用户选择的几十年视图替换,然后用户可以进一步深入某个特定的年份,以此类推。在任何时候,用户都可以选择从刚才来过的地方向后导航,这就像一个您访问过的时间的“面包屑”导航。
值得注意的是,在导航过程的任何阶段,用户只需单击条形图本身,即可轻松查看构成特定条形图的确切 ITimeLineItem 项目。如果用户找到了他们想要的东西,他们只需单击包含的弹出窗口中的 ITimeLineItem 项目,就会引发一个 TimeLineControl.TimeLineItemClicked 事件,用户可以在自己的代码中使用它,也许可以导航到所选 ITimeLineItem 项目的更详细页面。
所有内容如何运作
接下来的几节将概述整体内部设计并向您解释其工作原理。
基本思路
基本想法显然是一个非常基本的想法,我们希望显示一些带有时间戳数据(例如 DateTime 属性)的数据。我们希望以一种使用户易于导航到他们找到所需内容的位置的方式来显示这些时间线数据。简而言之,这就是我们要做的全部,我们只需要一个可以向用户显示时间线数据的控件。
那么,这种时间线数据应该是什么样的呢?我仔细想了想,认为至少应该包含以下数据。
- 描述
- 日期时间
因此,考虑到这一点,附带的 TimeLineControl 期望用户传入一个 ObservableCollection<T>,其中 T 是某个数据类,它实现了 TimeLineControl.ITimeLineItem 接口,而 TimeLineControl.ITimeLineItem 接口如下所示:
using System;
using System.Collections.Generic;
using System.Linq;
using System.Text;

namespace TimeLineControl
{
    /// <summary>
    /// Expected interface that must be implemented
    /// to add items to the <c>TimeLineControl</c>
    /// </summary>
    public interface ITimeLineItem
    {
        String Description { get; set; }
        DateTime ItemTime { get; set; }
    }
}
因此,一旦 TimeLineControl 接收到(是的,您需要提供项目,它并没有那么智能,如果我能制造出那么智能的东西,我就会制造一个终结者) ObservableCollection<Your ITimeLineItem based items> 项目,剩下的就是渲染它们。好吧,我说得简单,但老实说,这个控件包含许多活动部件(尽管它们本质上都是相似的),请查看项目结构。

您可以看到,一个主要绘制时间项的控件就有这么多东西。不过不要因此而气馁。随着文章的进展,您会发现其中有很多是相似的代码,一旦您理解了一个部分,其余的就会迎刃而解。
一切都关乎状态
由于我希望这个控件能够显示大量数据,并允许用户进行缩放,因此允许用户从几十年一直看到单天似乎是很自然的。我对此进行了一些思考,虽然我可以在一个控件中完成大部分逻辑,但对我来说似乎不太对,所以我又仔细思考了一下,并对自己说,这基本上就是 状态模式,通常显示为以下 UML 图。

这个想法是,您有一个上下文对象,它有一个单一的当前状态,并且它对当前状态对象发出请求。当前状态将执行一些逻辑,可能会将上下文对象置于新状态。通常,上下文会从已知状态开始,实际上这是必须的。
对于附带的演示代码,UML 图如下所示:

在附带的演示代码中,上下文对象是名为 TimeLineControl 的 UserControl,它持有一个当前的 IState(状态)对象。TimeLineControl 从 ViewingDecadesState 开始。此状态图进一步说明了从一种状态到另一种状态转换的内部机制。

思考所有状态如何与上下文对象进行通信有点棘手,因为状态本身是简单的数据类,而 TimeLineControl 上下文对象是一个 UserControl,并且状态还需要渲染该状态的那种视觉效果。所以我想到的是拥有一个与给定状态关联的 UserControl,并且该状态关联的 UserControl 应该能够与 TimeLineControl 上下文对象进行通信。这将在下一节中更详细地讨论。
关注点分离 / 组合 (好吧,好吧,所以这并非全关乎状态)
好吧,当我刚才说一切都关乎 状态模式 时,这是真实的。但 状态模式 只讲了故事的一半。我们还需要在每个状态中进行大量的渲染,那么我们如何做到这一点呢?对我来说,这都归结为关注点分离。我们可以在 TimeLineControl 中拥有大量代码,根据我们当前所处的状态来运行,但这让我感到不舒服。为此,我所做的就是创建一个状态可视化器,它本身就是一个 UserControl。所以每个状态都会有一个可视化器,并且在大多数情况下,状态可视化器还会使用更多的 UserControl 来使每个 UserControl 只完成一小部分工作。您知道,这一切都关乎关注点分离。
下表试图说明状态如何映射到它们的状态可视化器 UserControl,并且还显示了状态可视化器 UserControl 使用了哪些内部 UserControl。我们将查看每个状态可视化器的拆解图像,并附带注释,以及特定状态如何与其关联的状态可视化器 UserControl 一起工作。
| 当前状态 | 状态可视化控件 | 状态可视化器辅助控件 |
ViewingDecadesState (数据类) |
ViewingDecadesStateControl (UserControl) |
|
ViewingYearsState (数据类) |
ViewingYearsStateControl (UserControl) |
|
ViewingMonthsState (数据类) |
ViewingMonthsStateControl (UserControl) |
|
ViewingDaysState (数据类) |
ViewingDaysStateControl (UserControl) |
|
ViewingSpecificDayState (数据类) |
ViewingSpecificDayStateControl (UserControl) |
|
为了充分理解这一点,让我们检查一下这些状态控件的一些拆解图像。
ViewingDecadesStateControl

ViewingYearsStateControl

ViewingMonthsStateControl

ViewingDaysStateControl

ViewingSpecificDayStateControl

完整跟踪一个状态(是的,从头到尾)
好的,现在您可以看到每个状态都有一个 UserControl 负责渲染与当前状态相关的 UI 元素,那么我们是否可以更仔细地检查其中一个状态呢?让我们选择一个,比如 ViewingDaysState。正如我们之前所说的,有许多状态,每个状态都继承自 BaseState 并实现 IState 接口。
BaseState 如下所示:
public abstract class BaseState
{
    public IStateControl StateVisualiser { get; set; }
    public abstract List<ITimeLineItem> TimeLineItems { get; }
    public NavigateArgs NavigateTo { get; set; }
    public void Refresh()
    {
        if (((UserControl)StateVisualiser).IsLoaded)
            StateVisualiser.ReDraw(TimeLineItems);
    }
}
而 IState 接口如下所示:
public interface IState
{
    void NavigateDown(TimeLineControl context);
    void NavigateUp(TimeLineControl context);
    IStateControl StateVisualiser { get; }
    void Refresh();
}
因此,当用户选择向上或向下导航时,TimeLineControl 能够告知其活动状态,它需要根据用户的操作向上或向下导航。
这一切都转化为 ViewingDaysState 代码的状态:
深入了解 ViewingDaysState
using System;
using System.Collections.Generic;
using System.Linq;
using System.Text;
using System.Windows.Controls;
using System.Windows;
using System.Collections.ObjectModel;

namespace TimeLineControl
{
    /// <summary>
    /// Viewing days state
    /// </summary>
    public class ViewingDaysState : BaseState, IState, IDisposable
    {
        #region Data
        private TimeLineControl context;
        #endregion

        #region Ctor
        public ViewingDaysState(TimeLineControl context, NavigateArgs args)
        {
            this.NavigateTo = args;
            this.context = context;

            base.StateVisualiser = new ViewingDaysStateControl();
            base.StateVisualiser.CurrentViewingDate = NavigateTo.CurrentViewingDate;
            base.StateVisualiser.NavigateUpAction = new Action(context.NavigateUp);
            base.StateVisualiser.NavigateDownAction = new Action(context.NavigateDown);
            ((UserControl)base.StateVisualiser).Loaded += ViewingDaysState_Loaded;
        }
        #endregion

        #region Private Methods
        private void ViewingDaysState_Loaded(object sender, RoutedEventArgs e)
        {
            ((UserControl)base.StateVisualiser).Height = context.Height;
            base.StateVisualiser.ItemsDataTemplate = context.ItemsDataTemplate;
            base.StateVisualiser.ReDraw(TimeLineItems);
        }
        #endregion

        #region Public Properties

        public override List<ITimeLineItem> TimeLineItems
        {
            get
            {
                if (context.TimeLineItems == null)
                    return null;

                DateTime dt = base.StateVisualiser.CurrentViewingDate;

                return context.TimeLineItems.Where(
                    tm => tm.ItemTime.Year == dt.Year &&
                          tm.ItemTime.Month == dt.Month).ToList().SortList();
            }
        }
        #endregion

        #region IState Members

        public void NavigateDown(TimeLineControl context)
        {
            context.State = new ViewingSpecificDayState(
                context,
                new NavigateArgs(context.State.StateVisualiser.CurrentViewingDate,
                    NavigatingToSource.SpecificDay));
        }

        public void NavigateUp(TimeLineControl context)
        {
            context.State = new ViewingMonthsState(
                context,
                new NavigateArgs(context.State.StateVisualiser.CurrentViewingDate,
                    NavigatingToSource.MonthsOfYear));
        }
        #endregion

        #region IDisposable Members

        public void Dispose()
        {
            ((UserControl)base.StateVisualiser).Loaded -= ViewingDaysState_Loaded;
        }

        #endregion
    }
}
您可以看到,在 IState.NavigateUp()/IState.NavigateDown() 方法中有一个对 context 的引用,即 TimeLineControl。另外值得注意的是,在构造函数中,状态的可视化器控件(然后是用户与之交互的部分,而不是实际的状态代码本身)如何通过使用 Action 委托(一个用于 NavigateUp(),一个用于 NavigateDown() 方法)直接与 TimeLineControl 通信。这意味着当用户在状态可视化器控件(在本例中为 ViewingDaysStateControl)中执行需要新状态的操作时,会调用这些回调 Action 委托,并且 TimeLineControl 能够要求其当前状态相应地调用 NavigateUp() 或 NavigateDown()。这发生在 TimeLineControl 的代码中,请注意它只是调用其当前状态,并且请记住,由于上面提供的回调 Action 委托,这些方法直接从当前状态的可视化器控件中调用。
internal void NavigateDown()
{
    State.NavigateDown(this);
}

internal void NavigateUp()
{
    State.NavigateUp(this);
}
另一点是,当状态可视化器加载时,会调用 ReDraw() 方法,当然,所有绘图都发生在这里。当我们检查 ViewingDaysStateControl 的代码时,您将看到更多关于绘图如何发生的内容。
所以这就是状态代码的样子,但为了继续我们的旅程,现在让我们看看状态可视化器代码(在本例中为 ViewingDaysStateControl)是如何构建的。
深入了解 ViewingDaysStateControl
这里的想法是创建一个容器来放置另一个辅助 UserControl(在本例中为 DaysView),但同时提供两个回调 Action 委托,这些委托将反过来通过调用其自己的 NavigateUp() 或 NavigateDown() 方法来告诉 TimeLineControl 更改其状态。
这是 ViewingDaysStateControl 的完整 XAML:
<UserControl x:Class="TimeLineControl.ViewingDaysStateControl"
    xmlns="http://schemas.microsoft.com/winfx/2006/xaml/presentation"
    xmlns:x="http://schemas.microsoft.com/winfx/2006/xaml"
    xmlns:local="clr-namespace:TimeLineControl"
    HorizontalAlignment="Stretch" VerticalAlignment="Stretch">

    <UserControl.Resources>
        <ResourceDictionary>
            <ResourceDictionary.MergedDictionaries>
                <ResourceDictionary Source="../../../Resources/AppStyles.xaml"/>
            </ResourceDictionary.MergedDictionaries>
        </ResourceDictionary>
    </UserControl.Resources>


    <DockPanel>
        <Grid x:Name="spButtons" HorizontalAlignment="Stretch"
              DockPanel.Dock="Top" Height="50" >
            <Grid.ColumnDefinitions>
                <ColumnDefinition Width="Auto"/>
                <ColumnDefinition Width="*"/>
            </Grid.ColumnDefinitions>
            <Button x:Name="btnUp" Style="{StaticResource leftButtonTemplateStyle}"
                    Click="NavigateUp_Click" />

            <Border BorderThickness="2"
                    BorderBrush="{StaticResource TopBannerTextBorderBrush}"
                    Grid.Column="1"
                    Width="Auto"
                    Background="{StaticResource TopBannerBackGround}"
                    CornerRadius="5" Height="30" VerticalAlignment="Center"
                    HorizontalAlignment="Right" Margin="0,0,10,0">
                <Label x:Name="lblDetails"
                   Margin="5,0,5,0"
                   Padding="0"
                   HorizontalAlignment="Center"
                   HorizontalContentAlignment="Center"
                   VerticalAlignment="Center"
                   VerticalContentAlignment="Center"
                   Foreground="{StaticResource TopBannerTextForeground}"
                   FontFamily="Tahoma" FontSize="12"
                   FontWeight="Bold"/>
            </Border>


        </Grid>


        <local:FrictionScrollViewer Style="{StaticResource ScrollViewerStyle}"
            HorizontalAlignment="Stretch" VerticalAlignment="Stretch">
            <Grid x:Name="grid" HorizontalAlignment="Stretch"/>
        </local:FrictionScrollViewer>

    </DockPanel>
</UserControl>
那里没有什么特别有趣的地方,除了有一个导航向上 Button,以及一个将被用于容纳其余内容的 Grid。那么,让我们来看看代码隐藏吧,好吗?
using System;
using System.Collections.Generic;
using System.Collections.ObjectModel;
using System.Linq;
using System.Text;
using System.Windows;
using System.Windows.Controls;
using System.Windows.Data;
using System.Windows.Documents;
using System.Windows.Input;
using System.Windows.Media;
using System.Windows.Media.Imaging;
using System.Windows.Navigation;
using System.Windows.Shapes;

namespace TimeLineControl
{
    /// <summary>
    /// State visualiser for <c>ViewingDaysState</c>.
    /// This creates a new <c>DaysView</c> passing it the
    /// List of ITimeLineItem to draw
    /// </summary>
    public partial class ViewingDaysStateControl :
        UserControl, IStateControl, IDisposable
    {
        #region Ctor
        public ViewingDaysStateControl()
        {
            InitializeComponent();
        }
        #endregion

        #region Public Properties
        public Action NavigateUpAction { get; set; }
        public Action NavigateDownAction { get; set; }
        public DateTime CurrentViewingDate { get; set; }
        public TimeLineControl Parent { private get;  set; }


        #region ItemsDataTemplate

        /// <summary>
        /// ItemsDataTemplate Dependency Property
        /// </summary>
        public static readonly DependencyProperty ItemsDataTemplateProperty =
            DependencyProperty.Register("ItemsDataTemplate", typeof(DataTemplate),
            typeof(ViewingDaysStateControl),
                new FrameworkPropertyMetadata((DataTemplate)null,
                    new PropertyChangedCallback(OnItemsDataTemplateChanged)));

        /// <summary>
        /// Gets or sets the ItemsDataTemplate property.
        /// </summary>
        public DataTemplate ItemsDataTemplate
        {
            get { return (DataTemplate)GetValue(ItemsDataTemplateProperty); }
            set { SetValue(ItemsDataTemplateProperty, value); }
        }

        /// <summary>
        /// Handles changes to the ItemsDataTemplate property.
        /// </summary>
        private static void OnItemsDataTemplateChanged(DependencyObject d,
            DependencyPropertyChangedEventArgs e)
        {
        }
        #endregion
        #endregion

        #region Public Methods
        public void ReDraw(List<ITimeLineItem> timeLineItems)
        {
            if (timeLineItems != null)
            {

                CreateBreadCrumb();
                grid.Children.Clear();
                grid.Height = this.Height - 50;

                lblDetails.Content = String.Format("1-{0} {1} {2}",
                    CurrentViewingDate.DaysOfMonth(),
                    DataHelper.GetNameOfMonth(CurrentViewingDate.Month),
                    CurrentViewingDate.Year);

                DaysView dv = new DaysView()
                {
                    ItemsDataTemplate = this.ItemsDataTemplate,
                    Height = this.Height - spButtons.Height,
                    Width = grid.Width,
                    CurrentViewingDate = CurrentViewingDate,
                    TimeLineItems = timeLineItems
                };
                dv.ViewDateEvent += dv_ViewDateEvent;
                dv.Loaded += (s, e) =>
                {
                    dv.Draw();
                };
                grid.Children.Add(dv);
            }
        }
        #endregion

        #region Private Methods
        private void dv_ViewDateEvent(object sender, DateEventArgs e)
        {
            CurrentViewingDate = e.CurrentViewingDate;
            NavigateDownAction();
        }

        private void NavigateUp_Click(object sender, RoutedEventArgs e)
        {
            NavigateUpAction();
        }

        private void CreateBreadCrumb()
        {
            breadCrumbContainer.Children.Clear();
            BreadCrumb bc = new BreadCrumb();
            bc.Parent = this.Parent;
            bc.NavigateArgs = new NavigateArgs(this.CurrentViewingDate,
                NavigatingToSource.DaysOfMonth);
            breadCrumbContainer.Children.Add(bc);
        }
        #endregion

        #region IDisposable Members

        public void Dispose()
        {
            foreach (DaysView dv in grid.Children)
            {
                dv.ViewDateEvent -= dv_ViewDateEvent;
            }
        }

        #endregion
    }
}
您可以看到,此代码执行各种操作,例如挂钩事件,计算可传递给 DaysView UserControl(它将执行所有实际的日期渲染)的空间量。它还在等待 DaysView UserControl 加载完毕,然后要求它绘制自身,在内部它利用了 TimeLineItems 属性项,该属性项刚刚由 ViewingDaysStateControl 填充。
所以,接下来要分析的是 DaysView UserControl 所做的工作。让我们现在来看看。
深入了解 DaysView
这个 UserControl 负责渲染日期,这是它的完整 XAML。
<UserControl x:Class="TimeLineControl.DaysView"
    xmlns="http://schemas.microsoft.com/winfx/2006/xaml/presentation"
    xmlns:x="http://schemas.microsoft.com/winfx/2006/xaml"
    Height="Auto" Width="Auto" Background="Transparent" Margin="0,0,-2,0">

    <UserControl.Resources>
        <ResourceDictionary>
            <ResourceDictionary.MergedDictionaries>
                <ResourceDictionary Source="../../../Resources/AppStyles.xaml"/>
            </ResourceDictionary.MergedDictionaries>
        </ResourceDictionary>
    </UserControl.Resources>


    <Grid x:Name="grid">

        <Grid.RowDefinitions>
            <RowDefinition Height="*"/>
            <RowDefinition Height="35"/>
        </Grid.RowDefinitions>

    </Grid>
</UserControl>
那里没什么东西,对吧?这是因为所有内容都在代码隐藏中完成,毕竟有一些动态性需要处理,并非所有月份都有相同数量的天数,因此我们需要在代码中处理。这是代码隐藏:
using System;
using System.Collections.Generic;
using System.Linq;
using System.Text;
using System.Windows;
using System.Windows.Controls;
using System.Windows.Data;
using System.Windows.Documents;
using System.Windows.Input;
using System.Windows.Media;
using System.Windows.Media.Imaging;
using System.Windows.Navigation;
using System.Windows.Shapes;
using System.Collections.ObjectModel;

namespace TimeLineControl
{
    /// <summary>
    /// Displays days <c>ITemLineItem</c>s
    /// </summary>
    public partial class DaysView : UserControl
    {
        #region Data
        private Dictionary<Int32, List<ITimeLineItem>> itemsByKey =
            new Dictionary<int, List<ITimeLineItem>>();
        private Boolean initialised = false;
        private Int32 daysInCurrentMonth = 0;
        #endregion

        #region Ctor
        public DaysView()
        {
            InitializeComponent();
        }
        #endregion

        #region Public Properties

        public DateTime CurrentViewingDate { get; set; }

        #region ItemsDataTemplate

        /// <summary>
        /// ItemsDataTemplate Dependency Property
        /// </summary>
        public static readonly DependencyProperty ItemsDataTemplateProperty =
            DependencyProperty.Register("ItemsDataTemplate", typeof(DataTemplate),
            typeof(DaysView),
                new FrameworkPropertyMetadata((DataTemplate)null,
                    new PropertyChangedCallback(OnItemsDataTemplateChanged)));

        /// <summary>
        /// Gets or sets the ItemsDataTemplate property.
        /// </summary>
        public DataTemplate ItemsDataTemplate
        {
            get { return (DataTemplate)GetValue(ItemsDataTemplateProperty); }
            set { SetValue(ItemsDataTemplateProperty, value); }
        }

        /// <summary>
        /// Handles changes to the ItemsDataTemplate property.
        /// </summary>
        private static void OnItemsDataTemplateChanged(DependencyObject d,
            DependencyPropertyChangedEventArgs e)
        {
        }
        #endregion

        #region TimeLineItems

        /// <summary>
        /// TimeLineItems Dependency Property
        /// </summary>
        public static readonly DependencyProperty TimeLineItemsProperty =
            DependencyProperty.Register("TimeLineItems", typeof(List<ITimeLineItem>),
            typeof(DaysView),
                new FrameworkPropertyMetadata((List<ITimeLineItem>)null,
                    new PropertyChangedCallback(OnTimeLineItemsChanged)));

        /// <summary>
        /// Gets or sets the TimeLineItems property.
        /// </summary>
        public List<ITimeLineItem> TimeLineItems
        {
            get { return (List<ITimeLineItem>)GetValue(TimeLineItemsProperty); }
            set { SetValue(TimeLineItemsProperty, value); }
        }

        /// <summary>
        /// Handles changes to the TimeLineItems property.
        /// </summary>
        private static void OnTimeLineItemsChanged(DependencyObject d,
            DependencyPropertyChangedEventArgs e)
        {

        }
        #endregion

        #endregion

        #region Public Methods

        public void Draw()
        {
            if (TimeLineItems.Count() == 0)
                return;

            if (initialised)
                return;

            daysInCurrentMonth = CurrentViewingDate.DaysOfMonth();

            Double barWidth = (this.ActualWidth / daysInCurrentMonth) > 25 ?
                this.ActualWidth / daysInCurrentMonth : 25;


            //create grid columns for Month
            for (int dayOfMonth = 0; dayOfMonth < daysInCurrentMonth; dayOfMonth++)
            {
                grid.ColumnDefinitions.Add(new ColumnDefinition()
                    {
                        Width = new GridLength(barWidth, GridUnitType.Pixel)
                    });
            }

            grid.Children.Clear();
            Int32 barHeightToDrawIn = (Int32)this.Height - 35;

            Int32 maximumItemsForGraphAcrossAllBars = 0;

            for (int dayOfMonth = 1; dayOfMonth <= daysInCurrentMonth; dayOfMonth++)
            {
                List<ITimeLineItem> items =
                    (from t in TimeLineItems
                     where t.ItemTime.Year == CurrentViewingDate.Year &&
                           t.ItemTime.Month == CurrentViewingDate.Month &&
                           t.ItemTime.Day == dayOfMonth
                     select t).ToList();
                if (items != null && items.Count > 0)
                    itemsByKey.Add(dayOfMonth, items);
            }

            if (itemsByKey.Count > 0)
                maximumItemsForGraphAcrossAllBars =
                    (from x in itemsByKey
                     select x.Value.Count).Max();

            for (int dayOfMonth = 1; dayOfMonth <=
                daysInCurrentMonth; dayOfMonth++)
            {
                List<ITimeLineItem> items = null;

                Double columnWidth = grid.ActualWidth / 10;

                if (itemsByKey.TryGetValue(dayOfMonth, out items))
                {
                    ItemsBar bar = new ItemsBar();
                    bar.ItemsDataTemplate = this.ItemsDataTemplate;
                    bar.Height = barHeightToDrawIn;
                    bar.Width = columnWidth;
                    bar.TimeLineItems = items;
                    bar.MaximumItemsForGraphAcrossAllBars =
                        maximumItemsForGraphAcrossAllBars;
                    bar.Loaded += (s, e) =>
                    {
                        bar.Draw();
                    };
                    bar.SetValue(Grid.ColumnProperty, dayOfMonth - 1);
                    bar.SetValue(Grid.RowProperty, 0);
                    grid.Children.Add(bar);
                }

                //Need to build up buttons now
                grid.Children.Add(CreateButton(dayOfMonth, dayOfMonth - 1));
            }

            initialised = true;
        }

        #endregion

        #region Events

        public event EventHandler<DateEventArgs> ViewDateEvent;
        #endregion

        #region Private Methods
        private void OnViewDateEvent(DateTime currentViewingDate)
        {
            // Copy to a temporary variable to be thread-safe.
            EventHandler<DateEventArgs> temp = ViewDateEvent;
            if (temp != null)
                temp(this, new DateEventArgs(currentViewingDate));
        }

        private Button CreateButton(Int32 dayOfMonth, Int32 column)
        {
            Button btn = new Button();
            btn.Content = dayOfMonth;
            Style style = (Style)this.Resources["graphSectionButtonStyle"];
            if (style != null) { btn.Style = style; }
            btn.Click += Button_Click;
            btn.Tag = new DateTime(CurrentViewingDate.Year,
                CurrentViewingDate.Month, dayOfMonth);
            btn.IsEnabled = itemsByKey.ContainsKey(dayOfMonth);
            btn.SetValue(Grid.RowProperty, 1);
            btn.SetValue(Grid.ColumnProperty, column);
            return btn;
        }

        private void Button_Click(object sender, RoutedEventArgs e)
        {
            Button btn = (Button)sender;
            OnViewDateEvent((DateTime)btn.Tag);
        }
        #endregion
    }
}
可以看到,此代码主要负责为当前月份的正确天数设置正确的 Grid.Columns 数量,并创建一个 Button,其 Tag 属性存储了特定的 DateTime。其想法是,当 Button 被单击时,存储在其 Tag 属性中的 DateTime 可用于导航到下一个状态。
最后一块拼图是如何渲染实际的条形图。同样,这也是关注点分离的问题,因为条形图的渲染对于所有状态都是通用的,因此将其移到一个通用的 UserControl 中是有意义的,我称之为 ItemBar。
深入了解 ItemBar
ItemBar 负责渲染基于 List<ITimeLineItem> 的对象(这些对象由父控件填充,如上面 DaysView 的代码隐藏逻辑所示),如我所述,这对于所有状态都是通用的。ItemBar UserControl 有点聪明,因为它没有足够的垂直高度来渲染所有项目,它将渲染一个包含所有项目的单个块。ItemBar UserControl 还有一个 Popup 窗口,用户可以从中查看和选择构成条形图的项目。
这是 ItemBar UserControl 的全部 XAML。
<UserControl x:Class="TimeLineControl.ItemsBar"
    xmlns="http://schemas.microsoft.com/winfx/2006/xaml/presentation"
    xmlns:x="http://schemas.microsoft.com/winfx/2006/xaml"
    xmlns:local="clr-namespace:TimeLineControl"
    Height="Auto" Width="Auto">

    <UserControl.Resources>
        <ResourceDictionary>
            <ResourceDictionary.MergedDictionaries>
                <ResourceDictionary Source="../../Resources/AppStyles.xaml"/>
            </ResourceDictionary.MergedDictionaries>
        </ResourceDictionary>
    </UserControl.Resources>

    <Grid >
        <Canvas x:Name="canv" VerticalAlignment="Stretch"
                HorizontalAlignment="Stretch"/>

        <Popup x:Name="pop" Width="350" Height="190"
               Placement="RelativePoint" AllowsTransparency="True"
               StaysOpen="true"
               PopupAnimation="Scroll"
               VerticalOffset="-40"
               HorizontalOffset="0">
            <Border Background="{StaticResource itemsPopupBackgroundColor}"
                    HorizontalAlignment="Stretch"
                    VerticalAlignment="Stretch"
                    BorderBrush="{StaticResource itemsPopupBorderBrushColor}"
                    BorderThickness="3"
                    CornerRadius="5,5,5,5">

                <Grid Background="{StaticResource itemsPopupBackgroundColor}">

                    <Grid.RowDefinitions>
                        <RowDefinition Height="Auto"/>
                        <RowDefinition Height="*"/>
                    </Grid.RowDefinitions>

                    <Thumb Grid.Row="0" Width="Auto" Height="40"
                          Tag="{Binding ElementName=pop}">
                        <Thumb.Template>
                            <ControlTemplate>
                                <Border  Width="Auto" Height="40"
                                         BorderThickness="0"
                                         Background="{StaticResource
                                            itemsPopupHeaderBackgroundColor}"
                                         VerticalAlignment="Top"
                                         CornerRadius="0" Margin="0">

                                    <Grid HorizontalAlignment="Stretch"
                                          VerticalAlignment="Stretch">
                                        <Grid.ColumnDefinitions>
                                            <ColumnDefinition Width="*"/>
                                            <ColumnDefinition Width="Auto"/>
                                        </Grid.ColumnDefinitions>

                                        <StackPanel Grid.Column="0"
                                                Orientation="Horizontal"
                                                HorizontalAlignment="Stretch"
                                                VerticalAlignment="Center">

                                            <Label Content="Items"
                                               FontFamily="Tahoma"
                                               FontSize="14"
                                               FontWeight="Bold"
                                               Foreground="{StaticResource
                                                itemsPopupTitleColor}"
                                               VerticalContentAlignment="Center"
                                               Margin="5,0,0,0" />

                                        </StackPanel>

                                        <Button Grid.Column="1"
                                                Style="{StaticResource
                                                    itemsPopupCloseButtonStyle}"
                                                Tag="{Binding ElementName=pop}"
                                                Margin="5"
                                                Click="HidePopup_Click" />
                                    </Grid>
                                </Border>
                            </ControlTemplate>
                        </Thumb.Template>
                    </Thumb>

                    <ListBox x:Name="lst" Grid.Row="1"
                         Style="{StaticResource itemsListBoxStyle}"
                         SelectionChanged="lst_SelectionChanged">
                    </ListBox>
                </Grid>
            </Border>
        </Popup>
    </Grid>
</UserControl>
这是代码隐藏:
using System;
using System.Collections.Generic;
using System.Linq;
using System.Text;
using System.Windows;
using System.Windows.Controls;
using System.Windows.Data;
using System.Windows.Documents;
using System.Windows.Input;
using System.Windows.Media;
using System.Windows.Media.Imaging;
using System.Windows.Navigation;
using System.Windows.Shapes;
using System.Windows.Controls.Primitives;

namespace TimeLineControl
{
    //Event delegate
    public delegate void TimeLineItemClickedEventHandler(object sender, TimeLineArgs e);

    /// <summary>
    /// Represents a single collection of bars that
    /// is used across all state visualiser controls
    /// </summary>
    public partial class ItemsBar : UserControl, IDisposable
    {
        #region Data
        private Brush[] barBrushes = new Brush[]
        {
            Brushes.CornflowerBlue,
            Brushes.Bisque,
            Brushes.LightSeaGreen,
            Brushes.Coral,
            Brushes.DarkGreen,
            Brushes.DarkSalmon,
            Brushes.Gray,
            Brushes.Goldenrod,
            Brushes.DeepSkyBlue,
            Brushes.Lavender
        };
        #endregion

        #region Ctor
        public ItemsBar()
        {
            InitializeComponent();
        }
        #endregion

        #region Events

        //The actual event routing
        public static readonly RoutedEvent TimeLineItemClickedEvent =
            EventManager.RegisterRoutedEvent(
            "TimeLineItemClicked", RoutingStrategy.Bubble,
            typeof(TimeLineItemClickedEventHandler),
            typeof(ItemsBar));

        //add remove handlers
        public event TimeLineItemClickedEventHandler TimeLineItemClicked
        {
            add { AddHandler(TimeLineItemClickedEvent, value); }
            remove { RemoveHandler(TimeLineItemClickedEvent, value); }
        }
        #endregion

        #region Properties

        public Int32 MaximumItemsForGraphAcrossAllBars { get; set; }

        #region ItemsDataTemplate

        /// <summary>
        /// ItemsDataTemplate Dependency Property
        /// </summary>
        public static readonly DependencyProperty ItemsDataTemplateProperty =
            DependencyProperty.Register("ItemsDataTemplate", typeof(DataTemplate),
            typeof(ItemsBar),
                new FrameworkPropertyMetadata((DataTemplate)null,
                    new PropertyChangedCallback(OnItemsDataTemplateChanged)));

        /// <summary>
        /// Gets or sets the ItemsDataTemplate property.
        /// </summary>
        public DataTemplate ItemsDataTemplate
        {
            get { return (DataTemplate)GetValue(ItemsDataTemplateProperty); }
            set { SetValue(ItemsDataTemplateProperty, value); }
        }

        /// <summary>
        /// Handles changes to the ItemsDataTemplate property.
        /// </summary>
        private static void OnItemsDataTemplateChanged(DependencyObject d,
            DependencyPropertyChangedEventArgs e)
        {
            ItemsBar ib = (ItemsBar)d;
            ib.lst.ItemTemplate = (DataTemplate)e.NewValue;
        }
        #endregion

        #region TimeLineItems

        /// <summary>
        /// TimeLineItems Dependency Property
        /// </summary>
        public static readonly DependencyProperty TimeLineItemsProperty =
            DependencyProperty.Register("TimeLineItems", typeof(List<ITimeLineItem>),
            typeof(ItemsBar),
                new FrameworkPropertyMetadata((List<ITimeLineItem>)null,
                    new PropertyChangedCallback(OnTimeLineItemsChanged)));

        /// <summary>
        /// Gets or sets the TimeLineItems property.
        /// </summary>
        public List<ITimeLineItem> TimeLineItems
        {
            get { return (List<ITimeLineItem>)GetValue(TimeLineItemsProperty); }
            set { SetValue(TimeLineItemsProperty, value); }
        }

        /// <summary>
        /// Handles changes to the TimeLineItems property.
        /// </summary>
        private static void OnTimeLineItemsChanged(DependencyObject d,
            DependencyPropertyChangedEventArgs e)
        {

        }
        #endregion

        #endregion

        #region Private/Internal Methods

        internal void Draw()
        {
            canv.Children.Clear();
            canv.Height = this.Height;
            if (this.TimeLineItems.Count *
                TimeLineControl.PREFERRED_ITEM_HEIGHT <= this.Height)
            {
                for (int i = 0; i < TimeLineItems.Count; i++)
                {
                    Rectangle r = new Rectangle();
                    r.Height = TimeLineControl.PREFERRED_ITEM_HEIGHT;
                    r.Width = this.Width-2;
                    r.HorizontalAlignment = HorizontalAlignment.Center;
                    r.Fill = barBrushes[i % barBrushes.Length];
                    r.SetValue(Canvas.LeftProperty, (Double)1.0);
                    r.SetValue(Canvas.BottomProperty, (Double)(i * r.Height));
                    r.Tag = TimeLineItems[i];
                    r.ToolTip = string.Format("Description {0}\r\nItemTime : {1}",
                        TimeLineItems[i].Description, TimeLineItems[i].ItemTime);
                    r.MouseDown += Item_MouseDown;
                    canv.Children.Add(r);
                }
            }
            else
            {
                double heightForBar = this.Height;
                if (TimeLineItems.Count < MaximumItemsForGraphAcrossAllBars)
                {
                    double percentageOfMax =
                        (TimeLineItems.Count /
                            MaximumItemsForGraphAcrossAllBars) * 100;
                    heightForBar = (this.Height / 100) * percentageOfMax;
                }

                Rectangle r = new Rectangle();
                r.Height = heightForBar;
                r.Width = this.Width - 2;
                r.HorizontalAlignment = HorizontalAlignment.Center;
                r.Fill = barBrushes[0];
                r.SetValue(Canvas.LeftProperty, (Double)1.0);
                r.SetValue(Canvas.BottomProperty, (Double)0.0);
                r.Tag = TimeLineItems;
                r.ToolTip = string.Format("Collection of timeLines" +
                    "\r\nTo many to show individually");
                r.MouseDown += Item_MouseDown;
                canv.Children.Add(r);
            }
        }

        private void Item_MouseDown(object sender, MouseButtonEventArgs e)
        {
            if (pop.IsOpen)
                return;

            Rectangle rect = (Rectangle)sender;
            IEnumerable<ITimeLineItem> itemForRect = null;

            if (rect.Tag is ITimeLineItem)
            {
                List<ITimeLineItem> items = new List<ITimeLineItem>();
                items.Add((ITimeLineItem)rect.Tag);
                itemForRect = items.AsEnumerable();
            }

            if (rect.Tag is IEnumerable<ITimeLineItem>)
            {
                itemForRect = (IEnumerable<ITimeLineItem>)rect.Tag;
            }

            if (itemForRect != null)
            {
                lst.ItemsSource = itemForRect;
                pop.IsOpen = true;
            }
        }

        private void HidePopup_Click(object sender, RoutedEventArgs e)
        {
            try
            {
                Popup popup = (Popup)((Button)sender).Tag;
                popup.IsOpen = false;
            }
            catch
            {
            }
        }

        private void lst_SelectionChanged(object sender, SelectionChangedEventArgs e)
        {
            pop.IsOpen = false;
            //raise event
            TimeLineArgs args = new TimeLineArgs(
                ItemsBar.TimeLineItemClickedEvent,
                (ITimeLineItem)lst.SelectedItem);
            RaiseEvent(args);
        }

        private void btnClosePopup_Click(object sender, RoutedEventArgs e)
        {
            pop.IsOpen = false;
        }

        #endregion

        #region IDisposable Members

        public void Dispose()
        {
            if (canv.Children.Count > 0)
            {
                foreach (Rectangle rect in canv.Children)
                {
                    rect.MouseDown -= Item_MouseDown;
                }
            }
        }

        #endregion
    }
}
好了,这就是一个状态如何完整工作的。
那其他状态呢?
其他状态都是对这个的变体,唯一的区别是提供给每个状态可视化器 UserControl 的 List<ITimeLineItem> 将仅仅是用户通过其导航路径选择的显示所需的内容。
如何在您自己的项目中进行使用
我已尽力使您能够尽可能轻松地在自己的应用程序中使用附带的 TimeLineControl。您需要做的就是遵循这 3 个步骤。我将在过程中展示每个步骤的示例。
步骤 1:创建实现 TimeLineControl.ITimeLineItem 的数据类
附带本文的 TimeLineControl 在渲染任何内容之前,都需要提供特定类型的数据项。这些项必须实现 TimeLineControl.ITimeLineItem 接口,如果您还记得的话,它看起来是这样的:
using System;
using System.Collections.Generic;
using System.Linq;
using System.Text;

namespace TimeLineControl
{
    /// <summary>
    /// Expected interface that must be implemented
    /// to add items to the <c>TimeLineControl</c>
    /// </summary>
    public interface ITimeLineItem
    {
        String Description { get; set; }
        DateTime ItemTime { get; set; }
    }
}
所以您需要做的就是在这个数据类上实现这个 TimeLineControl.ITimeLineItem 接口。这是一个示例(注意,此示例还向您展示了如何在实现 TimeLineControl.ITimeLineItem 的数据类中使用 Image(s)。您可以看到,需要一个完整的 pack 语法 URL,因为您正在使用一个控件(TimeLineControl),它位于不同的程序集中,然后传递一个可能想要显示 Image(s)的 DataTemplate。因此,如果您选择在实现 TimeLineControl.ITimeLineItem 的数据类中显示 Image(s),则必须使用 pack 语法完全限定其位置,以便 TimeLineControl 在需要时知道如何显示它们。无论如何,我们又偏离了主题,这里是一个实现 TimeLineControl.ITimeLineItem 接口并且还支持图像的数据类:
using System;
using System.Collections.Generic;
using System.Linq;
using System.Text;
using TimeLineControl;
using System.Windows.Media.Imaging;
using System.Diagnostics;

namespace TimeLineDemoProject
{
    /// <summary>
    /// Simple <c>TimeLineControl.ITimeLineItem</c> implementation
    /// which can be used within a DataTemplate that is then supplied
    /// to the <c>TimeLineControl</c>
    /// </summary>
    [DebuggerDisplay("{ToString()}")]
    public class DataTimeLineItem : INPCBase, ITimeLineItem
    {
        #region Data
        private String description;
        private DateTime itemTime;
        private static BitmapImage descriptionImage;
        private static BitmapImage itemTimeImage;
        #endregion

        #region Ctor
        public DataTimeLineItem(String description, DateTime itemTime)
        {
            this.description = description;
            this.itemTime = itemTime;
        }
        #endregion

        #region Public Properties
        public String Description
        {
            get { return description; }
            set
            {
                description = value;
                RaisePropertyChanged("Description");
            }
        }

        /// <summary>
        /// As <c>TimeLineControl</c> is in different assembly
        /// and this will be used inside DataTemplate in this
        /// project, need full url so <c>TimeLineControl</c>
        /// knows how to display images
        /// </summary>
        public BitmapImage DescriptionImage
        {
            get
            {
                if (descriptionImage == null)
                {
                    descriptionImage = new BitmapImage(
                        new Uri("pack://application:,,,/" +
                            "TimeLineDemoProject;component/Images/description.png"));
                }
                return descriptionImage;
            }
        }

        public DateTime ItemTime
        {
            get { return itemTime; }
            set
            {
                itemTime = value;
                RaisePropertyChanged("ItemTime");
            }
        }

        /// <summary>
        /// As <c>TimeLineControl</c> is in different assembly
        /// and this will be used inside DataTemplate in this
        /// project, need full url so <c>TimeLineControl</c>
        /// knows how to display images
        /// </summary>
        public BitmapImage ItemTimeImage
        {
            get
            {
                if (itemTimeImage == null)
                {
                    itemTimeImage = new BitmapImage(
                        new Uri("pack://application:,,,/" +
                            "TimeLineDemoProject;component/Images/itemtime.png"));
                }
                return itemTimeImage;
            }
        }
        #endregion

        #region Overrides
        public override string ToString()
        {
            return String.Format("Description : {0}\r\n ItemTime : {1}",
                Description, ItemTime);
        }
        #endregion
    }
}
步骤 2:创建您的 TimeLineControl.ITimeLineItem 实现数据类的列表,并在 TimeLineControl 中使用它们
显然,TimeLineControl 将要显示一些项目(项目预计是实现 TimeLineControl.ITimeLineItem 的类)。那么我们如何让 TimeLineControl 使用一些项目呢?这很简单——TimeLineControl 有一个名为 TimeLineItems 的 DependencyProperty,它期望一个 ObservableList<ITimeLineItem>。所以您需要做的就是使用 MVVM 和数据绑定,或者如果您愿意,也可以从代码隐藏中填充该属性。我在附带的代码中包含了一个简单的 ViewModel,它创建了一个 ObservableList<ITimeLineItem>,如下所示:
using System;
using System.Collections.ObjectModel;
using TimeLineControl;

namespace TimeLineDemoProject
{
    /// <summary>
    /// Simple dummy ViewModel
    /// </summary>
    public class Window1ViewModel : INPCBase
    {
        #region Data
        private ObservableCollection<ITimeLineItem> timeItems;
        #endregion

        #region Ctor
        public Window1ViewModel()
        {
            LoadItems();
        }
        #endregion

        #region Public Properties
        public ObservableCollection<ITimeLineItem> TimeItems
        {
            get
            {
                return timeItems;
            }
        }
        #endregion

        #region Private Methods
        private void LoadItems()
        {
            timeItems = new ObservableCollection<ITimeLineItem>();

            //simulate fetching these from web server or something
            timeItems.Add(new DataTimeLineItem("This is 1995 Month 12, Day 1",
                new DateTime(1995, 12, 1)));
            timeItems.Add(new DataTimeLineItem("This is 1995 Month 12, Day 2",
                new DateTime(1995, 12, 2)));
            timeItems.Add(new DataTimeLineItem("This is 1995 Month 12, Day 3",
                new DateTime(1995, 12, 3)));
        }
        #endregion
    }
}
然后,在 XAML 中将此 ObservableList<ITimeLineItem> 传递给 TimeLineControl,如下所示。
<timeline:TimeLineControl
	TimeLineItems="{Binding TimeItems}">

</timeline:TimeLineControl>
正如我所说,这一切也可以通过代码隐藏来完成,我并不是强制您使用 MVVM,我只是碰巧喜欢它。
步骤 3:为您的 TimeLineControl.ITimeLineItem 实现数据类提供 DataTemplate
在内部,TimeLineControl 在 ListBox 中显示您的实现 TimeLineControl.ITimeLineItem 的数据类,因此我们可以利用这一点,并允许用户指定数据应该是什么样子。这可以通过一个简单的 DataTemplate 来轻松实现,它应该匹配您自己的实现 TimeLineControl.ITimeLineItem 的数据类的详细信息。这可以很简单,也可以很疯狂。附带的代码有一个相当复杂的 DataTemplate,因为我喜欢东西看起来漂亮。但它可以很简单。为了理解这一点,这是我们如何为 TimeLineControl 提供自定义 DataTemplate 的方法。
<Window.Resources>

    <DataTemplate x:Key="timeDataTemplate" DataType="{x:Type local:DataTimeLineItem}">

	<!-- Left out for clarity -->
	<!-- Left out for clarity -->
	<!-- Left out for clarity -->
	<!-- Left out for clarity -->
	<!-- Left out for clarity -->

    </DataTemplate>


</Window.Resources>

<timeline:TimeLineControl
      ItemsDataTemplate="{StaticResource timeDataTemplate}">

</timeline:TimeLineControl>
演示应用程序有一个相当复杂的 DataTemplate,定义如下:
<DataTemplate x:Key="timeDataTemplate"
	DataType="{x:Type local:DataTimeLineItem}">

    <DataTemplate.Resources>
        <Storyboard x:Key="Timeline1">
            <DoubleAnimationUsingKeyFrames
                BeginTime="00:00:00"
                Storyboard.TargetName="glow"
                Storyboard.TargetProperty="(UIElement.Opacity)">
                <SplineDoubleKeyFrame KeyTime="00:00:00.3000000" Value="1"/>
            </DoubleAnimationUsingKeyFrames>
        </Storyboard>
        <Storyboard x:Key="Timeline2">
            <DoubleAnimationUsingKeyFrames
                BeginTime="00:00:00"
                Storyboard.TargetName="glow"
                Storyboard.TargetProperty="(UIElement.Opacity)">
                <SplineDoubleKeyFrame KeyTime="00:00:00.3000000" Value="0"/>
            </DoubleAnimationUsingKeyFrames>
        </Storyboard>
    </DataTemplate.Resources>

    <Border x:Name="bord" Margin="10"
            BorderBrush="#FFFFFFFF"
            Background="Black"
            BorderThickness="2"
            CornerRadius="4,4,4,4">
        <Border Background="#7F000000"
                BorderBrush="White"
                Margin="-2"
                BorderThickness="2"
                CornerRadius="4,4,4,4">
            <Grid>
                <Grid.RowDefinitions>
                    <RowDefinition Height="0.507*"/>
                    <RowDefinition Height="0.493*"/>
                </Grid.RowDefinitions>
                <Border x:Name="glow"  Opacity="0"
                        HorizontalAlignment="Stretch"
                        Width="Auto" Grid.RowSpan="2"
                        CornerRadius="4,4,4,4">
                    <Border.Background>
                        <RadialGradientBrush>
                            <RadialGradientBrush.RelativeTransform>
                                <TransformGroup>
                                    <ScaleTransform ScaleX="1.702" ScaleY="2.243"/>
                                    <SkewTransform AngleX="0" AngleY="0"/>
                                    <RotateTransform Angle="0"/>
                                    <TranslateTransform X="-0.368" Y="-0.152"/>
                                </TransformGroup>
                            </RadialGradientBrush.RelativeTransform>
                            <GradientStop Color="#B28DBDFF" Offset="0"/>
                            <GradientStop Color="#008DBDFF" Offset="1"/>
                        </RadialGradientBrush>
                    </Border.Background>
                </Border>

                <StackPanel Orientation="Vertical" Grid.RowSpan="2"
                            Background="Transparent"
                            Margin="2">

                    <StackPanel Orientation="Horizontal">
                        <Grid VerticalAlignment="Center"
                               HorizontalAlignment="Left"
                               Margin="5">
                            <Ellipse Fill="Black" Stroke="White"
                               StrokeThickness="2"
                               VerticalAlignment="Center"
                               HorizontalAlignment="Center"
                               Width="25"
                               Height="25"/>

                            <Image VerticalAlignment="Center"
                               HorizontalAlignment="Center"
                               Source="{Binding DescriptionImage}"
                               Width="15" Height="15"/>

                        </Grid>
                        <Label Content="Description:"
                               VerticalAlignment="Center"
                               VerticalContentAlignment="Center"
                               FontSize="13"
                               FontWeight="Bold"
                               FontFamily="Tahoma"
                               Foreground="White"/>
                    </StackPanel>

                    <TextBlock Text="{Binding Description}"
                           FontFamily="Tahoma"
                           FontSize="10"
                           TextWrapping="Wrap"
                           Foreground="White"
                           Margin="40,2,0,0"/>

                    <StackPanel Orientation="Horizontal">
                        <Grid VerticalAlignment="Top"
                               HorizontalAlignment="Left"
                               Margin="5">
                            <Ellipse Fill="Black" Stroke="White"
                               StrokeThickness="2"
                               VerticalAlignment="Center"
                               HorizontalAlignment="Center"
                               Width="25"
                               Height="25"/>

                            <Image VerticalAlignment="Center"
                               HorizontalAlignment="Center"
                               Source="{Binding ItemTimeImage}"
                               Width="15" Height="15"/>

                        </Grid>
                        <Label Content="Item Time:"
                           VerticalAlignment="Center"
                           VerticalContentAlignment="Center"
                           FontSize="13"
                           FontWeight="Bold"
                           FontFamily="Tahoma"
                           Foreground="White"/>
                    </StackPanel>

                    <Label Content="{Binding ItemTime}"
                           FontFamily="Tahoma"
                           FontSize="10"
                           Foreground="White"
                           VerticalAlignment="Center"
                           VerticalContentAlignment="Center"
                           Height="Auto"
                           Margin="35,0,0,0"/>
                </StackPanel>

                <Border  x:Name="shine" HorizontalAlignment="Stretch"
                         Margin="0,0,0,0" Width="Auto"
                        CornerRadius="4,4,0,0">
                    <Border.Background>
                        <LinearGradientBrush EndPoint="0.494,0.889"
                                             StartPoint="0.494,0.028">
                            <GradientStop Color="#99FFFFFF" Offset="0"/>
                            <GradientStop Color="#33FFFFFF" Offset="1"/>
                        </LinearGradientBrush>
                    </Border.Background>
                </Border>
            </Grid>
        </Border>
    </Border>
    <DataTemplate.Triggers>
        <Trigger Property="IsMouseOver" Value="True">
            <Trigger.EnterActions>
                <BeginStoryboard Storyboard="{StaticResource Timeline1}"/>
            </Trigger.EnterActions>
            <Trigger.ExitActions>
                <BeginStoryboard x:Name="Timeline2_BeginStoryboard"
                                 Storyboard="{StaticResource Timeline2}"/>
            </Trigger.ExitActions>
        </Trigger>
    </DataTemplate.Triggers>
</DataTemplate>
在 TimeLineControl 中使用时,它看起来像这样:

但您可以创建一个更简单的 DataTemplate,例如:
<DataTemplate x:Key="SimpleTimeDataTemplate"
              DataType="{x:Type local:DataTimeLineItem}">

    <StackPanel Orientation="Vertical"
                            Background="Pink"
                            Margin="2">

        <Label Content="Description:"
                           VerticalAlignment="Center"
                           VerticalContentAlignment="Center"
                           FontSize="13"
                           FontWeight="Bold"
                           FontFamily="Tahoma"
                           Foreground="White"/>

        <TextBlock Text="{Binding Description}"
                           FontFamily="Tahoma"
                           FontSize="10"
                           TextWrapping="Wrap"
                           Foreground="White"
                           Margin="0,2,0,0"/>

        <Label Content="Item Time:"
                           VerticalAlignment="Center"
                           VerticalContentAlignment="Center"
                           FontSize="13"
                           FontWeight="Bold"
                           FontFamily="Tahoma"
                           Foreground="White"/>

        <Label Content="{Binding ItemTime}"
                           FontFamily="Tahoma"
                           FontSize="10"
                           Foreground="White"
                           VerticalAlignment="Center"
                           VerticalContentAlignment="Center"
                           Height="Auto"
                           Margin="0,0,0,0"/>

    </StackPanel>
</DataTemplate>
在 TimeLineControl 中使用时,它看起来像这样:

看看将自定义 DataTemplate 放入 TimeLineControl 中是多么容易。
如果您不喜欢我的风格,如何进行重新样式化
出于任何原因,如果您不喜欢我所做的,并认为我是一个疯狂的弗兰肯斯坦博士和他的怪物应用程序,**您所要做的就是**修改文件 *TimeLineControl\Resources\AppStyles.xaml* 中的 Style/ControlTemplate。该文件基本上是一个 ResourceDictionary,其中包含附带的 TimeLineControl 的**所有**样式。
我知道我可以通过使用 ComponentResourceKey 来让所有人的生活更轻松,您可以在 这里 阅读更多内容。
问题是我免费且出于乐趣而做这些事情,我不是一个单人组件供应商,所以有时我会务实并选择阻力最小的路径,对我来说,这相当于一个简单的 ResourceDictionary。
我认为这通常足够了,人们可以简单地修改 *TimeLineControl\Resources\AppStyles.xaml ResourceDictionary* 文件,搞定。
希望这对大家来说都还好,有时简单就是最好的。修订
Josh Smith 留下了一条消息,说他希望在那里看到一个面包屑导航,以避免所有单击后退按钮的操作。现在已经有了,但我无法更新所有文章中的图像(因为我丢失了一些原始图像)和视频,所以请原谅我,启用面包屑导航的代码的新屏幕截图如下:

您现在可以像以前一样轻松地一次单击返回 1 个状态,或者使用 BreadCrumb 来回退任意多的步骤。BreadCrumb 实际上是一个独立的、可重用的 UserControl,BreadCrumb 的工作方式非常简单。BreadCrumb UserControl 的一个实例托管在每个状态可视化器 UserControl 中,并且 BreadCrumb 简单地意识到父 TimeLineControl,当用户单击 BreadCrumb 按钮之一时,就会告知父 TimeLineControl 导航到所需(可能新)的状态。
无论如何,这是 BreadCrumb 的全部代码(这里只有代码隐藏,XAML 请参见下载,它并不太相关):
using System;
using System.Collections.Generic;
using System.Linq;
using System.Text;
using System.Windows;
using System.Windows.Controls;
using System.Windows.Data;
using System.Windows.Documents;
using System.Windows.Input;
using System.Windows.Media;
using System.Windows.Media.Imaging;
using System.Windows.Navigation;
using System.Windows.Shapes;

namespace TimeLineControl
{
    /// <summary>
    /// Simple breadcrumb of visited states
    /// </summary>
    public partial class BreadCrumb : UserControl
    {
        #region Data
        private NavigateArgs navigateArgs = null;
        #endregion

        #region Public Properties
        public TimeLineControl Parent { private get; set; }
        public NavigateArgs NavigateArgs
        {
            get
            {
                return navigateArgs;
            }
            set
            {
                navigateArgs = value;
                WorkOutWhatToShow();
            }
        }

        #endregion

        #region Ctor
        public BreadCrumb()
        {
            InitializeComponent();
        }
        #endregion

        #region Private Methods
        private void WorkOutWhatToShow()
        {
            switch (NavigateArgs.NavigateTo)
            {
                case NavigatingToSource.Decades:
                    break;
                case NavigatingToSource.YearsOfDecade:
                    CreateCrumbForYears();
                    break;
                case NavigatingToSource.MonthsOfYear:
                    CreateCrumbForMonths();
                    break;
                case NavigatingToSource.DaysOfMonth:
                    CreateCrumbForDays();
                    break;
                case NavigatingToSource.SpecificDay:
                    CreateCrumbForSpecificDay();
                    break;
            }
        }

        private void ShowDecades()
        {
            Parent.State = new ViewingDecadesState(this.Parent,
                new NavigateArgs(
                    this.NavigateArgs.CurrentViewingDate,
                    NavigatingToSource.Decades));
        }

        private void ShowYears()
        {
            Parent.State = new ViewingYearsState(this.Parent,
                new NavigateArgs(
                    this.NavigateArgs.CurrentViewingDate,
                    NavigatingToSource.YearsOfDecade));
        }

        private void ShowMonths()
        {
            Parent.State = new ViewingMonthsState(this.Parent,
                new NavigateArgs(
                    this.NavigateArgs.CurrentViewingDate,
                    NavigatingToSource.MonthsOfYear));
        }

        private void ShowDays()
        {
            Parent.State = new ViewingDaysState(this.Parent,
                new NavigateArgs(
                    this.NavigateArgs.CurrentViewingDate,
                    NavigatingToSource.DaysOfMonth));
        }

        private void CreateCrumbForYears()
        {
            Button btnDecades = CreateCrumbButton("Decades", ()=> ShowDecades());
            spBreadCrumb.Children.Add(btnDecades);
            spBreadCrumb.Children.Add(CreateCrumbLabel("Years"));
        }

        private void CreateCrumbForMonths()
        {
            Button btnDecades = CreateCrumbButton("Decades", () => ShowDecades());
            spBreadCrumb.Children.Add(btnDecades);
            spBreadCrumb.Children.Add(CreateCrumbLabel(">"));
            Button btnYears = CreateCrumbButton("Years", () => ShowYears());
            spBreadCrumb.Children.Add(btnYears);
            spBreadCrumb.Children.Add(CreateCrumbLabel(">"));
            spBreadCrumb.Children.Add(CreateCrumbLabel("Months"));
        }

        private void CreateCrumbForDays()
        {
            Button btnDecades = CreateCrumbButton("Decades", () => ShowDecades());
            spBreadCrumb.Children.Add(btnDecades);
            spBreadCrumb.Children.Add(CreateCrumbLabel(">"));
            Button btnYears = CreateCrumbButton("Years", () => ShowYears());
            spBreadCrumb.Children.Add(btnYears);
            spBreadCrumb.Children.Add(CreateCrumbLabel(">"));
            Button btnMonths = CreateCrumbButton("Months", () => ShowMonths());
            spBreadCrumb.Children.Add(btnMonths);
            spBreadCrumb.Children.Add(CreateCrumbLabel(">"));
            spBreadCrumb.Children.Add(CreateCrumbLabel("Days"));
        }

        private void CreateCrumbForSpecificDay()
        {
            Button btnDecades = CreateCrumbButton("Decades", () => ShowDecades());
            spBreadCrumb.Children.Add(btnDecades);
            spBreadCrumb.Children.Add(CreateCrumbLabel(">"));
            Button btnYears = CreateCrumbButton("Years", () => ShowYears());
            spBreadCrumb.Children.Add(btnYears);
            spBreadCrumb.Children.Add(CreateCrumbLabel(">"));
            Button btnMonths = CreateCrumbButton("Months", () => ShowMonths());
            spBreadCrumb.Children.Add(btnMonths);
            spBreadCrumb.Children.Add(CreateCrumbLabel(">"));
            Button btnDays = CreateCrumbButton("Days", () => ShowDays());
            spBreadCrumb.Children.Add(btnDays);
            spBreadCrumb.Children.Add(CreateCrumbLabel(">"));
            spBreadCrumb.Children.Add(CreateCrumbLabel("Current"));
        }

        private Button CreateCrumbButton(String text, Action workToDo)
        {
            Button btn = new Button();
            btn.Content = text;
            btn.ToolTip = text;
            btn.Click += (s, e) => workToDo();
            btn.Style = this.Resources["crumbButton"] as Style;
            return btn;
        }

        private Label CreateCrumbLabel(String content)
        {
            Label lbl = new Label();
            lbl.Content = content;
            lbl.Style = this.Resources["crumbLabel"] as Style;
            return lbl;
        }
        #endregion
    }
}
已知问题
TimeLineControl 不支持运行时高度调整。这是一个已知限制,您必须在 XAML 或代码中指定 TimeLineControl 的高度。例如,在 XAML 中:
<timeline:TimeLineControl
	Height="250"
</timeline:TimeLineControl>
或者在代码隐藏中:
timeItems.Height = 250;
就是这样,各位
好了,各位,暂时就说到这里。尽管本文的核心是一个非常简单的想法,但我对结果非常满意,并且认为它在您的项目中非常易于使用。因此,如果您认为此控件能帮助您完成 WPF 项目,我非常希望您能投个赞成票并发表评论。正如我在引言中所述,这个控件实际上是我有幸编写的最复杂的控件之一(不包括工作中的),所以如果您欣赏我的工作,请投赞成票。
历史
- 2010 年 4 月 14 日:初始发布