
WPF FlipView
4.72/5 (17投票s)
一个WPF的FlipView控件,其行为与Windows Store XAML FlipView完全一致。
引言
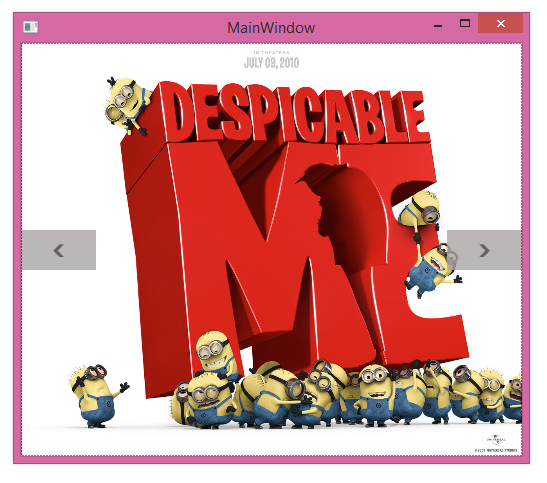
FlipView控件的行为类似于一个ItemsControl,并通过滑动手势逐个显示项目。 也可以使用鼠标上的导航按钮进行导航。 如今,许多用户期望使用WPF开发Windows商店触摸应用程序。 这不需要在商店上发布以进行分发。 同时,可以在WinRT中完成的所有功能和行为也可以在WPF中完成。 因此,许多用户更喜欢这样。
背景
因此,最好将WinRT中的大多数控件移植到WPF。 一些第三方工具包支持大多数控件。 但是我发现FlipView缺少这种方式。 所以我想写一个控件来实现这种行为。
最好对以下概念有基本的了解,以便清楚地理解此控件
- 自定义控件开发
- 触摸操作
基本结构
基本结构很简单。 FlipView的模板将包含三个容器,用于存储当前,下一个和上一个项目。 单击导航按钮或滑动时,持有整个模板的根网格将进行动画处理,并且项目将根据SelectedIndex进行更新。

以下是FlipView的ControlTemplate。
<Border Background="{TemplateBinding Background}"
                            BorderBrush="{TemplateBinding BorderBrush}"
                            BorderThickness="{TemplateBinding BorderThickness}">
                        <Grid ClipToBounds="True"
                              x:Name="PART_Container">
                            <local:FlipViewPanel x:Name="PART_Root"
                                                 IsManipulationEnabled="True"
                                                 Background="Transparent">
                                <ContentControl x:Name="PART_PreviousItem"
                                                ContentTemplate="{Binding ItemTemplate,
                                                RelativeSource={RelativeSource TemplatedParent}}" />
                                <ContentControl x:Name="PART_NextItem"
                                                ContentTemplate="{Binding ItemTemplate,
                                                RelativeSource={RelativeSource TemplatedParent}}" />
                                <ContentControl x:Name="PART_CurrentItem"
                                                ContentTemplate="{Binding ItemTemplate,
                                                RelativeSource={RelativeSource TemplatedParent}}" />
                            </local:FlipViewPanel>
                            <Grid VerticalAlignment="Center"
                                  x:Name="PART_ButtonPanel"
                                  Visibility="Collapsed">
                                <RepeatButton x:Name="PART_NextButton"
                                              FontFamily="Segoe UI Symbol"
                                              Content="?"
                                              FontSize="18"
                                              Style="{StaticResource NavigationButtonStyle}"
                                              Command="{x:Static local:FlipView.NextCommand}"
                                              HorizontalAlignment="Right" />
                                <RepeatButton x:Name="PART_PreviousButton"
                                              FontFamily="Segoe UI Symbol"
                                              Content="?"
                                              FontSize="18"
                                              Style="{StaticResource NavigationButtonStyle}"
                                              Command="{x:Static local:FlipView.PreviousCommand}"
                                              HorizontalAlignment="Left" />
                            </Grid>
                        </Grid>
</Border>
动画工厂
Factory类将基于to和from值生成动画。 默认情况下,动画目标属性设置为Translation.X值,因为动画转换只需要水平方向。 将创建两个EasingDoubleKeyFrame并将其添加到动画中。 第二个帧的KeyTime设置为500毫秒,它控制动画的速度。
public Storyboard GetAnimation(DependencyObject target, double to, double from)
        {
            Storyboard story = new Storyboard();
            Storyboard.SetTargetProperty(story, new PropertyPath("(TextBlock.RenderTransform).(TranslateTransform.X)"));
            Storyboard.SetTarget(story, target);

            var doubleAnimation = new DoubleAnimationUsingKeyFrames();

            EasingDoubleKeyFrame fromFrame = new EasingDoubleKeyFrame(from);
            fromFrame.EasingFunction = new ExponentialEase() { EasingMode = EasingMode.EaseOut };
            fromFrame.KeyTime = KeyTime.FromTimeSpan(TimeSpan.FromMilliseconds(0));

            EasingDoubleKeyFrame toFrame = new EasingDoubleKeyFrame(to);
            toFrame.EasingFunction = new ExponentialEase() { EasingMode = EasingMode.EaseOut };
            toFrame.KeyTime = KeyTime.FromTimeSpan(TimeSpan.FromMilliseconds(200));

            doubleAnimation.KeyFrames.Add(fromFrame);
            doubleAnimation.KeyFrames.Add(toFrame);
            story.Children.Add(doubleAnimation);

            return story;
        }
导航
当用户单击“下一个/上一个”按钮时,将使用AnimationFactory生成一个故事板,并且它将启动。 to和from值将基于SelectedIndex。 RoutedUICommands可用于控制“下一个/上一个”按钮的操作。
public static RoutedUICommand NextCommand = new RoutedUICommand("Next", "Next", typeof(FlipView));
public static RoutedUICommand PreviousCommand = new RoutedUICommand("Previous",
"Previous", typeof(FlipView));
一旦控件到达末尾,“下一个”按钮将被禁用。 这由RoutedUICommand的CanExecution回调控制。
private void OnNextCanExecute(object sender, CanExecuteRoutedEventArgs e)
        {
            e.CanExecute = this.SelectedIndex < (this.Items.Count - 1);
        }
如果没有可能导航到下一个项目(意味着它已到达末尾),“下一个”按钮将被折叠。 这是通过控制触发器中的可见性来实现的。
<Trigger Property="IsEnabled" Value="false">
    <Setter Property="Visibility" Value="Collapsed" />
</Trigger>
触摸手势
用户可以使用滑动手势导航项目。 这由WPF内置的操纵API控制。 滑动控件时,框架将触发OnManipulationDelta回调。 转换值将应用于根容器的呈现变换。
如果用户在完全滑动该项目之前松开了手指,则控件将为下一个项目设置动画,并将其带入位置。 为此,控件将在用户滑动时跟踪位置。 这种行为与Windows 8 FlipView完全相同。
private void OnRootManipulationDelta(object sender, ManipulationDeltaEventArgs e)
        {
            if (!(this.PART_Root.RenderTransform is MatrixTransform))
            {
                this.PART_Root.RenderTransform = new MatrixTransform();
            }

            Matrix matrix = ((MatrixTransform)this.PART_Root.RenderTransform).Matrix;
            var delta = e.DeltaManipulation;

            if ((this.SelectedIndex == 0 &&
            delta.Translation.X > 0 && this.elasticFactor > 0)
                || (this.SelectedIndex == this.Items.Count - 1 &&
                delta.Translation.X < 0 && this.elasticFactor > 0))
            {
                this.elasticFactor -= 0.05;
            }

            matrix.Translate(delta.Translation.X * elasticFactor, 0);
            this.PART_Root.RenderTransform = new MatrixTransform(matrix);

            e.Handled = true;
        }
弹性效果
如果控件的SelectedIndex为0,则表示选择了第一个项目,并且不允许用户导航到上一个项目。 因此,向用户指示在滑动上一个项目时的不可能很重要。 该控件将维护一个双精度值的因子变量。 在滑动控件时,此因子将乘以OffsetX值,然后应用于控件。 因此,在不可能导航到上一个项目时,该因子将减小0.05。 因此,用户会感到拖动的困难。 松开手指时,将运行一个动画并将其带回原始位置。
if ((this.SelectedIndex == 0 && delta.Translation.X > 0 && this.elasticFactor > 0)
    || (this.SelectedIndex == this.Items.Count - 1 &&
    delta.Translation.X < 0 && this.elasticFactor > 0))
{
    this.elasticFactor -= 0.05;
}

matrix.Translate(delta.Translation.X * elasticFactor, 0);
这与WinRT FlipView的确切行为一致。 这将清楚地表明该控件不可能导航到上一个项目。
数据绑定
FlipView从Selector继承。 因此,所有基本框架操作都可与此控件一起使用。 我们可以像对传统的ItemsControl一样将集合绑定到控件。 同样,可以将DataTemplate应用于装饰视觉效果。
<controls:FlipView ItemsSource="{Binding Movies}"
                           SelectedIndex="0">
            <controls:FlipView.ItemTemplate>
                <DataTemplate>
                    <Image Source="{Binding Image}"
                           Stretch="Fill"/>
                </DataTemplate>
            </controls:FlipView.ItemTemplate>
</controls:FlipView> 注意:必须设置SelectedIndex。 否则,将显示空白页。
关注点
对于我们开发的任何WPF应用程序以完全模仿Windows Store应用程序,此控件将非常有用。