OpenGL in .NET - 入门
了解如何使用SharpGL在您的.NET应用程序中使用OpenGL。
引言
欢迎来到我关于.NET中OpenGL系列的第一部分。本系列将向您展示如何在WinForms和WPF应用程序中使用OpenGL。我们将使用我的SharpGL库,以便从托管应用程序中使用OpenGL。

什么是SharpGL?
本质上,SharpGL只不过是对OpenGL API的封装。通常,OpenGL API直接用于C或C++应用程序,但设置代码可能相当复杂 - 特别是如果您需要使用现代OpenGL扩展。SharpGL直接提供了所有的OpenGL功能和扩展。
SharpGL实际上还包含其他一些东西 - 用于WinForms和WPF的用户控件,它们提供了OpenGL渲染表面,以及用于处理着色器和纹理等更复杂内容的帮助类。甚至还有一个场景图,让您可以以更面向对象的方式构建场景,但这些是我们将在后续文章中看到的功能。
SharpGL的原理是 - .NET中的OpenGL。如果您看到一个用C或C++编写的OpenGL教程,您可以毫不费力地用SharpGL来实现它 - 因为它只是为您包装了OpenGL。它不是一个您需要学习的新框架,有自己的一套原则,它只是OpenGL。有一些针对常见任务的助手,例如构建着色器程序,但这些都是“选择加入”的功能 - 您可以完全坚持使用纯粹的OpenGL。
入门
说够了,让我们开始吧!有两种方法可以开始使用SharpGL - 一种是使用Visual Studio扩展中的项目模板,另一种是直接引用程序集并将OpenGLControl放入您的应用程序中。我将描述这两种方法,但如果您时间紧迫,要点是:
- 如果您要开始一个新项目并想要基础知识,请使用Visual Studio扩展中的项目模板。
- 如果您有一个现有项目并想为其添加OpenGL,请使用Nuget包。
Visual Studio扩展
SharpGL Visual Studio扩展为Visual Studio添加了一个WinForms项目模板和一个WPF项目模板 - 非常简单快捷。
要安装扩展,请打开Visual Studio,选择“工具 > 扩展和更新”,然后在Visual Studio库中搜索SharpGL。

有一个适用于Visual Studio 2010的扩展,也有一个适用于Visual Studio 2012的扩展。点击“下载”,扩展就会下载并安装。如果出于某种原因找不到它,只需转到 github.com/dwmkerr/sharpgl 并从最新版本下载扩展。
安装扩展后,选择“文件 > 新建项目”。您会发现在C#模板下有两个新的项目模板 - SharpGL Winforms Forms Application 和 SharpGL WPF Application。在这篇文章中,我选择了Windows Forms模板,但在两种情况下基本原理都是相同的。

按F5运行项目,看看我们默认得到什么。

正如您所见,我们有一个非常简单的场景 - 一个旋转的彩色三角形和一个帧率显示。您的窗体代码隐藏中实现了三个函数。让我们一一查看。
OpenGLInitialized事件处理程序
我们拥有的第一个函数是OpenGLInitialized事件的事件处理程序。当底层的OpenGL对象准备就绪时,将触发此事件。此事件的典型用途是提供您所需的任何设置逻辑。默认实现非常基础。
 private void openGLControl_OpenGLInitialized(object sender, EventArgs e)
 {
     //  Get the OpenGL object.
     OpenGL gl = openGLControl.OpenGL;

     //  Set the clear color.
     gl.ClearColor(0, 0, 0, 0);
}通过引用OpenGLControl中的OpenGL对象,我们可以直接调用OpenGL方法,例如“glClearColor”,来设置场景的背景颜色。
OpenGLDraw事件处理程序
现在我们可以看看OpenGLDraw事件的处理程序。
private void openGLControl_OpenGLDraw(object sender, RenderEventArgs e)
{
    //  Get the OpenGL object.
    OpenGL gl = openGLControl.OpenGL;

    //  Clear the color and depth buffer.
    gl.Clear(OpenGL.GL_COLOR_BUFFER_BIT | OpenGL.GL_DEPTH_BUFFER_BIT);

    //  Load the identity matrix.
    gl.LoadIdentity();

    //  Rotate around the Y axis.
    gl.Rotate(rotation, 0.0f, 1.0f, 0.0f);

    //  Draw a coloured pyramid.
    gl.Begin(OpenGL.GL_TRIANGLES);
    gl.Color(1.0f, 0.0f, 0.0f);
    gl.Vertex(0.0f, 1.0f, 0.0f);
    // a few more calls like this omitted for clarity!
    gl.End();

    //  Nudge the rotation.
    rotation += 3.0f;
}我们在这里看到的是相同的过程。获取OpenGL对象,然后使用它来执行“传统”的OpenGL调用。
对于任何曾经处理过3D的人来说,最后一个事件处理程序是可以预测的 - 我们已经完成了设置和渲染,最后是视口和投影。
Resized事件处理程序
每当您的OpenGLControl调整大小时都会调用,这时您通常会设置投影。
private void openGLControl_Resized(object sender, EventArgs e)
{
    //  Get the OpenGL object.
    OpenGL gl = openGLControl.OpenGL;

    //  Set the projection matrix.
    gl.MatrixMode(OpenGL.GL_PROJECTION);

    //  Load the identity.
    gl.LoadIdentity();

    //  Create a perspective transformation.
    gl.Perspective(60.0f, (double)Width / (double)Height, 0.01, 100.0);

    //  Use the 'look at' helper function to position and aim the camera.
    gl.LookAt(-5, 5, -5, 0, 0, 0, 0, 1, 0);

    //  Set the modelview matrix.
    gl.MatrixMode(OpenGL.GL_MODELVIEW);
}这里与其它函数唯一的区别是,您可以看到“gluPerspective”函数直接在OpenGL对象上调用。这种方法适用于所有gl、glu和OpenGL扩展函数。
Nuget包
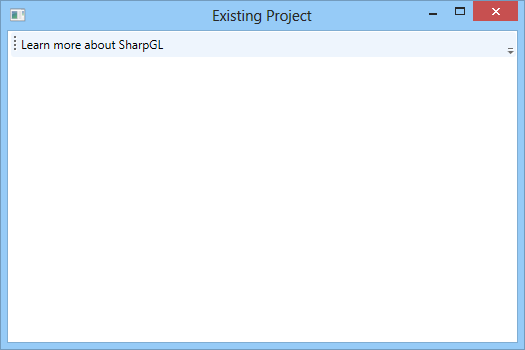
使用Nuget包是一种快速简便的方法,可以将SharpGL添加到现有项目中。让我们以一个简单的WPF项目为例,并为其添加一些OpenGL渲染。这是现有项目。

现在我们只需要添加对SharpGL和SharpGL.WPF(对于WinForms应用程序,这将是SharpGL.WinForms)的引用。最简单的方法是通过Nuget。
转到“工具 > 程序包管理器 > 管理解决方案的Nuget程序包”。在线搜索SharpGL并获取WPF包(或WinForms包)。

安装Nuget包的一个更简单的方法是通过程序包管理器控制台。使用命令
Install-Package SharpGLforWPF 
如果这是用于WinForms项目,您将使用“SharpGLforWinForms”包。
在主窗口XAML中添加一个OpenGLControl
<Window x:Class="ExistingProject.MainWindow"
        xmlns="http://schemas.microsoft.com/winfx/2006/xaml/presentation"
        xmlns:x="http://schemas.microsoft.com/winfx/2006/xaml"
        xmlns:WPF="clr-namespace:SharpGL.WPF;assembly=SharpGL.WPF" Title="Existing Project">
    <Grid>
        <DockPanel>
            <!-- content omitted for clarity -->

            <!-- The main opengl control. -->
            <WPF:OpenGLControl />

        </DockPanel>
    </Grid>
</Window>
为我们需要处理的关键事件添加事件处理程序 - 初始化,渲染和调整大小
<!-- The main opengl control. -->
<WPF:OpenGLControl
  x:Name="openGLControl"
  OpenGLInitialized="OpenGLControl_OpenGLInitialized"
  Resized="OpenGLControl_Resized"
  OpenGLDraw="OpenGLControl_OpenGLDraw" />
我们可以创建一些基本的初始化代码,例如将屏幕设置为黑色,使用透视变换并渲染一个三角形。
初始化
private void OpenGLControl_OpenGLInitialized(object sender, SharpGL.SceneGraph.OpenGLEventArgs args)
{
    //  Get the OpenGL object.
    OpenGL gl = openGLControl.OpenGL;

    //  Set the clear color.
    gl.ClearColor(0, 0, 0, 0);
}
Projection
private void OpenGLControl_Resized(object sender, SharpGL.SceneGraph.OpenGLEventArgs args)
{
    //  Get the OpenGL object.
    OpenGL gl = openGLControl.OpenGL;

    //  Set the projection matrix.
    gl.MatrixMode(OpenGL.GL_PROJECTION);

    //  Load the identity.
    gl.LoadIdentity();

    //  Create a perspective transformation.
    gl.Perspective(60.0f, (double)Width / (double)Height, 0.01, 100.0);

    //  Use the 'look at' helper function to position and aim the camera.
    gl.LookAt(-5, 5, -5, 0, 0, 0, 0, 1, 0);

    //  Set the modelview matrix.
    gl.MatrixMode(OpenGL.GL_MODELVIEW);
}
渲染
private void OpenGLControl_OpenGLDraw(object sender, SharpGL.SceneGraph.OpenGLEventArgs args)
{
    //  Get the OpenGL object.
    OpenGL gl = openGLControl.OpenGL;

    //  Clear the color and depth buffer.
    gl.Clear(OpenGL.GL_COLOR_BUFFER_BIT | OpenGL.GL_DEPTH_BUFFER_BIT);

    //  Draw a coloured pyramid.
    gl.Begin(OpenGL.GL_TRIANGLES);
    gl.Color(1.0f, 0.0f, 0.0f);
    // etc!
    gl.End();
}
结果是一个简单的渲染金字塔。

就是这样!
为什么使用SharpGL?
您可以轻松地从托管代码调用C API函数,P/Invoke使这一切变得轻而易举。但您必须创建所有函数的签名。如果弄错了,往往会发生灾难性的错误,出现访问冲突和难以分析的异常。
OpenGL API中有大量的函数。包装这些函数需要时间和精力,并且可能出错,所以这就是我创建SharpGL的原因之一 - 我花时间做了这件事,并希望其他人也能使用它。
SharpGL可以取代标准P/Invoke的另一个原因是,绝大多数OpenGL函数您无法直接P/Invoke - 至少无法通过创建外部方法签名来做到。OpenGL扩展函数必须在运行时动态加载 - 没有固定的DLL入口点来访问它们。这增加了更多的工作。
此外,设置渲染上下文可能很困难 - 有大量的底层Win32代码需要处理,以获取像素格式等工作 - 这是重复的,而且很麻烦,所以SharpGL为您处理了这些。
SharpGL的最后一个原因是,在OpenGL应用程序中通常有很多事情要做,这可能很麻烦 - 加载图像等。在.NET中,这很容易,所以.NET中的OpenGL应用程序往往会更精简一些 - 对于文件管理等标准任务,代码量更少。
下一步?
本教程中我们使用的OpenGL API中的几乎所有内容实际上都已被弃用。我们使用的是“立即模式”功能,即每一帧都将数据传递给OpenGL。在下一篇文章中,我将向您展示如何执行“现代OpenGL”。我们将使用像素缓冲区来处理我们的几何图形,并使用着色器来渲染。
这是使用更现代技术的一些快速预览。

这是来自Cel-Shading示例,您可以在 github.com/dwmkerr/sharpgl 找到,最初是用C++编写的,来自 The Little Grasshopper。在下一部分,我们将看到如何用SharpGL实现这一点。
