
XPence:一个WPF Metro风格的智能客户端费用追踪器
4.92/5 (72投票s)
WPF智能客户端演示,深入剖析MVVM在真实LOB应用中的细节

目录
引言
互联网上充斥着演示MVVM的示例。然而,初学者常常需要查阅不同的资料才能了解在“真实生活”LOB应用中实现MVVM的细节。XPence 最初是一个概念验证项目,旨在加深我对Metro(又称现代)UI设计原则的理解,但逐渐变成了一份热爱。这个应用几乎在一个地方汇集了在业务线应用程序中实现MVVM所需的所有最佳实践。
我的一位朋友曾争辩说,MVVM强制使用许多框架,如IOC容器或MVVM框架。我在这里重复我给他的答复:MVVM为应用程序架构设定了指导方针,让你可以编写健壮且易于更改的软件。框架是为了通过避免编写样板代码来让我们的生活更轻松。MVVM不强制使用任何框架。在编写XPence时,我刻意避免使用任何框架,这样MVVM的纯粹性就不会被框架所掩盖。话虽如此,我强烈建议使用框架。它们有助于保持代码更清晰、更有组织。许多开源框架都可用,并且它们被设计为MVVM友好。列举几个:
- Cinch by Sacha Barber:一个很棒的MVVM框架
- MVVM Light:一个轻量级且高效的MVVM框架
- Caliburn Micro:一个非常流行的框架,提供IOC容器和MVVM基类
- MEF: 我个人最喜欢的IOC容器,可与PRISM一起使用
本文适合谁?
确定目标受众通常是一项困难的任务。我只能说,它会吸引:
- 开始在LOB应用中实现MVVM,但仍被许多“如何”问题困扰的初学者。然而,本文要求对MVVM有基本的理解(它是什么,绑定的魔力等)。如果你是MVVM的绝对新手,可以在互联网上找到大量资源。我的建议是以下几个:
- Nick Polyak的一篇很好的入门文章
- 传奇的Josh Smith的传奇文章
- Carl Shifflett的In the Box 是学习MVVM的一个值得称赞的工具
- 此外,本文假设您熟悉WPF概念,如DependencyProperties、Styles、Templates、Converters等。
- 不介意回顾概念并乐于就其中一些概念进行辩论的MVVM专业人士。
在我们继续之前,请您阅读就这样!部分中的粗体文本。
运行应用程序
要构建代码,您需要Visual Studio 2022(Express/ Professional/ Ultimate)。
还使用了一些外部DLL,但它们已与源代码打包在一起,因此您无需担心单独获取它们。要了解更多信息,请访问致谢和外部组件部分。
为了持久化数据,使用了MS SQL Server CE。在运行应用程序之前,您需要MS SQL Server CE 4.0。在实际安装它之前,需要考虑几点。此页面提供了安装MS SQL Server CE所需的详细信息。
如果您不想安装SQL Server CE 4.0,仍然有办法。
- 从本页顶部下载SQL Server CE DLLs (SQLDlls),并将两个文件夹(amd64 和 x86)放入Output目录(参考目录结构)。
- 转到XPence项目的app.config文件,并取消注释
system.data标签。
重新构建项目,它应该可以工作。我在一台未安装SQL Server CE 4.0的64位机器上测试过。但是,提供的DLL是32位DLL。如果您的机器是64位,这些DLL仍然会作为32位运行。
致谢和外部组件
我是开源的倡导者,因此XPence使用了大量的外部组件。有些是开源的,其余的则是从其他作者那里无耻地“借用”来的。荣誉和致谢应归于它们所属之处。
- XPence 使用 Mahapps Metro 来实现 metro/现代 UI。这是一个很棒的 WPF 库,用于构建 Metro 风格的 UI。
- XPence 使用了 Apex 网格 来获得更清晰、更简洁的 XAML 文件。Apex 还提供了许多其他功能,尽管 XPence 并未全部使用。
- Syncfusion 的免费 Metro Studio 对 XPence 中使用的 XAML 图形非常有用。
- 创建图像裁剪控件的大部分代码取自这篇文章。
- 一个滑动内容控件在实现Metro体验时非常方便。Mahapps metro提供了自己的Metro内容控件,但我更喜欢这个,因为它提供了更“生动”的滑动效果。
- XPence 对密码进行加密后保存到数据库中。这篇文章提供了所有相关的代码。
- Compact Data Viewer 在开发过程中非常方便。
- NHibernate 被用作(首选的)ORM(优于 EntityFramework!)。
- 用于图表绘制,使用了Modern UI Charts 库。
- 日志记录方面,XPence 使用 log4net。
- 这篇博客帮助我克服了一个困扰我一段时间的WPF bug。
向用户介绍 Xpense
让我们来看看XPence 是什么以及它应该如何工作。XPence 是一个针对小型团队的费用追踪软件。它是一个“单一管理员和多用户系统”,管理员对系统拥有某些增强的授权。让我们以管理员身份浏览应用程序,看看它提供了哪些功能。请务必下载TestData(从本页顶部),以便亲自运行!
启动时,会出现登录屏幕。

输入管理员凭据后,将启动主屏幕。

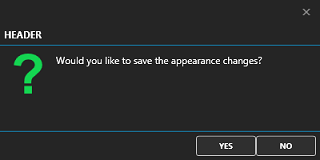
您可以从右上角的设置图标更改您的密码或应用程序的主题和强调色。点击图标后,设置浮出层会打开。

XPence 允许您保存设置以备将来使用。
在主屏幕上,您可以进入所有费用视图,在那里您可以对您或其他用户输入的费用执行所有CRUD操作(普通用户只能对其自己输入的费用执行此操作)。这是所有费用屏幕的截图。

您可以使用筛选浮出层筛选费用。以下是其截图。

请注意,普通用户在其筛选浮出层中不会启用“按用户筛选”字段。
最后,管理屏幕是只有管理员才能访问的地方,您可以从主屏幕导航到该屏幕。您可以更改用户的姓名或图片,当他们登录时,这些更改将显示在徽章(应用程序窗口的右上角)上。这是管理屏幕的截图。

这就是关于“XPence 是做什么的?”的所有内容。
初始事项
在开始内部细节之前,我们先来看看目录结构,了解代码是如何组织的。
-
目录结构
解压XPence.zip文件后,您会发现三个文件夹:
- ObjMatter:对于任何C#项目,Visual Studio都会在obj文件夹中生成大量文件。这会使每个项目文件夹的大小膨胀,特别是对于WPF Windows应用项目。它们可以被删除,Visual Studio会在每次构建后重新生成它们,但如果解决方案中有相当多的项目,进入单个项目文件夹清理obj文件夹就会很麻烦。因此,解决方案中的所有项目都将其对象文件重定向到此文件夹。这可以通过在
Project标签的PropertyGroup中包含以下路径来完成(您需要用文本编辑器打开所有.csproject文件)。<BaseIntermediateOutputPath>..\..\ObjMatter\</BaseIntermediateOutputPath>
- Output:包含所有项目(可执行文件和DLL)的输出文件以及三个文件夹。
- Data:包含数据库文件,这是一个SQL Server CE (.sdf) 文件。
- Logs:应用程序的日志文件存放于此。
- ThirdParty:此文件夹包含XPence使用的所有外部DLL。所有项目引用的DLL都将
CopyLocal设置为false,并且XPence项目的App.Config为运行时提供了探测路径,以检查依赖的DLL。这加快了构建时间,尽管在只有六个项目的解决方案中并不明显!
- XPence:包含项目的源文件。这是解决方案文件夹。
总而言之,这种结构使可执行文件和源代码的发布变得容易,并且还减少了“重建”时间!
- ObjMatter:对于任何C#项目,Visual Studio都会在obj文件夹中生成大量文件。这会使每个项目文件夹的大小膨胀,特别是对于WPF Windows应用项目。它们可以被删除,Visual Studio会在每次构建后重新生成它们,但如果解决方案中有相当多的项目,进入单个项目文件夹清理obj文件夹就会很麻烦。因此,解决方案中的所有项目都将其对象文件重定向到此文件夹。这可以通过在
-
源代码
在 Visual Studio 中打开解决方案会显示六个项目。请记住,“关注点分离”从创建项目的这一级别就开始了。在我看来,在添加项目引用时应该有所选择。我努力确保以下几点:
- ViewModel 不应了解视图,因此 ViewModel 项目不应引用与视图相关的 DLL,例如 PresentationFramework.dll 和 System.Xaml.dll。请记住,ViewModel 项目引用的任何内容也将被其测试项目引用,ViewModel 开发者在测试时根本不应依赖任何视图组件。
- Model 项目不应直接被 View 项目引用(稍后详述)。初学者很容易将枚举放在 Model 项目中。但这并非适用于所有情况。如果 View 中有一个 ItemsControl(如 ComboBox),它期望枚举作为其 DataSource,那么 View 项目就需要引用 Model。因此,最好将枚举放在一个共享项目中,该项目将独立地被 View、ViewModel 和 Model 项目引用。
- 在
View、ViewModel和Model之间共享的常量、资源字符串等应放在共享项目中。此项目也可以包含枚举。

这些要点有助于保持代码的可维护性和可测试性,尽管存在多重变更需求(这些需求不可避免地会不断出现!),尤其是对于大型项目。
概述
以下是概览的简要说明。
应用程序架构
应用程序架构如下图所示:

我相信,大多数遵循 MVVM 模式的 WPF 开发者会对此感到熟悉。该图是自解释的,所以我不会过多解释。但是,我会添加一些评论:
- Repository 的好处在于它通过接口注入到
ViewModel中,因此改变实现对影响最小。无论你的数据源是什么,ViewModel都与它无关。 - 一个模型,无论多么简单和小型,都应该在渲染到
View之前,始终被封装在一个ViewModel中。模型的唯一职责是携带数据并(可能)验证数据。模型不应符合 View 的任何要求。我的同事不喜欢我将只包含一个
string属性的模型封装在ViewModel中的想法。这些模型将构成combobox的项。几天后,出现了一个需求,用户希望每个组合框项都有一个按钮。包装器ViewModel公开了一个ICommand属性,然后这个需求就解决了! - 由于数据操作通过
Repository进行抽象,因此使用任何ORM的选择变得更广泛。NHibernate 与 WPF 配合得不是很好,但如果您有存储库,则不会。
UI 部分
以下是UI分区的简要说明。

如果您对上面的图表有任何疑问,请耐心等待,我们将在查看组件时详细了解。
Components
消息服务
消息服务负责多项任务,即:
- 显示消息框
- 显示带有自定义内容的弹出窗口(模态或非模态)
- 当应用程序进行后台工作时,显示忙碌消息并阻止应用程序窗口。
- 显示带有自定义内容的浮出层
消息服务是一个接口,通过构造函数注入提供给任何ViewModel。因此,ViewModel永远不会知道任何View特定的代码(例如,消息框、弹出窗口等)。这就是接口的样子。它提供了上述操作所需的所有成员。
    /// <summary>
    /// The messaging service interface.
    /// </summary>
    public interface IMessagingService
    {
        /// <summary>
        /// A quick method to show a modal dialog to the user.
        /// The header text would be default.
        ///
        /// <param name="message" />The message to be shown in the dialog.
        void ShowMessage(string message);

        /// <summary>
        /// A quick method to show a message to the user along with the header text.
        /// </summary>
        /// <param name="message" />The message to be shown in the dialog.
        /// <param name="header" />The header of the dialog.
        void ShowMessage(string message, string header);

        /// <summary>
        /// A method to show to the user a dialog with a  message.
        /// The method returns a dialog result.
        /// The header text would be default.
        /// </summary>
        /// <param name="message" />The message to be shown in the dialog.
        /// <param name="dialogueType" />The header of the dialog.
        /// <returns>The dialog result as selected by the user.</returns>
        DialogResponse ShowMessage(string message, DialogType dialogueType);

        /// <summary>
        /// A method to show to the user a dialog with a  message and header.
        /// The method returns a dialog result.
        /// </summary>
        /// <param name="message" />The message to be shown in the dialog.
        /// <param name="header" />The header of the dialog.
        /// <param name="dialogueType" />The dialog type.
        /// <returns>The dialog result as selected by the user.</returns>
        DialogResponse ShowMessage
              (string message, string header, DialogType dialogueType);

        /// <summary>
        ///  A method to display wait dialog to the user.
        /// </summary>
        /// <param name="showBusy" />
        /// <param name="message" />
        /// <param name="header" />
        void ShowProgressMessage(string header, string message);

        /// <summary>
        /// Closes a progress message dialog that is visible.
        /// </summary>
        void CloseProgressMessage();

        /// <summary>
        /// Shows a view identified by the <see cref="viewKey">
        /// and binds the view to the <see cref="viewModel">.
        /// The view is shown as a blocking modal dialog.
        /// </see></see>
        /// <param name="viewKey" />shows the view identified by the key.
        /// <param name="viewModel" />The modal view is bound to this view model.
        void ShowCustomMessageDialog
             (string viewKey, ModalDialogViewModelBase viewModel);

        /// <summary>
        /// Shows a view identified by the <see cref="viewKey">
        /// and binds the view to the <see cref="viewModel">.
        /// The view is shown as a non blocking modal dialog.
        ///
        /// <param name="viewKey" />shows the view identified by the key.
        /// <param name="viewModel" />The modal view is bound to this view model.
        void ShowCustomMessage(string viewKey, ModalDialogViewModelBase viewModel);

        /// <summary>
        /// Registers an instance of <see cref="FlyoutViewModelBase">
        /// that can be used in the application.
        /// </see></summary>
        /// <param name="flyoutViewModelBase" />
        void RegisterFlyout(FlyoutViewModelBase flyoutViewModelBase);
    }
请注意,DialogType和DialogResponse 枚举位于XPence.Infrastructure项目中。此接口的内部实现由MessageServiceFactory类作为单例实例维护。这是我最想念IOC容器的地方。如果没有构造函数注入,为单元测试存根数据将成为一场噩梦,因此单例实例在应用程序启动时创建,但通过构造函数注入传递给每个视图模型。
自定义弹出屏幕
值得花点时间看看 XPence 中如何显示自定义弹出消息。如果您已经注意到,IMessagingService 接口的两个成员,即:ShowCustomMessageDialog 和 ShowCustomMessage 的参数,期望一个 string 类型的 viewKey 和一个 ModalDialogViewModelBase 类型的参数。正如您可能正确猜测的那样,这是用于任何弹出视图的 ViewModel。该键由消息服务用于识别将绑定到传递的 ModalDialogViewModelBase 实例的 UserControl 类型。我们稍后将看到消息服务如何使用该键获取 UserControl 类型。首先,让我们看看 ModalDialogViewModelBase 的样子。代码如下:
    /// <summary>
    /// A base class for all view Models that cater to modal dialogs.
    /// </summary>
    public abstract class ModalDialogViewModelBase : ViewModelBase
    {
        #region Public Members

        /// <summary>
        /// Gets or sets if the user has cancelled the dialog.
        /// </summary>
        public bool IsCancelled
        {
            get { return _isCancelled; }
            set
            {
                if (value != _isCancelled)
                {
                    _isCancelled = value;
                    OnPropertyChanged(GetPropertyName(() => IsCancelled));
                }
            }
        }

        /// <summary>
        /// Gets or sets if the User has chosen Ok for the dialog.
        /// </summary>
        public bool IsOk
        {
            get { return _isOk; }
            set
            {
                if (value != _isOk)
                {
                    _isOk = value;
                    OnPropertyChanged(GetPropertyName(() => IsOk));
                }
            }
        }

        /// <summary>
        /// Gets or sets the title text for the window.
        /// </summary>
        public string TitleText
        {
            get { return _titleText; }
            set
            {
                if (value != _titleText)
                {
                    _titleText = value;
                    OnPropertyChanged(GetPropertyName(() => TitleText));
                }
            }
        }

        #endregion

        #region Commands

        /// <summary>
        /// Gets the Ok dialog command.
        /// Bind this to the button that selects Ok option for the dialog.
        /// </summary>
        public ICommand OkSelectedCommand { get; private set; }

        /// <summary>
        /// Gets the cancelled dialog command.
        /// Bind this to the button that cancels the dialog.
        ///
        public ICommand CancelSelectedCommand { get; private set; }

        #endregion

        #region Constructor

        /// <summary>
        /// Initializes instance of <see cref="ModalDialogViewModelBase">
        /// </see>
        protected ModalDialogViewModelBase()
        {
            OkSelectedCommand = new RelayCommand(OkSelected);
            CancelSelectedCommand = new RelayCommand(CancelSelected);
        }

        #endregion

        #region Protected Overidable methods

        /// <summary>
        /// Fired on OkCommand selected.
        /// </summary>
        protected virtual void OnOkSelected()
        {

        }

        /// <summary>
        /// Fired on Cancel selected.
        /// </summary>
        protected virtual void OnCancelSelected()
        {

        }

        #endregion

        #region Internal Events

        /// <summary>
        /// An event used internally by the
        /// <see cref="ModalCustomMessageDialog"> to listen to the Ok
        /// or cancelled option selected by user.
        /// </see></summary>
        internal event EventHandler DialogResultSelected
        {
            add { _dialogResultSelected += value; }
            remove { _dialogResultSelected -= value; }
        }

        #endregion

        #region Private Methods

        /// <summary>
        /// Caters the <see cref="OkSelectedCommand">.
        /// </see></summary>
        private void OkSelected()
        {
            IsOk = true;
            NotifyView(DialogResponse.Ok);
        }

        /// <summary>
        /// Caters the <see cref="CancelSelectedCommand">.
        ///
        private void CancelSelected()
        {
            IsCancelled = true;
            NotifyView(DialogResponse.Cancel);
        }

        /// <summary>
        /// Fires the <see cref="DialogResultSelected"> event.
        /// </see></summary>
        /// <param name="dialogResponse" />
        private void NotifyView(DialogResponse dialogResponse)
        {
            if (null != _dialogResultSelected)
                _dialogResultSelected(this, EventArgs.Empty);
        }

        #endregion

        #region Private Members

        private bool _isCancelled;
        private bool _isOk;
        private string _titleText;
        internal event EventHandler _dialogResultSelected;

        #endregion
    }
ModalDialogViewModelBase 提供 IsOk 和 IsCancelled 的基本属性,用于指示用户在该对话框上所做的选择。消费者代码可以根据用户选择继续其操作。它还提供了 OkSelectedCommand 和 CancelSelectedCommand,可以绑定到弹出视图中的任何 ICommandSource(通常是 Button)。它提供了一个事件 DialogResultSelected,视图将挂钩到该事件。无论何时用户做出选择(确定/取消),ModalDialogViewModelBase 都会记录响应并触发此事件。弹出窗口(已挂钩到此事件)明白它现在必须关闭。如果不是很清楚,请耐心,继续阅读!
消息服务使用一个名为 ModalCustomMessageDialog 的通用窗口。所有消息服务所做的就是:
- 打开
ModalCustomMessageDialog。 - 在窗口内容中设置通过键获取的
UserControl。 - 将窗口绑定到传递的
ModalDialogViewModelBase实例。
该窗口足够智能,可以监听其 DataContext 的任何通知。以下是 ModalCustomMessageDialog 的代码。
    /// <summary>
    /// Interaction logic for ModalCustomMessageDialog.xaml
    /// </summary>
    public partial class ModalCustomMessageDialog
    {
        #region Constructors

        /// <summary>
        /// Static constructor
        /// </summary>
        static ModalCustomMessageDialog()
        {
        }

        /// <summary>
        /// Initializes and ionstance of <see cref="ModalCustomMessageDialog">.
        ///
        public ModalCustomMessageDialog()
        {
            InitializeComponent();
        }

        #endregion

        #region Static Event Handlers

        /// <summary>
        /// The handler to handle the content property changed.
        /// </summary>
        /// <param name="source" />
        /// <param name="e" />
        private static void OnActualContentPropertyChanged
                (DependencyObject source, DependencyPropertyChangedEventArgs e)
        {
            var modalWindow = source as ModalCustomMessageDialog;
            if (null != modalWindow)
            {
                if (null != modalWindow.ActualContentHolder)
                    modalWindow.ActualContentHolder.Content = e.NewValue;
            }
        }

        #endregion

        /// <summary>
        /// A duplicate content property built to help a developer with his laziness.
        /// </summary>
        public object ActualContent
        {
            get { return GetValue(ActualContentProperty); }
            set { SetValue(ActualContentProperty, value); }
        }
        public static readonly DependencyProperty ActualContentProperty =
               DependencyProperty.Register("ActualContent", typeof(object),
               typeof(ModalCustomMessageDialog), new PropertyMetadata
               (null, OnActualContentPropertyChanged));

        #region Base class overrides

        /// <summary>
        /// On property changed.
        /// </summary>
        /// <param name="e" />
        protected override void OnPropertyChanged(DependencyPropertyChangedEventArgs e)
        {
            if (e.Property == DataContextProperty)
            {
                var oldViewModel = e.OldValue as ModalDialogViewModelBase;
                if (null != oldViewModel)
                    oldViewModel.DialogResultSelected -= OnViewNotified;
                var newViewModel = e.NewValue as ModalDialogViewModelBase;
                if (null != newViewModel)
                    newViewModel.DialogResultSelected += OnViewNotified;
            }
            else
            {
                base.OnPropertyChanged(e);
            }
        }

        #endregion

        #region Private Helpers

        /// <summary>
        /// Closes the Window.
        ///
        /// <param name="sender" />
        /// <param name="e" />
        private void OnViewNotified(object sender, EventArgs e)
        {
            var viewModel = DataContext as ModalDialogViewModelBase;
            if (null != viewModel)
                viewModel.DialogResultSelected -= OnViewNotified;
            Close(); //Close the window
        }

        #endregion
    }
现在让我们回到这个问题,消息服务从何处获取要设置在模态对话框窗口中的UserControl类型。答案是:从一个名为ModalViewRegistry的类的单例实例。在应用程序启动时,所有弹出用户控件类型都根据其键馈送到ModalViewRegistry中。就这么简单!下面是ModalViewRegistry类的代码:
    /// <summary>
    /// Registers the modal views used in the application against a key.
    /// This is a singleton class. Get an instance of the class
    /// at the application startup and
    /// Register all the modal views against suitable keys.
    /// This key would be used later on by the <see cref="IMessagingService"/>
    /// instance to extract the view and display in a modal dialog.
    /// </summary>
    public class ModalViewRegistry
    {
        #region Public Members

        /// <summary>
        /// Gets the sole instance of the MainViewRegistry class.
        ///
        public static ModalViewRegistry Instance { get { return _instance.Value; } }

        #endregion

        #region Public Methods

        /// <summary>
        /// Registers a UserControl that needs to be shown as a modal dialog.
        /// </summary>
        /// <param name="key" />Key against which the user control
        /// is stored in the registry.
        /// <param name="userControlType" />The type of UserControl
        /// that would be shown as a modal dialog.
        /// <exception cref="InvalidOperationException">Throws exception
        /// if an existing key is used to add another UserControl.
        /// This is to eliminate the risk of overwriting an existing
        /// UserControl in the registry.
        public void RegisterView(string key, Type userControlType)
        {
            if (string.IsNullOrEmpty(key))
                throw new ArgumentException("key");
            if (null == userControlType)
                throw new ArgumentException("userControl");
            if (!userControlType.IsSubclassOf(typeof(UserControl)))
                throw new InvalidCastException
                ("Only a user control type can be assigned.");
            if (_modalViewRegistry.ContainsKey(key))
                throw new InvalidOperationException("Key already exists.");
            _modalViewRegistry[key] = userControlType;
        }

        /// <summary>
        /// Determines if a  key is already registered in the registry.
        ///
        /// <param name="viewKey" />The key that needs for checked in the registry.
        /// <returns>
        public bool ContainsKey(string viewKey)
        {
            return _modalViewRegistry.ContainsKey(viewKey);
        }

        #endregion

        #region Internal Methods

        /// <summary>
        /// Gets the registered UserControl against the key.
        /// </summary>
        /// <param name="key" />
        /// <returns>
        internal UserControl GetViewByKey(string key)
        {
            Type userControlType = _modalViewRegistry[key];
            return Activator.CreateInstance(userControlType) as UserControl;
        }

        #endregion

        #region Member Variables

        private readonly IDictionary<string,> _modalViewRegistry;
        // static holder for instance, need to use lambda
        // to construct since constructor is private.
        private static readonly Lazy<modalviewregistry> _instance
          = new Lazy<modalviewregistry>(() => new ModalViewRegistry());
        #endregion

        #region Contructor

        /// <summary>
        /// Initializes and instance of <see cref="MessagingService">
        /// </see>
        private ModalViewRegistry()
        {
            _modalViewRegistry = new Dictionary<string,>();
        }

        #endregion
    }
浮出层
Metro UI 的主要功能和吸引力之一是浮出层。MahApps metro 开发者非常出色地将 MetroWindow 的浮出层作为 ItemsControl 提供。这意味着服务于应用程序 MainWindow 的视图模型可以包含一个对象列表,这些对象可以作为浮出层。Mahapps metro 的 Flyout 控件具有所有用于控制可见性、主题和方向的依赖属性。因此,如果我们有一个携带所有控制浮出层基本属性的基 ViewModel,那么继承自它的类就可以作为显示在 MainWindow 中的浮出层的 ViewModel。我们所需要的只是 MainWindowModel(又称浮出层容器)中这些基视图模型的集合。FlyoutViewModelBase 的样子如下:
public abstract class FlyoutViewModelBase : ViewModelBase
    {
        #region Public properties

        /// <summary>
        /// Gets or sets the header text of the flyout instance.
        /// </summary>
        public string Header
        {
            get { return _header; }
            set
            {
                if (_header == value)
                    return;
                _header = value;
                OnPropertyChanged(GetPropertyName(() => Header));
            }
        }

        /// <summary>
        /// Gets or sets the position of the flyout instance.
        /// </summary>
        public VisibilityPosition Position
        {
            get { return _position; }
            set
            {
                if (_position == value)
                    return;
                _position = value;
                OnPropertyChanged("Position");
            }
        }

        /// <summary>
        /// Gets or sets if the flyout instance is visible or collapsed.
        /// </summary>
        public bool IsOpen
        {
            get { return _isOpen; }
            set
            {
                if (_isOpen == value)
                    return;
                _isOpen = value;
                OnPropertyChanged("IsOpen");
            }
        }

        /// <summary>
        /// Gets or sets the theme of the flyout instance.
        ///
        public FlyoutTheme Theme
        {
            get { return _theme; }
            set
            {
                if (_theme == value)
                    return;
                _theme = value;
                OnPropertyChanged("Theme");
            }
        }

        #endregion

        #region protected members.

        protected string _header;
        protected VisibilityPosition _position;
        protected bool _isOpen;
        protected FlyoutTheme _theme;

        #endregion

    }
下一个需求是项目中任何 ViewModel 都可能需要一个 flyout。如何让该 ViewModel 将 FlyoutViewModelBase 的实例添加到 flyout 容器中?如果使用 IOC 容器,我们可以轻松获取 flyout 容器的单例实例。但我们没有使用。MessagingService 通过提供一种从应用程序任何地方添加 FlyoutViewModel 的方法来帮助我们。这是一个简化的图表,解释了它是如何工作的:

导航服务
导航是任何基于Metro应用程序的重要功能。虽然PRISM等框架提供强大的导航功能,但为自己创建一个小型的导航功能并非一项艰巨的任务。Mahapps metro提供了一个导航功能,但我不喜欢它,因为它也提供了一个前进按钮,我不想制作一个类似浏览器的应用程序。我更喜欢为自己编写一个小的导航功能。那么,让我们看看INavigator 接口是如何工作的。好吗?作为一个接口,它可以从任何地方(即任何ViewModel)通过IOC/DI访问。以下是该接口。
    /// <summary>
    /// A contract for an instance of navigator.
    /// Provides the members required for navigation.
    ///
    public interface INavigator:INotifyPropertyChanged
    {
        /// <summary>
        /// Commands the navigator instance to navigate back.
        /// </summary>
        void NavigateBack();

        /// <summary>
        /// Commands the navigator instance to navigate back.
        /// </summary>
        void NavigateToHome();

        /// <summary>
        /// Gets or sets the current selected view.
        /// </summary>
        WorkspaceViewModelBase CurrentView { get; set; }

        /// <summary>
        /// Gets the Enumerable of all the views.
        /// </summary>
        /// <returns>
        IEnumerable<workspaceviewmodelbase> GetAllView();

        /// <summary>
        /// Adds a workspace view to the navigator instance.
        /// </summary>
        /// <param name="workspaceView" />
        void AddView(WorkspaceViewModelBase workspaceView);

        /// <summary>
        /// Adds the home view model.
        ///
        /// <param name="workspaceView" />
        void AddHomeView(WorkspaceViewModelBase workspaceView);

        /// <summary>
        /// Navigates to the view specified by the key.
        /// </summary>
        /// <param name="viewKey" />
        void NavigateToView(string viewKey);
    }
导航器以三个非常简单的步骤工作:
- 它包含所有
WorkspaceViewModel的集合。 - 它持有当前的视图,而当前的视图又被
ApplicationViewModel监听以进行任何更改。 - 它提供了
NavigateToView(string viewKey)方法,该方法接收注册的WorksaceViewModelBase名称并将其设置为当前视图。
它特别关注HomeView并提供了一个特殊的NavigateToHome()方法。这是因为几乎所有地方都可能需要“导航到主页”。我认为,上述功能的实现非常简单直接,因此我没有提供实现。如果您想查看,可以在源代码中查看内部类Navigator。
视图模型的延迟加载
ViewModel类是MVVM应用程序的主要驱动组件。事实上,要运行一个纯MVVM应用程序,根本不需要View组件。一个简单的测试项目或控制台项目就可以了。因此,毫无疑问,由于ViewModel类承担了所有繁重的工作,它们可能包含耗时且内存密集型的初始化代码。如果您查看项目中的ViewModelBase 类(我在此处不粘贴代码),您会发现一个Initialize方法,它反过来调用一个可重写的OnInitialize方法。因此,任何派生自ViewModel的类都可以将其初始化代码放在被重写的OnInitialize方法中。这很公平,对吧?但是何时调用ViewModel的Initialize 方法呢?在应用程序启动时调用它是否可以?嗯,没错,就是那个地方!但是这样呢:我初始化了服务于管理视图的ViewModel,而用户甚至不关心加载管理屏幕?我白白获取了管理屏幕所需的所有数据,并将其保存在内存中。是不是更好的主意是仅在关联视图加载时才初始化ViewModel?但是我们不能使用代码隐藏来做这件事。附加行为来拯救我们。如果您想了解什么是附加行为,我建议阅读Josh Smith的这篇文章。InitializeDataContextWhenLoadedProperty负责在关联视图加载时调用ViewModel的Initialize方法。代码如下:
    /// <summary>
    /// Provides attached properties for loading of an element.
    /// </summary>
    public static class ElementLoadingBehavior
    {
        #region InitializeDataContextWhenLoaded

        /// <summary>
        /// Gets the value of <see cref="InitializeDataContextWhenLoadedProperty">.
        ///
        /// <param name="element" />
        /// <returns><see langword="bool" />
        public static bool GetInitializeDataContextWhenLoaded(FrameworkElement element)
        {
            return (bool)element.GetValue(InitializeDataContextWhenLoadedProperty);
        }

        /// <summary>
        /// sets the value of <see cref="InitializeDataContextWhenLoadedProperty">.
        /// </see></summary>
        /// <param name="element" />
        public static void SetInitializeDataContextWhenLoaded(
          FrameworkElement element, bool value)
        {
            element.SetValue(InitializeDataContextWhenLoadedProperty, value);
        }

        /// <summary>
        /// The attached property that attaches the behaviour to a
        /// <see cref="FrameworkElement">.
        /// </see>
        public static readonly DependencyProperty
               InitializeDataContextWhenLoadedProperty =
            DependencyProperty.RegisterAttached(
            "InitializeDataContextWhenLoaded",
            typeof(bool),
            typeof(ElementLoadingBehavior),
            new UIPropertyMetadata(false, OnInitializeDataContextWhenLoadedChanged));

        /// <summary>
        /// Property changed event handler for
        /// <see cref="InitializeDataContextWhenLoadedProperty">.
        ///
        /// <param name="depObj" />
        /// <param name="e" />
        static void OnInitializeDataContextWhenLoadedChanged
               (DependencyObject depObj, DependencyPropertyChangedEventArgs e)
        {
            var item = depObj as FrameworkElement;
            if (item == null)
                return;
            if (e.NewValue is bool == false)
                return;
            if ((bool)e.NewValue)
                item.Loaded += OnElementLoaded;
            else
                item.Loaded -= OnElementLoaded;
        }

        /// <summary>
        /// The event handler to handle the loaded event of a framework element.
        /// </summary>
        /// <param name="sender" />
        /// <param name="e" />
        static void OnElementLoaded(object sender, RoutedEventArgs e)
        {
            if (!ReferenceEquals(sender, e.OriginalSource))
                return;
            var item = e.OriginalSource as FrameworkElement;
            if (item != null)
            {
                var dataContext = item.DataContext as ViewModelBase;
                if(null!=dataContext && !dataContext.IsInitialized)
                {
                    dataContext.Initialize();
                }
            }
        }

        #endregion
    }
因此,通过这种行为,我们的ViewModel实际上是按需初始化的。
原生样式
尽管 XPence 的大部分样式都由 MahApps metro 负责,但我仍然倾向于覆盖一些样式。此外,还为 XPence 原生的自定义控件提供了样式。
我总是更喜欢 XAML 图形而不是 PNG/JPEG 图像,因为它们视觉效果清晰干净。值得一看 XPence 中 MetroButton 样式是如何设计的。样式如下所示:
 <Style x:Key="MetroButtonStyle" TargetType="{x:Type Button}">
        <Setter Property="Foreground" Value="{DynamicResource AccentColorBrush}"/>
        <Setter Property="Template">
            <Setter.Value>
                <ControlTemplate TargetType="{x:Type Button}">
                    <grid x:name="LayoutRoot" background="Transparent"
                          rendertransformorigin="0.5,0.5">
                        <grid.rendertransform>
                            <transformgroup>
                                <scaletransform>
                                <skewtransform>
                                <rotatetransform>
                                <translatetransform>
                            </translatetransform></rotatetransform></skewtransform>

                        <viewbox>
                            <grid x:name="backgroundGrid" width="48"
                                  height="48" visibility="Visible">
                                <path x:name="arrow" data="{TemplateBinding Content}"
                                 stretch="Uniform" fill="{TemplateBinding Foreground}"
                                 stroke="{TemplateBinding Foreground}" width="26"
                                 height="26" strokethickness="0.1">
                                <ellipse x:name="circle" fill="Transparent"
                                 stroke="{TemplateBinding Foreground}"
                                 width="40" height="40" strokethickness="2">

                    <controltemplate.triggers>
                        <trigger property="IsFocused" value="True">
                        <trigger property="IsDefaulted" value="True">
                        <trigger property="IsMouseOver" value="True">
                            <setter property="RenderTransform" targetname="LayoutRoot">
                                <setter.value>
                                    <transformgroup>
                                        <scaletransform scalex="1.1" scaley="1.1">
                                        <skewtransform>
                                        <rotatetransform>
                                        <translatetransform>

                        <trigger property="IsPressed" value="True">
                            <setter property="Opacity"
                             targetname="LayoutRoot" value="0.7">
                        </setter>
                        <trigger property="IsEnabled" value="False">
                            <setter property="Fill"
                             value="#8B8B8B" targetname="arrow">
                            <setter property="Stroke"
                             value="#8B8B8B" targetname="circle">
这种样式使按钮期望其内容为Geometry。而Path代替ContentPresenter在椭圆内部绘制几何图形。Geometries以键值资源的形式存储在单独的ResourceFile中。这种样式虽然不稳定,但很智能。
外观管理器
Mahapps metro 提供了一个 static ThemeManager 类,它提供更改应用程序主题和强调色的方法。XPence 使用了一个名为 AppearanceManager 的包装类来封装 ThemeManager 类。原因有以下几点:
- Mahapps metro 的主题管理器期望 Mahapps metro 本地的参数。将来,可能需要用其他库替换 Mahapps。更改将仅限于包装类。
AppearanceManager类以string形式向ViewModel层提供主题和强调色,这从“关注点分离”的角度来看是好的。- 还有其他组件也需要主题和强调色的更改(例如图表组件)。
AppearanceManager也负责它们的需求。
以下是AppearanceManager的代码:
/// <summary>
    /// A static class that manages the appearance of the application.
    /// </summary>
    public class AppearanceManager
    {
        internal static readonly ResourceDictionary
                 LightChartResource = new ResourceDictionary { Source = new Uri
 ("pack://application:,,,/XPence.Infrastructure;component/Resources/ChartLight.xaml") };
        internal static readonly ResourceDictionary DarkChartResource =
                 new ResourceDictionary { Source = new Uri
 ("pack://application:,,,/XPence.Infrastructure;component/Resources/ChartDark.xaml") };

        private static readonly string LightThemeText;
        private static readonly string DarkThemeText;

        #region Constructors

        /// <summary>
        /// Static constructor to initialize static variables.
        ///
        static AppearanceManager()
        {
            LightThemeText = "Light";
            DarkThemeText = "Dark";
        }

        #endregion

        #region Public Static Methods

        /// <summary>
        /// Gets the accent names.
        /// </summary>
        /// <returns />
        public static IEnumerable<string> GetAccentNames()
        {
            return ThemeManager.DefaultAccents.Select(a => a.Name).ToList();
        }

        /// <summary>
        /// Gets the theme names.
        /// </summary>
        /// <returns>
        public static IEnumerable<string> GetThemeNames()
        {
            var themes = new[] { LightThemeText, DarkThemeText };
            return themes;
        }

        /// <summary>
        /// Gets the accent name that the application is displaying presently.
        /// </summary>
        /// <returns>
        public static string GetApplicationAccent()
        {
            var theme = ThemeManager.DetectTheme(Application.Current);
            return theme.Item2.Name;
        }

        /// <summary>
        /// Gets the theme name that the app is displaying presently.
        /// </summary>
        /// <returns>
        public static string GetApplicationTheme()
        {
            var theme = ThemeManager.DetectTheme(Application.Current);
            if (theme.Item1 == Theme.Dark)
                return DarkThemeText;
            if (theme.Item1 == Theme.Light)
                return LightThemeText;
            throw new Exception("Undetected theme.");
        }

        /// <summary>
        /// Changes the accent of the application.
        ///
        /// <param name="accentName" />The name of the accent color.
        public static void ChangeAccent(string accentName)
        {
            var theme = ThemeManager.DetectTheme(Application.Current);
            var accent = ThemeManager.DefaultAccents.First(x => x.Name == accentName);
            ThemeManager.ChangeTheme(Application.Current, accent, theme.Item1);
        }

        /// <summary>
        /// Changes the theme of the application.
        ///
        /// <param name="themeName" />The name of the theme.
        public static void ChangeTheme(string themeName)
        {
            ChangeThemeForGraph(Application.Current.Resources, themeName);
            if (string.CompareOrdinal(LightThemeText, themeName) == 0)
            {
                var theme = ThemeManager.DetectTheme(Application.Current);
                ThemeManager.ChangeTheme(Application.Current, theme.Item2, Theme.Light);
            }
            else if (string.CompareOrdinal(DarkThemeText, themeName) == 0)
            {
                var theme = ThemeManager.DetectTheme(Application.Current);
                ThemeManager.ChangeTheme(Application.Current, theme.Item2, Theme.Dark);
            }
            else
            {
                throw new ValueUnavailableException("Theme name not known.");
            }
        }

        private static void ChangeThemeForGraph
                (ResourceDictionary resources, string themeName)
        {
            if (resources == null)
                return;
            ResourceDictionary oldChartThemeResource;
            ResourceDictionary newChartThemeResource;
            if (string.CompareOrdinal(LightThemeText, themeName) == 0)
            {
                oldChartThemeResource = DarkChartResource;
                newChartThemeResource = LightChartResource;

            }
            else if (string.CompareOrdinal(DarkThemeText, themeName) == 0)
            {
                oldChartThemeResource = LightChartResource;
                newChartThemeResource = DarkChartResource;
            }
            else
            {
                throw new ValueUnavailableException
                      ("Theme resource not found for graph.");
            }
            if (oldChartThemeResource != null)
            {
                var md = resources.MergedDictionaries.FirstOrDefault
                         (d => d.Source == oldChartThemeResource.Source);
                if(null!=md)
                {
                    resources.MergedDictionaries.Add(newChartThemeResource);
                    var chartThemeChanged = resources.MergedDictionaries.Remove(md);
                    if(!chartThemeChanged)
                    {
                        throw new Exception("Theme for chart could not be changed");
                    }
                }
            }
        }

        #endregion
    }
自定义控件1:NavigationButtonControl

我以前是Winforms程序员。当我接触WPF时,我被它赋予UI开发人员的巨大力量所震撼。无论你作为UI开发人员的想象力多么丰富,WPF都能让你实现。我相信,而且我相信你们大多数人也会认为,在WPF中编写自定义控件比在Winforms中容易得多。WPF引入的全新事物,即:DependencyProperties、ContentTemplate、DataTemplate,让你可以几乎随心所欲地以自己的方式显示数据。不再需要深入复杂的GDI绘图代码。我的两分钱是:一个认真的WPF开发人员,即使不是编写自定义控件的专家,如果他想拥有野性想象力的独立性(无不良含义!),也应该能够编写简单的自定义控件。
在编写自定义控件时,将其放入一个全新的库中始终是一个值得的决定(除非它对您的应用程序非常特定并包含其逻辑)。Expense 使用了许多自定义控件,但我将其中最简单的 NavigationButtonControl 放入了自定义控件库中。这样做是为了突出 WPF 控件库作为可重用组件的理念。
它是如何发生的?
我需要一个漂亮的按钮模板,可以将用户导航到我的 Linkedin 和 google+ 个人资料页面。我将其视为一个雄心勃勃的机会来编写一个自定义控件。虽然有些人可能会提出更好的方法,但我从选择自定义控件的基类开始。我是这样开始的:
- 选择一个现有控件,其功能尽可能接近您的控件。在我的情况下,它是按钮。
- 使用反汇编器(或者更好的是,Visual Studio中的对象浏览器),查看它实现的基类型。
- 找出为您提供最少共同所需功能的基类。
我对我自定义控件的功能非常清楚:
- 它将允许我拥有内容。
- 它将允许我重写其模板
- 它足够智能,能够理解何时被鼠标按下。(为什么?稍后会讲到。)
- 它会给我一个 Command 依赖属性,我可以将我的视图模型的
ICommand属性绑定到它。
我不想:
- 任何公开的点击事件。(我希望强制用户使用命令绑定。MVVM 仇恨者会因此讨厌我!)
- 任何像
IsDefault、IsCancelled等属性。
这是对象浏览器显示给我的内容:

不难猜测,我不得不编写ButtonBase类的替代品。NavigationButtonControl的代码如下:
    /// <summary>
    /// A replacement for <see cref="System.Windows.Controls.Primitives.ButtonBase"/>
    /// class that lets the consumer have a content and overridable style.
    /// when mouse is pressed over it.
    /// </summary>
    public class NavigationButtonControl : ContentControl, ICommandSource
    {
        #region Dependency Properties.

        public static readonly DependencyProperty CommandProperty =
         DependencyProperty.Register("Command", typeof(ICommand),
         typeof(NavigationButtonControl), new PropertyMetadata(null, CommandChanged));
        public static readonly DependencyProperty CommandParameterProperty =
         DependencyProperty.Register("CommandParameter", typeof(object),
         typeof(NavigationButtonControl), new PropertyMetadata(null));
        public static readonly DependencyProperty IsPressedProperty =
         DependencyProperty.Register("IsPressed", typeof(bool),
         typeof(NavigationButtonControl), new PropertyMetadata(false));

        #endregion

        #region Public properties

        /// <summary>
        /// The is pressed property to indicate the state of the control
        /// when mouse is pressed over it.
        /// </summary>
        public bool IsPressed
        {
            get { return (bool)GetValue(IsPressedProperty); }
            set { SetValue(IsPressedProperty, value); }
        }

        #endregion

        #region ICommandSource Members

        /// <summary>
        /// Gets or sets <see cref="ICommand"> implementation that will be fired
        /// when the control is clicked.
        ///
        public ICommand Command
        {
            get
            {
                return (ICommand)GetValue(CommandProperty);
            }
            set
            {
                SetValue(CommandProperty, value);
            }
        }

        /// <summary>
        /// The parameter, the command would pass in the handling method.
        /// </summary>
        public object CommandParameter
        {
            get
            {
                return GetValue(CommandParameterProperty);
            }
            set
            {
                SetValue(CommandParameterProperty, value);
            }
        }

        /// <summary>
        ///
        ///
        public IInputElement CommandTarget
        {
            get { return this; }
        }

        #endregion

        #region Private Static Event handlers

        /// <summary>
        /// Handles when the Command dependency property is changed.
        /// </summary>
        /// <param name="d" />
        /// <param name="e" />
        private static void CommandChanged
                (DependencyObject d, DependencyPropertyChangedEventArgs e)
        {
            var control = d as NavigationButtonControl;
            if (null != control)
            {
                control.HookUpCommand((ICommand)e.OldValue, (ICommand)e.NewValue);
            }
        }

        #endregion

        #region Private Methods

        /// <summary>
        /// Does the cleaning of old command and
        /// registers to the events of new commands.
        /// </summary>
        /// <param name="oldCommand" />
        /// <param name="newCommand" />
        private void HookUpCommand(ICommand oldCommand, ICommand newCommand)
        {
            // If oldCommand is not null, then we need to remove the handlers.
            if (oldCommand != null)
            {
                RemoveCommand(oldCommand);
            }
            AddCommand(newCommand);
        }

        /// <summary>
        /// Removes the CanExecuted handler from the old command.
        ///
        /// <param name="oldCommand" />
        private void RemoveCommand(ICommand oldCommand)
        {
            EventHandler handler = CanExecuteChanged;
            oldCommand.CanExecuteChanged -= handler;
        }

        /// <summary>
        /// Add the event handlers for the new commands.
        ///
        /// <param name="newCommand" />
        private void AddCommand(ICommand newCommand)
        {
            var handler = new EventHandler(CanExecuteChanged);
            var canExecuteChangedHandler = handler;
            if (newCommand != null)
            {
                newCommand.CanExecuteChanged += canExecuteChangedHandler;
            }
        }

        /// <summary>
        /// If can executed changes for the ICommand,
        /// the control should change its IsEnabled property.
        /// </summary>
        /// <param name="sender" />
        /// <param name="e" />
        private void CanExecuteChanged(object sender, EventArgs e)
        {
            if (Command == null)
                return;
            var command = Command as RoutedCommand;
            // Different handling for routed commands and
            // for plain implementation of ICommand.
            IsEnabled = command != null ? command.CanExecute
            (CommandParameter, CommandTarget) : Command.CanExecute(CommandParameter);
        }

        /// <summary>
        /// This method fires the command.
        /// </summary>
        private void FireAtWill()
        {
            if (Command == null)
                return;
            var command = Command as RoutedCommand;
            if (command != null)
            {
                command.Execute(CommandParameter, CommandTarget);
            }
            else
            {
                Command.Execute(CommandParameter);
            }
        }

        #endregion

        #region Overriden Methods

        /// <summary>
        /// Handles the Mouse down event
        ///
        /// <param name="e" />
        protected override void OnMouseDown(MouseButtonEventArgs e)
        {
            base.OnMouseDown(e);
            IsPressed = true;
            FireAtWill();
        }

        /// <summary>
        /// Handles the mouse leave event.
        ///
        /// <param name="e" />
        protected override void OnMouseLeave(MouseEventArgs e)
        {
            base.OnMouseLeave(e);
            IsPressed = false;
        }

        #endregion

        #region Static Constructor

        /// <summary>
        /// Static constructor to take care of the static properties.
        ///
        static NavigationButtonControl()
        {
            DefaultStyleKeyProperty.OverrideMetadata(typeof(NavigationButtonControl),
                                                     new FrameworkPropertyMetadata
                                                    (typeof(NavigationButtonControl)));
        }

        #endregion
    }
它只提供了ICommandSource接口的实现和IsPressed属性。现在,当您的控件准备好后,它的外观如何?如果您就这样放置它,它将具有其基类(即无外观的ContentControl)的外观。我希望为我的控件的消费者提供一个默认外观,他可以覆盖。这可以通过三个简单的步骤实现:
- 通过将此代码放在自定义控件项目的 Assembly.cs 中,告诉自定义控件库包含控件默认样式的资源文件在项目中的位置。
[assembly: ThemeInfo(
    ResourceDictionaryLocation.None, // where theme specific resource
                               // dictionaries are located
                               // (used if a resource is not found in the page,
                               // or application resource dictionaries)
    ResourceDictionaryLocation.SourceAssembly //where the generic
                               // resource dictionary is located
                               // (used if a resource is not found in the page,
                               // app, or any theme specific resource dictionaries)
)]
代码中的注释解释了一切。您正在告诉 WPF 在何处查找控件的资源,如果在使用它的应用程序(包括 App.xaml)中找不到这些资源。此路径固定为 your project\Themes\Generic.xaml。
- 告诉控件您希望它采用默认样式。您在控件的
static构造函数中重写了DefaultStyleKey依赖属性。DefaultStyleKeyProperty.OverrideMetadata(typeof (NavigationButtonControl), new FrameworkPropertyMetadata(typeof (NavigationButtonControl))); - 现在,在\Themes\Generic.xaml文件中提供控件的默认样式。
<Style TargetType="{x:Type ControlsLib:NavigationButtonControl}">
        <Setter Property="MaxWidth" Value="50"/>
        <Setter Property="MaxHeight" Value="23"/>
        <setter property="Padding" value="2">
        <setter property="Margin" value="3">
        <setter property="SnapsToDevicePixels" value="True">
        <setter property="Template">
            <setter.value>
                <controltemplate targettype=
                    "{x:Type ControlsLib:NavigationButtonControl}">
                    <grid x:name="backgroundGrid"
                     rendertransformorigin="0.5,0.5"
                     background="{DynamicResource
                     {x:Static SystemColors.ControlBrush}}">
                        <contentpresenter snapstodevicepixels=
                        "{TemplateBinding SnapsToDevicePixels}">
                    </contentpresenter></grid>
                    <controltemplate.triggers>
                        <trigger property="IsPressed" value="True">
                            <setter targetname="backgroundGrid"
                             property="Background"
                             value="{DynamicResource
                             {x:Static SystemColors.ControlDarkBrush}}">
                        </setter></trigger>
                        <trigger property="IsMouseOver" value="True">
                            <setter targetname="backgroundGrid"
                             property="RenderTransform">
                                <setter.value>
                                    <scaletransform scalex="1.1" scaley="1.1">


                            <setter targetname="backgroundGrid"
                             property="Background"
                             value="{DynamicResource
                             {x:Static SystemColors.InactiveBorderBrush}}">
                        </setter>
自定义控件2:ImageCropperControl

由于此控件的大部分代码取自darrellp的这篇文章,我将不再深入探讨控件的工作原理。然而,将工作打包到自定义控件中已在XPence中完成。图像裁剪器控件提供了一个readonly DependencyProperty,用于给出用户通过调整裁剪矩形生成的裁剪图像。该控件还支持将JPEG图像拖放到其上(此外,还提供了使用打开文件对话框选择图像的功能)。
正是在编写这个控件时,我遇到了WPF的一个bug,它阻止了使用OnWayToSource绑定模式将readonly依赖属性绑定到ViewModel属性。使用PushBinding来克服这个问题。
图像裁剪器考虑周全,无论您放入何种图像,它都会给出 75x75 的固定图像大小。这是因为输出图像将进入数据库,并且必须限制大小。
作为图像裁剪控件输出的RenderTargetBitmap使用ImageToBinaryConverter转换为byte[]。这个字节数组实际上保存到数据库中。以下是ImageToBinaryConverter的代码:
    /// <summary>
    /// Am implementation of <see cref="IValueConverter"/> to convert Image
    /// to byte array and vice versa.
    /// </summary>
    public class ImageToBinaryConverter : IValueConverter
    {
        #region Implementation of IValueConverter

        /// <summary>
        /// Converts byte[] to Image source.
        ///
        /// <returns>
        /// A converted value.
        /// If the method returns null, the valid null value is used.
        /// </returns>
        /// <param name="value" />The value produced by the binding source.
        /// <param name="targetType" />The type of the binding target property.
        /// <param name="parameter" />The converter parameter to use.
        /// <param name="culture" />The culture to use in the converter.
        public object Convert(object value, Type targetType,
                              object parameter, CultureInfo culture)
        {
            var bytes = value as byte[];
            if (bytes != null && bytes.Length > 0)
            {
                var stream = new MemoryStream(bytes);
                var image = new BitmapImage();
                image.BeginInit();
                image.StreamSource = stream;
                image.EndInit();
                return image;
            }
            return null;
        }

        /// <summary>
        /// Converts ImageSource to byte[]
        /// </summary>
        /// <returns>
        /// A converted value.
        /// If the method returns null, the valid null value is used.
        /// </returns>
        /// <param name="value" />The value that is produced by the binding target.
        /// <param name="targetType" />The type to convert to.
        /// <param name="parameter" />The converter parameter to use.
        /// <param name="culture" />The culture to use in the converter.
        public object ConvertBack(object value, Type targetType,
                                  object parameter, CultureInfo culture)
        {
            var renderTargetBitmap = value as RenderTargetBitmap;
            if (null != renderTargetBitmap)
            {
                var bitmapImage = new BitmapImage();
                var bitmapEncoder = new BmpBitmapEncoder();
                bitmapEncoder.Frames.Add(BitmapFrame.Create(renderTargetBitmap));

                using (var stream = new MemoryStream())
                {
                    bitmapEncoder.Save(stream);
                    stream.Seek(0, SeekOrigin.Begin);
                    bitmapImage.BeginInit();
                    bitmapImage.CacheOption = BitmapCacheOption.OnLoad;
                    bitmapImage.StreamSource = stream;
                    bitmapImage.EndInit();
                }
                var encoder = new JpegBitmapEncoder();
                encoder.Frames.Add(BitmapFrame.Create(bitmapImage));
                byte[] data = null;
                using (var ms = new MemoryStream())
                {
                    encoder.Save(ms);
                    data = ms.ToArray();
                }
                return data;
            }
            return null;
        }

        #endregion
    }
我相信有更好的方法来做到这一点。我时间太紧,无法深入研究 WPF 的图像处理细节。如果有人能提供更好的 ConvertBack 代码,我将非常乐意更新代码并致谢。
以下是控件运行时的截图:

存在或不存在!
很多时候,我都会遇到这样的问题:MVVM 意味着没有代码隐藏吗?直接的答案是:不。View 是 MVVM 应用程序中的一个组件,我认为如果代码隐藏中的代码严格将其范围限制在 View 内部,那就没有什么害处。例如,在 XPence 中有两处你会发现代码隐藏:
- 消息服务中的窗口
UserEmblemView
在前者中,消息服务通过接口注入到任何ViewModel中,因此ViewModel绝不会知道消息服务内部的任何视图特定代码或逻辑。消费者ViewModel只处理string或enum。这绝不会妨碍它们的可测试性。
在后者中,用户控件在两个实例中使用:首先作为应用程序视图右上角的徽章,其次作为ListBox的ItemTemplate中显示用户的DataTemplate。这两个实例中控件的外观略有变化(路径的可见性)。在一个案例中隐藏用户组件而在另一个案例中显示用户组件的逻辑完全限定在View组件内部。因此,在这种情况下编写代码隐藏是完全可以的,不会违反MVVM指南。通过在ListBox的ItemTemplate中重复控件的.xaml,可以很容易地避免代码隐藏。但这难道不是破坏了可重用性吗?我会称之为过度工程!
拖延症:懒人的工具?
拖延症是懒人跟上昨天的方式!因此,我确保XPence永远不会成为我的昨天!有几个点可能会阻止XPence成为一个“近乎完美”的应用程序。其中一些归因于我的懒惰,其余的归因于我“时间紧迫”的日程。虽然我用几个点来开始这个列表,但我相信您会补充这个列表:
- 糟糕的数据模型
XPence中的数据模型非常直接:一个模型用于承载交易数据,另一个用于承载用户日期。虽然交易模型应该包含相关用户模型的引用,但它只有一个名为
ModifiedUser的string属性。 - ModalCustomMessageDialog 中多余的依赖属性
我想覆盖 Mahapps metro 的
MetroWindow的控件模板,它用作ModalCustomMessageDialog。正确的方法是覆盖窗口的内容模板。但我发现创建另一个名为ActualContent的依赖属性更容易,从而绕过了深入研究MetroWindow模板的任务。 - NavigationButtonControl 不准确
我在一个独立的普通WPF应用程序中创建了这个控件,该应用程序没有使用Mahapps metro,并且它运行完美。但是当我将其用于XPence时,它停止工作了。我意识到任何放置在Mahapps MetroWindow中的控件,其某些鼠标事件都会受到影响。这是因为Mahapps对鼠标事件进行了严格的操作,以使MetroWindow成为MetroWindow。我采取了快捷方式,在
MouseDown时触发命令,而不像真正的按钮那样在鼠标抬起时触发命令。准确的代码仍然躺在代码文件的底部,已废弃。
很抱歉,但我相信诚实认错比明明“有罪”却辩称“无罪”更好!
就是这样!
嗯,这就是我要分享的全部内容。我非常渴望听到您的评论、建议和意见。尽管我很懒,但完成这项工作也付出了相当大的努力!我不像这里大多数酷酷的人那样是经验丰富的作家,但我已尽力解释 XPence 所传达的关键思想。如果您评分低于 5 分,请至少说明原因。我还想问,如果您喜欢这篇文章,请为它投票。此外,发表评论会很好,因为它能让我知道这篇文章是否提供了人们想知道的内容。这将是我从文章中获得的收获。
如果您觉得某些部分需要更多解释,请随时留言,我很乐意更新文章并致谢。但是,请考虑这样一个事实:由于涉及的概念很多,每个点都无法提供非常详细的解释,否则文章的长度会变得非常庞大。
历史
- 版本 1.0 (2014年4月23日): 初稿
- 版本 1.1 (2014年5月1日): 主要更新如下:
- 修复了LOKImotive报告的bug。v.i.z.
- 错误是,输入的交易金额即使保存后也不会反映在网格中。
- 如果金额字段留空,则提供更好的消息。
- 另一个 bug 修复,阻止了选定交易的标题文本在交易保存时发生变化。
- 根据DaveAuld的建议,减小了文章中图片的大小。
- 为饼图添加了强调色支持。
- 更改内容
- 修复了LOKImotive报告的bug。v.i.z.