
ASP.NET MVC 文档示例
4.88/5 (31投票s)
构建一个 ASP.Net 数据驱动的网站
引言
本文档介绍了如何创建一个基本的 ASP.NET MVC 4 Web 应用程序,该应用程序用于跟踪收到的文档。项目创建时使用了Code First 方法,因此我们编写所需的类,然后根据这些类创建数据库。创建数据库后,我们创建所需的控制器和视图,并将它们连接起来,以获得一个可用于创建、读取、编辑和删除记录的、可工作的 Web 应用程序。
本文档包含 5 个部分
创建基本的 ASP.NET MVC Web 应用程序
创建类
创建数据库
创建控制器和视图
背景
本文档不会讨论 MVC 模型本身或控制器的工作原理等内容,因为这方面的内容在其他文章中已有大量介绍。本文档的主要目标是展示一个编程新手如何从零开始创建一个功能齐全的、动态数据驱动的 Web 应用程序。动态数据是指 HTML 代码中没有静态列表,列表中的所有数据都来自数据库,并且可以根据需要进行更改。
完成此示例后,距离成品还有很大差距,因为我没有关注用户输入的验证等问题,所以这是一个粗糙的、可工作的模型,已准备好进入下一阶段。
下一阶段将是更改外观和感觉,并添加功能。目前我正在撰写本文档的下一部分,我将单独发布,该部分将在此代码的基础上进一步扩展。最终结果将类似于我自己在家里使用的版本,用于跟踪通过标准文档扫描仪扫描并上传到此网站的进件。本文档中 Document.cs 类中的 Document_uri 字符串用于链接扫描的文档,点击时会在浏览器中显示该 .PDF 文件。最终结果将是一个方便的应用程序,可以快速找到本应是地图的文档。
使用代码
我使用 Visual Studio 2012 Professional 构建了此示例,然后使用 Visual Studio 2013 Ultimate 90 天试用版进行了测试,以确保其正常工作,因此您也可以使用该版本。
重要提示:请确保已安装 EntityFramework。要检查,请在解决方案资源管理器中单击创建的项目,然后转到“管理 NuGet 包…”,并在下一个屏幕中选择“全部视图”。如果它不在列表中,请转到左侧的“在线”选项,您将获得可用包的列表,选择 EntityFramework 并单击“安装”,然后会将引用添加到您的项目中。
单击 OneDrive 中的 MvcDocuments 示例,然后选择下载

1. 创建基本的 ASP.NET MVC Web 应用程序
此项目的第一步是创建我们将使用的骨架,我们从 Visual Studio 2012 菜单中的“新建项目”选项开始。

我们将看到以下屏幕,在其中选择“Visual C#”下的“ASP.NET MVC 4 Web 应用程序”。要获得此选项,请选择“Web”选项,如下图所示,为应用程序命名为 MVCDocuments,然后单击“确定”按钮。

在下一个屏幕中,我们选择“Internet 应用程序”选项,并确保“视图引擎”设置为“Razor”,然后再次单击“确定”按钮。

项目骨架已创建,我们转到“视图”菜单选项下的“解决方案资源管理器”。

在解决方案资源管理器中,我们看到 MvcDocuments 项目,当我们打开 Models 文件夹时,我们发现其中已经有一个 Model,即 AccountModels.cs 文件,该文件负责 Web 应用程序的注册和登录过程。

此时我们对 AccountModels.cs 文件不感兴趣,首先我们将调试 Web 应用程序以查看它是否正常工作。

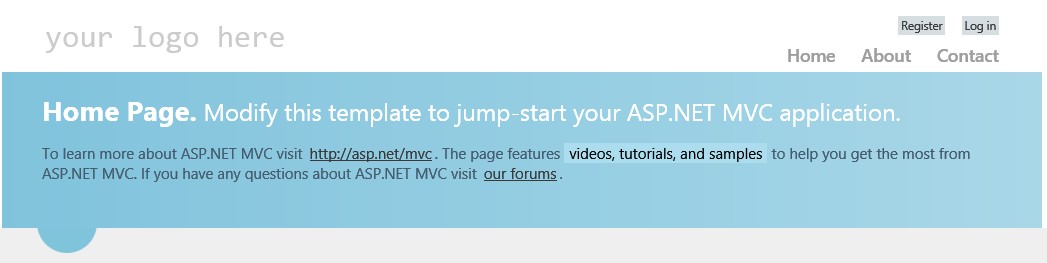
如果一切正常,我们将在 Web 浏览器中看到以下屏幕,如您所见,在屏幕的右上角有“注册”和“登录”按钮,下方是“主页”、“关于”和“联系方式”按钮。
让我们首先测试“注册”选项,创建一个用户名和密码。

如果一切正常,您将看到“Hello”和您的用户名替换了“注册”按钮,“登录”按钮被“注销”选项替换。
刚刚创建的应用程序可以工作,但幕后发生了其他事情,创建了一个名为:aspnet-MvcDocuments-20140404125332.mdf 的数据库(数字是创建的年份和时间),还有一个类似的日志文件。您可以在项目的 APP_Data 文件夹中找到这两个文件,右键单击该文件夹并选择“在文件资源管理器中打开文件夹”。
注意:您也可以使用“服务器资源管理器”来查看数据库,您可以在“视图”菜单选项下找到它。
2. 创建类
我们已经为应用程序创建了基本骨架。下一步是编写我们需要的类。我们希望将类放在 Models 文件夹中,所以转到“解决方案”,右键单击该文件夹,选择“添加”菜单选项,然后从选项中选择“类”。请确保选择“Visual C# 类”并将其命名为:Company.cs
我现在可以给您很多屏幕截图,但而不是那样,我将为您提供您需要创建的类的代码。所有类最终将共同创建此示例应用程序的文档部分的上下文。
所有类都属于 Models 文件夹。请注意,有时 - 在编写代码时 - 引用的类此刻尚不存在,因此代码中会出现红色波浪线,暂时忽略它。
1. Company.cs 类
using System;
using System.Collections.Generic;
using System.Linq;
using System.Web;

namespace MvcDocuments.Models
{
    public class Company
    {
        //Identifier
         public int CompanyId { get; set; }
        //Company
        public string Company_name { get; set; }
        public string Address { get; set; }
        public string Postal_Code { get; set; }
        public string City { get; set; }
        // State
        public int StateId { get; set; }
        public virtual State State { get; set; }
        //Country
        public int CountryId { get; set; }
        public virtual Country Country { get; set; }
        //Communication
        public string Phone { get; set; }
        public string Email { get; set; }
        public string Website_Uri { get; set; }
        //List Contacts
        public virtual List<Contact> Contacts { get; set; }
        //List Documents
        public virtual List<Document> Documents { get; set; }
    }
}
2. Contact.cs 类
using System;
using System.Collections.Generic;
using System.Linq;
using System.Web;

namespace MvcDocuments.Models
{
    public class Contact
    {
        //Identifier
        public int ContactId { get; set; }
        //Company
        public int CompanyId { get; set; }
        public virtual Company Company { get; set; }
        //Function
        public int FunctionId { get; set; }
        public virtual Function Function { get; set; }
        //Title
        public int TitleId { get; set; }
        public virtual Title Title { get; set; }
        //Contact
        public string Surname { get; set; }
        public string Last_name { get; set; }
        //Communication
        public string Email_address { get; set; }
        public string Phone { get; set; }
        public string Cellphone { get; set; }
    }
}
3. Costs_group.cs 类
using System;
using System.Collections.Generic;
using System.Linq;
using System.Web;

namespace MvcDocuments.Models
{
    public class Costs_group
    {
        //Identifier
        public int Costs_groupId { get; set; }
        //Costs group
        public string Cost_group_name { get; set; }
    }
}
4. Country.cs 类
using System;
using System.Collections.Generic;
using System.Linq;
using System.Web;
namespace MvcDocuments.Models
{
    public class Country
    {
        //Identifier
        public int CountryId { get; set; }
        //Country
        public string Country_name { get; set; }
    }
}
5. Document.cs 类
using System;
using System.Collections.Generic;
using System.Linq;
using System.Web;

namespace MvcDocuments.Models
{
    public class Document
    {
        //Identifier
        public int DocumentId { get; set; }
        //Document date
        public DateTime Document_date { get; set; }
        //Company
        public int CompanyId { get; set; }
        public virtual Company Company { get; set; }
        //Mail category
        public int Mail_categoryID { get; set; }
        public virtual Mail_category Mail_category { get; set; }
        //Costs group
        public int Costs_groupId { get; set; }
        public virtual Costs_group Costs_group { get; set; }
        //Payment status
        public int Payment_statusId { get; set; }
        public virtual Payment_status Payment_status { get; set; }
        //Bill
        public string Reference { get; set; }
        //Note
        public string Note { get; set; }
        //Financial
        public double AmoutExVat { get; set; }
        public double Vat { get; set; }
        public double Amount { get; set; }
        //.PDF Link
        public string Document_uri { get; set; }
    }
}
6. Function.cs 类
using System;
using System.Collections.Generic;
using System.Linq;
using System.Web;
namespace MvcDocuments.Models
{
    public class Function
    {
        //Identifier
        public int FunctionId { get; set; }
        //Function
        public string Function_name { get; set; }
    }
}
7. Mail_category.cs 类
using System;
using System.Collections.Generic;
using System.Linq;
using System.Web;

namespace MvcDocuments.Models
{
    public class Mail_category
    {
        //Identifier
        public int Mail_categoryId { get; set; }
        //Mail category
        public string Mail_category_name { get; set; }
    }
}
8. Payment_status.cs 类
using System;
using System.Collections.Generic;
using System.Linq;
using System.Web;
namespace MvcDocuments.Models
{
    public class Payment_status
    {
        //Identifier
        public int Payment_statusId { get; set; }
        //Payment status
        public string Payment_status_name { get; set; }
    }
}
9. State.cs 类
using System;
using System.Collections.Generic;
using System.Linq;
using System.Web;

namespace MvcDocuments.Models
{
    public class State
    {
        //Identifier
        public int StateId { get; set; }
        //State
        public string State_name { get; set; }
    }
}
10. Title.cs 类
using System;
using System.Collections.Generic;
using System.Linq;
using System.Web;
namespace MvcDocuments.Models
{
    public class Title
    {
        //Identifier
        public int TitleId { get; set; }
        //Title
        public string Title_name { get; set; }
    }
}
11. MvcDocumentsContext.cs 类
上面创建的所有类将共同构成我们应用程序的所谓上下文。在 Models 文件夹中还需要创建另一个类,那就是上下文类。我们将这个类命名为:MvcDocumentsContext.cs,该类的代码是
using System;
using System.Collections.Generic;
using System.Linq;
using System.Web;
using System.Data.Entity;
namespace MvcDocuments.Models
{
    public class MvcDocumentsContext : DbContext
    {
        public DbSet<Company> Companies { get; set; }
        public DbSet<Contact> Contacts { get; set; }
        public DbSet<Costs_group> Costs_groups { get; set; }
        public DbSet<Country> Countries { get; set; }
        public DbSet<Document> Documents { get; set; }
        public DbSet<Function> Functions { get; set; }
        public DbSet<Mail_category> Mail_categories { get; set; }
        public DbSet<Payment_status> Payment_statusses { get; set; }
        public DbSet<State> States { get; set; }
        public DbSet<Title> Titles { get; set; }
    }
}
正如您所见,在 using System.Web; 下添加了一个 using 语句。我们已将其添加了 using System.Data.Entity
同时请注意上面的代码中的以下行
public class MvcDocumentsContext : DbContext
: DbContext 也新加的。
好的,我认为我们关于类和所需上下文的创建工作已经完成,所以我们可以关闭 Models 文件夹,继续下一步。我们的下一步将是基于 MvcDocumentsContext.cs 和我们刚刚编写的类创建数据库。
3. 创建数据库
在这一部分,我们将根据上一部分编写的类来创建数据库。我们要做的第一件事是在 Webconfig 文件中添加一行。您可以在解决方案资源管理器底部找到该文件。打开此文件并查找以下部分,其中写着:<connectionString>...</connectionStrings>
<connectionStrings>
    <add name="DefaultConnection" connectionString="Data Source=(LocalDb)\v11.0;Initial Catalog=aspnet-MvcDocuments-20140405094433;Integrated Security=SSPI;AttachDBFilename=|DataDirectory|\aspnet-MvcDocuments-20140405094433.mdf" providerName="System.Data.SqlClient" />
</connectionStrings>
请添加以下代码行
<add name="MvcDocumentsContext" connectionString="Data Source=(LocalDb)\v11.0;Initial Catalog=aspnet-MyDocuments;Integrated Security=SSPI;AttachDBFilename=|DataDirectory|\aspnet-MyDocuments.mdf" providerName="System.Data.SqlClient" />完成后您的代码应如下所示
 <connectionStrings>
    <add name="DefaultConnection" connectionString="Data Source=(LocalDb)\v11.0;Initial Catalog=aspnet-MvcDocuments-20140405094433;Integrated Security=SSPI;AttachDBFilename=|DataDirectory|\aspnet-MvcDocuments-20140405094433.mdf" providerName="System.Data.SqlClient" />
    <add name="MvcDocumentsContext" connectionString="Data Source=(LocalDb)\v11.0;Initial Catalog=aspnet-MyDocuments;Integrated Security=SSPI;AttachDBFilename=|DataDirectory|\aspnet-MyDocuments.mdf" providerName="System.Data.SqlClient" />
 </connectionStrings>
请注意,第一行中的数字可能会有所不同,不要用上面的代码替换您自己的代码,否则您的数据库将无法工作)。完成后,最好重新生成解决方案(“生成”菜单和“重新生成解决方案”选项)。
下一步是创建数据库,我们已经添加了要使用的连接字符串,我们将使用 Visual Studio 中的程序包管理器控制台工具。您可以在“工具”菜单下找到它,查找“NuGet 程序包管理器”并选择它,然后单击“程序包管理器控制台”将其打开。
Each package is licensed to you by its owner. Microsoft is not responsible for, nor does it grant any licenses to, third-party packages. Some packages may include dependencies which are governed by additional licenses. Follow the package source (feed) URL to determine any dependencies.

Package Manager Console Host Version 2.8.50126.400


Type 'get-help NuGet' to see all available NuGet commands.


PM>
您会看到一些许可信息和 PM>,之后输入以下行
PM> Enable-Migrations -contexttypename MvcDocuments.Models.MvcDocumentsContext
然后按键盘上的 Enter 键。如果一切正常,您将在控制台中看到以下文本
PM> Enable-Migrations -contexttypename MvcDocuments.Models.MvcDocumentsContext
Checking if the context targets an existing database...
Code First Migrations enabled for project MvcDocuments.
但您不会注意到这一点,因为您的项目中已创建一个名为 Migrations 的新文件夹和一个名为 Configuration.cs 的文件,您看到的正是那个屏幕。
在 Configuration.cs 代码的以下部分,AutomaticMigrationsEnabled 默认设置为 = false;,您需要将其设置为 = true;,如下所示
namespace MvcDocuments.Migrations
{
    using System;
    using System.Data.Entity;
    using System.Data.Entity.Migrations;
    using System.Linq;

    internal sealed class Configuration : DbMigrationsConfiguration<MvcDocuments.Models.MvcDocumentsContext>
    {
        public Configuration()
        {
            AutomaticMigrationsEnabled =  true;
        }
        protected override void Seed(MvcDocuments.Models.MvcDocumentsContext context)


        {


            //  This method will be called after migrating to the latest version.
现在重新生成您的解决方案(“生成”菜单/“重新生成解决方案”)并再次转到程序包管理器控制台,然后键入
PM> Add-Migration “DocumentsDatabaseCreation”
按 Enter 键后,将在 Migrations 文件夹中创建一个新的 Migrations 文件(数字会有所不同)。同样,您不会注意到这一点,因为刚刚创建的配置文件将可见,但返回控制台并键入
PM> Update-Database
再次按 Enter 键后,数据库将被创建
PM> Update-Database
Specify the '-Verbose' flag to view the SQL statements being applied to the target database.
Applying code-based migrations: [201404050752573_DocumentsDatabaseCreation].
Applying code-based migration: 201404050752573_DocumentsDatabaseCreation.
Running Seed method.

PM>
要查看是否确实发生了这种情况,请查看 Visual Studio 中的“视图”菜单下的“服务器资源管理器”。

如您所见,数据库已创建,这也是本部分的目标。接下来,我们将创建控制器和视图并进行连接,以便获得一个可工作的应用程序。
4. 创建控制器和视图
在前面的部分,我们创建了 MVCDocuments 解决方案骨架,编写了类,并创建了数据库。在本部分,我们将为此应用程序创建控制器和视图,并将进行连接,以便获得一个可工作的应用程序。
我们从 Controllers 文件夹(已存在两个文件)开始,右键单击该文件夹并选择“添加控制器”选项。

我们将为我们创建的所有类添加控制器,所以让我们从我们创建的 Company.cs 类开始,并将控制器命名为:CompanyController,如下图所示。
请确保“模型类”选择为:Company(MvcDocuments.Models),“数据上下文类”选择为:MvcDocumentsContext (MvcDocuments.Models),如下图所示。
同时请确保在“脚手架选项”下选择:使用 Entity Framework 的带读/写操作和视图的 MVC 控制器!
正如我所说,您需要为每个类创建一个控制器,所以当您单击“添加”以创建 Company 控制器后,对所有这些控制器都执行相同的操作,但 MvcDocumentsContext.cs 类除外。

当您完成创建控制器后,您会注意到在创建控制器时自动创建了视图,正如您在上面的图片中看到的,就在 Company 控制器创建之后。
如果一切顺利,几乎所有需要的视图都已创建,我们的下一步将是连接它们,以便在调试应用程序时,我们的视图能在 Web 浏览器中可见并正常工作。
创建一个新的控制器并将其命名为:ListController,在“脚手架选项”下选择“空 MVC 控制器”并单击“添加”按钮。

您将在屏幕上看到以下代码
using System;
using System.Collections.Generic;
using System.Linq;
using System.Web;
using System.Web.Mvc;
namespace MvcDocuments.Controllers
{
    public class ListController : Controller
    {
        //
        // GET: /List/
        public ActionResult Index()
        {
            return View();
        }
    }
}
此控制器类将重定向 List 页面的请求。将光标放在 return View(); 的右侧,即逗号旁边,然后右键单击并选择:“添加视图…”菜单选项。

在接下来的屏幕中,请确保将默认的 Index 设置为名称,其余的保持不变。

将创建一个名为:List 的新视图文件夹,并在该文件夹中创建 Index.cshtml 文件,如果一切正常,屏幕上将显示其内容。我们将对此部分进行一些更改,使其看起来像这样
@{
    ViewBag.Title = "Lists";
}

<h2>Lists</h2>

<li>@Html.ActionLink("Costs Group", "Index", "Costs_group")</li>
<li>@Html.ActionLink("Country", "Index", "Country")</li>
<li>@Html.ActionLink("Function", "Index", "Function")</li>
<li>@Html.ActionLink("Mail Category", "Index", "Mail_category")</li>
<li>@Html.ActionLink("Payment Status", "Index", "Payment_status")</li>
<li>@Html.ActionLink("State", "Index", "State")</li>
<li>@Html.ActionLink("Title", "Index", "Title")</li>
当请求 Lists Index.cshtml 页面时,这将显示命名页面的链接。
接下来,我们将找到 Views 文件夹中的 Shared 文件夹并打开 _Layout.cshtml 文件,并查找以下部分
 <ul id="menu">
    <li>@Html.ActionLink("Home", "Index", "Home")</li>
    <li>@Html.ActionLink("About", "About", "Home")</li>
    <li>@Html.ActionLink("Contact", "Contact", "Home")</li>
</ul>
上面显示的这部分作为 Web 页面的导航按钮显示,您在第一次调试时就已经看到了它们。
我们将把上面显示的 .cshtml 代码更改为这样
<ul id="menu">
    <li>@Html.ActionLink("Home", "Index", "Home")</li>
    <li>@Html.ActionLink("Contacts", "Index", "Contact")</li>
    <li>@Html.ActionLink("Companies", "Index", "Company")</li>
    <li>@Html.ActionLink("Documents", "Index", "Document")</li>
    <li>@Html.ActionLink("List", "Index", "List")</li>
</ul>
正如您所见,只保留了“主页”链接,我们添加了指向联系方式、公司、文档和列表页面的链接。
正如您所见,“索引”页面将在单击链接时被请求。让我们看看按 F5 键后会发生什么,如果一切正常,应用程序将运行,Web 页面将显示如下

如您所见,有联系方式、公司、文档和列表按钮。
理解例如您添加到数据库的新公司的内容部分取决于您的列表很重要,请看下面的屏幕

如您所见(或在运行的网站上自行测试),State 或 Country 列表中没有任何内容,因为这两个列表都没有添加任何数据。所以我们必须先填充列表,所以单击列表按钮。

让我们为每个列表输入一些数据,所以单击第一个链接并输入一些您能想到的成本名称,如租金、能源、医疗保健、保险,在国家列表中至少添加几个国家,为职位添加经理和顾问等,为邮件类别添加账单和信件,为付款状态添加到期和已付款,以及一些状态到状态列表,最后为头衔列表添加先生和女士。
好的,我们已经将一些数据输入到列表中,这些数据应该在您进入公司并单击创建链接时可见。

如您所见,我们输入的数据就在那里。您会理解,在想向数据库添加新文档之前,您必须先创建一个公司。
也尝试一下其他屏幕,创建一个新的联系人,创建一个账单并玩一下。
关注点
创建的 MvcDocuments 示例将在第二部分
https://codeproject.org.cn/Articles/767635/ASP-NET-MVC-Documents-sample-Part
中扩展,将处理 .Pdf 扫描文档的上传以及选中时在屏幕上的显示,以及其他一些关于数据呈现的更改。在第二部分还将为控制器代码添加搜索功能并将其实现到屏幕上。
我很高兴为这一部分创作它,我希望读者能按照以上步骤创建这个 Web 应用程序。如果您有任何问题,请随时提出。
建议阅读关于 CodeFirst 的内容
Code-First (Juli Lerman, Rowan Miller)
历史
这是第一个版本